Fed up with the hassle of getting your bike tires inflated? Fortunately, operating a bike pump is a simple and uncomplicated procedure. No matter if you’re an experienced rider or new to cycling, mastering the use of a bike pump is a crucial skill to possess.
In this article, we will provide you with step-by-step instructions on how to use a bicycle pump and offer some tips to help you maintain your pump.
Before you start pumping air into your bicycle tires, the first thing you need to do is identify the valve type on your tire. There are two types of valves commonly used on bicycle tires: Presta and Schrader valves.
Once you have identified the valve type, you can then attach the pump head to the valve. It is important to note that the pump head you use must be compatible with your valve type. The wrong pump head can damage your valve and cause air to leak out of your tire.
Key Takeaways
- There are two types of valves: Presta and Schrader, and the pump head must be compatible with the valve type.
- Proper inflation level is important to avoid decreased performance, lifespan, and blowouts.
- Pump slowly and steadily, and release pressure before removing pump head.
- Regularly check pressure gauge and use separate gauge to compare readings, and clean pump after every use to prevent costly repairs and extend pump life.

FANSPRO 2 Pack of 20 Inch Bike Tube 20x1.75 20x1.95 20x2.10 20x2.125 Heavy Duty Bicycle Tube with 2 Tire Levers,32mm Schrader Valve Premium Quality Butyl Inner Tube
【Bicycle Tube Size】32mm Schrader value 20 inch bicycle tube.Fits most kids mtb, bmx, cruisers. tire width 1.75" to...
As an affiliate, we earn on qualifying purchases.
Identify Your Valve Type
So, you wanna pump up your tires? Well, first things first – you gotta figure out what kind of valve you’ve got goin’ on there.
Take a look and see if it’s a Presta or a Schrader valve. Valve type identification is crucial because each valve requires different inflation techniques.
To identify your valve type, look at the valve stem. Presta valves are slender and have a lock nut at the top, while Schrader valves are wider and look similar to the valves on a car tire.
Once you’ve identified your valve type, you can move on to the next step and attach the pump head.

CYCLAMI 2 Pack TPU Inner Tube 700C x 18/23/25/28/30/32C for Road Bike Tire Upgraded Durability Bicycle Tube 45MM Length of Aluminum Presta Valve
Fits multiple tire sizes: 2PCS in the package.Suitable for range of road bikes,compatible with many tire sizes: 700x18/23/25/28/30/32c-Metal...
As an affiliate, we earn on qualifying purchases.
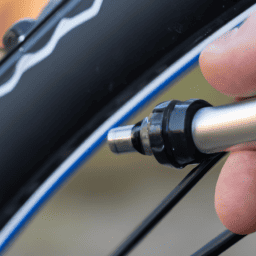
Attach the Pump Head
To get the air flowing, snap the head onto the valve like a puzzle piece coming together. First, identify the proper placement of the pump head onto the valve. It’s important to ensure that the pump head is secure and tight, otherwise air will leak from the valve and your tire won’t inflate properly.
When attaching the pump head, make sure it’s aligned with the valve stem. For a Schrader valve, press the pump head down onto the valve until it clicks into place. For a Presta valve, unscrew the valve cap and press the pump head onto the valve until it’s snug. To ensure a tight seal, use a tightening technique that varies depending on the type of pump head you’re using. Some pump heads have a lever that you flip to secure it in place, while others require twisting the head clockwise until it’s tight.
Now that the pump head is securely attached to the valve, it’s time to start pumping air into your tire.

24 x 1.9 / 2.125 in Schrader (American) - 35 mm Thorn Resistant Bicycle Tube
Puncture resistance built into the tube
As an affiliate, we earn on qualifying purchases.
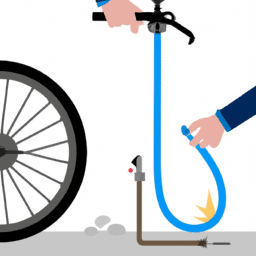
Pumping Air into Your Tire
Ready to give your tire a boost? It’s time to start pumping in some air! Before you begin, make sure you know the proper inflation level for your particular tire. This information can usually be found on the side of the tire itself or in the owner’s manual. Over-inflating or under-inflating your tire can lead to decreased performance, decreased lifespan, and increased risk of a blowout.
When pumping air into your tire, it’s important to avoid some common mistakes. First, make sure the pump head is securely attached to the valve stem. If it’s not, air will escape from the tire instead of going in. Second, make sure you’re using the correct pump for your valve type. Different valves require different pumps. Finally, don’t rush the process. It’s better to pump slowly and steadily to ensure proper inflation rather than trying to rush and risk over-inflation.
Now that your tire is properly inflated, it’s time to remove the pump head.

Blackburn 29" x 2.1-2.3" Presta Heavy Duty Bicycle Inner Tube with tire levers
20% thicker tube helps prevent flats
As an affiliate, we earn on qualifying purchases.
Removing the Pump Head
Once you’ve ensured the proper inflation level, securely attach the pump head to the valve stem and remember to pump slowly and steadily to avoid over-inflation. Once you’ve reached the desired pressure, it’s time to remove the pump head. Here’s how:
-
Release the pressure: Before removing the pump head, release any remaining pressure in the hose by pressing the release lever or unscrewing the valve cap. This will prevent any sudden bursts of air from escaping and potentially damaging the valve stem.
-
Twist technique: To remove the pump head, use the twist technique. This involves twisting the pump head counterclockwise while holding onto the valve stem with your other hand. This will loosen the pump head and allow it to be removed easily.
-
Pump head compatibility: Make sure the pump head is compatible with your valve stem before attempting to remove it. Some pump heads may require a different technique or may not be compatible at all.
-
Store the pump: Once the pump head is removed, store it in a safe place and make sure the hose is not kinked or tangled. This will ensure that your pump is ready for use the next time you need it.
Now that you’ve successfully removed the pump head, it’s important to keep your bike pump in good condition. Regular maintenance can help prolong the life of your pump and ensure that it works properly when you need it.
Maintenance Tips
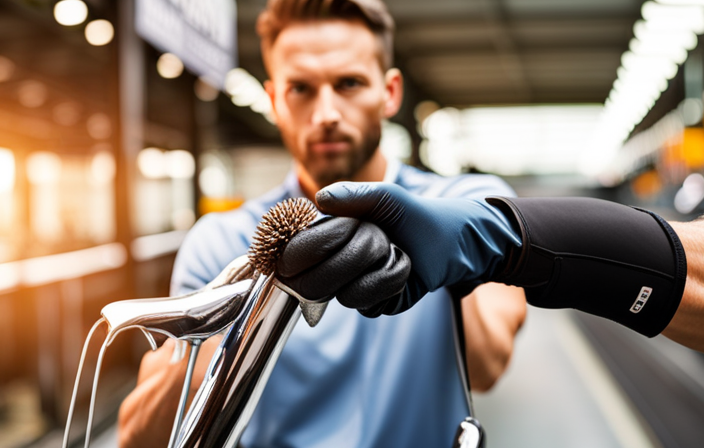
Keeping your bike pump in good condition is crucial for ensuring a smooth and stress-free ride every time. Proper maintenance can help you avoid costly repairs and extend the life of your pump. Here are some maintenance tips to keep in mind:
Firstly, it is important to regularly check the pressure gauge on your pump to ensure it is accurate. Use a separate gauge to compare readings and adjust if necessary. Secondly, make sure to clean your pump after every use to prevent dirt and debris from clogging the pump head or valve. Use a soft cloth or brush to wipe down the exterior and remove any dirt or grime. Lastly, be mindful of how you store your pump. Avoid exposing it to extreme temperatures or leaving it in direct sunlight for extended periods of time, as this can cause damage to the internal components. By following these simple steps, you can keep your pump in top condition and enjoy a worry-free ride every time.
| Checking pressure | Preventing damage |
|---|---|
| Regularly check the pressure gauge | Clean pump after every use |
| Use separate gauge to compare readings | Store pump in a cool, dry place |
| Adjust pressure if necessary | Avoid extreme temperatures and direct sunlight |
| Use a protective case when transporting pump |
Remember, a well-maintained bike pump is essential for maintaining proper tire pressure and ensuring a safe and comfortable ride. By regularly checking pressure and taking steps to prevent damage, you can keep your pump in top condition and avoid costly repairs down the road. Incorporate these maintenance tips into your routine and enjoy a hassle-free cycling experience.
Frequently Asked Questions
How do I know when my tire is fully inflated?
Do not rely on guesswork when checking pressure. Use a pressure gauge to ensure your tire is fully inflated. Over inflation risks include blowouts and compromised handling.
Can I use a bicycle pump on a car tire?
No, you cannot use a bicycle pump on a car tire as it requires a much higher pressure than what a bike pump can provide. However, you can use a bike pump for basketballs and beach cruiser tire pressure.
How often should I pump up my tires?
You should pump up your tires at least once a week, as the importance of tire pressure cannot be overstated. Factors affecting tire pressure include temperature and usage, so be sure to check your pressure regularly to maintain optimal performance.
Is there a specific direction to attach the pump head to the valve?
To properly attach the pump head to the valve, align the head with the valve stem and press it on firmly. Common mistakes include not aligning the head correctly, not pressing it on securely, or attaching it to the wrong valve type.
How do I fix a pump that is not working properly?
When troubleshooting pump issues, check the valve head for debris and ensure it’s securely attached. For longevity, regularly clean and lubricate the pump’s parts. Don’t overtighten the head, as it can damage the valve.
Conclusion
Congratulations! You’ve successfully learned how to use a bicycle pump. As a symbol of empowerment, your newly acquired skill allows you to take control of your cycling experience by ensuring that your tires are properly inflated.
Remember to always identify your valve type before attaching the pump head. This will prevent any mishaps and ensure that you’re using the correct pump head.
When pumping air into your tire, make sure to pump in short bursts and check the tire pressure frequently to avoid over-inflation. Once you’ve reached the desired pressure, remove the pump head carefully.
To maintain the longevity of your pump, store it in a dry place and lubricate the pump head occasionally. Regular maintenance will ensure that your pump continues to work efficiently and effectively.
With these tips in mind, you’re now ready to hit the road with confidence. Happy cycling!