Hello, everyone!
Ever struggled with inflating your bike tires? Well, fear no more because I’ve got you covered. In this article, I’ll walk you through the ins and outs of using an electric bike pump.
We’ll cover everything from understanding the pump to checking the tire pressure and even storing it properly. Get ready to breeze through your bike maintenance routine like a pro.
So, without further ado, let’s dive right in!
Key Takeaways
- Electric bike pumps make inflating tires quick and effortless
- Understanding the components of an electric bike pump helps with maintenance and troubleshooting
- Proper attachment of the pump head ensures a secure and efficient inflation process
- Regularly inspect and maintain the electric bike pump for optimal performance and durability

TOBWOLF 1 Pair MTB Disc Brake Set, Hydraulic Disc Brake Kit with 160mm Rotors, Left Front 81cm & Right Rear 147cm, Aluminum Oil Pressure Calipers Levers for Mountain Bike E-Bike Fat Bike Road Bike
【Important NOTE】-- This set works on the principle of Left Front and Right Rear, which means the left...
As an affiliate, we earn on qualifying purchases.
Introduction to Electric Bike Pumps
You’re going to love using an electric bike pump because it makes inflating your tires quick and effortless.
Electric bike pumps are a great tool for maintaining your bike’s tire pressure and ensuring a smooth ride.
One of the advantages of using an electric bike pump is that it eliminates the need for manual pumping, which can be tiring and time-consuming.
With an electric pump, all you have to do is attach it to the valve on your tire and press a button to start the inflation process.
This makes it much easier to achieve the recommended tire pressure for optimal performance and safety.
Understanding your electric bike pump is essential for proper maintenance and efficient usage.
Let’s dive into the details of how to make the most out of your electric bike pump.
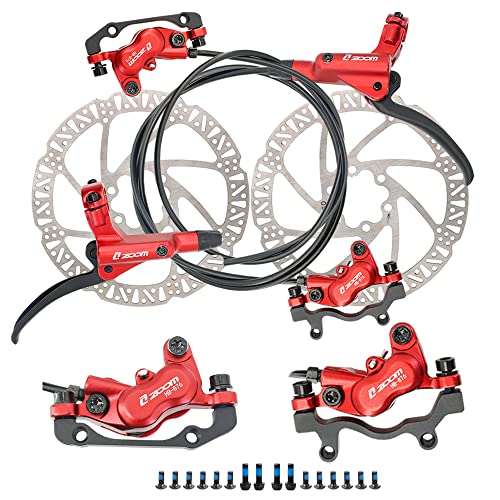
JFOYH zoom HB876 4-Piston Pre-Bled Hydraulic Disc Brake Set for Mountain Bike, Bike Disc Brake Kit with 160mm Rotors, Front and Rear Levers(PM Adapter Included) - Left-Front&Right-Rear
Experience Powerful Braking: Our 4-piston dual-way brake system provides exceptional braking force, allowing you to stop on a...
As an affiliate, we earn on qualifying purchases.
Understanding Your Electric Bike Pump
Once you’ve familiarized yourself with how it works, it’s important to understand the different components of your e-bike pump. Here are the key elements you need to know for electric bike pump maintenance and troubleshooting common issues:
-
Pressure Gauge: This displays the current pressure inside your bike tires, allowing you to monitor and adjust it accurately.
-
Valve Head: The valve head is the part that attaches to the valve on your bike tire. It comes in different types, such as Presta or Schrader, so make sure you have the correct one for your bike.
-
Power Source: Electric bike pumps typically have a built-in battery or can be powered by an external power source. Ensure your pump is properly charged or connected to a power outlet before use.
Understanding these components will help you maintain your e-bike pump and troubleshoot any common issues that may arise. Now, let’s move on to preparing your bike for inflation.

4-Pistons E-Bike Hydraulic Disc Brake Set, 2-PIN Electric Power-Off Hydraulic Brakes Set with 160mm Rotors, Pre-Bled with Mineral Oil Brakes Kit for eBike, MTB, Electric Scooters
【4-Piston Powerful Braking】2026 Upgrade Hydraulic Disc Brake Set Features with a 4-piston pistons, which makes the dual-side breaking...
As an affiliate, we earn on qualifying purchases.
Preparing Your Bike for Inflation
Before inflating my bike tires, there are a few key points I need to keep in mind.
First, I should always check the tire pressure using a pressure gauge to ensure proper inflation.
Secondly, I need to remove the dust caps from the valve stems before attaching the pump.
Lastly, it is important to also remove the valve caps to allow for smooth air flow during the inflation process.
Checking tire pressure
To check your tire pressure, start by attaching the pressure gauge to the valve on your bike’s tire. This step is crucial for measuring accuracy and ensuring that your tires are properly inflated. The pressure gauge will provide you with the current PSI (pounds per square inch) reading.
If you encounter any issues during this process, such as a tight valve or difficulty attaching the gauge, try troubleshooting common problems like ensuring the gauge is properly aligned and applying gentle pressure.
Once you have obtained the pressure reading, you can proceed to the next step of removing the dust caps and valve caps to prepare for inflation.
Removing dust caps and valve caps
After you have obtained the pressure reading, you can proceed by removing the dust caps and valve caps to prepare for inflation. It is important to remove the dust caps using a gentle twisting motion, being careful not to damage the valve stem. Once the dust caps are removed, it is a good practice to clean the valve caps using a soft cloth or tissue to ensure a clean and secure connection between the pump and the valve.
To help you visualize the process, here is a table outlining the steps for removing the dust caps and cleaning the valve caps:
| Step | Action |
|---|---|
| 1 | Obtain pressure reading |
| 2 | Remove dust caps |
| 3 | Clean valve caps |
| 4 | Proceed to inflation |
Now that the dust caps and valve caps are removed and cleaned, we can move on to the next step of attaching the pump to the valve.

DURATECH 41 Pieces Bike Repair Tools, Complete Bike Tools Kit with Storage Box, Mountain Bike Maintenance Tools, for Mountain, Road, and Park Bicycle with Chain Riveter, Tire Levers, Crank Puller
Complete Kit: Our Bike tool kit includes everything you need to perform both major or delicate work without...
As an affiliate, we earn on qualifying purchases.
Attaching the Pump to the Valve
When it comes to attaching the pump to the valve, it’s important to understand the different valve types that exist, such as Presta, Schrader, and others.
Each valve type requires a specific pump head or adapter for a secure connection.
To ensure a proper fit, I recommend checking the valve type on your bike and selecting the corresponding pump head or adapter for a secure and efficient inflation process.
Different valve types (Presta, Schrader, etc.)
There’s a variety of valve types for electric bike pumps, such as Presta and Schrader. Understanding the differences between these valve types is crucial for proper valve maintenance and effective inflation. Here are four key points to consider:
-
Presta valve: This type of valve is typically found on road bikes and is known for its slender design. It requires a specific pump head that can accommodate the smaller diameter and higher pressure.
-
Schrader valve: Commonly found on mountain bikes and other recreational bikes, the Schrader valve is larger and more robust. It resembles the valves found on car tires and can be easily inflated with most pumps.
-
Valve compatibility: It’s essential to ensure that your pump is compatible with the valve type on your bike. Using the wrong pump head can lead to air leaks or difficulty in inflating the tire.
-
Proper maintenance: Regularly inspect and clean your valve to prevent dust and debris from affecting its performance. Lubricate the valve if necessary to ensure smooth operation.
Now that we understand the different valve types, let’s move on to securing the pump onto the valve without any difficulties.
Securing the pump onto the valve
To secure the pump onto the valve, you’ll need to align the pump head with the valve and firmly press it down for a tight connection. Start by selecting the appropriate pump head for your valve type, whether it’s Presta or Schrader.
Once you have the correct head, make sure the valve is open by unscrewing the cap. Then, place the pump head onto the valve, ensuring that it is aligned properly. With a firm grip, push down on the pump head to create a tight seal. You may hear a slight hiss as the pump attaches securely to the valve. This step is crucial in preventing any air leakage during inflation.
Now that the pump is securely attached, let’s move on to setting the desired pressure.
Setting the Desired Pressure
When it comes to setting the desired pressure for your electric bike, there are two key points to keep in mind: using the pressure gauge and adjusting the pressure level.
First, you’ll need to consult the pressure gauge on your pump to determine the current pressure of your bike’s tires. Once you have this information, you can then adjust the pressure level to your desired setting using the appropriate controls on the pump.
Using the pressure gauge
You’ll need to make sure the pressure gauge is properly aligned with the valve on the bike tire. This is crucial for accurate pressure readings.
To use the pressure gauge, simply attach it to the valve and wait for the reading to stabilize. If the gauge shows a pressure lower than desired, you can add more air by using the pump. On the other hand, if the pressure is too high, you can release some air by pressing the valve stem.
It’s important to note that overinflating or underinflating the tire can affect your riding experience and safety.
If you encounter any issues with the pressure gauge, such as an inaccurate reading or a malfunctioning gauge, it’s recommended to troubleshoot the problem before proceeding to adjust the pressure level accordingly.
Adjusting the pressure level
Before adjusting the pressure level, ensure the pressure gauge is properly aligned with the valve. This step is crucial to accurately measure and adjust the pressure of your bike tires.
When adjusting pressure levels, keep the following in mind:
- Use the valve cap to protect the valve from dirt and debris.
- Slowly release air from the tire if it is overinflated, using a small tool like a valve core remover.
Troubleshooting common issues with pressure adjustments can help ensure smooth operation of your electric bike pump. Some common issues include:
- If the pressure gauge is not reading correctly, check for any obstructions or damage to the gauge.
- If the pressure is not changing despite adjusting the valve, ensure the valve is properly connected and there are no leaks.
Inflating Your Bike Tires
To properly inflate your bike tires, it’s essential to understand the process of starting the pump and monitoring the inflation.
First, make sure the pump is securely attached to the valve of the tire. Then, activate the pump by pressing the power button or lever, and ensure that the pressure gauge is functioning properly.
Throughout the inflation process, keep a close eye on the pressure gauge and adjust accordingly to reach the desired tire pressure.
Starting the pump
First, make sure the pump is firmly attached to the valve before turning it on. This is crucial to ensure a proper seal and prevent air leakage. To start the pump, simply press the power button located on the device. The pump will automatically inflate your bike tires to the desired pressure level. However, in case you encounter any issues during the process, refer to the table below for troubleshooting common problems.
| Issue | Possible Cause | Solution |
|---|---|---|
| Pump not turning on | Dead battery or faulty connection | Check battery and connections |
| No airflow | Obstructed valve or clogged filter | Clean valve and filter |
| Inconsistent pressure | Faulty pressure gauge | Calibrate or replace pressure gauge |
| Slow inflation | Low power or worn-out pump | Charge battery or replace worn-out parts |
| Overheating | Continuous operation or high ambient temperature | Allow pump to cool down before use |
After starting the pump, it is important to monitor the inflation process closely to ensure your tires are properly inflated without any leaks or issues.
Monitoring the inflation process
During the inflation process, keep a close eye on the pressure gauge to ensure your tires are reaching the desired level. This is crucial for maintaining optimal performance and safety while riding. Here are some inflating techniques and troubleshooting tips to make the process easier:
- Start by attaching the pump securely to the valve stem.
- Use short bursts of air to prevent over-inflation and potential tire damage.
- If the pressure gauge shows the tire is not inflating, double-check the connection between the pump and the valve stem.
- If the pressure gauge is not working properly, try using a separate gauge to ensure accuracy.
- If you encounter any leaks or difficulty inflating the tire, inspect the valve stem for any debris or damage that may be causing the issue.
- Always refer to the manufacturer’s guidelines for the recommended tire pressure.
By closely monitoring the inflation process and following these tips, you can ensure that your tires are properly inflated and ready for your next ride.
Now let’s move on to checking the tire pressure to complete the maintenance process.
Checking the Tire Pressure
Make sure you’re using the electric bike pump correctly by checking the tire pressure.
Checking the tire pressure is an essential step in maintaining your bike’s performance and safety. Proper tire pressure ensures optimal traction, stability, and control while riding.
To check the tire pressure, start by attaching the pump’s nozzle securely onto the valve stem. Activate the pump and monitor the pressure gauge until it reaches the recommended PSI (pound per square inch) for your bike. It is crucial to follow the manufacturer’s guidelines for the appropriate tire pressure range.
Maintaining proper tire pressure not only enhances your riding experience but also extends the lifespan of your tires. Once you have confirmed the desired pressure, you can proceed to disconnect the pump, ensuring a smooth transition to the subsequent section.
Disconnecting the Pump
To disconnect the pump, simply release the nozzle from the valve stem. This is an important step in using an electric bike pump, as it allows you to safely remove the pump from the tire once you have completed the inflation process.
Here are some troubleshooting tips for common pump issues:
-
Check the connection: Ensure that the nozzle is securely attached to the valve stem to prevent any air leakage.
-
Inspect the hose: Look for any signs of wear or damage on the pump hose. If you notice any issues, it may be necessary to replace it.
-
Test the pressure gauge: Use a separate pressure gauge to verify the accuracy of the pump’s gauge. If there is a significant difference, consider calibrating or replacing the gauge.
By following these steps, you can ensure a successful pumping experience.
Now, let’s move on to storing and maintaining your electric bike pump.
Storing and Maintaining Your Electric Bike Pump
Now that you know how to properly disconnect the pump, let’s discuss storing and maintaining it.
Proper storage and maintenance are crucial to ensure the longevity and functionality of your electric bike pump.
When storing your pump, make sure to keep it in a dry and cool place, away from direct sunlight and extreme temperatures. It is also important to store it in a clean environment, free from dust and debris.
To prevent pump damage, avoid dropping or mishandling it, as this can cause internal components to shift or break.
Regularly inspect your pump for any signs of wear or damage, and if necessary, use maintenance tools such as lubricants to keep it in optimal condition.
By following these guidelines, you can ensure that your electric bike pump remains in good shape and ready for use whenever you need it.
Now, let’s move on to the conclusion and final tips section.
Conclusion and Final Tips
Storage and maintenance are crucial for the longevity and functionality of your electric bike pump, so it’s important to follow these guidelines to keep it in good shape. Here are three important tips for prolonging the lifespan of your electric bike pump and avoiding common mistakes:
-
Properly store your electric bike pump: When not in use, make sure to store your pump in a dry and clean place. Avoid exposing it to extreme temperature or humidity, as it can damage the internal components.
-
Regularly clean your pump: Dust and debris can accumulate over time, affecting the pump’s performance. Use a soft cloth to wipe off any dirt or grime from the pump’s surface. Additionally, clean the nozzle and valve connections to ensure a secure and efficient seal.
-
Avoid over-inflating or under-inflating: Be mindful of the recommended pressure range for your bike tires and follow it closely. Over-inflating can strain the pump and cause damage, while under-inflating can lead to poor performance and increased wear.
Frequently Asked Questions
How long does it take to fully inflate a bike tire using an electric bike pump?
Using an electric bike pump, it takes approximately 1-2 minutes to fully inflate a bike tire. The advantages of using an electric pump include quick and effortless inflation, accurate pressure control, and compatibility with various valve types.
Can an electric bike pump be used on other types of tires, like car tires or sports equipment?
Yes, an electric bike pump can be used to inflate basketballs and motorcycle tires. It is important to adjust the pressure settings accordingly and use the appropriate adapters for each type of tire.
Is it possible to overinflate a bike tire using an electric pump? If so, what are the consequences?
Overinflating bike tires with an electric pump can lead to disastrous consequences. It’s like blowing up a balloon until it pops. The tire can burst, causing loss of control and potential accidents.
Are there any safety precautions to take when using an electric bike pump?
To ensure safety when using an electric bike pump, it is important to follow proper usage guidelines. This includes wearing protective eyewear and gloves, ensuring the pump is stable, and checking for any signs of damage or malfunction.
Can an electric bike pump be used to deflate a bike tire if it is overinflated?
Yes, an electric bike pump can be used to deflate a bike tire if it is overinflated. However, caution must be exercised as overdeflating can cause tire damage and compromise riding safety.
Conclusion
In conclusion, using an electric bike pump has been a game-changer for me. It not only makes inflating my tires quick and effortless, but it also ensures that I have the perfect pressure every time.
With just a few simple steps, I can easily attach the pump to the valve, set my desired pressure, and check if my tires are properly inflated. The convenience and efficiency of this tool have made my biking experience even more enjoyable.
Plus, maintaining and storing the pump is a breeze. I highly recommend investing in an electric bike pump for all biking enthusiasts out there. Trust me, you won’t be disappointed!