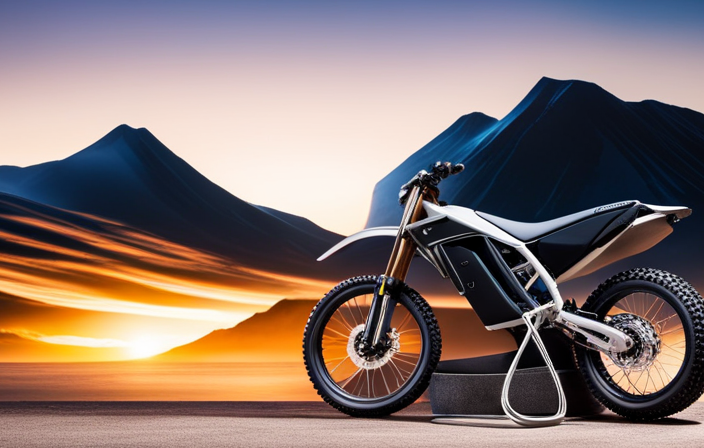
Coinciding the worlds of electric scooters and bikes, this article delves into the intricate art of using an electric scooter wheel for a bike friction drive. By combining technical precision with detailed instructions, you will learn how to gather the necessary materials, prepare your bike, and install the electric scooter wheel seamlessly.
With the benefits of friction drive in mind, you’ll be able to conquer different terrains and ride with ease.
Get ready to elevate your biking experience with this upgraded electric-assisted technique.
Key Takeaways
- Friction drive allows for easy installation and removal of the electric scooter wheel on a bike.
- Regular maintenance and alignment checks are necessary to ensure optimal performance and safety.
- Electric-assisted riding with a friction drive provides added power and ease of pedaling, making it easier to tackle inclines and ride longer distances.
- Friction drive offers precise control and adjustment of power output, enhancing the overall electric-assisted riding experience.

Under Armour Squeeze Water Bottles, 32 oz Water Bottles, Sideline Sports Water Bottle with Quick-Shot Lid, Quick & Easy Hydration, Gym Water Bottles, Squeeze Bottle, 1 32oz Bottle
- Easy Hydration: Quick-shot lid and one-way valve
- On-the-Go Use: One-hand operation for active hydration
- Measurement Markings: Ounces and milliliters for tracking
As an affiliate, we earn on qualifying purchases.
Gathering the Necessary Materials
You’ll need to gather the necessary materials for the electric scooter wheel bike friction drive. Start by gathering tools such as a wrench, pliers, and a screwdriver. These tools will be essential for disassembling the electric scooter wheel and attaching it to your bike.
Next, you’ll need to source the required parts. Look for a suitable electric scooter wheel that fits your bike’s specifications. Additionally, you’ll need a motor controller, a battery, and a throttle control. Make sure to choose high-quality parts to ensure the durability and efficiency of your bike modification.
Once you have gathered all the necessary tools and parts, you can move on to preparing your bike for the modification by removing the rear wheel and making any necessary adjustments.
Preparing Your Bike for the Modification
To get started, make sure your bicycle is properly equipped for the modification. Here is a list of four items you will need for this bike modification:
- A bike frame with enough clearance and a sturdy rear triangle to support the added weight and torque of the electric scooter wheel.
- A rear dropout spacing that matches the electric scooter wheel’s axle width.
- Disc brake compatibility, if you plan to use the scooter wheel’s built-in disc brake.
- A compatible gearing system that aligns with the scooter wheel’s RPM range.
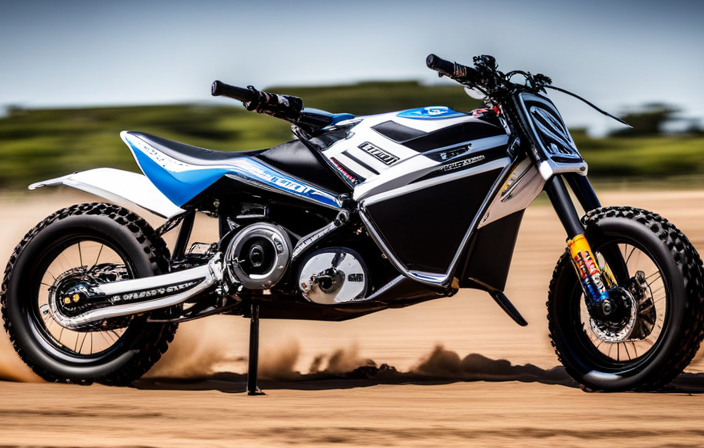
Choosing the right electric scooter wheel is crucial. Consider factors like wheel diameter, motor power, and torque output to match your desired riding style and terrain. Additionally, ensure that the scooter wheel’s axle diameter matches your bike’s dropouts.
Now that you have gathered the necessary materials and chosen the right electric scooter wheel, it’s time to move on to removing the rear wheel of your bike.
Removing the Rear Wheel of Your Bike
First, make sure your bicycle is properly equipped for the modification by removing the rear wheel.
Begin by shifting the gears to the smallest chainring and rear cog to relieve tension on the chain.
Next, use a wrench to loosen the nuts or quick-release skewer that holds the wheel in place.
Carefully slide the wheel out of the dropouts, ensuring that the chain is disengaged from the cassette or freewheel.
Once the wheel is removed, inspect it for any damage or wear that may affect the installation of the electric scooter wheel.
Choosing the right electric scooter wheel is crucial, as it should be compatible with your bike’s frame and have the necessary power to drive the bike.
With the rear wheel removed, you are now ready to move on to installing the electric scooter wheel and completing the modification.
Installing the Electric Scooter Wheel
Once the rear wheel of your bicycle has been removed, it’s time to proceed with the installation of the electric scooter wheel.
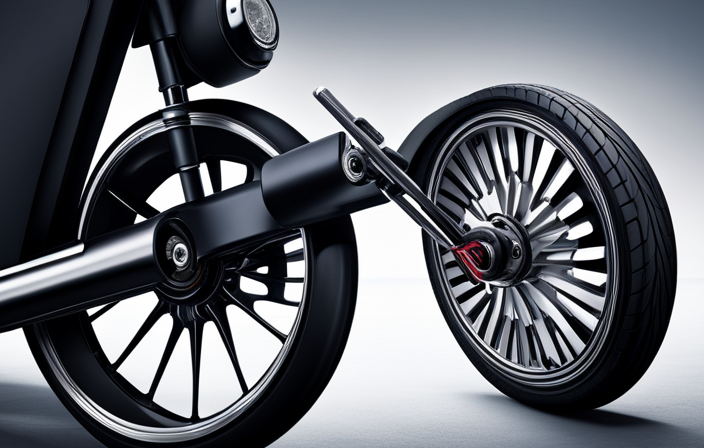
Begin by aligning the axle of the electric scooter wheel with the dropouts on the bike’s frame. Slowly slide the axle into the dropouts, making sure it is centered and properly seated. Once in position, tighten the axle nuts or quick release lever to secure the wheel in place. Double-check that the wheel is straight and centered between the chainstays.
Now, let’s troubleshoot some common issues that may arise during the installation process. If the wheel doesn’t fit properly in the dropouts, check if the axle is fully inserted and aligned correctly. If the wheel feels loose, tighten the axle nuts or quick release lever until it is snug. Additionally, ensure that the wheel spins freely without any resistance.
With the electric scooter wheel securely installed, we can now move on to connecting it to the bike’s drivetrain, which will be covered in the next section.
Connecting the Wheel to the Bike’s Drivetrain
Now, you’ll need to attach the wheel to the bike’s drivetrain. Start by removing the bike’s rear wheel and placing the electric scooter wheel in its place. Make sure the axle of the electric scooter wheel fits securely into the bike’s dropouts.
Next, connect the electric scooter wheel’s motor to the drivetrain of the bike. This can be done by using a chain or a belt, depending on the configuration of your bike. Ensure that the chain or belt is properly tensioned and aligned with the motor sprocket and the bike’s rear cassette or freewheel.
Common issues that may arise during this process include misalignment of the chain or belt, excessive tension causing the drivetrain to bind, or inadequate tension causing slipping. Troubleshoot these issues by adjusting the alignment, tension, or replacing worn-out components.
Now that you have successfully connected the wheel to the bike’s drivetrain, you can proceed to the next section about securing the wheel and ensuring proper alignment.
Securing the Wheel and Ensuring Proper Alignment
To ensure the wheel is secure and properly aligned, you’ll need to check the tightness of the axle nuts or quick release skewer.
Start by verifying that the axle nuts or quick release skewer are tightened adequately. Use a wrench or a quick release lever to tighten the nuts or skewer until they are snug. Avoid overtightening, as this may cause damage to the wheel or the bike frame.
Once the nuts or skewer are tightened, spin the wheel to check for any wobbling or misalignment. If you notice any issues, loosen the nuts or skewer and adjust the wheel until it spins smoothly without any wobbling.
If troubleshooting alignment issues, check if the wheel is properly seated in the dropouts and aligned with the frame.
Once the wheel is secure and properly aligned, you can move on to wiring and connecting the electric motor.
Wiring and Connecting the Electric Motor
To wire and connect the electric motor, you’ll need to follow the specific instructions provided by the manufacturer.
Begin by identifying the wires coming out of the motor and determining their functions. Typically, you will find wires for power, ground, and control.
Ensure that you have the appropriate connectors or terminals for each wire. Strip the ends of the wires and connect them to the corresponding terminals on the motor controller. Make sure to secure the connections tightly to prevent any loose connections.
After wiring the motor, double-check all connections to ensure they are secure and properly aligned.
Once the motor is wired and connected, you can move on to adding a throttle control system, which will allow you to control the speed and power output of the electric motor.
Adding a Throttle Control System
Once you have successfully wired and connected the electric motor, you can easily add a throttle control system to regulate the speed and power output. To achieve this, follow these steps:
- First, choose a suitable throttle grip that fits comfortably on your handlebars.
- Next, connect the throttle grip to the controller by attaching the wires according to the provided instructions.
- Then, adjust the throttle sensitivity to your preference by accessing the controller’s settings. This will allow you to control the motor’s response and acceleration.
By incorporating a throttle control system, you can fine-tune the throttle adjustment to match your riding style and needs. This will provide a smoother and more controlled riding experience.
Now that you have successfully added the throttle control system, you can proceed to the next section where we will discuss testing and adjusting the friction drive for optimal performance.
Testing and Adjusting the Friction Drive
Now that you’ve successfully added the throttle control system, it’s time to test and adjust the friction drive for optimal performance.
To ensure the smooth operation of your electric scooter wheel for bike friction drive, it’s crucial to employ effective testing methods and adjusting techniques.
Start by checking the alignment of the friction drive wheel with the bike’s rear wheel. Use a tape measure to ensure that the two wheels are aligned parallel to each other.
Next, perform a test run on a flat and safe surface, gradually increasing the throttle to observe the speed and smoothness of the drive. If you notice any vibrations or slippage, adjust the tension of the friction drive belt accordingly.
Finally, ensure safety measures and proper maintenance by regularly inspecting the friction drive components and lubricating the drive chain.
Ensuring Safety Measures and Proper Maintenance
Make sure you regularly inspect and lubricate the components of the friction drive system to ensure safety and proper maintenance. Here are some maintenance precautions you should follow:
- Check the condition of the drive roller regularly to ensure it is not worn out or damaged.
- Inspect the drive belt for any signs of wear and tear, and replace it if necessary.
- Clean the friction wheel and drive roller regularly to remove any dirt or debris that could affect their performance.
To ensure your safety while using the electric scooter wheel for bike friction drive, it is important to follow these safety gear requirements:
- Always wear a helmet to protect your head in case of a fall or accident.
- Use knee and elbow pads to protect your joints from injuries.
- Wear sturdy shoes that provide good grip on the pedals.
By following these maintenance precautions and safety gear requirements, you can ensure a safe and enjoyable riding experience.
Now, let’s move on to getting familiar with the electric-assisted riding experience.
Getting Familiar with the Electric-Assisted Riding Experience
To become familiar with the electric-assisted riding experience, you’ll quickly adjust to the added power and ease of pedaling. The electric scooter motor seamlessly integrates into your bike’s wheel, providing an extra boost to your pedaling efforts.
As you start pedaling, you’ll feel the electric motor gently kicking in, offering assistance as you ride. This electric-assisted riding experience allows you to effortlessly tackle inclines and ride for longer distances without straining yourself. The added power of the electric motor reduces the effort required to pedal, making your bike rides more enjoyable and less tiring.
With the electric-assisted riding, you can easily maintain a higher speed and cover more ground in less time. Understanding the benefits of friction drive is essential to fully grasp the advantages of using an electric scooter wheel for bike friction drive.
Understanding the Benefits of Friction Drive
As you become familiar with it, you’ll quickly see the benefits of friction drive.
The advantages of using friction drive for your electric scooter wheel on a bike are numerous. Firstly, the friction drive system is lightweight and compact, making it easy to install and remove as needed. This allows for convenient transportation and storage of your electric scooter.
Secondly, the friction drive provides a smooth and efficient transfer of power from the motor to the wheel, resulting in a seamless riding experience. Additionally, the friction drive system allows for precise control and adjustment of the power output, giving you the ability to tailor your riding experience to your preferences.
Overall, the benefits of friction drive make it an excellent choice for enhancing your electric-assisted riding experience.
Now, let’s explore different terrain and riding conditions.
Exploring Different Terrain and Riding Conditions
Get ready to discover how your electric-assisted ride adapts to various terrains and riding conditions.
When exploring different terrains, your electric scooter wheel for bike friction drive excels in providing optimal traction and stability. Whether you’re riding on smooth pavements, gravel paths, or even off-road trails, this versatile system ensures a smooth and controlled ride.
Additionally, riding in different weather conditions is a breeze with the electric scooter wheel for bike friction drive. Its advanced design allows for efficient power transfer, even in wet or slippery conditions, ensuring maximum safety and performance.
With its ability to adapt to various terrains and weather conditions, this friction drive system revolutionizes your riding experience. So, if you encounter any issues or problems along the way, don’t worry. The next section will guide you through troubleshooting common concerns seamlessly.
Troubleshooting Common Issues and Problems
Now that you have explored different terrain and riding conditions with your electric scooter wheel for bike friction drive, it’s important to be prepared for any common issues and problems that may arise.
Troubleshooting techniques are essential to keep your electric-assisted bike running smoothly.
One common issue you may encounter is a loss of power or reduced performance. This could be caused by a loose connection or a worn-out battery. To troubleshoot this, check all connections and ensure they are secure. If the battery is the issue, consider replacing it with a new one.
Another common problem is excessive noise or vibration. This could be due to misalignment or loose components. Inspect the wheel and drive system for any signs of misalignment or looseness and make necessary adjustments.
By troubleshooting these common issues, you can ensure a seamless and enjoyable upgraded electric-assisted bike experience.
Enjoying Your Upgraded Electric-Assisted Bike Experience
Make sure to fully embrace and enjoy the enhanced experience of riding your upgraded electric-assisted bicycle. By upgrading bike accessories and optimizing electric scooter performance, you can take your ride to the next level.
Here are three key ways to make the most of your upgraded electric-assisted bike experience:
-
Feel the power: With an electric scooter wheel for bike friction drive, you’ll experience a boost in speed and acceleration. Embrace the thrill of effortlessly gliding through traffic and conquering hills with ease.
-
Extend your range: Upgrading your bike with an electric scooter wheel allows you to travel longer distances without exerting excessive effort. Enjoy the freedom of exploring new routes and taking on longer rides without worrying about running out of energy.
-
Customize your ride: Experiment with different settings and modes to find the perfect balance of speed and efficiency. Fine-tune your electric-assisted bike to suit your riding style and preferences, optimizing its performance for a personalized and enjoyable ride.
Remember, upgrading your bike accessories and maximizing electric scooter performance can transform your everyday commute or leisurely ride into an exhilarating and unforgettable experience. So, get ready to embrace the power, extend your range, and customize your ride!
Frequently Asked Questions
How long does it typically take to install the electric scooter wheel onto a bike?
Installing an electric scooter wheel onto a bike can typically take around 30-60 minutes, depending on your familiarity with the process. The installation time may vary based on the compatibility of the scooter wheel with different bike models.
It is important to carefully follow the manufacturer’s instructions during installation to ensure proper alignment and secure attachment. Taking time to properly install the wheel will ensure optimal performance and safety while riding.
Can the electric scooter wheel be used on any type of bike?
The electric scooter wheel can be used on most types of bikes, but it’s important to consider the advantages and disadvantages.
One advantage is that it can improve the performance of your bike by providing an extra boost of power.
However, there are some disadvantages to using an electric scooter wheel, such as added weight and limited compatibility with certain bike frames.
It’s crucial to carefully assess these factors before deciding to install an electric scooter wheel on your bike.
Are there any special tools required for the installation process?
To install an electric scooter wheel for a bike friction drive, you will need a few specific tools. These include a wrench to remove the existing wheel, a torque wrench to tighten the bolts properly, and a screwdriver to adjust the tension of the friction drive.
The installation process involves removing the old wheel, attaching the electric scooter wheel to the bike frame, and adjusting the tension for optimal performance.
Pay close attention to the manufacturer’s instructions for a successful installation.
What kind of maintenance is required for the electric scooter wheel?
To ensure optimal performance and longevity of the electric scooter wheel, regular maintenance is essential. Here are some maintenance tips for you.
Firstly, periodically inspect the wheel for any signs of damage or wear.
Clean the wheel and remove any debris that may have accumulated.
Lubricate the bearings and axles to reduce friction and ensure smooth operation.
Additionally, troubleshooting common issues such as motor malfunctions or electrical problems may require professional assistance.
Is it possible to switch back to a regular bike wheel after installing the electric scooter wheel?
Switching back to a regular bike wheel after installing an electric scooter wheel for bike friction drive is possible. However, it’s important to consider the pros and cons before making the switch.
The electric scooter wheel can affect the bike’s performance in terms of speed and efficiency. While it provides a convenient and eco-friendly alternative, it may also add extra weight and require frequent maintenance.
It’s crucial to assess your specific needs and preferences before deciding.
Conclusion
Congratulations! You’ve successfully transformed your ordinary bike into an electrifying machine with the help of an electric scooter wheel.
By following the simple steps outlined in this guide, you’ve unlocked a whole new world of riding possibilities.
Picture yourself effortlessly gliding through various terrains, feeling the surge of power as the electric-assisted bike propels you forward.
Soak in the joy and excitement of this upgraded biking experience, and let it fuel your adventurous spirit.
Get ready to embark on thrilling journeys like never before!