Connect with us

Electric Bike

How To Wash A Electric Bike

Published

on

An image showcasing the step-by-step process of washing an electric bike: a person wearing gloves and using a hose to rinse off dirt, then gently scrubbing the frame with a sponge, and finally drying it with a microfiber cloth

Are you ready to give your electric bike a much-needed spa day?

Get ready to bring back that shiny, brand-new feel as you learn the expert techniques of washing your electric bike.

Picture yourself standing outside, hose in hand, as you gently rinse away the dirt and grime that has accumulated on your trusty two-wheeler.

With a mild soap or bike cleaner, and a soft brush or sponge, you’ll scrub away any stubborn residue.

So, let’s dive in and discover the step-by-step process to keep your electric bike looking and performing at its best.

Advertisement

Key Takeaways

  • Properly drying components and applying lubrication is essential for preventing damage and ensuring smooth operation of the bike.
  • Storing the electric bike in a safe and protected location is important to avoid rust, corrosion, and damage to electrical components.
  • Protecting against moisture is crucial to prevent rust, corrosion, and maintain optimal bike performance.
  • Considering the impact of extreme temperatures and avoiding storage in extreme heat or cold is necessary to protect battery life and maintain proper bike functionality.

Gather the necessary cleaning supplies

You’ll need to gather the necessary cleaning supplies before you can start washing your electric bike. To begin, grab a bucket, a hose, and a soft-bristle brush. The bucket will be used for mixing cleaning solution and carrying water. Opt for a mild detergent or bike-specific cleaner to prevent any damage to the bike’s components.

Additionally, grab a microfiber cloth or sponge for wiping down the frame and components. A hose with adjustable pressure will come in handy for rinsing off the bike. Don’t forget to gather some degreaser for cleaning the drivetrain and a lubricant for afterwards.

Once you have all the supplies, you’ll be ready to move on to preparing your electric bike for washing by following these steps…

Preparing your electric bike for washing

First, make sure your e-bike is turned off and disconnected from any power source before starting the washing process. This is crucial to ensure your safety and prevent any electrical mishaps.

Advertisement

Begin by inspecting your bike for any loose or damaged parts that may require repair or replacement before washing. Cover sensitive areas such as the battery, motor, and display with plastic bags or waterproof covers to protect them from water damage. Additionally, remove any accessories like lights or mirrors that may be easily damaged during the cleaning process.

By preparing your electric bike in this manner, you can prevent potential damage and ensure a smooth and effective washing experience.

Now, let’s move on to the next step, starting with a gentle rinse.

Start with a gentle rinse

Advertisement

To begin, turn on the hose and spray water gently over your e-bike, ensuring a thorough rinse of any dirt or debris. Start at the top and work your way down, making sure to cover every nook and cranny. The water pressure should be enough to remove any loose particles without causing damage to the bike’s electrical components.

Pay extra attention to areas like the chain, gears, and brakes, as these tend to accumulate more grime.

Once you’ve rinsed off the surface dirt, it’s time to move on to the next step – using a mild soap or bike cleaner. This will help to break down any stubborn dirt or grease and leave your electric bike looking clean and shiny.

Use a mild soap or bike cleaner

After rinsing your e-bike, it’s time to apply a mild soap or bike cleaner to remove stubborn dirt and grease. This step is crucial in maintaining the cleanliness and longevity of your electric bike.

Here are four reasons why using a mild soap or bike cleaner is essential:

Advertisement
  • Efficient cleaning: A mild soap or bike cleaner is specifically formulated to break down dirt and grease, ensuring a thorough cleaning of your e-bike.

  • Protects the finish: Using the right cleaner helps preserve the paint and coating on your bike, preventing any damage or fading caused by harsh chemicals.

  • Safe for components: Mild soaps and bike cleaners are gentle on the bike’s components, ensuring that they remain in optimal condition without any corrosion or deterioration.

  • Environmentally friendly: Many bike cleaners are eco-friendly, meaning they are biodegradable and won’t harm the environment.

Now that your e-bike is soaped up, you can move on to the next step and scrub gently with a soft brush or sponge.

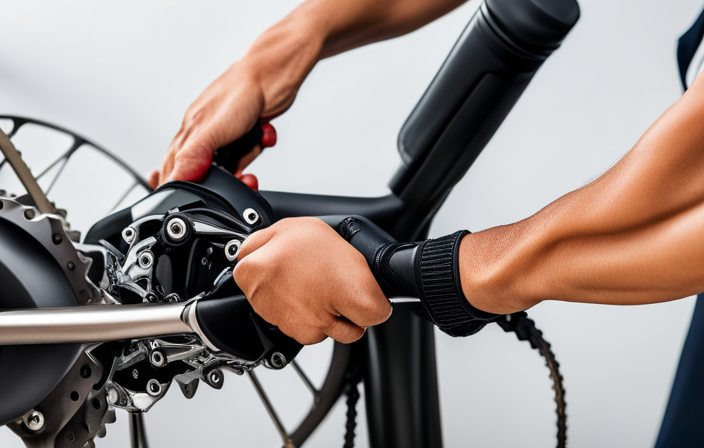
Scrub gently with a soft brush or sponge

Once you’ve soaped up your e-bike, gently scrub it with a soft brush or sponge to remove any remaining dirt or grime. Be sure to use a brush or sponge with soft bristles to avoid scratching the surface of your bike.

Start at the top and work your way down, paying close attention to areas that are prone to dirt buildup, such as the chain, gears, and wheels. Take extra care when scrubbing around delicate components like the display screen or charging port.

Advertisement

To make this process even more effective, you can use a table to keep track of the different areas of your bike and ensure you don’t miss any spots. Remember to rinse your brush or sponge frequently to avoid spreading dirt around.

Now, let’s move on to the next section and discuss how to pay attention to the electrical components of your e-bike.

Pay attention to the electrical components

Make sure you’re gentle when cleaning the electrical components, as they can be sensitive to water and harsh scrubbing. The electrical components of an electric bike are crucial for its proper functioning, so it’s important to handle them with care during cleaning.

Start by inspecting the components for any dirt or debris. Use a soft brush or sponge to gently remove the dirt, making sure not to apply too much pressure. Avoid using excessive water, as it can damage the electrical parts. Instead, dampen the brush or sponge with a small amount of water or a mild cleaning solution specifically designed for electronics.

Clean the components by lightly brushing or wiping them, taking care not to get any water or cleaning solution into the sensitive areas such as connectors or cables. After cleaning, rinse thoroughly to remove all soap residue, ensuring that no cleaning solution is left behind that could potentially damage the electrical components.

Advertisement

Rinse thoroughly to remove all soap residue

Be sure to thoroughly rinse the components to remove any soap residue that may be left behind. After washing your electric bike, it is crucial to rinse it properly to ensure the removal of all soap residue.

Soap residue can be detrimental to the electrical components of your bike, causing damage or malfunction. To rinse the bike, use a gentle stream of water from a hose or a bucket. Ensure that all areas, including hard-to-reach places, are thoroughly rinsed. Pay close attention to the battery compartment, motor, and any electrical connections.

Make sure there is no soap residue left behind, as it can lead to corrosion and electrical issues. Once all the components are rinsed, you can move on to the next step of properly drying your electric bike.

Dry your electric bike properly

To ensure proper drying, use a soft cloth or towel to gently wipe down all the components of your electric bike. Start with the frame, wiping away any remaining moisture or dirt. Pay close attention to hard-to-reach areas such as the bottom bracket and headset.

Next, move on to the wheels, making sure to dry the rims, spokes, and hubs thoroughly. Don’t forget to dry the brake calipers, ensuring they are free from water or debris that could affect their performance.

Advertisement

Take the time to wipe down the handlebars, stem, and seat post, removing any moisture that may have accumulated.

Once all the components are dry, it’s time to apply lubrication to the chain and other moving parts.

Apply lubrication to the chain and other moving parts

You’ll want to use a lubricant to ensure the chain and other moving parts of your bike are properly lubricated.

Lubrication is essential for maintaining the smooth operation of your electric bike and prolonging its lifespan.

When applying lubricant, start by cleaning the chain and other parts with a degreaser to remove any dirt or debris.

Advertisement

Once cleaned, apply the lubricant evenly along the chain, making sure to penetrate the links thoroughly.

You can use a lubricating spray or a drip bottle for precise application.

After applying the lubricant, give it some time to penetrate and then wipe off any excess.

This will prevent attracting dirt and ensure a clean and efficient operation.

Now, let’s move on to the next section on how to store your electric bike in a safe and dry place.

Advertisement

Store your electric bike in a safe and dry place

Now that you’ve properly lubricated the chain and other moving parts of your electric bike, it’s crucial to store it in a safe and dry place. This is essential to ensure the longevity and optimal performance of your bike.

When choosing a storage location, consider a space that’s protected from the elements, such as rain, snow, and excessive humidity. Moisture can lead to rust and corrosion, which can damage the electrical components of your bike. Additionally, avoid areas with extreme temperatures as they can also impact the battery life and overall functionality of your electric bike.

If possible, store your bike indoors, in a garage, or a dedicated bike storage area. Make sure to keep it away from any chemicals or substances that may be harmful to the bike’s frame or electrical system.

Conclusion

Now that you’ve learned how to wash your electric bike, you’re equipped with the knowledge to keep it clean and in optimal condition.

By following these simple steps and using the right cleaning supplies, you can ensure that your bike stays free from dirt, grime, and residue.

Advertisement

Remember to rinse thoroughly, scrub gently, and dry your bike properly to prevent any damage.

With regular maintenance and proper storage, your electric bike will continue to provide you with a smooth and enjoyable ride for years to come.

Zane rides her bike because she loves it, but also because she is mindful of the need to leave a better world for her children.

Continue Reading
Advertisement

Electric Bike

How To Tighten Forward Break Ancher Electric Bike

Published

on

By

An image featuring a close-up shot of a gloved hand gripping a wrench, firmly tightening the bolt connecting the forward brake anchor to the frame of an electric bike

Were you aware that a loose anchor on the forward brake can impact the safety and efficiency of your electric bicycle? Recent studies reveal that defective brakes are a major contributing factor to cycling accidents.

But fear not! In this article, I will guide you through the step-by-step process of tightening your forward brake anchor. By following these simple instructions, you can ensure a secure and reliable braking system, allowing for safe and enjoyable rides on your electric bike.

So let’s get started!

Key Takeaways

  • Regular maintenance tasks are important for ensuring the optimal performance and safety of an electric bike.
  • Brake inspections should be conducted regularly to identify any issues and prevent brake failures.
  • Checking and inspecting brake components, such as brake pads and cables, is crucial for maintaining their functionality and responsiveness.
  • Proper adjustment of brake cables is necessary to maintain correct tension and ensure reliable brakes.

Gather the Necessary Tools

You’ll need to gather the necessary tools to tighten the forward brake anchor on your electric bike.

Advertisement

Choosing the right tools is crucial to ensure a successful and safe tightening process. Start by getting a set of metric Allen wrenches, as they are commonly used for bike repairs. Make sure to have a wrench that matches the size of the anchor bolt on your specific bike model.

Additionally, a torque wrench is recommended to ensure proper tightening without over-tightening. Common mistakes to avoid include using the wrong size wrench, which can damage the bolt or strip it, and not applying enough torque, which can cause the brake anchor to become loose again.

Once you have the tools ready, you can proceed to locate the forward brake anchor and begin the tightening process.

Locate the Forward Brake Anchor

First, find the anchor for the front brake on your e-bike. It is usually located near the front wheel, attached to the fork or the frame.

To inspect the forward brake anchor on your electric bike, follow these steps:

Advertisement
  1. Use a flashlight to get a clear view of the anchor and its components.
  2. Check for any signs of wear, such as rust or corrosion.
  3. Ensure that the anchor is securely fastened to the frame or fork.

Inspecting the forward brake anchor is crucial for maintaining and improving brake performance on electric bikes. By regularly checking and tightening the anchor, you can prevent any potential issues that may arise from loose or damaged components.

Once you have completed this inspection, you can move on to the next section about loosening the bolts or screws.

Loosen the Bolts or Screws

To begin, make sure the bolts or screws are properly loosened. This is a crucial step in the process of tightening the forward brake anchor on an electric bike. Loosening the bolts or screws allows for easier adjustment and ensures that the anchor can be properly tightened afterwards. When loosening the bolts or screws, it is important to use the correct technique to avoid causing any damage. One common mistake is using too much force, which can strip the threads or break the bolts. Another mistake is not loosening all the bolts or screws evenly, which can result in an uneven anchor and compromised braking performance. By following the correct loosening technique and avoiding common mistakes, you can ensure a successful tightening process. Now, let’s move on to the next step of adjusting the position of the brake anchor.

Adjust the Position of the Brake Anchor

Once the bolts or screws are properly loosened, you can adjust the position of the brake anchor.

Advertisement

To begin, locate the brake anchor and examine its current position. Use a wrench or pliers to loosen the anchor bolt, allowing for movement.

Adjust the position of the anchor to ensure proper brake cable tension. This adjustment will ensure that the brake pads engage with the wheel properly and provide optimal braking performance.

Once the anchor is in the desired position, tighten the anchor bolt securely.

Additionally, while adjusting the brake anchor, it is a good opportunity to inspect the brake pads. If they are worn or damaged, replace them with new ones to maintain effective braking.

With the brake anchor properly adjusted and the brake pads in good condition, you can now proceed to align the brake pads for optimal performance.

Advertisement

Align the Brake Pads

After adjusting the position of the brake anchor, the next step is to align the brake pads for optimal performance.

Proper brake alignment is crucial for ensuring efficient braking and preventing premature wear of the brake pads.

To adjust the brake tension and align the pads, start by loosening the bolts or screws that secure the brake pads in place.

Advertisement

With the bolts or screws slightly loose, squeeze the brake lever to bring the pads close to the rim or disc.

While holding the brake lever, carefully align the pads so that they make contact with the rim or disc evenly on both sides.

Once aligned, tighten the bolts or screws to secure the brake pads in their optimal position.

This will provide consistent and reliable braking power.

Moving on to the next step of tightening the bolts or screws…

Advertisement

Tighten the Bolts or Screws

First, make sure to securely fasten the bolts or screws. Proper bolt tightening techniques are essential to ensure the optimal performance and safety of your electric bike’s brake system. Loose bolts can lead to a variety of issues, such as decreased braking power, increased wear on brake pads, and potential accidents. To tighten the bolts or screws, use an appropriate-sized wrench or screwdriver and apply sufficient torque. Be careful not to overtighten, as this can damage the bolts or strip the threads. It is crucial to check all the bolts and screws related to the brake system, including those securing the brake calipers, brake levers, and brake pads. Once all the bolts and screws are properly tightened, you can proceed to test the brake functionality.

Test the Brake Functionality

To ensure your safety, try out the brakes to make sure they are functioning properly. Testing the brakes is an important step in tightening the forward brake anchor on an electric bike.

When testing the brake functionality, there are a few signs of brake functionality issues that you should look out for. These include a spongy or loose brake lever, excessive brake lever travel, or a lack of stopping power. If you experience any of these issues, it may indicate that the brakes need further adjustment or repair.

Once you have tested the brakes and identified any functionality issues, you can make additional adjustments if needed to ensure optimal brake performance. This will ensure that your electric bike stops smoothly and efficiently, providing you with a safe riding experience.

Make Additional Adjustments if Needed

You may need to make additional adjustments if necessary to ensure optimal brake performance. Here are some troubleshooting tips to help you with this task:

Advertisement
  1. Check the brake pads: Inspect the brake pads to ensure they are properly aligned and have sufficient thickness. If they are worn out or misaligned, replace or reposition them accordingly.

  2. Adjust the brake cable tension: If the brakes feel loose or sluggish, you may need to adjust the cable tension. Use the barrel adjuster on the brake lever or the cable anchor bolt to make the necessary adjustments.

  3. Align the brake caliper: A misaligned brake caliper can cause uneven braking. Loosen the mounting bolts, align the caliper with the brake rotor, and then tighten the bolts securely.

  4. Test and fine-tune: After making any adjustments, test the brakes to ensure they are working properly. If necessary, make further adjustments until the desired brake performance is achieved.

By following these additional adjustments and troubleshooting tips, you can improve the brake performance of your electric bike. Make sure to maintain regular brake inspections and maintenance for continued optimal performance.

Maintain Regular Brake Inspections and Maintenance

To ensure the optimal performance of your electric bike’s brakes, it is crucial to maintain regular brake inspections and maintenance. This will help identify any issues and prevent potential accidents. One important aspect of brake maintenance is brake pad replacement. Over time, brake pads can wear out and become less effective, compromising the braking power of your electric bike. By regularly inspecting and replacing worn brake pads, you can ensure that your bike’s braking system operates at its best. Additionally, brake cable adjustment is another vital maintenance task. Over time, brake cables can stretch or become loose, affecting the responsiveness of the brakes. By adjusting the brake cables as needed, you can maintain the correct tension and ensure a tight and reliable braking system. With these regular inspections and maintenance tasks, you can enjoy safe and smooth rides on your electric bike.

Enjoy Safe and Smooth Rides on Your Electric Bike

Ensure the optimal performance of your e-bike by regularly maintaining and inspecting its brakes.

Electric bike maintenance is crucial for the overall safety and functionality of your ride. One of the most important aspects of maintenance is ensuring the brakes are in proper working condition. Brake safety is of utmost importance, as it can prevent accidents and ensure smooth rides.

Regularly check the brake pads for wear and tear, and replace them if necessary. Additionally, inspect the brake cables for any fraying or damage, and adjust them if needed. It is also essential to maintain the proper tension in the brake system to ensure effective stopping power.

Advertisement

By prioritizing brake maintenance, you can enjoy safe and smooth rides on your electric bike, knowing that your brakes are in excellent condition.

Frequently Asked Questions

What are the necessary tools needed to tighten the forward brake anchor on an electric bike?

To tighten the forward brake anchor on an electric bike, the necessary tools include an adjustable wrench, a socket wrench, and a torque wrench. The tightening process involves loosening the bolts, aligning the anchor, and then tightening the bolts with the appropriate tool.

How do I locate the forward brake anchor on my electric bike?

To locate the forward brake anchor on your electric bike, start by identifying the brake caliper positioned near the front tire. The forward brake anchor is usually a metal bracket connecting the caliper to the bike frame.

What should I do if the bolts or screws are difficult to loosen?

If the bolts or screws are difficult to loosen, I recommend using alternative methods such as applying penetrating oil or heat to loosen them. If all else fails, seeking professional help may be necessary to prevent damage to the bike.

How do I adjust the position of the brake anchor once it is loosened?

To adjust the position of the brake anchor, first loosen the bolts or screws holding it in place. Then, carefully slide the anchor to the desired position. Once in position, tighten the bolts or screws securely. When troubleshooting brake anchor issues, follow these steps.

Advertisement

Is it necessary to regularly inspect and maintain the brake system on an electric bike?

Regular inspection and maintenance of the brake system on an electric bike is crucial. It ensures optimal performance and safety. Common issues include brake pad wear, loose cables, and misaligned calipers. Regularly check and adjust these components for a smooth and responsive braking experience.

Conclusion

Well, there you have it folks. You’ve now become a pro at tightening the forward brake anchor on your electric bike. Who needs a professional mechanic anyway?

With just a few simple steps, some basic tools, and a little know-how, you can ensure your brake system is in top-notch condition.

So go ahead, hit the road with confidence, and remember, nothing could possibly go wrong when you’re in control of your own bike maintenance.

Happy riding!

Advertisement

Continue Reading

Electric Bike

How To Turn A Bicycle Into An Electric Bike

Published

on

By

An image showcasing a step-by-step transformation of a bicycle into an electric bike

Want to give your bike an extra oomph? Ready to feel the excitement of riding an electric bike without spending a fortune? Your solution is here!

In this article, we will guide you through the process of turning your regular bicycle into an electric bike. With the help of electric bike conversion kits and some basic tools, you’ll be able to transform your two-wheeler into a high-performance, eco-friendly mode of transportation in no time.

So, grab your toolkit and let’s get started!

Key Takeaways

  • Adjust pedal assist levels and fine-tune motor power output to optimize bike performance.
  • Check electrical connections for damage and ensure proper battery installation and charge level for functionality and safety.
  • Experiment with different power levels and fine-tune pedal assist settings to adjust settings for performance.
  • Install additional features and accessories such as racks, phone mounts, fenders, lights, and comfortable seating or grips for customization and comfort.

Understanding Electric Bike Conversion Kits

Understanding electric bike conversion kits can be helpful when you want to turn your bicycle into an electric bike. These kits offer numerous benefits for bike enthusiasts looking to add an electric motor to their ride.

Advertisement

The first step is choosing the right motor for your needs. Consider factors such as power output, battery range, and compatibility with your bicycle. Higher power motors provide more speed and torque, while larger battery capacity allows for longer rides. Additionally, ensure that the motor is compatible with your bike’s frame and wheel size.

Once you have selected the right motor, you can move on to gathering the necessary tools and equipment. This will include items such as wrenches, screwdrivers, and a battery pack, which we will discuss in the next section.

Gathering the Necessary Tools and Equipment

To get started, you’ll need a few tools and equipment for the electric bike conversion process.

First, you’ll need a conversion kit, which typically includes a motor, battery, controller, and other necessary components. Make sure to choose a kit that is compatible with your bicycle’s frame and wheel size.

Additionally, you’ll need a set of wrenches and screwdrivers to remove the existing parts and install the new components. It’s also recommended to have a torque wrench to ensure proper tightening of bolts and nuts.

Advertisement

Other tools you may need include wire cutters, crimping tools, and electrical tape for wiring connections.

Lastly, don’t forget safety equipment such as gloves and safety glasses.

With these necessary tools and equipment, you can now move on to preparing your bicycle for the conversion by removing the pedals and other non-essential parts.

Preparing Your Bicycle for the Conversion

Advertisement

Once you have gathered the necessary tools and equipment, you can begin preparing your bicycle for the conversion by removing non-essential parts. This will make room for the electric components and ensure a smoother installation process. Start by taking off any accessories such as fenders, racks, and baskets. Next, remove the pedals and crankset using a pedal wrench and crank puller. Once these parts are off, detach the front and rear wheels by loosening the axle nuts or quick-release levers.

In terms of preparing tools, make sure you have a set of Allen wrenches, screwdrivers, and adjustable wrenches on hand. These will come in handy when disassembling and reassembling various components.

Now that your bicycle is stripped down to its essentials, you can move on to choosing the right battery for your electric bike conversion. Consider factors such as voltage, capacity, and size when making your selection. Keep in mind that a higher voltage battery will provide more power, but it may also be heavier and more expensive. Once you have chosen the battery, you can proceed to the next step of installing the electric motor.

Transitioning into the subsequent section about ‘installing the electric motor’, you can now move on to the exciting part of transforming your bicycle into an electric bike.

Installing the Electric Motor

Now that your bicycle is stripped down to its essentials, you can begin installing the electric motor.

Advertisement

Start by mounting the motor onto the frame using the appropriate brackets and screws. Ensure that the motor is securely attached and properly aligned.

Next, connect the motor controller to the motor and securely fasten it in place. Follow the manufacturer’s instructions to properly connect the wires and ensure that they are insulated and protected.

Once the motor and controller are installed, it’s important to test the system and troubleshoot any common motor installation issues. Check for proper wiring connections, ensure that the motor spins freely, and listen for any abnormal sounds.

If you encounter any issues, consult the manufacturer’s troubleshooting guide or seek professional assistance.

With the motor successfully installed, you can now move on to adding the battery and controller to complete your electric bike setup.

Advertisement

Adding the Battery and Controller

To add the battery and controller to your electric bike, you will need to carefully choose the right battery that suits your needs. Consider factors such as the battery’s capacity, voltage, and weight.

Once you have selected the battery, you can then proceed to install it along with the controller, ensuring proper wiring and connections are made for optimal performance.

Choosing the Right Battery for Your Needs

When choosing the right battery for your needs, you’ll want to consider factors such as capacity, voltage, and weight.

Advertisement

Battery capacity refers to the amount of energy a battery can hold and is measured in watt-hours (Wh). It determines how far you can go on a single charge. If you plan on longer rides or have hilly terrains, a higher battery capacity is recommended for better battery range.

Voltage, on the other hand, determines the power output of the battery. Higher voltage batteries provide more power, resulting in better acceleration and hill climbing ability.

Lastly, weight is an important consideration as it affects the overall weight of your electric bike. A lightweight battery will ensure better handling and maneuverability.

Now that you have chosen the right battery, let’s move on to installing the battery and controller.

Installing the Battery and Controller

Installing the battery and controller is the next step in the process of converting your regular bicycle into an electric bike. To ensure a successful installation, follow these steps:

Advertisement
  • Choose a suitable location on your bike to mount the battery, considering factors such as weight distribution and accessibility.

  • Securely attach the battery using mounting brackets or straps, ensuring it is well-protected from vibrations and impacts.

  • Connect the battery to the controller using the provided wiring harness, ensuring the connections are secure and insulated.

  • Program the controller according to your desired settings, such as maximum speed and battery capacity.

  • Test the system by turning on the controller and checking if the battery is properly supplying power to the electric components.

With the battery and controller successfully installed and programmed, you can now proceed to the next section about wiring and connecting the components, ensuring a well-functioning electric bike.

Wiring and Connecting the Components

After connecting the components, it’s important to ensure the wiring is secure. Start by carefully inspecting all the connections and making sure they are tight and properly connected. Double-check that all the wires are correctly routed and organized to prevent any potential issues.

It’s also essential to use zip ties or cable clips to secure the wires in place and avoid any loose or dangling cables. When it comes to wiring tips, make sure to follow the manufacturer’s instructions and color codes for each component. If you encounter any difficulties, consult the troubleshooting guide provided with the electric bike conversion kit.

Once the wiring is secure, you can proceed to the next step of testing and fine-tuning the electric bike’s performance and functionality.

Testing and Fine-Tuning the Electric Bike

To ensure proper functionality and safety of your electric bike, it’s crucial to perform thorough checks.

Advertisement

Start by inspecting the wiring connections, ensuring they’re secure and free from any damage.

Next, test the brakes, throttle, and motor to verify that they’re all working correctly.

Finally, make adjustments to the settings to optimize the bike’s performance. This could include adjusting the pedal assist levels or fine-tuning the motor power output.

Checking for Proper Functionality and Safety

Before you begin, make sure to properly check for functionality and safety of your electric bike conversion. Safety precautions are essential to ensure a smooth and secure ride.

Start by inspecting the electrical connections, ensuring they are secure and free from any damage. Check the battery’s charge level and make sure it is properly installed and secured.

Advertisement

Test the brakes to ensure they are responsive and functioning effectively. Additionally, check the throttle and motor to ensure they are working properly. If any issues arise, refer to troubleshooting tips provided in the conversion kit manual to diagnose and resolve the problem.

Once you have confirmed the functionality and safety of your electric bike, you can proceed to the next step of adjusting settings for performance optimization.

Adjusting Settings for Performance Optimization

Once you’ve ensured the functionality and safety of your electric bike conversion, you can adjust the settings for optimal performance.

To achieve performance upgrades, start by adjusting the power output of your electric motor. Most controllers have settings that allow you to increase or decrease the power level. Experiment with different levels to find the right balance between speed and battery consumption.

Additionally, you can fine-tune the pedal assist settings to suit your riding style.

Advertisement

Troubleshooting common issues is an essential part of optimizing performance. Check for any error codes or unusual behavior and consult the user manual for guidance. Common issues include motor overheating, poor battery performance, and inconsistent power delivery. Addressing these issues promptly will ensure a smooth and efficient ride.

Now that you’ve optimized your electric bike’s performance, it’s time to explore adding additional features and accessories to enhance your riding experience.

Adding Additional Features and Accessories

Adding additional features and accessories can greatly enhance the functionality and enjoyment of your electric bike. There are a variety of options available to customize your ride and make it more convenient and efficient.

One popular feature is the addition of a front or rear rack, which provides extra storage space for carrying groceries, a backpack, or other items. Another useful accessory is a phone mount, allowing you to easily navigate using GPS or listen to music while riding.

Additionally, fenders can be installed to protect you from mud and water splashes, especially when riding in wet conditions. Lights and reflectors are essential for visibility and safety, especially when riding at night. Finally, consider adding a comfortable saddle or ergonomic grips to improve comfort during long rides.

Advertisement

By incorporating these additional features and accessories, you can customize your electric bike to meet your specific needs and preferences.

When it comes to maintenance and care for your electric bike, there are a few key steps to keep it running smoothly.

Maintenance and Care for Your Electric Bike

To properly maintain and care for your electric bike, there are a few key points to keep in mind.

Regular cleaning and lubrication is essential to ensure the longevity and smooth operation of your bike. By keeping the chain, gears, and other moving parts clean and properly lubricated, you can prevent rust, corrosion, and unnecessary wear and tear.

Additionally, it is important to regularly check and replace any worn-out parts, such as brake pads or tires, to ensure optimal performance and safety.

Advertisement

By following these maintenance practices, you can enjoy a well-maintained and reliable electric bike for years to come.

Regular Cleaning and Lubrication

Regular cleaning and lubrication are essential for maintaining an electric bike. Neglecting regular maintenance can lead to premature wear and reduce the overall lifespan of your bike.

When it comes to cleaning, start by using a soft cloth or sponge soaked in soapy water to gently wipe down the frame, wheels, and components. Avoid using high-pressure water as it can damage sensitive electrical parts.

As for lubrication, choosing the right lubricant is crucial. Opt for a bicycle-specific lubricant that is designed for electric bikes and apply it to the chain, derailleur, and other moving parts. This will help reduce friction and keep your bike running smoothly. Remember to wipe off any excess lubricant to prevent attracting dirt and debris.

Regular cleaning and lubrication will ensure your electric bike performs at its best.

Advertisement

Now, let’s move on to checking and replacing worn-out parts.

Checking and Replacing Worn-Out Parts

First, you’ll want to regularly check and replace any worn-out parts on your electric bike. This is essential to ensure the optimal performance and longevity of your bike.

Start by inspecting the tires for any signs of wear or damage, such as cracks or bald spots. Replace them if necessary to maintain proper traction and safety.

Next, examine the brake pads to ensure they have enough thickness and aren’t worn down. Replace them if they are less than 1/8 inch thick.

Additionally, check the chain for any signs of rust, stretching, or tight spots. Lubricate it regularly and replace it if it’s excessively worn.

Advertisement

Troubleshooting common issues like loose bolts, loose spokes, or worn-out pedals is also crucial.

By regularly replacing worn-out parts and addressing common issues, you’ll enjoy a smooth and safe ride on your new electric bike.

Now, let’s move on to the next section about enjoying your new electric bike.

Enjoying Your New Electric Bike

When it comes to enjoying your new electric bike, there are two key points to consider:

  • Exploring new cycling routes and adventures: By taking your electric bike on new routes, you can discover scenic and challenging paths that you may not have considered before.

  • Sharing your electric bike experience with others: Additionally, sharing your electric bike experience with others can be a great way to introduce them to the benefits of electric biking and encourage them to try it out for themselves.

So, get out there and start exploring new routes while sharing your electric bike experience with others!

Advertisement

Exploring New Cycling Routes and Adventures

Exploring new cycling routes and adventures is a great way to spice up your biking routine. It allows you to discover new places, challenge yourself, and experience the thrill of riding your electric bike in different terrains.

To make the most out of your explorations, consider the following:

  • Invest in new cycling gear: Upgrade your helmet, gloves, and shoes to ensure maximum comfort and safety during your rides.

  • Finding the best cycling routes: Use apps like Strava or Komoot to discover popular trails and routes in your area. These apps provide detailed maps, elevation profiles, and user reviews to help you find the perfect route for your adventure.

  • Join a cycling group or club: Connecting with like-minded individuals who share your passion for biking can enhance your exploration experience. Not only can you learn from their expertise, but you can also discover new routes and share incredible adventures together.

By expanding your horizons and trying new cycling routes, you can create unforgettable memories and discover the full potential of your electric bike.

Next, let’s delve into how sharing your electric bike experience with others can amplify the joy of owning one.

Sharing Your Electric Bike Experience with Others

Sharing your electric bike experience with others can be a fantastic way to spread the joy and excitement of owning one. As an electric bike enthusiast, you can share tips and tricks with fellow electric bike owners to enhance their riding experience.

Advertisement

One way to do this is by organizing group rides and events specifically for electric bike owners. These events can be a great platform for exchanging knowledge, discussing modifications, and learning from each other’s experiences. Additionally, they offer an opportunity to explore new routes and adventures together, fostering a sense of community among electric bike enthusiasts.

By sharing your knowledge and organizing group rides, you not only contribute to the growth of the electric bike community but also create lasting connections with like-minded individuals who share your passion for this eco-friendly mode of transportation.

Frequently Asked Questions

Can I convert any type of bicycle into an electric bike?

Yes, you can convert most types of bicycles into electric bikes. However, bike compatibility is important, as some frames may not be suitable. To do this, you will need the necessary equipment such as a motor, battery, and controller.

How long does it typically take to complete the conversion process?

The conversion process typically takes around 4-6 hours, depending on your familiarity with the necessary tools. To complete the conversion, you’ll need tools such as a wrench, screwdriver, and wire cutters.

Can I still use my bike as a regular bicycle after the conversion?

Yes, you can still use your bike as a regular bicycle after the conversion. Converting your bike into an electric bike allows you the option of using it for exercise or enjoying the benefits of electric assistance.

Advertisement

How far can an electric bike travel on a single charge?

The electric bike range depends on various factors such as battery capacity, terrain, rider weight, and level of pedal assistance. On average, electric bikes can travel 20-50 miles on a single charge.

Are there any legal restrictions or regulations for riding an electric bike?

Riding an electric bike has numerous benefits, like gliding effortlessly through traffic. However, there are legal restrictions and regulations to ensure electric bike safety. Familiarize yourself with local laws to ride confidently and responsibly.

Conclusion

Congratulations! You’ve successfully transformed your ordinary bicycle into a marvelous electric bike. Just like a caterpillar metamorphosing into a beautiful butterfly, your two-wheeled companion has undergone a remarkable transformation.

With the help of an electric bike conversion kit, a few handy tools, and a dash of determination, you’ve unlocked a world of possibilities. Now, you can effortlessly conquer hills, soar through the streets, and experience the thrill of riding with a little extra oomph.

So, spread your wings, embrace the freedom, and enjoy the electric adventure that awaits you!

Advertisement

Continue Reading

Electric Bike

How To Turn A Mountain Bike Into An Electric Bike

Published

on

By

An image showcasing a skilled individual in a well-equipped workshop, meticulously installing a sleek electric motor on a rugged mountain bike frame

Picture the excitement of effortlessly conquering mountains, smoothly gliding up steep inclines, and impressing your fellow riders.

Now, picture transforming your trusty mountain bike into a powerful electric machine that can make this dream a reality.

In this guide, we will unveil the secrets of turning your beloved ride into an electric marvel.

Get ready to dive into the technical intricacies, gather the necessary tools, and embark on a journey to electrify your mountain bike like never before.

Key Takeaways

  • Thoroughly examine the mountain bike frame for cracks or dents before starting the conversion process.
  • Follow the manufacturer’s instructions carefully to ensure a successful and safe installation.
  • Regularly maintain and inspect the tires and chain to ensure smooth and safe operation of the electric bike.
  • Troubleshoot common issues such as motor not engaging or battery draining quickly by consulting the user manual or seeking professional assistance.

Assess Your Bike’s Compatibility

Advertisement

You’ll need to assess if your bike’s frame, brakes, and drivetrain are compatible with an electric conversion kit.

Start by assessing battery capacity to determine if your bike can handle the additional weight of the battery.

Check the motor compatibility to ensure that it fits within the frame of your bike and aligns with the drivetrain system.

Look for any potential modifications or adjustments that may be required to accommodate the conversion kit.

Examine the condition of your brakes to ensure they are in good working order and capable of handling the increased speed and weight of an electric bike.

Advertisement

Once you have assessed these factors, you can move on to choosing the right conversion kit that suits your bike’s specifications.

This will allow you to seamlessly transition into the subsequent section about choosing the right conversion kit.

Choose the Right Conversion Kit

When choosing a conversion kit for turning your mountain bike into an electric bike, there are a few key points to consider.

First, you need to decide whether to go with a front wheel or rear wheel conversion. This will depend on your specific needs and preferences.

Second, it is important to select the correct motor power and battery size to ensure optimal performance and range.

Advertisement

Finally, look for a kit that offers a user-friendly installation process to make the conversion as smooth and hassle-free as possible.

Decide Between Front or Rear Wheel Conversion

To decide between front or rear wheel conversion, it’s important to consider factors such as balance and traction. When converting your mountain bike into an electric bike, you have the option to choose between a front wheel or a rear wheel conversion. Each option has its own set of pros and cons that you should take into account.

Front Wheel Conversion: This option provides better traction when climbing steep hills and allows for easier steering. However, it may compromise the balance of your bike, especially when going downhill.

Rear Wheel Conversion: This option maintains the natural balance of your bike and provides better stability when going downhill. However, it may result in less traction when climbing steep hills.

Considering these factors, you need to carefully assess your needs and preferences before making a decision. After deciding between front or rear wheel conversion, the next step is to select the correct motor power and battery size for your electric bike.

Advertisement

Select the Correct Motor Power and Battery Size

After considering factors such as balance and traction, it is important to select the correct motor power and battery size for your electric bike. Motor power selection depends on the terrain you will be riding on and your desired speed. A more powerful motor, such as a 750W, is suitable for off-road trails and steep hills, while a 500W motor works well for urban commuting. As for battery capacity calculation, you need to determine your desired range and the weight you are willing to carry. A larger battery, like a 48V 14Ah, provides a longer range but increases the overall weight of your bike. To help you understand the correlation between motor power and battery capacity, refer to the table below:

Motor Power (W) Battery Capacity (Ah) Range (Miles)
250 8 20
500 10 30
750 14 40

By selecting the appropriate motor power and battery size, you can ensure a smooth and efficient electric biking experience. Next, look for a kit with a user-friendly installation process, making the conversion process hassle-free.

Look for a Kit with a User-Friendly Installation Process

Find a kit with an installation process that is easy for you to use. Look for a user-friendly installation process when converting your mountain bike into an electric bike. This will save you time and frustration.

Here are some pros and cons of DIY versus professional installation:

  • DIY Installation:
    Pros: Cost-effective, you can customize the installation according to your preferences, and it can be a rewarding learning experience.
    Cons: Requires technical knowledge and skills, may void the warranty on certain parts, and can be time-consuming.

  • Professional Installation:
    Pros: Saves time and effort, ensures proper installation and functionality, and may come with a warranty.
    Cons: Can be expensive, limits customization options, and may require you to leave your bike at the shop for a certain period.

Consider these factors before deciding whether to install the electric bike conversion kit yourself or seek professional help. Once you have made a decision, you can proceed to gather the necessary tools for the installation process.

Advertisement

Gather the Necessary Tools

First, you’ll need a few tools to turn your mountain bike into an electric bike. Gather these necessary tools to ensure a smooth conversion process. In order to choose the right battery capacity for your electric bike, consider factors such as the distance you plan to ride, the weight of the bike and rider, as well as the terrain. Research and find the best conversion kit brand that suits your needs, taking into account factors such as price, motor power, and customer reviews. To visually represent these ideas, refer to the table below:

Tools Needed
Wrench set
Screwdriver
Allen keys
Wire cutters

Once you have gathered these tools, you can proceed to the next step of preparing your bike for conversion.

Prepare Your Bike for Conversion

Before converting your mountain bike into an electric bike, there are a few key points to consider.

First, remove any unnecessary accessories or components that may hinder the conversion process.

Next, thoroughly clean and lubricate the bike’s moving parts to ensure smooth operation.

Advertisement

Finally, inspect and repair any damaged or worn out parts to prevent potential issues down the road.

Taking these steps will help prepare your bike for a successful conversion and ensure optimal performance of your new electric bike.

Remove Any Unnecessary Accessories or Components

To start, you’ll wanna take off any unnecessary accessories or components from your mountain bike to prepare it for the electric conversion. This step is crucial as it allows you to assess the bike’s condition and remove any items that may hinder the conversion process.

Here are three items you should consider removing:

  1. Fenders: These are usually not needed on an electric bike and can add unnecessary weight.

  2. Kickstand: While useful for regular bikes, it is not compatible with electric conversion kits and can interfere with the motor or battery placement.

  3. Front derailleur: Since electric bikes usually have a single chainring, the front derailleur becomes redundant and can be removed to simplify the bike’s drivetrain.

Once you have removed these accessories, you can proceed to clean and lubricate the bike’s moving parts. This will ensure optimal performance and longevity for your electric conversion.

Advertisement

Clean and Lubricate the Bike’s Moving Parts

Next, make sure you clean and lubricate all the moving parts of your bike for optimal performance and longevity.

Cleaning and lubricating your bike’s moving parts is crucial for maintaining a smooth and efficient ride. Start by using a mild detergent and water to remove any dirt or grime from the chain, derailleur, and gears. Be sure to scrub gently with a soft brush to avoid damaging these delicate components. Once clean, thoroughly dry the parts to prevent rusting.

After cleaning, apply a high-quality lubricant specifically designed for bicycles. Focus on the chain, bearings, and pivots. Proper lubrication reduces friction, improves shifting, and extends the lifespan of your bike’s moving parts. Regular maintenance, including cleaning and lubrication, is essential to keep your electric mountain bike running smoothly. This ensures you can enjoy your rides without any hiccups.

Moving forward, it is important to inspect and repair any damaged or worn-out parts to ensure proper functioning.

Inspect and Repair Any Damaged or Worn Out Parts

Now that you have cleaned and lubricated the bike’s moving parts, it is time to move on to the next crucial step in turning your mountain bike into an electric bike.

Advertisement

Take a moment to inspect and repair any damaged or worn out parts. This is essential to ensure the smooth functioning of your electric bike.

Start by thoroughly examining the frame for cracks or dents, and repair or replace any compromised sections. Next, check the brakes, gears, and chain for signs of wear or damage. Replace any worn brake pads, adjust the gears, and lubricate the chain if necessary. Additionally, inspect the wheels for loose spokes or bent rims, resolving any issues promptly.

By employing these repairing techniques and addressing common bike issues, you will guarantee a sturdy foundation for your electric bike conversion.

Now, let’s move on to the next step and install the electric conversion kit.

Install the Electric Conversion Kit

First, you’ll need to assemble the electric conversion kit for your mountain bike. To help you through the installation process, here are four key steps:

Advertisement
  1. Benefits of converting a mountain bike into an electric bike: Electric conversion kits offer numerous advantages, including extended range, assistance on uphill climbs, and reduced physical exertion.

  2. Common challenges faced during the installation process of an electric conversion kit for a mountain bike: Some common challenges include aligning the motor and wheel properly, ensuring the battery is securely attached, managing the wiring without interfering with the bike’s functionality, and troubleshooting any technical issues that may arise.

  3. Carefully follow the manufacturer’s instructions: Each conversion kit may have specific requirements, so it is crucial to follow the provided instructions to ensure a successful installation.

  4. Double-check all connections and test the bike before riding: Before moving on to testing and adjusting your electric bike, thoroughly inspect all connections to ensure they are secure. Once everything is in place, you can proceed to test and adjust your newly converted electric bike.

Now, let’s move on to the next section about testing and adjusting your electric bike.

Test and Adjust Your Electric Bike

To ensure optimal performance, you should carefully test and make any necessary adjustments to your newly converted electric bike.

Start by checking the battery voltage and ensuring it is fully charged.

Test the throttle response and make sure it is smooth and consistent.

Ride the bike and pay close attention to any unusual noises or vibrations.

Advertisement

If you encounter any common troubleshooting issues such as a motor that doesn’t engage or a battery that drains quickly, consult the user manual or contact the manufacturer for assistance.

To optimize your electric bike’s performance, consider adjusting the pedal assist levels to suit your riding style and terrain.

Additionally, keep the tires properly inflated and regularly check the chain tension.

By thoroughly testing and making adjustments, you can enjoy a smooth and efficient ride on your newly converted electric bike.

Frequently Asked Questions

What are the potential risks or drawbacks of converting a mountain bike into an electric bike?

Converting a mountain bike to an electric bike can have potential risks and drawbacks. Risks include improper installation, voiding warranties, and safety hazards. Drawbacks include increased weight, reduced range, and limited customization options.

Advertisement

Can any type of mountain bike be converted into an electric bike, or are there specific requirements?

To convert a mountain bike into an electric bike, specific requirements must be met. Choose a mountain bike compatible with electric bike conversion kits. The best mountain bikes for electric conversion have sturdy frames and ample space for battery and motor installation.

How long does the conversion process typically take, and is it something that can be done by a beginner?

The conversion process typically takes a few hours to a few days, depending on your experience and the complexity of the conversion kit. It can be done by a beginner with basic mechanical skills and the right tools.

Are there any legal considerations or restrictions when it comes to using an electric bike on public roads or trails?

When it comes to using an electric bike on public roads or trails, there are important legal considerations and safety regulations to keep in mind. These guidelines ensure the proper usage and protection of both riders and pedestrians.

What are some common maintenance and troubleshooting tips for maintaining an electric bike after the conversion?

To properly maintain your electric bike, perform regular maintenance tasks such as checking the battery, inspecting the motor and wiring, cleaning the bike, and lubricating the chain. Troubleshooting tips include checking connections, testing the battery, and consulting the user manual for specific issues.

Conclusion

Now that you’ve successfully transformed your mountain bike into an electric bike, you can enjoy the irony of effortlessly conquering those steep hills that used to challenge you.

Advertisement

The compatibility assessment, careful selection of the conversion kit, and precise installation have paid off.

With your new electric bike, you can effortlessly glide through rugged terrains while others struggle to keep up.

So, get ready to experience the thrill of mountain biking with an unexpected twist – the power of electricity at your fingertips.

Happy riding!

Advertisement

Continue Reading
Advertisement

Affiliate disclaimer

As an affiliate, we may earn a commission from qualifying purchases. We get commissions for purchases made through links on this website from Amazon and other third parties.

About us

We are a passionate team driven by the belief that cycling is a fantastic and accessible way to stay active while enjoying the beauty of the outdoors. Our mission is to share our love for cycling with as many people as possible. We provide a welcoming environment for individuals of all ages, abilities, and backgrounds to come together and ride bikes. With Ralf’s visionary leadership, Zane’s expertise in cycling adventures, and Olivia’s dedication to community building, we strive to create a vibrant space where everyone can experience the joy of cycling. Through group rides, workshops, and inclusive events, we inspire and empower individuals to embrace an active lifestyle. Join us in our quest to pedal together, embrace the joy of cycling, and foster connections that last a lifetime.

Advertisement

Trending