I have always been intrigued by electric bicycles and the sense of liberation they provide. Therefore, I made the decision to educate myself on how to wire one from scratch.
In this guide, I’ll walk you through the process step by step, making it easy for even a beginner like me to understand.
We’ll gather the necessary tools, remove existing components, install the conversion kit, and connect the motor to the battery.
With proper safety measures and maintenance, you’ll soon be enjoying the thrill of riding your own wired electric bike.
Let’s get started!
Key Takeaways
- Securely fasten and organize play and wiring for a professional look
- Route wires along the frame, avoiding damage and interference
- Use cable ties or adhesive mounts to secure wires
- Group similar wires together for a streamlined setup
Gather the necessary tools and materials
You’ll need to gather all the necessary tools and materials for wiring your electric bike.
When it comes to gathering tools, you can find most of them at your local hardware store or online. Look for a wire stripper, crimping tool, soldering iron, heat shrink tubing, and electrical tape. These tools will ensure a clean and secure connection throughout your wiring process.
As for materials, you’ll need electrical wires in various gauges, connectors, and a battery pack. It’s important to estimate the cost of these materials, as they can vary depending on the quality and brand. To save money, consider buying in bulk or looking for deals online. Remember to double-check the compatibility of your materials with your electric bike’s specifications.
Now that you have all the necessary tools and materials, it’s time to move on to understanding the basic components of an electric bike.
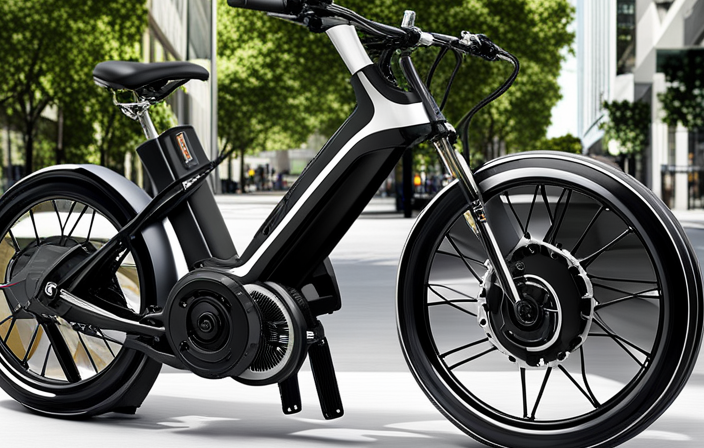
Understand the basic components of an electric bike
To get started, it’s important to familiarize yourself with the fundamental parts of an e-bike. Understanding the basic components is crucial when it comes to wiring techniques.
The key components of an electric bike include the battery, controller, motor, throttle, and display.
The battery is the power source, providing energy to the motor.
The controller acts as the brain of the system, regulating the flow of electricity.
The motor converts electrical energy into mechanical power, propelling the bike.
The throttle controls the speed, allowing you to accelerate or decelerate.
Lastly, the display provides information such as speed, battery level, and distance traveled.
Remove the existing components from your bicycle
First, identify and detach the current components from your bicycle. To do this, gather necessary tools such as wrenches, screwdrivers, and pliers. Carefully remove existing components one by one, ensuring not to damage any parts or cables. Refer to the table below to understand which components need to be detached:
| Component | Location | Removal Steps |
|---|---|---|
| Pedals | Crank arms | Unscrew using pedal wrench |
| Chain | Rear derailleur | Use chain tool to break and remove |
| Rear Wheel | Rear dropouts | Loosen quick release skewer and slide out |
| Front Wheel | Front dropouts | Loosen quick release skewer and slide out |
| Brakes | Brake calipers | Unscrew mounting bolts and release cables |
| Shifters | Handlebars | Loosen clamps and slide off |
| Bottom Bracket | Bottom bracket shell | Unscrew using bottom bracket tool |
| Crankset | Crank arms | Unscrew using crank puller tool |
Install the electric bike conversion kit
Before you begin the installation process, gather all the necessary tools and components for the conversion kit.
Installing the battery is a crucial step in converting your bike to electric. Start by locating a suitable spot on your bike frame to mount the battery. Ensure it’s secure and won’t interfere with any moving parts.
Next, connect the motor to the battery. Follow the manufacturer’s instructions for the specific wiring configuration. Make sure to double-check all connections and tighten any screws or bolts.
Once the motor is properly connected to the battery, you’re one step closer to enjoying your electric bike.
Now, let’s move on to the next section and learn how to connect the motor to the battery without writing ‘step’.
Connect the motor to the battery
Now that you’ve located a suitable spot on your bike frame to mount the battery, it’s time to connect the motor. Here are the steps to connect the motor and battery:
-
First, ensure that the motor and battery are compatible in terms of voltage and power output.
-
Locate the motor connection cable, which is usually a three-wire cable.
-
Connect one end of the motor connection cable to the motor, ensuring a secure connection.
-
Find the battery connection cable, which is typically a two-wire cable.
-
Connect the other end of the motor connection cable to the corresponding wires on the battery connection cable, making sure to match the positive and negative terminals.
With the motor and battery properly connected, you’re now ready to install the controller and throttle. These components will give you control over the electric assistance on your bike.
Install the controller and throttle
To install the controller and throttle, make sure you have properly connected the motor and battery. The controller is the brain of the electric bike, controlling the flow of power to the motor.
Start by finding a suitable location to mount the controller. It should be easily accessible for wiring and future maintenance.
Next, connect the throttle to the controller using the provided wires. Ensure that the connections are secure and free from any loose wires or exposed metal.
Once the throttle is connected, you may need to adjust its sensitivity according to your preference. This can usually be done through the settings on the controller.
If you encounter any issues with the throttle connection, double-check the wiring and connections before proceeding.
With the controller and throttle installed, you can now move on to connecting the brake sensors, which will enhance the safety and functionality of your electric bike.
Connect the brake sensors
Once you have the controller and throttle installed, it’s time to connect the brake sensors for added safety and functionality. Here are some important tips for brake sensor compatibility and installation:
-
Check compatibility: Ensure that the brake sensors you have are compatible with your electric bike system. Different bikes may require different types of brake sensors, so make sure to check the specifications.
-
Position the sensors: Locate the brake levers on your bike and attach the sensors to them. The sensors should be securely fastened and positioned close to the brake levers to detect when the brakes are engaged.
-
Connect the wires: Use the provided connectors to attach the brake sensor wires to the corresponding connectors on the controller. Double-check that the connections are secure to ensure proper functioning.
By following these brake sensor installation tips, you can ensure that your electric bike has the necessary safety features in place.
Now, let’s move on to the next section where we will discuss how to attach the display and wiring.
Attach the display and wiring
After attaching the brake sensors, it’s time to securely fasten the display and connect the wiring for your electric bike system.
To begin, make sure the display is positioned in a convenient and easily readable location on your handlebars. Use the provided mounting bracket and screws to attach the display securely.
Next, carefully connect the wires from the display to the corresponding ports on the main controller. It’s crucial to double-check that each wire is properly seated and securely connected. Take your time to avoid any loose connections that could lead to malfunctioning or unreliable performance.
Once the wiring is complete, you can move on to the next step of securing and organizing the wires, ensuring they are neatly tucked away for a clean and professional look.
Secure and organize the wires
Make sure the display and wiring are securely fastened and neatly organized for a clean and professional look.
Cable management and wire routing are crucial steps in ensuring a well-organized electric bike setup. To achieve this, start by carefully routing each wire along the frame, avoiding any areas where they may be prone to damage or interference. Use cable ties or adhesive mounts to secure the wires in place, making sure they are not overly tight or loose.
Additionally, consider grouping similar wires together to further streamline the setup. Properly organizing the wires not only improves the overall aesthetics but also makes troubleshooting and maintenance much easier.
Now that the wiring is secure and organized, it’s time to test the electric bike for functionality.
Test the electric bike for functionality
Now, you’ll want to take a moment to test out your e-bike and make sure everything is functioning properly. Here’s what you need to do:
-
First, go for a test ride to ensure that the motor engages smoothly and provides the necessary power assistance.
-
Next, check the battery life by observing the battery level indicator or using a multimeter to measure the voltage. This will give you an idea of how much charge is remaining and if the battery needs to be recharged.
-
Finally, pay attention to any unusual noises or vibrations during the test ride, as these could indicate a problem with the motor or other components.
Adjust and fine-tune the settings
Once you’ve finished testing the functionality, it’s time to adjust and fine-tune the settings to ensure an optimal riding experience.
Start by adjusting the brakes to achieve the desired level of responsiveness. This can be done by tightening or loosening the brake cables and calipers as needed.
Next, focus on optimizing battery life. This involves adjusting the power settings on the electric bike, such as the pedal assist level or throttle sensitivity, to find the right balance between performance and energy efficiency. Additionally, consider adjusting the battery charge cycles to extend its overall lifespan.
With the brakes adjusted and the battery settings optimized, you’ll have a smoother and more efficient ride.
Now, let’s move on to installing additional accessories, such as lights or a horn, to enhance your electric bike.
Install additional accessories, such as lights or a horn
To enhance your riding experience, you should consider installing additional accessories like lights or a horn. These accessories not only increase your safety on the road but also add convenience and functionality to your electric bike.
When it comes to lighting options, there are several choices available, including LED headlights, taillights, and turn signals. Adding these lights will ensure visibility and make your presence known to other road users.
Additionally, installing a horn will allow you to alert pedestrians and vehicles of your presence, enhancing your safety further.
Ensure proper safety measures, such as wearing a helmet and reflective gear
Wearing a helmet and reflective gear is crucial for ensuring your safety while riding. Helmet safety is of utmost importance when it comes to protecting your head from potential injuries in case of accidents. A well-fitted helmet can absorb the impact and reduce the risk of severe head trauma.
Additionally, reflective gear plays a vital role in enhancing your visibility, especially during low light conditions or at night. By wearing reflective clothing or accessories, such as vests or bands, you significantly increase the chances of being seen by other road users, reducing the risk of collisions.
Now that you understand the importance of safety measures, let’s move on to the next section and learn how to maintain and troubleshoot your electric bike.
Maintain and troubleshoot your electric bike
Before you take your newly wired electric bike for a ride, it’s crucial to know how to maintain and troubleshoot common issues that may arise. This will ensure the longevity and optimal performance of your electric bike.
Here are some tips to help you with this:
-
Regularly inspect the wiring connections to ensure they are secure and free from damage.
-
Keep your battery charged within the recommended voltage range to maximize its lifespan.
-
Clean the battery terminals and connectors regularly to prevent corrosion.
-
If you encounter any issues with the electrical system, such as a sudden loss of power, check the fuse and wiring connections first.
By following these maintenance and troubleshooting practices, you can enjoy a smooth and hassle-free ride on your electric bike.
Now, it’s time to embark on new adventures and explore the world with your newly wired electric bike!
Enjoy your newly wired electric bike and explore new adventures!
Now that you’ve got your newly wired electric bike, it’s time to hit the road and start exploring new adventures!
When it comes to exploring off-road trails, there are a few tips to keep in mind for long-distance rides.
First, make sure you have a comfortable saddle and handlebar position to prevent any discomfort during extended rides.
It’s also important to carry a spare battery or charger, especially if you plan on venturing far from civilization.
Additionally, familiarize yourself with the bike’s different power modes and adjust them accordingly to conserve energy.
Lastly, don’t forget to pack essential tools and supplies like a tire repair kit, water, and snacks.
With these tips in mind, you’re ready to embark on exciting off-road trails and enjoy the freedom and thrill of long-distance rides on your electric bike.
Happy exploring!
Frequently Asked Questions
How long does it typically take to wire an electric bike using a conversion kit?
Typically, wiring an electric bike using a conversion kit takes around 2-4 hours. However, it can vary depending on experience and the complexity of the kit. Common wiring mistakes include improper connections, insufficient insulation, and incorrect wire gauge.
Can I use any type of bicycle for an electric bike conversion?
Certainly! When considering an electric bike conversion, it’s crucial to select a suitable bicycle. Carefully choosing a compatible frame, wheel size, and weight capacity is essential for seamless integration with electric bike conversion kits.
Are there any specific safety precautions I should take while wiring an electric bike?
When wiring an electric bike, it is crucial to take safety precautions to prevent accidents. Common mistakes to avoid include improper insulation, incorrect wire connections, and overloading the electrical system.
What should I do if I encounter any issues or difficulties during the wiring process?
If I encounter any issues or difficulties during the wiring process, I’ll tackle them head-on with troubleshooting tips. I’ll also make sure to avoid common mistakes to ensure a smooth wiring experience.
Is it possible to upgrade or modify the electric bike after it has been wired?
Yes, it is possible to upgrade or modify an electric bike after it has been wired. However, there are limitations to upgrading certain components, and any wiring modifications should be done carefully to ensure proper functionality and safety.
Conclusion
So there you have it, my step-by-step guide on how to wire an electric bike.
By following these instructions and using the right tools and materials, you can successfully convert your regular bicycle into an exciting and efficient electric bike.
Remember, safety should always be a priority, so make sure to wear a helmet and reflective gear when riding.
As the saying goes, ‘The devil is in the details,’ so pay close attention to each step and maintain your electric bike properly.
Now, get out there and enjoy the thrill of your newly wired electric bike!