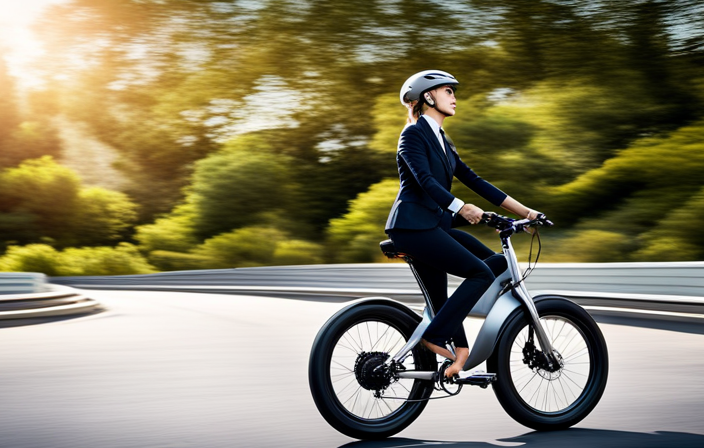

You have an electric dirt bike and are eager to enhance its safety and enjoyment.
Well, look no further, because I’ve got the perfect guide for you on how to wire a horn onto your trusty ride.
In just a few simple steps, I’ll show you how to gather the necessary tools, locate the perfect mounting spot, and make all the necessary connections.
So let’s get started and make your electric dirt bike the envy of the off-road!
Key Takeaways
- Mount the horn securely to the bike’s frame or handlebars to prevent it from coming loose during rides.
- Connect the positive and negative wires from the horn to the corresponding terminals on the battery.
- Protect the wires from abrasion and moisture by using wire loom or conduit and secure them with zip ties or clamps.
- Install a horn switch for easy access and connect it to a power source and ground using high-quality connectors and insulation.
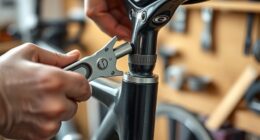
Gather the Necessary Tools and Materials
To wire the horn on your electric dirt bike, you’ll need to gather the necessary tools and materials.
First, you will need a wire routing system to ensure that the wires are neatly organized and protected. This can be achieved using wire loom or conduit to encase the wires and prevent them from getting damaged.
Additionally, you will need electrical tape to secure the connections and prevent any loose wires. It is important to choose the appropriate gauge of wire for the horn to ensure proper functionality.
Finally, you may also need wire connectors and a wire stripper/cutter to make clean and secure connections. With these tools and materials, you can effectively wire the horn on your electric dirt bike.
Once the necessary tools and materials have been gathered, the next step is to locate a suitable mounting spot for the horn.
Locate a Suitable Mounting Spot for the Horn
You can easily find a suitable spot to mount it on your handlebars. When it comes to horn placement and installation, there are a few key factors to consider.
Here’s a step-by-step guide to help you with the process:
-
Assess the handlebar space: Look for an area on the handlebars that is easily accessible and won’t interfere with your grip or other controls.
-
Consider visibility: Ensure that the horn is visible to other riders and pedestrians, as this will enhance its effectiveness in warning others.
-
Check for clearance: Make sure the horn won’t obstruct your hands or any other components on the handlebars.
-
Secure the mount: Use the appropriate hardware to securely attach the horn mount to the chosen spot on the handlebars.
Now that you have determined the ideal horn placement, it’s time to move on to the next crucial step: disconnecting the battery to ensure safety during the installation process.
Disconnect the Battery to Ensure Safety
Before proceeding with the installation, it’s important to disconnect the battery for safety purposes. This step ensures that there is no electrical current flowing through the system, reducing the risk of electric shock or short circuits. To disconnect the battery, you’ll need a few tools: a wrench or pliers to loosen the battery terminals and a pair of gloves to protect your hands. Start by locating the battery on your electric dirt bike. Then, using the appropriate tool, loosen the nuts or screws that secure the battery terminals. Carefully remove the negative terminal first, followed by the positive terminal. Place the terminals away from the battery to prevent accidental contact. With the battery disconnected, you can now proceed to identify the positive and negative wires on the horn.
Table:
| Tools needed | Safety precautions |
|---|---|
| Wrench or pliers | Wear gloves |
| Gloves |
Transition: Now that the battery is safely disconnected, we can move on to identifying the positive and negative wires on the horn.
Identify the Positive and Negative Wires on the Horn
Now that the battery’s safely disconnected, let’s figure out which wires are positive and negative on the horn. Identifying the polarity of the wires is crucial for proper wiring techniques.
To begin, locate the horn and examine the wires attached to it. Most horns come with two wires, one positive and one negative. The positive wire is usually red or marked with a plus sign, while the negative wire is typically black or marked with a minus sign.
If there are no markings, you can use a multimeter set to the continuity mode to test the wires. Connect the positive probe to one wire while touching the negative probe to the other. If the multimeter beeps, the wire being tested is the positive wire.
Once you have identified the positive and negative wires, you can proceed to connect the positive wire to the positive terminal of the battery.
Connect the Positive Wire to the Positive Terminal of the Battery
To complete the connection, simply attach the positive wire to the positive terminal of the battery.
When wiring a horn on an electric dirt bike, it is crucial to use the proper wire gauge. The wire gauge determines the amount of current that can safely flow through the wires without causing overheating or voltage drop. Using a wire gauge that is too small may result in inadequate power supply to the horn, causing it to malfunction or produce a weak sound. On the other hand, using a wire gauge that is too large can be unnecessary and add unnecessary weight to the bike.
Another important consideration is troubleshooting common horn wiring issues. Some common problems include loose connections, faulty switches, or blown fuses. Properly inspecting and testing these components can help identify and resolve any wiring problems.
As we move forward, let’s now discuss how to connect the negative wire to a grounding point on the bike.
Connect the Negative Wire to a Grounding Point on the Bike
Make sure you attach the negative wire to a grounding point on the bike. This is an essential step to ensure proper functioning of the horn on your electric dirt bike. When it comes to grounding point options, there are a few alternatives to consider. The most common grounding point on a bike is the frame, as it provides a stable and reliable connection. However, you can also use the engine block or any other metal component that is securely bolted to the bike. It is important to choose a grounding point that is easily accessible and close to the horn. This will help minimize the length of the wire and reduce the risk of interference.
To illustrate the grounding point options, refer to the table below:
| Grounding Point Options |
|---|
| Frame |
| Engine Block |
| Metal Component |
Once you have selected the appropriate grounding point, securely attach the negative wire to it using a suitable connector or bolt. Ensure that the connection is tight and free from any loose or damaged components. With the negative wire properly grounded, you can move on to the next step of testing the horn to ensure proper functionality.
Test the Horn to Ensure Proper Functionality
Once you have securely attached the negative wire to a grounding point, it’s important to test the horn to ensure it is functioning properly.
Horn maintenance is crucial for a safe and efficient ride on an electric dirt bike. Troubleshooting horn issues may involve checking the wiring connections, horn button functionality, and the horn itself.
To test the horn, simply press the horn button while the bike is powered on. Listen for a loud and clear sound indicating proper functionality. If the horn does not produce any sound or emits a weak sound, further troubleshooting is required.
This may include checking the wiring connections for any loose or damaged wires, testing the horn with a multimeter, or replacing the horn altogether.
Once the horn is confirmed to be working, it’s time to securely mount it to the chosen spot on the bike, ensuring it is easily accessible and protected from any potential damage.
Securely Mount the Horn to the Chosen Spot
When securing the horn to your chosen spot, ensure it is easily accessible and protected from potential damage. There are various mounting options available depending on the type of electric dirt bike you have.
One common method is to use mounting brackets that attach to the bike’s frame or handlebars. Make sure to use sturdy bolts and screws for a secure fit.
Another option is to use adhesive or double-sided tape to attach the horn to a flat surface on the bike. Whichever method you choose, ensure that the horn is positioned in a way that allows for easy operation and does not interfere with other components.
Once the horn is securely mounted, it is time to move on to the horn wiring techniques.
To transition into the subsequent section without writing ‘step’, you can conclude the paragraph by saying: ‘With the horn now securely mounted, we can proceed to the next crucial step: reconnecting the battery and testing the horn again to ensure proper functionality.’
Reconnect the Battery and Test the Horn Again
Now it’s time for you to reconnect the battery and give the horn another test to ensure everything is working properly.
Start by locating the positive and negative terminals on the battery. Take the positive wire from the horn and connect it to the positive terminal of the battery.
Then, take the negative wire from the horn and connect it to the negative terminal of the battery. Ensure that the connections are tight and secure to prevent any loose connections or electrical issues.
Once the battery is reconnected, turn on the ignition and press the horn button to test it. You should hear a loud, clear sound indicating that the horn is functioning correctly. If you don’t hear anything, double-check the connections and try again.
Now that the horn is properly connected and tested, it’s important to ensure proper wire routing and protection for a clean and safe installation.
Ensure Proper Wire Routing and Protection
Make sure to route and protect the wires properly for a clean and safe installation. Proper wire protection and routing are crucial to ensure the longevity and functionality of your electric dirt bike’s horn system. Here are three key considerations for wire protection and routing:
-
Use wire loom or conduit: Covering the wires with a protective layer such as wire loom or conduit safeguards them from abrasion, moisture, and other potential damage. This helps maintain the integrity of the wires and reduces the risk of short circuits.
-
Secure the wires with zip ties or clamps: Fastening the wires securely using zip ties or clamps prevents them from dangling or getting caught in moving parts. This ensures a neat and organized wiring setup, minimizing the chances of accidental damage.
-
Keep wires away from heat sources and sharp edges: Properly route the wires away from hot components, such as the exhaust system, and sharp edges that can cut or damage the insulation. This protects the wires from heat-related issues and physical harm.
By following these wire protection and routing practices, you can create a tidy and safe wiring system for your electric dirt bike’s horn.
Now, let’s consider adding a horn switch for convenient use.
Consider Adding a Horn Switch for Convenient Use
Consider installing a switch for easy horn access.
When it comes to horn placement on your electric dirt bike, finding a convenient spot is crucial. The horn should be mounted securely and within reach of your hand. You can choose to attach it near the handlebars or on the front forks, depending on your preference and bike design.
To ensure proper horn wiring, connect the positive wire to a power source and the negative wire to the ground. Use high-quality connectors and insulation to prevent any electrical issues.
Double-Check All Connections for Safety and Stability
Ensure all connections are properly secured and stable before testing the functionality of your electric dirt bike’s horn. It is crucial to check the wiring connections to avoid any potential safety hazards.
Here are some horn installation tips to ensure a successful and safe installation:
- Inspect all wiring connections, ensuring they are tightly connected and free from any loose or frayed wires.
- Use electrical tape or wire connectors to secure and protect the connections from moisture and vibrations.
- Double-check the polarity of the horn, connecting the positive wire to the positive terminal and the negative wire to the negative terminal.
By thoroughly checking all connections, you can ensure a reliable and safe horn installation on your electric dirt bike.
Now, let’s move on to adjusting the horn’s sound level, if possible, to further customize your riding experience.
Adjust the Horn’s Sound Level, if Possible
To adjust the sound level of your horn, you can simply locate the volume control knob and turn it clockwise to increase the loudness or counterclockwise to decrease it. This knob is usually located on the dashboard or steering column of your electric dirt bike. By adjusting the volume, you can ensure that your horn is loud enough to be heard by other riders or pedestrians, without being overly disruptive. If you’re experiencing issues with your horn, such as it being too quiet or not working at all, adjusting the volume may help troubleshoot the problem. Refer to the table below for a visual representation of the volume control knob and its possible positions. Once you’ve adjusted the sound level, you’ll be ready to take your electric dirt bike for a test ride and enjoy the thrill of the open trail.
| Position | Sound Level | Emotional Response |
|---|---|---|
| Low | Quiet | Calm |
| Medium | Moderate | Alert |
| High | Loud | Attention |
Take Your Electric Dirt Bike for a Test Ride
Once you’ve adjusted the sound level, you’ll be ready to hop on your electric dirt bike and take it for a test ride. Before you do, though, it’s important to ensure that the horn is properly wired and functioning.
To add a horn switch, you’ll need to locate a suitable spot on your handlebars where it can be easily accessed. Once you’ve found the perfect spot, you can then proceed to properly route the wires from the horn to the switch. Make sure to secure the wires using zip ties or electrical tape to prevent any interference with the bike’s components.
Once everything is securely in place, you can enjoy the added safety and fun of your new horn as you ride your electric dirt bike.
Enjoy the Added Safety and Fun of Your New Horn
After securing the wires, you can start enjoying the added safety and fun of your new horn while riding your electric dirt bike.
The horn installation process is crucial for ensuring a smooth and hassle-free experience. First, locate a suitable position on your bike to mount the horn. It should be easily accessible and visible, without obstructing any other components.
Next, connect the positive wire from the horn to the positive terminal of your bike’s battery, and the negative wire to the ground. Make sure all connections are secure and insulated to prevent any short circuits.
Once everything is properly connected, test the horn to ensure it is functioning correctly.
Now, you can confidently ride your electric dirt bike, knowing that you have the added safety of a horn to alert others of your presence and enhance your overall riding experience.
Frequently Asked Questions
Can I use any type of horn for an electric dirt bike?
No, you cannot use any type of horn for an electric dirt bike. It is important to consider safety regulations when choosing a horn. There are alternative horn options specifically designed for electric dirt bikes that comply with these regulations.
How do I disconnect the battery safely?
Disconnecting the battery safely is crucial to avoid any potential hazards. Start by turning off all power sources and removing any accessories connected to the battery. Then, carefully detach the negative terminal first, followed by the positive terminal, ensuring no sparks or short circuits occur.
What should I do if I cannot locate a suitable mounting spot for the horn?
If I cannot find a suitable mounting spot for the horn, I should consider alternative mounting options such as using brackets or custom fabrication. Troubleshooting the horn installation may require checking the wiring connections, fuse, and horn button.
How can I adjust the sound level of the horn?
To adjust the sound level of the horn, you can use the horn sound customization feature. This allows me to modify the volume according to my preference. Simply follow the instructions in the user manual for detailed guidance.
Are there any specific safety precautions I should take before taking my electric dirt bike for a test ride with the new horn?
Before taking my electric dirt bike for a test ride with the new horn, it is crucial to ensure proper safety precautions. I should wear appropriate safety gear, such as a helmet, gloves, and protective clothing. Additionally, I must carefully follow the horn installation process to ensure it is securely and correctly wired.
Conclusion
Well, there you have it, folks! By following these simple steps, you can now proudly boast a horn on your electric dirt bike. This horn will make your presence known from miles away! With this powerful tool in your arsenal, you’ll feel like the king or queen of the off-road world.
So, strap on your helmet, rev up your bike, and prepare for endless adventures filled with safety and excitement. Get ready to turn heads and make a statement with your electrifying horn.
Let the wild rides begin!