I’m truly passionate about the holiday season, and among my favorite activities is gifting items that are not only considerate but also useful. And is there anything more useful than presenting someone with a brand new bicycle?
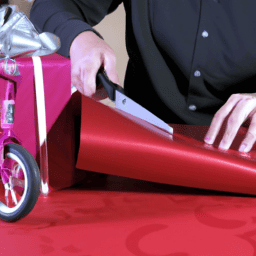
However, wrapping a bicycle can be a bit of a challenge. That’s why I’m here to share my tips and tricks on how to wrap a bicycle for Christmas, so you can give the perfect gift without any stress or hassle.
First things first, you’ll need to gather your materials. You’ll need wrapping paper (enough to cover the entire bike), tape, scissors, a bow or ribbon, and any other decorations you’d like to add. Make sure you have enough space to work with, as wrapping a bicycle can take up quite a bit of room.
Once you have everything you need, it’s time to get started!
Key Takeaways
- Use bubble wrap or foam padding to protect the frame and wheels
- Cut wrapping paper to size, leaving enough excess to cover the ends
- Create paper tubes for each wheel for added protection
- Finish with a bow or ribbon for a festive touch
Gather Your Materials
Get ready to spread some holiday cheer by gathering all the materials you’ll need to wrap your beloved bicycle! To wrap your bicycle, you’ll want to have a few key materials on hand.
Start by grabbing some wrapping paper, scissors, and tape. If you’re looking for DIY wrapping alternatives, you can try using brown kraft paper or old newspaper to wrap your bicycle. These options are not only eco-friendly but can also give your gift a unique look.
In addition to wrapping paper, you’ll also need to gather some extra materials to secure the bike in place. You can use bubble wrap or foam padding to protect the bike’s frame and wheels. You may also want to use twine or bungee cords to keep the bike in place while you’re wrapping it.
With all your materials gathered, it’s time to remove any obstacles and get started on wrapping your bicycle!
Remove Any Obstacles
First, you’ll wanna clear out any clutter or obstacles from the area where you plan on putting the bike. This will give you enough space to work with and prevent any accidents from happening. Make sure to move any furniture, decorations, or other items that may be in the way.
If you’re wrapping the bike outside, ensure that the ground is clear and even.
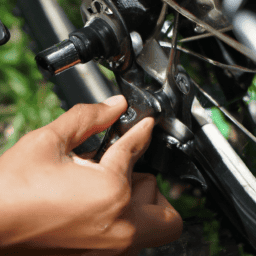
After clearing space, it’s time to prepare the bike for wrapping. Check if any parts need to be tightened, adjusted, or cleaned. Make sure to remove any accessories such as bells, water bottles, or lights that may get in the way of wrapping. If the bike has any sharp edges or protruding parts, consider covering them with bubble wrap or foam padding to prevent any tears or scratches on the wrapping paper.
Once the bike is prepped and ready, it’s time to start wrapping the frame.
Start Wrapping the Frame
Now that I’ve removed any obstacles from my bike, I’m ready to start wrapping!
The first step is to cut the wrapping paper to size, making sure to leave enough excess to cover the ends.
Once the paper is in place, I’ll secure it with tape, making sure it’s tight and smooth.
Finally, I’ll fold and tuck the edges neatly for a polished finish.
With these key points in mind, I’m confident my bike will look perfectly wrapped for Christmas!
Cut the Wrapping Paper to Size
To make things easier, you can use scissors to trim the wrapping paper to the perfect size. Before starting, make sure that you have enough paper to cover the entire bicycle frame and that the paper is aligned correctly. To do this, measure the width and height of the bicycle frame, and then mark the wrapping paper with a pencil.
Once you’ve marked the paper, use scissors to cut along the lines. When cutting the paper, make sure to be precise so that it fits snugly around the bicycle frame. A few creative designs can also be added to the paper to make it more festive.
If you want to use alternative materials instead of wrapping paper, consider using fabric or old newspapers. These materials can add a unique touch to the wrapping and help reduce waste.
Once the paper is cut to size, it’s time to move on to the next step and secure the wrapping paper with tape.
Secure the Wrapping Paper with Tape
After cutting the wrapping paper to size, you’ll need to use tape to secure it in place. Make sure to use enough tape to hold the paper firmly onto the frame, but not so much that it becomes difficult to remove.
When taping the paper onto the bike, start at one end and work your way around the frame, smoothing the paper as you go. If you’re using traditional tape, consider using double-sided tape for a more seamless look. If you’re looking for creative alternatives, try using colorful washi tape or sustainable options such as biodegradable tape made from paper or plant-based materials.
Once the wrapping paper is securely taped onto the bike, it’s time to fold and tuck the edges. Starting at one end of the frame, fold the wrapping paper over the edge and crease it tightly against the bike. Then, tuck the excess wrapping paper underneath the frame and secure it in place with tape.
Repeat this process around the entire bike, making sure to fold and tuck the paper tightly to avoid any loose or flappy edges. With this step complete, your beautifully wrapped bike is ready to be placed under the tree.
Fold and Tuck the Edges
Who knew folding and tucking could turn a regular bike into a festive masterpiece? Proper folding techniques are essential to creating a clean and polished look.
Start by folding the excess paper at the top and bottom of the bike towards the center. Make sure to keep the paper taut to prevent any wrinkles or creases. Secure the folded edges in place with a small piece of tape.
Next, it’s time to get creative with tucking! Tuck the sides of the paper towards the center of the bike, creating a neat triangle shape. Make sure to press down firmly on the paper to create clean edges. Repeat this process on the other side of the bike.
Don’t be afraid to experiment with different folding and tucking techniques to make your gift stand out. With the edges neatly folded and tucked, it’s time to move on to wrapping the wheels.
(Note: The subsequent section will be about wrapping the wheels.)
Wrap the Wheels
Now that the frame’s wrapped, it’s time to move on to the wheels!
To do this, I create a paper tube for each wheel by rolling a large sheet of wrapping paper and taping the edges together. Once the tube is the appropriate size, I slide it over the wheel and secure it with tape.
Then, I repeat this process for the other wheel, making sure everything’s even and secure before moving onto the next step.
Create a Paper Tube for the Wheel
Let’s start by creating a paper tube to protect the wheel while wrapping your Christmas bicycle gift. This step is crucial to ensure that the wheel doesn’t get scratched or damaged during transportation. You can use any type of paper, but I recommend using wrapping paper or butcher paper for added durability.
If you want to add some decorative options, you can use patterned or colored paper that matches the wrapping paper you’ll use for the rest of the bike.
To create the paper tube, measure the circumference of the wheel and cut a strip of paper that’s slightly longer than the circumference. Then, fold the paper in half lengthwise and roll it tightly around the wheel, making sure that the paper overlaps itself slightly.
You can secure the paper tube with tape, or if you want to use alternative materials, you can use a rubber band or twine to keep it in place. With the paper tube in place, you can now move on to the next step of wrapping the rest of the bike.
Secure the Paper Tube with Tape
Once the paper tube has been rolled tightly around the wheel, it’s essential to secure it with tape to prevent it from unraveling during transportation. I recommend using a strong adhesive tape that can withstand the weight of the bicycle. Here are some tips on how to securely tape the paper tube:
- Start by placing a strip of tape at the end of the paper tube and pressing it firmly against the wheel.
- Use a diagonal pattern when taping the paper tube to ensure maximum coverage.
- Make sure to overlap the tape to prevent any gaps where the paper could slip out.
- Continue taping around the paper tube until it’s completely covered.
- Smooth out any wrinkles or bumps in the tape to ensure a tight seal.
- Finally, add extra strips of tape at the ends of the paper tube to secure it in place.
If you’re looking for alternative methods for securing the paper tube, you can also try using zip ties or rubber bands. These options may be more time-consuming, but they offer added security during transportation.
Additionally, consider adding some decorative options to make the wrapped bicycle more festive. You can add a ribbon or bow to the handlebars or attach a small gift tag with a holiday message.
Once you’ve securely wrapped and decorated one wheel, repeat the process for the other wheel.
Repeat for the Other Wheel
After securing one wheel, it’s time to repeat the process for the other wheel. Wheel wrapping techniques may vary depending on personal preference, but the basic steps remain the same.
Roll the wrapping paper tightly around the wheel, ensuring that it covers the entire surface. Use tape to secure the paper in place, making sure that it’s tight enough to prevent any loose edges.
When choosing wrapping paper for the wheels, there are different color options available. You could choose a color that complements the color of the bicycle or go for a contrasting shade for a more unique look. Regardless of the color, make sure that it’s of good quality and can withstand the rigors of transportation.
Once both wheels are securely wrapped, it’s time to move on to the final step of finishing with a bow or ribbon.
Finish with a Bow or Ribbon
To add a festive touch to your wrapped bicycle, secure a colorful ribbon or bow around the handlebars. This is the finishing touch that’ll make your gift truly stand out.
Here are some tips to make your bow or ribbon tying technique more creative:
- Use multiple ribbons of different sizes and colors to create a layered effect.
- Tie the bow or ribbon in a unique way, such as a knot or twist instead of a traditional bow.
- Add a small ornament or charm to the center of the bow for an extra special touch.
Remember to choose colors and patterns that complement the wrapping paper and overall theme of your gift.
With these creative bow ideas and ribbon tying techniques, your wrapped bicycle will be the highlight of the holiday season.
Frequently Asked Questions
How do you wrap a bicycle with a child seat attached?
Wrapping a bike with a child seat is challenging. Child seat compatibility should be checked before starting. Creative wrapping techniques, such as using a tarp or box, can help. It’s important to ensure the bike is secure and won’t tip over during transport.
Can you wrap a bicycle without removing the pedals?
Yes, it’s possible to wrap a bicycle without removing the pedals. To do this, you’ll need to use some tips and tricks, like wrapping the pedals with bubble wrap and using extra padding to protect them. The tools you’ll need include wrapping paper, tape, and scissors.
How do you wrap a bicycle with a basket or panniers attached?
Creative solutions abound for wrapping a bicycle with a basket or panniers attached. Decorative options include using wrapping paper, gift bags, or even a large ribbon. It’s important to secure loose parts and protect the bike during transport.
Is it necessary to deflate the tires before wrapping a bicycle?
Deflating tires can make it easier to wrap a bicycle, but it’s not necessary. Pros: reduces the overall size, easier to fit in a box. Cons: risk of damaging the rims. Alternatives: remove pedals, handlebars, and wheels.
How do you wrap a folding bicycle?
When it comes to folding bicycle transportation, creative wrapping solutions are key. I recommend starting by folding the bike neatly and securing it with bungee cords. From there, wrap it in protective bubble wrap and add a festive touch with wrapping paper and bows.
Conclusion
So there you have it, a step-by-step guide on how to wrap a bicycle for Christmas. As a bike enthusiast, I’ve wrapped my fair share of bikes, and trust me, it’s not as daunting as it may seem.
With a few materials and some patience, you can transform a bike into a beautiful present that any cycling enthusiast would love to receive.
Wrapping a bike can be compared to climbing a steep hill on a bike. At first, it may seem overwhelming and impossible, but with each pedal stroke, you gain momentum and eventually reach the top.
Similarly, wrapping a bike may seem like a daunting task, but with each step, you gain confidence and eventually create a beautiful gift.
So, don’t be afraid to take on the challenge and surprise your loved one with a wrapped bike this Christmas. Happy wrapping!