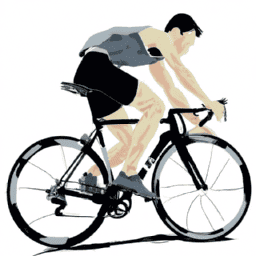
As someone who’s passionate about biking, I can personally attest to the excitement of being gifted a new bicycle. With the holiday season fast approaching, there couldn’t be a more perfect moment to astonish your beloved with a sparkling new bicycle.
But if you’re wondering how to wrap a bicycle for Christmas, fear not! With a few simple steps and some basic materials, you can create a beautifully wrapped present that will make your recipient’s day.
Before you begin, make sure you have all the necessary materials on hand. You’ll need wrapping paper (preferably in a festive design), scissors, tape, a box slightly larger than the bike, and some bubble wrap or padding to protect the bike during transport.
With these items at the ready, you’ll be able to wrap your bike with ease and create a gift that will be the envy of all who see it. So let’s get started!
Key Takeaways
- Clean and dry the bike before wrapping, paying special attention to hard-to-reach areas and removing any loose accessories or sharp objects that could scratch the bike or injure the recipient.
- Use durable wrapping paper and different types of tape to securely wrap the bike, including covering hubs with cardboard or bubble wrap and using bubble wrap or padding to protect the bike during transport.
- Get creative with bike decorations, such as wrapping handlebars with ribbon or string lights, incorporating small ornaments or bows, or attaching trinkets like miniature bike ornaments or keychains to the wrapping paper.
- Personalize the gift with a bow and personalized gift tag or trinket, adding a heartfelt message or simply the recipient’s name to show how much you care. Consider unique presentation ideas to make the gift stand out, such as tying it to the handlebars of a new bike or placing it under the Christmas tree with a big red bow.
Gather Your Materials
You’ll need to gather all your materials before you can start wrapping, so make sure you’ve got everything you need to create a beautiful and thoughtful gift. Here’s a materials checklist to get you started:
- Wrapping paper
- Scissors
- Tape
- Ribbon or string
- Any DIY bike decorations you want to add
You can find wrapping paper and ribbon at any craft store, and for the DIY decorations, you can get creative and use things like bells, tinsel, or even small Christmas ornaments.
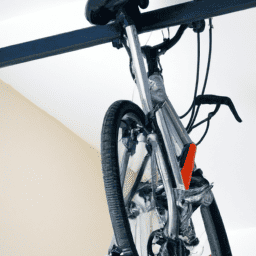
Once you’ve gathered all your materials, it’s time to prepare the bike. Start by making sure it’s clean and dry. If it’s been ridden recently, give it a quick wipe down with a damp cloth to remove any dirt or debris.
If you’re adding any decorations to the bike itself, like tinsel or ornaments, now is the time to do it. Just be careful not to cover any important parts, like the brakes or gears.
Prepare the Bike
Before getting started, it’s important to make sure the handlebars are straight and the tires are fully inflated, so that the bike is in good condition for the lucky recipient to ride right away. For example, last year my friend received a bike for his birthday but couldn’t ride it until his parents got it tuned up at the bike shop. To avoid this delay, I recommend checking the bike’s condition before wrapping it.
To prepare the bike, start by cleaning it thoroughly. Use a soft cloth and gentle soap to wipe down the frame, handlebars, and wheels. Pay special attention to any dirt or grime that may have accumulated in hard-to-reach areas, like the chain and gears. Once the bike is clean, make sure to take any necessary safety precautions, such as removing any loose accessories or sharp objects that could scratch the bike or injure the recipient. With the bike clean and safe, you’re now ready to move on to the next step: wrapping it up for the perfect Christmas surprise.
Wrap the Bike
Alright, now that we’ve prepared the bike, it’s time to wrap it up!
I always start with the wheels since they’re the most difficult part to cover. I make sure to cover the entire frame next, and then secure the wrapping paper with tape to keep it from slipping or tearing.
Start with the Wheels
First things first, let’s tackle those wheels and give them the perfect wrapping job for your bike this Christmas! Before wrapping your wheels, make sure they’re clean and free of any dirt or debris. Use a soft cloth or sponge and mild soap to gently clean the surface of the wheels. Once the wheels are clean, dry them thoroughly with a clean towel to prevent any moisture from accumulating.
Next, protect the hubs of the wheels by covering them with a piece of cardboard or bubble wrap. This will prevent any damage to the hubs during the wrapping process. Once the hubs are covered, wrap each wheel individually with wrapping paper or gift wrap. Use a generous amount of tape to secure the wrapping paper in place and ensure that it doesn’t come loose.
Finally, gently place the wrapped wheels on either side of the bike and continue with covering the frame.
With the wheels wrapped and protected, it’s time to move on to the next step and cover the frame of the bicycle.
Cover the Frame
Now that the wheels are taken care of, let’s focus on dressing up the frame of your beloved ride. As the frame is the backbone of the bike, covering it in shiny paper or a neat bow is like giving it a fancy suit for a special occasion.
When choosing bicycle wrapping paper, make sure it’s durable and can withstand the elements. You don’t want the paper to tear or fade after just one ride. To add some creative flair to your wrapping, consider using multiple colors or patterns of wrapping paper. You can also incorporate other decorative elements, such as ribbon or bows, to make the gift even more special.
Once you have the paper and decorations in place, it’s time to secure the wrapping paper with tape. This will ensure that the paper stays in place while your loved one unwraps their new ride.
Secure the Wrapping Paper with Tape
So you’ve got your chosen wrapping paper and decorations in place, and now it’s time to make sure it stays put by securing it with some trusty tape.
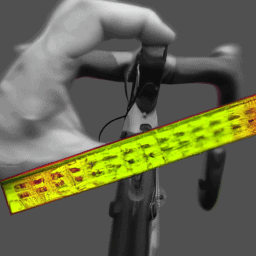
When it comes to taping up your bicycle, there are a few different types of tape you can use to ensure the wrapping stays in place. One option is clear packing tape, which is strong and durable. It’s also transparent, so it won’t interfere with any designs or patterns on the wrapping paper. Another option is duct tape, which is also durable and comes in a variety of colors and patterns. However, it’s important to note that duct tape can leave a sticky residue behind if left on for too long.
In addition to using different types of tape, there are also some creative wrapping techniques you can use to make your bicycle look even more festive. For example, you could wrap the handlebars with ribbon or string lights to add some extra sparkle. Another option is to incorporate small ornaments or bows into the wrapping to make it more three-dimensional. Whatever techniques you choose, just be sure to secure everything in place with tape to prevent any accidents or damage during transport.
With the wrapping securely in place, it’s time to add the finishing touches by tying on a bow or attaching a gift tag.
Add the Finishing Touches
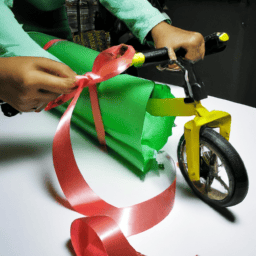
To top off the perfect present, add some festive flair with a bow and ribbon, making it the icing on the cake. Decorative bows come in various sizes, colors, and shapes, so choose one that complements the color scheme of the wrapping paper.
To make the bow, loop the ribbon back and forth, creating a series of loops until you have the desired number. Then, tie the loops together in the center with another piece of ribbon and fluff out the loops to create a full, voluminous bow.
Personalized gift tags are another way to add a personal touch to your gift. Write a heartfelt message or simply the recipient’s name on the tag and attach it to the ribbon or bow. You can also add a small trinket or ornament to the ribbon for an extra special touch.
Once you’ve added the finishing touches, your beautifully wrapped bicycle is ready to be presented to the lucky recipient.
Present Your Gift
When you’re ready to give your present, don’t forget to show off your wrapping skills and add a personalized touch with a thoughtful gift tag or trinket. Consider using a unique presentation idea to make your gift stand out, such as placing it under the Christmas tree with a big red bow or tying it to the handlebars of a new bike.
You can also create a festive atmosphere by playing holiday music or decorating the space with twinkling lights and garlands.
To make your gift even more special, add a personalized gift tag with a heartfelt message or a funny pun. You can create your own tags using colorful cardstock or purchase pre-made ones from a craft store.
Another option is to attach a small trinket, such as a miniature bike ornament or a keychain, to the wrapping paper. These little touches will show your loved one how much you care and make the gift-giving experience even more memorable.
Frequently Asked Questions
Can I use regular wrapping paper or do I need a special kind of paper for wrapping a bike?
Regular wrapping paper can work for wrapping a bike, but specialty paper is designed to be more durable and protective. Alternative materials like bubble wrap or a bike cover can also be creative options for wrapping a bike.
How do I determine the right size of wrapping paper to use for my bike?
To determine the right size of wrapping paper for my bike, I use measuring techniques such as measuring the length, width, and height of the bike. Then, I use folding techniques to create a neat and snug wrap.
Is it necessary to remove the pedals and handlebars before wrapping the bike?
Removing pedals and handlebars may ease wrapping, but it’s not necessary. Pros include reducing potential damage, while cons include the inconvenience of reassembly. Wrapping unconventional shapes requires creativity. Tips include starting with the frame and using padding.
Can I wrap the bike using only tape or do I need other materials like ribbon or bows?
Using only tape for wrapping a bicycle has both pros and cons. It saves money and time, but can be difficult to achieve a neat finish. Creative ways to decorate without ribbon or bows include using colorful tape to make patterns or shapes on the bike frame.
How do I transport the wrapped bike to its destination without damaging it?
Protect your precious cargo with proper transportation tips. Secure your bike with protective gear such as foam padding and straps. Don’t forget to check for loose parts and give it a test ride before hitting the road.
Conclusion
Well, there you have it folks, the ultimate guide on how to wrap a bicycle for Christmas. I hope my instructions have been helpful and that you were able to successfully wrap your precious gift.
As you present the bike to your loved one on Christmas morning, take a moment to appreciate the irony of it all. You spent hours wrapping and preparing the bike, only for it to be unwrapped in a matter of seconds.
But isn’t that the beauty of gift-giving? The joy and excitement that comes from watching someone you love unwrap a present, especially one as special as a bicycle, is worth all the effort put into wrapping it.
So, sit back, relax, and enjoy the magic of the holiday season.