I’ve always loved biking, but lately, I’ve been craving a little extra speed and power. That’s why I’ve decided to convert my pedal bike into an electric one.
It may sound like a daunting task, but with the right guidance, it’s definitely achievable. In this article, I’ll walk you through the steps on how to make a pedal bike electric.
From understanding the different types of conversions to choosing the right kit and ensuring safety, I’ll cover it all.
So let’s get started on this electrifying journey!
Key Takeaways
- Research and explore different options for electric bike conversions, considering factors such as battery types and compatibility with the existing bike.
- Assess the advantages and challenges of converting an existing bike, including evaluating the bike’s frame and brakes for handling the added weight and increased power.
- Choose the right conversion kit based on factors like terrain and riding style, and gather the necessary tools and equipment for installation.
- Ensure safety by wearing appropriate gear, double-checking connections, maintaining the bike’s components, and following legal requirements and maintenance recommendations.
Understand the Different Types of Electric Bike Conversions
To understand the different types of electric bike conversions, you’ll need to do some research and explore the options available. One of the key considerations is the type of battery you choose. There are different options, including lithium-ion, lead-acid, and nickel-metal hydride. Each type has its own pros and cons.
Lithium-ion batteries are lightweight and have a high energy density, providing longer range and better performance. However, they are more expensive. Lead-acid batteries are more affordable but heavier and have a shorter lifespan. Nickel-metal hydride batteries fall in between in terms of cost and performance.
Another factor to consider is the pros and cons of electric bike conversions in general. One advantage is that you can convert your existing bike into an electric one, saving money compared to buying a new electric bike. Electric bike conversions also allow you to customize your bike to meet your specific needs and preferences. However, there are also challenges to consider, such as the added weight of the motor and battery, which can affect the handling of the bike.
Understanding the different types of electric bike conversions and the pros and cons associated with them is crucial in making an informed decision. Once you have a good understanding of the options available, you can move on to assessing your bike’s compatibility for conversion.
Assess Your Bike’s Compatibility for Conversion
Assessing your bike’s compatibility for conversion can be done by considering the frame, brakes, and wheel size. These factors play a crucial role in determining whether your bike is suitable for an electric conversion. Let’s take a closer look at each of these elements:
| Factors to Consider | What to Assess |
|---|---|
| Frame | Check if your bike frame is sturdy enough to handle the additional weight and stress of an electric motor. |
| Brakes | Ensure that your bike’s brakes are in good working condition and can handle the increased speed and power. |
| Wheel Size | Verify if your bike’s wheel size matches the specifications of the conversion kit you plan to install. |
| Compatibility with Kit | Assess if your bike’s components, such as bottom bracket, fork, and dropouts, are compatible with the kit you choose. |
Choose the Right Conversion Kit for Your Bike
Once you’ve determined your bike’s compatibility, it’s time to select the appropriate conversion kit for your needs.
Choosing the right motor, battery, and controller is crucial for a successful electric bike conversion. When it comes to motors, there are two main options: hub motors and mid-drive motors. Hub motors are easier to install and maintain, while mid-drive motors provide better power and torque. Consider your terrain and riding style to determine which one suits you best.
Next, you need to choose a battery that offers the right balance between power and range. Lithium-ion batteries are popular for their high energy density and long lifespan. Make sure to check the voltage, capacity, and weight of the battery to ensure it matches your requirements.
The controller is the brain of your electric bike conversion. It regulates the flow of power from the battery to the motor. Look for a controller that is compatible with your chosen motor and battery, and offers features like regenerative braking and multiple power modes.
When converting your bike into an electric one, cost-effective options are available. Look for conversion kits that offer good quality components at an affordable price. Consider factors such as warranty, customer reviews, and the reputation of the manufacturer to ensure you are getting the best value for your money.
Now that you have chosen the right conversion kit, it’s time to gather the necessary tools and equipment.
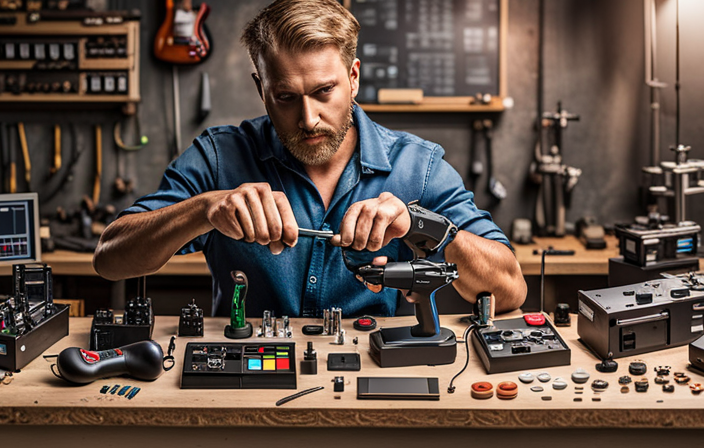
Gather the Necessary Tools and Equipment
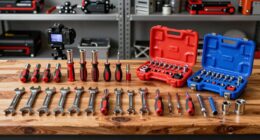
Now that you’ve chosen the right conversion kit, it’s time to gather all the tools and equipment you’ll need. To ensure a smooth and successful installation, it’s important to have the right tools at your disposal. Here are the essential tools and equipment you’ll need:
| Tools | Equipment |
|---|---|
| Allen wrenches | Torque wrench |
| Pliers | Cable cutters |
| Screwdrivers | Chain breaker |
| Adjustable wrench | Digital multimeter |
| Pedal wrench | Spoke wrench |
Having these tools on hand will make the conversion process much easier and efficient. The Allen wrenches will come in handy for removing and installing various components, while the torque wrench will ensure that everything is tightened to the correct specifications. Pliers and cable cutters will be useful for handling cables and wires, and a screwdriver set will cover any other fasteners that need attention. The chain breaker is essential for resizing the chain to fit your bike properly. An adjustable wrench will be necessary for adjusting nuts and bolts, and a digital multimeter will help troubleshoot any electrical issues that may arise.
With all the necessary tools and equipment gathered, you’re now ready to move on to the next step: removing the pedals, crankset, and bottom bracket. This process will prepare your bike for the electric conversion and ensure a smooth installation.
Remove the Pedals, Crankset, and Bottom Bracket
Before you begin removing the pedals, crankset, and bottom bracket, it’s crucial to gather all the necessary tools and equipment.
Bike modifications can be an exciting project, especially when it comes to converting a pedal bike into an electric one. The benefits of having an electric bike are numerous, from extended range to reduced effort during long rides.
To start the process, you will need a pedal wrench, crank puller tool, and a bottom bracket removal tool. These tools will allow you to safely and efficiently remove the components.
Begin by removing the pedals with the pedal wrench, turning them counterclockwise. Next, use the crank puller tool to remove the crankset. This tool threads into the crank arm and pulls it away from the bottom bracket. Finally, use the bottom bracket removal tool to unscrew the bottom bracket from the frame. This tool will vary depending on the type of bottom bracket you have.
Once you have successfully removed these components, you are ready to install the electric bike conversion kit, which will transform your pedal bike into an electric one seamlessly.
Install the Electric Bike Conversion Kit
To install the electric bike conversion kit, you’ll need to ensure that all the necessary tools and equipment are readily available. This step is crucial in order to have a smooth and successful installation process.
The benefits of converting a pedal bike into an electric one are numerous. Firstly, it provides an eco-friendly transportation option as it reduces carbon emissions. Secondly, it allows for a cost-effective electric bike conversion method compared to purchasing a brand new electric bike.
To begin the installation, start by mounting the motor onto the rear wheel of the bike. Make sure to securely fasten it using the provided bolts and brackets. Next, attach the sensor and magnet to the bike’s frame and wheel, respectively. This will enable the motor to detect your pedaling motion and provide assistance accordingly.
After that, connect the battery and controller. The battery is the powerhouse of the electric bike and should be securely mounted on the frame. Connect the wires from the battery to the controller, ensuring that they are properly insulated and free from any obstructions. This will complete the installation process and allow you to enjoy the benefits of your newly converted electric bike.
Moving on to the next section, we will discuss how to connect the battery and controller to the bike’s electronic system.
Connect the Battery and Controller
Start by securely mounting the battery onto the frame and then connect the wires to the controller to complete the installation process. This crucial step ensures that your electric bike will have the power it needs to run smoothly.
Here’s how you can connect the battery and controller:
- Determine the appropriate location on the bike frame to securely mount the battery.
- Use the provided mounting brackets or straps to attach the battery firmly to the frame.
- Once the battery is securely mounted, locate the wires that connect to the controller.
- Connect the positive (+) wire from the battery to the positive (+) terminal on the controller.
- Similarly, connect the negative (-) wire from the battery to the negative (-) terminal on the controller.
By following these steps, you will establish a solid battery connection and ensure that the power flows smoothly to the controller.
Now that the battery and controller are connected, the next step is to attach the motor to the wheel. This will allow the bike to propel forward with the assistance of the electric motor, giving you the extra boost you desire.
Attach the Motor to the Wheel
Now that the battery and controller are connected, you can attach the motor to the wheel for that extra boost. The motor attachment is a crucial step in converting your pedal bike into an electric one.
To begin, you will need to modify the wheel to accommodate the motor. Start by removing the wheel from the bike frame and disassembling it. Next, insert the motor onto the axle, ensuring that it is securely fastened. Some motors may require additional brackets or adapters for proper alignment. Once the motor is in place, reassemble the wheel, making sure all components are correctly positioned. Tighten the nuts or bolts to secure everything in place.
When attaching the motor, it is essential to consider the weight distribution and balance of the bike. Make sure the motor is aligned with the center of the wheel to maintain stability while riding. Additionally, check that the motor’s gear or sprocket is properly aligned with the bike’s chain or belt drive system.
Now that the motor is securely attached to the wheel, you can move on to the next step: installing the throttle and brake sensors. These components are crucial for controlling the speed and ensuring safe operation of your electric bike.
Install the Throttle and Brake Sensors
Once you’ve attached the motor to the wheel, it’s time to install the throttle and brake sensors for complete control over your electric bike. The throttle sensor is responsible for regulating the speed of your electric bike, while the brake sensor ensures that the motor disengages when you apply the brakes.
Here are some throttle and brake installation tips to help you with the process:
-
Throttle installation:
-
Locate the appropriate spot on your handlebar for the throttle.
-
Attach the throttle to the handlebar using the provided clamp or adhesive.
-
Connect the throttle wires to the corresponding wires coming from the motor controller.
-
Double-check the connections and secure them with zip ties to prevent any loose wires.
-
Brake sensor installation:
-
Identify the brake levers on your bike.
-
Attach the brake sensors to the brake levers using adhesive or zip ties.
-
Connect the brake sensor wires to the motor controller, ensuring that the wires are properly insulated.
Common challenges in installing throttle and brake sensors include incorrect wire connections, loose connections, and improper sensor placement. Ensure that the sensors are securely fastened and the wires are properly connected to avoid any issues.
With the throttle and brake sensors successfully installed, you now have complete control over your electric bike’s speed and braking. This brings us to the next section, where we will test and adjust the electric bike conversion to ensure optimal performance.
Test and Adjust the Electric Bike Conversion
After successfully installing the throttle and brake sensors, it’s time to test and adjust the electric bike conversion for optimal performance. Testing the conversion is crucial to ensure everything is working correctly and to identify any issues that may arise.
To start, I recommend taking the bike for a short test ride in a controlled environment. Pay close attention to the throttle response and braking performance. Note any abnormalities or inconsistencies during the test ride, as these will help troubleshoot any potential problems. Additionally, check the battery life and range to get an idea of how far you can go on a single charge.
Once you have completed the initial test ride, it’s time to make adjustments if necessary. If you notice any issues with the throttle response, such as delayed acceleration or excessive sensitivity, you may need to adjust the throttle sensor. Refer to the manufacturer’s instructions or consult an expert for guidance on how to make these adjustments. Similarly, if you experience any problems with the braking system, such as weak braking or excessive grabbing, adjust the brake sensor accordingly.
After making the necessary adjustments, take the bike for another test ride to evaluate the improvements. Keep track of the test results and note any changes or improvements in performance. If you encounter persistent issues or are unsure how to troubleshoot certain problems, it’s always a good idea to consult with a professional or seek guidance from online forums and communities dedicated to electric bike conversions.
In conclusion, testing and adjusting the electric bike conversion is crucial to ensure optimal performance. By conducting thorough test rides, monitoring test results, and troubleshooting any issues that arise, you can fine-tune your conversion for a smoother and more enjoyable riding experience.
Now that we have optimized the performance of the conversion, let’s consider additional upgrades and accessories to enhance our electric bike even further.
Consider Additional Upgrades and Accessories
To enhance your electric bike even further, you might consider exploring additional upgrades and accessories.
Upgrading bike components can significantly improve the performance and efficiency of your electric bike. One important component to consider upgrading is the battery. Choosing the right battery is crucial as it directly impacts the range and power of your electric bike. Lithium-ion batteries are commonly used due to their high energy density and long lifespan. When selecting a battery, consider factors such as voltage, capacity, and weight. Higher voltage batteries provide more power, while higher capacity batteries offer longer range. Additionally, lighter batteries can improve the overall weight distribution of the bike.
It’s also worth considering accessories such as lights, fenders, and racks to enhance the versatility and functionality of your electric bike. These upgrades and accessories can greatly enhance your riding experience and make your electric bike even more enjoyable to use.
However, it’s important to ensure proper maintenance and safety checks to keep your bike in optimal condition and ensure your safety on the road.
Ensure Proper Maintenance and Safety Checks
Regular maintenance and safety checks are essential for keeping your electric bike in optimal condition and ensuring your safety on the road. To maintain your electric bike, there are several key maintenance tips you should follow.
- First, regularly check the tire pressure and ensure they are properly inflated. Underinflated tires can affect the performance of your electric bike and increase the risk of accidents.
- Additionally, inspect the brakes and make sure they are functioning properly. Worn-out brake pads should be replaced promptly to maintain effective braking.
- Lubricating the chain and drivetrain regularly will help reduce friction and ensure smooth operation.
- It is also important to keep the battery clean and charged, as a well-maintained battery will provide better performance and longer lifespan.
In addition to regular maintenance, there are important safety precautions to consider.
- Always wear a properly fitting helmet to protect your head in case of a fall or collision.
- Be sure to use reflective gear and lights to make yourself visible to other road users, especially during low-light conditions.
- Obey traffic laws and signals, and always signal your intentions to other cyclists and motorists.
- Lastly, familiarize yourself with local electric bike regulations to ensure you are riding within the legal limits.
By following these maintenance tips and safety precautions, you can enjoy a safe and smooth ride on your electric bike while prolonging its lifespan.
Now, let’s move on to the next section and learn about familiarizing yourself with local electric bike regulations.
Familiarize Yourself with Local Electric Bike Regulations
It’s important to familiarize yourself with local electric bike regulations to ensure you are riding within the legal limits. Understanding the local electric bike laws is crucial for a safe and enjoyable riding experience. These regulations vary from place to place, so it’s essential to research and be aware of the specific rules in your area.
Many cities and regions have specific laws regarding the use of electric bikes. These laws may cover aspects such as maximum speed, power limits, age restrictions, helmet requirements, and where electric bikes are allowed to be ridden. By familiarizing yourself with these regulations, you can avoid any potential fines or legal issues.
In addition to abiding by the law, there are several benefits to converting your pedal bike into an electric bike. Electric bike conversions allow you to enjoy the advantages of electric power while still using your existing bicycle. It’s a cost-effective option compared to purchasing a brand-new electric bike, and it allows you to customize your ride to your specific needs and preferences.
Enjoy Your Newly Converted Electric Bike
Get ready to experience the thrill of riding your newly converted electric bike. Now that you’ve successfully transformed your traditional pedal bike into an electric one, it’s time to reap the enjoyment benefits and ensure proper maintenance.
One of the key benefits of an electric bike is the ability to effortlessly tackle hills and cover longer distances without getting tired. You’ll find yourself cruising along with a smile on your face, feeling the wind in your hair as you enjoy the freedom and speed of your electric bike.
To keep your electric bike running smoothly, it’s important to follow a few maintenance tips. Regularly check the tire pressure to ensure optimal performance and grip. Keep the chain clean and lubricated to prevent rust and prolong its lifespan. Additionally, inspect the brakes and ensure they are in good working condition for safe and reliable stopping power. Remember to charge the battery regularly and store it in a cool, dry place when not in use.
As you explore the world on your electric bike, don’t forget to share your experience and tips with other bike enthusiasts. By connecting with fellow riders, you can exchange valuable insights, discover new routes, and learn from each other’s experiences. So, join online forums, participate in group rides, and be a part of the electric bike community.
Share Your Experience and Tips with Other Bike Enthusiasts
Don’t forget to connect with other bike enthusiasts and share your experience and tips with them. It’s always helpful to exchange knowledge and learn from each other’s experiences.
Here are some topics you can discuss with fellow bike enthusiasts:
-
Best battery options: Share your insights on the different types of batteries available for electric bikes. Discuss the pros and cons of each option, such as lithium-ion, lead-acid, or nickel-metal hydride batteries. Highlight factors like capacity, weight, and cost that should be considered when choosing the best battery for your electric bike.
-
Common troubleshooting issues: Share your expertise in troubleshooting common problems that electric bike owners may encounter. Talk about issues like motor malfunctions, battery charging problems, or electrical system failures. Provide tips on how to diagnose and resolve these issues, such as checking connections, replacing faulty components, or seeking professional help when necessary.
-
Performance upgrades: Discuss any modifications or upgrades you have made to improve the performance of your electric bike. Share tips on upgrading components like the motor, controller, or battery to enhance speed, range, or torque. Explain the benefits and challenges of these upgrades, and offer advice on how to ensure compatibility and safety.
-
Riding techniques and safety: Exchange tips on riding techniques and safety practices for electric bike enthusiasts. Discuss topics like proper braking, cornering, and accelerating techniques specific to electric bikes. Share insights on safety gear, visibility, and defensive riding strategies to ensure a safe and enjoyable riding experience.
Frequently Asked Questions
How much does it cost to convert a pedal bike to electric?
Converting a pedal bike to electric typically costs around $500 to $1500. The necessary components include an electric motor, battery, controller, and throttle. Prices vary depending on the quality and power of the components chosen.
What is the average range of an electric bike after conversion?
The electric bike range can vary depending on factors such as battery capacity, terrain, and rider weight. With proper configuration, an electric bike can achieve an impressive range that will make you feel like you’re flying across the city.
Can any type of bike be converted to electric?
Any type of bike can be converted to electric, but the cost of electric bike conversion varies depending on the components used. Converting a bike to electric offers benefits such as increased speed, longer range, and reduced effort during pedaling.
How long does it take to install an electric bike conversion kit?
On average, it takes about 1-2 hours to install an electric bike conversion kit. The cost of conversion can range from $200 to $1500, depending on the quality and features of the kit. Converting a pedal bike to electric offers benefits like increased speed, range, and easier uphill riding.
Are there any legal restrictions or regulations for riding electric bikes?
To ride an electric bike, it is important to follow legal requirements such as age restrictions, speed limits, and helmet laws. Safety guidelines include using lights, signaling properly, and obeying traffic laws.
Conclusion
In conclusion, converting a pedal bike into an electric one is an exciting and rewarding project. By understanding the different types of conversions, assessing compatibility, choosing the right kit, and following the necessary steps, anyone can successfully transform their bike.
Remember to prioritize safety and adhere to local regulations while enjoying your new electric bike. So, why wait? Take the plunge into the world of electric biking and experience the thrill of effortless pedaling and extended rides. Your eco-friendly adventures await!