
To convert your bike into an e-bike, start by choosing a compatible power system like a 36V or 52V kit with a suitable motor and battery. Remove the rear wheel, then install the new motorized wheel or mid-drive system, making sure everything aligns properly. Route and secure the wiring neatly along the frame, then mount controls, display, and safety features. Test everything thoroughly to guarantee safe operation. Keeping these steps in mind will help you complete a smooth, efficient conversion.
Key Takeaways
- Select compatible battery and motor components, matching voltage and wattage for optimal performance.
- Remove the rear wheel, tire, and tube, then install the motorized wheel securely with torque arms.
- Route and secure wiring along the frame, avoiding moving parts and protecting connections with sleeves or heat shrink.
- Install controls such as throttle, display, and brakes on the handlebars, ensuring proper placement and safety.
- Perform system testing, adjust settings via the controller, and verify all connections for safe, reliable operation.
Choosing the Appropriate Power Source
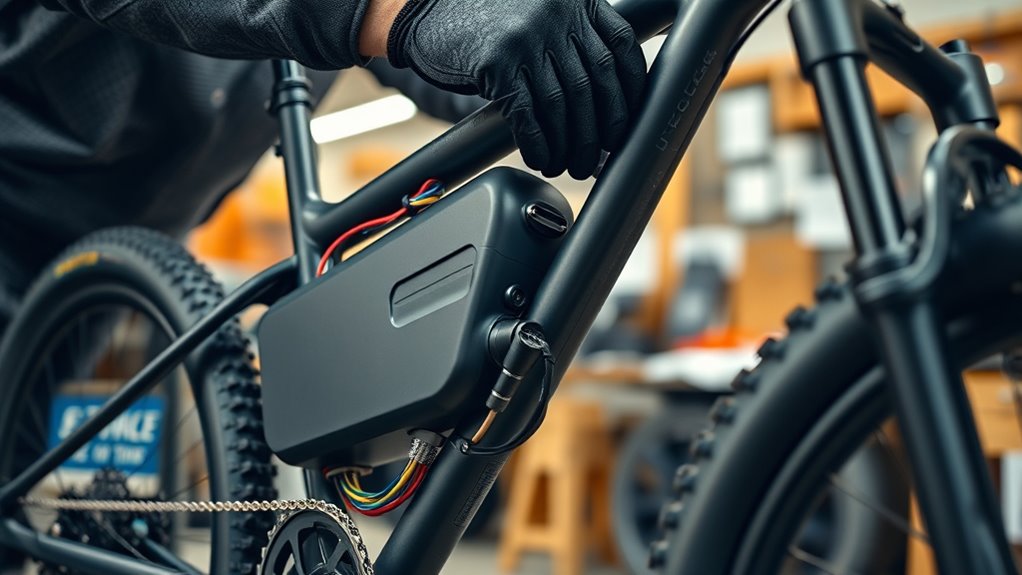
When choosing a power source for your e-bike conversion, it’s vital to align the battery pack’s voltage with your motor’s specifications, like 36V or 52V, to guarantee peak performance. Select a battery with the right voltage to assure proper operation and avoid damage. Higher mAh ratings mean longer rides; for example, a 13.5Ah battery provides more range than a 10Ah. Opt for a reputable brand such as Panasonic or Samsung for better safety and longevity. Decide on the best placement—frame-mounted, handlebar, or rear rack—based on your bike’s design and riding style. Always use a compatible charger supplied by the manufacturer to charge your battery safely and efficiently. Proper selection guarantees a reliable, safe, and efficient power source for your e-bike. Additionally, understanding the importance of battery capacity can help you choose a model that best fits your riding needs. Being aware of drivetrain compatibility ensures that your conversion components work seamlessly together and reduces the risk of mechanical issues. For optimal performance, consider battery management systems that help monitor and protect your battery during use. Furthermore, paying attention to charger specifications can prevent potential safety hazards and extend your battery’s lifespan. Selecting a proper mounting location ensures better weight distribution and riding comfort.
Preparing Your Bicycle for Conversion

Start by removing your rear wheel, tire, and tube carefully, making sure to deflate the tire first. Check that your brake system matches the kit’s specifications, whether disc or rim brakes, and be ready to disconnect cables if needed. Confirm your frame and dropouts are sturdy enough to handle the motor’s torque, and consider installing torque arms for added safety.
Remove Existing Components
Before installing your e-bike kit, you’ll need to remove the existing components from your bicycle. Start by loosening and disconnecting the brake cables and quick-release levers to free the rear wheel. Use a freewheel remover tool and socket to detach the freewheel from the wheel hub. Next, deflate the tire completely and carefully insert tire levers to remove the tire and inner tube for reuse. Once the tire is off, remove the wheel axle, inspecting it for damage or wear. Keep track of all parts for reinstallation or reuse. Removing the rear wheel may involve loosening the axle or quick-release mechanism. This process clears the way for installing the new motor wheel and ensures your bike is properly prepared for the conversion. Fathers’ guidance can also be invaluable during this process, as their wisdom often emphasizes patience and careful handling of bike components.
Check Brake Compatibility
Are your brakes compatible with your new e-bike conversion? First, check if your bike has disc brakes or rim brakes that can handle the motor kit. Some kits require specific brake types for safe installation. If you’re installing disc brakes, verify that your brake calipers can fit the rotor size, which typically ranges from 160mm to 203mm. Ensure your brake levers are compatible with your brake type and can be disconnected or adjusted easily during the conversion. Also, confirm that the brake mounting points and cable routing support any additional wiring or sensors needed for electric assist. After installation, test your brakes thoroughly to make sure they function correctly with the new motor components and don’t interfere with the wheel or motor hardware. Proper brake performance is crucial to ensure your safety during riding, and remember that compatible brakes are essential for safe e-bike operation. Additionally, inspecting the overall brake system for wear and proper adjustment can help prevent issues during your rides. It’s also wise to consult your bike’s manufacturer specifications to ensure full compatibility.
Removing the Existing Wheel and Components
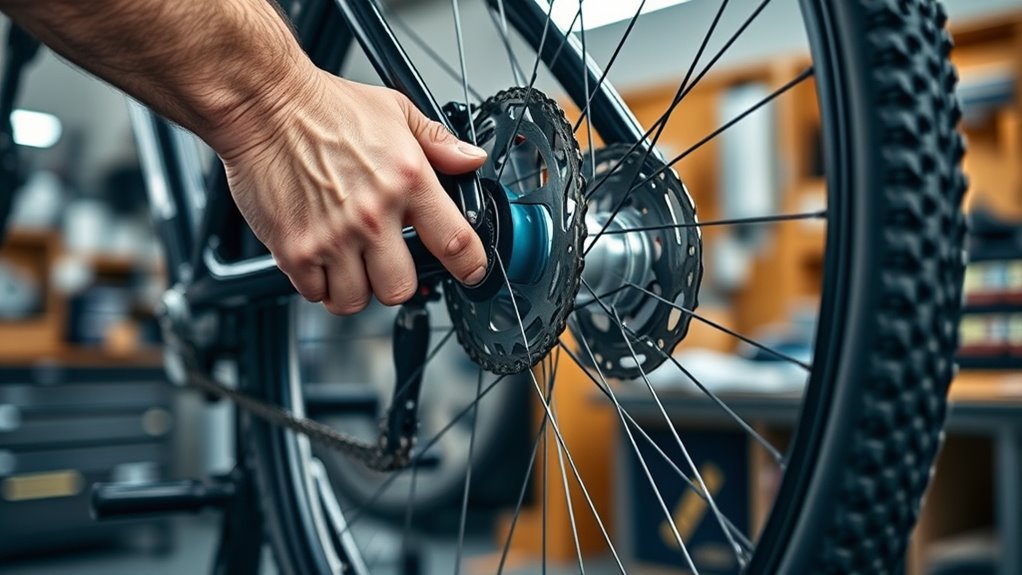
To remove the rear wheel and components, first loosen the brake cable and quick release lever to free the wheel from the frame. Deflate the tire completely, then use tire levers to carefully pry the tire and tube off the wheel. Next, remove the axle nuts with a 7/8″ socket wrench, then slide out the rear wheel from the dropouts. To detach the freewheel, use a freewheel remover tool and socket—widen the remover hole with a 9/16″ drill if needed. If spacers are present, remove and set them aside. Carefully transfer the tire and tube onto the new wheel later. Keep track of all components, including the hub and freewheel, to ensure smooth installation of the new e-bike wheel or mid-drive system. Proper maintenance of your bike components can significantly extend their lifespan and ensure safe operation. Additionally, inspecting the electric power generation system before installation can help identify potential issues and improve overall performance. Being aware of automated systems in your bike can further assist in optimizing your e-bike’s functionality. Regularly checking and maintaining these components ensures reliable performance and safety.
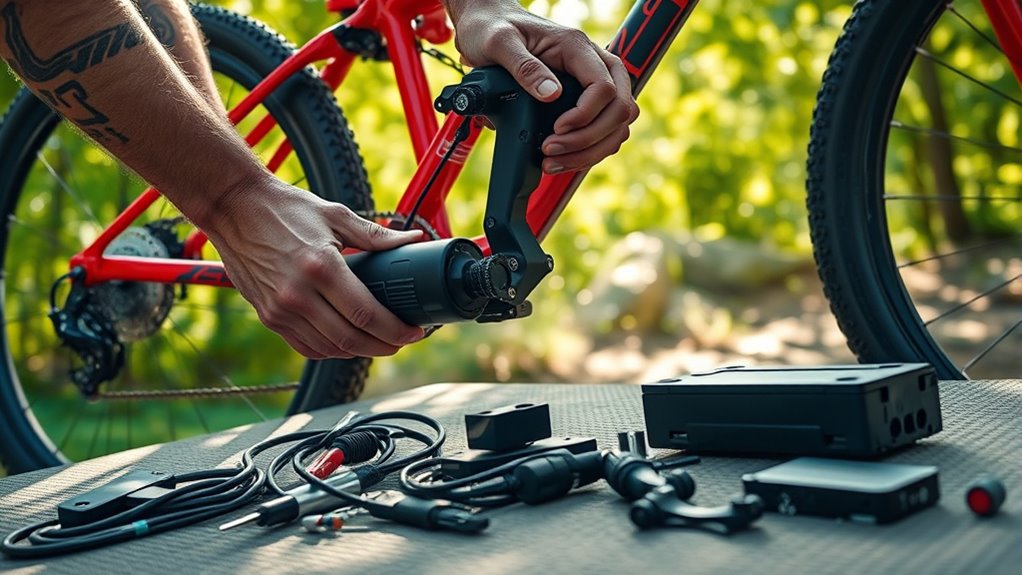
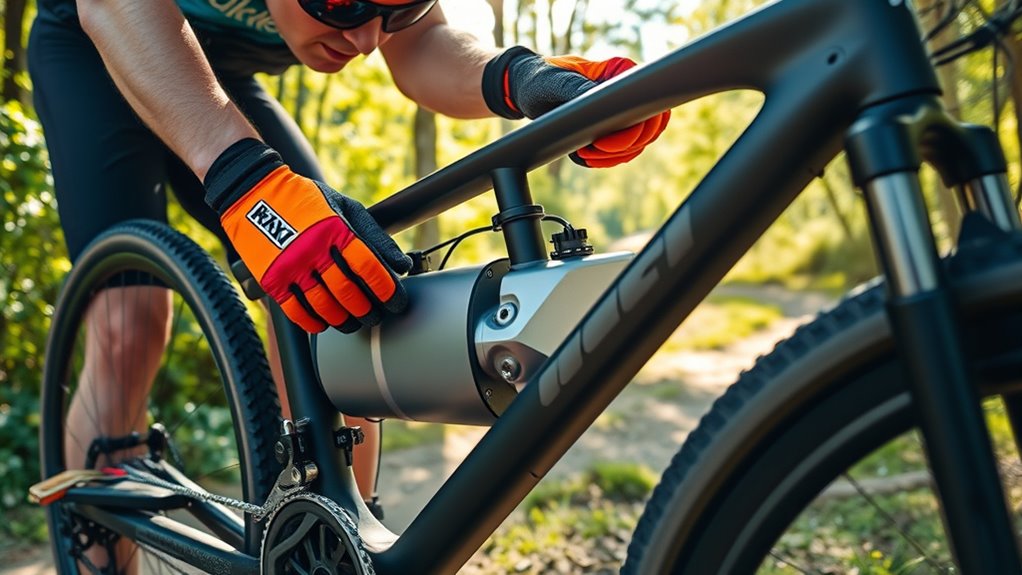
Installing the New E-Bike Wheel or Mid-Drive System
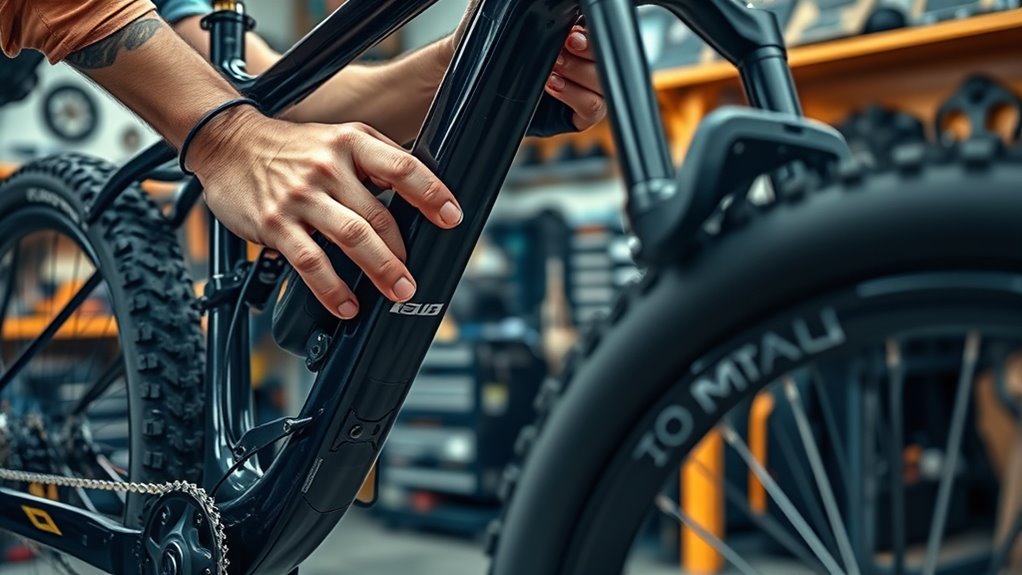
With the old wheel removed and components set aside, you can now install the new motorized wheel or mid-drive system. Start by placing the e-bike wheel into the dropouts, making sure the axle is aligned properly. Secure the axle with washers and tighten everything using a 7/8″ socket wrench. Attach the torque arm on the motor side to prevent damage during operation. Connect the wiring from the motor to the control system, ensuring cables are routed cleanly along the bike frame and secured with zip ties. Keep wires away from spokes, cranks, and sharp edges. It’s also important to verify that the motor installation is correctly aligned to avoid any operational issues. Proper alignment and securement are crucial for safe operation and to prevent damage. Confirm that the electric system is functioning correctly by performing a test ride before full use. This step completes the installation, bringing your bike closer to full bike conversion with a reliable e-bike wheel and control system.
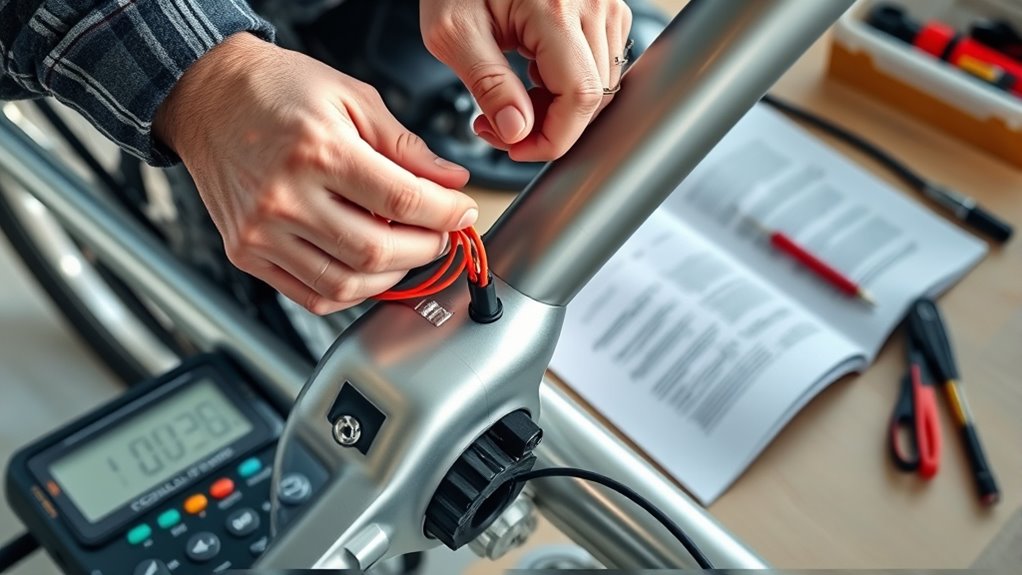
Routing and Securing Electrical Wires
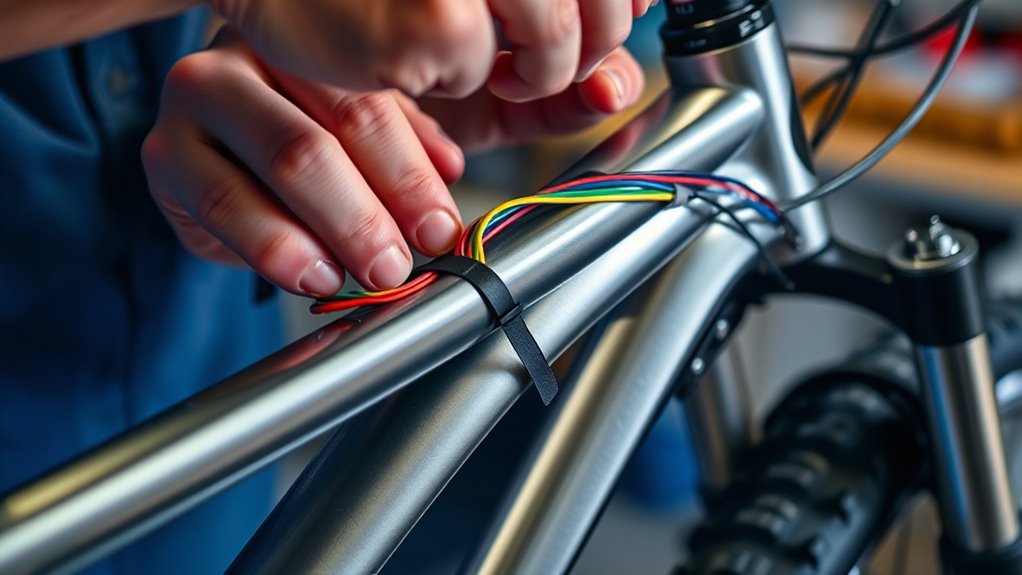
To keep your e-bike safe and reliable, you need to route the wires carefully along the frame. Use zip-ties every few inches to secure them firmly and prevent any movement that could cause damage. Make sure wires stay away from moving parts and are bundled neatly to avoid kinks or snagging.
Proper Cable Management
Ensuring proper cable management is essential for a safe and reliable e-bike conversion. You should route all wiring along the frame, securing it with zip ties at regular intervals to prevent movement and abrasion. Keep wiring away from moving parts like chains, gears, and brake rotors to avoid tension or pinching during rides. Use protective sleeves or heat shrink tubing on exposed connections to shield them from water ingress and corrosion. Loop excess wire neatly around the seat tube or frame tubes, avoiding slack that could snag on obstacles or spokes. Regularly inspect the cable routes for wear or damage, replacing zip ties or protective coverings as needed. Proper cable management not only protects your wiring but also ensures a clean and professional-looking conversion. Additionally, following guidelines for cable routing and safety can help prevent potential issues during your rides. Employing protective measures such as waterproof connectors further enhances the durability of your wiring setup, especially in adverse weather conditions. To maintain optimal performance, consider regular maintenance to identify and address any issues early.
Secure Wiring Safeguards
Securing your electrical wires properly is crucial to prevent damage and guarantee safe operation of your e-bike conversion. Use cable guides and zip ties to route wires along the frame, keeping them away from spokes, brake rotors, and moving parts. Secure wires firmly at regular intervals, especially near joints and connectors, to prevent slack that could snag or wear. Avoid sharp edges and rough surfaces; instead, use protective sleeves or tubing for wire insulation and water protection. Ensure waterproof connectors are fully plugged in and sealed with waterproof tape or heat shrink tubing. Loop excess wiring neatly and secure it to prevent dangling or pulling, which can strain connections.
| Tip | Purpose |
|---|---|
| Cable guides and zip ties | Keep wires organized and secure |
| Protective sleeves/tubing | Prevent abrasion and water damage |
| Waterproof connectors | Guarantee secure, weatherproof connections |
Mounting Controls, Display, and Safety Features
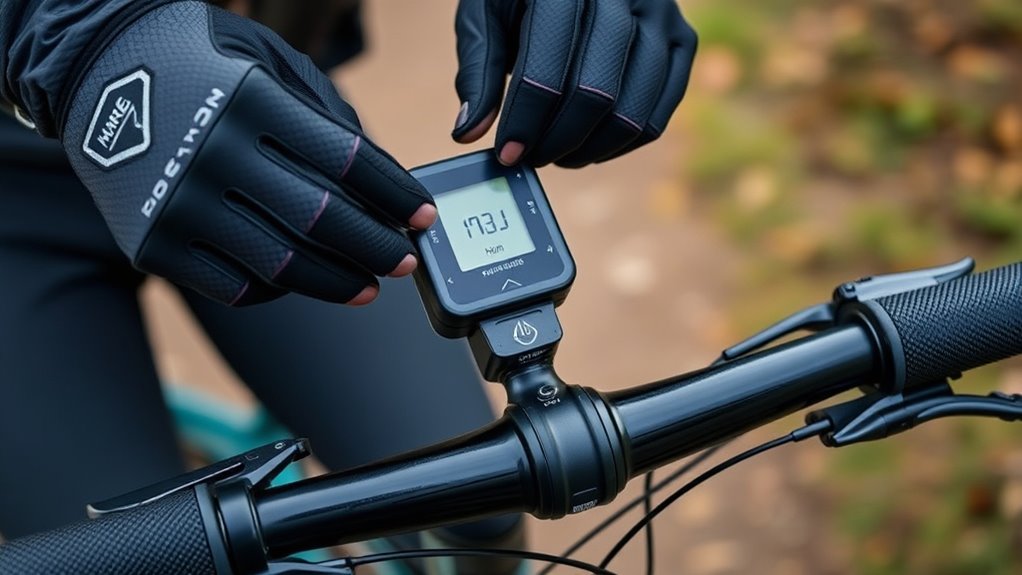
Mounting controls, display, and safety features requires careful placement to maximize accessibility and safety during your ride. Start by mounting the display at the center of the handlebars for ideal visibility and easy access. For handlebar controls, install the throttle and e-brakes on the left side, ensuring they don’t interfere with other controls. Secure the cruise control switch, e-brakes, and shifter on the right handlebar for quick, intuitive operation. Remove the handlebar grips using compressed air or a grip removal tool, then reattach them securely after installing new controls. Connect all wiring carefully along the frame, securing it with zip ties to prevent damage or snagging. Proper control positioning, combined with secure wiring, ensures a safe and comfortable riding experience.
Testing the System and Making Adjustments
Before taking your e-bike for a long ride, it’s essential to test the system thoroughly. Perform a test ride to ensure smooth acceleration, consistent speed, and responsive braking, confirming safe operation. Check all electrical connections—wires and plugs—for security and damage. Adjust pedal assist levels and throttle response via the controller or software to optimize comfort and performance. During testing, monitor the system for abnormal noises, overheating, or error messages, troubleshooting as needed. Verify that the speed limit aligns with local laws (e.g., 24 km/h in Europe) and make software adjustments if necessary. Use this quick reference to guide your testing:
| Task | Focus Area |
|---|---|
| Electrical connections | Secure and damage-free |
| Test ride | Acceleration, braking, speed |
| System monitoring | Noises, overheating, errors |
| Performance adjustment | Pedal assist, speed limit |
Final Steps: Programming, Legal Compliance, and Maintenance
Have you properly programmed your e-bike’s controller to guarantee it meets both your riding preferences and local legal requirements? Start by connecting the controller with a USB programming cable to your Windows PC, then adjust settings such as maximum speed, acceleration, and regenerative braking. Configure the software to ensure your bike complies with legal speed limits, typically around 20–24 mph (32–38 km/h). Regularly perform firmware updates to optimize performance and safety, especially after hardware changes or battery swaps. Conduct thorough safety checks and a test ride to verify throttle response, assist levels, and braking. Make necessary adjustments to meet your needs and legal standards. Keep detailed documentation of your setup, settings, and firmware versions for compliance verification and troubleshooting purposes.
Frequently Asked Questions
How Much Does It Cost to Convert a Bike to an Ebike?
You’re wondering how much it costs to convert your bike into an e-bike. Typically, expect to spend between $300 and $900, depending on the kit’s quality and features. Basic rear wheel kits are more affordable, while high-performance mid-drive systems cost more. Keep in mind, additional expenses for batteries, tools, and accessories can add a few hundred dollars, making it a budget-friendly alternative to buying a new e-bike.
Can I Turn a Regular Bike Into an Ebike?
You’re asking if you can turn a regular bike into an e-bike—absolutely! With the right conversion kit, you can give your bike a new lease on life. It’s a smart way to save money and customize your ride. Just make sure your bike’s frame and components are compatible. Once installed, you’ll be pedaling with a boost, making every ride smoother and more enjoyable.
Are E-Bike Conversion Kits Worth It?
You might wonder if e-bike conversion kits are worth it. They’re a smart choice because they’re budget-friendly, letting you upgrade your bike without buying a new one. Plus, you get to customize power levels and components to suit your needs. If you’re comfortable with DIY projects, they’re easy to install. Just make sure your bike is compatible and check local laws to guarantee a smooth, cost-effective upgrade.
Are Electric Bike Conversion Kits Legal?
Think of legality like a set of traffic rules guiding your journey. When you ask if e-bike conversion kits are legal, you’re checking if your ride complies with local laws. In many regions, as long as your kit doesn’t exceed speed or power limits, it’s legal. Always verify local regulations, use speed limiters, and choose compliant kits to stay on the right side of the law and enjoy smooth riding.
How Fast Will a 1000W Ebike Kit Go?
A 1000W e-bike kit can typically hit speeds between 28 to 35 mph, depending on your setup and conditions. Your actual speed may vary based on factors like rider weight, terrain, and wind. Keep in mind, local laws often limit e-bike speeds to 20 or 28 mph, which you might need to set via the controller. Exceeding these limits could lead to legal issues or classification as a motorcycle.
Conclusion
Converting your bike into an e-bike is a rewarding project that boosts your riding experience. Did you know e-bike sales grew by over 50% worldwide in 2022? With the right kit and careful installation, you can enjoy eco-friendly, efficient rides tailored to your needs. Just remember to check local regulations and perform regular maintenance. Now, hit the road confidently, knowing you’re riding a custom e-bike built by your own hands.