
Installing disc brakes might seem tricky at first, but with the right tools and careful steps, you can do it yourself. Start by ensuring your components match your bike’s model and wheel size. Attach the calipers to the fork, align them properly with the rotor, and tighten bolts to the right torque. Route hoses neatly, fill and bleed the system, then make final adjustments. Keep practicing, and you’ll gain confidence in creating reliable, smooth braking.
Key Takeaways
- Verify compatibility of brake components, rotors, and hoses with your bike model and wheel size.
- Mount the caliper correctly, centering it over the rotor with proper alignment and torque.
- Route brake hoses neatly, avoiding sharp edges and tension, and secure with clips or zip ties.
- Fill and bleed the brake system to remove air, ensuring firm lever feel and proper fluid levels.
- Test the brakes in a controlled environment, checking for smooth operation and secure mounting before riding.

CHUMXINY Brake Bleed Kit for Shimano, TEKTRO, TRP Hydraulic Disc Brakes. Mountain Bike Brake Bleed Kit Includes Transparent Funnel, 120ML Mineral Oil Brake Fluid.
Transparent Funnel: Liquid and bubbles are clearly visible during the bleeding of bicycle brakes.
As an affiliate, we earn on qualifying purchases.
As an affiliate, we earn on qualifying purchases.
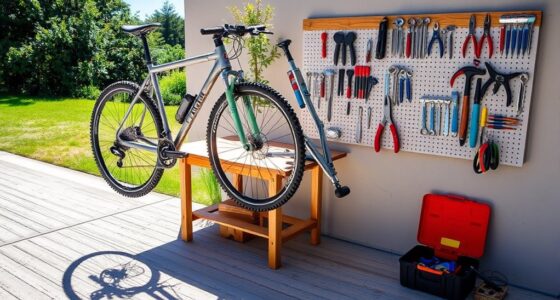
Ensuring Compatibility and Gathering Necessary Tools

Before you begin installing disc brakes, it’s essential to verify that all components—calipers, levers, hoses, and rotors—are compatible with your bike’s model and wheel size. Compatibility ensures proper fit and exemplary performance, preventing issues like misalignment or poor braking. Check that the rotor mounting type (six-bolt or center lock) matches your hub and frame specifications. Use appropriate adapters if needed to match rotor size and frame compatibility. Confirm that brake fluid, such as Shimano mineral fluid, and replacement parts like olives and rubber sheaths, are compatible with your brake system. Gathering the right tools—including Allen keys, an 8mm spanner, Torx T25, and bleed kits—further streamlines your installation. Ensuring compatibility and having the necessary tools ready sets a solid foundation for a successful disc brake setup. Additionally, understanding bike compatibility can help you select the correct components for your specific model. Being aware of sound healing science also emphasizes the importance of precise assembly to ensure optimal performance and safety.
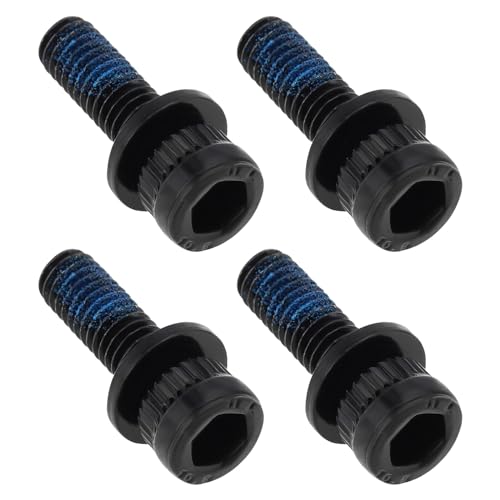
Be In Your Mind 4Pcs M6x18mm MTB Caliper Bolts Bike Hydraulic Disc Brake Caliper Adapter Bolts Compatible with Shimano Bike Overall Length 25 mm Black
Material: High carbon steel bicycle caliper screws have remarkable capabilities in corrosion prevention, antioxidation and excellent durability.
As an affiliate, we earn on qualifying purchases.
As an affiliate, we earn on qualifying purchases.
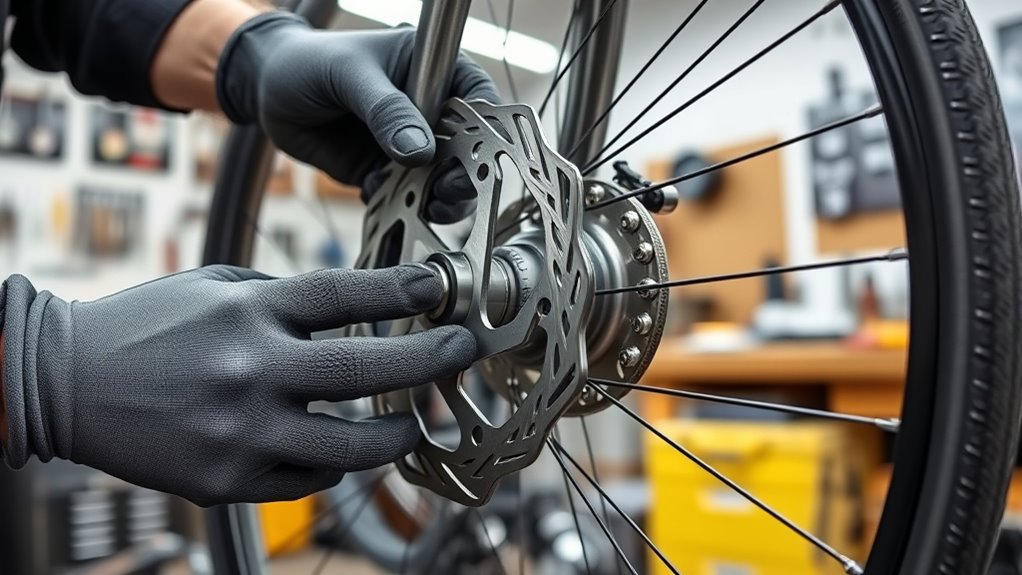
Mounting the Calipers Correctly

To mount your calipers correctly, start by aligning them with the rotor and ensuring the mounting holes are perpendicular before inserting the bolts. Use pad spacers during installation to keep the pads from touching and to help position the caliper properly. Tighten the bolts gradually in a crisscross pattern to the specified torque, then verify the caliper’s alignment before riding. Additionally, consulting airless paint sprayer reviews can help you select the best tools for your painting projects. Proper caliper alignment is essential for optimal braking performance and safety. Ensuring the brake assembly is free of debris and properly lubricated can also improve braking efficiency and longevity.
Proper Mounting Position
Ensuring the caliper is mounted correctly is essential for effective braking. Proper mounting position guarantees that the caliper aligns with the rotor, allowing the brake pads to contact evenly. Start by attaching the caliper onto the fork post mount with clean, debris-free surfaces. Use the correct bolts and leave them slightly loose for fine adjustments. Use pad spacers to prevent rubbing during setup. When positioning, ensure the caliper is centered over the rotor, with equal clearance on both sides. Tighten the bolts in a crisscross pattern to the manufacturer’s torque specifications once aligned. Additionally, verifying the flushing mechanism to ensure proper operation can prevent issues during riding. Being aware of industry trends can also help in choosing the best components for your setup. Incorporating the latest brake technology developments can further enhance your braking performance and safety. Regularly checking the caliper alignment can help maintain optimal braking efficiency over time. Moreover, paying attention to component compatibility ensures that all parts work seamlessly together for reliable braking.
Correct Bolt Tightening Sequence
When tightening your caliper mounting bolts, it’s important to follow a proper sequence to avoid uneven pressure and rotor rub. Begin by snugging the bolts in a crisscross pattern, starting with one bolt and then the opposite, to guarantee even pressure distribution. Always use a torque wrench to tighten the bolts to the manufacturer’s specified torque, typically around 6-8 Nm for most mountain bike calipers. Tighten gradually in sequence, avoiding full force on any one bolt at first, to prevent misalignment. Confirm the caliper is properly aligned with the rotor before applying final torque. Following this sequence ensures the caliper mounts securely and evenly, reducing the risk of brake issues and guaranteeing optimal braking performance. Additionally, understanding how arcade games work can help in troubleshooting any electronic components involved in modern brake systems that utilize digital controls.
Caliper Alignment and Adjustment
Start by loosely mounting the caliper onto the fork post mount with the appropriate bolts, allowing room for fine adjustments. Position the caliper so the brake pads are centered relative to the rotor, ensuring equal spacing on both sides. Use pad spacers during installation to prevent contact with the rotor, then remove them once the caliper is properly aligned. Slightly loosen the caliper mounting bolts, then squeeze the brake lever to center the caliper automatically. While holding the lever, tighten the bolts fully, securing the caliper’s position. Check that the caliper doesn’t rub against the rotor during full wheel rotation. Make final adjustments if needed, ensuring smooth operation and even pad contact. Proper caliper alignment guarantees effective braking and reduces uneven wear. Additionally, understanding the effectiveness of eye patches can help in maintaining a fresh and comfortable eye area, which can be beneficial after long rides or intense physical activity. Incorporating precise caliper positioning techniques can further enhance braking performance and prevent uneven pad wear, thereby extending the lifespan of your brake components.

CHUMXINY Brake Bleed Kit for SHIMANO, TEKTRO Hydraulic Disc Brakes, Including High Performance Mineral Brake Fluid (120ml)
Can Be Changed Several Times: 2 x 60ml Bottles mineral oil brake fluid
As an affiliate, we earn on qualifying purchases.
As an affiliate, we earn on qualifying purchases.
Routing Brake Hoses for Optimal Performance

To get the best braking performance, you need to route your brake hoses carefully. Keep the hoses as short as possible while still allowing full movement of your bike and handlebars. Use neat, secure clips or guides to prevent damage and make certain of smooth, reliable braking.
Optimal Hose Length
Routing brake hoses with the correct length is essential for smooth operation and safety. Your hose length should be just slightly different from the stock or previous setup, so it allows full bike travel and handlebar rotation without tension or rubbing. If you’re going to loosen the hose, leave one little extra bit—just enough to prevent strain. I’m going to show you, it’s pretty good to leave a tiny bit more if you have a mountain bike, especially with higher rise bars or longer travel forks. There’s actually a method: measure the route, then cut the hose to fit. There’s one thing to keep in mind—buy one that’s not too long, because that last thing you want is excess slack causing noise or interference. Proper bike maintenance can help ensure your brake hoses are correctly routed and secure, which is also crucial when considering Kia Tuning modifications that involve suspension or handling upgrades. Additionally, understanding proper hose routing techniques can prevent unnecessary wear and potential failure. Paying attention to vibrational energy during installation can also help maintain consistent brake performance over time.
Neat Routing Techniques
Neat routing of your brake hoses is key to maintaining ideal performance and safety. Start by running the hose along the inside of the fork or frame to protect it from damage and allow smooth movement. Keep the hose as short as possible while still permitting full handlebar rotation and suspension travel—this prevents slack or strain that could affect braking. Use zip ties or clips at regular intervals to secure the hose neatly against the frame or fork, avoiding loose loops or kinks. Be sure not to route the hose across moving parts or sharp edges, which can cause abrasion or hinder brake function. Proper routing also helps prevent hose wear, extending the lifespan of your brake system. Regular inspection and understanding brake maintenance can further ensure your setup remains safe and reliable. Before trimming, double-check the hose path to ensure it won’t interfere with steering, suspension, or other components, ensuring a clean, reliable setup.
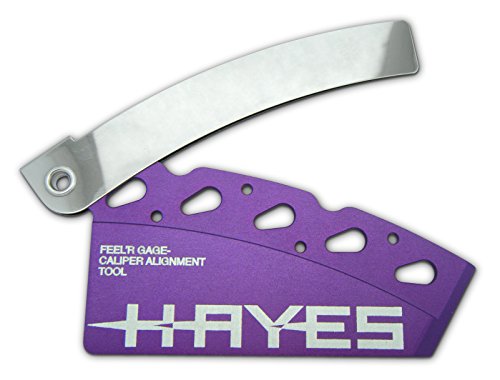
Hayes Brake Pad & Rotor Alignment Tool
Hayes
As an affiliate, we earn on qualifying purchases.
As an affiliate, we earn on qualifying purchases.
Filling and Bleeding the Brake System

Filling and bleeding the brake system guarantees your disc brakes work reliably and effectively. First, remove the top Allen bolt from the brake lever to access the master cylinder. Pour Shimano mineral fluid into the reservoir until it reaches the MAX line. When bleeding, attach a bleeding cup to the brake lever and pump the lever repeatedly while tapping the line to dislodge air bubbles. Carefully remove the cup to avoid spills, then secure it back quickly after refilling. Use brake cleaner or isopropyl alcohol to clean any spilled fluid immediately, as it can damage paint. Always ensure the reservoir is filled to the correct level before sealing to prevent air ingress. This process ensures consistent brake performance and safety.
| Step | Action | Tips |
|---|---|---|
| Access master cylinder | Remove Allen bolt and open reservoir | Use a clean cloth around to catch spills |
| Fill with brake fluid | Pour until at MAX line | Do not overfill |
| Attach bleeding cup | Secure to brake lever | Pump lever repeatedly |
| Dislodge air bubbles | Tap line while pumping | Repeat until no more air escapes |
| Clean spills | Use brake cleaner or isopropyl alcohol | Prevent damage to painted surfaces |
Adjusting Caliper Position and Lever Feel

To guarantee your disc brakes function smoothly and comfortably, start by adjusting the caliper position so it’s centered over the rotor. Loosen the mounting bolts slightly, then carefully position the caliper until it’s aligned with the rotor. Once centered, tighten the bolts securely to prevent any movement. Using pad spacers during installation helps keep the pads from contacting the rotor, ensuring proper alignment. Next, fine-tune the lever feel by adjusting its reach and position on the handlebar, making sure it’s comfortable and responsive for your riding style. If the lever feels spongy or pulls too far, bleeding the brake system will restore consistent pressure. finally, double-check that the brake lever is mounted securely and positioned at an appropriate distance from the handlebar for comfortable control.
Final Checks and Secure Fastening

Before riding, double-check that all components are securely fastened to guarantee reliable braking performance. Verify caliper mounting bolts are tightened to the manufacturer’s specified torque, usually between 6-8 Nm, to prevent loosening. Verify that rotor bolts are securely fastened with thread lock, like Loctite, and tightened in the correct sequence to avoid warping. Confirm the brake hose is firmly clamped at all points, including the lever, frame, and caliper, to prevent movement that could cause leaks or reduced braking. Make sure the brake pad spacer is removed, and the caliper is properly aligned with the rotor before final tightening. Finally, inspect visually and test the brake lever to ensure a firm, responsive feel without sponginess or excessive travel.
Testing Your Disc Brakes Safely

Ensuring your disc brakes function correctly is essential for safe riding, so it’s important to test them carefully. First, support your bike securely to prevent movement. Pump the brake lever multiple times; it should feel firm and engage smoothly without sponginess. Gradually increase pressure to check for consistent stopping power and proper feel. Test your brakes at low speed in an open, safe area to evaluate responsiveness and confirm the rotor and pads work smoothly together. Always wear protective gear and be ready to stop quickly if needed.
| Step | Purpose |
|---|---|
| Support bike securely | Prevent movement during testing |
| Pump brake lever | Check for firmness and proper engagement |
| Gradually apply pressure | Verify consistent stopping power |
| Test at low speed | Assess responsiveness and smooth operation |
| Wear protective gear | Ensure safety during testing |
Frequently Asked Questions
Do You Have to Change the Master Cylinder When Converting to Disc Brakes?
When converting to disc brakes, you might wonder if you need to change the master cylinder. Usually, if your current hydraulic system and brake lever are compatible with disc brake fluid and pressure, you don’t need a new master cylinder. However, if your existing one can’t generate enough pressure or isn’t compatible, you’ll need to upgrade. Always verify your master cylinder’s specifications to guarantee proper function and safety with your new disc brakes.
How Do You Bed in New Disc Brakes?
You might worry about damaging your new brakes, but proper bedding prevents that. To bed in your new disc brakes, accelerate to a moderate speed, then brake firmly 10-15 times from 20-30 km/h, letting them cool between stops. Avoid high speeds or hard stops initially. Check for noise or vibrations afterward, and verify your rotor and pads are clean. This process helps your pads and rotors work smoothly and last longer.
What Two Things Should Be Done After Installing New Disc Brake Pads?
After installing new disc brake pads, you should first bed-in the pads by performing gentle brake applications to transfer material onto the rotor, guaranteeing ideal braking performance. Next, check and adjust the brake lever travel and pad clearance, making sure the pads aren’t rubbing when the brake is released. These steps help prevent brake drag and ensure your brakes work smoothly and reliably.
Is It Worth Converting Drum Brakes to Discs?
Did you know disc brakes provide up to 30% better stopping power in wet conditions? Converting your drum brakes to discs can be worth it if you ride often in challenging weather or need improved performance. You’ll enjoy better heat dissipation and reduced maintenance. However, consider your bike’s compatibility, the cost, and whether the upgrade suits your riding style. For many enthusiasts, the benefits outweigh the investment.
Conclusion
Installing disc brakes might seem intimidating, but with the right steps, you can do it yourself and boost your bike’s performance. Did you know that properly maintained disc brakes can improve stopping power by up to 30%? By ensuring compatibility, mounting correctly, and regularly checking your system, you’ll stay safe and ride confidently. Just take your time, follow the guide, and enjoy the smoother, more reliable braking experience you’ve built yourself.