Since I’ve always enjoyed cycling, I wanted to find a way to bring my child along on my adventures. That’s when I came across InStep bike trailers, which are specifically designed to attach effortlessly to your bike and offer a secure and comfortable ride for your little one.
In this article, I’ll guide you through the process of attaching the trailer to your bike, ensuring a secure connection, and following all the necessary safety guidelines.
Get ready to enjoy countless cycling adventures with your child by your side!
Key Takeaways
- InStep bike trailers are designed with features for convenience and practicality.
- They provide a safe and secure environment for children while riding.
- It is important to ensure bike compatibility with the trailer for stability and safety.
- Proper attachment and adjustment of the trailer to the bike is crucial for a smooth and safe ride.

Under Armour Squeeze Water Bottles, 32 oz Water Bottles, Sideline Sports Water Bottle with Quick-Shot Lid, Quick & Easy Hydration, Gym Water Bottles, Squeeze Bottle, 1 32oz Bottle
- Easy Hydration: Quick-shot lid and one-way valve
- On-the-Go Use: One-hand operation for active hydration
- Measurement Markings: Ounces and milliliters for tracking
As an affiliate, we earn on qualifying purchases.
Introduction to InStep Bike Trailers
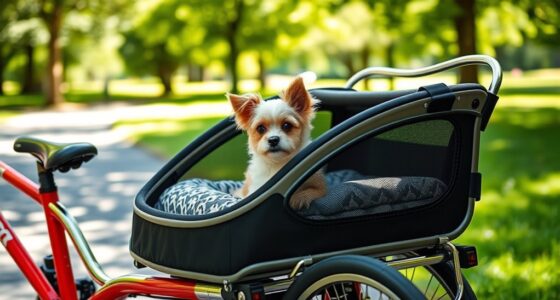
InStep bike trailers are a popular choice for parents who want to easily hook up a trailer to their bike. These trailers are designed with a range of features that make them convenient and practical for everyday use.
One of the key features of InStep bike trailers is their sturdy construction. They are built to withstand different terrains and ensure a smooth and safe ride for your child. The trailers also come with ample storage space, allowing you to carry all your essentials, such as snacks, water bottles, and extra clothing. Another great feature is the adjustable harness system, which ensures that your child stays secure and comfortable during the ride.
Using an InStep bike trailer offers several benefits. Firstly, it allows you to spend quality time with your child while getting some exercise. You can go on bike rides together and explore the outdoors, promoting a healthy and active lifestyle. Additionally, these trailers provide a safe and secure environment for your child, with their robust construction and safety features. They also offer protection from the elements, with weather-resistant materials and a canopy to shield your child from the sun and rain.
To ensure your bike is compatible with the trailer, it is important to check the manufacturer’s guidelines and specifications. This will help you determine if your bike meets the necessary requirements for a secure attachment.
Ensure Your Bike is Compatible with the Trailer
Make sure your bicycle is compatible with the trailer before attaching it. Ensuring bike trailer compatibility is essential for a safe and enjoyable ride. Here are some key factors to consider when choosing the right bike for your trailer:
-
Frame Compatibility: Check if your bike’s frame is compatible with the trailer hitch. Some trailers require a specific type of attachment, such as a quick-release skewer or a bolt-on axle mount.
-
Wheel Size: Verify that the trailer is designed for the same wheel size as your bike. Common wheel sizes include 16′, 20′, and 26′. Using the wrong size can lead to instability and potential accidents.
-
Weight Capacity: Determine the trailer’s weight capacity and compare it to the weight of your child or cargo. Ensure that your bike can handle the additional load without compromising its stability or performance.
-
Braking System: Consider whether your bike has a compatible braking system with the trailer. Some trailers have their own braking system, while others rely on the bike’s brakes.
-
Suspension Compatibility: If your trailer has suspension, ensure that your bike can accommodate it. Some bikes have limited clearance or lack the necessary mounting points for suspension systems.
By carefully evaluating these factors, you can choose a bike that is compatible with your trailer and maximize the safety and comfort of your rides.
Now, let’s move on to gathering the necessary tools for attaching the trailer.
Gather the Necessary Tools
To attach the trailer, you’ll need a few tools like a wrench, screwdriver, and possibly a socket set. Before you begin, it’s important to choose the right bike trailer for your needs. Consider factors such as weight capacity, safety features, and the type of terrain you’ll be riding on.
Once you have the right trailer, proper maintenance is key to ensuring its longevity and performance. Regularly inspect the trailer for any signs of wear or damage, such as worn-out tires or loose bolts. Keep the tires properly inflated and lubricate the moving parts as needed. Clean the trailer after each use to remove any dirt or debris that may accumulate. Additionally, make sure the hitch mechanism is in good condition and securely attached to your bike.
Transitioning into the next section, attaching the trailer hitch to your bike is a crucial step in the process. Without a secure hitch, the trailer may detach while you’re riding, posing a serious safety risk. So, let’s move on to the next step of attaching the trailer hitch to your bike.
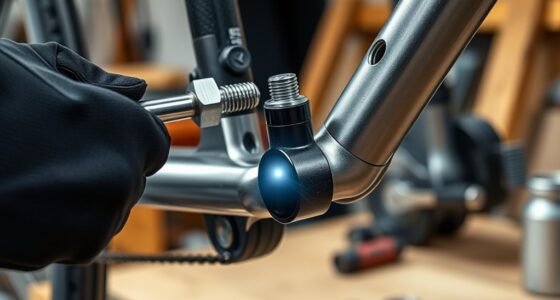
Attach the Trailer Hitch to Your Bike
Now, it’s time for you to secure the hitch onto your bicycle frame so you can safely connect the trailer. Proper trailer hitch installation is crucial for bike trailer safety, ensuring a secure and stable connection between your bike and the trailer. Follow these steps to attach the hitch:
-
Start by locating the hitch attachment point on your bike frame. It is usually located near the rear axle.
-
Align the hitch with the attachment point and slide it onto the frame.
-
Use the provided hardware, such as bolts or screws, to fasten the hitch securely to the frame. Make sure to tighten them snugly but not excessively, as overtightening can damage the frame.
-
Once the hitch is securely attached, verify that it is aligned straight and level with the ground. This will help prevent any swaying or instability while towing the trailer.
-
Finally, give the hitch a firm tug to ensure it is properly secured to the frame. It should not move or shift.
By following these trailer hitch installation steps, you can ensure a safe and reliable connection between your bike and the trailer.
Now, let’s move on to adjusting the trailer’s coupler for optimal towing performance.
Adjust the Trailer’s Coupler
Once the hitch is securely attached to your bicycle frame, you’ll need to adjust the trailer’s coupler for optimal towing performance. Adjusting the trailer’s coupler is an important step in ensuring a smooth and safe ride with your InStep bike trailer.
One of the first things you’ll want to do is adjust the height of the coupler. This will allow the trailer to ride level with your bike, preventing any unnecessary strain on the coupler or the frame of the trailer.
To adjust the height of the coupler, you’ll need to loosen the nut on the coupler bolt and slide the coupler up or down until it aligns with your bike’s rear axle. Once the desired height is achieved, tighten the nut to secure the coupler in place. It’s important to make sure the coupler is securely tightened to avoid any wobbling or shifting during your ride.
If you’re experiencing any issues with the coupler, such as difficulty in attaching or detaching the trailer, it may be helpful to troubleshoot common coupler issues. One common issue is a misaligned coupler, which can be resolved by adjusting the height as mentioned earlier. Another issue could be a loose or damaged coupler, in which case you may need to tighten or replace the coupler for optimal performance.
Now that the coupler is adjusted, let’s move on to the next step: connecting the safety strap.
Connect the Safety Strap
After adjusting the coupler, you’ll want to connect the safety strap for added security. The safety strap is an essential component of ensuring a safe and stable ride when using an InStep bike trailer. Here are four key steps to follow when connecting the safety strap:
-
Adjust the Strap Tension: Before connecting the safety strap, make sure it is properly adjusted to provide a snug fit. You want the strap to be tight enough to prevent any movement or slippage but not too tight that it restricts the child’s comfort.
-
Find the Proper Placement: Locate the attachment points for the safety strap on both the bike trailer and your bike. Typically, these attachment points are located near the rear axle of the bike and on the rear frame of the trailer. Ensure that the strap is securely fastened to both attachment points.
-
Double-Check the Connection: After securing the safety strap, give it a gentle tug to ensure it is firmly attached. It’s crucial to verify that the strap is properly connected to both the bike and the trailer to prevent any accidents or mishaps during the ride.
-
Verify the Strap’s Tension: Once the safety strap is connected, check its tension again. Make sure it is snug and secure without being overly tight. Adjust the tension as needed to ensure maximum safety and stability.
Check the Trailer’s Stability
To ensure a safe ride, make sure the trailer is stable by checking the connection points and verifying the tension of the safety strap. A stable trailer is crucial for a smooth and secure biking experience. There are a few key steps to follow when checking the trailer’s stability.
Firstly, it is important to check the trailer’s weight distribution. Make sure that the weight is evenly distributed throughout the trailer to avoid any imbalance. Uneven weight distribution can cause the trailer to sway or tip over, leading to potential accidents.
Additionally, ensure that the trailer’s tires are properly inflated. Underinflated tires can affect the stability of the trailer, making it more prone to wobbling or losing control. Use a tire gauge to check the tire pressure and inflate them to the recommended level.
To help visualize these steps, refer to the table below:
| Steps to Check Trailer’s Stability | ||
|---|---|---|
| 1. Check connection points | 2. Verify tension of safety strap | 3. Check weight distribution |
| 4. Ensure tires are properly inflated | 5. Securely attach trailer’s frame to hitch |
Securely Attach the Trailer’s Frame to the Hitch
Make sure you securely attach the frame of your trailer to the hitch to ensure a safe and stable ride. Attaching the trailer’s frame to the hitch is a crucial step in preparing for your bike ride.
There are different methods to attach the frame, depending on the type of trailer you have. The most common method is using a hitch coupler that connects the trailer’s frame to the hitch on your bike. This coupler typically consists of a metal bracket that attaches to the trailer’s frame and a ball that fits into the bike’s hitch. To attach the frame, simply slide the coupler onto the hitch and secure it tightly using the provided latch or pin. It is important to double-check that the latch or pin is securely fastened to prevent any accidents during the ride. Additionally, it is recommended to use a safety strap as an extra precautionary measure. This strap is usually attached to the trailer’s frame and the bike’s seat post, providing an additional layer of security.
By following these attaching methods and safety precautions, you can ensure that your trailer is securely connected to your bike, allowing for a smooth and worry-free ride.
To ensure the trailer is level and balanced, it is important to check its position after attaching it to the hitch. A level and balanced trailer is essential for stability and proper weight distribution. You can do this by placing the trailer on a flat surface and adjusting the hitch height if needed. The trailer should be level from front to back and side to side. If the trailer is not level, it may affect the handling of your bike and increase the risk of accidents.
To achieve balance, distribute the weight evenly within the trailer, placing heavier items closer to the bike’s axle. This will prevent the trailer from swaying or tipping during your ride. By ensuring that your trailer is level and balanced, you can enjoy a safe and comfortable biking experience.
Ensure the Trailer is Level and Balanced
Checking the position of the trailer after attaching it to the hitch is crucial to ensure it is level and balanced. Proper leveling techniques are vital to maintain a safe and stable ride while towing.
To achieve this, start by placing a level on the trailer’s frame, making sure it is parallel to the ground. If the trailer is not level, adjust the hitch height accordingly. This can be done by raising or lowering the trailer’s tongue using the hitch jack.
Once the trailer is level, it’s important to distribute the weight evenly. Make sure heavier items are placed closer to the center of the trailer to prevent it from becoming unbalanced during transit. Additionally, check the tire pressure on both the trailer and the bike to ensure they are properly inflated. This will help maintain stability during the ride.
By following these leveling techniques and maintaining balance throughout the trailer, you can ensure a smooth and safe towing experience.
Now that the trailer is level and balanced, it’s time to test its attachment to the bike.
Test the Trailer’s Attachment
After ensuring that the trailer is level and balanced, the next important step is to test the attachment of the instep bike trailer to your bike. This will ensure the safety and stability of the trailer while riding.
To test the attachment, follow these troubleshooting tips:
-
Apply gentle pressure: Push the trailer from side to side and back and forth to check for any excessive movement. If the attachment feels loose, you may need to adjust the hitch or tighten the connection.
-
Check the safety strap: Ensure that the safety strap is securely fastened to your bike frame. This strap provides an extra layer of security in case the trailer becomes detached from the hitch.
-
Conduct a test ride: Take a short test ride on a smooth surface to evaluate the trailer’s stability and handling. Pay attention to any unusual noises or vibrations that may indicate an issue with the attachment.
By thoroughly testing the trailer’s attachment, you can identify and address any potential problems before hitting the road with your child.
Once you are confident in the attachment, you can proceed to adjust the trailer’s seat and straps for your child’s comfort.
Adjust the Trailer’s Seat and Straps for Your Child’s Comfort
To ensure your child’s comfort, adjust the seat and straps on the trailer. Proper adjustment techniques are essential for a safe and enjoyable ride.
Start by adjusting the seat to a position that provides adequate support for your child’s back. This will help prevent any discomfort or strain during the ride.
The straps should be adjusted snugly but not too tight, ensuring that your child is secure and stable in the trailer. It is important to note that the straps should never be loose enough for your child to slip out, but also not so tight that they restrict movement or cause discomfort.
Safety precautions should always be taken when adjusting the seat and straps. Double-check all connections and safety features to ensure that they are properly locked and secure. This will help prevent any accidents or mishaps during the ride.
Now that the seat and straps are adjusted, you can move on to the next step of preparing your instep bike trailer for a safe and enjoyable ride.
Double-Check All Connections and Safety Features
Make sure you securely fasten all connections and safety features before riding to ensure a safe and enjoyable experience. When attaching an InStep bike trailer to your bike, it is crucial to double check all connections and ensure that all safety features are in place. This will not only provide a secure attachment but also give you peace of mind while riding with your child.
To help you visualize the process, here is a table outlining the important connections and safety features to check:
| Connection/Safety Feature | Description | Action Required |
|---|---|---|
| Hitch | Attaches the trailer to the bike frame | Ensure it is securely fastened and locked |
| Safety Strap | Attaches the trailer to the bike frame as a backup | Double-check that it is properly secured |
| Seat Belt | Secures your child in the trailer | Verify that it is correctly fastened |
| Wheel Lock | Prevents the trailer from rolling when parked | Engage the lock before riding |
Practice Riding with the Trailer Attached
Now that you’ve securely attached the trailer, it’s time to practice riding with it. Riding with a trailer attached to your bike requires some adjustments to your riding techniques and additional safety precautions. Here are a few tips to help you get started.
Firstly, it’s important to remember that the added weight of the trailer will affect your balance and handling. Take some time to get used to the feel of the bike with the trailer attached before heading out into traffic or challenging terrain. Start by riding in a safe and open area, such as an empty parking lot or a quiet street, to get a feel for how the trailer affects your bike’s stability.
When riding with the trailer, make sure to give yourself plenty of time and space to stop. The added weight can increase your stopping distance, so be sure to apply your brakes earlier and more gradually than you normally would. Additionally, be mindful of the trailer’s width when maneuvering through tight spaces or around obstacles.
Lastly, always keep safety in mind. Make sure the trailer is securely attached to your bike before each ride, and regularly check the hitch and connections for any signs of wear or damage. Use hand signals to communicate your intentions to other road users, and be extra cautious when turning or changing lanes.
By practicing these riding techniques and following these safety precautions, you’ll become more comfortable and confident riding with your trailer attached.
Now, let’s move on to the importance of following safety guidelines and regulations.
Follow Safety Guidelines and Regulations
When riding with a trailer, remember to always follow safety guidelines and regulations to ensure a safe and enjoyable experience. Bike trailer safety is of utmost importance, especially when it involves carrying precious cargo like your child.
By following the guidelines set by manufacturers and regulatory bodies, you can minimize the risk of accidents and ensure a smooth ride.
Firstly, make sure to properly attach and secure the trailer to your bike. This includes checking the hitch mechanism and ensuring it is properly fastened. Additionally, check that the trailer is properly balanced and not overloaded with weight. Distribute the weight evenly to maintain stability and prevent tipping.
Another important aspect of bike trailer safety is wearing the appropriate gear. Always wear a helmet when riding, as well as any other protective gear such as knee and elbow pads. Your child should also be properly secured in the trailer with a safety harness or seatbelt.
Lastly, be mindful of your surroundings and ride defensively. Keep a safe distance from other vehicles and obey traffic laws. Use hand signals to indicate your intentions and be aware of any potential hazards on the road.
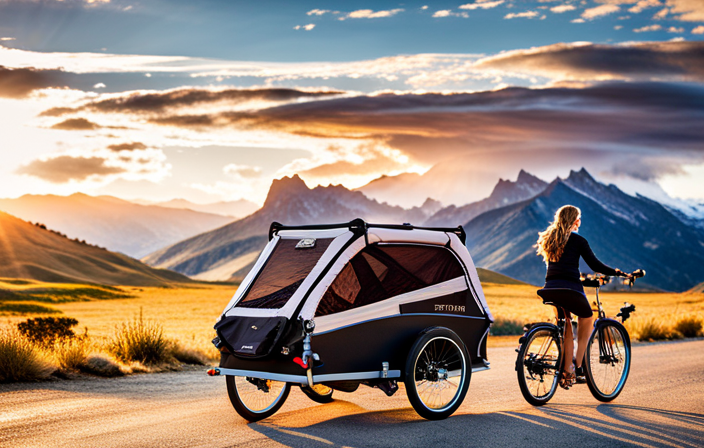
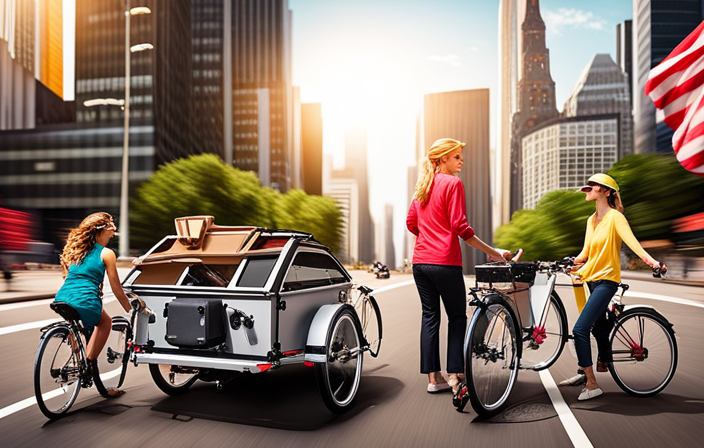
Enjoy Your Cycling Adventures with Your Child in the InStep Bike Trailer
To fully enjoy your cycling adventures with your child, ensure you have securely attached and balanced the trailer, and are wearing the appropriate safety gear. Here are some tips to help you choose the right bike trailer for your needs:
-
Consider the trailer’s weight capacity: Make sure the trailer can safely accommodate your child’s weight. Most trailers have a weight limit, so be sure to check this before purchasing.
-
Look for safety features: A good bike trailer should have a sturdy frame, a harness system to secure your child, and a safety flag for visibility. Additionally, make sure the trailer has good ventilation and a rain cover to protect your child from the elements.
-
Consider storage and portability: If you plan on transporting the trailer frequently, look for one that is easy to fold and store. Some trailers even come with a storage compartment for snacks and other essentials.
Frequently Asked Questions
How do I know if my bike is compatible with an InStep bike trailer?
To determine if your bike is compatible with an Instep bike trailer, there are a few factors to consider.
Firstly, check the trailer weight capacity and compare it to your bike’s weight. It’s crucial to ensure that your bike can handle the additional load.
Additionally, look for a hitch system that matches your bike’s design, as different bikes may have varying attachment points.
Always consult the manufacturer’s guidelines for specific compatibility information.
What tools do I need to attach the trailer hitch to my bike?
To install a bike trailer hitch, you’ll need a few tools. The most common tools required are a wrench and a screwdriver. These tools will allow you to securely attach the hitch to your bike frame.
Additionally, some bike trailer hitches may require specific tools, such as an Allen wrench, depending on the brand and model. Make sure to consult the specific instructions provided with your bike trailer to ensure you have all the necessary tools for a successful installation.
How do I adjust the trailer’s coupler?
To adjust the trailer’s coupler, start by locating the coupler on the trailer’s frame. You may need a wrench or screwdriver to loosen the bolts or screws holding it in place. Once loosened, you can slide the coupler back and forth to adjust its position.
Make sure it is securely tightened once you have found the desired position. If you encounter any issues while adjusting the coupler, such as it not fitting properly, consult the troubleshooting guide provided by the manufacturer.
How do I connect the safety strap?
When connecting the safety strap, make sure to follow these steps for a secure attachment.
First, locate the anchor point on the bike trailer.
Then, fasten one end of the safety strap to the anchor point and the other end to a sturdy part of your bike frame.
Ensure the strap is tight and secure, providing extra protection while riding.
If you encounter any issues with the safety strap connection, try troubleshooting by checking for any obstructions or adjusting the strap length.
What safety guidelines and regulations should I follow when using an InStep bike trailer?
When using an instep bike trailer, it’s important to follow safety guidelines and regulations to ensure a safe ride.
Make sure the trailer is compatible with your bike and use the necessary tools to properly attach the coupler. Adjust the coupler to the correct height and tighten it securely.
Always connect the safety strap to your bike’s frame to prevent the trailer from tipping over.
Remember to always prioritize safety when using a bike trailer.
Conclusion
In conclusion, attaching an InStep bike trailer to your bike is a simple and straightforward process that can be easily accomplished with the right tools and a little bit of practice.
By following the steps outlined in this article, you can ensure a safe and enjoyable ride for both you and your child.
So, why wait? Take the plunge and embark on exciting cycling adventures with your little one by your side.
Remember, with an InStep bike trailer, the world is your oyster!