Back in the day, we all used to look for creative ways to tackle energy challenges, and making your own bicycle dynamo was a popular solution.
Have you ever thought about generating electricity as you pedal your way around town? It's a rewarding project that not only promotes sustainability but also offers a sense of accomplishment.
Stay tuned to discover how this DIY guide can help you harness the power of pedaling and create a simple yet effective energy source right in your own home.
Key Takeaways
- Build a sturdy dynamo stand for efficient power generation.
- Securely mount the dynamo to the front wheel for optimal performance.
- Monitor battery voltage closely to prevent overcharging.
- Regularly adjust tension and maintain connections for reliable operation.
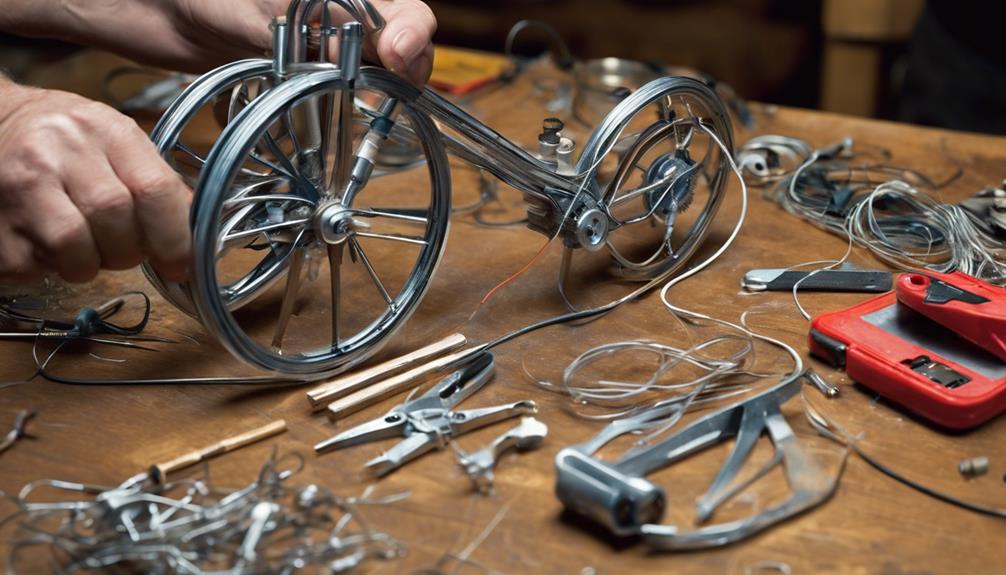
Required Materials and Tools
Utilizing an adverb of frequency to enhance readability, we typically gather all the required materials and tools before commencing the construction of a homemade bicycle dynamo.
The key components for this project include a DC motor, charge controller, lead-acid battery, diode, voltage divider, MOSFET, angle aluminum for structural support, and spade connectors for secure electrical connections.
To ensure optimal performance and safety, proper heat management is crucial, particularly for components like the diode. When selecting materials, consider using sturdy box section steel for durability, along with nuts, bolts, and brake cables for assembly.
It's essential to have tools such as a hacksaw, drill, metal file, spanners, wire strippers, and a soldering iron at hand for construction. These tools will aid in cutting, shaping, and assembling the various parts needed to build the dynamo efficiently.
Remember to pay attention to detail when using spade connectors or soldering to make robust electrical connections that will withstand the rigors of generating power from your bicycle dynamo.
Building the Dynamo Stand

To ensure stability and proper alignment of the dynamo, a sturdy stand must be constructed using materials like metal or wood capable of withstanding the dynamo's weight and movement. The dynamo stand plays a crucial role in providing support to the dynamo setup, preventing vibrations that could affect its performance during power generation. It's essential that the stand is adjustable to accommodate various bike sizes and frame geometries for universal use.
When assembling the dynamo stand, attention should be paid to securing the dynamo firmly to the stand to avoid any movement that could lead to misalignment. The materials chosen for the stand should be durable enough to endure the weight and dynamic forces exerted by the dynamo during operation. Proper alignment of the dynamo on the stand is key to efficient power generation, ensuring that the components work together seamlessly.
Attaching the Dynamo to the Bike

Now, let's move on to attaching the dynamo to the bike by mounting it securely to the front wheel using a suitable bracket. Proper installation is crucial for efficient power generation. Check out the table below for a detailed guide on attaching the dynamo to your bike:
| Step | Description | Tools Needed |
|---|---|---|
| 1. Mount Bracket | Attach the bracket to the front wheel securely | Screwdriver |
| 2. Secure Dynamo | Fix the dynamo onto the bracket | Wrench |
| 3. Align Dynamowheel | Ensure dynamo aligns properly with the wheel | Allen key |
| 4. Route Wiring | Guide wiring along the bike frame | Cable ties |
| 5. Check Tension | Regularly adjust tension for optimal power gen. | Adjustable wrench |
Connecting the Dynamo to the Battery

When connecting the dynamo to the battery, ensure that the output wires are securely linked to the battery terminals to facilitate effective charging. Proper polarity matching between the dynamo and battery connections is crucial to prevent damage. Using appropriate connectors like spade terminals or soldering will ensure a secure electrical connection, preventing power loss during charging.
Here are some key steps to consider:
- Check Polarity: Before connecting, verify that the positive and negative terminals of the dynamo match with the corresponding terminals on the battery to avoid short circuits.
- Use Secure Connectors: Opt for reliable connectors such as spade terminals or soldering to create a stable connection that can handle the charging current without overheating or disconnecting.
- Monitor Voltage: Continuously monitor the battery voltage while charging to prevent overcharging, which can damage the battery. Use a voltage monitor to keep track of the charging process and ensure it stays within safe limits.
Testing and Using Your Dynamo

After successfully connecting the dynamo to the battery, the next step is to test and utilize its functionality by measuring voltage output using a multimeter while pedaling the bike. Ensure the generator is securely attached to the bike frame, and the drive belt is properly aligned for efficient power generation. To test the voltage output, connect the multimeter to the dynamo terminals and start pedaling. Experiment with different loads like light bulbs, cell phones, laptops, and blenders to gauge the dynamo's performance under varying power requirements. Monitor the battery's voltage level to ensure efficient charging and consider adding a voltage divider for accurate readings. Below is a table summarizing the testing and usage process:
| Task | Description | Tips |
|---|---|---|
| Connect Multimeter | Measure voltage output while pedaling | Ensure proper connection |
| Align Drive Belt | Ensure proper alignment for efficiency | Adjust tension if necessary |
| Test with Load | Connect small appliances to test dynamo | Start with low power devices |
| Monitor Battery | Check voltage level for efficient charging | Add voltage divider for accuracy |
| Experiment | Vary loads to assess dynamo performance | Record results for future adjustments |
Frequently Asked Questions
How to Make Dynamo at Home Easy?
We can create a dynamo at home easily by utilizing a small DC motor and basic tools. Attaching it to the bicycle wheel allows electricity generation while riding. This DIY project is cost-effective and educational.
How to Make a Simple Bike Generator?
To make a simple bike generator, attach a DC motor to the back wheel, connect it to a battery through a charge controller, and use an inverter for power conversion. Understanding wiring is crucial for proper function.
What Materials Are Needed to Make a Dynamo?
We need a small DC motor, a wheel with a rim, wires, a rectifier, and basic tools to make a dynamo. The motor generates electricity when the wheel spins, the rectifier converts AC to DC, and wires connect everything.
How Do You Manually Generate Electricity?
We generate electricity by converting mechanical energy, like pedaling a bicycle, into electrical energy. This process involves using a dynamo, a device that produces electricity when in motion. Dynamo hubs on bicycles can generate power for various applications.
Conclusion
In conclusion, building your own bicycle dynamo at home is a rewarding and practical project that can provide sustainable energy solutions for various devices.
Remember, 'where there's a will, there's a way' – with determination and effort, you can create a functional generator that not only helps you save energy but also allows you to explore the world of clean electricity generation.
So, get started on your DIY journey and enjoy the benefits of pedal-powered innovation!