TL;DR

Get sports gear delivered free with Prime
- Fast, free delivery on millions of items
- Prime Video, Amazon Music and more included
- Member-only deals all year
A mountain bike repair kit should include essential tools for fixing flats, broken chains, and minor damage. Customizing your kit based on your bike and terrain boosts your confidence and safety on remote trails.
If you’ve ever been miles from civilization with a flat or a broken chain, you know the value of a solid repair kit. It’s not just about fixing your bike; it’s about keeping your adventure alive. A well-thought-out kit turns potential disaster into a quick fix, letting you focus on the trail instead of panic.
Every rider’s kit is different, but certain essentials make the biggest difference. Knowing what to pack, how to use it, and when to call for help can turn a frustrating day into a memorable story. Ready to build your ultimate mountain bike repair arsenal? Let’s dig into what makes a kit truly effective—and how to make sure you’re prepared for whatever the trail throws your way.
Tailor your repair kit to your specific bike and riding terrain for maximum effectiveness.
Include essentials like a reliable multitool, spare tube, tubeless plugs, and a pump or CO₂ inflator.
Follow a repair hierarchy: try to seal the puncture with sealant and plugs before resorting to internal fixes or tubes.
Stay updated on new tools and innovations that make trail repairs quicker and lighter.
Regularly check and maintain your kit—practice repairs to build confidence before you need them.
What Should Be in Your Mountain Bike Repair Kit? This List Will Save Your Ride
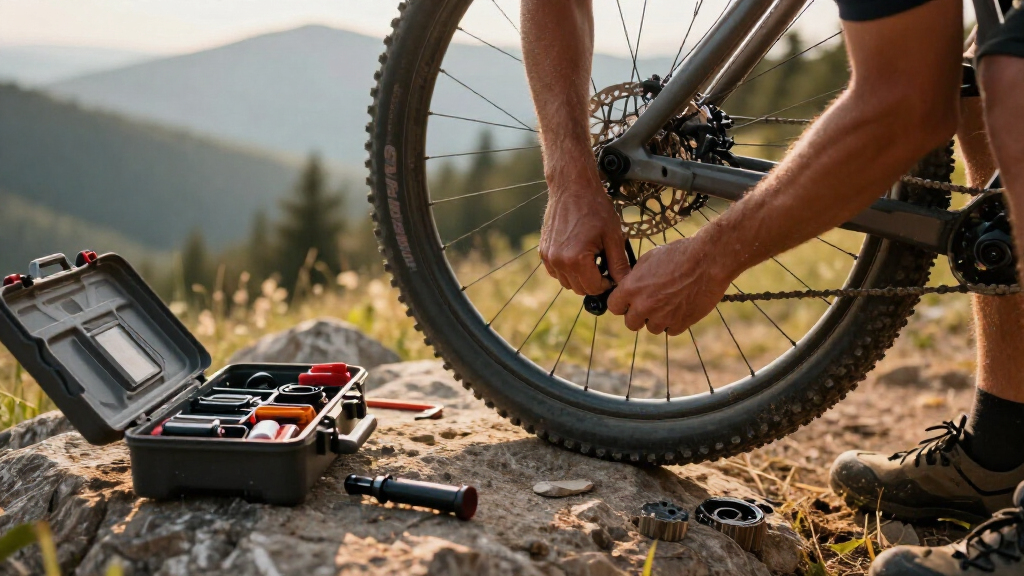
Imagine a flat tire in the middle of a remote trail or a chain that suddenly won’t shift. Your repair kit is your lifeline. It should contain specific tools and parts designed for mountain biking’s rougher terrain. The essentials include a multitool tailored for MTB, spare inner tubes, tire levers, a pump or CO₂ inflator, and a tubeless plug kit.
For example, a standard MTB multitool features hex keys from 2 to 8 mm, a Torx T25 for disc brakes, and a chain tool. The chain tool is crucial for fixing or replacing a broken chain link. A pair of sturdy tire levers helps remove the tire from the rim—crucial when you’re dealing with a stubborn bead or inserting a new tube.
Spare inner tubes are still relevant even on tubeless setups, as some punctures or valve failures can’t be sealed with plugs alone. Confirm your tire size—typically 27.5 or 29 inches—and valve type (Presta or Schrader). A compact pump or CO₂ inflator gets your tire back to pressure quickly. Tubeless plug kits are vital for sealing punctures without removing the tire, especially on technical trails where stopping for a full repair isn’t practical.
Additional handy items include a tire boot for sidewall tears, valve-core tools for sealant adjustments, zip ties, tape, and even emergency cash. These small items often save the day when secondary problems pop up. Think about your ride length and terrain—longer, more technical rides demand a more comprehensive kit.
As an affiliate, we earn on qualifying purchases.
How to Customize Your Mountain Bike Repair Kit for Your Bike and Terrain
Every mountain bike is a little different, and so should your repair kit be. The key is matching your kit to your bike’s specs and the terrain you ride. For instance, if you ride rocky, technical trails, include larger tubeless plugs and a more powerful pump. If you’re on a long, remote ride, carry extra supplies like a second tube or a more robust multitool.
Start by checking your bike’s details: wheel size, tube and valve type, axle hardware, chain speed, and quick-link compatibility. For example, a 29-inch wheel with a 12-speed chain needs a specific quick-link—don’t assume a generic one will fit.
Next, consider your terrain and ride style. Muddy, wet environments require sealant and a tire boot for sidewall damage. Technical trails might necessitate tools for suspension adjustments or disc brake maintenance. The goal: create a kit that matches your bike’s unique needs and the challenges you face.
To help, here’s a quick checklist for customization:
- Confirm wheel and tire size
- Select the right tube and valve type
- Match quick-links to your chain
- Include tools for suspension and disc brakes if needed
- Pick a pump suited for MTB tires
- Add extra patches or plugs if riding rough terrain
Tubeless Repair Hierarchy: Quick Steps to Fix a Puncture on the Trail
When a puncture hits, you want a clear plan. First, rotate the bike so the puncture faces downward—this helps sealant flow and slows the leak. Next, if the tire continues to lose pressure, insert a tubeless plug. Use a dedicated insertion tool for a tight fit. Reinflate and check if the plug holds the air.
If the puncture is larger, or the bead is broken, you’ll need an internal tire boot or a spare tube. Apply the boot inside the tire at the damage site, then insert a tube if necessary. Inflate again and test. Remember, plugs and boots are trail-side fixes—serious damage demands a full tire replacement or professional repair after your ride.
Understanding this hierarchy matters because it helps you prioritize repairs based on severity and feasibility. Sealing small punctures with plugs is quick and effective, but larger tears or sidewall damage require internal fixes or tire replacement. Knowing this tradeoff can save you time, effort, and the risk of a flat worsening mid-ride. For example, choosing the right repair method at each stage ensures you’re not wasting time on ineffective fixes, and you’re making the most of limited resources while maintaining safety.
Latest Innovations in MTB Repair Kits: What’s New and Why It Matters
The world of mountain bike repair kits is evolving fast. Compact tubeless tools now fit inside handlebars, crank spindles, or multitools, making repairs quicker and easier. New plug systems include multiple sizes and smoother insertion mechanisms—saving precious seconds when you’re on the trail.
For instance, some kits now feature TPU (thermoplastic polyurethane) tubes that are lighter and smaller than traditional butyl tubes. They cost more but are easier to carry and less bulky, perfect for remote rides. Multitools are also merging functions—combining chain breakers, spoke wrenches, and tire plugs into single, pocket-sized units.
Miniature pumps designed for MTB tires are now higher volume, reducing your effort when inflating wide tires. Electronic drivetrain components might need special attention too—carrying a spare battery or a charger can be part of a modern kit. On-bike storage options like frame compartments and strap-on pouches make it simple to keep your gear accessible.
All these innovations aim to make repairs faster, lighter, and more reliable—key traits when every second counts on rugged trails. The implications are significant: lighter gear reduces fatigue, faster repairs get you back on the trail sooner, and more reliable tools decrease the chance of failure during an emergency. Staying updated on these innovations means you’re better equipped to handle any situation, turning potential setbacks into minor inconveniences.
Safety and Limits: What Your Repair Kit Can’t Fix and When to Seek Help
A repair kit isn’t magic. It can fix most common issues, but some problems are beyond quick fixes. For example, a bent rotor or a cracked frame needs professional attention. Never try to ride on a seriously damaged wheel or frame—your safety comes first.
Also, avoid touching brake rotors or pads with oil, sealant, or lubricants—they can compromise braking power. Excessive torque on lightweight fasteners or carbon parts can cause damage. Remember, CO₂ inflators can deflate quickly—check pressures again after a few minutes.
Understanding these limitations is crucial because attempting to fix or ride on severely damaged components can lead to accidents or further damage, increasing repair costs or risking injury. Recognizing when a problem exceeds your kit’s capabilities helps you make safe decisions—whether that’s calling for help, walking out, or waiting for professional repair. Always prioritize safety over expedience, especially in remote or hazardous environments.
Maintaining Your Repair Kit: Keep It Ready for Your Next Adventure
A repair kit isn’t a set-it-and-forget-it item. Regular checks make sure it’s ready when needed. Every few months, inspect your tubes—make sure they hold air and aren’t dried out. Replace used patches, sealant, or plugs. Test your pump and CO₂ inflator to confirm they work properly.
It’s also smart to verify that quick-links match your chain’s current setup. Practice using your chain tool and inserting plugs before your ride—nothing beats muscle memory when you’re in a pinch. Keep spare cartridges and supplies topped up, especially if you ride often or in harsh conditions.
Finally, store your kit where you can access it easily—inside a frame bag, saddle pack, or mounted on your bike. A well-maintained kit is like insurance—peace of mind on every trail. Regular maintenance ensures that all tools are functional and ready to perform under pressure, reducing the risk of failure when it matters most. This proactive approach minimizes delays and ensures you’re always prepared for unexpected issues, making your rides safer and more enjoyable.
Frequently Asked Questions
What should every mountain biker carry in their repair kit?
Every rider needs a compatible spare tube, tire levers, a pump or CO₂ inflator, a multitool with hex keys and a chain breaker, and tubeless plugs if running tubeless tires. For longer or remote rides, add extra supplies like a second tube, patches, and a small first-aid kit.
Can I rely on a tubeless repair kit for all punctures?
While tubeless plugs are effective for many punctures, large cuts, sidewall damage, or unseated beads require internal repairs or replacing the tire. Always assess the damage carefully—trail repairs are temporary solutions.
Is a pump better than CO₂ inflators?
A pump offers repeated, reliable inflation and is less affected by leaks. CO₂ inflators are faster and more compact but provide limited gas. Many riders carry both for maximum flexibility and speed.
How do I choose the right tubeless plug size?
Select plugs that match your typical puncture size. Carry several sizes if possible, since larger holes may require multiple plugs or internal repairs. Practice inserting plugs at home to get comfortable with the process.
What’s the most important thing to practice before hitting the trail?
Master how to change a tube, insert a tubeless plug, and operate your chain tool. Practice these skills in your garage so you can perform them confidently under pressure, without wasting time or risking damage.
Conclusion
A mountain bike repair kit is more than just gear—it’s your ticket to self-reliance on the trail. Build it smart, keep it maintained, and practice fixing common problems. When a flat or a chain break happens, you’ll face it with calm and confidence—ready to keep your adventure going.
Invest a little time now, and you’ll save hours of frustration later. Your next ride might be the one where you prove that preparation turns a mishap into just another story to tell.
Evergreen bestsellers Picks
bestsellers
As an affiliate, we earn on qualifying purchases.