Switching to tubeless for trail and enduro rides offers better traction, control, and fewer flats. You can run lower pressures for increased grip and comfort over rough terrain, while sealant instantly seals small punctures to prevent flats. It also reduces weight and maintenance, letting you enjoy longer rides with fewer interruptions. If you want to learn how to set up and maintain tubeless tires properly, keep exploring the details below.
Key Takeaways
- Tubeless setups improve grip, control, and traction on technical trail and enduro terrain.
- Converting to tubeless reduces the risk of flats and allows lower tire pressures for better shock absorption.
- Proper installation with quality rims, tires, and sealant ensures optimal sealing and performance.
- Regular maintenance, including sealant top-offs and pressure checks, keeps the system reliable during rides.
- Overall, tubeless enhances ride quality, safety, and reduces mechanical interruptions on challenging trail and enduro routes.
Switching to tubeless setups has become a game-changer for trail and enduro riders, offering lower pressure, fewer flats, and improved traction on tough terrains. When you decide to go tubeless, the initial step is a tubeless conversion, which involves removing your inner tubes and sealing the rims with tubeless-ready tape. This process might seem intimidating at first, but it’s straightforward once you understand the basics. You’ll need tubeless-ready tires, compatible rims, and tire sealant. The sealant plays a vital role, as it not only helps seal small punctures instantly but also maintains an airtight environment inside the tire, reducing the risk of flats and air loss during rides.
During the tubeless conversion, you’ll clean and prepare your rims, applying tubeless tape to guarantee an airtight seal. Then, you mount the tubeless-ready tires onto your rims, making sure the bead seats properly. Once the tires are mounted, you inject tire sealant through the valve stem or pour it directly into the tire if your setup allows. The sealant quickly coats the inside of the tire, sealing microscopic holes and punctures as they happen. This is particularly beneficial on rugged trails where thorns, sharp rocks, and debris are common. After filling the tires with sealant, you inflate them to the recommended pressure, and you should see the bead seat securely with minimal air loss. It’s a good idea to rotate and shake the tire to distribute the sealant evenly across the interior surface.
In addition, choosing high-quality tubeless-ready tires and rims can significantly improve the longevity and effectiveness of your setup. The benefits of a proper tubeless setup go beyond just avoiding flats. With lower pressures, you’ll experience enhanced grip and control, especially on uneven, technical terrain. Plus, the ability to run softer tires means you can absorb shocks better and maintain better traction on loose or slippery surfaces. Over time, the tire sealant keeps working to plug punctures, saving you from the hassle of roadside repairs. Just remember to check and top off the sealant periodically, as it tends to dry out after several months. Many riders find that a well-executed tubeless conversion with quality sealant transforms their riding experience, making trails and enduro routes more enjoyable and less interrupted by mechanical issues. Ultimately, investing in a tubeless setup is a smart move that enhances performance, safety, and confidence on the toughest rides.

Maxxis Minion DHF Tire, Dual Compound, EXO Protection, E25, Tubeless Ready – 29 x 2.50 WT
MAXXIS MINION DHF: With a tread design that deftly balances rolling speed with braking and cornering traction, it’s…
As an affiliate, we earn on qualifying purchases.
As an affiliate, we earn on qualifying purchases.
Frequently Asked Questions
How Often Should I Recheck My Tubeless Sealant?
You should recheck your tubeless sealant every 2 to 3 months, especially if you ride often or in rough conditions. Sealant longevity varies based on temperature, terrain, and tire use, so regular inspections help maintain ideal sealing. During rechecks, top off or replace the sealant if it’s dried out or lost its effectiveness. Staying consistent with recheck frequency ensures your tires stay sealed and ready for trail adventures.
Can Tubeless Setups Handle Extreme Cold Temperatures?
Yes, tubeless setups can handle extreme cold temperatures, but you should be aware that cold weather can impact sealant longevity. In freezing conditions, sealant may thicken or solidify, reducing its effectiveness. To maintain peak performance, you might need to add fresh sealant more frequently and consider using formulas designed for cold weather. Regularly check your tire pressure and sealant levels before rides in extreme cold to avoid surprises.
What Are the Best Tubeless Tires for Rocky Trails?
On rocky trails, you’ll want tires that excel in grip and puncture resistance. The Maxxis Minion DHF is a top choice, offering 15% better rocky trail grip compared to similar tires. Its aggressive tread pattern grips uneven surfaces, while sidewall reinforcements boost puncture resistance. This combo keeps you confident and rolling smoothly over sharp rocks, giving you the durability and traction needed for rough terrains.
How Do I Fix a Tubeless Tire Puncture on the Trail?
When you get a puncture on the trail, first remove the valve core to release some air. Use a tubeless tire plug or a plug kit for quick puncture repair. After sealing the hole, add some sealant topping to make sure it stays airtight. Reinflate the tire, then check for leaks. Always carry a spare sealant and repair tools, so you’re ready for any trail side punctures.
Is Tubeless Worth It for Beginner Mountain Bikers?
Yes, tubeless is worth it for beginner mountain bikers because it enhances mountain biking safety by reducing flats and allowing lower tire pressures. Plus, it simplifies bike maintenance tips since you’ll spend less time fixing punctures on the trail. While initial setup takes some effort, the benefits in ride quality and fewer interruptions make it a smart choice as you learn and grow in mountain biking.

Stan's NoTubes Tire Sealant (250ml) Long Lasting Flat Prevention, Ultra Fast Sealing, up to 1/4" punctures, Proactive Tire Repair, for Mountain, Road, Gravel, Cyclocross, and Commuter Bikes
The world’s first tubeless sealant and the first choice of riders today
As an affiliate, we earn on qualifying purchases.
As an affiliate, we earn on qualifying purchases.
Conclusion
Switching to tubeless for trail and enduro riding is a game-changer. It offers fewer flats, better traction, and less weight, helping you ride more confidently and push your limits. Once you experience the benefits firsthand, you’ll wonder why you ever rode with tubes. Remember, if you want to stay ahead of the game, you’ve got to stay ahead of the flats. Embrace tubeless and take your ride to the next level—it’s worth its weight in gold.
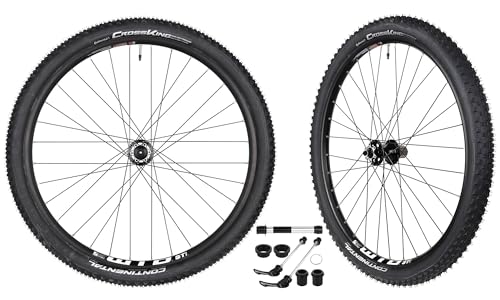
CyclingDeal WTB ST i25 Mountain Bike Bicycle Novatec Hub with Tires Wheelset 11 Speed Tubeless Ready 27.5" – Front: Quick Release, 15x100mm, 20x100mm; Rear:Quick Release, 12x142mm 4 in 1
Rims: WTB ST i25, Tubeless Compatible System, NOT Includes Tubeless Tape and Valves. Wheel Size: 27.5", ETRTO 25-584….
As an affiliate, we earn on qualifying purchases.
As an affiliate, we earn on qualifying purchases.

Muc-Off Ultimate Tubeless Setup Kit, DH/Trail/Enduro – Tubeless Conversion Kit for Bikes – Includes Tubeless Tire Sealant and Tubeless Valve Stems
GOING TUBELESS?: Muc-Off Ultimate Tubeless Setup Kit is a one-stop shop for everything you need to make the…
As an affiliate, we earn on qualifying purchases.
As an affiliate, we earn on qualifying purchases.