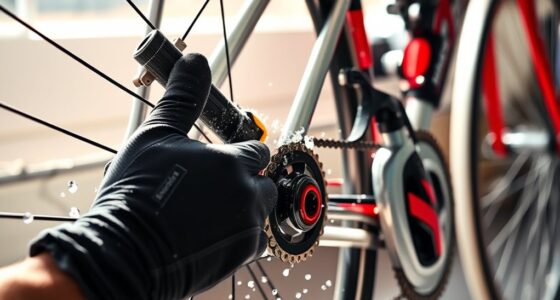

To re-grease your press-fit bottom bracket, start by removing the wheels and crankset carefully, then extract the bottom bracket using the right tools. Clean the shell and components thoroughly, inspecting for damage or wear. Apply fresh, high-quality grease evenly to all contact surfaces before installing everything back securely. Check that everything spins smoothly without noise. For detailed steps and tips to keep your bike performing at its best, continue exploring.
Key Takeaways
- Remove wheels and crankset, then extract the bottom bracket carefully using appropriate tools.
- Clean the shell and components thoroughly with degreaser and brushes to remove old grease and debris.
- Inspect for damage, corrosion, or wear on the shell and bearings before applying new grease.
- Apply high-quality, water-resistant bike grease generously to bearing surfaces and frame shell.
- Reinstall the bottom bracket ensuring proper fit, then test for smooth rotation and overall operation.
Gather Your Tools and Supplies
Before you begin re-greasing your press-fit bottom bracket, acquiring all the necessary tools and supplies is essential. Start with a tools checklist: you’ll need an Allen wrench or hex key set, a clean rag, degreaser, and fresh bike grease for application. Make sure you have a plastic scraper or brush to remove old grease and dirt from the frame. Proper grease application is critical for smooth operation and preventing future issues. Use a high-quality bike-specific grease to coat the contact surfaces evenly. Having the right tools on hand saves time and reduces frustration, making the process more efficient. Double-check your supplies before starting to avoid interruptions, and prepare a clean workspace to keep everything organized and accessible throughout the re-greasing process. Additionally, understanding the proper press-fit bottom bracket compatibility and specifications helps ensure you select the right components for your bike. Being familiar with brand policies and social statements can also influence your choices if supporting ethical brands aligns with your values. Proper knowledge of automated systems in bike maintenance can further streamline your workflow and improve precision. Moreover, reviewing installation procedures ensures you follow correct steps for a secure fit and optimal performance.
Remove the Wheels and Crankset
Before you start working on the bottom bracket, you need to remove the wheels and crankset. Begin by loosening the wheel fasteners and carefully detaching the wheels. Then, properly detach the crankset to give yourself clear access to the area. Additionally, self-watering plant pots can be helpful in maintaining an optimal moisture level for plants during the repair process. To ensure a smoother Mazda Tuning experience, double-check that all components are properly disconnected before proceeding. Remember, understanding the components involved in ice cream production can be analogous to knowing your bike parts, ensuring a more effective repair process. Staying informed about private equity market trends can also help you anticipate industry shifts that may impact your projects.
Loosen Wheel Fasteners
Have you removed the wheels and crankset before, or is this your first time? Loosening the wheel fasteners is straightforward but vital for proper access. Start by shifting your bike into the smallest gear to reduce tension. Use the correct wrench or quick-release lever to loosen the axle nuts or skewers. Keep an eye on wheel alignment as you remove the wheels to avoid bending the rim or damaging the frame. Check the tire pressure before removing the wheels—low pressure makes removal easier and prevents damage. Once loose, carefully lift the wheel away, ensuring you don’t strain the brake calipers or derailleur. Properly removing the wheels sets the stage for inspecting and re-greasing the press-fit bottom bracket effectively. Additionally, understanding best soil conditions can help maintain the longevity of your bike components and prevent issues caused by improper maintenance. Recognizing the importance of nutrient retention in different maintenance steps can also contribute to the overall health of your bike. Being aware of digital literacy programs can also make your maintenance process safer and more efficient. Incorporating proper lubrication techniques ensures smoother operation and reduces wear on moving parts.
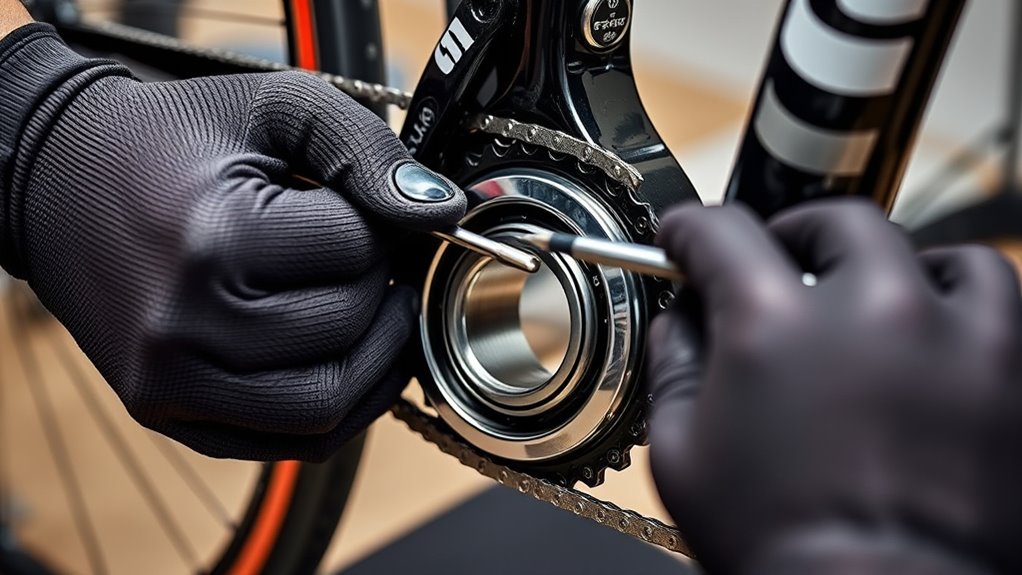
Detach Crankset Properly
With the wheels removed, you can now access the crankset more easily. To detach it properly, follow these steps:
- Identify the crankset compatibility and choose the correct bottom bracket tools to remove the crank arms without damage.
- Use the appropriate crank puller tool to loosen and detach the crank arms, ensuring you turn counterclockwise on the drive side and clockwise on the non-drive side.
- Once the crankset is free, inspect the spindle and bottom bracket for wear or debris, making sure to keep tools organized for reinstallation. Proper removal is essential to prevent damage and facilitate effective re-greasing later.
- Be aware that coastal conditions such as saltwater exposure can accelerate corrosion, so inspecting for rust or damage is especially important if you ride near the beach. Additionally, understanding arcade machines can help you recognize common hardware components involved in maintenance.
Be careful not to force parts, and double-check that you’re using the right bottom bracket tools for your specific crankset. Proper removal prevents damage and ensures easy re-greasing later.
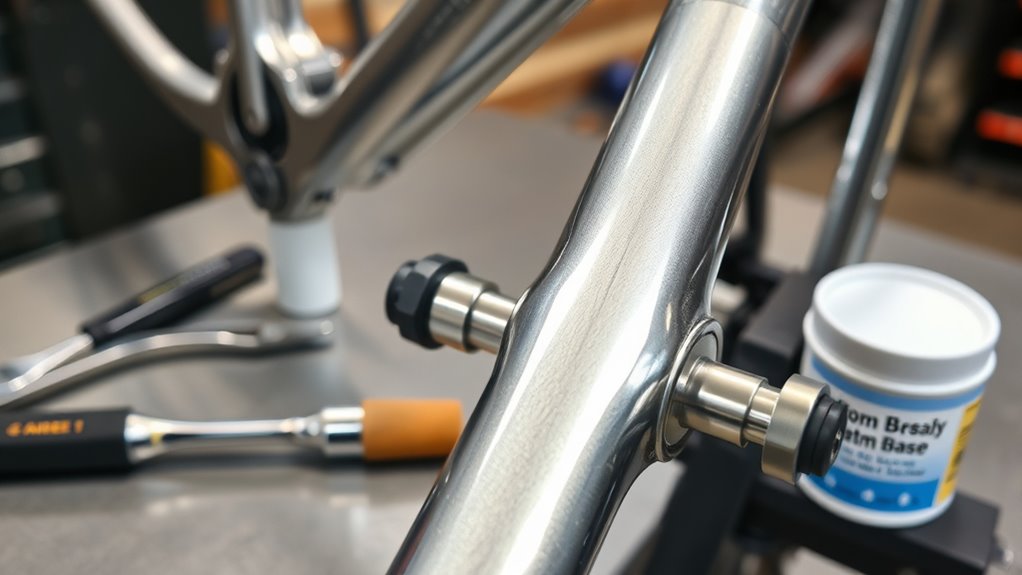
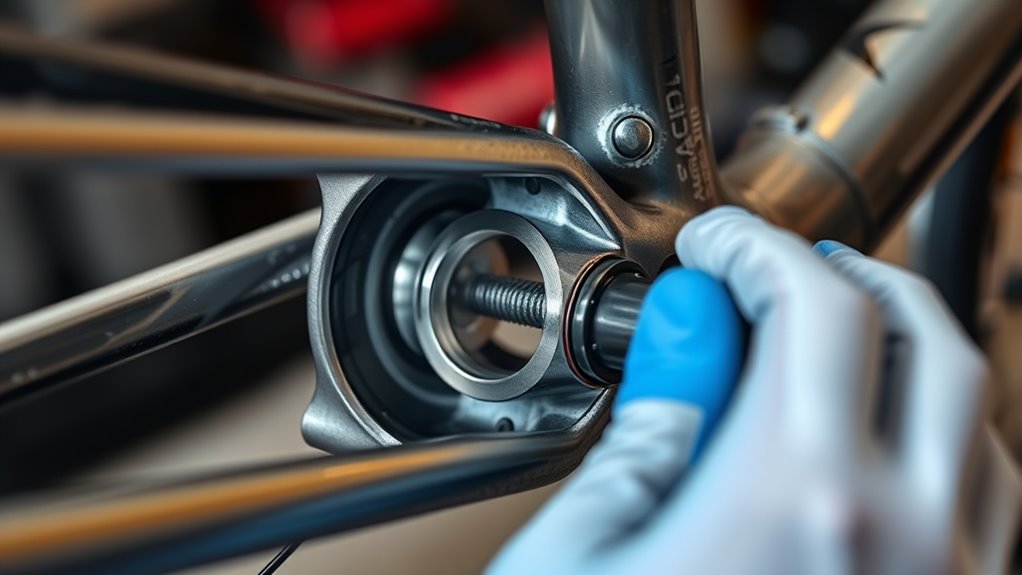
Carefully Extract the Bottom Bracket
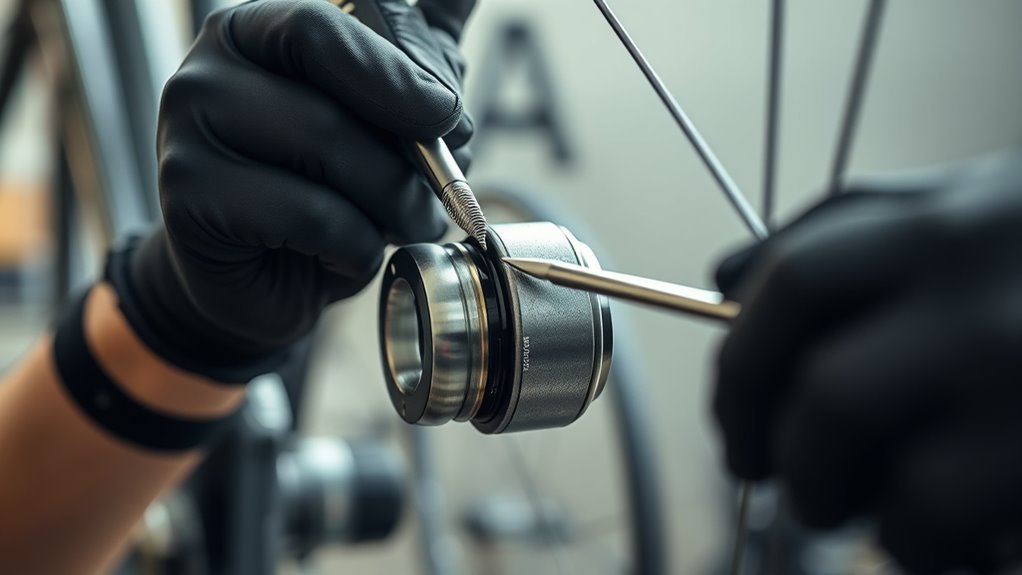
Careful extraction of the bottom bracket is essential to avoid damaging your bike’s frame or components. Start by selecting the proper tools, such as a bottom bracket extractor or specific crank pullers, to guarantee a secure grip. Using the correct tools prevents slipping or stripping threads, which could cause costly repairs. Before proceeding, follow safety precautions—wear gloves and eye protection, and work in a well-ventilated space. Apply steady, even pressure when removing the bottom bracket, avoiding sudden force that could crack the frame. If the bottom bracket resists, don’t force it; instead, double-check tool compatibility and consider applying a penetrating lubricant. Patience and precision are key to extracting the bottom bracket safely without risking damage. Additionally, understanding the types of bottom brackets can help in choosing the appropriate removal technique. Being aware of corrosion and wear can also aid in anticipating difficulties during removal and prevent unnecessary damage. For particularly stubborn parts, exploring specialized extraction techniques can often make the process smoother and safer.
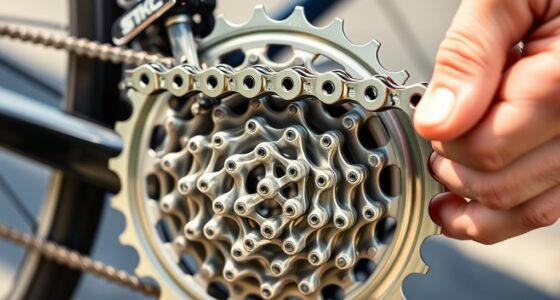
Clean the Bottom Bracket Shell and Components
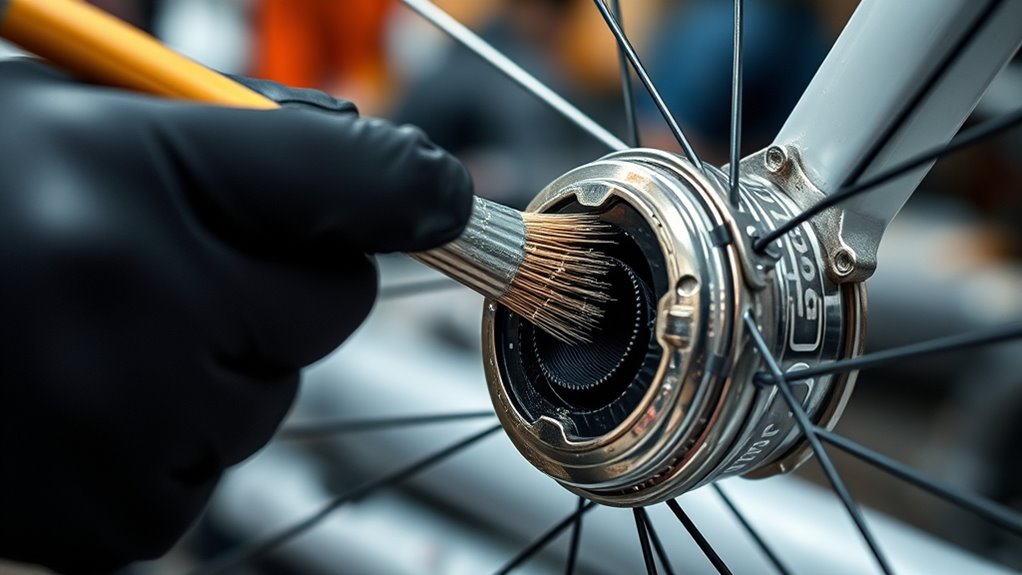
Before re-greasing the bottom bracket, it’s important to thoroughly clean the shell and all components. Start by using cleaning brushes to remove loose dirt and debris from the shell’s interior. Next, apply degreasing solvents to break down old grease and grime; make sure to let them sit for a few minutes. Finally, scrub the surfaces with the brushes to lift stubborn residue. Here’s a quick checklist:
- Use cleaning brushes to clear debris.
- Apply degreasing solvents to dissolve old grease.
- Scrub all surfaces thoroughly for a clean, smooth fit.
Ensuring all parts are free of dirt and grease will help prevent contamination and promote better press-fit installation. Proper cleaning guarantees better installation and longer-lasting performance of your press-fit bottom bracket. Additionally, understanding the importance of proper cleaning can significantly impact the longevity of your components, especially since dirt and old grease can compromise the seal integrity and overall functionality. Regular cleaning with suitable tools and cleaning agents is essential for maintaining optimal performance and preventing premature wear.
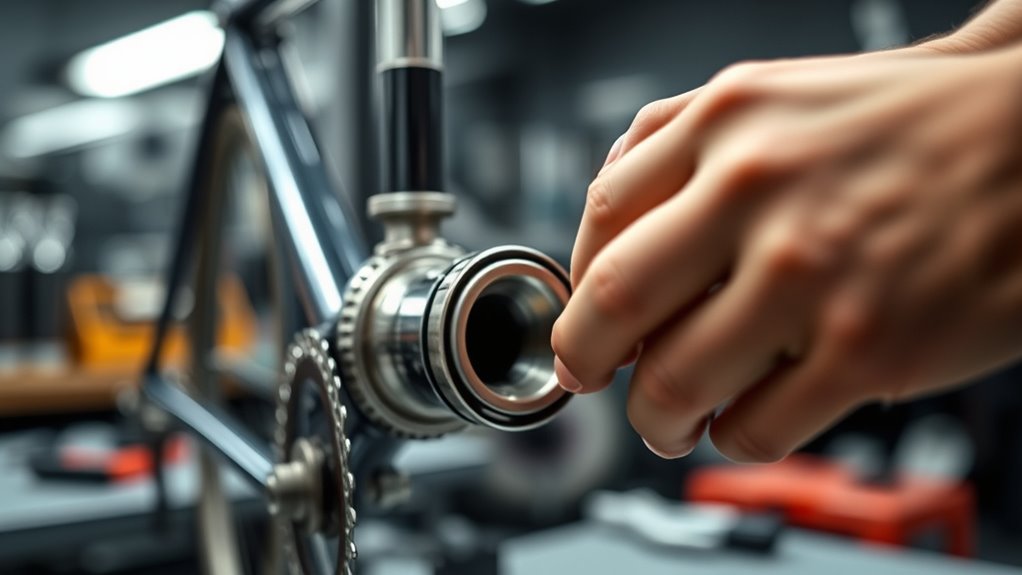
Inspect for Damage or Wear

Start by closely inspecting the bottom bracket for any cracks or visible damage that could compromise its integrity. Check for signs of corrosion or rust, which can weaken components over time. Also, examine the bearing surfaces for wear, ensuring they spin smoothly without wobbling or roughness. Be aware of any signs of emotional or spiritual discord, as these can indicate underlying issues that may need attention before re-greasing.
Visual Inspection for Cracks
Inspecting your bottom bracket for cracks is a crucial step before re-greasing, as damage or wear can compromise its performance and lead to failure. Crack detection helps identify signs of material fatigue that may not be immediately obvious. To do this effectively:
- Examine the entire surface closely, looking for fine hairline fractures or deformations.
- Use good lighting and a magnifying glass if needed to spot subtle cracks.
- Feel for any roughness, sharp edges, or changes in texture that could indicate internal damage.
Pay attention to areas of high stress or where the material may have weakened over time. Detecting cracks early ensures you avoid catastrophic failure and extend your bottom bracket’s lifespan.
Check for Corrosion or Rust
Corrosion and rust can weaken your bottom bracket, so it’s important to check for any signs of these issues during your inspection. Look closely at the metal surfaces for discoloration, flaking, or pitting, which indicate corrosion. Rust can cause parts to seize or become brittle, leading to damage. If you spot rust, it’s vital to remove it promptly—use a rust removal solution or a wire brush to clean affected areas. After removing rust, consider applying corrosion prevention treatments like a light coating of grease or anti-corrosion spray to protect against future damage. Regular inspections help identify early signs of rust, keeping your bottom bracket functioning smoothly and extending its lifespan. Proper rust removal and prevention are essential for a reliable, long-lasting bottom bracket.
Examine Bearing Surface Wear
Examining the bearing surfaces is essential to guarantee your bottom bracket remains smooth and functional. During bearing surface inspection, look for signs of damage or uneven wear. Focus on wear pattern analysis to identify issues early.
- Check for scratches, pitting, or scoring that indicate surface damage.
- Observe if the bearing surfaces show uneven wear, which suggests misalignment or contamination.
- Feel for roughness or play that could affect smooth rotation.
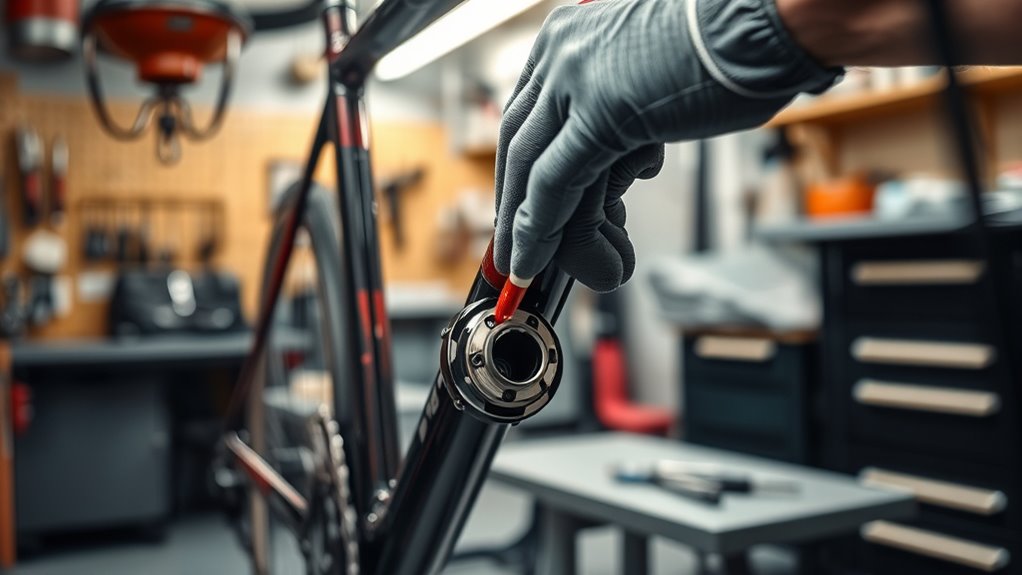
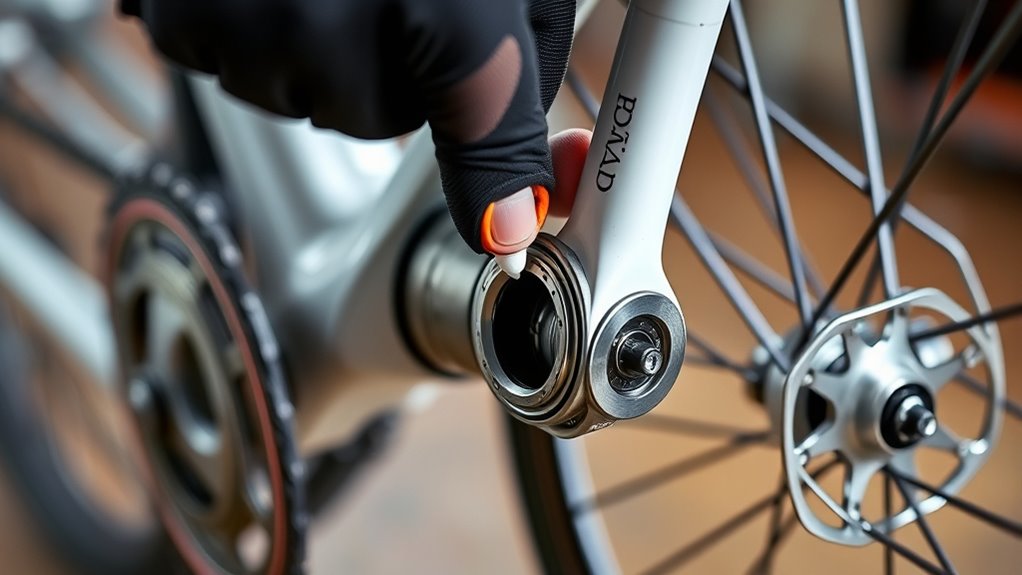
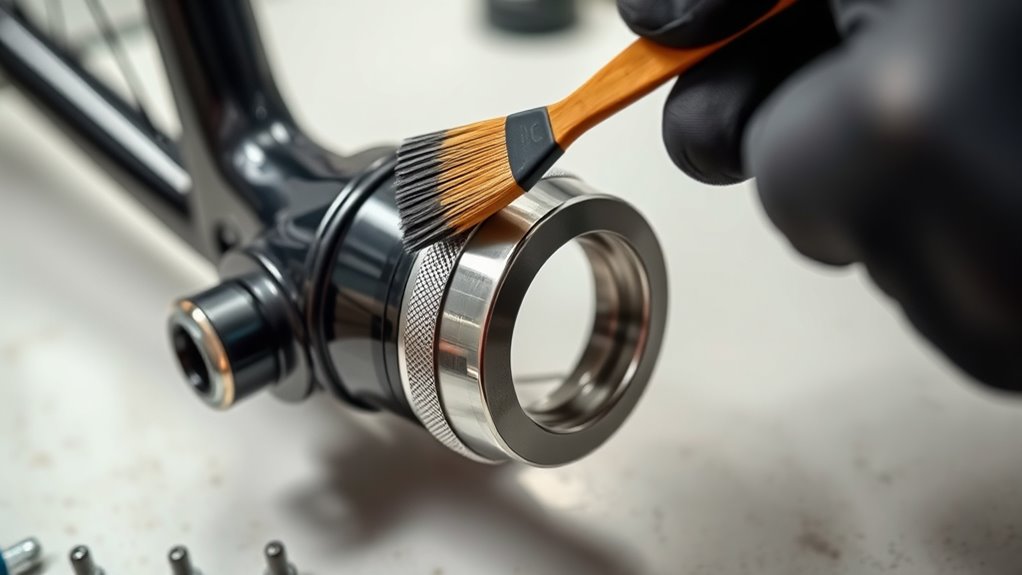
Apply Fresh Grease to the Bottom Bracket
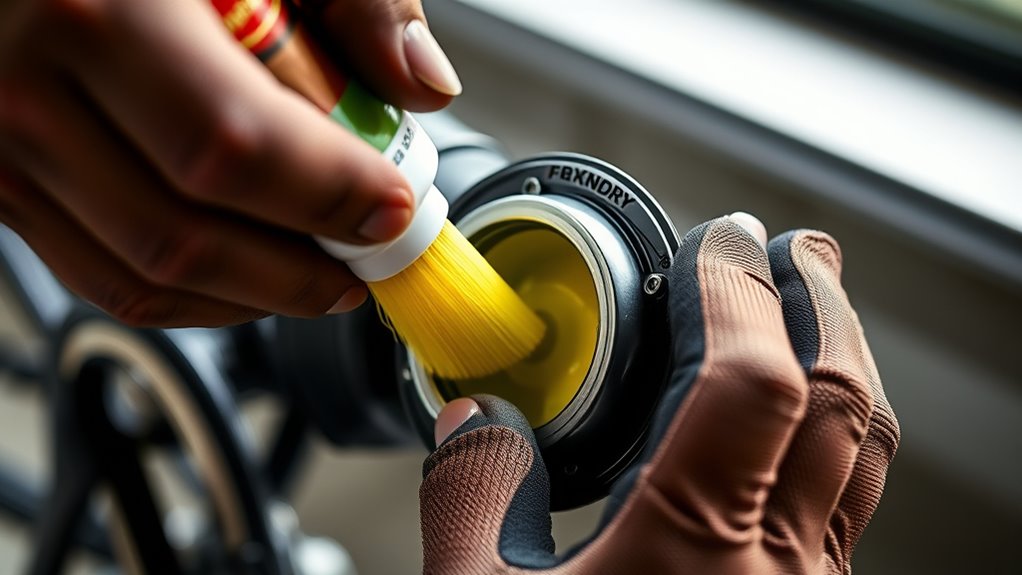
Have you already cleaned the bottom bracket and removed old grease? Now, it’s time to apply fresh grease. Start by choosing the right grease; look for a high-quality, water-resistant, bike-specific lubricant. There are different types of grease, including lithium-based and synthetic options—select one suited for your riding conditions and frame material. Apply a generous layer of grease to the bearing surfaces and the inside of the frame shell. Make sure every contact point is well-coated to prevent corrosion and ensure smooth operation. Avoid over-greasing, which can attract dirt and debris. Properly greasing the bottom bracket helps protect the bearings and makes future maintenance easier. Take your time to spread the grease evenly, preparing for the next step of reinstallation.
Reinstall the Bottom Bracket Into the Frame
Once you’ve applied fresh grease, carefully align the bottom bracket with the bike frame shell. Different bike frame types require specific steps, but the core process remains similar. For press-fit bottom brackets, make certain you match the correct bottom bracket type to your frame. To properly reinstall:
- Insert the bottom bracket evenly into the frame shell, making sure it’s aligned straight.
- Use a press-fit tool or a rubber mallet to gently tap it into place, avoiding excessive force.
- Check that the bottom bracket seats flush and is fully seated without any wobble or gaps.
This process varies slightly depending on your bike frame and bottom bracket type, so double-check compatibility before installation. Proper seating ensures maximum performance and prevents future issues.
Reassemble the Crankset and Reinstall Wheels
Ready to put everything back together? First, reassemble your crankset, guaranteeing the chainrings and arms are aligned correctly. Check component compatibility before installing to avoid issues later. Next, slide the crankset into the bottom bracket, applying light grease if needed. Confirm all parts fit smoothly and tighten bolts to manufacturer specs. Then, reinstall your wheels, making sure the axles seat properly in the dropouts. Use a quick table to verify:
| Step | Key Point | Tip |
|---|---|---|
| Reattach crankset | Ensure proper alignment and torque | Use thread lock if needed |
| Reinstall wheels | Check for free rotation and fit | Tighten quick releases |
| Final check | Confirm everything spins smoothly | Test ride for noise |
This process keeps your bike maintenance precise and safe, emphasizing component compatibility.
Test for Smooth Operation and No Noise
After reassembling your crankset and reinstalling the wheels, it’s time to guarantee everything operates smoothly. First, spin the pedals by hand, listening for any unusual noises—these might indicate misalignment or insufficient lubrication. Second, check for smooth rotation; if you feel resistance or grinding, revisit your lubrication techniques. Third, test ride your bike on a flat surface, paying attention to any creaks or squeaks. Noise prevention strategies include applying grease precisely where components contact and ensuring no dirt or debris interferes. If you notice resistance or noise, re-lubricate the bottom bracket and recheck the fit. Proper lubrication and careful testing will help you confirm your bottom bracket is well-installed, quiet, and efficient.
Perform Regular Maintenance Checks
Regular maintenance checks are essential to keep your bottom bracket performing smoothly and to catch potential issues early. Start by inspecting for any creaking, play, or roughness during pedaling. Use proper lubrication techniques when applying grease, ensuring even coverage without excess. Regularly check the tool calibration on your torque wrench to avoid over-tightening or under-tightening components. Accurate torque application prevents damage and maintains proper fit. Keep an eye on the bearing condition and listen for any unusual noises. Schedule these checks every few months or after rough rides. Maintaining a consistent routine ensures your bottom bracket stays well-lubricated, properly assembled, and free of dirt or corrosion. Proper lubrication techniques combined with calibrated tools help extend the lifespan of your bottom bracket and optimize performance.
Conclusion
Now that you’ve re-greased your press-fit bottom bracket, your bike will ride smoother than a racing car on a crystal-clear track. With just a little effort, you’ve prevented future headaches and saved yourself a fortune. Keep up with regular maintenance, and your bike will thank you with years of flawless performance. Remember, a well-maintained bottom bracket is the secret to riding like you’re gliding on air—so don’t skip these simple steps!