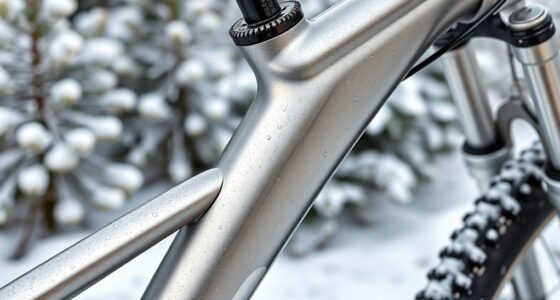

To restore a vintage rusted steel frame, start by working in a well-ventilated space with protective gear. Carefully disassemble the bike, removing components like wheels and that keep track of their order. Use rust removal methods such as wire brushes, chemical rust removers, and sanding, then treat the surface with primer and paint for protection. Reassemble carefully, making adjustments for smooth operation. If you continue exploring, you’ll discover detailed steps to bring your bike back to life.
Key Takeaways
- Disassemble the bike carefully, labeling and organizing parts for easy reassembly.
- Remove rust using chemical rust removers, wire brushing, and sanding for a smooth surface.
- Treat internal and external rust with rust inhibitors or coatings to prevent future corrosion.
- Prime and paint the frame with suitable primers and protective topcoats for durability.
- Reassemble the bike, lubricate components, and ensure proper alignment for safe riding.
Preparing the Workspace and Gathering Necessary Materials
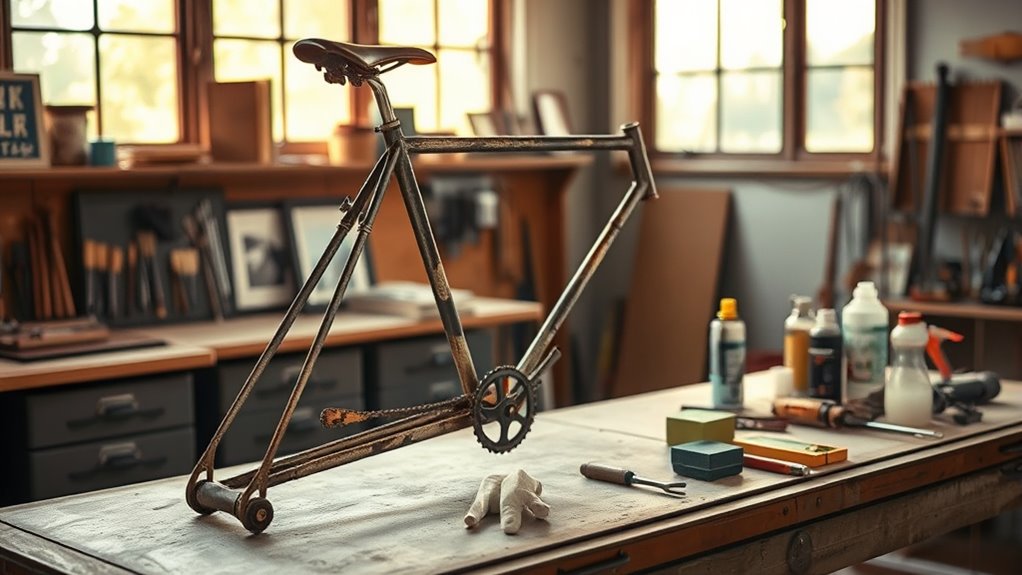
Before starting your rust removal project, you need to prepare a safe and organized workspace. Choose a well-ventilated area, like outdoors or a garage with plenty of space to move around the bike frame comfortably. Gather all essential materials beforehand, including protective gloves, safety goggles, and a respirator mask to guarantee safety. Collect chemical rust removers such as oxalic acid or Evapo-Rust, along with cleaning tools like wire brushes, sandpaper, and degreasers. Keep protective coverings like painter’s tape and plastic sheeting nearby to shield areas from overspray. Also, have your tools—screwdrivers, pliers, and wire brush attachments—ready for mechanical rust removal. Ensuring your workspace is organized and stocked with materials promotes safety and efficiency throughout your project. Incorporating knowledge about rust removal science can help you choose the most effective methods for your specific needs. Additionally, understanding the benefits of glycolic acid can be useful if your project involves skin or surface treatments related to metalwork. Proper corrosion mechanisms understanding can further enhance your rust removal process, ensuring a more durable and aesthetically pleasing finish. Developing a clear understanding of surface preparation techniques will also contribute to better adhesion of any protective coatings applied afterward. Being aware of metal types and their specific reactions to different rust removal methods can help prevent damage to the frame during the process.
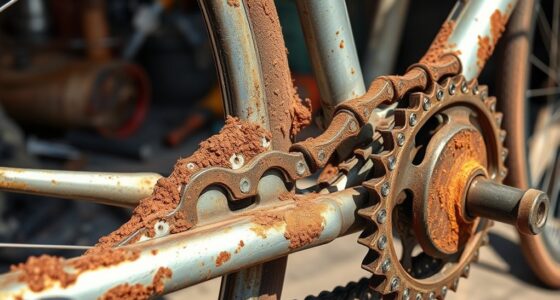
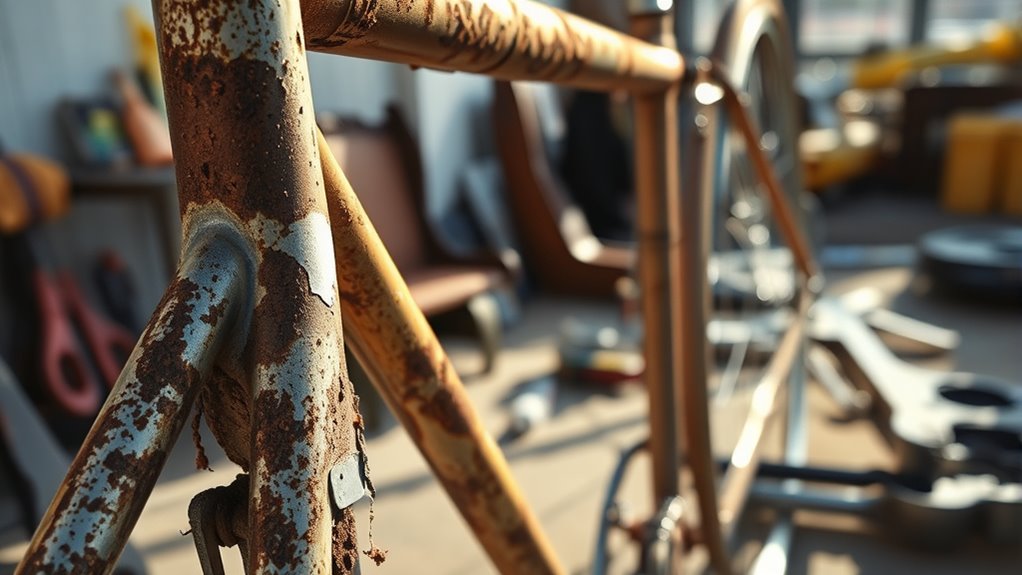
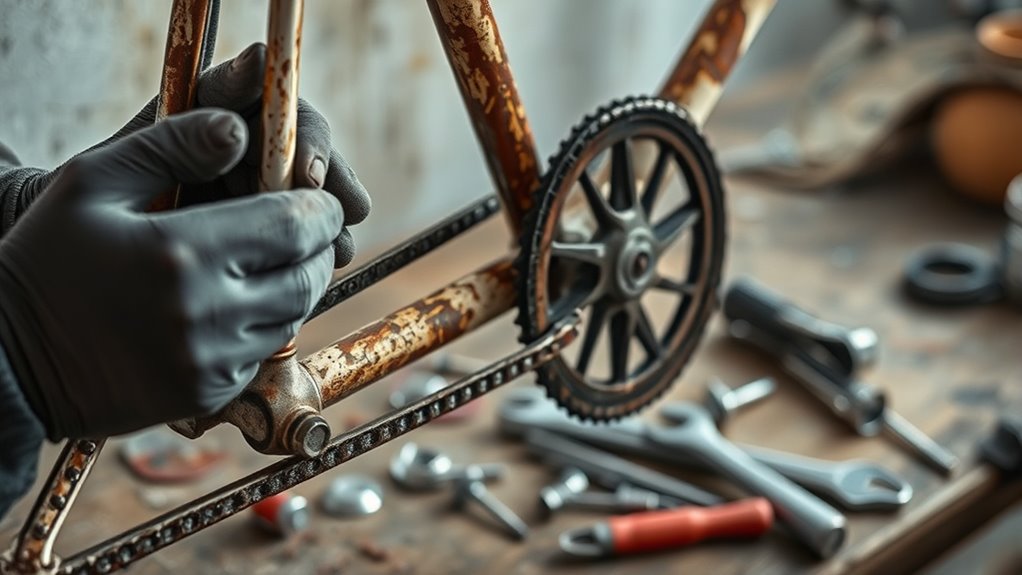
Removing Components and Disassembling the Frame
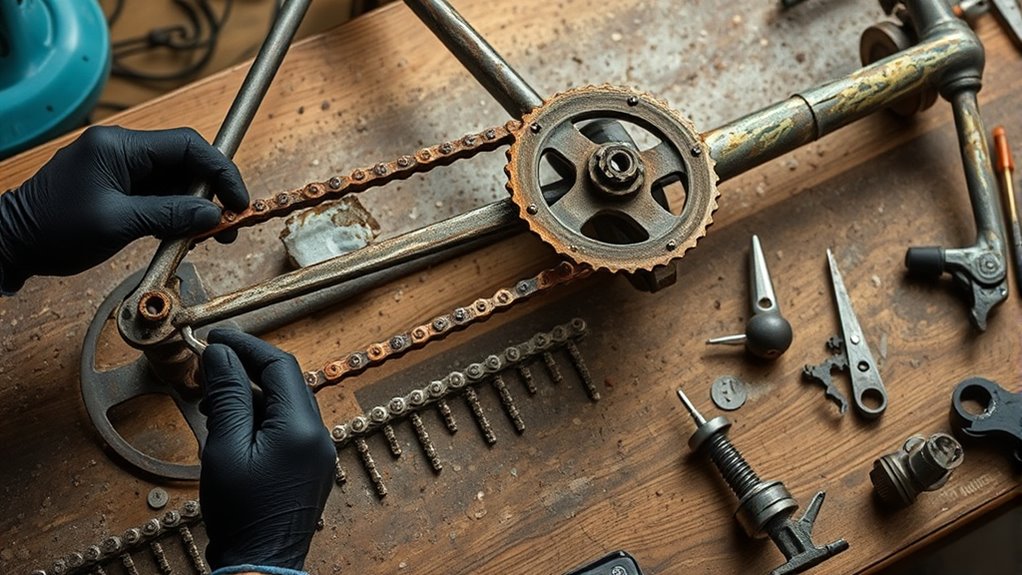
Start by carefully removing each component, like wheels, chain, and handlebars, and keep track of their order. Use WD40 or RP7 to loosen rusted or stuck parts, gently tapping if needed. Organize the disassembly steps so you can reassemble everything smoothly later. Implementing space-saving techniques during disassembly can help prevent clutter and make storage easier afterward. Additionally, consider using portable storage solutions to keep small parts organized and prevent losing any pieces during the process. Incorporating self watering plant pots strategies can also be a smart move if you’re looking to optimize space and plant care while working on your project. Proper organization can also mitigate potential disassembly difficulties caused by rust or corrosion.
Detaching Key Parts
To effectively disassemble your vintage steel frame, begin by carefully removing essential components such as wheels, cranks, derailleurs, brakes, and cables, making sure to note their placement for reassembly. When detaching parts like the bottom bracket, use the appropriate tools and apply penetrating oil if rusted or stuck. Be gentle to avoid damaging threads or finishes. For stubborn components, like rusted pedals or the headset, patience and proper leverage are key. Keep small parts and fasteners organized in labeled containers to prevent loss. Before proceeding, thoroughly clean each component with kerosene or degreaser to remove grease, dirt, and rust, ensuring they’re ready for inspection or reconditioning. Proper detaching sets the foundation for effective rust removal and frame restoration. Additionally, staying aware of automation in business can help streamline your workspace and improve efficiency during your restoration process.
Organizing Disassembly Steps
Begin by removing all accessories, such as brakes, derailleurs, shifters, grips, and pedals, to gain clear access to the frame. This is the first step in organizing your disassembly process. Use the appropriate tools—wrenches, screwdrivers, and a crank puller—to carefully detach components from the frame. Disassemble the wheels by removing tires, tubes, and quick-release or axle nuts, then set these aside for cleaning or replacement. Next, detach the bottom bracket, crank arms, and chainrings using cone wrenches and other specialized tools. Finally, remove the headset components, including the bearings and spacers, after loosening the crown race. Keep detailed records or take photos of each part and its placement to ensure smooth reassembly after cleaning and restoration. Additionally, understanding the riding environment can help determine the appropriate cleaning and preservation methods for your vintage frame. Being aware of metal corrosion risks, especially with rusted steel frames, will guide your cleaning process to prevent further deterioration. Regular inspection of the exfoliating benefits of glycolic acid can also assist in choosing suitable cleaning techniques to maintain the frame’s condition. Incorporating proper disassembly techniques and safety precautions ensures that each component is handled safely and efficiently, reducing the risk of damage during the restoration process.
Cleaning and Stripping Old Paint and Rust
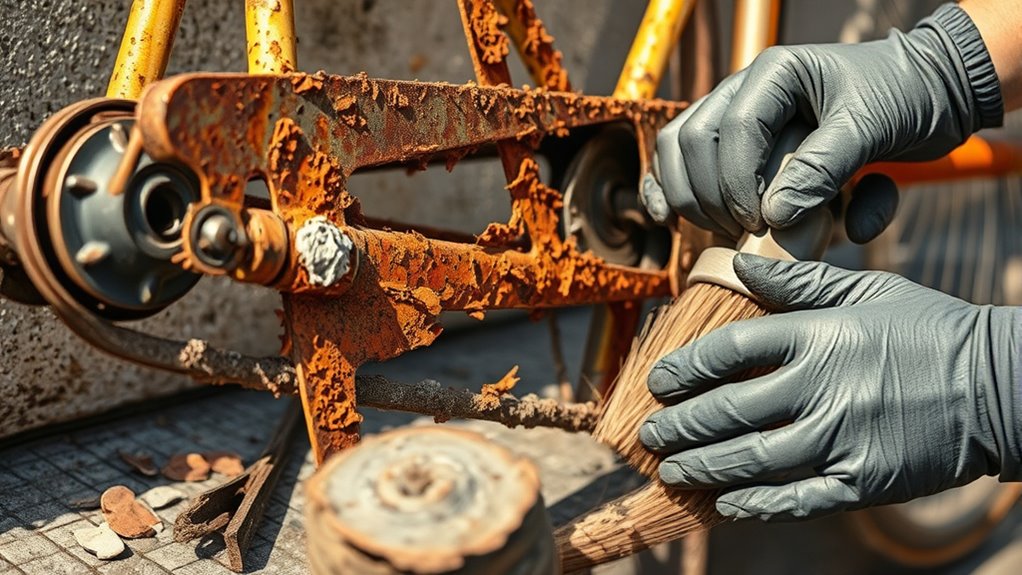
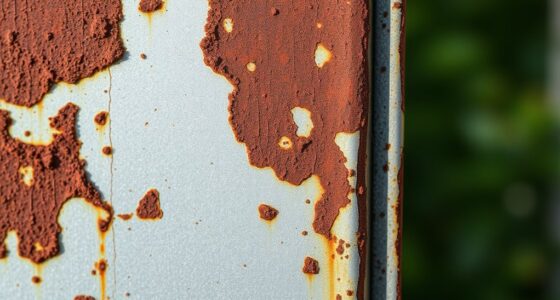
Removing old paint and rust from a vintage steel frame requires a combination of chemical and mechanical methods to guarantee a smooth, clean surface. You’ll want to use a paint stripper or chemical paint remover to soften and lift the old paint layers, applying it evenly and letting it work before scraping or washing it away. Mechanical methods like wire brushes, cup brushes, or sandpaper (80 to 600 grit) are effective for removing surface rust and paint but require careful handling to avoid damaging the metal. For heavily rusted areas, chemical rust removers such as oxalic or phosphoric acid can dissolve rust thoroughly. Remember to mask nearby areas to prevent chemical contact and work in well-ventilated spaces. After stripping, clean the frame with solvents like isopropyl alcohol to ensure a smooth, ready surface. Incorporating 16PF insights can also help identify the best approach based on the frame’s specific condition and your experience level. Additionally, choosing the proper cleaning methods will ensure the longevity of your restoration work.
Treating Rust Internally and Externally

Treating rust on a vintage steel frame involves both external and internal approaches to guarantee thorough protection. For external rust, use sandpaper, wire brushes, or abrasive blasting to remove rust and prepare the surface. Once clean, apply a protective paint or coating to prevent future corrosion. Internally, rust treatment starts by filling the tubes with chemical solutions like oxalic or phosphoric acid, which dissolve rust veins and surface corrosion inside the frame. After treatment, neutralize the acidity with baking soda to prevent re-oxidation. Applying internal coatings such as boiled linseed oil, wax oils, or rust inhibitors like Frame Saver creates a barrier against future rust formation. Proper surface preparation and sealing both inside and outside are essential for long-term preservation and durability. Additionally, using vetted products like 1st Home Theatre Projector can ensure high-quality protection against rust and corrosion. Ensuring proper surface preparation is crucial for maximizing the effectiveness of these treatments and achieving lasting results.
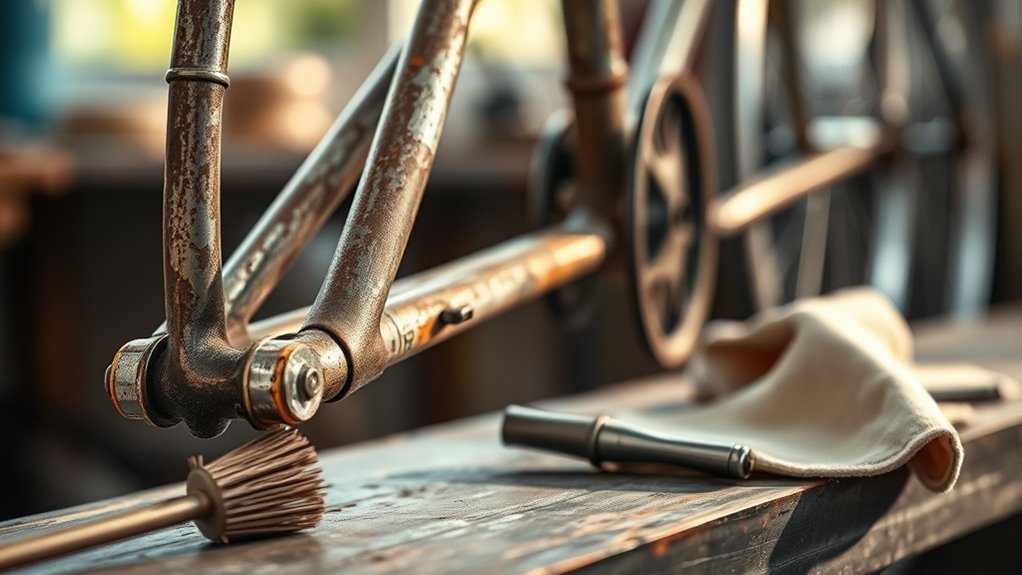
Sanding and Smoothing the Surface
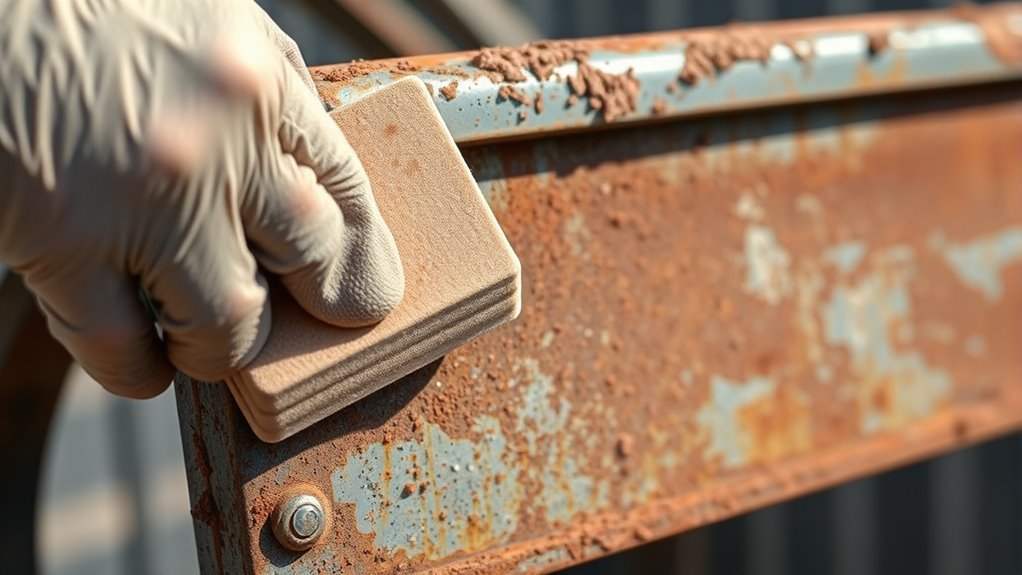
After tackling the rust removal, the next step is to sand and smooth the surface to guarantee a clean, even finish. Use progressively finer grit sandpaper—start with 80-120 grit for removing rust and rough spots, then switch to 600-1200 grit for a polished, smooth finish. Wet sanding with water or a damp cloth helps reduce dust and ensures an even surface, especially in detailed or curved areas. Lightly sand the entire frame to eliminate paint or primer imperfections, which improves adhesion of new coatings. Pay close attention to edges and weld seams, smoothing out any rough or jagged areas that could cause issues later. After sanding, thoroughly clean the frame with a solvent like rubbing alcohol to remove dust, grease, and debris.
Applying Primer and Paint or Powder Coating
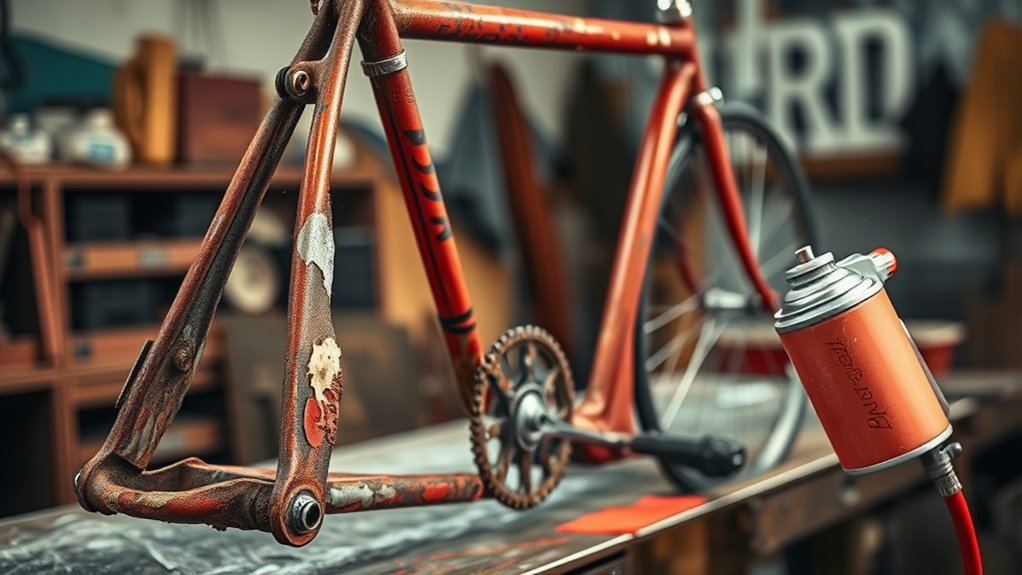
Applying primer and paint or powder coating is essential to safeguard your restored steel frame and guarantee a long-lasting finish. After rust removal, ensure the surface is clean and lightly sanded to improve adhesion. Use a suitable primer, like leadless red oxide or epoxy, and apply multiple thin coats to boost corrosion resistance and durability. When spray painting, use short, even strokes at a consistent distance to prevent runs and achieve a smooth, uniform surface. Allow each coat to dry for 1-2 hours before applying the next, ensuring proper curing and adhesion. For added protection, consider applying a clear topcoat or sealant after painting. This final step helps shield your vintage frame from moisture and environmental damage, extending its lifespan considerably.
Reassembling the Frame and Components
Reassembling your bike frame and components requires careful attention to detail to guarantee everything functions smoothly and safely. Start by reassembling in reverse order, focusing on the steel frame’s integrity. Ensure proper component alignment by referencing diagrams and manuals. Key steps include installing the headset, bottom bracket, and crankset, with all parts clean and lubricated. Pay close attention to torque specifications for bearings, cones, and quick-release levers. When fitting cables and housing, cut new cables to match the old ones and run them smoothly through the frame, securing all stops and guides. Double-check wheel seating, brake adjustment, and gear operation before tightening everything fully. Finally, take a test ride to verify proper function, making minor adjustments as needed for ideal performance.
Fine-Tuning and Adjustments

Once you’ve reassembled your bike, it’s time to fine-tune the gear and brake systems for smooth operation. Adjust cable tension and tighten bolts to the proper torque to guarantee everything functions correctly. Before riding, perform a safety check and test ride to confirm that shifting, braking, and wheel alignment are all ideal.
Final Gear Adjustments
To achieve smooth and reliable shifting, you need to carefully fine-tune your derailleur’s limit screws and indexing. Begin by adjusting the cable tension with a barrel adjuster to eliminate chain slack or tightness. Proper derailleur adjustment ensures each gear shifts smoothly without hesitation. Check the alignment of the derailleur hanger using a gauge or visual inspection—misalignment causes poor shifting. Fine-tune the derailleur’s limit screws to prevent chain overshoot or drop-off, ensuring the derailleur stays within its range. Test your bike on a controlled ride, paying attention to chain noise, slipping, or hesitation, and make incremental adjustments. Regularly lubricate derailleur pivots and cable housing for consistent performance. This careful tuning guarantees smooth gear transitions and prolongs your bike’s lifespan.
Brake and Shifter Tuning
Proper brake and shifter tuning is essential for responsive and reliable performance on your bike. Start by adjusting cable tension to ensure smooth shifting and effective braking. Use the barrel adjusters to fine-tune shifting, eliminating hesitation, overshoot, and misalignment. For brake calipers, center them over the rim or rotor by adjusting the mounting bolts and spring tension, then set pad clearance so they stop effectively without rubbing. Limit screws help prevent derailleur over-shoot by stopping movement at the correct sprocket. Regularly inspect and lubricate cables and housing to reduce friction. Here’s a quick visual:
| Component | Adjustment Focus |
|---|---|
| Shifter cables | Cable tension and barrel adjusters |
| Limit screws | Prevent derailleur over-shoot |
| Brake calipers | Centering and pad clearance |
| Brake pads | Effective stopping without rubbing |
| Cables & housing | Lubrication for smooth operation |
Safety and Test Ride
Before taking your bike out for a test ride, double-check that all bolts, nuts, and quick releases are securely tightened and safety-checked. This guarantees your frame integrity remains solid and prevents accidents. Once confirmed, fine-tune gear shifting and brake adjustments, checking for smooth operation and proper alignment. Conduct a short, cautious test ride in a safe area to verify everything functions correctly. Pay attention to unusual noises, wobbling, or vibrations that might indicate issues. After riding, inspect your bike closely:
- Listen for strange sounds
- Feel for wobbling or vibrations
- Check for signs of misalignment
- Ensure brakes respond properly
- Confirm the frame feels secure
These steps guarantee your vintage restoration is safe and ready for regular rides.
Adding Personal Touches and Final Inspection
After completing the restoration, take a moment to give the frame a thorough visual inspection. Look inside the paint where it might have chipped or worn, and check for any remaining rust spots that could compromise the frame’s integrity. This final inspection helps guarantee every detail is addressed before moving forward. To add a personal touch, apply decorative decals, paint accents, or new handlebar tape that reflect your style. Once you’re satisfied, protect your work with clear sealants or waxes over painted and decal areas to prevent future damage. Make sure all components are properly lubricated and adjusted. Doing this ensures your vintage bike not only looks unique but performs safely and reliably during your next ride.
Frequently Asked Questions
How Do You Remove Rust From a Steel Frame?
To remove rust from a steel frame, you can start by mechanically scrubbing it with wire brushes, cup brushes, or fine grit sandpaper to eliminate surface rust. For stubborn or internal rust, apply chemical treatments like oxalic acid or commercial rust removers, ensuring you thoroughly rinse and neutralize the acids afterward. Finish by drying the frame completely and applying a protective coating to prevent future rust.
How to Restore a Rusted Bike Frame?
To restore a rusted bike frame, first inspect the rust to see if it’s surface-level or deep. Remove external rust with wire brushing or sanding, and treat internal rust with chemical solutions like oxalic acid. Rinse and dry thoroughly, then apply internal protective coatings. Finally, prime and paint or powder coat the frame for a durable, rust-free finish. Regular maintenance will keep it looking great.
How to Remove Rust From Bike Frame Without Damaging Paint?
To remove rust from your bike frame without damaging the paint, start with fine-grit sandpaper or a soft abrasive pad to gently scrub rusted areas. Apply rust-neutralizing products carefully with a brush or cloth, keeping them away from painted surfaces. Mask off the paint and decals before applying any removers. Afterward, rinse thoroughly, dry immediately, and buff gently with a soft cloth to preserve the paint’s finish.
What Is the Best Paint for a Steel Bike Frame?
Did you know epoxy-based paints can last up to 10 years on steel surfaces? For your bike frame, the best choice is a two-component epoxy paint with a hardener, offering exceptional durability and corrosion resistance. Use a rust-inhibiting primer first to guarantee better adhesion and protection. Spray paints designed for metal, like Rust-Oleum, are also good options, providing an easy, strong finish that keeps your vintage bike looking sharp.
Conclusion
By restoring your vintage steel frame, you’re giving new life to a piece of history. Did you know that proper rust removal and maintenance can extend a steel bike frame’s lifespan by up to 20 years? Take your time with each step, and don’t rush the process. With patience and care, you’ll end up with a beautiful, durable frame that’s both functional and full of character, ready for many more rides ahead.