
To set up your trainer for silent operation, start by securely mounting your bike, ensuring the rear wheel is properly aligned and the trainer is stable. Place it on a vibration-absorbing surface like thick carpet or rubber mats, and add damping pads underneath. Use a quiet, high-quality trainer with proper tire pressure, and perform regular calibration. Keep everything tightened and maintained. If you want to learn more about maximizing your trainer’s quietness, keep exploring these tips.
Key Takeaways
- Place the trainer on a vibration-absorbing surface like rubber mats or thick carpets to dampen noise and vibrations.
- Use vibration isolation pads such as Sorbothane between the trainer and floor for extra noise reduction.
- Select a quiet trainer type, like a fluid or magnetic model, and ensure proper mounting to minimize contact noise.
- Keep the environment stable and install the latest software updates to maintain calibration accuracy and smooth operation.
- Regularly tighten all trainer components and clean parts to prevent wobbling, vibrations, and noise buildup over time.
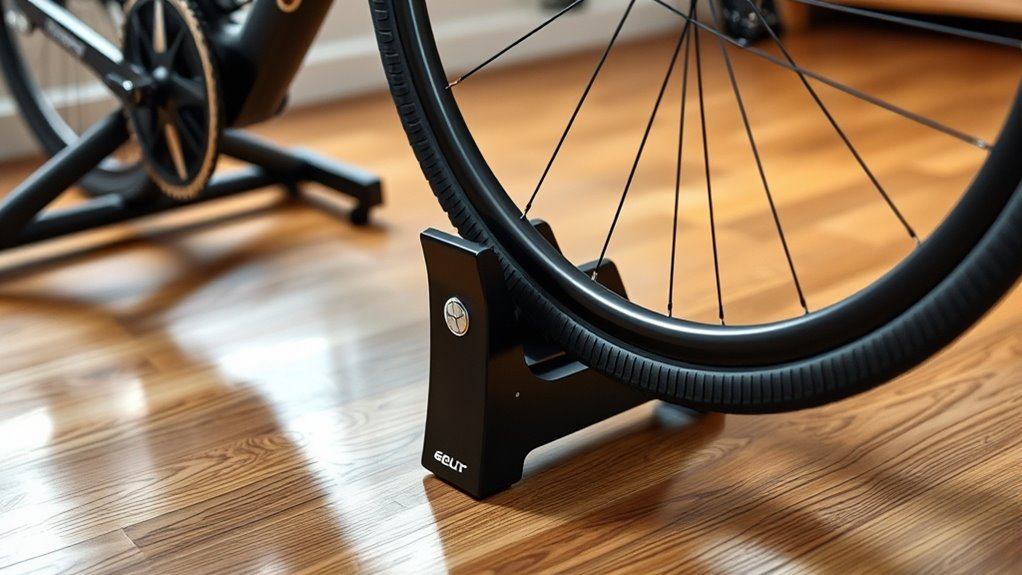
Proper Bike Mounting Techniques
To achieve silent operation, you need to start with proper bike mounting techniques. Begin by ensuring the rear wheel is securely positioned on the trainer’s axle or quick-release lever. Tighten the quick-release or thru-axle according to manufacturer instructions, ensuring the bike is firmly mounted and stable. Check the alignment of the rear wheel—center it so it’s evenly positioned in the trainer’s contact points. Use the correct adapters and spacers, like the 1.8mm spacer for 9-10 speed cassettes, to guarantee proper cassette alignment with the freehub body. Double-check that the rear wheel is snug and that the axle is secure. Proper mounting prevents wobbling and vibrations, which minimizes noise and ensures a smooth, quiet ride. Additionally, proper wheel alignment helps maintain stability and reduces unwanted noise during your workout. Ensuring the tire pressure is correctly inflated also plays a vital role in reducing vibrations, contributing further to a quieter cycling experience. Properly inflated tires also help maintain consistent contact with the trainer, further decreasing unwanted noise and movement.
Choosing the Right Surface and Placement
Selecting the right surface and placement for your trainer can considerably reduce noise and vibrations during your workout. Place your trainer on a flat, stable surface like interlocking rubber tiles or a thick carpet to dampen vibrations and lower noise transmission. Using a foam or rubber mat underneath the trainer helps absorb shocks and isolates vibrations from the floor. Keep the trainer away from shared walls or floors to prevent vibrations from reaching neighbors or other rooms. Clean contact points with a soft, damp cloth to eliminate dirt and debris that can cause unnecessary vibrations. Avoid hard, reflective surfaces such as concrete or hardwood without insulation, as these amplify noise and vibrations. Proper surface choice and placement are essential for a quieter, more comfortable workout environment. Incorporating soundproofing techniques can further enhance noise reduction and improve overall workout comfort. Additionally, selecting surfaces with absorptive qualities can help minimize vibrations and noise more effectively. Ensuring the surface has vibration-dampening properties can further optimize your workout space for minimal disturbance. Using anti-vibration pads under the trainer can also significantly reduce transmitted vibrations and noise. To maximize comfort and minimize environmental impact, consider choosing eco-friendly materials that also possess vibration absorption capabilities.
Ensuring Secure Leg and Frame Adjustments

| Action | Effect |
|---|---|
| Tighten bolts securely | Prevents wobbling and noise. Proper tightening ensures all components stay in place during use. |
| Check level surface | Ensures even vibrations, which can extend the lifespan of your equipment and provide a smoother workout experience. |
| Engage locking mechanisms | Maintains stability during use, reducing the risk of accidents or equipment shifting. |
| Inspect frame components | Preserves structural integrity and prevents unexpected breakdowns, contributing to overall equipment safety. |
| Avoid over-tightening | Protects against damage, as excessive force can compromise the frame or bolts. |
| Regularly perform maintenance checks | Keeps the trainer in optimal condition and reduces potential noise. Additionally, consulting security zone info can offer insights on reliable equipment maintenance. Proper maintenance also helps in mitigating security vulnerabilities that could compromise equipment integrity. |
Performing Warm-Up and Calibration Correctly
Before calibration, make sure to warm up your trainer for at least 10 minutes to guarantee accurate resistance readings. Follow the JetBlack Cycling App’s on-screen instructions carefully during the Spin Down process, and increase your cadence gradually without pedaling hard. Regularly calibrate your trainer, especially after moving it or changing conditions, to keep silent operation and accuracy at their best. Ensuring proper toilet maintenance and understanding your equipment can help prevent issues that disrupt consistent performance. Incorporating proper equipment setup techniques can further enhance calibration accuracy and trainer longevity. Additionally, being aware of Kia Tuning options can help you optimize your vehicle’s performance, which is essential for maintaining a balanced and effective training environment. Staying informed about security zone info can also ensure your training space remains safe and secure. Being mindful of ear wax odor and other environmental factors can help maintain a pleasant training environment and prevent unexpected disruptions.
Proper Warm-Up Procedures
To guarantee accurate resistance and power readings, it’s essential to properly warm up your trainer before calibration. A proper warm-up ensures the firmware responds accurately, providing stable resistance and reliable power output. Follow these steps:
- Warm up for at least 10 minutes at a moderate pace to activate the internal components and reach a stable environment. Consistent environment helps maintain calibration accuracy and silent operation.
- Increase your speed steadily during calibration, then maintain a steady state to allow the firmware to adjust resistance precisely.
- Perform the spin-down calibration using the official JetBlack Cycling App, following on-screen instructions to prevent firmware damage.
- Incorporate consistent maintenance routines, such as checking for firmware updates and inspecting hardware components, to ensure ongoing silent operation and calibration accuracy. Additionally, avoiding abrupt temperature changes can help preserve the calibration stability of your trainer.
Ensuring the trainer operates in a stable environment, with consistent temperature and minimal vibrations, further enhances calibration accuracy and silent operation.
Accurate Calibration Techniques
Performing accurate calibration starts with a thorough warm-up to stabilize the trainer’s temperature and internal components. Warm up for at least 10 minutes to ensure temperature stability, which is essential for precise calibration. Use the JetBlack Cycling App exclusively for calibration to prevent damage and follow the correct steps. During spin-down calibration, gradually increase your trainer’s speed to the recommended level, then immediately return to your workout. Always perform calibration in a stable, level environment to minimize vibrations that can impact accuracy. Regularly recalibrate your trainer monthly or after moving it to maintain power measurement accuracy within 2.5%. Keep your trainer setup up to date by installing the latest software updates, which can improve calibration consistency and overall performance. Additionally, ensuring proper spinal alignment during setup can help optimize the precision of your calibration results.
Selecting Appropriate Tires and Trainers
Choosing the right trainer and tires can make a big difference in keeping noise levels low. Opt for quiet trainer types like fluid or magnetic models, and consider vibration-absorbing tires designed for indoor use. Ensuring compatibility and proper mounting will also help maintain a silent, smooth ride.
Choosing Quiet Trainer Types
When selecting a trainer, the type you choose can make a significant difference in noise levels during indoor rides. To guarantee quiet operation, consider these options:
- Fluid trainers provide minimal noise and vibrations, making them one of the quietest choices.
- Direct-drive trainers eliminate tire contact noise entirely, offering near-silent performance.
- Using a trainer tire designed for indoor use with low rolling resistance can further reduce noise and tire wear.
Additionally, proper trainer setup—placing your trainer on a thick rubber mat—can absorb vibrations and sound. Choosing the right trainer type and accessories ensures your indoor sessions stay quiet and enjoyable.
Selecting Vibration-Absorbing Tires
Selecting the right tires plays a key role in maintaining a quiet indoor cycling environment. Vibration-absorbing tires made of softer rubber or with vibration-dampening compounds help reduce noise and vibrations, contributing to trainer noise reduction. Trainer-specific tires with reduced tread or designed for indoor use improve vibration damping and limit tire wear. Properly inflated tires free of debris also decrease contact noise, enhancing silent indoor cycling. When choosing trainer tires, consider options engineered for vibration damping to maximize noise reduction. Combining vibration-absorbing tires with a stable trainer surface, like rubber mats, further dampens vibrations. Your trainer tire selection directly impacts overall ride quietness, making it easier to enjoy indoor cycling without disturbing others.
Implementing Vibration Isolation Methods
Implementing effective vibration isolation is essential to keep your trainer operating quietly. To maximize vibration damping and noise reduction, consider these methods:
- Use Sorbothane pads or sheets between the trainer and the floor to absorb shocks and prevent vibration transmission.
- Mount the trainer on MDF or rubber mats to distribute vibrations evenly, reducing their spread and protecting your floor.
- Employ multiple small Sorbothane pieces in a cascade setup rather than one large pad, enhancing shock absorption efficiency.
Additionally, placing the trainer on interlocking rubber tiles or thick carpets further dampens vibrations. Adjust the pressure and load to optimize natural frequency, avoiding excessive stiffness that can amplify vibrations. These methods help protect your floor and maintain a silent, smooth operation.
Managing Airborne and Structural Noise Paths
Managing airborne and structural noise paths is essential to keep your trainer operation as quiet as possible. Installing acoustic insulation materials absorbs sound waves, reducing noise transmission through the air. To minimize vibrations that transmit noise through the floor, use vibration damping mats or Sorbothane pads, which dampen structural vibrations effectively. Combining multiple measures, like acoustic barriers and vibration insulators, enhances noise reduction. Proper placement on soft surfaces such as carpets or rubber tiles also dampens vibrations at the source. Use the table below to understand key methods:
| Noise Type | Solution | Benefits |
|---|---|---|
| Airborne noise | Acoustic insulation | Absorbs sound waves, reduces transmission |
| Structural vibrations | Vibration damping mats | Isolates trainer, minimizes vibrations |
| Noise transmission | Multi-layer isolation setup | Combines barriers for superior noise reduction |
| Source placement | Soft surfaces like mats | Dampens vibrations, improves quietness |
Using Accessories to Reduce Noise
To effectively reduce noise from your trainer, accessories play a crucial role in dampening vibrations and contact sounds. Using the right accessories can make quiet indoor riding much more enjoyable. Here are three key items:
- Rubber mats or dense foam mats—these absorb vibrations and prevent them from traveling through the floor.
- Sorbothane pads or vibration isolation mounts—placed between the trainer and the floor, these minimize structural vibrations and neighbor disturbance.
- High-quality trainer tires—fluid or magnetic tires reduce noise caused by tire contact and vibrations during your workout.
Adding these accessories enhances noise reduction and creates a more peaceful training environment. They’re simple investments that greatly improve vibration damping and help keep your indoor rides quiet and neighbor-friendly.
Maintaining Equipment for Quieter Operation
Regular maintenance is essential for keeping your trainer operating quietly. Consistent trainer maintenance ensures all components function smoothly, reducing noise caused by wear or dust buildup. Clean your trainer parts with a moist, soft cloth to prevent dust from creating unnecessary vibrations. Using high-quality tires or trainer-specific tires minimizes contact noise and vibrations. Place your trainer on a carpet, rug, or interlocking rubber tiles to absorb vibrations and reduce transmitted sound. Incorporate vibration dampening materials like Sorbothane pads or MDF boards to isolate vibrations from the floor. Perform routine checks by tightening bolts and inspecting for worn or loose parts. These upkeep practices help maintain quiet operation, prevent mechanical noise, and extend your trainer’s lifespan, ultimately creating a more peaceful training experience.
Frequently Asked Questions
How Do I Make My Bike Trainer Quieter?
To make your bike trainer quieter, start by choosing a high-quality, specialized trainer tire to reduce noise and vibrations. Place your trainer on a soft surface like a carpet or towels to absorb sound. Use vibration isolation pads or MDF boards underneath, and opt for a quieter model like a fluid or eddy current trainer. Keep your bike well-maintained with proper tire inflation and lubrication to minimize squeaks.
How to Connect Kickr Core to Bluetooth?
To connect your KICKR CORE to Bluetooth, first verify Bluetooth is enabled on your device and no other conflicting devices are paired. Turn on the trainer and wait for the blue LED to flash, indicating pairing mode. Open your training app, search for “My Sensors” or “Controllable Trainer,” and select the KICKR CORE. Once connected, the LED should turn solid blue, confirming a successful Bluetooth connection.
Why Is My Turbo Trainer so Loud?
Your loud turbo trainer is like a roaring engine, disrupting peace. It’s likely due to contact noise from worn tires, improper inflation, or hard surfaces amplifying vibrations. Rapid resistance changes or high resistance settings can also add to the noise. Without proper damping or insulation, vibrations travel through your floor, echoing loudly. To quiet things down, check your tire, use damping mats, and place the trainer on a softer surface.
How to Maintain Wahoo KICKR CORE?
To maintain your Wahoo Kickr Core, regularly check and tighten all bolts and connections to prevent vibrations and noise. Keep it clean by wiping down with a soft, moist cloth, avoiding harsh chemicals. Update the firmware through the Wahoo app to guarantee peak performance. Inspect resistance arms and magnetic components frequently for wear or debris, replacing parts when needed. Using a quality, smooth tire also helps reduce contact noise during rides.
Conclusion
By following these steps, you’ll tame your trainer’s noise like a skilled conductor guiding an orchestra. With proper setup, thoughtful adjustments, and mindful maintenance, your indoor rides become a whisper-quiet symphony. Remember, a little attention to detail transforms your training space into a peaceful haven where focus, not noise, takes center stage. Stick to these tips, and you’ll enjoy silent, smooth rides—your home gym’s best-kept secret.