
To set up tubeless on your road bike, start by confirming your wheel is tubeless-compatible and thoroughly clean the rim. Apply tubeless tape over all spoke holes, then install the tubeless valve securely. Mount the tire using soapy water if needed, add sealant through the valve, and inflate to the recommended pressure. Spin the wheel to check for leaks and proper seating. Keeping up with maintenance helps make certain a smooth, puncture-resistant ride—more tips await as you continue.
Key Takeaways
- Verify wheel and rim compatibility with tubeless tires before starting installation.
- Thoroughly clean the rim and apply tubeless tape to ensure an airtight seal.
- Install the tubeless valve stem securely and mount the tire onto the rim.
- Add tubeless sealant through the valve and inflate to recommended pressure.
- Regularly check sealant levels and tire pressure for optimal performance and maintenance.

Have you ever wondered how to set up your road bike tubeless for a smoother, puncture-resistant ride? Switching to a tubeless setup offers numerous benefits, making your cycling experience more enjoyable and less stressful. One of the biggest advantages of tubeless tires is their ability to dramatically reduce flats caused by thorns, glass, and other debris. Without an inner tube, you’re less likely to experience sudden punctures, which means fewer stops and quicker fixes on the road. Additionally, tubeless tires allow for lower pressures, enhancing grip, comfort, and rolling efficiency. These benefits ultimately translate into better performance and a more confident ride, especially on rougher terrains or long-distance routes.
Getting started with tubeless setup might seem intimidating at first, but with the right approach, it becomes straightforward. First, you’ll want to verify your wheel and rim are compatible with tubeless tires. Most modern road bike wheels are tubeless-ready, but it’s worth double-checking. Once you’ve confirmed compatibility, the next step involves cleaning the rim thoroughly to remove any dirt, oil, or residue that could interfere with sealing. Proper cleaning assures that the tubeless tape and sealant adhere well, reducing the risk of leaks later on.
Verify your wheel and rim are compatible with tubeless tires before starting.
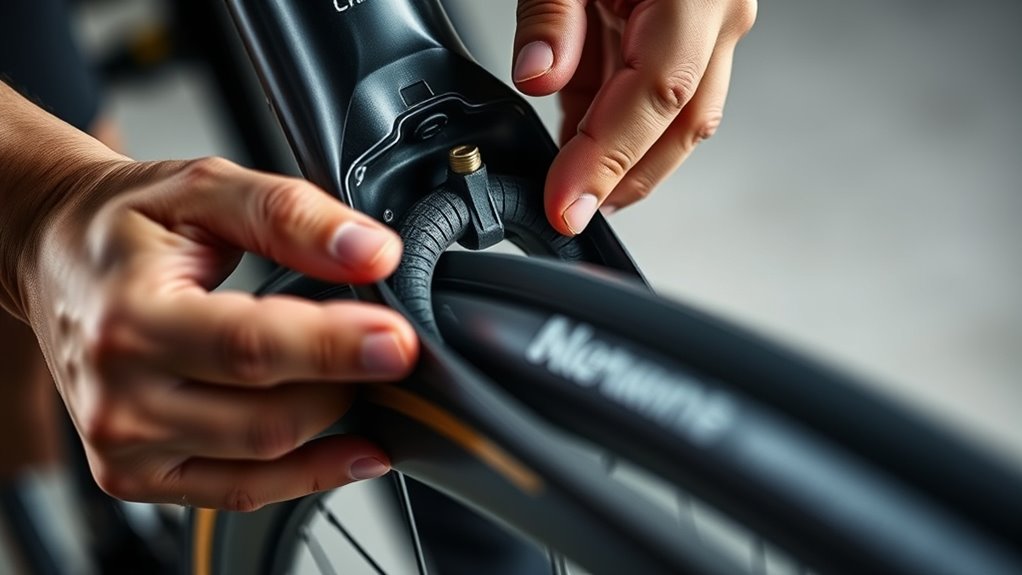
Applying tubeless tape around the rim’s inner surface is essential. This tape creates an airtight seal, preventing air leaks during inflation and riding. Make sure to cover all spoke holes completely, pressing the tape firmly into place. After sealing the rim, install the tubeless valve stem, tightening it securely to prevent any air leaks. Now, you’re ready to mount the tubeless tire onto the rim. It’s often easier to use a little soapy water on the tire bead to help it seat properly during inflation.
Once the tire is mounted, you’ll need to add tubeless sealant through the valve stem. This liquid plays a crucial role in maintaining the benefits of tubeless tires. Sealant automatically seals small punctures and tiny leaks, ensuring your ride remains smooth and flat-free. After adding the sealant, inflate the tire to the recommended pressure, which is typically lower than traditional clincher tires, to optimize comfort and grip. It’s a good idea to spin the wheel for a few minutes and inspect for any leaks or unseated beads, then re-inflate if necessary.
Maintaining tubeless tires involves periodically checking sealant levels and topping off as needed, usually every few months. Regular inspection is part of good road bike maintenance, helping you catch potential issues before they become serious problems. With a proper setup and consistent upkeep, tubeless tires truly transform your riding experience—delivering a smoother, more puncture-resistant journey every time you hit the road.
Frequently Asked Questions
Can I Convert Any Road Bike to Tubeless?
Yes, you can convert most road bikes to tubeless, but you need to check rim tape compatibility first. Make sure your rims can accommodate tubeless setup and replace existing rim tape if necessary to prevent air leaks. Proper tire bead seating is vital for a secure seal. If your rims support tubeless, installing tubeless-ready tires and sealant will give you a smoother ride and fewer flats.
What Are the Signs of a Tubeless Setup Failure?
A tubeless setup failing is like a leaky faucet—you’ll notice it quickly. Signs include difficulty with tire bead seating, which causes the tire to wobble or not sit properly. You may also see sealant leakage around the rim or sidewalls, or sudden loss of air pressure. If you hear hissing or notice frequent air loss, it’s a clear sign to check for leaks and reseat the tire to prevent a blowout.
How Often Should I Check Tubeless Sealant?
You should check your tubeless sealant every 2 to 3 months to guarantee proper sealant longevity. During your maintenance schedule, remove the tire and inspect the sealant level, topping it up if it’s dried out or gone. Regular checks prevent leaks and punctures, keeping your ride smooth. Keep in mind that sealant can dry or become less effective over time, so consistent maintenance helps maintain peak performance.
Is Tubeless Setup Suitable for Racing Bikes?
Yes, tubeless setup is highly suitable for racing bikes because of its tubeless compatibility, which reduces weight and minimizes flats. It enhances racing performance by allowing lower tire pressures for better grip and comfort without risking pinch flats. Many racers prefer tubeless because it offers consistent puncture resistance and improved rolling efficiency. If you prioritize speed and reliability, switching to a tubeless setup can give you a competitive edge.
What Tools Are Essential for Tubeless Installation?
To install tubeless tires, you’ll need essential tools like a tubeless tire sealant, a valve core removal tool, and a floor pump with a pressure gauge. These help you seat the tire bead properly and guarantee a tight fit. You’ll also need a valve for installation, and sometimes, a tire lever to assist with bead seating. Proper tools make the process smoother and help you achieve a secure, leak-free setup.
Conclusion
Setting up tubeless tires might seem intimidating at first, but with patience, you’ll discover it’s like riding on a smooth, uninterrupted road. I once struggled with a flat mid-ride, but switching to tubeless saved my day—no more downtime, just seamless cruising. Remember, the effort you put in now pays off in the long run, turning every ride into a carefree journey. Embrace the process, and enjoy the ride ahead—your perfect setup awaits.