Connect with us

Gravel Bike

What Brakes For Gravel Bike

Published

on

An image showcasing a close-up of a gravel bike's brake system, highlighting the robust disc brakes with heat-dissipating rotors and powerful calipers

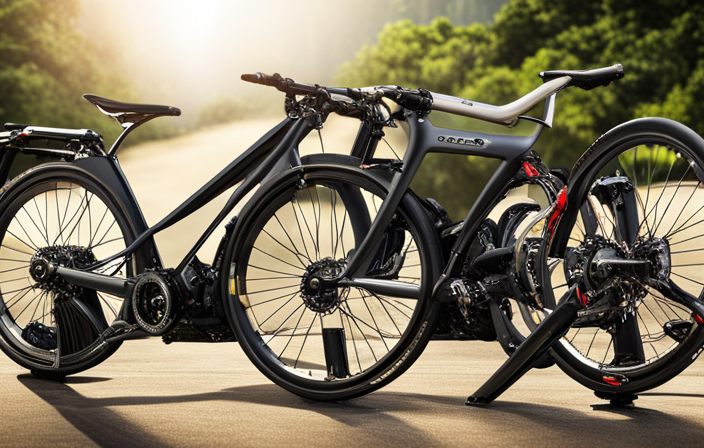
While riding my gravel bike through the rough terrain, I realize the importance of brakes. They serve as a crucial element in maintaining the balance between control and excitement when tackling unpredictable surfaces.

In this article, we delve deep into the world of gravel bike brakes, exploring disc brakes, hydraulic systems, mechanical options, and more.

Join me as we uncover the technical nuances and considerations that will ensure your ride remains safe and thrilling.

Key Takeaways

  • Disc brakes are commonly used on gravel bikes due to their superior stopping power and reliability.
  • Hydraulic brakes are preferred for gravel bikes as they provide better modulation and control.
  • Regular maintenance of brakes is essential to ensure reliable stopping power and optimal performance.
  • When upgrading brakes for a gravel bike, factors such as braking power, ride impact, and proper installation should be considered.

Disc Brakes

Disc brakes are commonly used on gravel bikes because they offer several advantages that make them a popular choice for off-road riding. One advantage is their superior stopping power. The larger brake rotor provides more surface area for the brake pads to grip onto, resulting in stronger and more controlled braking performance. This is particularly important when riding on loose gravel or steep descents where quick and powerful braking can be crucial.

Advertisement

Another advantage of disc brakes is their consistent performance in all weather conditions. Unlike rim brakes, which can become less effective in wet or muddy conditions, disc brakes maintain their stopping power regardless of the weather. This makes them ideal for gravel riding, where you may encounter various terrains and unpredictable weather.

However, there are also some disadvantages to consider when using disc brakes on a gravel bike. One disadvantage is the added weight. Disc brake systems tend to be heavier than rim brake systems due to the additional components required, such as the calipers and rotors. This extra weight may not be noticeable on smooth pavement, but it can affect your ride experience on rougher terrain.

In conclusion, disc brakes provide significant advantages in terms of stopping power and all-weather performance for gravel biking. However, it’s essential to consider the added weight they bring to your bike setup before making a decision.

Moving on to hydraulic brakes…

Hydraulic Brakes

Try out hydraulic braking systems on your gravel ride! Hydraulic brakes offer several advantages over other types of braking systems.

Advertisement

Firstly, they provide superior stopping power, allowing you to have better control and confidence when riding on different terrains. This is especially important for gravel bikes as they are designed to tackle rough and unpredictable surfaces.

Hydraulic brakes also have a more consistent and responsive feel, providing smooth modulation and precise braking control.

In terms of maintenance, hydraulic brakes require less frequent adjustments compared to mechanical ones. The sealed system prevents dirt, dust, and water from getting inside the brake lines, reducing the chances of contamination and ensuring reliable performance even in harsh conditions. However, it is essential to regularly check the brake fluid level and replace it if necessary to maintain optimal braking performance.

Transitioning into the subsequent section about mechanical brakes: While hydraulic brakes offer many advantages, some riders prefer mechanical brakes for their simplicity and ease of maintenance.

Mechanical Brakes

Advertisement

One advantage of mechanical brakes is that they are easier to adjust and maintain compared to hydraulic systems. With mechanical brakes, you have control over the brake cable tension, allowing you to fine-tune the braking performance according to your preferences. Additionally, mechanical brakes offer brake lever reach adjustment, which means you can customize the position of the brake levers for optimal comfort and control.

To further illustrate the advantages of mechanical brakes, let’s take a look at this comparison table:

Mechanical Brakes Hydraulic Brakes
Ease of Adjustment High Low
Maintenance Simple Complex
Cost Affordable Expensive
Modulation Good Excellent

As you can see, mechanical brakes excel in terms of ease of adjustment and maintenance. They are also more cost-effective compared to their hydraulic counterparts. However, it’s important to note that while mechanical brakes offer good modulation, hydraulic systems provide excellent modulation due to their fluid-based design.

Moving on to the next section about dual-pivot caliper brakes…

Advertisement

Dual-Pivot Caliper Brakes

Dual-pivot caliper brakes are a popular choice for many cyclists due to their efficient braking performance. These types of brakes offer several benefits compared to disc brakes, making them a preferred option for gravel bike riders.

One advantage of dual-pivot caliper brakes is their lightweight design, which helps keep the overall weight of the bike down. This is especially important when riding off-road, as lighter bikes are easier to maneuver and handle on rough terrain.

In addition to their weight advantage, dual-pivot caliper brakes also provide excellent stopping power. The dual-pivot mechanism allows for increased leverage, resulting in stronger and more responsive braking. This can be particularly beneficial when navigating steep descents or encountering unexpected obstacles on gravel roads.

Another benefit of dual-pivot caliper brakes is their ease of maintenance. Unlike disc brakes that require regular adjustments and potential bleeding of hydraulic systems, dual-pivot caliper brakes can be easily adjusted using basic tools. This simplicity makes them a practical choice for riders who prefer to do their own bike maintenance.

As we transition into the next section about cantilever brakes, it’s important to note that while dual-pivot caliper brakes offer impressive performance, they do have limitations when it comes to tire clearance and compatibility with wider tires commonly used in gravel biking. Cantilever brakes address these concerns by providing ample clearance and allowing for easy installation of wider tires without compromising braking performance.

Advertisement

Cantilever Brakes

Cantilever brakes offer ample tire clearance and easy installation of wider tires, making them a popular choice for cyclists riding off-road. These brakes are designed with two arms that pivot on separate posts, allowing them to provide enough space for larger tires commonly used in gravel biking. The design also allows for quick and straightforward installation, which is essential when dealing with different tire widths.

To dive deeper into the technical aspects of cantilever brakes, let’s take a look at the following table:

Brake Pad Materials Brake Lever Reach Adjustment
Rubber Yes
Cork No
Kevlar Yes

When it comes to brake pad materials, cyclists have several options to choose from. Rubber pads are widely available and provide reliable stopping power on various terrains. Alternatively, some riders prefer cork pads for their quiet operation but sacrifice some braking performance. For those seeking improved durability and heat resistance, kevlar pads are an excellent choice.

Advertisement

Another crucial feature of cantilever brakes is the brake lever reach adjustment. This allows riders to customize the distance between the brake lever and handlebars according to their hand size and preference. With this feature, cyclists can achieve optimal comfort and control while riding off-road.

Now that we’ve explored cantilever brakes in detail, let’s transition into discussing v-brakes without skipping a beat.

V-Brakes

If you’re looking for a reliable and easy-to-install option, v-brakes are a great choice. V-brakes, also known as linear-pull brakes, are a popular braking system for gravel bikes due to their simplicity and effectiveness.

Here are four key advantages of v-brakes:

  1. Easy Installation: V-brakes can be easily installed on most gravel bikes without the need for complicated adjustments or additional components. This makes them a convenient option for riders who prefer to do their own maintenance.

  2. Cost-effective: Compared to disc brakes, v-brakes are generally more affordable. They offer good stopping power at a lower price point, making them an attractive option for budget-conscious riders.

  3. Lightweight: V-brakes are lighter than disc brakes since they don’t require the additional weight of rotors and calipers. This can be beneficial for riders who prioritize weight savings on their gravel bikes.

  4. Adequate Stopping Power: While v-brakes may not offer the same level of stopping power as disc brakes, they still provide sufficient braking force for most gravel riding situations.

Despite these advantages, it’s important to note that v-brakes have some limitations compared to disc brakes. In the next section, we will discuss linear-pull brakes (mini v-brakes) and their features in more detail while comparing them with disc brakes.

Advertisement

Linear-Pull Brakes (Mini V-Brakes)

After discussing V-Brakes, let’s move on to a more modern and efficient option for gravel bikes: Linear-Pull Brakes, also known as Mini V-Brakes. These brakes provide enhanced stopping power and modulation compared to traditional V-Brakes.

Installing mini V-Brakes requires a few simple steps. First, remove your existing brake calipers by loosening the mounting bolts. Then align the new mini V-Brake arms with the rim of your wheel and secure them in place using the mounting bolts. Make sure they are centered and positioned correctly before tightening everything down.

Once installed, it’s important to adjust the tension of your mini V-Brake system properly. Start by squeezing the brake lever and observing how much clearance there is between the brake pads and the rim. If there is too much space, use an Allen key to tighten the tension screw until you achieve a desired distance.

Conversely, if there is not enough clearance or if the pads are rubbing against the rim, loosen the tension screw slightly. It may take a few adjustments to find that perfect balance between optimal braking performance and smooth wheel rotation.

Now that we have covered mini V brakes installation and adjustment techniques, let’s dive into another crucial aspect of braking systems: disc brake pads…

Advertisement

Disc Brake Pads

To ensure optimal performance, you’ll need to regularly check and replace your disc brake pads. Disc brake pads are an essential component of your gravel bike’s braking system. They provide the necessary friction to slow down or stop your bike when you apply the brakes. Over time, these brake pads wear out and become less effective, so it’s important to keep an eye on their condition.

Here are three important things to consider when it comes to disc brake pads:

  • Brake pad materials: Disc brake pads can be made from various materials, including organic compounds, metallic compounds, or semi-metallic compounds. Each material has its own advantages and disadvantages in terms of durability, noise level, heat dissipation, and stopping power.

  • Disc brake rotor alignment: Proper alignment between the disc brake rotor and the brake pads is crucial for optimal braking performance. If the rotor is misaligned, it can cause uneven wear on the brake pads and reduce their effectiveness. Regularly inspecting and adjusting the rotor alignment will help maintain consistent braking power.

  • Regular maintenance: It’s important to routinely inspect your disc brake pads for signs of wear or damage. If they appear thin or worn down beyond a certain point (as specified by the manufacturer), it’s time to replace them. Additionally, cleaning your rotors with a non-contaminating solvent will help remove any debris that could affect braking performance.

Transitioning into the subsequent section about ‘brake rotors,’ it is equally important to understand how they work in conjunction with disc brake pads to provide efficient stopping power for your gravel bike.

Brake Rotors

Brake rotors work in conjunction with disc brake pads to provide efficient stopping power for your gravel bike. They are an essential component of the braking system and play a crucial role in ensuring your safety on the trails. When it comes to choosing the right brake rotors for your gravel bike, there are a few factors to consider.

Firstly, you need to ensure brake compatibility with your bike’s brake calipers. Different bikes may have different mounting standards, such as 6-bolt or center lock, so make sure to choose rotors that are compatible with your specific setup.

Advertisement

Secondly, optimizing brake performance is important for a smooth and reliable stopping experience. Factors like rotor size and material can affect heat dissipation and overall braking efficiency. Larger rotors tend to offer better heat management, while certain materials like stainless steel or aluminum can provide improved durability and reduced weight.

To help you understand the various options available, here’s a table outlining some common specifications of gravel bike brake rotors:

Rotor Size (mm) Material Weight (g)
160 Stainless Steel 100
180 Aluminum 120
203 Carbon Fiber 90

With this information in mind, you can choose the right brake rotor that suits your needs and enhances your gravel riding experience. Speaking of enhancing performance, let’s now delve into the next topic: brake levers.

Brake rotors work in conjunction with disc brake pads to provide efficient stopping power for my gravel bike. They are an essential component of the braking system and play a crucial role in ensuring my safety on the trails. When it comes to choosing the right brake rotors for my gravel bike, there are a few factors I need to consider.

Firstly, I need to ensure brake compatibility with my bike’s brake calipers. Different bikes may have different mounting standards, such as 6-bolt or center lock, so I need to choose rotors that are compatible with my specific setup.

Advertisement

Secondly, optimizing brake performance is important for a smooth and reliable stopping experience. Factors like rotor size and material can affect heat dissipation and overall braking efficiency. Larger rotors tend to offer better heat management, while certain materials like stainless steel or aluminum can provide improved durability and reduced weight.

To help me understand the various options available, here’s a table outlining some common specifications of gravel bike brake rotors:

Rotor Size (mm) Material Weight (g)
160 Stainless Steel 100
180 Aluminum 120
203 Carbon Fiber 90

With this information in mind, I can choose the right brake rotor that suits my needs and enhances my gravel riding experience. Speaking of enhancing performance, let’s now delve into the next topic: brake levers.

Brake Levers

When choosing the right brake levers for my gravel riding experience, it’s important to consider factors like comfort and lever reach. Brake lever reach adjustment is a crucial feature that allows me to customize the distance between the lever and the handlebar, ensuring a comfortable grip regardless of hand size or preference. This adjustment helps optimize control and responsiveness while riding on different terrains.

Additionally, I need to ensure that the brake levers are compatible with the handlebars on my gravel bike. Different handlebars may have varying diameters or shapes, so it’s essential to choose brake levers that can be securely mounted onto them. This compatibility ensures proper leverage and stability when braking in various riding positions.

Advertisement

Transitioning into the subsequent section about ‘brake cable and housing,’ it’s worth mentioning that brake levers play a vital role in connecting the rider’s input to actual braking power through these components. The adjustments made possible by brake lever reach settings will affect how effectively force is transferred through the brake cable and housing system, ultimately influencing overall braking performance.

Therefore, it is crucial to not only select high-quality brake levers but also make appropriate adjustments based on individual preferences and bike setup for optimal control when tackling gravel trails.

Brake Cable and Housing

Ensure that you choose the correct brake cable and housing for your gravel riding experience to maintain optimal control and responsiveness. When it comes to brake cables, one crucial factor to consider is the tension.

It is essential to have proper brake cable tension as it directly affects the braking performance of your gravel bike. Too much tension can lead to a stiff and unresponsive brake lever, while too little tension can result in a spongy feel and reduced stopping power. To achieve the right balance, follow the manufacturer’s recommendations or consult with a professional bike mechanic.

Another important aspect is the housing material options. There are various types of housing materials available, including stainless steel, polymer-coated stainless steel, and compressionless housing. Stainless steel housing provides durability and corrosion resistance but may lack flexibility compared to other options. Polymer-coated stainless steel combines strength with enhanced flexibility, making it ideal for rougher terrains encountered during gravel riding. Compressionless housing utilizes metal or carbon fiber reinforcements to prevent compression when applying brakes forcefully.

Advertisement

Having the appropriate brake cable and housing ensures precise control over your bike’s braking system on challenging gravel surfaces. Now let’s delve into another critical aspect of braking: brake modulation.

Brake Modulation

Achieving optimal control and responsiveness on challenging gravel surfaces requires mastering brake modulation. Brake modulation refers to the ability to smoothly and precisely apply the brakes, allowing for gradual deceleration or controlled stops. It is a crucial skill that every gravel rider should develop in order to navigate tricky terrains with confidence.

To understand brake modulation better, let’s take a look at this table:

Braking Technique Description Benefits
Feathering Gently squeezing the brake lever to gradually slow down. Allows for precise speed adjustments on loose surfaces.
Trail braking Applying both brakes while entering a turn and gradually releasing them as you exit. Provides stability and control during cornering.
Stomp Applying maximum braking force to quickly stop when necessary. Offers emergency stopping power on steep descents or obstacles.
Pulse braking Alternating between light braking and release to maintain traction on loose terrain. Prevents skidding by keeping the wheels rolling over uneven surfaces.
Modulation Adjusting pressure on the brake lever based on terrain conditions and desired speed changes. Maximizes control and minimizes wheel lock-up.

Mastering these techniques will improve your overall riding experience, helping you safely navigate difficult gravel trails with precision and confidence.

Moving onto brake maintenance, it is important to ensure that your brakes are functioning optimally in order to maintain control during your rides without any unexpected surprises or issues arising from faulty equipment."

Advertisement

Brake Maintenance

To keep your bike’s braking system in optimal condition, it’s important to regularly perform maintenance tasks. This includes checking brake pads and adjusting cable tension. Brake pad replacement is a key aspect of brake maintenance. Over time, the brake pads on your gravel bike will wear down due to friction against the rims or rotors. It is crucial to inspect them regularly and replace them when they become too thin or worn out. This not only ensures effective braking but also prevents damage to the rims or rotors.

Additionally, proper brake lever adjustment is essential for optimal performance. The position of the levers should be comfortable for your hands and allow for easy modulation while riding on different terrains. Adjusting the cable tension can help achieve this by ensuring that there is enough slack for smooth operation without excessive play.

Regularly maintaining your brakes will not only enhance their longevity but also improve your overall riding experience. With well-maintained brakes, you can ride confidently knowing that you have reliable stopping power when needed.

Now that we have covered the importance of brake maintenance, let’s move on to discussing some considerations for upgrading your brakes.

Brake Upgrade Considerations

When considering a brake upgrade, it’s important to assess your current braking performance and identify areas for improvement.

Advertisement

I plan to consult with bike experts or mechanics who can provide personalized recommendations based on my specific needs.

Factors such as budget, riding style, and the terrain you typically ride on should also be taken into account when choosing an upgraded brake system.

Assess your current braking performance and identify areas for improvement

Assess your braking performance and identify areas for improvement. When it comes to improving braking technique, there are a few key factors to consider. First, evaluate your current brake pads. Different pad materials offer varying levels of grip and durability, so selecting the right ones can greatly enhance stopping power on gravel terrain. The table below provides an overview of three commonly used brake pad materials and their characteristics:

Brake Pad Material Grip Level Durability
Organic Moderate Average
Semi-Metallic High Good
Ceramic Excellent Excellent

By understanding these options, you can make an informed decision about which brake pads may be most suitable for your needs. If you’re unsure about which direction to take, consult with bike experts or mechanics for personalized recommendations. They can offer valuable insights and help optimize your braking system for optimal performance on gravel trails.

Consult with bike experts or mechanics for personalized recommendations

Consulting with experts or mechanics can provide you with personalized recommendations to optimize your braking system for better performance on rough trails. When it comes to gravel biking, the choice of brakes is crucial.

Advertisement

Hydraulic brakes have several advantages over mechanical brakes. They offer more power and precision, allowing for quicker and more controlled stops. With hydraulic brakes, you can modulate the amount of pressure applied to the brake pads, which is essential for optimal performance on varying terrain. Brake modulation allows you to maintain traction without skidding or losing control, especially when riding on loose gravel or slippery surfaces. It gives you the confidence to navigate challenging descents and corners safely.

As we move forward in considering factors such as budget, riding style, and terrain when upgrading brakes…

Consider factors such as budget, riding style, and terrain when upgrading brakes

Take into account your budget, riding style, and the terrain you typically ride on when upgrading your braking system. When considering factors to consider when upgrading gravel bike brakes, there are two key aspects to keep in mind: cost vs performance and compatibility with frame and fork. Firstly, it’s important to find a balance between cost and performance. While high-end brakes may offer superior stopping power, they can also come with a hefty price tag. Secondly, ensure that the brakes you choose are compatible with your bike’s frame and fork. This will prevent any installation issues or potential damage to your bike. To emphasize this point further, here is a table outlining the key considerations:

Factors Cost vs Performance Compatibility with Frame and Fork
Importance High High
Considerations Budget Bike specifications
Impact on Ride Braking power Proper installation

Considering these factors will help you make an informed decision when upgrading your gravel bike brakes. In the next section, we’ll discuss how to test and tune your brakes for optimal performance without compromising safety.

Test and Tune Your Brakes

Adjusting and fine-tuning your brakes is essential to ensure optimal performance on your gravel bike. As a gravel rider, testing and tuning your braking technique is crucial for both safety and control. Here are three important steps to help you achieve the best braking experience:

Advertisement
  1. Check brake pad wear: Start by inspecting your brake pads regularly. Look for any signs of wear or damage, such as uneven surfaces or thinning pads. If necessary, replace them promptly to maintain consistent stopping power.

  2. Adjust brake cable tension: Proper cable tension ensures that your brakes engage smoothly and effectively. Begin by squeezing the brake lever and observing how much play there is before the pads make contact with the rim or rotor. Adjust the barrel adjuster until this play is minimized but without causing any drag on the wheel.

  3. Practice controlled braking: To test your braking technique, find a safe area where you can practice emergency stops at different speeds. Focus on using both front and rear brakes together in a balanced manner, gradually increasing pressure without locking up the wheels.

By testing and tuning your braking technique regularly, you can avoid common mistakes such as grabbing the front brake too aggressively or relying solely on one brake. Remember, effective braking requires finesse and control to ensure a safe ride on gravel terrain.

Frequently Asked Questions

Can I use disc brake pads on my cantilever brakes?

Yes, you can’t use disc brake pads on cantilever brakes.

Disc brakes have several advantages over cantilever brakes. They offer better stopping power, especially in wet or muddy conditions. Additionally, they provide more consistent and modulated braking performance.

When choosing brake pads for your gravel bike, consider factors such as the type of riding you’ll be doing, the terrain you’ll encounter, and the weather conditions.

It’s important to select brake pads that are compatible with your specific braking system for optimal performance and safety.

Advertisement

How often should I replace my brake cables and housing?

When it comes to brake cables and housing, knowing when to replace them is crucial for maintaining optimal performance.

While hyperbole may seem excessive, I can’t stress enough the importance of regular inspection.

Signs of wear and tear include fraying, corrosion, or a decrease in braking efficiency.

To maintain and clean your brake cables and housing, regularly wipe them down with a cloth and lubricate with a specific cable lubricant.

Remember, proper maintenance ensures safe rides.

Advertisement

What is the difference between hydraulic brakes and mechanical brakes?

The difference between hydraulic brakes and mechanical brakes lies in their operation.

Hydraulic brakes use a fluid-filled system to transmit force from the brake lever to the brake caliper, providing consistent and powerful stopping power.

On the other hand, mechanical brakes rely on cables to transfer force, which can result in varying levels of performance.

While hydraulic brakes offer better modulation and require less maintenance, they are more complex and expensive compared to mechanical brakes.

Can I upgrade my current brakes to disc brakes?

Yes, you can upgrade your current brakes to disc brakes. Disc brakes offer several advantages over traditional rim brakes. They provide improved stopping power and performance in wet conditions. They also offer better modulation and require less force to operate.

Advertisement

However, there are a few disadvantages to consider. The cost of the upgrade is one factor to keep in mind. Additionally, there may be a need for additional components like new wheels or adapters.

Alternative braking systems for gravel bikes include mechanical disc brakes and hydraulic disc brakes.

How do I adjust the brake modulation on my bike?

To adjust the brake modulation on my bike, I would start by checking for common brake issues. These can include loose cables or worn brake pads.

Next, I would make sure the brakes are properly aligned and centered.

After that, I would adjust the tension of the brake cable to achieve the desired modulation.

Advertisement

It may also be necessary to clean and lubricate the braking system for optimal performance.

Conclusion

After considering all the options, I believe that disc brakes are the best choice for a gravel bike.

While some may argue that hydraulic brakes offer better modulation and control, disc brakes provide superior stopping power and performance in various weather conditions.

Additionally, they require less maintenance and are easier to tune.

Despite initial concerns about weight and complexity, disc brakes have become increasingly popular among gravel riders for their reliability and versatility.

Advertisement

So don’t hesitate to upgrade your bike with disc brakes for an enhanced off-road riding experience.

Olivia's writing is not only informative but also inspiring. She has a knack for telling stories that capture the essence of cycling and the joy it brings to people's lives. Her writing has been praised by readers and industry experts alike for its clarity, depth, and authenticity. In addition to her writing, Olivia is also an avid cyclist. She enjoys exploring new trails and routes and has participated in several cycling events and races. Her first-hand experience with cycling gives her a unique perspective on the sport, reflected in her writing. Overall, Olivia is a talented writer passionate about cycling and dedicated to producing high-quality content for FlatironBike. Her contributions to the magazine have helped make it a go-to source for cycling enthusiasts worldwide.

Continue Reading
Advertisement

Gravel Bike

How To Properly Size A Gravel Bike

Published

on

By

An image showcasing a cyclist astride a gravel bike, demonstrating the ideal frame size with a slightly bent knee at the bottom of the pedal stroke, a relaxed grip on the handlebars, and proper clearance between the rider and the top tube

Are you ready to tackle challenging gravel bike trails? Hang onto your handlebars as I unveil the key to a smooth ride: getting the right size.

It’s not just about guessing or settling for what’s available – it’s about finding that harmonious balance between you and your machine. In this article, I’ll guide you through the precise steps of measuring, calculating, and fine-tuning every aspect of your gravel bike’s size for an optimized riding experience.

Get ready to take control of your adventure like never before!

Key Takeaways

  • Proper sizing affects comfort, performance, and riding experience.
  • Measure inseam length for accurate frame size.
  • Reach, stack height, and top tube length fine-tune bike fit.
  • Test ride different sizes to find the best fit.

Understand the Importance of Proper Sizing

You need to understand the importance of proper sizing when choosing a gravel bike. The right fit can greatly affect your comfort, performance, and overall riding experience. Bike fit is crucial because it ensures that you are in the correct position to maximize power transfer and minimize strain on your body.

Advertisement

One of the most common sizing mistakes people make is choosing a bike based solely on their height. While height can give you a general idea of frame size, it doesn’t account for individual proportions such as inseam length or torso length. A bike that is too small or too large can lead to discomfort, pain, and reduced efficiency.

To ensure proper sizing, start by measuring your inseam length. This measurement will help determine the appropriate frame size for your gravel bike. Stand with your feet shoulder-width apart and measure from the floor to your crotch. With this measurement in hand, consult a size chart provided by the manufacturer or visit a professional bike fitter who can guide you in selecting the right frame size for your specific measurements.

Now that we understand the importance of proper sizing, let’s move on to how to measure your inseam length accurately without any guesswork.

Measure Your Inseam Length

To accurately measure your inseam length, start by standing barefoot against a wall. Place a book between your legs, pressing it firmly against your groin. Make sure the spine of the book is parallel to the floor. Have someone measure from the top of the book down to the ground using a measuring tape or ruler. This measurement will give you an accurate inseam length.

Once you have determined your inseam length, you can use it as a starting point for finding the right size gravel bike. Bike fit is crucial for comfort and efficiency while riding, so taking accurate measurements is essential.

Advertisement

When considering bike sizing, keep in mind that different brands and models may have slightly different sizing charts. It’s important to consult each manufacturer’s guidelines to find the best fit for you.

Now that you have measured your inseam length, it’s time to consider your riding style and terrain. This will help determine other aspects of bike fit such as top tube length and handlebar height. By taking these factors into account along with your inseam measurement, you can ensure that your gravel bike is properly sized for optimal performance on any ride.

Consider Your Riding Style and Terrain

Considering your riding style and the type of terrain you will be encountering is crucial when determining the right fit for your gravel bike. Your riding style will directly affect your position on the bike, which in turn impacts comfort and efficiency. If you prefer a more aggressive riding position with a lower handlebar height, you may want to consider a smaller frame size. On the other hand, if you prefer a more relaxed and upright position, a larger frame size would be more suitable.

Advertisement

The type of terrain you plan to ride on also plays a significant role in determining the appropriate sizing for your gravel bike. If you anticipate tackling rough and technical off-road trails, a smaller frame size with a shorter wheelbase can provide better maneuverability. However, if long-distance endurance rides or smooth gravel roads are more your style, a larger frame size with increased stability may be preferred.

When considering bike fit and sizing charts, it’s important to note that each manufacturer might have slight variations in their measurements. Take the time to review specific sizing charts provided by different brands to ensure an accurate fit for your body proportions.

In the subsequent section about determining your frame size, we will dive deeper into calculating specific measurements based on your inseam length and other factors.

Determine Your Frame Size

Taking into account your body proportions and riding preferences is essential when determining the right fit for your gravel bike. One of the key factors in finding the correct frame size is measuring your inseam accurately. To do this, stand barefoot against a wall with your legs slightly apart and place a book between your legs, snug against your crotch. Measure from the top of the book to the floor to get an accurate inseam measurement.

Once you have your inseam measurement, you can use it to choose the correct frame size for your gravel bike. Most manufacturers provide sizing charts that correlate inseam measurements with recommended frame sizes. These charts take into consideration factors such as seat tube length and top tube length to ensure a proper fit.

Advertisement

It’s important to note that different manufacturers may have slightly different sizing conventions, so be sure to consult each manufacturer’s specific sizing chart for accurate results. Additionally, keep in mind that there may be some variations depending on personal preference and riding style.

Now that you have determined your frame size based on your inseam measurement, let’s move on to the next step: taking into account reach and stack height when choosing the right gravel bike for you.

Take into Account Reach and Stack Height

Once you know your frame size, it’s important to consider the reach and stack height to ensure a comfortable fit for your riding style. The reach refers to the horizontal distance between the bottom bracket and the top of the head tube, while the stack height is the vertical distance between these two points. Proper reach and stack height are crucial in bike sizing because they directly affect your riding position and overall comfort on the bike.

Advertisement

When determining reach and stack height for gravel biking, there are several factors to consider. Firstly, your body proportions play a significant role. Longer arms may require a longer reach, while shorter arms may necessitate a shorter one. Additionally, considering your flexibility is important as well. If you have limited flexibility, opting for a higher stack height can alleviate strain on your back and neck.

To help you visualize how reach and stack height impact your riding experience, here is a table:

Reach Stack Height
Longer Reach Higher Stack Height
Shorter Reach Lower Stack Height
Increased Comfort Decreased Discomfort
Optimal Riding Position Reduced Strain

Considering the top tube length will further fine-tune your bike fit in relation to your individual needs. By ensuring proper reach, stack height, and top tube length, you’ll be one step closer to finding that perfect gravel bike fit.

Consider the Top Tube Length

The top tube length is an important factor to consider when finding the right fit for your riding style and body proportions. It plays a crucial role in determining your overall comfort and control on the bike. When considering the top tube length, it’s essential to take into account both the reach and stack height measurements.

The reach measurement refers to the distance from the center of the bottom bracket to the top of the head tube. It determines how stretched out or upright you will be on the bike. A shorter top tube length will result in a more relaxed and upright position, while a longer one will provide a more aggressive and aerodynamic stance.

Advertisement

On the other hand, stack height measures how high or low your handlebars are relative to your saddle. A higher stack height can lead to a more comfortable and relaxed riding position, ideal for long-distance rides or endurance events.

When considering these factors, it’s also crucial to check the standover height, which is how much clearance you have when standing over your bike with both feet flat on the ground. This ensures that you can easily dismount and maneuver your bike without any discomfort or restrictions.

Considering all these aspects will help you find a gravel bike with an optimal top tube length that suits your body proportions, riding style, and preferences. Now let’s move on to checking the standover height…

Check the Standover Height

Make sure you check the standover height to ensure comfortable dismounting and maneuvering when both feet are flat on the ground. Standover clearance refers to the amount of space between your crotch and the top tube of the bike frame when you straddle it. To measure this, stand with your feet shoulder-width apart and wear the shoes you plan to ride in. Lift one leg slightly and swing it over the bike as if mounting or dismounting.

The ideal standover clearance is about 2-3 inches for road bikes, but gravel bikes may require more due to their off-road nature. A higher standover clearance allows for easier handling and control on rough terrain.

Advertisement

When considering sizing options, make sure there is enough room between your inseam and the top tube while maintaining a proper riding position. Some manufacturers offer multiple frame sizes with different standover heights, so choose one that suits your body proportions best.

To test ride different sizes, visit a local bike shop or participate in demo events organized by manufacturers or cycling clubs. This will give you a better understanding of how each size feels under real riding conditions before making a final decision on which size gravel bike to purchase.

Test Ride Different Sizes

When you test ride different sizes, it gives you a better understanding of how each one feels under real riding conditions before you make a final decision on which size to purchase. This test ride experience is crucial in determining the optimal fit for your gravel bike.

Here are some key points to consider during your test ride:

  • Comfort: Pay attention to how comfortable you feel on each size. Does the bike feel too big or too small? A proper fit should allow for easy maneuverability and control.

  • Stability: Notice how stable the bike feels when riding at various speeds and on different terrains. A well-sized bike will provide a balanced and confident riding experience.

  • Handling: Test the bike’s responsiveness when cornering or navigating tight spaces. The right size should offer precise handling without feeling twitchy or sluggish.

  • Power Transfer: Observe how efficiently your pedaling power is transferred to the wheels. An optimal fit will maximize energy transfer, allowing you to ride more efficiently.

By test riding different sizes, you can gather valuable insights into how each option performs and find the best fit for your needs.

Advertisement

Once you have identified a few potential sizes, it’s time to consult with a professional bike fitter who can provide further guidance in selecting the perfect size for your gravel bike setup.

Consult with a Professional Bike Fitter

Consider consulting with a professional bike fitter to ensure the optimal fit for your gravel bike setup. A bike fit assessment conducted by a trained expert can provide valuable insights into your body’s biomechanics and help determine the ideal frame size, stem length, handlebar width, and saddle position for you. Professional bike fitting services are equipped with specialized tools and expertise to analyze your riding style, flexibility, and any potential imbalances or discomfort you may experience on the bike.

During a professional bike fit session, the fitter will take various measurements of your body proportions and assess your range of motion. They may also observe your pedaling technique to identify any areas that need improvement. Based on this comprehensive analysis, they will make precise adjustments to optimize your position on the gravel bike.

By consulting with a professional bike fitter, you can avoid common pitfalls like choosing a frame size that is too small or large for you, which could lead to discomfort or decreased performance. Additionally, they can recommend appropriate components such as saddles or handlebars that suit your individual needs.

Once you have completed the initial assessment and received recommendations from the professional fitter, it is time to consider adjustments and components that will further enhance your gravel biking experience.

Advertisement

Consider Adjustments and Components

To enhance your experience, you could explore different adjustments and components for your gravel biking setup. When it comes to bike fit, there are a few key areas to consider.

First, saddle position is crucial for comfort and power transfer. Make sure your saddle height is set correctly so that your legs can fully extend with a slight bend at the knee when the pedal is at its lowest point. Additionally, the fore-aft position of the saddle should be adjusted to achieve proper weight distribution between the front and rear wheels.

Next, handlebar width and reach can greatly affect your riding comfort and control. Experiment with different handlebar widths to find the one that feels most natural for you. You may also want to consider adjusting the stem length to achieve a comfortable reach to the handlebars.

In terms of components, selecting tires that suit your riding style and terrain is essential for optimal performance. Consider choosing wider tires with more aggressive tread patterns for off-road adventures, while opting for narrower tires with smoother tread patterns if you plan on spending more time on pavement.

Taking note of the bike’s geometry is crucial in ensuring a proper fit. The frame geometry determines factors such as stack height (vertical distance from bottom bracket to top of head tube) and reach (horizontal distance from bottom bracket to top of head tube). These measurements play a significant role in determining how comfortable you will be on long rides or during technical sections.

Advertisement

Transitioning into taking note of the bike’s geometry in order to properly size your gravel bike, it’s important to understand how these frame measurements can impact your overall riding experience.

Take Note of the Bike’s Geometry

Now that we have considered adjustments and components, let’s move on to the next important aspect of properly sizing a gravel bike: taking note of the bike’s geometry.

Bike fit is crucial for comfort, efficiency, and overall performance, so it’s essential to understand how the geometry of a bike can affect your riding experience.

Here are some important factors to consider when evaluating the bike’s geometry:

  1. Frame Size: The frame size determines the overall fit of the bike. It should be proportional to your body measurements and allow for proper reach and standover height.

  2. Top Tube Length: This measurement affects your riding position and comfort. A longer top tube provides a more stretched-out position, while a shorter one offers a more upright stance.

  3. Head Tube Angle: The head tube angle influences steering responsiveness and stability. Steeper angles provide quicker handling, while shallower angles offer stability at higher speeds.

  4. Bottom Bracket Drop: This measurement impacts pedal clearance during cornering and affects how low you feel on the bike.

By considering these aspects of the bike’s geometry, you can ensure a better fit and an optimal riding experience.

Advertisement

Now let’s move on to our next topic where we will discuss why it is important to consider the bike’s wheel size.

Consider the Bike’s Wheel Size

Take note of the wheel size on the bike to ensure a comfortable and enjoyable ride. The wheel diameter plays a crucial role in determining how the bike performs on different surfaces. For gravel biking, it is common to see wheel sizes ranging from 650b to 700c.

Smaller wheels, like the 650b, offer better maneuverability and acceleration while sacrificing some top-end speed. On the other hand, larger wheels, such as the standard 700c, provide better stability and roll over obstacles more easily.

Another important factor to consider is tire clearance. Gravel bikes are designed with wider tire clearances compared to road bikes. This allows for fitting tires with more tread and larger volume, which improves traction and comfort on rough terrains. When choosing a wheel size, make sure it accommodates your desired tire width without any clearance issues.

Considering both wheel size and tire clearance will help you find the right balance between agility and stability for your gravel bike adventures. In the next section about handlebar width, we will explore another aspect that contributes to a well-sized gravel bike setup.

Advertisement

Without compromising on performance or comfort…

Consider the Bike’s Handlebar Width

Ensure that your handlebar width suits your riding style and preferences for a comfortable and controlled experience.

When it comes to bike fit, handlebar comfort is crucial. Here are some factors to consider when determining the right handlebar width:

  • Shoulder Width: Your handlebars should be slightly wider than your shoulder width. This allows for better control and stability while riding.

  • Riding Style: Different riding styles require different handlebar widths. For example, if you prefer an aggressive riding position, narrower handlebars may be more suitable. On the other hand, if you enjoy long-distance rides or gravel adventures, wider handlebars provide better stability.

  • Maneuverability: Wider handlebars offer increased leverage, making it easier to maneuver through technical terrain or tight corners.

  • Comfort: Handlebar width can affect your overall comfort on the bike. It’s important to find a width that allows for relaxed hand positioning without strain or discomfort.

Finding the optimal handlebar width requires considering these factors along with personal preference. Once you have determined the appropriate handlebar width, you can move on to evaluating the bike’s stem length in order to achieve a well-balanced setup.

Consider the Bike’s Stem Length

Choosing the right stem length is crucial for achieving a well-balanced setup on your bike. When it comes to gravel biking, finding the optimal stem length can greatly affect your comfort, control, and overall riding experience. The stem connects the handlebars to the fork steerer tube, determining your reach and position on the bike.

Advertisement

To choose the right stem length for your gravel bike, you need to consider various factors such as your body measurements, riding style, and personal preferences. A shorter stem provides quicker handling and more responsive steering, ideal for technical terrains or aggressive riding. On the other hand, a longer stem offers more stability and less twitchy handling, suitable for long-distance endurance rides.

Adjusting the stem angle can also help fine-tune your fit on the bike. By angling it up or down slightly, you can modify your riding position and alleviate strain on your back or wrists. It’s essential to experiment with different angles until you find what feels most comfortable for you.

Once you have chosen the right stem length and adjusted its angle accordingly, you can further fine-tune the fit with saddle and handlebar adjustments. These additional adjustments will ensure that all components work together harmoniously to provide an ergonomic and efficient riding experience.

Transitioning into adjusting saddle and handlebar positions allows riders to optimize their setup without compromising comfort or performance.

Fine-Tune the Fit with Saddle and Handlebar Adjustments

To optimize your riding experience, it’s important to make adjustments to the saddle and handlebar positions. Fine-tuning these elements will ensure a comfortable and efficient ride on your gravel bike.

Advertisement

Let’s start with the saddle position. Finding the right height is crucial for proper leg extension and power transfer. Start by sitting on the saddle with one foot at the bottom of the pedal stroke. Your knee should have a slight bend, around 25-30 degrees. Adjust accordingly until you achieve this angle.

Next, let’s focus on handlebar height. This adjustment affects both comfort and control. Begin by loosening the stem bolts and raising or lowering the handlebars to your desired position. Keep in mind that a higher handlebar offers a more upright riding posture, which can be beneficial for long rides or those seeking greater comfort. Conversely, a lower handlebar promotes an aerodynamic position suitable for faster-paced riding.

Once you’ve made these adjustments, take some time to test out your new setup on various terrains. Pay attention to any discomfort or strain in your back, neck, or wrists – these are signs that further adjustments may be necessary.

Remember, finding the ideal saddle position and handlebar height is essential for achieving optimal performance and preventing injuries while enjoying your gravel bike adventures!

Frequently Asked Questions

What are the benefits of consulting with a professional bike fitter?

Consulting with a professional bike fitter offers numerous benefits. Firstly, they possess the expertise to ensure proper bike sizing, which is crucial for optimal performance and comfort. Through their precise measurements and analysis, they can identify any issues that may impact your riding experience.

Advertisement

Additionally, a professional bike fitting can help prevent injuries by ensuring correct body alignment and reducing strain on joints. Overall, the importance of proper bike sizing cannot be overstated, making a consultation with a professional bike fitter invaluable.

How does the bike’s geometry impact the sizing process?

The bike’s geometry plays a crucial role in the bike fit and sizing process. It determines how the bike will handle, its stability, and comfort. A slight change in geometry can have a significant impact on your riding experience.

Factors like head tube angle, top tube length, and seat tube angle all affect how you fit on the bike. Therefore, understanding the geometry is essential for finding the right size and achieving optimal performance.

What factors should I consider when choosing the bike’s wheel size?

When considering wheel size for a gravel bike fit, there are several important factors to take into account.

Firstly, the terrain you’ll be riding on plays a crucial role. Smaller wheels provide nimbleness and agility, while larger wheels offer better momentum and stability over rough surfaces.

Advertisement

Additionally, tire clearance is essential as wider tires require larger wheel sizes.

Lastly, personal preference and riding style should also influence your decision on wheel size considerations for optimal gravel bike fit.

How does the bike’s handlebar width affect the overall fit?

The handlebar width plays a crucial role in bike fit. It symbolizes control and comfort while riding.

A wider handlebar provides better stability and control, especially on rough terrains. However, it may affect aerodynamics and maneuverability.

On the other hand, a narrower handlebar allows for more precise steering and improved aerodynamics.

Advertisement

Finding the right balance between these factors is essential to ensure an optimal bike fit and enhance your overall riding experience.

What adjustments can be made to the saddle and handlebars for a more customized fit?

To achieve a more customized fit on a gravel bike, adjustments can be made to the saddle height and handlebar reach.

The saddle height refers to the vertical position of the seat, which affects leg extension and power output. By adjusting the saddle height correctly, optimal pedaling efficiency can be achieved.

Handlebar reach refers to the horizontal distance between the saddle and handlebars. Adjusting this allows for a comfortable riding position and proper weight distribution on the bike.

Conclusion

In conclusion, properly sizing a gravel bike is crucial for a comfortable and efficient riding experience. By measuring your inseam length and considering your riding style and terrain, you can determine the appropriate frame size that suits you.

Advertisement

Additionally, taking into account factors such as reach and stack height, wheel size, handlebar width, stem length, and fine-tuning the fit with saddle and handlebar adjustments will ensure a customized fit.

Remember that 90% of cyclists who ride bikes that are too big or small experience discomfort or pain. Therefore, investing time in finding the right size is essential for an enjoyable gravel biking journey.

Continue Reading

Gravel Bike

Mountain Bike Tire Pressure When Riding On Gravel Roads

Published

on

By

An image capturing the moment a mountain biker's tire encounters a gravel road, showcasing the tire's tread gripping the loose stones, while dust particles dance around in the air

Riding on gravel trails can be an exciting experience. However, it is important to pay attention to your mountain bike’s tire pressure in order to navigate the uneven terrain safely. Just like a tightrope walker on a thin wire, maintaining the perfect balance is essential for achieving peak performance and control.

In this article, we delve into the intricate world of tire pressure, exploring its impact on gravel riding. We provide you with valuable insights to help you conquer any off-road challenge with confidence.

So grab your helmet and let’s dive into the fascinating realm of mountain bike tire pressure on gravel roads!

Key Takeaways

  • Adjusting tire pressure based on factors like rider weight and terrain conditions enhances comfort and stability.
  • Wider tires with higher volume provide improved stability and traction on gravel roads.
  • Lower tire pressures increase grip and control during cornering.
  • Finding the right tire pressure for specific conditions ensures control and stability.

Understanding the Basics of Tire Pressure

You should understand the basics of tire pressure before riding on gravel roads. Tire pressure plays a crucial role in determining your bike’s performance and safety on different terrains.

Advertisement

When it comes to road biking, there are specific tire pressure recommendations that you can follow. Generally, higher tire pressures are recommended for smoother pavement surfaces, as they provide lower rolling resistance and better efficiency. However, when riding on gravel roads, lower tire pressures are typically preferred.

Understanding the effects of tire pressure on cornering is essential for safe navigation on gravel roads. Lower tire pressures allow for a larger contact patch between the tire and the road surface, increasing traction and grip while cornering. This increased grip helps to prevent sliding or skidding, ensuring better control over your bike.

Transitioning into factors affecting tire pressure on gravel roads, it is important to consider various elements such as rider weight, terrain conditions, and personal preference. These factors influence the optimal tire pressure that you should use when riding off-road.

By properly adjusting your tire pressure based on these factors, you can enhance your comfort, stability, and overall performance while tackling challenging gravel roads without sacrificing control or jeopardizing your safety.

Factors Affecting Tire Pressure on Gravel Roads

When it comes to tire pressure on gravel roads, there are three key factors that come into play: tire width and volume, rider weight, and riding style, as well as the terrain and surface conditions.

Advertisement

Tire width and volume determine the amount of air in the tires, affecting both stability and traction.

Rider weight plays a role in determining how much pressure is needed to support the bike on uneven surfaces.

Finally, the terrain and surface conditions impact tire pressure by influencing how much grip is needed for optimal performance.

It’s important to consider all these factors when adjusting tire pressure for a smooth and safe ride on gravel roads.

Tire Width and Volume

With increased tire width and volume, riders can experience improved stability and traction when riding on gravel roads. When it comes to tire pressure for wet conditions, wider tires with higher volume allow for lower pressures, which increase the contact patch with the ground and enhance grip. This is crucial in wet conditions where maintaining control is essential.

Advertisement

On the other hand, when riding on sandy terrain, narrower tires with lower volume and higher pressures are preferred to prevent sinking into the loose surface. These tires cut through the sand more efficiently and provide better maneuverability. However, it’s important to note that finding the optimal tire pressure involves a balance between stability, traction, and comfort based on individual rider weight and riding style.

Adjusting tire pressure according to these factors will ensure a smoother ride while tackling gravel roads.

Transitioning into the subsequent section about ‘rider weight and riding style’, it is crucial to consider these aspects as they greatly influence tire performance on different surfaces.

Rider Weight and Riding Style

Consider your weight and riding style as factors that significantly impact the performance of your tires on various surfaces. When it comes to adjusting tire pressure for downhill rides, it is crucial to find the right balance between grip and rolling resistance. Higher pressures provide better rolling efficiency but can decrease traction, while lower pressures increase grip but may result in higher rolling resistance. A general rule of thumb is to reduce tire pressure by 2-3 psi when descending, allowing for more contact with the ground and improved control. On the other hand, cornering requires a different approach. Higher tire pressures help prevent sidewall collapse and maintain stability during aggressive turns. It’s important to experiment with different pressures based on personal preference and terrain conditions to find what works best for you. Taking these factors into account will ensure optimal performance when riding on gravel roads.

Moving forward, let’s delve into how terrain and surface conditions further influence our tire pressure choices without compromising safety or ride quality.

Advertisement

Terrain and Surface Conditions

The type of surface you’re riding on can greatly impact the optimal tire pressure for your ride. When it comes to gravel roads, understanding the terrain and surface conditions is crucial in determining the right tire pressure. Gravel road maintenance plays a significant role in how bumpy or smooth the surface is. If the gravel has been recently graded and compacted, you may be able to run slightly higher tire pressures to increase efficiency and reduce rolling resistance. However, if the gravel road is wet or loose, lower tire pressures are recommended to improve traction and prevent sliding.

Wet gravel can be especially tricky as it tends to create a slippery surface that requires more grip from your tires. Finding the right tire pressure for these specific conditions is essential for maintaining control and stability while riding on gravel roads.

Transitioning into the subsequent section about the importance of finding the right tire pressure: It’s important to understand that finding the right tire pressure not only depends on terrain and surface conditions but also factors such as rider weight, riding style, and personal preferences.

Importance of Finding the Right Tire Pressure

To find the right tire pressure for riding on gravel roads, it is important to understand the importance of having the correct amount of air in your tires. Finding optimal tire pressure is crucial as it directly affects your performance and overall ride experience. Adjusting pressure based on different terrain and surface conditions can greatly enhance your bike’s handling capabilities.

Here are three factors to consider when finding the right tire pressure for gravel road riding:

Advertisement
  1. Traction: Maintaining adequate tire pressure ensures better traction on loose surfaces like gravel. Lower pressures allow the tire to conform to irregularities in the road, increasing grip and reducing slippage.

  2. Comfort: Adjusting your tire pressure can significantly impact ride comfort. Higher pressures result in a stiffer ride, transmitting more vibrations from rough terrains. Lower pressures absorb these vibrations, providing a smoother journey.

  3. Rolling Resistance: Tire pressure affects rolling resistance, which influences speed and efficiency while pedaling on gravel roads. Higher pressures reduce rolling resistance by minimizing tire deformation, enabling faster speeds with minimal effort.

Understanding these factors will help you fine-tune your mountain bike’s tire pressure for optimal performance on gravel roads. The relationship between tire pressure and performance is intricate and deserves careful consideration when seeking an enjoyable off-road cycling experience.

The Relationship Between Tire Pressure and Performance

When it comes to mountain biking, finding the right tire pressure is crucial for optimal performance. The relationship between tire pressure and performance can be seen in three key areas: traction and grip, rolling resistance, and comfort and control.

Maintaining the proper tire pressure ensures maximum traction and grip on various terrains. It reduces rolling resistance for a smoother ride and enhances overall comfort and control while riding.

Traction and Grip

Riding with lower tire pressure on gravel roads increases traction and grip. When the tire pressure is lower, the tire conforms better to the uneven surface of the gravel road, allowing for more contact points between the tire and the ground. This increased contact improves traction and stability, enabling me to maintain control and balance even on loose or slippery surfaces. The added grip gives me confidence in my bike’s handling capabilities, especially during cornering or braking maneuvers.

Lower tire pressure also helps in absorbing vibrations from rough terrain, reducing fatigue and providing a smoother ride. However, it is important to find a balance as too low of a tire pressure can lead to pinch flats or sidewall damage.

Advertisement

Transitioning into the next section about rolling resistance, maintaining optimal tire pressure not only improves traction but also affects how efficiently I can roll over gravel roads without expending excessive energy.

Rolling Resistance

Lowering tire pressure on gravel roads increases rolling resistance, making it more difficult to maintain speed and momentum.

When riding on gravel, the increased traction and grip provided by lower tire pressure can be beneficial, but it comes at a cost. The lower pressure causes the tires to deform more as they roll over the uneven surface, resulting in increased friction between the tires and the ground. This extra resistance slows down the bike and requires more effort from the rider to maintain speed.

Additionally, lower tire pressure can also affect puncture resistance. With less air in the tires, there is a higher risk of pinch flats or snake bites when hitting sharp rocks or potholes.

Therefore, finding an optimal balance between lower tire pressure for traction and grip while still maintaining sufficient rolling resistance is crucial for achieving both comfort and control on gravel roads without sacrificing speed or puncture protection.

Advertisement

Comfort and Control

Finding the right balance between traction and grip while still maintaining sufficient rolling resistance is crucial for achieving comfort and control on gravel roads.

When it comes to mountain bike tire pressure, there are a few factors to consider. For downhill trails, a lower tire pressure can provide increased traction and better handling on steep descents. This allows the tires to deform around obstacles, maximizing grip.

On the other hand, riding in wet conditions calls for slightly higher tire pressure to prevent excessive sinking into soft terrain and to improve mud shedding capabilities.

It’s important to find the sweet spot that offers enough cushioning for a comfortable ride while maintaining control over the bike. Determining the ideal tire pressure involves considering factors such as rider weight, trail conditions, and personal preference.

By finding this balance, riders can enjoy optimal comfort and control on gravel roads without compromising performance or safety.

Advertisement

How to Determine the Ideal Tire Pressure

To determine the ideal tire pressure for riding on gravel roads, it’s important to consider factors such as terrain and rider weight. By finding the right balance, you can optimize comfort and control during your off-road adventures. Determining pressure involves understanding how different tire pressures affect performance on gravel surfaces.

Terrain Type Rider Weight Ideal Tire Pressure
Loose Gravel Light 30-35 psi
Medium 35-40 psi
Heavy 40-45 psi
Packed Gravel Light 25-30 psi
Medium 30-35 psi
Heavy 35-40 psi
Rough Gravel Light 20-25 psi
Medium 25-30 psi
Heavy 30-35 psi

Maintaining tire pressure is crucial for optimal performance. Regularly check your tires using tools like a digital pressure gauge or a floor pump with an integrated gauge. Adjust the pressure according to the conditions you will be riding in, ensuring that you have enough traction without sacrificing too much comfort.

Moving forward into the section about tools and techniques for checking tire pressure, it’s essential to ensure accurate readings to maintain peak performance while exploring gravel roads.

Tools and Techniques for Checking Tire Pressure

When it comes to checking tire pressure, there are a few tools and techniques that I rely on.

First, using a pressure gauge is essential for precise measurements. It allows me to accurately determine the exact pressure of my tires.

Advertisement

Second, feeling for tire firmness can also be helpful, as I can quickly assess if the tires need more or less air based on how they feel when pressed with my hand.

Lastly, if I am using tubeless tires, I make sure to regularly check and replenish the tubeless sealant to ensure optimal performance and prevent any potential leaks.

These tools and techniques help me maintain the ideal tire pressure for a smooth and efficient ride.

Using a Pressure Gauge

Check your pressure gauge to ensure that you have the correct tire pressure for riding on gravel roads. Accuracy is crucial when using a pressure gauge, so it’s important to choose a high-quality one. Cheaper gauges may not provide accurate readings, leading to incorrect tire pressures. To check the accuracy of your gauge, compare its reading with that of another reliable gauge or use an alternative method such as a digital gauge or an air compressor with a built-in pressure display.

Once you have confirmed the accuracy of your gauge, it’s time to measure the tire pressure. Attach the gauge securely onto the valve stem and press down firmly until you hear a hiss indicating that air has been released into the gauge. The reading will show you the current tire pressure in PSI (pounds per square inch).

Advertisement

With this information, you can now assess whether your tires are properly inflated for riding on gravel roads. Transitioning into feeling for tire firmness allows for another practical way of checking if your tire pressures are suitable for off-road conditions without relying solely on numbers and gauges.

Feeling for Tire Firmness

Assessing the firmness of your tires by applying pressure with your hand will help determine if they are suitable for off-road conditions. When riding on gravel roads, it is crucial to have the right tire pressure to ensure optimal performance and prevent any mishaps. To accurately assess tire firmness, follow these tire pressure troubleshooting techniques:

Firmness Level Description Suitable for Off-Road?
Too Soft Tire feels excessively squishy and can bottom out easily on rough terrain. No
Ideal Firmness Tire feels slightly firm but still provides enough cushioning for a smooth ride. Yes
Overinflated Tire feels overly hard, resulting in reduced traction and a harsh ride. No

By feeling for tire firmness using this method, you can quickly identify if adjustments need to be made to your tire pressure before heading out on gravel roads. Next, we will explore the importance of using tubeless sealant in maintaining optimal tire performance.

Using Tubeless Sealant

Using tubeless sealant is essential for maintaining optimal performance of your tires. When applying tubeless sealant, there are several benefits that come along with it.

  • Increased puncture resistance: The sealant fills small holes and punctures as they occur, preventing air leakage and flat tires.
  • Enhanced traction: Tubeless tires allow for lower tire pressures, increasing grip on loose gravel surfaces.
  • Improved rolling efficiency: With the absence of inner tubes, friction is reduced, resulting in a smoother and faster ride.
  • Self-sealing properties: The sealant automatically seals punctures while riding, minimizing the need for immediate repairs.
  • Weight reduction: Eliminating inner tubes reduces overall weight, making your bike more agile and responsive.

By understanding the application process and appreciating the benefits of using tubeless sealant, you can ensure a hassle-free gravel riding experience.

Now let’s delve into some tips for adjusting tire pressure on the go.

Advertisement

Tips for Adjusting Tire Pressure on the Go

When riding on gravel roads, it’s important to be able to adjust tire pressure on the go. This skill becomes crucial when facing steep descents or navigating through wet conditions. Adjusting tire pressure correctly can greatly enhance your performance and ensure a safer ride.

When tackling steep descents, lowering your tire pressure can improve traction and control. By reducing the air volume in your tires, you increase the contact patch with the ground, allowing for better grip on loose gravel surfaces. It’s essential to find the right balance between low enough pressure for traction and high enough pressure to avoid pinch flats.

In wet conditions, adjusting tire pressure is equally important. Lowering your tire pressure slightly will provide more surface area contact with the ground, increasing traction and reducing the chances of slipping or sliding. However, be mindful not to go too low as this may result in decreased stability and an increased risk of punctures from sharp rocks or debris.

As you venture into different terrains, always remember that adjusting tire pressure is a continuous process that requires observation and experimentation. It’s crucial to monitor how your bike performs under varying conditions and fine-tune accordingly.

Transitioning into common mistakes to avoid when adjusting tire pressure…

Advertisement

Common Mistakes to Avoid

When it comes to adjusting tire pressure on the go, there are a few common mistakes that should be avoided.

One of these is overinflating or underinflating the tires, which can negatively impact performance and handling on gravel roads.

Another mistake is ignoring changing conditions, such as changes in terrain or weather, which can greatly affect tire pressure needs.

Lastly, neglecting regular maintenance, such as checking tire pressure before each ride and ensuring proper tire condition, can lead to potential issues while riding on gravel roads.

Overinflating or Underinflating

If you’re not careful, overinflating or underinflating your mountain bike tires can lead to a less enjoyable ride on gravel roads.

Advertisement

Overinflating your tires can be dangerous as it reduces the contact patch between the tire and the ground, resulting in decreased traction. This lack of traction can make it difficult to maintain control and navigate through loose gravel, leading to a higher risk of accidents.

On the other hand, underinflating your tires can have its disadvantages too. It increases rolling resistance and makes pedaling harder, causing unnecessary fatigue. Moreover, underinflation reduces stability and maneuverability, making it more challenging to handle your bike on uneven surfaces.

So finding the right tire pressure for riding on gravel roads is crucial for an optimal cycling experience. Ignoring changing conditions such as varying terrains or weather conditions can also impact your ride in unexpected ways.

Ignoring Changing Conditions

Ignoring changing conditions, such as varying terrains or weather, can impact your ride on gravel roads in unexpected ways. Adjusting pressure according to the conditions is crucial for maintaining control and maximizing performance. Here are some key considerations for tire pressure maintenance:

  • Tire Width: Wider tires require lower pressure to increase grip and stability on rough surfaces.
  • Terrain Type: Decrease pressure for loose gravel to enhance traction, while increasing pressure on hard-packed gravel minimizes rolling resistance.
  • Weather Conditions: Lower pressure in wet conditions improves traction, but higher pressure may be needed in dry conditions to prevent pinch flats.
  • Rider Weight: Heavier riders should increase tire pressure to avoid bottoming out.
  • Personal Preference: Experiment with different pressures to find what works best for you.

By adjusting tire pressure accordingly, you can ensure a smoother and safer ride on gravel roads. Neglecting regular maintenance, including tire pressure adjustments, can lead to further issues down the line.

Neglecting Regular Maintenance

Make sure you don’t neglect regular maintenance to avoid potential issues down the line.

Advertisement

When riding on gravel roads, it is crucial to adjust your tire pressure according to the conditions you encounter. Wet conditions, for example, require a lower tire pressure to increase traction and prevent sliding. Adjusting your tire pressure can greatly impact your cornering performance as well.

Lower pressures allow the tires to conform better to uneven surfaces, providing more grip when navigating turns. Neglecting regular maintenance can lead to improper tire pressure, which in turn can affect your handling and control on gravel roads.

Maintaining proper tire pressure ensures optimal performance and safety while riding off-road. It’s important not only for cornering but also for overall comfort and efficiency on rough terrains.

Benefits of Proper Tire Pressure on Gravel Roads

To ensure a smooth and comfortable ride on gravel roads, it is important to maintain proper tire pressure. Determining the ideal pressure for your mountain bike tires on gravel can make a significant difference in your overall riding experience. Proper inflation offers several benefits that contribute to better performance and increased safety.

Firstly, maintaining the correct tire pressure allows for optimal traction on loose surfaces. Gravel roads can vary in terms of compactness and texture, but having the right amount of air in your tires ensures that they conform to the terrain, providing maximum grip. This prevents unnecessary skidding or sliding, allowing you to confidently navigate through gravel patches without losing control.

Advertisement

Additionally, riding with proper tire pressure helps absorb shocks and vibrations caused by rough terrain. With enough cushioning effect from properly inflated tires, you’ll experience less discomfort and fatigue during long rides on gravel roads. This means you can focus more on enjoying the scenery and less on dealing with jarring impacts.

Furthermore, maintaining accurate tire pressure enhances rolling efficiency. When your tires are inflated to their recommended levels, they roll smoothly over gravel surfaces with minimal resistance. This reduces energy wastage and enables you to cover longer distances effortlessly.

In conclusion, ensuring proper tire pressure when riding on gravel roads is crucial for a smooth and enjoyable experience. The benefits of determining the ideal pressure include improved traction, enhanced comfort, reduced fatigue, and increased efficiency while rolling over different types of gravel road surfaces. Now let’s delve into how to handle these various terrains effectively without compromising our ride quality.

How to Handle Different Gravel Road Surfaces

Navigating through different types of gravel road surfaces can be challenging, but with the right techniques, you can handle them effectively.

When it comes to riding on gravel roads, having the correct tire pressure is crucial. Different tire pressures are required for different types of gravel roads. For loose or sandy surfaces, a lower tire pressure is recommended to increase traction and prevent skidding. This allows the tires to grip the surface better and provides more stability. On the other hand, for compacted or hard-packed gravel roads, a higher tire pressure is necessary to reduce rolling resistance and maintain speed.

Advertisement

To handle loose or sandy surfaces, it is important to distribute your weight evenly on both wheels and keep a relaxed grip on the handlebars. This helps in maintaining balance and control over your bike as you navigate through these tricky terrains. Additionally, it is advisable to pedal smoothly without any sudden jerks or accelerations.

For compacted or hard-packed gravel roads, maintaining a steady speed can help in riding more efficiently. With higher tire pressure, there will be less resistance from the surface which allows for smoother pedaling and faster speeds.

Transitioning into adjusting tire pressure for different riding styles:

Now that we have discussed how to handle different gravel road surfaces effectively using appropriate techniques, let’s move on to another important aspect – adjusting tire pressure for different riding styles without compromising safety or performance.

Adjusting Tire Pressure for Different Riding Styles

Transitioning into adjusting tire pressure for different riding styles, it’s important to consider the terrain and your desired level of performance. When it comes to mountain bike suspension, choosing the right tire pressure is crucial. The amount of air in your tires directly affects how well your bike absorbs shocks and maintains traction on varying surfaces.

Advertisement

For riders who prefer a more aggressive style on gravel roads, lower tire pressures are recommended. This allows the tires to conform to the uneven surface, providing better grip and control. However, keep in mind that running too low of a pressure can increase the risk of pinch flats or rim damage.

On the other hand, if you prefer a faster-paced ride with less rolling resistance, higher tire pressures are suitable. This reduces the amount of tire deformation during contact with the ground, resulting in improved efficiency and speed. However, be cautious not to go too high as this may compromise traction and comfort.

To find the optimal tire pressure for your riding style, start by experimenting within a range recommended by your bike manufacturer or experienced riders. Fine-tune from there based on personal preferences and feedback from each ride.

Transitioning into the subsequent section about ‘tire pressure recommendations for various tire widths,’ it’s essential to understand how different widths affect overall performance without compromising safety or comfort.

Tire Pressure Recommendations for Various Tire Widths

When considering different tire widths, it’s important to understand the recommended tire pressures for optimal performance and safety. For wet conditions, it is generally recommended to lower the tire pressure slightly to increase traction. This allows the tire to conform better to the surface, improving grip and reducing the chances of slipping. However, it’s important not to go too low as this can lead to pinch flats or a loss of control.

Advertisement

On sandy terrain, a higher tire pressure is typically suggested. This helps prevent the tires from sinking into the sand and improves rolling efficiency. By maintaining a firmer contact with the ground, you’ll be able to navigate sandy areas more easily without getting bogged down.

It’s worth noting that these recommendations may vary depending on personal preference and riding style. Some riders may prefer slightly higher or lower pressures based on their own experiences and comfort levels.

In conclusion, adjusting your tire pressure according to different terrains can greatly enhance your riding experience. By following these recommendations for wet conditions and sandy terrain, you can optimize your performance while maintaining safety on your mountain bike rides.

Now let’s move on to some tips for maintaining optimal tire pressure on long rides.

Tips for Maintaining Optimal Tire Pressure on Long Rides

To maintain optimal tire pressure on long rides, it is important to regularly check and adjust the air in your tires. This is especially crucial when riding on gravel roads, as the terrain can be unpredictable.

Advertisement

Here are some tips to help you maintain the right tire pressure for a smooth and safe ride:

  • Check tire pressure before every ride: Use a reliable pressure gauge to ensure your tires are inflated to the recommended PSI. This will help prevent pinch flats and improve traction on rough surfaces.

  • Adjust tire pressure for wet conditions: When riding in wet conditions, it is advisable to slightly lower your tire pressure to increase grip. This will provide better traction and reduce the risk of sliding or skidding.

  • Maintain tire pressure on steep descents: When going downhill, it is crucial to have adequate tire pressure for stability and control. Lowering the air pressure slightly can enhance grip without compromising speed.

  • Monitor temperature changes: Tire pressure can fluctuate with temperature variations. If you notice significant changes, make necessary adjustments to maintain optimal performance.

  • Carry a portable pump or CO2 inflator: In case of unexpected drops in tire pressure during your ride, it is recommended to have a portable pump or CO2 inflator handy. This will allow you to quickly add air if needed.

By following these tips, you can ensure that your mountain bike tires maintain optimal performance throughout long rides.

Now let’s move on to troubleshooting common tire pressure issues without skipping a beat.

Troubleshooting Common Tire Pressure Issues

Maintaining optimal tire pressure on long rides is crucial for a smooth and enjoyable biking experience. However, there may be times when you encounter common tire pressure issues that need troubleshooting. Understanding how to address these problems can help you find the right tire pressure for your mountain bike on gravel roads.

One common issue is having too low or too high tire pressure. This can cause discomfort, reduced traction, and increased risk of flats. To troubleshoot this problem, you can refer to the following table:

Advertisement
Tire Pressure Issue Possible Cause Solution
Low tire pressure Poor inflation or small punctures Inflate the tires to the recommended PSI or patch any punctures
High tire pressure Over-inflation or hot weather Release some air from the tires or wait for them to cool down

By addressing these issues promptly, you can ensure a more comfortable and safer ride on gravel roads. Finding the right tire pressure is essential for optimal performance and control. It may require some trial and error to determine what works best for your specific riding style and terrain conditions.

In conclusion, troubleshooting tire pressure issues is an important part of maintaining an optimal biking experience on gravel roads. By understanding possible causes and solutions for low or high tire pressures, you can fine-tune your bike’s performance. Now let’s move on to our final thoughts and recommendations for mountain bike tire maintenance.

Final Thoughts and Recommendations

In conclusion, when it comes to riding on gravel roads, there are a few final thoughts and recommendations that can greatly enhance your biking experience.

One important consideration is adjusting tire pressure for wet conditions. Wet gravel roads can be slippery, so reducing tire pressure slightly can improve traction and prevent sliding. However, be careful not to lower the pressure too much as it may increase the risk of pinch flats or rim damage.

Another crucial aspect to consider is the impact of tire pressure on cornering performance. Higher tire pressures provide better stability and reduce rolling resistance on straightaways, but they can compromise cornering ability. Lowering the tire pressure slightly allows for increased contact patch with the ground, providing better grip during turns.

Advertisement

It’s essential to find a balance between comfort, traction, and performance when adjusting tire pressure for gravel road riding. Experimenting with different pressures and observing how your bike handles in various conditions will help you determine the optimal range for your specific needs.

Remember that these final thoughts and recommendations are based on general guidelines, but individual preferences may vary. So always trust your own judgment and make adjustments accordingly to ensure an enjoyable and safe biking experience on gravel roads.

Frequently Asked Questions

How does tire pressure affect the comfort of the ride on gravel roads?

When it comes to choosing the right tire pressure for different types of gravel surfaces, it’s important to consider the impact on bike handling and stability.

A lower tire pressure provides more comfort by absorbing bumps and vibrations on rough gravel roads. However, too low of a pressure can increase the risk of pinch flats or sidewall damage.

It’s crucial to find a balance that offers both comfort and sufficient support for optimal bike control and stability on various gravel terrains.

Advertisement

Can I use the same tire pressure for both front and rear tires when riding on gravel?

When it comes to tire pressure on gravel, one size does not fit all. Different types of gravel surfaces require different tire pressures for optimal performance.

Additionally, when participating in the demanding sport of gravel racing, it is crucial to adhere to recommended tire pressures to ensure both speed and control.

However, it is important to note that using the same tire pressure for both front and rear tires may not always be ideal, as individual preferences and riding styles can differ.

Are there any specific tire pressure recommendations for riding on wet gravel roads?

When riding on wet gravel roads, it’s important to adjust your tire pressure accordingly. The recommended tire pressure for different types of gravel surfaces can vary.

Generally, a slightly lower tire pressure is preferred for wet conditions to increase traction and prevent slippage. However, it’s crucial to strike a balance as too low of a tire pressure can lead to increased rolling resistance.

Advertisement

Experimenting with different pressures will help find the optimal setting for your specific riding conditions.

Does tire pressure affect the grip and traction on loose gravel surfaces?

Tire pressure plays a crucial role in off-road performance, akin to a tightrope walker’s balance on a thin rope. It greatly affects grip and traction on loose gravel surfaces.

Finding the optimal tire pressure for different gravel road conditions is key. Lower pressure increases contact area, enhancing grip but risking pinch flats, while higher pressure reduces traction.

Experimentation is necessary to strike the perfect balance and conquer those challenging gravel roads with confidence and control.

What are the signs that indicate I have too low or too high tire pressure when riding on gravel roads?

When it comes to the effects of tire pressure on mountain bike performance, finding the optimal tire pressure for gravel riding is crucial.

Advertisement

Riding with too low tire pressure on gravel roads can result in a sluggish and unstable ride, making it difficult to maintain control and reducing overall traction.

On the other hand, riding with too high tire pressure can lead to reduced grip and an uncomfortable ride.

It’s important to find the right balance by experimenting with different pressures based on your weight, terrain conditions, and personal preference.

Conclusion

In conclusion, understanding the importance of tire pressure when riding on gravel roads is crucial for optimal performance and safety.

By finding the right tire pressure and maintaining it throughout your ride, you can ensure a smooth and enjoyable experience.

Advertisement

While some may argue that monitoring tire pressure can be time-consuming or unnecessary, the benefits far outweigh any inconvenience.

With improved traction, control, and reduced risk of flats or damage to your tires, taking the time to properly inflate them is well worth it.

So don’t hesitate to invest in a good pump and gauge and make tire pressure a priority on your next gravel adventure.

Continue Reading

Gravel Bike

What Kimd Of Bike To Buy For Gravel Trails

Published

on

By

An image showcasing a sturdy bike with wide tires, equipped with disc brakes and a suspension fork, conquering a scenic gravel trail surrounded by lush greenery and rocky terrain

Ready to tackle the gravel trails but unsure which bike is best for the adventure? Look no further!

In this article, I’ll be your guide through the world of bikes designed specifically for those rough and rugged terrain. From mountain bikes built to tackle any obstacle, to versatile adventure bikes perfect for long distances, we’ll explore all the options available.

So, saddle up and get ready to find your ideal ride for those exhilarating gravel trails!

Key Takeaways

  • High-quality touring bikes with wide tires and durable construction are ideal for gravel trails.
  • Different touring bike brands offer unique advantages, so choose based on preferences and needs.
  • Wide tires on soft surfaces provide increased comfort, improved control, better traction, reduced fatigue, and enhanced durability.
  • The right tire tread is important for different terrains to maintain stability and prevent sliding.

Mountain Bikes

If you’re looking to ride on gravel trails, you’ll want to consider a mountain bike. Mountain bikes are designed for off-road riding and can handle the rough terrain that gravel trails often present. They have sturdy frames, wide tires with aggressive tread patterns, and suspension systems that absorb shocks and bumps. These features make them ideal for navigating through uneven surfaces and maintaining control on loose gravel.

Advertisement

When it comes to mountain biking techniques, there are a few things to keep in mind. First, always maintain a balanced body position by keeping your weight centered over the bike. This will help you maneuver through obstacles more easily. Second, use proper braking technique by applying both brakes evenly to avoid skidding or losing control. Lastly, practice shifting gears smoothly to ensure efficient power transfer when climbing or descending.

Maintenance tips for mountain bikes include regularly cleaning and lubricating the chain to prevent rust and improve performance. It’s also important to check tire pressure before each ride and inspect the brakes for wear.

Now let’s transition into discussing gravel bikes without missing a beat. Gravel bikes offer some unique advantages when it comes to riding on gravel trails…

Gravel Bikes

When considering off-road paths, a gravel bike is an excellent choice. Gravel bikes are specifically designed to handle the challenges of riding on gravel trails, making them perfect for adventurous riders looking to explore new terrains. These bikes have several features that set them apart from other types of bicycles.

One key feature of gravel bikes is their wider tires, typically ranging from 35mm to 45mm in width. This allows for better traction and stability on loose surfaces, ensuring a smooth and comfortable ride. Additionally, gravel bikes often have a more relaxed geometry compared to road or mountain bikes, providing a more upright position that enhances comfort during long rides.

Advertisement

When it comes to brands, there are several reputable options available in the market. Some popular gravel bike brands include Specialized, Trek, Giant, and Cannondale. These brands offer a wide range of models with varying components and price points to suit different budgets and preferences.

Transitioning into the next section about cyclocross bikes, it’s important to note that while both gravel bikes and cyclocross bikes are suitable for off-road riding, they have slight differences in design and intended use.

Cyclocross Bikes

When it comes to off-road riding, one of the best options is a Cyclocross bike. These bikes are known for their agility and responsiveness, making them perfect for navigating through gravel trails and other challenging terrains.

Advertisement

Additionally, Cyclocross bikes are typically lighter in weight compared to other types of bikes, allowing for faster acceleration and easier maneuverability. Another advantage is their narrower tires, which provide better efficiency on hard surfaces, allowing riders to maintain speed with less effort.

Overall, if you’re looking for a bike that can handle off-road adventures with ease while still offering great performance on smoother surfaces, a Cyclocross bike is definitely worth considering.

Agile and Responsive for Off-Road Riding

For off-road riding, it’s essential to choose a bike that’s agile and responsive. One key aspect to consider is the benefit of suspension systems for off-road riding. These systems allow the bike to absorb bumps and uneven surfaces, providing a smoother and more comfortable ride. They also help maintain better control and traction on rough terrains, enhancing overall performance.

Another factor that plays a crucial role in agility and control is proper bike fit. A bike that fits well ensures an optimal riding position, allowing for quick maneuvering and precise handling on gravel trails. It’s important to find the right frame size, handlebar width, and saddle height that suit your body dimensions.

By prioritizing agility and control through suspension systems and proper fit, you’ll be able to tackle off-road trails with confidence and ease.

Advertisement

Speaking of ease, let’s now transition into discussing the importance of lighter weight for faster acceleration without skipping a beat.

Lighter Weight for Faster Acceleration

To achieve faster acceleration, prioritize a lighter weight when choosing your off-road bike. A lighter bike allows for quicker maneuverability and easier pedaling, resulting in faster speeds. Every ounce counts on gravel trails, helping you gain and maintain momentum. A lighter bike also improves climbing capabilities, requiring less effort on steep inclines. Manufacturers reduce overall weight to create agile and responsive frames and components for off-road riding, enhancing your experience on challenging terrain.

With faster acceleration and improved climbing abilities, a lighter-weight off-road bike enhances your performance on gravel trails.

When it comes to efficiency on hard surfaces, narrower tires are key.

Narrower Tires for Better Efficiency on Hard Surfaces

Choosing a lighter off-road bike with narrower tires can greatly improve efficiency on hard surfaces. When it comes to gravel trails, opting for narrower tires over wider ones has its advantages. Here are four reasons why:

Advertisement
  1. Increased speed: Narrower tires have less rolling resistance, allowing you to accelerate faster and maintain higher speeds on hard surfaces.

  2. Better traction: With less surface area in contact with the ground, narrower tires can dig into loose gravel and provide better grip.

  3. Improved maneuverability: The reduced width of the tires makes it easier to navigate corners and switch directions quickly.

  4. Less maintenance: Narrower tires tend to pick up fewer rocks and debris from the trail, minimizing the need for frequent cleaning.

Considering these benefits, a bike equipped with narrower tires is a great choice for efficient riding on hard-packed gravel trails.

Now let’s delve into the world of adventure bikes without skipping a beat.

Adventure Bikes

When looking for an adventure bike, you should consider the type of gravel trails you plan on riding. Adventure bikes are specifically designed to handle a variety of terrains, making them perfect for gravel trails. These bikes have features that enhance their performance and durability in off-road conditions.

One of the main benefits of adventure bikes is their versatility. They typically come with wider tires that provide better traction on loose surfaces like gravel. This allows you to navigate through uneven terrain with ease and confidence. Adventure bikes also have a more relaxed geometry compared to road bikes, providing a comfortable riding position for long hours on the saddle.

In addition to their tire width and geometry, adventure bikes often come equipped with disc brakes for reliable stopping power in all weather conditions. They also have mounting points for racks and panniers, allowing you to carry your gear on multi-day adventures.

Advertisement

Transitioning into the subsequent section about touring bikes, it’s important to note that while adventure bikes excel on gravel trails, touring bikes are specifically designed for long-distance rides on paved roads.

Touring Bikes

If you’re planning on taking long rides on paved roads, touring bikes are a great option. These bikes are specifically designed for long-distance travel and offer a comfortable riding experience. One of the key features of touring bikes is their ability to carry heavy loads, making them ideal for bikepacking or extended trips. They usually come with racks and panniers that allow you to easily transport your gear.

When it comes to choosing the best touring bike brand, there are several options available in the market. Some popular brands include Trek, Surly, and Salsa Cycles. These brands have a reputation for producing high-quality touring bikes that can withstand rough terrains and provide stability during long rides.

To help you better understand the different features offered by various touring bike brands, here’s a comparison table:

Brand Frame Material Tire Size
Trek Aluminum 700c
Surly Steel 26"
Salsa Carbon Fiber 650b

Each brand offers its unique advantages based on your preferences and needs. Now let’s move on to the next section about ‘fat bikes’ which are perfect for off-road adventures while still maintaining versatility and comfort."

Advertisement

Fat Bikes

When it comes to riding on soft surfaces like sand, snow, or mud, wide tires are essential for maximum traction. Fat bikes are designed with extra-wide tires that provide excellent grip and stability on these types of terrain.

The wide tires also allow the bike to float over these soft surfaces, making it easier to ride in challenging conditions. Additionally, fat bikes are built with durable construction to withstand rough conditions, ensuring that they can handle anything you throw at them.

Wide Tires for Maximum Traction on Soft Surfaces

For maximum traction on soft surfaces, wide tires are essential. When riding on gravel trails or any kind of loose terrain, having wider tires allows for a larger contact patch with the ground, which in turn provides better grip and stability.

The tire width you choose will depend on the specific terrain you plan to ride on. For example, if you’re mainly riding on packed gravel or hard-packed dirt, a tire width between 35-40mm would be suitable. On the other hand, if you anticipate encountering softer surfaces like sand or mud, opting for a tire width of 45-50mm would be more appropriate.

Wide tires also allow for lower tire pressure options, which further enhances their performance on soft surfaces. By decreasing the tire pressure within the recommended range (usually indicated on the sidewall), you increase the tire’s ability to conform and grip uneven terrain.

Advertisement

With their increased surface area and lower pressure capabilities, wide tires provide excellent flotation over sand, snow, and mud without sacrificing speed or agility. They effortlessly glide over these challenging terrains while providing exceptional traction and control.

Floats Over Sand, Snow, and Mud

Wide tires with their increased surface area and lower pressure capabilities effortlessly glide over sand, snow, and mud while providing exceptional traction and control. When it comes to conquering these soft surfaces, it’s crucial to understand the concept of floats vs sinks.

Wide tires excel in floating on top of loose terrain like sand or snow, preventing them from sinking in and getting stuck. Additionally, the best tire tread for different terrains plays a significant role in performance. Aggressive knobs are perfect for muddy conditions as they dig into the ground for maximum grip. On the other hand, smaller knobs with wider spacing work well on sandy trails by allowing the tire to float better. Lastly, a more closely spaced tread pattern is ideal for snowy conditions to maintain stability and prevent sliding.

Now let’s dive into discussing durable construction for rough conditions without any delay.

Durable Construction for Rough Conditions

With durable construction in mind, you’ll want to look for tires that can withstand rough conditions and provide long-lasting performance. When it comes to gravel trails, a bike with a sturdy frame is essential. Look for durable frame materials such as aluminum or steel, which can handle the bumps and vibrations of rough terrain. Additionally, consider suspension options to further enhance durability. Suspension forks absorb shocks and impacts, ensuring a smoother ride and reducing stress on the frame. A rear suspension system can also be beneficial for added comfort and control over uneven surfaces. By investing in a bike with durable construction and reliable suspension options, you can confidently tackle any rough conditions that come your way while enjoying the thrill of riding on gravel trails.

Advertisement
Pros Cons
Increased comfort Added weight
Improved control Higher cost
Better traction Maintenance requirements
Reduced fatigue Limited efficiency on smooth roads
Enhanced durability Decreased pedaling efficiency

Frequently Asked Questions

Can I use a mountain bike for gravel trails?

Yes, you can use a mountain bike for gravel trails. It has its pros and cons.

The pros include the ability to handle rough terrain with ease and provide better control on descents.

However, the cons include slower speeds on flat surfaces and less efficiency compared to a hybrid bike.

When choosing tire width for a mountain bike on gravel trails, consider wider tires (around 2 inches) for improved stability and traction, while narrower tires offer more speed but less stability.

What is the main difference between a gravel bike and a cyclocross bike?

Comparing gravel bikes to cyclocross bikes is like comparing a sturdy SUV to a nimble rally car. Both are designed for off-road adventures, but with different focuses.

Advertisement

Gravel bikes excel in long-distance comfort and versatility, making them ideal for exploring various terrain types.

On the other hand, cyclocross bikes prioritize speed and agility, perfect for intense races on rough courses.

Ultimately, the choice between the two depends on your specific off-road preferences and riding style.

Are adventure bikes suitable for long-distance rides on gravel trails?

Adventure bikes can be a great option for long-distance rides on gravel trails. They offer a comfortable riding position and are designed to handle rough terrains.

The pros of using a gravel bike for long distance rides include their versatility, allowing you to tackle different surfaces with ease. However, there are alternative bike options for gravel trails such as mountain bikes or cyclocross bikes that may provide better performance in certain situations.

Advertisement

Consider your specific needs and preferences when choosing the right bike.

Can I use a touring bike for off-road gravel trails?

Yes, you can use a touring bike for off-road gravel trails. While it may not be as nimble as a dedicated gravel bike, a touring bike offers stability and durability, making it suitable for rough terrains. It is important to choose a model with wider tires and sturdy construction.

Additionally, while hybrid bikes can handle some off-road trails, they may not be ideal for more challenging terrains.

As for speed, a gravel bike is generally faster than a mountain bike on gravel trails due to its lighter frame and more efficient rolling resistance.

Are fat bikes recommended for gravel trails or are they more suited for snow or sand terrains?

Fat bikes are versatile and can handle a variety of terrains, including gravel trails. Their wide tires provide excellent traction on loose surfaces, making them suitable for off-road adventures.

Advertisement

However, fat bikes may not be as efficient or fast on smoother trails compared to gravel bikes. Gravel bikes are specifically designed for off-road riding and offer a more efficient and comfortable experience on gravel trails.

Ultimately, the choice between fat bikes and gravel bikes depends on personal preference and the specific terrain you plan to ride on.

Conclusion

In conclusion, it’s important to choose a bike that suits your needs and riding style when considering what kind of bike to buy for gravel trails. Whether it’s a mountain bike for technical terrain or a gravel bike for smoother paths, there are plenty of options available.

One interesting statistic to note is that sales of adventure bikes have increased by 60% in the past year, reflecting the growing popularity of this versatile and capable type of bike.

So, go out there and find the perfect ride to conquer those gravel trails!

Advertisement

Continue Reading
Advertisement

Affiliate disclaimer

As an affiliate, we may earn a commission from qualifying purchases. We get commissions for purchases made through links on this website from Amazon and other third parties.

About us

We are a passionate team driven by the belief that cycling is a fantastic and accessible way to stay active while enjoying the beauty of the outdoors. Our mission is to share our love for cycling with as many people as possible. We provide a welcoming environment for individuals of all ages, abilities, and backgrounds to come together and ride bikes. With Ralf’s visionary leadership, Zane’s expertise in cycling adventures, and Olivia’s dedication to community building, we strive to create a vibrant space where everyone can experience the joy of cycling. Through group rides, workshops, and inclusive events, we inspire and empower individuals to embrace an active lifestyle. Join us in our quest to pedal together, embrace the joy of cycling, and foster connections that last a lifetime.

Advertisement

Trending