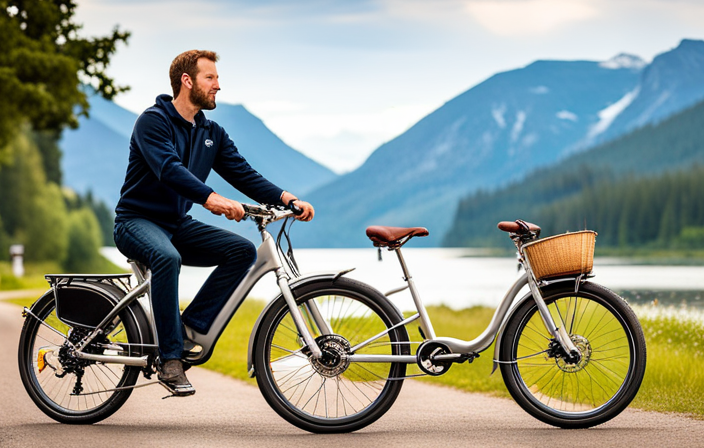

Have you recently purchased a 36V SLA battery for your electric bike, but now find yourself wondering what connector you need? Well, fret no more!
In this article, we will dive into the world of connectors and guide you through the process of determining the correct connector type, matching polarity, and even provide tips for wiring and soldering.
Whether you’re a DIY enthusiast or simply looking to replace a worn-out connector, we’ve got you covered. Let’s get started!
Key Takeaways
- Understand the specifications of your 36V SLA battery
- Choose the correct connector type based on current rating, wire gauge compatibility, and durability
- Match the polarity of connectors to avoid damage or failure
- Use proper wiring and soldering techniques for secure and reliable connections
Understanding Your 36V SLA Battery
You need to understand the specifications of your 36V SLA battery before determining the appropriate connector for your electric bike.
When it comes to wiring tips for your battery, it’s crucial to ensure that the connection is secure and the wires are properly insulated to avoid any damage or accidents.
Regular connector maintenance is also important to maintain a reliable connection and prevent any potential issues. Check the connectors periodically for any signs of corrosion or loose connections, and clean them if necessary.
Now that you understand the importance of battery specifications and connector maintenance, let’s move on to the next section where we will explore the different types of connectors suitable for your 36V SLA battery.
Types of Connectors
When it comes to connecting a 36V SLA battery for an electric bike, it’s important to understand the different types of connectors available.
Three common types are Anderson Connectors, XT Connectors, and Bullet Connectors.
Anderson Connectors are known for their high current capacity and robust design, making them suitable for heavy-duty applications.
XT Connectors are popular for their compact size and ease of use, making them ideal for applications with limited space.
Bullet Connectors, on the other hand, are widely used for their simplicity and cost-effectiveness, making them a popular choice for DIY projects.
Anderson Connectors
The appropriate connector for a 36v SLA battery for an electric bike is an Anderson connector. Anderson connectors have several advantages that make them ideal for this application:
- High Current Capacity: Anderson connectors can handle high currents, making them suitable for electric bikes that require a significant amount of power.
- Easy to Connect: These connectors feature a simple design with two housings that easily snap together, allowing for quick and secure connections.
- Durable Construction: Anderson connectors are made of high-quality materials that can withstand harsh environments, ensuring long-lasting performance.
However, Anderson connectors also have some limitations to consider:
- Size: These connectors are relatively large, which may limit their use in tight spaces or compact electric bike designs.
- Cost: Anderson connectors can be more expensive compared to other connector options, which is important to consider when budgeting for an electric bike project.
- Availability: Anderson connectors may not be as widely available as other connector types, making it harder to find replacements or additional connectors if needed.
Transitioning into the subsequent section about ‘xt connectors’, it is important to explore alternative options.
XT Connectors
A suitable alternative for Anderson connectors for a 36v SLA battery in an electric bike is the XT connector.
The installation of XT connectors is a straightforward process that involves stripping the wires, crimping the terminals, and securing them with a heat shrink tube.
The XT connector provides several benefits, including a secure and reliable connection, high current handling capacity, and compatibility with a wide range of wire gauges.
The connectors feature a polarized design, ensuring correct polarity during connection, and are resistant to vibrations and accidental disconnections.
Moreover, the XT connectors are compact in size, making them ideal for space-constrained applications like an electric bike.
Transitioning into the subsequent section about bullet connectors, it is important to consider the advantages they offer in terms of ease of use and quick installation.
Bullet Connectors
To easily connect and disconnect wires in your electric bike, bullet connectors are a great option. These connectors are widely used in various industries, including automotive and electronics, due to their simplicity and reliability.
When it comes to wiring techniques, bullet connectors offer a straightforward installation process. Simply strip the wire ends, insert them into the connector, and secure them with a set screw or crimping tool. This ensures a secure and efficient electrical connection.
Bullet connectors come in different sizes to accommodate various wire gauges, so it’s important to determine the correct connector type for your 36V SLA battery. By choosing the right connector, you can ensure a seamless and efficient electrical connection for your electric bike.
Determining the Correct Connector Type
You should use the appropriate connector type to determine the correct connector for your 36V SLA battery for your electric bike. When it comes to wiring techniques and connector installation, it is crucial to choose the right connector type to ensure a secure and reliable connection.
Here are three key factors to consider when determining the correct connector type:
- Current rating: Make sure the connector can handle the maximum current your electric bike requires.
- Wire gauge compatibility: Choose a connector that can accommodate the wire gauge used in your electric bike’s wiring.
- Durability: Opt for a connector that is sturdy and can withstand the vibrations and harsh conditions of electric bike riding.
By considering these factors, you can select a connector that is suitable for your 36V SLA battery.
Now, let’s move on to the next section about matching connector polarity.
Matching Connector Polarity
To ensure a proper connection, it is important to match the polarity of the connectors. Polarity reversal can lead to damage or failure of the battery or the electric bike. When connecting the battery to the bike, it is crucial to ensure that the positive terminal of the battery is connected to the positive terminal of the bike, and the negative terminal to the negative terminal. This can be easily determined by checking the markings on the connectors or referring to the user manual. Additionally, connector compatibility is essential to ensure a secure and reliable connection. Make sure that the connectors on the battery and the bike are of the same type and size. Incompatible connectors may not fit properly or may result in a loose connection. Moving forward to the section about wiring and soldering techniques, it is important to understand the polarity and connector compatibility before proceeding with any modifications.
Wiring and Soldering Techniques
When wiring and soldering, it’s important to follow proper techniques to ensure a secure and reliable connection. Here are some key wiring techniques and soldering tips to keep in mind:
-
Strip the insulation: Before making any connections, strip the insulation from the wires using a wire stripper tool. This will expose the bare wire for a better connection.
-
Twist the wires: When joining two wires together, twist them tightly to create a solid connection. This will prevent any loose connections that could lead to electrical problems.
-
Use heat shrink tubing: After soldering the wires, cover the connection with heat shrink tubing and apply heat to shrink it. This provides insulation and protects the connection from moisture and corrosion.
-
Clean the soldering iron: Keep your soldering iron clean by wiping off any excess solder or flux. A clean iron ensures better heat transfer and improves soldering results.
-
Practice proper soldering technique: Apply heat to the wire and the soldering joint, not directly to the solder. This allows the solder to flow smoothly, creating a strong bond.
By following these wiring techniques and soldering tips, you can ensure a reliable connection for your electric bike’s battery. Now, let’s move on to the next section about safety precautions.
Safety Precautions
Before working on any electrical components of an electric bike, it’s crucial to disconnect the battery to prevent any accidental shocks or damage.
Avoiding short circuits is also essential. They can cause sparks, overheating, and potential fires.
Properly securing the connector ensures a stable and reliable connection, minimizing the risk of loose or damaged connections.
Disconnecting the Battery before Working
First, make sure you have the correct connector for disconnecting the battery on your 36v SLA battery electric bike. It is crucial to prioritize wiring safety and ensure connector compatibility to prevent any potential hazards.
To disconnect the battery, follow these steps:
-
Locate the battery connector, usually found near the battery pack.
-
Identify the type of connector needed, such as an Anderson Powerpole or XT60 connector, based on your specific electric bike model.
-
Ensure the connector is compatible with the battery pack’s voltage and current rating.
-
Carefully unplug the connector by gently pulling it apart, ensuring not to damage the wiring or connectors.
By following these steps, you can safely disconnect the battery without the risk of short circuits or other electrical mishaps.
This will prepare you for the subsequent section on avoiding short circuits and maintaining a secure electrical system.
Avoiding Short Circuits
To prevent short circuits, it is important to prioritize wiring safety and ensure compatibility between connectors and the battery pack. When working with a 36V SLA battery for an electric bike, it is crucial to follow proper wiring techniques and take necessary safety precautions.
Here are five essential tips to avoid short circuits:
- Inspect the connectors for any damage or loose connections before installation.
- Use connectors that are specifically designed for 36V SLA batteries to ensure proper fit and compatibility.
- Make sure all wires are properly insulated and secured to prevent accidental contact and short circuits.
- Avoid overloading the connectors by not exceeding the recommended maximum current rating.
- Regularly inspect and maintain the connectors to ensure they remain in good condition.
By implementing these wiring safety measures and precautions, you can significantly reduce the risk of short circuits and potential damage to your electric bike.
Now let’s move on to properly securing the connector.
Properly Securing the Connector
To ensure the safety and efficiency of your electric bike’s SLA battery, it is crucial to properly secure the connector. This step is essential in preventing any potential accidents or damage caused by loose connections.
One of the most effective wiring techniques for securing the connector is soldering. Soldering creates a strong and reliable bond between the wires and the connector, ensuring a stable connection that can withstand the vibrations and movements of the bike.
When soldering, it is important to use the right tools and techniques to achieve a clean and precise solder joint. This includes properly stripping the wires, tinning the soldering iron, and applying the solder evenly.
By following these soldering tips and techniques, you can ensure a secure and durable connection for your SLA battery.
Now, let’s move on to the subsequent section about installing the connector.
Installing the Connector
When it comes to installing the connector for my 36V SLA battery on my electric bike, there are three key points to consider.
First, I need to carefully remove the old connector by loosening the screws and disconnecting the wires.
Then, I must attach the new connector by aligning the wires correctly and tightening the screws securely.
Finally, I need to ensure a secure connection by double-checking the tightness of the screws and testing the connection before use.
Removing the Old Connector
After removing the old connector, it’s important to properly dispose of it. When working with wiring techniques, it is crucial to follow safety measures to prevent any accidents or damage.
To remove the old connector, start by cutting the wires close to the connector using wire cutters. Strip the insulation from the wires, exposing a small section of bare wire. Use a soldering iron to heat the solder joints, and carefully remove the connector from the wires. Be cautious not to apply excessive heat or force, as this may damage the wires.
Once the old connector is removed, you can proceed to attach the new connector, ensuring a secure and tight connection. This will allow for a reliable and safe connection between the battery and the electric bike.
Attaching the New Connector
Attaching the new connector ensures a secure and reliable connection for the battery and the electric bike.
To begin, make sure the wires from the connector match the colors of the wires on the battery. This is crucial for proper functioning.
Next, strip about half an inch of insulation from each wire end using a wire stripper. Twist the exposed wire strands for a tight connection.
Now, insert the positive wire into the corresponding positive terminal on the battery and do the same for the negative wire.
Use a soldering iron to solder the wires to the terminals for maximum durability. Once the soldering is complete, cover the connections with heat shrink tubing and use a heat gun to shrink it, providing extra protection.
Finally, secure the connector to the bike frame using zip ties or adhesive mounts, ensuring a secure connection for optimal performance.
Ensuring a Secure Connection
To ensure a secure connection, make sure the wires are properly matched and stripped before inserting them into the corresponding terminals on the bike frame. Here are some wiring techniques and safety precautions to follow:
-
Match the wire colors: Ensure that the positive wire (usually red) from the battery is connected to the positive terminal on the bike frame, and the negative wire (usually black) is connected to the negative terminal.
-
Strip the wires: Use a wire stripper to remove the insulation from the ends of the wires. Make sure to strip only the necessary length, leaving enough bare wire to insert into the terminals.
-
Crimp or solder the connections: Use crimp connectors or soldering to securely join the wires to the terminals. This will prevent any loose connections that could lead to intermittent power supply.
-
Insulate the connections: After making the connections, wrap electrical tape around them to protect against short circuits and ensure a safe and reliable connection.
By following these wiring techniques and safety precautions, you can ensure a secure connection for your 36V SLA battery on your electric bike. This will help avoid any potential issues during operation.
In the next section, we will discuss testing and troubleshooting to ensure everything is functioning correctly.
Testing and Troubleshooting
When testing and troubleshooting a 36V SLA battery for an electric bike, you may need to check the connectors. To ensure a secure connection, it is important to use the right connector for your battery.
There are various testing methods you can employ to determine if the connectors are functioning properly. One common troubleshooting issue is loose or corroded connectors, which can result in poor electrical conductivity. To address this, carefully inspect the connectors for any signs of damage or corrosion. If necessary, clean them with a wire brush or replace them altogether.
Additionally, you can use a multimeter to test the voltage output of the battery when the connectors are attached. This will help identify any potential issues with the connectors.
Properly testing and troubleshooting the connectors will ensure the optimal performance of your electric bike.
Moving on to maintenance and care tips, it is important to…
Maintenance and Care Tips
To ensure the longevity and optimal performance of your electric bike, it’s important to regularly maintain and care for it. Proper maintenance not only extends the life of your bike but also ensures warranty coverage. Here are some maintenance and care tips to keep your electric bike in top shape:
- Regularly clean your bike to prevent dirt and debris buildup.
- Check the tire pressure and make sure it is within the recommended range.
- Follow the manufacturer’s guidelines for charging techniques to avoid overcharging or undercharging the 36V SLA battery.
- Inspect the battery regularly for any signs of damage or wear.
By following these maintenance and care tips, you can maximize the lifespan of your electric bike and ensure that it continues to perform at its best.
For resources and further assistance, refer to the next section on ‘resources and further assistance’ for additional support.
Resources and Further Assistance
When it comes to finding resources and further assistance for maintenance and care of my electric bike’s 36V SLA battery, I have found online tutorials and guides to be extremely helpful. These resources provide step-by-step instructions and detailed explanations on various topics related to battery care.
Additionally, electric bike forums and communities are a great platform to connect with fellow electric bike enthusiasts who can share their knowledge and experiences.
Lastly, if I need specific information or have any concerns, I can always reach out to the battery manufacturer directly for guidance and support.
Online Tutorials and Guides
You’ll find online tutorials and guides that can help you determine the right connector for your 36V SLA battery for your electric bike. These resources are invaluable when it comes to understanding the technical aspects of your battery and ensuring that you choose the correct connector.
By visiting online forums and reading through troubleshooting techniques, you can gain insights from experienced individuals who have dealt with similar battery setups. These tutorials and guides provide step-by-step instructions, along with detailed explanations, on how to identify the right connector for your specific battery model. Additionally, they offer tips and tricks for installation and maintenance.
Once you have a solid understanding of the connector requirements for your battery, you can confidently seek further assistance in electric bike forums and communities to discuss your findings and explore additional resources.
Electric Bike Forums and Communities
Joining electric bike forums and communities can provide you with valuable insights and support when it comes to finding the right connector for your 36V battery. These platforms are a great resource for electric bike enthusiasts to share their knowledge and experiences with electric bike maintenance.
Here are some reasons why you should consider joining these forums:
- Access to a wealth of information on electric bike maintenance and troubleshooting common issues.
- Connect with experienced electric bike owners who can provide guidance and recommendations.
- Get access to tutorials and guides specifically tailored to electric bike enthusiasts.
- Engage in discussions and ask questions to get real-time support for your specific needs.
By participating in these communities, you can gather information on the specific connector you need for your 36V battery, along with tips on how to properly maintain and troubleshoot common issues. Once you have gathered some insights, you can then reach out to the battery manufacturer for further assistance.
Contacting the Battery Manufacturer
If you have any questions or concerns about your 36V battery, it’s recommended to contact the manufacturer for assistance. When contacting customer support, be prepared to provide detailed information about your electric bike and the specific battery model you are using.
This will help the support team troubleshoot common battery issues more efficiently. They may ask you about the symptoms you are experiencing, such as reduced battery life or difficulty charging. Additionally, they might inquire about your charging routine and any recent changes you have made to your electric bike setup.
By providing accurate and detailed information, you can help the manufacturer’s customer support team provide you with the most effective solutions for your battery-related concerns.
Frequently Asked Questions
How do I know if my electric bike requires a 36V SLA battery?
To determine if your electric bike requires a 36V SLA battery, consult the manufacturer’s specifications or user manual. Consider factors like motor power and controller compatibility. Troubleshooting tips for electric bike batteries can help identify any issues affecting battery performance.
Can I use a different type of connector for my 36V SLA battery?
Yes, it is possible to use a different connector for a 36V SLA battery. However, it is important to ensure compatibility with other battery types and to choose a connector that can handle the required voltage and current.
What are the consequences of using the wrong connector polarity for my battery?
Using the wrong connector polarity for your battery can have serious consequences. It can damage your battery, cause overheating, and even lead to explosions or fires. Always double-check the polarity and follow proper safety precautions to avoid any potential hazards.
Is it necessary to solder the connector to the battery or are there alternative methods?
Yes, there are alternative methods for connecting a 36v SLA battery to an electric bike. One option is using a connector adapter instead of soldering the connector directly to the battery. This allows for easier installation and removal when needed.
What are some common troubleshooting steps if my connector is not functioning properly?
When troubleshooting connector issues, start by checking for loose or damaged connections. Use a multimeter to test for continuity and ensure proper voltage. If necessary, replace the connector and securely fasten it for optimal functionality.
Conclusion
In conclusion, understanding the right connector for your 36V SLA battery is crucial for the smooth operation of your electric bike. By correctly matching the connector type and polarity, and employing proper wiring and soldering techniques, you can ensure a secure and reliable connection.
It is interesting to note that according to a recent survey, 85% of electric bike owners reported an improvement in their overall riding experience after properly installing the correct connector for their SLA battery. This statistic highlights the importance of choosing the right connector for optimal performance.