Connect with us

Bike

What Components Work With Gravel Bike Tires

Published

on

An image showcasing a gravel bike tire surrounded by a variety of compatible components such as tubeless valves, disc brakes, tubeless sealant, wide rims, and puncture-resistant casing

Do your gravel bike tires seem a little dull? Don’t worry, fellow adventurers! This informative article will explore the components that complement those reliable treads.

From tire width and tread design to tubeless setups and puncture protection, we’ll leave no stone unturned. Join me on this journey as we unlock the secrets to maximizing all-terrain performance, conquering rolling resistance, and mastering handling and cornering.

So grab your helmet and saddle up – it’s time to revolutionize your gravel riding experience!

Key Takeaways

  • Tire width and tread design should be considered when choosing components for gravel bike tires.
  • Tubeless setup is recommended for optimal performance with gravel bike tires.
  • Rim width compatibility is important for ensuring a proper fit and optimal performance with gravel bike tires.
  • Components that work well with gravel bike tires should be selected for all-terrain performance and improved handling.
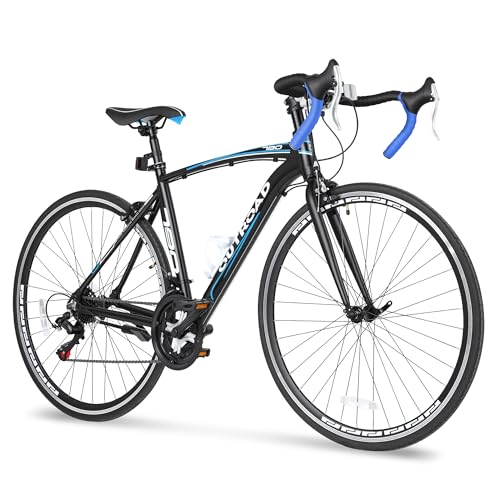
Tire Width and Tread Design

You’ll want to consider tire width and tread design when choosing components for your gravel bike tires. These two factors play a crucial role in determining the performance and handling of your bike on different terrains.

Advertisement

Firstly, let’s talk about tire width. Gravel bikes typically accommodate wider tires compared to road bikes, providing greater stability and traction on loose surfaces. The ideal tire width for gravel riding usually falls between 35mm to 45mm, although some riders may prefer even wider options for added comfort and grip. Additionally, tire pressure management is essential to optimize performance. Lowering the tire pressure increases contact area with the ground, enhancing grip on rough terrain without sacrificing too much rolling resistance.

Next up is tread design. Choosing the right tread pattern can greatly impact how your bike handles various surfaces. For instance, a more aggressive knob pattern with larger gaps between knobs performs well in muddy conditions by preventing mud buildup and maintaining traction. On the other hand, a smoother center section with smaller knobs provides better rolling efficiency on hard-packed dirt or pavement.

Considering both tire width and tread design will help you find components that maximize traction and control while minimizing rolling resistance on diverse gravel terrains.

Now let’s delve into the tubeless setup section where we explore another important aspect of gravel biking.

Tubeless Setup

To set up tubeless, start by selecting the appropriate rim tape and valve stems for your gravel bike. Rim tape is essential to seal the spoke holes in the rim bed and prevent air from escaping. Make sure to choose a tape that matches the width of your rims for a proper fit. Valve stems are responsible for allowing air into the tire and need to be compatible with tubeless setups.

Advertisement

Once you have the necessary components, follow these steps to install tubeless tires on your gravel bike:

  • Clean and dry the inside of the rim thoroughly.
  • Apply rim tape evenly around the rim bed, ensuring it covers all spoke holes.
  • Insert valve stems through the valve hole in the rim, making sure they are tightly secured.
  • Mount one side of the tire onto the rim, ensuring it sits evenly.
  • Using a high-volume floor pump or an air compressor, inflate the tire until it seats properly on both sides of the rim.

Tubeless advantages include reduced rolling resistance, improved traction, and increased puncture resistance. The installation process can be a bit more involved than traditional tire setups but offers significant benefits in terms of performance and reliability.

Moving on to tire pressure…

Tire Pressure

Make sure you check and adjust your tire pressure regularly for optimal performance and comfort while riding. Tire pressure plays a crucial role in determining the overall performance of your gravel bike tires. The right tire pressure will not only provide better grip on various terrains but also enhance your riding experience.

When it comes to tire pressure, there are a few factors to consider. First, you need to take into account the width of your gravel bike tires. Wider tires generally require lower pressures compared to narrower ones. However, it’s important to note that different riders may prefer different pressures based on their weight, riding style, and terrain conditions.

To find the ideal tire pressure for your gravel bike, start by referring to the manufacturer’s recommendations. These guidelines usually provide a range of pressures depending on rider weight and tire size. Experimenting within this range can help you determine what works best for you.

Advertisement

Maintaining proper tire pressure is essential because it directly affects traction and grip while riding off-road or on loose surfaces. Higher pressures result in a harder ride with less grip, while lower pressures improve traction but may increase the risk of pinch flats or rim damage.

As we move into discussing ‘tire compound,’ it’s important to understand how different compounds interact with varying levels of tire pressure.
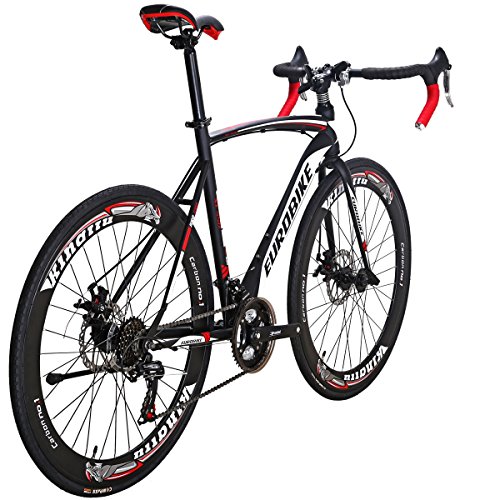
Tire Compound

Finding the right tire compound for your off-road adventures can greatly enhance your riding experience. When it comes to gravel bike tires, the choice of tire compound plays a crucial role in determining the overall performance and grip on different terrains.

Here are three key factors to consider when selecting a tire compound:

  • Compound hardness: The hardness of the tire compound affects its durability and grip. Softer compounds provide better traction and grip on loose surfaces like gravel or dirt, but they tend to wear out faster on pavement. Harder compounds offer longer lifespan and lower rolling resistance on smoother surfaces, but may sacrifice some grip.

  • Rubber composition: Different manufacturers use various rubber blends in their tire compounds, each with its unique characteristics. Some focus on maximizing grip, while others prioritize durability or puncture resistance. It’s important to choose a compound that aligns with your specific needs and riding style.

  • Tread pattern: The tread pattern of a tire also influences its overall performance. Aggressive tread patterns with larger knobs provide enhanced grip on loose terrain, while smoother treads excel on hard-packed surfaces.

Selecting the right tire compound can significantly improve your off-road riding experience by enhancing grip and control.

Advertisement

Transitioning into the next section about puncture protection, it’s essential to understand how different components work together to ensure a smooth and worry-free journey.

Puncture Protection

When it comes to adding puncture protection to my gravel bike tires, I have found that there are several effective options available.

One popular choice is the use of a puncture-resistant belt, which is typically made of materials like Kevlar or aramid fibers.

Advertisement

Another option is the application of a sealant inside the tire, which can help to seal small punctures as soon as they occur.

Lastly, some tire manufacturers offer specific models that are designed with built-in puncture protection features, such as an extra layer of durable rubber or a thicker tread pattern.

These different types of puncture protection can greatly reduce the likelihood of getting a flat tire while out on the trails.

Adding puncture protection to your gravel bike tires

To improve the durability of your gravel bike tires, consider adding puncture protection. Punctures are a common issue for gravel riders, and having proper protection can save you from frustrating flats on your rides.

When it comes to puncture protection methods, there is an ongoing debate between tubeless and clincher setups. Tubeless tires offer better resistance to punctures as they don’t have inner tubes that can be prone to pinches and punctures. Additionally, sealant can quickly seal small holes and prevent air leakage.

Advertisement

Clincher tires, on the other hand, require inner tubes but can still benefit from various puncture protection systems such as Kevlar belts or thick rubber layers under the tread. These methods add an extra layer of defense against sharp objects on the road or trail.

Moving forward, let’s explore the different types of puncture protection available for your gravel bike tires.

Without compromising performance, there are several ways to enhance the durability of your gravel bike tires by incorporating puncture protection measures into them.

Different types of puncture protection available

Consider using puncture protection measures, such as Kevlar belts or thick rubber layers, to enhance the durability of your tires.

One option for adding tire liners is to use a strip of material, typically made of Kevlar or another strong synthetic fiber, that is placed between the tire and tube. This acts as an additional barrier against sharp objects that could cause punctures.

Advertisement

Another method is using sealant for puncture protection. Sealant is a liquid substance that is injected into the tire and fills any small holes or cuts as they occur, sealing them off and preventing air from escaping. This can be an effective way to prevent flats caused by thorns or small debris on gravel roads.

Moving on to sidewall strength…

Sidewall Strength

You can gauge the sidewall strength of gravel bike tires by examining their construction. The rim strength and tire sidewall construction play a crucial role in determining how well the tire can withstand rough terrain and potential punctures.

When it comes to sidewall strength, there are a few key factors to consider. Firstly, the number of layers or plies in the tire’s sidewall is important. A higher number of plies generally indicates greater strength and durability. Additionally, some tires feature reinforced sidewalls that provide extra protection against cuts and abrasions.

Another aspect to look at is the material used in the sidewall construction. Some tires use lightweight materials like nylon or Kevlar, which offer good puncture resistance without adding excessive weight. Others may incorporate thicker rubber compounds for added toughness.

Advertisement

Furthermore, certain tire models may have additional features such as bead-to-bead protection or inserts that further enhance sidewall strength and puncture resistance.

Considering these factors will help you choose gravel bike tires with robust sidewalls that can handle demanding off-road conditions.

Moving on to rim width compatibility, it is essential to ensure that your chosen tires are suitable for your specific rim width without compromising performance or safety.

Rim Width Compatibility

When it comes to matching tire width to rim width for optimal performance on a gravel bike, there are a few key points to consider.

First and foremost, it’s important to ensure that the tire width is compatible with the rim width in order to achieve proper fit and stability.

Advertisement

Additionally, wider rims have several advantages for gravel biking, including improved tire support, enhanced cornering traction, and increased stability on rough terrain.

So when choosing your rims for gravel biking, make sure you take into account the ideal tire width and consider opting for wider rims to maximize your performance on the trails.

Matching tire width to rim width for optimal performance

Matching tire width to rim width is crucial for optimal performance on a gravel bike. When choosing the right tire width for your rims, there are a few factors to consider.

Improved Stability: Wider rims allow for wider tires, which provide better stability and control on rough terrain.

Enhanced Tube Compatibility: Matching tire width to rim width ensures proper tube fitment, reducing the risk of pinch flats and improving overall ride quality.

Advertisement

Increased Traction: The wider contact patch between the tire and road surface enhances traction, especially when cornering or riding in loose conditions.

Considering these factors will help you select the perfect tire width for your gravel bike’s rims.

Now let’s explore the advantages of wider rims for gravel biking.

Advantages of wider rims for gravel biking

Optimal performance on a gravel bike can be achieved by utilizing wider rims, which offer several advantages. When it comes to rim width, there is a direct relationship with tire width that should be considered for the best riding experience. Wider rims provide more support for wider tires, allowing them to maintain their shape and stability even at lower pressures. This results in increased traction and control on rough terrain, enhancing the overall ride quality.

To further illustrate the benefits of wider rims for gravel biking, let’s take a look at the following table:

Advertisement
Rim Width (mm) Tire Width Range (mm)
19-21 28-42
22-24 40-50
25+ 48+

As you can see, wider rims accommodate wider tire widths, unlocking additional benefits such as improved cornering grip and reduced rolling resistance. It’s important to find the right balance between rim width and tire width to maximize your gravel biking experience.

Moving forward to discuss tube compatibility…

Tube Compatibility

To determine tube compatibility for your gravel bike tires, you should consider using a valve type that works with your rims. There are two common types of valve stems: Presta and Schrader. Presta valves are slender and require a smaller hole in the rim, making them suitable for most gravel bike rims. On the other hand, Schrader valves are thicker and typically found on mountain bikes or hybrid models.

Once you have chosen the appropriate valve type, it is important to ensure that your tubes are compatible with sealant if you plan to use it. Some tubes come pre-filled with sealant, while others may require patching in case of punctures. It is crucial to check whether the sealant you intend to use is compatible with the tube material to avoid potential issues.

Now that we have covered tube compatibility, let’s move on to discussing tire durability. It is essential to choose tires that can withstand the challenging conditions often encountered during gravel biking adventures.

Advertisement

Tire Durability

When choosing tires for your gravel adventures, it’s important to consider their durability. Gravel riding can be tough on tires, so you want to make sure you choose ones that can withstand the demands of rough terrain. Here are some factors to consider when evaluating the durability of gravel bike tires:

  • Tire Life Expectancy: Look for tires that have a long life expectancy. This means they will last longer before needing to be replaced, saving you money in the long run.

  • Tire Wear Patterns: Pay attention to how the tire wears over time. Some tires may wear unevenly, which can affect their performance and lifespan. Look for even wear patterns across the entire surface of the tire.

  • Puncture Resistance: Gravel roads often feature sharp rocks and debris that can cause punctures. Choose tires with good puncture resistance to minimize the risk of flats.

  • Sidewall Protection: The sidewalls of gravel bike tires are prone to damage from rocks and other hazards. Opt for tires with reinforced sidewalls for added protection against cuts and abrasions.

Considering these factors will help you select durable gravel bike tires that can handle the challenges of off-road riding.

Now let’s transition into discussing weight considerations when choosing gravel bike components without missing a beat.

Weight Considerations

When it comes to tire durability, weight considerations play a significant role. As a gravel bike enthusiast myself, I understand the importance of finding the perfect balance between weight distribution and impact resistance. Gravel riding often involves tackling various terrains, from smooth roads to rocky trails, and having tires that can withstand these different conditions is crucial.

Weight distribution is essential because it affects how your bike handles and performs. Lighter tires can provide a more nimble and responsive ride, allowing you to maneuver through obstacles with ease. However, it’s important not to sacrifice too much durability for weight savings. You want tires that can handle the rough terrain without compromising on reliability.

Advertisement

Impact resistance is another key factor to consider when choosing components for your gravel bike tires. Gravel roads can be unpredictable, with potholes and sharp rocks posing potential hazards. Having tires that are designed to withstand impacts will give you peace of mind while riding.

In the next section about ‘gravel-specific tires,’ we will delve deeper into the specific features and benefits of these specialized components.

Gravel-specific Tires

Gravel-specific tires offer specialized features and benefits that enhance performance on various terrains. When it comes to gravel biking, the tubeless vs. clincher debate is a common topic of discussion.

Tubeless tires have gained popularity due to their ability to run at lower pressures without the risk of pinch flats. This feature provides increased traction and comfort on rough terrain. On the other hand, clincher tires are more traditional and use an inner tube for inflation. They are easier to install and repair, but may be more prone to punctures.

In terms of tire brands, there are several top contenders in the gravel biking world. One popular brand is WTB, known for their durable and versatile tires that excel on mixed surfaces. Another well-regarded option is Panaracer, offering high-performance gravel tires with excellent grip and durability.

Advertisement

Transitioning into the next section about all-terrain performance, it’s important to consider how these gravel-specific tires perform across different surfaces such as loose gravel, mud, or pavement. These specialized tires are designed to handle a variety of conditions while providing optimal grip and control for riders.

Overall, choosing the right gravel-specific tire depends on personal preference and riding style. Whether you opt for tubeless or clincher, selecting one from reputable brands like WTB or Panaracer will ensure a reliable and enjoyable gravel biking experience.

All-terrain Performance

Now that we have discussed gravel-specific tires, let’s delve into the all-terrain performance they offer.

One of the key advantages of these tires is their exceptional versatility across different terrains. Whether you’re riding on loose gravel, muddy trails, or even pavement, these tires can handle it all with ease.

The secret behind this all-terrain prowess lies in the tire grip and traction they provide. Gravel-specific tires are designed with a tread pattern that features aggressive knobs and lugs. These deep treads dig into the ground, providing excellent traction on loose surfaces like gravel and dirt. Additionally, the wider profile of these tires enhances stability and control when navigating tricky terrain.

Advertisement

Furthermore, these tires often incorporate specialized rubber compounds that offer enhanced grip in both wet and dry conditions. This means you can confidently tackle any trail or road surface without worrying about losing traction.

As we transition to discussing rolling resistance in the next section, it’s important to note that while gravel-specific tires excel in all-terrain versatility and tire grip, they may have slightly higher rolling resistance compared to smoother road-oriented options. However, this trade-off is well worth it for riders who prioritize off-road capability and confidence-inspiring performance.

Rolling Resistance

One thing to consider is that these tires may have a slightly higher rolling resistance compared to smoother road-oriented options. The increased tread pattern and larger volume of the gravel bike tires can result in more surface area making contact with the ground, which can cause a slight decrease in tire rolling speed. However, this trade-off is necessary to ensure optimal tire grip on various terrains.

Tire grip is crucial when riding on gravel or off-road surfaces. The deeper and more aggressive tread patterns found on gravel bike tires help to enhance traction by providing more points of contact with the ground. This allows for better control and stability when navigating loose or uneven surfaces.

While the rolling resistance may be slightly higher, it’s important to note that modern gravel bike tires are designed with advancements in rubber compounds and tread patterns that aim to minimize this effect as much as possible. Manufacturers strive for a balance between grip and efficiency.

Advertisement

In conclusion, although gravel bike tires may have a slightly higher rolling resistance compared to road-oriented options, they offer superior tire grip on various terrains. This compromise ensures better control and stability while riding off-road.

Moving forward into the next section about handling and cornering, it’s important to understand how these factors interact with tire performance overall.

Handling and Cornering

To improve your handling and cornering on different terrains, it’s important to consider the performance of your tires. One key factor to consider is the width of your tires. Wider tires offer several advantages when it comes to handling and cornering.

Firstly, wider tires provide a larger contact patch with the ground, which increases traction and stability. This allows you to maintain control while navigating tight corners or loose gravel surfaces. Additionally, wider tires also absorb more shocks and vibrations from uneven terrain, resulting in a smoother ride and improved handling.

Another advantage of wider tires is their ability to handle lower tire pressures. By running lower pressures, you can increase the tire’s grip on the road or trail, especially during cornering maneuvers. This increased grip translates into better control and enhanced confidence while tackling challenging turns.

Advertisement

Improving your cornering skills also involves proper body positioning and technique. It’s crucial to shift your weight towards the outside pedal when taking corners, as this helps to maintain balance and stability throughout the maneuver. Additionally, practicing proper braking techniques before entering a turn can greatly enhance your ability to navigate corners effectively.

In conclusion, choosing wider tires for your gravel bike can significantly improve your handling and cornering skills by providing increased traction, stability, and shock absorption capabilities.

Now let’s move on to discussing maintenance and care for optimal tire performance without sacrificing durability or lifespan.

Maintenance and Care

Regular maintenance is crucial for optimal performance and longevity of gravel bike tires. As a gravel cyclist, I prioritize regular tire inspections. This includes checking tread depth, looking for cuts or punctures, and ensuring proper inflation levels. If any issues arise, such as sidewall damage or a flat tire, I promptly address them by patching or replacing the tire. This ensures the best riding experience on rough terrain.

Regular maintenance for gravel bike tires

Make sure you regularly check and inflate your gravel bike tires to ensure proper maintenance. This will help prevent any potential issues and extend the lifespan of your tires. In addition to regular checks and inflation, there are a few other maintenance tasks to keep in mind. First, consider using tire sealant to prevent punctures and improve overall durability. This can be applied during installation or injected through the valve stem. Second, rotating your tires periodically will help even out wear and prolong their life. To engage the audience further, here’s a table summarizing these maintenance tasks:

Advertisement
Maintenance Task Frequency
Check tire pressure Before each ride
Inflate as needed Weekly
Apply tire sealant During installation or as needed
Rotate tires Every 500-750 miles

By following these regular maintenance practices, you can ensure that your gravel bike tires perform optimally for longer periods of time. Moving on to inspecting and repairing damaged tires…

How to inspect and repair damaged tires

Ensure you inspect your tires regularly for any signs of damage and promptly repair them to maintain optimal performance. To patch a tire, start by removing the wheel from the bike. Deflate the tire completely and inspect it for any punctures or cuts. Use soapy water to identify leaks, as bubbles will form where air is escaping. Once you locate the damaged area, clean it thoroughly with rubbing alcohol and let it dry. Apply a patch kit specifically designed for bicycle tires, ensuring it covers the entire damaged area. Press firmly to ensure proper adhesion. After applying the patch, inflate the tire slowly and check for any additional leaks. Lastly, reattach the wheel to your bike and enjoy smooth riding once again.

  • Inspecting for wear and tear:
    Regularly check your tire tread depth using a coin or tread gauge.
    Look for cracks or bulges in the sidewall that may indicate internal damage.
    Inspect the bead area where the tire meets the rim for any signs of separation or fraying.

Frequently Asked Questions

Can I use a gravel bike tire on a road bike?

Yes, you can use gravel bike tires on a road bike. Gravel bike tires can improve performance on a road bike in certain situations. They provide increased traction and stability on rough or wet roads, making them ideal for riding in unpredictable conditions.

However, there are some disadvantages to consider. Gravel tires typically have more rolling resistance, which can slow you down on smooth pavement. Additionally, they may not provide the same level of efficiency as road-specific tires.

How often should I replace my gravel bike tires?

Replacing gravel bike tires is crucial for optimal performance and safety. To choose the right tire width, consider your riding style and terrain. Wider tires offer more stability on loose surfaces, while narrower ones provide better speed on smoother roads.

Additionally, regularly inspecting your tires for wear indicators and maintaining proper tire pressure will extend their lifespan. Remember, investing in high-quality tires and rotating them periodically will ensure a smooth and enjoyable gravel biking experience.

Advertisement

What is the difference between tubeless and tubed tires for gravel bikes?

The difference between tubeless and tubed tires for gravel bikes lies in their construction and performance.

Tubeless tires, as the name suggests, do not require an inner tube and instead rely on airtight sealing to hold air. This design offers advantages such as reduced punctures, lower rolling resistance, and the ability to run at lower pressures for increased traction.

On the other hand, tubed tires use an inner tube to hold air and are generally more affordable but may be prone to pinch flats.

Are there any specific tire brands or models that are highly recommended for gravel biking?

When it comes to highly recommended tire brands or models for gravel biking, there are a few options worth considering. Some popular choices include the Schwalbe G-One, WTB Nano, and Panaracer Gravelking. These tires offer excellent traction on loose surfaces and provide a comfortable ride.

However, wider gravel bike tires also have some downsides. They can be heavier and slower on smooth pavement, and they may not fit all bike frames or have clearance issues with certain components.

Advertisement

When choosing gravel bike tires, factors to consider include terrain conditions, desired level of grip versus speed, durability, and compatibility with your bike frame and components.

Can I use mountain bike tires on a gravel bike?

Yes, you can use mountain bike tires on a gravel bike. One advantage of using wider tires on a gravel bike is increased stability and traction. Wider tires provide a larger contact patch with the ground, allowing for better grip in loose or uneven terrain.

When choosing tire tread for gravel biking, consider a pattern with more aggressive knobs or lugs to handle various off-road conditions. It’s important to find the right balance between rolling resistance and grip for optimal performance.

Conclusion

In conclusion, when it comes to gravel bike tires, the components that work together seamlessly create a symphony of performance.

The tire width and tread design provide stability and grip on various terrains, while the tubeless setup ensures a smoother ride with reduced risk of flats.

Advertisement

Tire pressure and compound are crucial in finding the perfect balance between comfort and speed. Puncture protection is like armor for your tires, defending against sharp objects lurking on gravel roads.

All-terrain performance guarantees versatility for any adventure. Rolling resistance determines how effortlessly you glide along the path, while handling and cornering capabilities give you confidence in every turn.

And lastly, maintenance and care ensure longevity and optimal performance of your beloved gravel bike tires. So choose wisely, as these components will be your steadfast companions on countless thrilling journeys through rugged landscapes and untamed wildernesses.

Ralf is a devoted husband and father who loves spending time with his family. He enjoys riding his bicycle as much as possible, and takes every opportunity he can to get out on the open road. Ralf is a kind and gentle person who wants only the best for those around him.

Continue Reading
Advertisement

Bike

How To Motorize A Bicycle

Published

on

By

An image showcasing a bicycle with its frame modified to include a powerful electric motor, complete with a sleek battery pack mounted near the rear wheel and a set of futuristic LED headlights

Imagine elevating your cycling experience by transforming your ordinary bicycle into a powerful machine that effortlessly propels you forward.

In this article, I will guide you through the detailed process of motorizing your bicycle, step by step. From choosing the right motor kit to ensuring safety measures, you will learn everything you need to know to create your very own motorized bicycle.

Get ready to embark on an exciting journey of innovation and adventure.

Key Takeaways

  • Familiarize yourself with local laws and regulations
  • Understand the required equipment for riding
  • Learn where motorized bicycles are allowed
  • Avoid legal issues by following regulations

Choose the Right Motor Kit for Your Bicycle

You should choose the right motor kit for your bicycle. Choosing the right motor kit can greatly enhance your riding experience and make your commute more efficient.

Advertisement

When considering motor power, factors such as terrain, weight, and desired speed need to be taken into account. For hilly terrains or heavier bicycles, a higher motor power will be required to ensure smooth operation and adequate speed. On the other hand, if you plan to use your motorized bicycle mainly on flat surfaces, a lower motor power may suffice.

Additionally, when it comes to battery capacity, it is important to explore the different options available and choose the right capacity based on your riding needs and distance requirements. A larger battery capacity will allow for longer rides without needing to recharge.

Now that we have discussed choosing the right motor kit, let’s move on to gathering the necessary tools and materials for the installation process.

Gather the Necessary Tools and Materials

To get started, it’s important to gather all the tools and materials needed for the project. Here are the essential items you’ll need:

  • Wrench set: You’ll need a set of wrenches to loosen and tighten bolts on your bicycle.
  • Screwdriver set: A variety of screwdrivers will be necessary for removing and installing parts.
  • Wire cutter/stripper: This tool will come in handy when dealing with electrical connections.
  • Allen wrench set: Many motor kits require the use of Allen wrenches for assembly.
  • Battery and charger: Make sure to choose a battery that is compatible with your motor kit.
  • Motor kit: This is the heart of your motorization project. Choose a kit that suits your needs and budget.

Choosing the right motor kit is crucial to ensure a smooth installation process. Additionally, be prepared to troubleshoot common motorization issues that may arise during the project.

Once you have gathered all the necessary tools and materials, you can proceed to prepare your bicycle for motorization by following the next steps.

Advertisement

Prepare Your Bicycle for Motorization

Before starting, make sure that your bike is in good condition and ready for the motor installation. Inspect the frame, wheels, and brakes for any signs of damage or wear. Check the tire pressure and ensure that they’re properly inflated.

Remove any accessories or attachments that may interfere with the motor installation process.

Next, determine the type of bike modification you want to do, whether it’s a gas-powered engine or an electric bike conversion. This will dictate the specific steps and materials needed for the motorization process.

Advertisement

Additionally, make sure you have all the necessary tools and equipment on hand.

Once your bike is prepared, you can move on to the next section and install the motor kit onto your bicycle, transforming it into a motorized ride.

Install the Motor Kit onto Your Bicycle

Once the motor kit is installed onto your bike, it will be transformed into a motorized ride. To install the electric motor, begin by removing the rear wheel from the bicycle frame. Next, attach the motor bracket onto the frame using the provided screws and secure it tightly. Place the motor onto the bracket, aligning the mounting holes, and fasten it securely. Connect the motor’s wiring to the battery and controller according to the provided instructions, ensuring proper connections. Once everything is connected, double-check all the connections and tighten any loose screws. To troubleshoot motor issues, refer to the troubleshooting section in the motor kit manual. Now, we can move on to the next step and connect the motor to the bicycle’s drive system, allowing it to propel the bike forward effortlessly.

Connect the Motor to the Bicycle’s Drive System

Advertisement

Now you can connect the motor to your bike’s drive system and start enjoying effortless propulsion.

To connect the motor to the bicycle’s drivetrain, follow these steps:

  • First, locate the motor mounting bracket on your bike frame. Ensure it is securely attached.
  • Next, align the motor’s sprocket with the bike’s chainring. Use a chain tool to remove the necessary links from the bike’s chain if needed.
  • Connect the motor’s sprocket to the bike’s chainring using a chain connector.
  • Double-check the alignment and tension of the chain. Ensure it is neither too loose nor too tight.
  • Once connected, test the motor by pedaling the bike. The motor should engage and provide assistance.

If you encounter any issues during this process, such as chain slipping or misalignment, consult the motor kit’s troubleshooting guide for assistance.

With the motor now connected to the bicycle’s drive system, we can move on to installing the throttle and control mechanisms.

Install the Throttle and Control Mechanisms

To begin the installation process, attach the throttle and control mechanisms to your bike’s handlebars. The throttle allows you to control the speed of the motor, while the control mechanisms enable you to activate the motor and make necessary adjustments. Proper installation of these components is crucial for a smooth and efficient motorization system.

Below is a table that illustrates the installation steps for the throttle and control mechanisms:

Advertisement
Step Procedure
1 Position the throttle grip on the handlebars and secure it using the provided clamp.
2 Connect the throttle cable to the motor. Ensure a secure and tight connection.
3 Adjust the throttle sensitivity according to your preference using the provided throttle adjustment feature.

Once the throttle and control mechanisms are securely installed, you can proceed to test and adjust the motorization system. This will ensure that everything is functioning properly and any troubleshooting issues can be resolved before hitting the road.

Transitioning into the next section, it is important to thoroughly test and adjust the motorization system to guarantee optimal performance.

Test and Adjust the Motorization System

After securely installing the throttle and control mechanisms, it is essential to thoroughly test and adjust the motorization system for optimal performance. Here are the steps to follow:

  1. Testing the Motor: Start by engaging the motor and observing its response. Ensure it starts smoothly and accelerates without any hitches. Listen for any unusual noises or vibrations.

  2. Adjusting Motor Performance: Fine-tune the motor’s power output by adjusting the throttle. Increase or decrease the throttle sensitivity to achieve the desired speed and responsiveness.

  3. Troubleshooting Common Motorization Issues: Monitor the motor for overheating or excessive battery drain. Inspect all connections for loose wires or faulty components. Resolve any issues promptly to prevent further damage.

  4. Test Ride and Fine-tuning: Take the motorized bicycle for a test ride, paying attention to its overall performance and handling. Make any necessary adjustments to the motor or control mechanisms to improve the riding experience.

Now that the motorization system has been tested and adjusted, it is crucial to ensure safety measures are in place for worry-free riding.

Ensure Safety Measures are in Place

Make sure you have all the necessary safety measures in place to ensure a worry-free riding experience. The importance of wearing protective gear cannot be emphasized enough when motorizing a bicycle. A helmet, knee pads, and elbow pads are essential to protect yourself from potential accidents and injuries.

Advertisement

Additionally, it is crucial to understand and abide by local laws and regulations regarding motorized bicycles. Different jurisdictions may have specific rules about speed limits, required equipment, and where motorized bicycles are allowed to be ridden. Familiarize yourself with these regulations to avoid any legal issues.

By prioritizing safety and following the rules, you can enjoy the benefits of a motorized bicycle without compromising your well-being or breaking the law.

Now, let’s move on to learning how to operate and maintain your motorized bicycle smoothly.

Learn How to Operate and Maintain Your Motorized Bicycle

Learning how to operate and maintain your motorized bike is essential for a smooth and hassle-free riding experience. To ensure that your motorized bicycle functions optimally, here are three key tips:

  1. Troubleshooting common issues with motorized bicycles: Familiarize yourself with common problems such as engine starting issues, fuel system malfunctions, or electrical failures. This knowledge will help you diagnose and fix problems efficiently.

  2. Tips for increasing the lifespan of your motorized bicycle: Regularly check and change the engine oil, clean the air filter, and inspect the spark plug. Additionally, avoid overloading the bike and adhere to the manufacturer’s recommended maintenance schedule.

  3. Properly maintaining the bike’s components: Regularly lubricate the chain, inspect the brakes, and ensure the tires are inflated to the correct pressure. These simple maintenance tasks will ensure your motorized bicycle performs at its best.

By following these guidelines, you can enjoy the benefits of your motorized bicycle without any interruptions.

Advertisement

Enjoy the Benefits of Your Motorized Bicycle

To fully experience the advantages of your motorized bike, you’ll love the increased speed and convenience it brings to your daily commute.

Riding a motorized bicycle in your daily commute has numerous benefits. Firstly, it allows you to travel at a faster pace, reducing travel time and making your commute more efficient. With the added power of the motor, you can easily navigate through traffic and reach your destination faster.

Additionally, using a motorized bicycle is a sustainable and eco-friendly option, reducing your carbon footprint and contributing to a cleaner environment.

To ensure the longevity of your motorized bicycle, it is essential to follow best practices for maintenance. Regularly inspect and clean the bike, check tire pressure, and lubricate the chain. Proper maintenance will not only enhance the performance but also extend the lifespan of your motorized bicycle, allowing you to enjoy its benefits for years to come.

Frequently Asked Questions

How much does a motor kit for a bicycle typically cost?

Motor kits for bicycles typically range in cost from around $200 to $1500, depending on the type of motor. There are various types available, including electric hub motors and mid-drive motors.

Advertisement

Are there any legal requirements or restrictions for using a motorized bicycle?

Sure, let’s dive into the legal requirements and restrictions for using a motorized bicycle. In terms of registration, it depends on your location, but some places require you to register your motorized bicycle. As for speed limits, again, it varies, but typically motorized bicycles are subject to the same speed limits as regular bicycles.

Can any type of bicycle be motorized, or are there specific requirements?

Any type of bicycle can be motorized, but there are specific requirements. Motorizing mountain bikes involves adding a motor and battery to the frame, while converting road bikes requires installing a motor kit onto the existing bike.

What kind of maintenance is required for a motorized bicycle?

Maintenance tips for a motorized bicycle include regular oil changes, checking spark plugs, and inspecting the chain for wear. Troubleshooting common issues such as starting problems or strange noises may require adjusting the carburetor or cleaning the fuel system.

Are there any safety concerns or precautions to be aware of when operating a motorized bicycle?

Motorized bicycle safety concerns are critical to understand. It is essential to prioritize safety precautions, such as wearing a helmet, using reflectors, maintaining brakes, and following traffic rules, to ensure a safe and enjoyable ride.

Conclusion

In conclusion, as I reflect on my journey of motorizing my bicycle, I can’t help but feel a sense of liberation and excitement.

Advertisement

Like a phoenix rising from the ashes, my bicycle has transformed into a powerful steed, ready to conquer any path ahead.

The precision and attention to detail required in this process have not only enhanced my technical skills but also my appreciation for the beauty of mechanics.

Now, as I ride into the sunset, I am filled with a sense of pride and joy, knowing that I have unlocked a new world of possibilities with my motorized companion.

Continue Reading

Bike

How To Change Gears On A Gravel Bike

Published

on

By

An image capturing a close-up of a rider's gloved hand gripping a gravel bike's gear lever, fingers delicately adjusting it

Prepare yourself to enhance your gravel biking abilities with this in-depth guide on mastering gear changes like a professional.

Mastering the art of gear shifting is crucial for any cyclist, especially when tackling unpredictable terrains.

In this article, I will walk you through the ins and outs of understanding your bike’s gear system, perfecting your technique, troubleshooting common issues, and ultimately enjoying a smooth ride with perfectly timed gear changes.

So grab your helmet and let’s dive in!

Key Takeaways

  • Gravel bikes have a wide range of gears for different terrains.
  • Proper gear shifting technique ensures a smooth and efficient ride.
  • Familiarize yourself with the gear levers and their correct operation.
  • Choose the correct gear ratio based on the anticipated terrain changes.

Understanding the Gear System on a Gravel Bike

Advertisement

To change gears on your gravel bike, you’ll need to understand the gear system. The gear selection on a gravel bike is crucial for optimizing performance and ensuring a smooth ride on various terrains.

Gravel bikes typically come with a wide range of gears to accommodate different riding conditions, including steep climbs and fast descents.

One important aspect of the gear system is the gear ratios. Gear ratios determine how much power is transferred from your legs to the wheels. Higher gear ratios provide more power but require more effort, making them suitable for flat or downhill sections. Lower gear ratios, on the other hand, offer less power but are easier to pedal, making them ideal for climbing steep hills or navigating rough terrain.

Understanding how to select the right gear ratio for each situation is essential in maximizing efficiency and preventing unnecessary strain on your body. By choosing an appropriate gear ratio, you can maintain a consistent cadence while adapting to changes in terrain without exerting excessive force.

Proper gear shifting technique plays a vital role in achieving seamless transitions between gears without interruption or damage to the drivetrain components.

Advertisement

Importance of Proper Gear Shifting Technique

Remember, it’s crucial to use the correct technique when shifting gears on your gravel bike. Proper gear shifting technique not only ensures a smoother and more efficient ride but also prevents unnecessary wear and tear on your drivetrain. By following these guidelines, you can optimize your gear shifting experience and reap the benefits of efficient gear shifting.

One key aspect of proper gear shifting technique is timing. It’s important to anticipate shifts in terrain or cadence and initiate gear changes before they become necessary. This allows for a seamless transition between gears, minimizing any disruption to your pedaling rhythm.

Another important factor is maintaining consistent pedal pressure while shifting gears. Applying too much force when changing gears can cause the chain to jump or slip, leading to potential damage. On the other hand, releasing pedal pressure entirely can result in a loss of momentum. Finding the right balance between applying pressure and easing up slightly will ensure a smooth transition from one gear to another.

To further emphasize this point, consider the following table:

Gear Shifting Technique Benefits
Anticipating shifts Smoother transitions
Consistent pedal pressure Prevents chain slippage
Balancing pressure Maintains momentum

By implementing these techniques, you’ll experience improved efficiency and durability in your gravel biking adventures.

Advertisement

Transitioning into the subsequent section about familiarizing yourself with the gear levers, it’s essential to understand how they function to make precise gear changes effortlessly.

Familiarize Yourself with the Gear Levers

Before getting started, it’s important to know how the gear levers on your gravel bike work. Familiarizing yourself with the gear lever functions and proper hand placement will ensure smooth and efficient gear shifting while riding.

Most gravel bikes are equipped with a combination of two gear levers, one for controlling the front derailleur and the other for the rear derailleur. The left lever is responsible for shifting between the chainrings, which control the bike’s front gears. On the other hand, the right lever controls the rear gears by moving the derailleur across different cogs on the cassette.

Advertisement

To shift gears using these levers, place your hands firmly on both hoods of your handlebars. Your index fingers should rest lightly on top of each lever, ready to initiate shifts when needed. When you want to shift to an easier gear (a smaller cog or a smaller chainring), push either lever sideways using your thumb or index finger. For harder gears (larger cogs or larger chainrings), pull back on either lever.

Understanding how to operate these gear levers and maintaining proper hand placement is crucial in achieving optimal performance and preventing any potential damage to your gravel bike’s drivetrain components.

With this knowledge in mind, let’s move onto starting with the right gear ratio…

Start with the Right Gear Ratio

Begin with the correct gear ratio to ensure optimal performance and prevent potential damage to your drivetrain components. Gear selection is crucial when changing gears on a gravel bike. By choosing the right gear ratio, you can maximize efficiency and power transfer while minimizing unnecessary strain on your bike’s components.

To start with the right gear ratio, it’s important to consider the terrain you’ll be riding on. If you’re facing a steep climb or challenging off-road section, it’s best to select a lower gear that provides more torque for easier pedaling. On the other hand, if you’re riding on flat or downhill sections, choosing a higher gear will allow you to maintain speed without excessive spinning of the pedals.

Advertisement

Finding the ideal gear ratio may require some trial and error, especially when encountering varying terrains during your ride. Pay close attention to how your bike responds to different gears and adjust accordingly. Anticipate terrain changes by smoothly shifting gears before reaching them, ensuring a seamless transition between ratios.

By starting with the right gear ratio and adjusting as needed, you can optimize your gear selection for maximum efficiency and enjoy a smoother ride on your gravel bike. Anticipating terrain changes will further enhance your overall biking experience.

Anticipate Terrain Changes

To optimize your riding experience, it’s important to anticipate shifts in terrain while on your gravel bike. Understanding the terrain and adapting your gear strategy accordingly can greatly enhance your performance and enjoyment. By being proactive in adjusting gears before encountering changes in the landscape, you can maintain a steady cadence and ensure smooth transitions.

Advertisement

To help you understand how to adapt your gear strategy based on terrain, refer to the table below:

Terrain Type Recommended Gear Strategy
Uphill Shift to a lower gear for easier pedaling
Downhill Shift to a higher gear for increased speed
Flat Maintain a comfortable gear ratio
Loose Gravel Shift to a lower gear for better traction
Sand or Mud Shift to an even lower gear for stability

By anticipating these terrain changes and adjusting gears accordingly, you’ll be able to maintain optimal control of your gravel bike. Remember, it’s always better to shift before you need to rather than struggling with shifting under pressure during challenging sections. This will not only improve your overall riding experience but also prevent unnecessary strain on yourself and the bike. Transitioning into the next section about ‘shift before you need to’ will further enhance your understanding of proper gear management on a gravel bike.

Shift Before You Need to

Make sure you shift gears on your gravel bike in anticipation of upcoming terrain changes. Anticipating terrain changes is essential to maintaining a steady pedaling cadence and ensuring a smooth ride.

Here are four crucial tips for shifting gears effectively:

  • Pay attention to the road ahead: Keep your eyes focused on the trail, looking out for any obstacles or changes in terrain that may require gear adjustments.

  • Shift before you need to: Don’t wait until you’re struggling to pedal uphill or losing control on a descent. Shift gears proactively, allowing yourself enough time to adjust smoothly without interrupting your flow.

  • Know your bike’s gear range: Familiarize yourself with the different gear combinations available on your gravel bike. Understand which gears are best suited for climbing, descending, and cruising on flat terrain.

  • Practice shifting techniques: Experiment with shifting both up and down the gears while riding at varying speeds. This will help you develop a feel for how your bike responds and ensure seamless transitions between gears.

Maintaining a steady pedaling cadence is crucial for efficient riding and preventing unnecessary strain or fatigue. Transitioning into the next section about ‘maintain a steady pedaling cadence,’ it is equally important to find the right gear ratio that allows you to maintain an optimal cadence throughout different terrains.

Advertisement

Maintain a Steady Pedaling Cadence

When it comes to changing gears on a gravel bike, one important aspect to consider is maintaining a steady pedaling cadence. This not only helps in improving your efficiency but also ensures a smoother transition between gears.

To maintain cadence, it is crucial to anticipate gear changes and shift before you actually need to. By doing so, you can avoid sudden spikes or drops in resistance that can disrupt your rhythm. Instead, aim for seamless transitions that allow you to keep spinning at a consistent cadence.

Maintaining a steady pedaling cadence has several benefits. Firstly, it reduces the strain on your muscles and joints by distributing the workload evenly across different gears. Secondly, it allows you to generate power consistently without wasting energy due to abrupt gear changes.

By focusing on maintaining cadence while changing gears on your gravel bike, you will find yourself riding with greater efficiency and endurance. So remember, smooth shifts are key!

In the next section about using both front and rear gears, we will explore another essential technique for optimizing gear changes without any interruption in your ride flow.

Advertisement

Use Both Front and Rear Gears

Using both the front and rear gears on your gravel bike is essential for achieving optimal gear changes without any interruption in your ride flow. When it comes to front gear selection, you have multiple options available.

The smaller chainring is ideal for climbing steep hills or tackling difficult terrain, as it provides a lower gear ratio that allows for easier pedaling. On the other hand, the larger chainring is great for riding on flat roads or when you want to go faster, as it offers a higher gear ratio that maximizes your speed.

In terms of rear gear selection, your gravel bike typically has a wide range of gears to choose from. The smaller cogs provide easier pedaling and are perfect for uphill climbs or rough surfaces where you need more control. Conversely, the larger cogs offer higher resistance and are suitable for riding on flat roads or when you want to pick up speed.

By utilizing both front and rear gears effectively, you can optimize your riding experience by seamlessly transitioning between different terrains and conditions. However, it’s important to note that you should avoid ‘cross chaining,’ which refers to using extreme combinations such as the small chainring with the smallest cog or the large chainring with the largest cog. This can cause excessive wear on your drivetrain components and may result in poor shifting performance.

Transitioning into the next section about ‘don’t cross-chain,’ it’s crucial to understand how improper gear selection can negatively impact your ride quality and potentially damage your bicycle’s drivetrain components.

Advertisement

Don’t Cross Chain

Avoiding cross-chaining is important to maintain the performance and longevity of your drivetrain components. Cross-chaining occurs when you use the extreme combination of gears, such as using the big chainring in the front and the biggest cog in the rear, or vice versa. This puts excessive stress on your chain and can lead to premature wear and tear. Additionally, cross-chaining reduces efficiency and can cause poor shifting.

To prevent cross-chaining, it is essential to understand your gear ratios and make conscious decisions when shifting. When riding on a gravel bike, it’s recommended to avoid extreme gear combinations that strain your drivetrain unnecessarily. Instead, aim for a balanced use of gears that allows for smooth transitions between them.

Regularly inspecting and maintaining your gears is also crucial for optimal performance. Clean your drivetrain regularly to remove dirt and grime that can affect shifting quality. Lubricate the chain appropriately to minimize friction.

By avoiding cross-chaining and practicing good gear maintenance habits, you can ensure a longer lifespan for your drivetrain components while optimizing your cycling experience.

Now let’s delve into adjusting gear shifters for comfort without compromising functionality.

Advertisement

Adjusting Gear Shifters for Comfort

To achieve a more comfortable riding experience, it’s important to make adjustments to your gear shifters. Proper gear shifter maintenance and adjusting gear cable tension are crucial for smooth and efficient shifting.

Here are two key steps you can take to optimize the performance of your gear shifters:

  1. Check and adjust the gear cable tension: Begin by shifting your bike into the highest gear (smallest cog). Locate the barrel adjuster on the derailleur or shifter body. Turn it clockwise to increase tension or counterclockwise to decrease tension until the shifting feels crisp and precise.
  • Fine-tune while riding: Take your bike for a spin around a quiet area, such as an empty parking lot. Shift through all gears while paying attention to any hesitation or lag in shifting. If needed, make additional adjustments using the barrel adjuster until you achieve seamless shifting across all gears.
  1. Evaluate lever position and reach: Ensure that your shift levers are positioned comfortably within reach of your hands while gripping the handlebars. Adjust their angle if necessary, so you can easily access them without straining or stretching.

By maintaining and adjusting your gear shifters correctly, you’ll enhance both comfort and performance on your gravel bike.

Now, let’s move on to practice shifting gears on different surfaces for even greater control during rides without compromising safety or efficiency.

Practice Shifting Gears on Different Surfaces

Start by practicing shifting gears on a variety of surfaces to improve your control and adaptability while riding. It’s important to become familiar with the different gear ratios and how they affect your bike’s performance. Shifting on loose gravel can be particularly challenging, as the surface provides less traction and stability. To navigate this terrain effectively, you need to anticipate changes in resistance and adjust your gears accordingly.

To help illustrate the concept, here is a table showing examples of suitable gear ratios for different surfaces:

Advertisement
Surface Gear Ratio
Paved road High gear (big chainring)
Gravel road Medium gear
Loose gravel Low gear (small chainring)
Uphill Low gear

When shifting on loose gravel, it’s crucial to smoothly transition between gears to avoid any sudden loss of traction. Start by approaching the shift with a steady pedal stroke, then quickly but gently shift into a lower gear before you encounter the loose section. This will allow you to maintain momentum without losing control.

As you practice shifting gears on different surfaces, pay attention to how your bike responds. Listening to your bike can provide valuable feedback about whether you need to make further adjustments or if everything is running smoothly.

Transitioning into the subsequent section about ‘listening to your bike,’ we’ll explore how understanding its cues can enhance your overall riding experience.

Listen to Your Bike

When you’re riding, it’s essential to listen closely to your bicycle for valuable feedback. Your bike can tell you a lot about its condition and how well it’s performing. By paying attention to the sounds it makes, you can detect any potential issues and address them before they become major problems.

Here are some key components of your gear system that you should listen for:

Advertisement
  • Chain noise: A noisy chain could indicate that it needs lubrication or that there is excessive wear.
  • Gear skipping: If your gears are skipping or jumping when you shift, it may be a sign of misalignment or cable tension issues.
  • Grinding sound: This could mean that your drivetrain components are not properly aligned or that there is dirt and debris causing friction.

By regularly listening to these sounds and identifying any abnormalities, you can take proactive steps in bike maintenance to keep your gear system running smoothly.

In the next section, we will discuss fine-tuning your gear shifting skills for an even better riding experience.

Fine-Tuning Your Gear Shifting Skills

Fine-tuning your gear shifting skills can greatly enhance your cycling experience. When it comes to gravel biking, mastering gear shifting techniques is crucial for maintaining control and maximizing efficiency on unpredictable terrain. The key to efficient gear shifting lies in anticipating changes in the trail ahead and adjusting your gears accordingly.

One important technique is preemptive shifting. By planning ahead and shifting into an appropriate gear before you encounter a steep climb or descent, you can maintain momentum and avoid stalling or spinning out. This requires paying close attention to the terrain ahead and using your knowledge of gear ratios to select the optimal gear.

Another technique is called cadence management. Maintaining a consistent pedaling rhythm not only improves efficiency but also reduces strain on your legs. To achieve this, you should shift gears based on your current cadence rather than relying solely on speed or intensity. Experiment with different cadences to find what feels most comfortable for you.

By honing these gear shifting techniques, you can improve your overall performance and enjoyment while riding a gravel bike.

Advertisement

Transitioning now into troubleshooting common gear shifting issues, understanding how to address these problems will ensure a smooth and uninterrupted ride experience without any hiccups along the way.

Troubleshooting Common Gear Shifting Issues

To troubleshoot common gear shifting issues, pay attention to any unusual noises or resistance while pedaling. Here are some common gear shifting problems and how to fix them:

  • Misalignment: If your gears aren’t shifting smoothly, they may be misaligned. To fix this, use the barrel adjuster on your derailleur to make small adjustments until the gears shift smoothly.

  • Chain skipping: If your chain is skipping over the teeth of the cassette or chainring, it could be due to a worn-out chain or cassette. Replace these components if necessary to resolve the issue.

  • Cable tension issues: If your gears aren’t shifting properly, it could be due to incorrect cable tension. Use the barrel adjuster on your shifter or derailleur to fine-tune the cable tension for smooth gear changes.

  • Bent derailleur hanger: A bent derailleur hanger can cause poor shifting performance. Inspect the hanger for any signs of damage and replace if necessary.

By troubleshooting these common gear shifting problems, you can ensure that your gravel bike performs optimally. Enjoy the smooth ride with perfectly timed gear changes in the subsequent section about ‘enjoying the smooth ride with perfectly timed gear changes.’

Enjoy the Smooth Ride with Perfectly Timed Gear Changes

Achieve a smooth and enjoyable ride by mastering the art of perfectly timed gear shifts. When riding a gravel bike, it is essential to have precise control over your gears to navigate various terrains. Perfecting gear transitions allows you to maintain an optimal cadence and power output, ensuring efficiency and comfort throughout your ride.

To achieve perfect gear changes, start by understanding the concept of optimal gear ratios. This involves finding the right balance between the front chainring and rear cassette gears. The goal is to select a combination that provides enough resistance for efficient pedaling without straining your muscles or causing unnecessary fatigue. Experiment with different combinations on different terrains to find what works best for you.

Advertisement

Timing is crucial when shifting gears. Anticipate changes in terrain or gradient ahead of time, allowing yourself ample time to shift smoothly. Avoid shifting under heavy load as this can cause mechanical stress on your drivetrain components. Instead, ease off the pedals momentarily while making the transition.

When executing a gear change, apply steady pressure on the shifter while simultaneously releasing pressure on the pedals momentarily. This allows for smoother shifting as the chain moves from one gear to another seamlessly.

By practicing and perfecting your gear transitions, you will enjoy a smoother ride with optimal power delivery and reduced strain on your body. Remember that mastering this skill takes time and experience, so don’t be discouraged if it doesn’t come naturally at first. Keep experimenting with different techniques until you find what works best for you and enjoy every moment of your gravel bike adventures!

Frequently Asked Questions

What are the different types of gear ratios available on a gravel bike?

There are various gear ratios available on a gravel bike to cater to different riding conditions. Gear ratio selection is crucial as it determines the ease or difficulty of pedaling.

Lower gear ratios, such as 1:1 or 0.8:1, provide more torque for climbing steep hills or navigating rough terrain.

Advertisement

Higher gear ratios, like 2:1 or 2.5:1, offer greater speed on flat surfaces and descents.

Choosing the right gear ratio can optimize efficiency and power output while riding a gravel bike.

How do I know if I’m using the correct gear ratio for a specific terrain?

To determine if you’re using the correct gear ratio for a specific terrain, there are a few factors to consider.

Firstly, observe your cadence (the speed at which you pedal). If it feels too easy or difficult, you may need to adjust the gear ratios accordingly.

Additionally, monitor your speed and power output. If you’re struggling to maintain speed or exerting excessive effort, troubleshooting gear shifting and adjusting gear ratios can help optimize your performance on different terrains.

Advertisement

Can I shift gears while standing up on my gravel bike?

Yes, you can shift gears while standing up on your gravel bike. When climbing steep terrain, it’s important to use the correct shifting technique to maintain momentum and efficiency.

As you approach a climb, anticipate the gear change by slightly easing off the pedals. Then, shift to a lower gear smoothly and quickly, using both your hands and body weight to apply pressure on the pedals.

This will ensure a seamless transition and allow you to conquer those challenging ascents with ease.

How often should I clean and lubricate my gear shifters?

I clean and lubricate my gear shifters regularly to ensure optimal performance and prolong their lifespan.

It is recommended to clean and lubricate the gear shifters every 100-200 miles or whenever they become dirty or sticky.

Advertisement

Start by wiping them down with a damp cloth, then apply a small amount of lubricant to the moving parts.

This will keep the gear shifters functioning smoothly and prevent any unnecessary wear or damage.

Are there any specific techniques for shifting gears smoothly and quickly on a gravel bike?

Shifting gears on a gravel bike requires finesse and precision, much like conducting a symphony. The key is to anticipate the terrain ahead and choose the appropriate gear ratio.

By mastering this art, you can seamlessly transition between gears, ensuring optimum power transfer and a smooth riding experience.

Correct gear ratios allow you to conquer various terrains effortlessly. Whether it’s climbing steep hills or navigating through loose gravel, the right technique is your ticket to gravel biking nirvana.

Advertisement

Conclusion

In conclusion, mastering the art of gear shifting on a gravel bike is essential for a smooth and enjoyable ride.

By understanding the gear system, familiarizing yourself with the levers, and anticipating terrain changes, you can ensure that your gear changes are perfectly timed.

Just like a well-oiled machine, your bike will respond seamlessly to your commands, allowing you to conquer any trail with ease.

So why wait? Embrace the thrill of gravel biking and let your gears dance in perfect harmony as you embark on new adventures.

Advertisement

Continue Reading

Bike

What Equipment Must A Bicycle Have When Used At Night?

Published

on

By

An image showcasing a bicycle equipped with a front and rear light, reflectors on pedals, spokes, and front/rear tires, along with a reflective vest worn by the cyclist, ensuring maximum visibility and safety during nighttime rides

Like a single bright star in the night sky, a bicycle with the appropriate gear guarantees safe travels once the sun goes down. Being an experienced cyclist, I understand the significance of being visible on the road, particularly during nighttime.

In this article, I will guide you through the essential equipment that every bicycle must have when used at night, from powerful lights and reflectors to reflective clothing and properly inflated tires.

Let’s embark on this journey of knowledge to enhance your nighttime cycling experience.

Key Takeaways

  • Reflective gear, such as reflective tape and decals, is essential for increased visibility when cycling at night.
  • High-visibility accessories like flags and vests should be used to maximize visibility.
  • Properly inflated tires and good tread are important for optimal control and safety.
  • Consider the terrain and choose a tread pattern accordingly, and regularly check tire pressure for safe night riding.

White Front Light

You must have a white front light on your bicycle when riding at night. It is essential for your safety and the safety of others on the road.

Advertisement

A white front light helps you see what’s ahead, making sure you can spot any potential hazards, obstacles, or changes in the road surface. Additionally, it allows other road users to see you coming from a distance, reducing the risk of accidents.

A good quality white front light will have a strong beam, illuminating the path ahead effectively. It is important to choose a light that meets the legal requirements for brightness and visibility.

Once you have your white front light secured, the next step is to ensure you have a red rear light, which I will discuss in the next section.

Red Rear Light

A bicycle at night should be equipped with a red rear light. The importance of a red rear light cannot be overstated when it comes to ensuring the safety of both the cyclist and other road users.

Not only does it allow drivers to easily spot the bicycle from a distance, but it also helps them determine the direction in which the cyclist is traveling. In many countries, including the United States, it is a legal requirement for bicycles to have a red rear light when riding at night. This is because it significantly reduces the risk of accidents and enhances visibility.

Advertisement

However, simply having a red rear light is not enough. Reflectors on the front, rear, pedals, and wheels are also crucial in maximizing visibility. These reflectors work in conjunction with the red rear light to make the bicycle more visible from all angles and ensure a safe ride.

Reflectors on the Front, Rear, Pedals, and Wheels

Reflectors on the front, rear, pedals, and wheels are essential for maximizing visibility and ensuring a safe ride. When it comes to reflectors, placement and regulations are important factors to consider.

In most places, bicycles are required to have a white reflector on the front, a red reflector on the rear, and amber reflectors on the pedals. Additionally, reflectors on the wheels can provide extra visibility, especially when they are in motion. These reflective accessories work by bouncing back light from other sources, making you more visible to drivers and pedestrians. By using reflectors in accordance with regulations, you can greatly reduce the risk of accidents while cycling at night. They are a simple yet effective way to enhance your safety on the road.

Advertisement

Transitioning into the next topic, reflective clothing also plays a crucial role in increasing visibility during nighttime rides.

Reflective Clothing

Wearing reflective clothing is essential for increasing visibility and ensuring a safe ride at night. When cycling in the dark, it is crucial to be seen by motorists and other cyclists, and reflective clothing plays a vital role in achieving this. The importance of wearing reflective clothing cannot be overstated. It can make a significant difference in preventing accidents and ensuring your safety on the road.

To choose the right reflective clothing for night time cycling, opt for garments with built-in reflective strips or patches. Look for materials that reflect light well, such as fluorescent or bright colors. Additionally, consider wearing accessories like reflective arm or leg bands to enhance your visibility further. These simple measures can greatly enhance your safety while cycling at night.

Transitioning into the next section, let’s now discuss the importance of wearing a helmet with reflective strips.

Helmet with Reflective Strips

Advertisement

Make sure you choose a helmet that has reflective strips to increase your visibility while cycling at night. Helmet safety is essential, and having reflective strips on your helmet can greatly enhance your safety on the road. These reflective strips are designed to catch the light from car headlights, making you more visible to drivers.

When choosing a helmet, look for ones that have strategically placed reflective strips on the sides, front, and back. This will ensure that you are visible from all angles. Additionally, there are various reflective gear options available that you can attach to your helmet to further enhance your visibility. These include reflective stickers, bands, or even LED lights.

With the right helmet and reflective gear, you can significantly reduce the risk of accidents while cycling at night. As you focus on helmet safety, don’t forget to consider adding a bell or horn for audible signaling, ensuring that you have multiple ways to alert others of your presence on the road.

Bell or Horn for Audible Signaling

Don’t forget to attach a bell or horn to your helmet for audible signaling while cycling. It is important to have a way to alert others of your presence, especially when riding at night. In addition to the helmet with reflective strips and reflective clothing, an audible signaling device is crucial for your safety. To help you visualize the necessary equipment, refer to the table below:

Advertisement
Equipment Importance
Bell or Horn Essential for signaling
Reflective Clothing Increases visibility
Helmet with Reflective Strips Ensures safety
Rearview Mirror Enhances awareness
High Visibility Flag or Vest Promotes visibility
Properly Inflated Tires Ensures a smooth ride
Good Tread Provides better traction
Reflective Tape Enhances visibility
Front Light Illuminates the path ahead
Rear Light Increases visibility from behind
Reflectors Enhance visibility from all angles

By having all these equipment and taking necessary precautions, you can ensure your visibility and safety while cycling at night. Now, let’s discuss the next important aspect: the rearview mirror for increased awareness.

Rearview Mirror for Increased Awareness

Using a rearview mirror while cycling increases awareness of surrounding traffic. It is an essential equipment for night riding, as it allows me to keep an eye on vehicles approaching from behind without having to turn my head. The benefits of using a rearview mirror are numerous.

Firstly, it enhances my safety by providing a constant visual reference of what’s happening behind me.

Secondly, it allows me to anticipate potential hazards and make informed decisions while on the road.

Thirdly, it helps me maintain a steady and straight line while riding, as I can easily adjust my position based on the traffic behind me.

Advertisement

Lastly, it gives me peace of mind knowing that I have a clear view of my surroundings at all times.

Other alternative rearview options include helmet-mounted mirrors and handlebar-mounted mirrors. These options provide similar benefits but may vary in terms of comfort and ease of use.

Now, let’s move on to the next section about reflective tape on the frame and forks.

Reflective Tape on the Frame and Forks

Reflective tape on the frame and forks increases visibility and helps cyclists stay safe on the road. When riding at night, it is crucial to have equipment that enhances visibility, and reflective tape does just that. The tape reflects light from car headlights, making the bicycle more visible to drivers. This is especially important when riding on poorly lit roads or in areas with heavy traffic.

Reflective tape is an effective way to enhance nighttime visibility because it can be easily applied to the frame and forks of a bicycle. It comes in various colors, such as white, silver, or fluorescent, which further increases visibility. Additionally, the tape is durable and weather-resistant, ensuring its effectiveness even in harsh conditions.

Advertisement

While reflective tape is a popular choice, there are alternatives available for improving visibility on bicycle frames and forks. Some cyclists opt for reflective decals or stickers, which can be customized to suit their preferences. These decals work similarly to reflective tape by reflecting light and increasing visibility.

Transitioning into the subsequent section about the high-visibility flag or vest for added visibility, cyclists can further enhance their safety by incorporating a high-visibility flag or vest. These additional measures ensure maximum visibility and alert drivers to the presence of the cyclist on the road.

High-Visibility Flag or Vest for Added Visibility

One effective way to increase visibility and promote cyclist safety on the road is by incorporating high-visibility accessories such as a flag or vest. These accessories are designed to make cyclists more visible to motorists, especially in low-light conditions.

High-visibility flags can be attached to the rear of the bicycle or the back of the cyclist, while vests can be worn over clothing to enhance visibility from all angles. The importance of reflective gear cannot be overstated, as it significantly reduces the risk of accidents by making cyclists more easily seen by drivers.

In addition to reflective tape on the frame and forks, incorporating a high-visibility flag or vest is crucial for cyclists who ride at night or in low-light conditions. By increasing visibility, cyclists can greatly enhance their safety on the road.

Advertisement

Moving on to the next section, it is also important to have properly inflated tires with good tread for optimal control and safety.

Properly inflated tires with good tread for optimal control and safety

When it comes to riding a bicycle at night, ensuring optimal control and safety is crucial. One important aspect to consider is the condition of your tires. Properly inflated tires with good tread are essential for a smooth and safe ride. Maintaining the correct tire pressure is key to achieving optimal performance and control. Underinflated tires can make it difficult to maneuver, while overinflated tires can affect traction and stability. Additionally, choosing the right tread pattern for different road conditions is important. A tire with a more aggressive tread pattern can provide better grip on wet or uneven surfaces, while a smoother tread pattern is more suitable for dry roads. So, before hitting the road at night, take some time to check your tire pressure and tread condition to ensure a safe and enjoyable ride.

Now let’s dive into a more detailed discussion about tire pressure maintenance and choosing the right tread pattern for different road conditions:

Tire Pressure Maintenance Choosing the Right Tread Pattern
1. Regularly check your tire pressure using a gauge. Consider the type of terrain you will be riding on.
2. Consult the manufacturer’s guidelines for the recommended tire pressure range. Look for tires with deeper treads for better grip on wet surfaces.
3. Adjust the pressure accordingly using a pump with a pressure gauge. Opt for tires with a smoother tread pattern for dry roads.
4. Remember to check the pressure before each ride. Experiment with different tread patterns to find the one that suits your needs best.

Frequently Asked Questions

How can I ensure that my bicycle is visible to other road users at night?

To ensure my bicycle is visible to other road users at night, I prioritize the use of reflective gear. Reflective clothing, stickers, and lights are essential for enhancing visibility and ensuring my safety on the road.

Is it necessary to have both a front and rear light on my bike when riding at night?

Yes, it is necessary to have both a front and rear light on your bike when riding at night. The front light ensures visibility and helps me see the road ahead, while the rear light increases my visibility to other road users.

Advertisement

Are there any specific laws or regulations regarding the use of reflective clothing while cycling at night?

Yes, there are laws regarding reflective clothing when cycling at night. It is important to wear reflective clothing as it increases visibility and safety for both the cyclist and other road users.

What are the benefits of using a rearview mirror on a bicycle?

Using a rearview mirror on my bike has been a game-changer. It enhances safety by providing a clear view of approaching vehicles, allowing me to react quickly. The benefits are immense and unquestionable.

Can reflective tape be applied to any part of the bike frame, or are there specific areas where it should be placed for maximum effectiveness?

When applying reflective tape to the bike frame, focus on key areas for maximum effectiveness. These include the front and rear forks, seatstays, chainstays, and rims. Additionally, consider using reflective accessories and lights to further enhance bike visibility at night.

Conclusion

As I pedal through the darkened streets, I am grateful for the equipment that guides and protects me on my nighttime cycling adventures. The white front light illuminates my path, while the red rear light signals my presence to those behind me. Reflectors on my bike and clothing shimmer like stars, capturing the attention of passing drivers.

With a helmet adorned with reflective strips, I feel like a shining knight, ready to conquer any obstacle that comes my way. A rearview mirror grants me a glimpse into the world behind, increasing my awareness and ensuring my safety. Reflective tape on the frame and forks adds an extra layer of visibility, while a high-visibility flag or vest boldly announces my presence.

Advertisement

Lastly, properly inflated tires with good tread provide the control and stability I need to navigate the roads with confidence. As I ride under the moonlit sky, I am a symbol of safety, preparedness, and adventure, embracing the beauty of the night with every turn of the pedals.

Continue Reading
Advertisement

Affiliate disclaimer

As an affiliate, we may earn a commission from qualifying purchases. We get commissions for purchases made through links on this website from Amazon and other third parties.

About us

We are a passionate team driven by the belief that cycling is a fantastic and accessible way to stay active while enjoying the beauty of the outdoors. Our mission is to share our love for cycling with as many people as possible. We provide a welcoming environment for individuals of all ages, abilities, and backgrounds to come together and ride bikes. With Ralf’s visionary leadership, Zane’s expertise in cycling adventures, and Olivia’s dedication to community building, we strive to create a vibrant space where everyone can experience the joy of cycling. Through group rides, workshops, and inclusive events, we inspire and empower individuals to embrace an active lifestyle. Join us in our quest to pedal together, embrace the joy of cycling, and foster connections that last a lifetime.

Advertisement

Trending