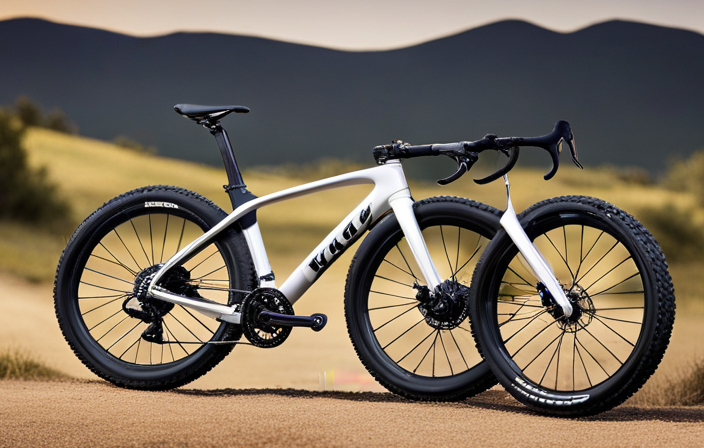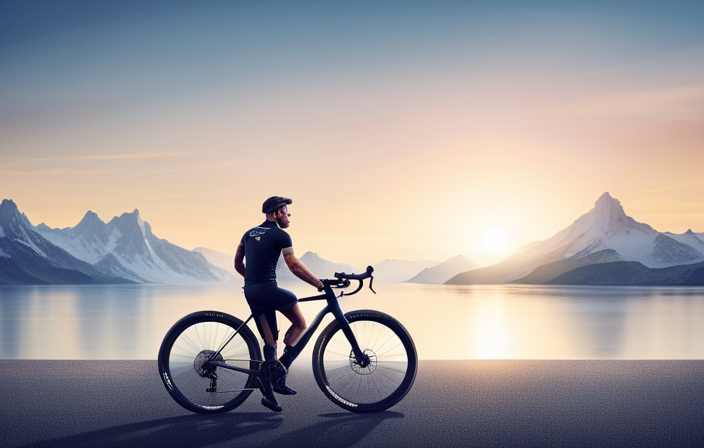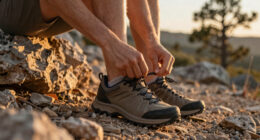
Get your road bike ready to take on rough terrain and turn it into a gravel grinding machine. If you’re itching for the excitement of off-road excursions but don’t want to buy a new bike, don’t worry! By making a few essential upgrades and adjustments, you can tackle those dirt trails with ease.
From swapping out tires to installing gravel-specific handlebars, I’ll guide you through the necessary steps to unleash your road bike’s inner explorer.
So grab your wrench and let’s hit the trail!
Key Takeaways
- Increasing tire clearance and swapping out tires for wider ones with thicker treads are essential modifications for turning a road bike into a gravel grinder.
- Upgrading components such as handlebars, gearing, suspension fork, dropper seatpost, and disc brakes can enhance off-road performance and bike stability.
- Balancing between off-road capabilities and pavement performance, considering weight, durability, and reliability of components is crucial when making compatibility upgrades.
- Additional accessories like frame and fork guards, bikepacking racks, tubeless tires, storage options, and gravel-specific gear ratio and saddle can further improve the gravel riding experience.

Under Armour Squeeze Water Bottles, 32 oz Water Bottles, Sideline Sports Water Bottle with Quick-Shot Lid, Quick & Easy Hydration, Gym Water Bottles, Squeeze Bottle, 1 32oz Bottle
- Easy Hydration: Quick-shot lid and one-way valve
- On-the-Go Use: One-hand operation for active hydration
- Measurement Markings: Ounces and milliliters for tracking
As an affiliate, we earn on qualifying purchases.
Assess Your Bike’s Compatibility
To turn a road bike into a gravel grinder, you’ll need to assess your bike’s compatibility.
The first thing you should consider is the bike frame. Most road bikes have a lightweight and stiff frame, which may not be suitable for rough terrains. Look for a frame that offers more clearance between the tires and the frame itself. This will allow you to fit wider tires, which are essential for riding on gravel.
Next, take a look at your tire pressure. Road bikes typically have high-pressure tires for smooth pavement, but these won’t work well on gravel. Lowering the tire pressure will provide better traction and stability on loose surfaces. Aim for a pressure range of 40-60 psi depending on your weight and preferences.
Now that you’ve assessed your bike’s compatibility, it’s time to swap out your tires. Invest in some wider tires with thicker treads specifically designed for off-road riding. These tires will give you better grip and protection against punctures.
By making these adjustments to your road bike, you’ll be well on your way to transforming it into a capable gravel grinder without compromising its performance on pavement.
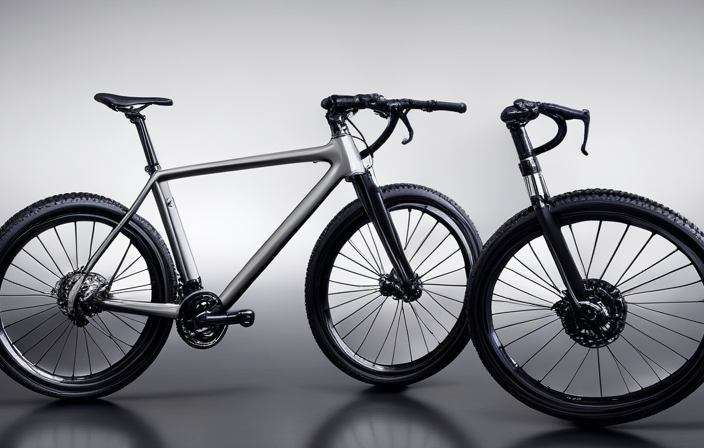
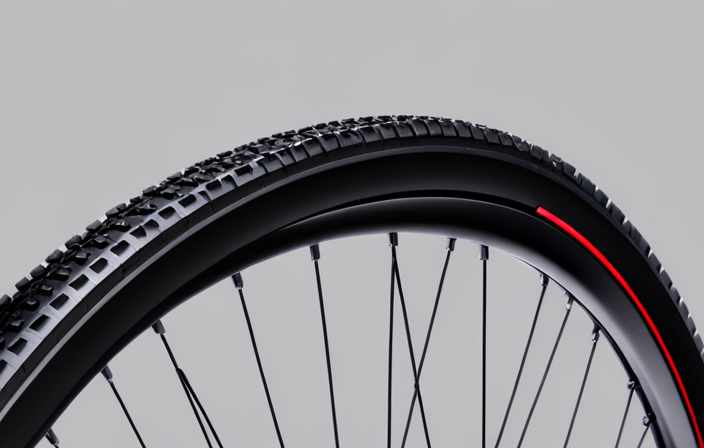
Swap out Your Tires
Swap out your tires to easily transform your road bike into a capable gravel grinder. One of the first things you’ll need to consider is whether to go with tubeless or clincher tires. Tubeless tires offer several advantages, including reduced risk of flats due to their sealant-filled design and the ability to run lower pressures for improved traction on rough terrain. On the other hand, clincher tires are easier to install and repair in case of a puncture on the trail.
Once you’ve decided on the type of tire, it’s time to think about width. Wider tires are highly recommended for gravel riding as they provide better stability, comfort, and grip. They can absorb more shock from uneven surfaces, allowing you to tackle rough terrains with confidence. Aim for tire widths between 35mm and 45mm for optimal performance on gravel.
Now that you understand the importance of swapping out your tires, let’s move on to the next step: installing gravel-specific handlebars.
Install Gravel-Specific Handlebars
Start by installing gravel-specific handlebars to enhance your control and comfort while riding on rough terrain. Gravel handlebars are specifically designed to provide a more relaxed and comfortable riding position, allowing you to tackle long hours in the saddle with ease. These handlebars typically feature a wider flare at the drops, giving you better leverage and stability when navigating challenging gravel roads.
In terms of comfort, gravel handlebars offer multiple hand positions that alleviate pressure on your wrists and shoulders. This is especially important when tackling bumpy surfaces, as it reduces fatigue and allows for a more enjoyable riding experience. Additionally, the increased width of these bars provides added stability and control, ensuring that you feel confident even on loose or uneven terrain.
Not only do gravel handlebars enhance comfort, but they also improve performance. The wider flare at the drops gives you greater control during descents, allowing for more precise steering and improved handling. This translates into faster speeds and increased confidence when taking your road bike off-road.
With improved control and comfort achieved through installing gravel-specific handlebars, it’s time to upgrade your gearing for an optimal gravel grinding experience.
Upgrade Your Gearing
Upgrading your gearing can greatly enhance your gravel riding experience. When it comes to tackling rough terrains, having the right gear ratios is crucial for maintaining speed and control.
Here are four key ways to upgrade your gearing and make the most out of your road bike turned gravel grinder:
-
Upgrade drivetrain: Consider investing in a gravel-specific drivetrain that offers a wider range of gears. This will allow you to effortlessly tackle steep climbs and navigate challenging descents.
-
Modify crankset: Switching to a smaller chainring on your crankset can provide you with lower gears, making it easier to conquer steep inclines. Additionally, opting for a wider range cassette at the rear can further enhance your bike’s climbing capabilities.
-
Install a clutch derailleur: A clutch derailleur helps prevent chain slap and keeps the chain in place over rough terrain, reducing the risk of drops or damage.
-
Consider an electronic shifting system: Electronic shifting systems offer precise and effortless gear changes, allowing you to focus more on the trail ahead.
Upgrading your gearing and modifying your crankset are essential steps towards transforming your road bike into a capable gravel grinder. Once these enhancements are made, consider a suspension fork for added comfort and control during off-road adventures.
Consider a Suspension Fork
If you want to enhance your gravel riding experience, consider equipping your bike with a suspension fork for added comfort and control on off-road trails. A suspension fork can absorb the bumps and vibrations of uneven terrain, allowing you to maintain better traction and ride with more confidence. It can help reduce fatigue on longer rides by minimizing the impact on your wrists, arms, and shoulders.
When choosing a suspension fork for your road bike turned gravel grinder, there are a few key factors to consider. First, make sure that the fork is compatible with your frame’s specifications and steerer tube diameter. Additionally, pay attention to the travel distance of the fork, as this will determine how much suspension it provides. Generally, a travel distance of around 40-50mm should be sufficient for most gravel riding.
Furthermore, tire selection plays an important role in maximizing the benefits of a suspension fork. Opting for wider tires with lower air pressure can further enhance comfort and traction on rough surfaces. This combination of a suspension fork and appropriate tires will greatly improve your off-road capabilities while maintaining efficiency on smoother sections.
Now that we’ve discussed upgrading your bike with a suspension fork let’s take it one step further and explore adding a dropper seatpost for even greater versatility during technical descents without compromising climbing performance.
Add a Dropper Seatpost
After considering a suspension fork for my road bike turned gravel grinder, I realized that there is another component that can greatly enhance my off-road experience: a dropper seatpost. A dropper seatpost allows me to quickly and easily adjust the height of my saddle while riding.
This means that when I encounter rough terrain or steep descents, I can lower my saddle to get more control and maneuverability. Conversely, when I need more pedaling power on flat sections or climbs, I can raise the saddle back up to its optimal position.
The benefits of a dropper seatpost are numerous. It not only improves overall comfort and efficiency but also enhances safety by allowing me to maintain better balance and stability on unpredictable surfaces.
When it comes to choosing the right dropper seatpost, there are a few factors to consider. These include the amount of travel (the distance the post can move up and down), compatibility with my frame size and geometry, as well as weight and reliability.
Now that I have upgraded my suspension fork and added a dropper seatpost to my road bike turned gravel grinder, the next step is installing disc brakes for ultimate stopping power on any terrain.
Install Disc Brakes
To maximize stopping power on any terrain, installing disc brakes is the next step in my bike upgrade journey. Disc brakes offer superior performance and reliability compared to traditional rim brakes, especially when riding off-road or in wet conditions. Here are four reasons why I’m excited to install hydraulic disc brakes on my road bike:
-
Increased braking power: Hydraulic disc brakes provide consistent and powerful stopping power, allowing me to confidently tackle steep descents and navigate technical sections with ease.
-
Improved modulation: With hydraulic disc brakes, I can precisely control the amount of braking force applied, giving me more confidence and control while navigating tricky terrain.
-
Better heat dissipation: Disc brakes are less prone to overheating than rim brakes, ensuring consistent performance even during long descents or intense braking.
-
Convertibility to singlespeed: By installing disc brakes, I can easily convert my road bike into a singlespeed setup if desired, as many single-speed conversion kits are designed for bikes with disc brake mounts.
With the installation of hydraulic disc brakes complete, the next step is to protect my bike with frame and fork guards. These guards will shield my bike from scratches and damage caused by rocks, branches, and other trail hazards without compromising its performance or aesthetics.
Protect Your Bike with Frame and Fork Guards
One way to protect your bike from scratches and damage caused by trail hazards is by installing frame and fork guards. These guards act as a protective barrier between your bike’s frame and the elements, preventing any potential damage that could occur while riding on gravel roads or rough terrain. They are especially helpful when you’re taking your road bike off-road and turning it into a gravel grinder.
To give you a better understanding of how these guards work, let me paint a picture for you with a table:
| Frame Guards | Fork Guards |
|---|---|
| Made of durable materials such as neoprene or silicone | Designed to fit snugly around the fork legs for maximum protection |
| Easy to install with Velcro straps or adhesive backing | Prevents scratches, dings, and chips caused by debris kicked up from the trail |
| Provides an extra layer of defense against rocks, branches, and other trail hazards | Shields vulnerable areas like the front suspension components |
By incorporating these bike protection measures into your maintenance routine, you can ensure that your road bike turned gravel grinder stays in top condition. Now that we’ve covered how to protect your bike’s frame and forks, let’s move on to enhancing its stability with a longer wheelbase.
Enhance Your Bike’s Stability with a Longer Wheelbase
Enhancing your bike’s stability can be achieved by opting for a longer wheelbase. A longer wheelbase refers to increasing the distance between the front and rear axles of your bike. This modification provides numerous benefits, including improved balance, better handling, and enhanced control over rough terrains.
To understand the significance of a longer wheelbase for bike stability, consider these three key points:
-
Increased Stability: With a longer wheelbase, your bike becomes more stable and less prone to wobbling or tipping over on uneven surfaces. This is especially crucial when riding on gravel roads that demand greater traction and steadiness.
-
Enhanced Handling: The extended wheelbase allows for smoother turns and better maneuverability. It reduces the chances of losing control while cornering or navigating tight spots.
-
Improved Comfort: A longer wheelbase contributes to a more comfortable ride by absorbing vibrations caused by bumpy terrain. This helps reduce fatigue and allows you to go further distances with ease.
By understanding how a longer wheelbase enhances bike stability, you can confidently explore new horizons on your gravel grinder. In the next section, we will discuss how installing a bikepacking rack can further enhance your cycling experience without compromising stability.
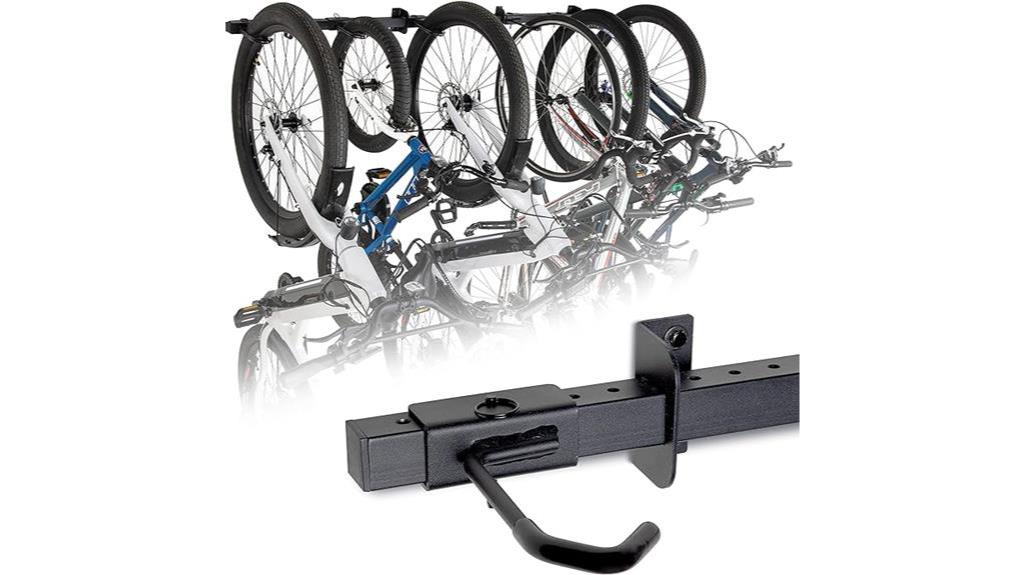
Install a Bikepacking Rack
Installing a bikepacking rack can further enhance your cycling experience by providing additional storage space for your gear. When it comes to choosing the right bikepacking rack, there are a few things to consider.
First, make sure the rack is compatible with your road bike frame. Look for racks that offer adjustable mounting options to ensure a proper fit. Additionally, consider the weight capacity of the rack and choose one that can support all of your gear without compromising stability.
Before installing the bikepacking rack, gather all necessary tools and materials such as screws, washers, and an Allen wrench. Start by removing any accessories or components that may obstruct the installation process. Then, carefully attach the rack to designated mounting points on your road bike frame using the provided screws and washers. Make sure everything is securely tightened to prevent any wobbling during rides.
Once installed, you can start loading up your gear onto the bikepacking rack. Use bungee cords or straps to secure items in place and distribute weight evenly across both sides of the rack for better balance. Remember to keep heavier items closer to the center of gravity to maintain stability while riding.
With a bikepacking rack installed, you’ll have plenty of storage space for all of your essential gear on those long gravel rides. Upgrade your pedals next for an even more comfortable and efficient cycling experience.
Upgrade Your Pedals
Upgrading your pedals can greatly improve your cycling experience. When it comes to off-road riding, having the right pedals is essential to ensure optimal performance and control. By upgrading your pedals, you can enhance your power transfer and improve your grip on the bike.
When choosing new pedals for gravel grinding, there are a few factors to consider. First, look for pedals that offer a larger platform. This will provide better stability and support when riding over rough terrain. Additionally, consider opting for pedals with adjustable tension settings. This allows you to customize the amount of force required to clip in and out, ensuring a secure connection without sacrificing ease of use.
Clipless pedals are a popular choice among gravel grinders as they provide efficient power transfer by allowing you to pull up on the pedal stroke as well as push down. However, if you prefer not being attached to the bike, flat pedals with pins can provide excellent grip and control.
Upgrading your pedals is an important step towards transforming your road bike into a capable gravel grinder. Once you’ve improved your grip and power transfer with upgraded pedals, it’s time to consider a tubeless setup for added puncture protection and lower tire pressures on rough terrain.
Consider a Tubeless Setup
Once you’ve upgraded your pedals, it’s worth considering a tubeless setup for added puncture protection and the ability to run lower tire pressures on rough terrain. The tubeless vs. clincher debate has been ongoing in the cycling community for some time now, with strong arguments on both sides. However, there are several advantages of tubeless tires that make them an appealing option for gravel grinding.
One of the main advantages of tubeless tires is their ability to resist flats and punctures more effectively than traditional clincher tires. By eliminating the inner tube and relying solely on sealant to seal any small punctures or cuts in the tire, you greatly reduce the risk of getting stranded with a flat tire out on the gravel roads. This is especially important when riding in remote areas where assistance may be far away.
Another advantage of tubeless tires is their ability to run at lower pressures without sacrificing performance. Lower tire pressures provide better traction and comfort on rough terrain, allowing you to maintain control and ride more confidently over rocks, roots, and loose surfaces. This can greatly enhance your overall riding experience and make tackling challenging gravel routes much easier.
Moving forward into adding extra storage with frame bags and saddlebags…
Add Extra Storage with Frame Bags and Saddlebags
To increase your storage capacity, consider adding frame bags and saddlebags to your setup. These bikepacking essentials are a great way to carry all the gear you need for longer gravel rides.
When choosing the right size bags, it’s important to consider how much storage space you’ll need without compromising the handling of your road bike. Look for frame bags that fit snugly against the top tube and seat tube, providing ample room for items like spare tubes, tools, snacks, and even a lightweight jacket.
Saddlebags are another excellent option for extra storage on your gravel grinder. They attach securely under the saddle and can hold larger items such as a compact sleeping bag or extra layers of clothing.
Investing in a gravel-specific saddle is also worth considering at this stage. Gravel saddles are designed with more padding and wider profiles to provide added comfort during long off-road rides. This will ensure that you stay comfortable throughout your adventure without sacrificing performance.
With increased storage capacity from frame bags and saddlebags, as well as a gravel-specific saddle for added comfort, you’ll be ready to take on any gravel grinding adventure with confidence.
Invest in a Gravel-Specific Saddle
Consider investing in a gravel-specific saddle to enhance your comfort during long off-road rides. A gravel saddle is designed with features that cater to the demands of rough terrain, providing better support and cushioning compared to a standard road bike saddle.
When choosing a gravel saddle, there are a few alternatives worth considering.
-
Cutout Design: Look for a saddle with a center cutout or relief channel to reduce pressure on sensitive areas and improve blood flow.
-
Padding: Opt for a saddle with sufficient padding to absorb vibrations and impacts from uneven surfaces without compromising stability.
- Gel padding can provide extra comfort but may be less durable than foam or synthetic materials.
- Memory foam contours to your body shape for personalized support.
-
Width and Shape: Consider the width of the saddle based on your sit bone measurements. A wider design distributes weight more evenly, reducing discomfort during long rides.
When selecting the right gravel saddle, it’s crucial to find one that suits your riding style and body physiology. Test and fine-tune your setup before hitting the trails by adjusting the tilt, height, and fore-aft position of the saddle. This will help ensure optimal comfort and performance on your gravel adventures.
Test and Fine-Tune Your Setup before Hitting the Trails
Before you head out on the trails, make sure to test and fine-tune your setup for optimal comfort and performance.
One of the first things you should do is find a suitable test track where you can put your modified road bike through its paces. Look for a trail that closely mimics the conditions you’ll encounter on gravel roads, with loose gravel, uneven terrain, and sharp turns. This will allow you to get a feel for how your bike handles in these conditions and make any necessary adjustments.
Proper fit is also crucial when converting your road bike into a gravel grinder. Take the time to ensure that your saddle height and position are correctly adjusted to maximize comfort and power transfer. A saddle that is too high or too low can lead to discomfort or even injury during long rides on rough terrain. Additionally, consider investing in padded handlebar tape or gloves to absorb vibrations and reduce fatigue.
Once you have fine-tuned your setup, take it out for a spin on the test track. Pay attention to how the bike handles corners, descents, and climbs. Make note of any areas where improvements can be made, such as adjusting tire pressure or adding wider tires for better traction.
By testing and fine-tuning your setup before hitting the trails, you can ensure that your converted road bike performs optimally as a gravel grinder.
Frequently Asked Questions
Can I turn any road bike into a gravel grinder, or are some bikes more suitable than others?
For off-road adventures, a gravel bike is generally better than a road bike. However, with the right modifications, you can turn a road bike into a capable gravel grinder.
Selecting the right tires is crucial – go for wider tires with aggressive tread patterns for improved grip and stability on loose surfaces. Additionally, consider adding disc brakes for better stopping power and upgrading your drivetrain to handle rougher terrains.
How much does it typically cost to convert a road bike into a gravel grinder?
Converting a road bike into a gravel grinder can cost anywhere from $200 to $1000, depending on the specific modifications and components needed.
The benefits of this conversion are numerous. Firstly, it allows you to explore off-road terrains while maintaining the speed and efficiency of a road bike.
Additionally, the wider tires and stronger wheels provide increased stability and durability on rough surfaces.
Overall, the cost is worth it for those seeking versatile cycling experiences.
Are there any specific tools or equipment I need to complete the conversion process?
To convert a road bike into a gravel grinder, you’ll need some specific tools and equipment.
First, you’ll need a set of wider tires with more traction for off-road riding.
Additionally, installing disc brakes will provide better stopping power on uneven terrain.
Other necessary tools include a torque wrench for properly tightening bolts, cable cutters for adjusting the brake and shifter cables, and possibly a bottom bracket tool if you need to replace or upgrade that component.
What are the potential downsides or disadvantages of converting a road bike into a gravel grinder?
Potential downsides and disadvantages of converting a road bike into a gravel grinder include compatibility issues and decreased speed and performance. Converting a road bike may require modifications that could affect the overall functionality of the bike.
Additionally, the change in tires and components designed for off-road use can lead to decreased speed on pavement. It’s important to consider these factors before embarking on the conversion process to ensure it aligns with your intended usage.
Are there any safety considerations I should keep in mind when using a converted gravel grinder on different terrains?
When using a converted gravel grinder on different terrains, safety considerations are essential.
Firstly, ensure that the tires are suitable for the specific terrain to maintain traction and control. Regularly check tire pressure and adjust accordingly.
Additionally, inspect brakes regularly and make sure they are in good working condition. Proper maintenance is crucial for optimal performance.
Keep the bike clean, lubricate moving parts regularly, and have it serviced by a professional mechanic periodically to ensure safe riding experiences.
Conclusion
In conclusion, transforming your road bike into a gravel grinder requires careful consideration and a few key modifications.
By assessing your bike’s compatibility and making necessary swaps like installing gravel-specific handlebars and upgrading your gearing, you can enhance its performance on rougher terrain.
Additionally, the addition of a suspension fork and tubeless setup can further improve comfort and control.
Adding extra storage with frame bags and saddlebags allows for longer rides, while investing in a gravel-specific saddle ensures optimal comfort.
Remember to test and fine-tune your setup before hitting the trails for an exhilarating off-road adventure!