Connect with us

Bike

What Do I Need To Turn A Road Bike Into A Gravel Griner

Published

on

An image that showcases a road bike transformed into a gravel grinder

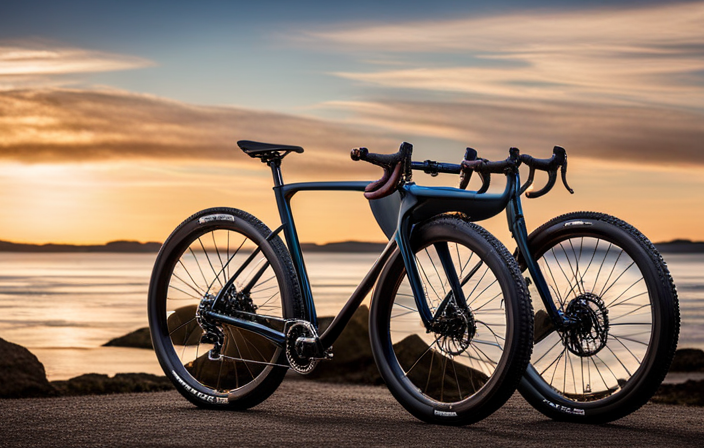
You’ve probably heard about the excitement surrounding gravel grinding and now you’re eager to try taking your road bike off-road. But where should you begin? No need to stress, I have all the information you’ll need.

In this article, I’ll guide you through everything you need to know about turning your trusty road bike into a capable gravel grinder. From assessing compatibility and upgrading tires to adding suspension and fine-tuning your setup, we’ll leave no stone unturned in preparing your bike for the thrilling world of gravel riding.

Let’s dive in!

Key Takeaways

  • Upgrading tires to wider options with aggressive tread patterns improves the bike’s performance on gravel and provides better grip.
  • Adjusting gearing by upgrading to a wider range cassette and choosing smaller chainrings for easier climbing or larger chainrings for higher speeds on flat sections optimizes the bike’s performance for gravel grinding.
  • Installing disc brakes provides improved stopping power and control off-road, while adding suspension absorbs shocks and vibrations for a smoother ride and better traction on challenging terrain.
  • Upgrading handlebars for a more upright riding position, adding extra frame protection to minimize damage, enhancing visibility with lights, and carrying essential tools such as a multi-tool, spare tubes, and a mini pump are important for safety and convenience on gravel roads.

Assess Your Bike’s Compatibility

Assess if your bike is compatible for gravel grinding. Before you embark on the journey of turning your road bike into a gravel grinder, it’s crucial to evaluate your bike’s components and performance.

Advertisement

Gravel grinding requires a sturdy and reliable bike that can handle rough terrains and unpredictable conditions.

Start by inspecting the frame of your road bike. Look for signs of damage or weakness, as gravel riding can put additional stress on the frame. Consider if your current frame has clearance for wider tires, which are essential for navigating gravel roads.

Next, assess your bike’s drivetrain and brakes. Gravel rides often involve steep climbs and descents, so make sure your gears are suitable for tackling different gradients. Check if your brakes have enough power to handle off-road conditions effectively.

Evaluate the wheels and tires of your road bike as well. Upgrading to stronger wheels with wider rims can provide better stability and durability on gravel surfaces. Additionally, opt for tubeless-ready tires that offer improved puncture resistance.

By assessing these key components of your bike, you’ll be able to determine its compatibility for gravel grinding. Once you’ve identified any areas that may need improvement or upgrading, you can move on to the next step: upgrading your tires.

Advertisement

Upgrade Your Tires

To enhance your ride on different terrains, consider swapping out the tires on your road bike for more rugged options. Upgrading tire size is one way to improve your bike’s performance on gravel. Look for wider tires, around 32-40mm in width, as they provide better stability and traction on uneven surfaces. The larger volume of air in these tires also helps absorb shocks and vibrations, making for a smoother ride.

Choosing the right tread pattern is equally important when upgrading your tires. For gravel riding, opt for tires with a more aggressive tread design. Look for knobs or lugs that can grip loose gravel and provide better control while cornering. Additionally, consider selecting tubeless-ready tires as they offer lower tire pressure options without risking flats.

Upgrading your tires can significantly transform your road bike into a capable gravel grinder. However, it’s essential to remember that adjusting your gearing is another crucial step towards optimizing your bike’s performance off-road. By addressing both tire selection and gearing adjustments, you’ll be well-equipped to tackle any gravel adventure that comes your way.
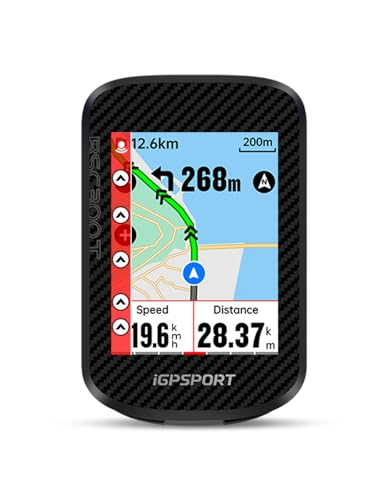
Adjust Your Gearing

Advertisement

Consider adjusting the gearing on your road bike to optimize its performance for off-road riding. By adjusting the shifting and upgrading the chainrings, you can ensure that your bike is capable of tackling gravel roads with ease.

When it comes to adjusting your gearing, there are a few key factors to consider. First, you’ll want to evaluate the range of gears available on your current setup. If you find that you frequently run out of gears on steep climbs or struggle to maintain speed on descents, it may be worth upgrading to a wider range cassette. This will give you more options when it comes to selecting the appropriate gear for any given terrain.

Next, take a look at your chainrings. Upgrading to smaller chainrings can make climbing easier by providing lower gearing ratios. On the other hand, larger chainrings can help you achieve higher speeds on flat sections or descents.

By adjusting your shifting and upgrading your chainrings, you can fine-tune your bike’s performance for gravel grinding adventures. The next step in transforming your road bike into a gravel grinder is installing disc brakes, which will provide improved stopping power and control in off-road conditions.

Install Disc Brakes

When installing disc brakes on your road bike, you’ll experience improved stopping power and control while riding off-road. Before diving into the installation process, it’s important to assess the compatibility of your road bike with disc brakes. Some older models may require specific adapters or modifications to accommodate disc brakes. Once you’ve confirmed compatibility, you can proceed with the upgrade.

Advertisement

To install disc brakes, start by removing the existing rim brakes and brake levers from your bike. Next, attach the disc brake calipers to the frame and fork using the provided mounting bolts. Make sure they are aligned properly for optimal performance. Then, connect the hydraulic or mechanical brake lines to each caliper and secure them tightly.

Upgrading pedals is another essential step when converting a road bike into a gravel grinder. Flat pedals with good traction are ideal for off-road riding as they allow for quick foot adjustments and easy dismounting if needed.

Now that you have installed disc brakes and upgraded your pedals, you’re one step closer to transforming your road bike into a capable gravel grinder. The next section will cover how to add suspension for a smoother ride on rough terrains without compromising speed on smooth roads.

Add Suspension

Advertisement

Adding suspension to your road bike can greatly improve the comfort and performance of your ride on rough terrains. The benefits of suspension are numerous, as it helps absorb shocks and vibrations, allowing for a smoother ride. This is especially important when riding on gravel roads or uneven surfaces, where bumps and obstacles can make the ride uncomfortable and even dangerous. Suspension also provides better traction and control, enabling you to navigate through challenging terrain with ease.

When choosing the right suspension for your road bike turned gravel grinder, there are a few factors to consider. First, determine the type of suspension system you want: either a front fork suspension or a full-suspension setup. Front fork suspensions are more common and suitable for most gravel riding situations. However, if you plan on tackling more technical trails or off-road adventures, a full-suspension setup may be worth considering.

Incorporating suspension into your road bike will enhance its capability to handle different terrains with greater ease and comfort. Now that we have covered adding suspension, let’s move on to upgrading your handlebars without compromising your biking experience.

Upgrade Your Handlebars

To enhance your biking experience, why not upgrade your handlebars? Upgrading your handlebars can greatly improve comfort and control while riding on gravel. Here are three ways you can upgrade your handlebars to make them more suitable for gravel grinding:

  1. Upgrade Your Stem: Consider replacing your current stem with a shorter and higher-rise stem. This will help you achieve a more upright riding position, reducing strain on your back and neck during long rides. A shorter stem also improves maneuverability, making it easier to navigate rough terrain.

  2. Change Your Handlebar Tape: Invest in thicker and more cushioned handlebar tape. This will provide extra padding and absorb vibrations, reducing hand fatigue on bumpy gravel roads. Look for tape that has an anti-slip feature to ensure a secure grip even in wet conditions.

  3. Install Wide Fenders: While not directly related to upgrading the handlebars themselves, installing wide fenders can greatly enhance your gravel grinding experience by keeping mud and debris off you and your bike. This will help keep you cleaner and protect important components from damage caused by dirt accumulation.

By upgrading your stem, changing your handlebar tape, and installing wide fenders, you’ll be well-equipped for tackling challenging gravel terrains with ease.

Advertisement

Next up, let’s talk about how to install wide fenders without any hassle!

Install Wide Fenders

Upgrading your handlebars is a great way to improve the comfort and control of your road bike when turning it into a gravel grinder. But that’s not all you need to consider. To fully prepare your bike for off-road adventures, it’s important to install wide fenders.

Wide fenders serve multiple purposes on a gravel bike. Firstly, they help keep you and your bike clean by blocking mud, dirt, and water from splashing onto you while riding through wet or muddy terrain. This means less time spent cleaning your bike after each ride! Secondly, wide fenders increase tire clearance, allowing you to fit larger tires on your road bike.

By increasing tire clearance, wider fenders enable you to upgrade the brakes on your road bike as well. Gravel riding often requires more stopping power due to rougher terrain and varying weather conditions. Upgrading your brakes can give you better control and confidence when navigating challenging surfaces.

Now that we have covered upgrading handlebars and installing wide fenders, the next step in transforming your road bike into a gravel grinder is investing in a reliable gravel-specific saddle…

Advertisement

Invest in a Reliable Gravel-specific Saddle

When it comes to turning a road bike into a gravel grinder, one key consideration is investing in a reliable gravel-specific saddle. It’s important to prioritize comfort and support, especially for long rides on rough terrain.

To find the right saddle, I recommend testing out different options before making a purchase, as what works for one person may not work for another.

Consider the Importance of Comfort and Support

Considering comfort and support is crucial when turning a road bike into a gravel grinder. When venturing off-road, it’s important to find the right balance between comfort and performance. A comfortable bike will allow you to ride longer without experiencing discomfort or fatigue, while still maintaining the necessary efficiency for gravel riding.

To achieve this, focus on finding the right bike fit that suits your body type and riding style. Ensure that your bike’s frame geometry is suitable for off-road riding, providing stability and control over rough terrain. Additionally, consider investing in components like wider tires and suspension systems that absorb vibrations and bumps. These will enhance your overall comfort while allowing you to tackle challenging gravel routes with ease.

When choosing a saddle suitable for long rides on rough terrain, it’s essential to prioritize both comfort and support.

Advertisement

Choose a Saddle Suitable for Long Rides on Rough Terrain

Finding a saddle that provides both comfort and support is essential for long rides on rough terrain. When it comes to choosing a saddle suitable for gravel grinding, there are a few important factors to consider.

First, pay attention to the material of the saddle. Look for options made from durable and lightweight materials such as carbon fiber or titanium, as they can withstand the rigors of off-road riding while keeping weight down.

Additionally, consider the design of the saddle. Look for saddles with ample padding and ergonomic shapes that can provide cushioning and proper support to prevent discomfort during long rides. It’s also worth considering saddles with cutouts or channels in the middle to relieve pressure on sensitive areas.

Ultimately, testing different saddle options before making a purchase will help you find the perfect fit for your gravel grinding adventures without compromising comfort or support.

Test Different Saddle Options Before Making a Purchase

To find the perfect saddle for your long rides on rough terrain, you should test different options before making a purchase. It’s essential to consider various factors when choosing a saddle that will provide optimal comfort and support during your gravel grinding adventures.

Advertisement

One important factor to consider is the width of the saddle, as it should match the distance between your sit bones for proper weight distribution. Additionally, the shape of the saddle plays a crucial role in ensuring a comfortable fit, with options ranging from narrow and sleek designs to wider and more cushioned ones.

Another aspect to evaluate is the material used in construction; leather saddles may offer durability but require more maintenance compared to synthetic materials. By testing different saddle options, you can determine which one suits your riding style and body type best.

The next section will cover how upgrading your pedals can enhance your gravel grinding experience seamlessly.

Upgrade Your Pedals

Upgrading your pedals is essential to turning a road bike into a gravel grinder. When riding on rough and uneven surfaces, having the right pedals can greatly improve your performance and comfort. Here are some key considerations when upgrading your pedals:

  • Upgrade your shoes: Investing in a good pair of cycling shoes specifically designed for gravel riding is crucial. These shoes provide better grip and stability, allowing you to transfer power efficiently to the pedals.

  • Consider clipless pedals: Clipless pedals offer many advantages for gravel grinding. They provide a secure connection between your shoes and the pedals, preventing slippage on bumpy terrain. Additionally, they allow you to use more muscles during each pedal stroke, resulting in improved efficiency.

  • Opt for wider platform pedals: Wide platform pedals offer increased stability and support when navigating through gravelly roads. They provide a larger contact area for your feet, reducing foot fatigue during long rides.

  • Choose durable materials: Look for pedals made from sturdy materials like aluminum or titanium. These materials ensure longevity and can withstand the harsh conditions encountered while riding off-road.

By upgrading your pedals and considering these factors, you’ll enhance both the performance and durability of your road bike as it transitions into a capable gravel grinder.

Advertisement

To further protect your bike’s frame from potential damage caused by debris or impacts, adding extra frame protection is highly recommended.

Add Extra Frame Protection

Now that we have upgraded our pedals, let’s move on to adding some extra frame protection to our road bike turned gravel grinder. When riding off-road, your bike is more prone to scratches and dings from rocks, branches, and other obstacles. By adding frame protection, you can minimize the damage and keep your bike looking pristine.

There are several options for frame protection, such as adhesive vinyl wraps or clear protectors that can be applied directly onto the vulnerable areas of your bike. These protective layers act as a shield against potential scrapes and scratches, ensuring that your precious bike remains in top condition.

In addition to frame protection, it’s also crucial to consider tire upgrades for optimal performance on gravel terrain. Gravel-specific tires typically feature wider treads with increased traction and puncture resistance. This allows for better grip and stability when navigating rough surfaces.

By equipping your road bike with frame protection and upgrading your tires, you’ll be well-prepared for the challenges of gravel riding. But before we hit the trails, there’s one more essential upgrade we need: lights to ensure visibility in low-light conditions.

Advertisement

Equip Your Bike with Lights

When riding on gravel roads, visibility is of utmost importance for safety. To ensure that I’m visible to other road users, I choose bright and reliable front and rear lights for my bike. These lights not only illuminate the path ahead but also make me more conspicuous in low-light conditions.

Additionally, considering additional lighting options such as helmet-mounted or wheel-mounted lights can further enhance safety. These lights provide a wider field of vision and make me even more visible from different angles.

Importance of Visibility on Gravel Roads

Visibility on gravel roads is crucial when converting a road bike into a gravel grinder. To ensure your safety and maintain control, it’s essential to prioritize visibility in various ways. Here are four key elements that can greatly enhance your visibility:

  1. Reflective clothing: Wearing high-visibility clothing allows you to stand out in low-light conditions, making it easier for motorists and other cyclists to spot you from a distance.

  2. Rearview mirror: Installing a rearview mirror on your handlebars provides valuable situational awareness by allowing you to monitor traffic behind you without turning your head, reducing the risk of accidents.

  3. Bright front and rear lights: Choose lights with high lumens output and multiple modes to increase your visibility both during the day and at night.

  4. Reliable light mounts: Ensure your lights are securely attached to your bike using reliable mounts that can withstand the vibrations of rough gravel roads.

By incorporating these measures, you significantly improve your safety on gravel roads. This sets the stage for the subsequent section about choosing bright and reliable front and rear lights.

Choose Bright and Reliable Front and Rear Lights

To ensure optimum safety, it’s important to select bright and dependable front and rear lights for your gravel riding experience.

Advertisement

When it comes to front light options, there are a few key factors to consider. Look for lights that offer a high lumen output to provide maximum visibility in low-light conditions. Additionally, choose a light with different brightness settings so you can adjust the intensity based on the surrounding environment.

For rear light options, opt for lights that have a wide-angle beam pattern to increase your visibility from all angles. It’s also crucial to choose lights that have long battery life or are rechargeable so you don’t run out of power during your ride.

By selecting the right front and rear lights, you can greatly enhance your visibility on gravel roads and ensure a safer riding experience.

Consider additional lighting options for enhanced safety without needing an extra step in your setup.

Consider Additional Lighting Options for Enhanced Safety

For an extra layer of safety, you might want to consider adding additional lighting options to your setup. When it comes to riding in low-light conditions or on dark trails, visibility is crucial.

Advertisement

Here are some additional lighting options that can enhance your safety:

  • Bike-mounted headlights: These powerful lights provide a clear view of the road ahead and make you more visible to others.

  • Helmet-mounted lights: Attach these lightweight lights to your helmet for increased visibility wherever you look.

  • Wheel or frame lights: These colorful LED lights not only make you more visible but also add a fun touch to your bike.

  • Reflective gear: Invest in reflective vests, jackets, or ankle bands that reflect light and make you stand out even in the darkest conditions.

  • Light-up gloves or shoe clips: These accessories with built-in LED lights improve your visibility from all angles.

By incorporating these additional lighting options, you’ll significantly improve your visibility and ensure a safer ride.

Now, let’s move on to the next section about carrying essential tools and accessories for gravel grinding.

Carry Essential Tools and Accessories

Don’t forget to carry all the essential tools and accessories you need when turning your road bike into a gravel grinder. Bike maintenance becomes even more important when venturing into off-road terrains, so it’s crucial to be prepared.

One of the first things you should have is a multi-tool that includes different sizes of Allen wrenches, screwdrivers, and a chain breaker. This will allow you to make on-the-go adjustments and repairs as needed. Additionally, carrying spare tubes, tire levers, and a mini pump or CO2 inflator is essential in case of punctures or sudden loss of pressure.

Advertisement

Gravel riding tips also include having a patch kit for quick fixes on the trail and a small first aid kit for any minor injuries that may occur. It’s wise to pack some zip ties and duct tape as well; they can come in handy for makeshift solutions if something breaks or needs securing temporarily.

By being equipped with these tools and accessories, you’ll be better prepared to handle any unexpected situations that may arise during your gravel adventures.

Now that we have covered the importance of carrying essential items, let’s move on to fine-tuning your bike’s suspension and tire pressure for optimal performance on varied terrain without compromising comfort.

Fine-tune Your Bike’s Suspension and Tire Pressure

Adjusting your bike’s suspension and tire pressure can greatly enhance its performance on various terrains. When it comes to gravel grinding, fine-tuning your bike’s suspension is essential for a smooth and controlled ride. Suspension adjustments allow you to optimize the amount of travel and damping, ensuring that your bike absorbs bumps effectively without feeling too soft or stiff.

Start by adjusting the sag, which is the amount your suspension compresses under your weight when you’re sitting on the bike. This will help you find the right balance between comfort and efficiency. Additionally, consider adjusting the rebound damping to control how quickly your suspension returns after compression.

Advertisement

In addition to suspension adjustments, adjusting tire pressure is crucial for optimal gravel riding performance. Lowering tire pressure provides better traction and allows your tires to conform to uneven surfaces, reducing vibrations and improving overall stability. However, keep in mind that too low of a tire pressure can increase rolling resistance and risk pinch flats. Experiment with different pressures based on your weight, terrain conditions, and personal preferences.

By fine-tuning your bike’s suspension and adjusting tire pressure accordingly, you’ll have a smoother ride with improved control on gravel roads. Practice and familiarize yourself with gravel riding techniques will further enhance your skills in tackling this challenging terrain seamlessly.

Practice and Familiarize Yourself with Gravel Riding Techniques

To enhance your skills in tackling challenging gravel terrain, it’s important to practice and become familiar with various gravel riding techniques. Here are some key gravel bike skills to master:

  • Body Positioning: Maintain a centered and balanced position on the bike, shifting your weight as needed to maintain control and stability.

  • Cornering: Learn how to navigate turns on loose surfaces by leaning the bike into the turn while keeping your body upright.

  • Climbing and Descending: Adjust your gear selection and body position for efficient climbing, while using controlled braking techniques when descending steep sections.

  • Handling Rough Terrain: Develop the ability to absorb bumps and obstacles by bending your arms and legs, allowing the bike to move beneath you.

  • Choosing the Right Gravel Routes: Research and select routes that match your skill level. Start with easier terrains before gradually progressing to more technical challenges.

By practicing these techniques regularly, you’ll build confidence in handling different types of gravel surfaces.

As you hone your skills, don’t forget to enjoy the adventure and explore new gravel routes that will further push your abilities without compromising safety or fun.

Advertisement

Enjoy the Adventure and Explore New Gravel Routes

Explore new gravel routes and embrace the adventure of discovering unfamiliar terrain. Riding a road bike on gravel can be a thrilling experience that allows you to enjoy the benefits of both road cycling and off-road biking. Gravel riding offers numerous benefits, including improved stability, versatility, and increased comfort due to its wider tires and relaxed frame geometry.

To fully enjoy your gravel adventures, it’s important to consider some tips for riding at night. Firstly, invest in high-quality lights both on the front and rear of your bike to ensure visibility. Additionally, wearing reflective clothing will make you more visible to other road users. It is also crucial to plan your route beforehand, especially when exploring unfamiliar areas, as this will help you avoid potential hazards.

To further enhance your knowledge about gravel riding and night cycling safety, refer to the following table:

Gravel Bike Benefits Tips for Gravel Riding at Night
Improved stability Invest in high-quality lights
Versatility Wear reflective clothing
Increased comfort Plan your route beforehand

By following these tips and exploring new gravel routes, you can create unforgettable experiences while enjoying the freedom that comes with riding off-road on your converted road bike. So get out there and start exploring!

Frequently Asked Questions

Can I convert any road bike into a gravel grinder?

Yes, you can convert some road bikes into gravel grinders. However, using a mountain bike for gravel grinding is often more suitable due to its wider tires and stronger frame.

Advertisement

As for the best tires for gravel riding, look for ones with a tread pattern designed for off-road use and wider widths to provide better traction and stability on loose surfaces.

What are the benefits of upgrading to disc brakes?

Upgrading to disc brakes on a road bike is like unleashing the power of a rocket ship!

The benefits of hydraulic disc brakes are simply mind-blowing. They provide unmatched stopping power, even in wet and muddy conditions, making your rides safer than ever before.

On the other hand, mechanical disc brakes offer precise control and easy maintenance.

So whether you choose hydraulic or mechanical, upgrading to disc brakes will revolutionize your biking experience.

Advertisement

Get ready for an adrenaline-fueled adventure!

How do I choose the right gravel-specific saddle?

Choosing the right saddle for gravel riding is crucial for optimal comfort during long rides. Start by considering the width and shape of the saddle to match your sit bones. Look for a saddle with added padding or gel inserts to absorb vibrations from rough terrain.

Adjusting the saddle position is also important; ensure it’s level and experiment with different angles until you find the most comfortable position. Remember, finding the right saddle may require some trial and error, so don’t be afraid to test out different options.

Are wider fenders necessary for gravel riding?

Wider fenders can be beneficial for gravel riding. They provide more coverage and protection from mud, dirt, and debris that you may encounter on rough terrain.

Additionally, wider tires are often used in gravel riding to improve stability and traction. When combined with a tubeless setup, they can further enhance your ride by reducing the risk of flats and allowing you to run lower tire pressures for a smoother experience on uneven surfaces.

Advertisement

What are the essential tools and accessories I should carry for gravel riding?

When it comes to gravel riding, there are a few essential tools and accessories that I always make sure to carry.

First and foremost, upgrading tires is crucial for better traction on the rough terrain.

Additionally, having essential clothing like padded shorts, a breathable jersey, and gloves can greatly enhance comfort during long rides.

Other important items include a multi-tool for any necessary repairs, spare tubes, a mini pump or CO2 inflator, and of course, plenty of water and snacks.

Conclusion

So there you have it, folks! With just a few simple upgrades and adjustments, you can turn your regular road bike into a gravel grinding machine.

Advertisement

It may seem like a daunting task at first, but trust me when I say that the end result is well worth the effort. Imagine flying down those gravel paths with ease, tackling rough terrains like a pro, and exploring new routes that were once off-limits.

The possibilities are endless! So go ahead, take on this adventure, and let your road bike transform into the ultimate gravel grinder.

Happy riding!

Ralf is a devoted husband and father who loves spending time with his family. He enjoys riding his bicycle as much as possible, and takes every opportunity he can to get out on the open road. Ralf is a kind and gentle person who wants only the best for those around him.

Continue Reading
Advertisement

Bike

How To Motorize A Bicycle

Published

on

By

An image showcasing a bicycle with its frame modified to include a powerful electric motor, complete with a sleek battery pack mounted near the rear wheel and a set of futuristic LED headlights

Imagine elevating your cycling experience by transforming your ordinary bicycle into a powerful machine that effortlessly propels you forward.

In this article, I will guide you through the detailed process of motorizing your bicycle, step by step. From choosing the right motor kit to ensuring safety measures, you will learn everything you need to know to create your very own motorized bicycle.

Get ready to embark on an exciting journey of innovation and adventure.

Key Takeaways

  • Familiarize yourself with local laws and regulations
  • Understand the required equipment for riding
  • Learn where motorized bicycles are allowed
  • Avoid legal issues by following regulations

Choose the Right Motor Kit for Your Bicycle

You should choose the right motor kit for your bicycle. Choosing the right motor kit can greatly enhance your riding experience and make your commute more efficient.

Advertisement

When considering motor power, factors such as terrain, weight, and desired speed need to be taken into account. For hilly terrains or heavier bicycles, a higher motor power will be required to ensure smooth operation and adequate speed. On the other hand, if you plan to use your motorized bicycle mainly on flat surfaces, a lower motor power may suffice.

Additionally, when it comes to battery capacity, it is important to explore the different options available and choose the right capacity based on your riding needs and distance requirements. A larger battery capacity will allow for longer rides without needing to recharge.

Now that we have discussed choosing the right motor kit, let’s move on to gathering the necessary tools and materials for the installation process.

Gather the Necessary Tools and Materials

To get started, it’s important to gather all the tools and materials needed for the project. Here are the essential items you’ll need:

  • Wrench set: You’ll need a set of wrenches to loosen and tighten bolts on your bicycle.
  • Screwdriver set: A variety of screwdrivers will be necessary for removing and installing parts.
  • Wire cutter/stripper: This tool will come in handy when dealing with electrical connections.
  • Allen wrench set: Many motor kits require the use of Allen wrenches for assembly.
  • Battery and charger: Make sure to choose a battery that is compatible with your motor kit.
  • Motor kit: This is the heart of your motorization project. Choose a kit that suits your needs and budget.

Choosing the right motor kit is crucial to ensure a smooth installation process. Additionally, be prepared to troubleshoot common motorization issues that may arise during the project.

Once you have gathered all the necessary tools and materials, you can proceed to prepare your bicycle for motorization by following the next steps.

Advertisement

Prepare Your Bicycle for Motorization

Before starting, make sure that your bike is in good condition and ready for the motor installation. Inspect the frame, wheels, and brakes for any signs of damage or wear. Check the tire pressure and ensure that they’re properly inflated.

Remove any accessories or attachments that may interfere with the motor installation process.

Next, determine the type of bike modification you want to do, whether it’s a gas-powered engine or an electric bike conversion. This will dictate the specific steps and materials needed for the motorization process.

Advertisement

Additionally, make sure you have all the necessary tools and equipment on hand.

Once your bike is prepared, you can move on to the next section and install the motor kit onto your bicycle, transforming it into a motorized ride.

Install the Motor Kit onto Your Bicycle

Once the motor kit is installed onto your bike, it will be transformed into a motorized ride. To install the electric motor, begin by removing the rear wheel from the bicycle frame. Next, attach the motor bracket onto the frame using the provided screws and secure it tightly. Place the motor onto the bracket, aligning the mounting holes, and fasten it securely. Connect the motor’s wiring to the battery and controller according to the provided instructions, ensuring proper connections. Once everything is connected, double-check all the connections and tighten any loose screws. To troubleshoot motor issues, refer to the troubleshooting section in the motor kit manual. Now, we can move on to the next step and connect the motor to the bicycle’s drive system, allowing it to propel the bike forward effortlessly.

Connect the Motor to the Bicycle’s Drive System

Advertisement

Now you can connect the motor to your bike’s drive system and start enjoying effortless propulsion.

To connect the motor to the bicycle’s drivetrain, follow these steps:

  • First, locate the motor mounting bracket on your bike frame. Ensure it is securely attached.
  • Next, align the motor’s sprocket with the bike’s chainring. Use a chain tool to remove the necessary links from the bike’s chain if needed.
  • Connect the motor’s sprocket to the bike’s chainring using a chain connector.
  • Double-check the alignment and tension of the chain. Ensure it is neither too loose nor too tight.
  • Once connected, test the motor by pedaling the bike. The motor should engage and provide assistance.

If you encounter any issues during this process, such as chain slipping or misalignment, consult the motor kit’s troubleshooting guide for assistance.

With the motor now connected to the bicycle’s drive system, we can move on to installing the throttle and control mechanisms.

Install the Throttle and Control Mechanisms

To begin the installation process, attach the throttle and control mechanisms to your bike’s handlebars. The throttle allows you to control the speed of the motor, while the control mechanisms enable you to activate the motor and make necessary adjustments. Proper installation of these components is crucial for a smooth and efficient motorization system.

Below is a table that illustrates the installation steps for the throttle and control mechanisms:

Advertisement
Step Procedure
1 Position the throttle grip on the handlebars and secure it using the provided clamp.
2 Connect the throttle cable to the motor. Ensure a secure and tight connection.
3 Adjust the throttle sensitivity according to your preference using the provided throttle adjustment feature.

Once the throttle and control mechanisms are securely installed, you can proceed to test and adjust the motorization system. This will ensure that everything is functioning properly and any troubleshooting issues can be resolved before hitting the road.

Transitioning into the next section, it is important to thoroughly test and adjust the motorization system to guarantee optimal performance.

Test and Adjust the Motorization System

After securely installing the throttle and control mechanisms, it is essential to thoroughly test and adjust the motorization system for optimal performance. Here are the steps to follow:

  1. Testing the Motor: Start by engaging the motor and observing its response. Ensure it starts smoothly and accelerates without any hitches. Listen for any unusual noises or vibrations.

  2. Adjusting Motor Performance: Fine-tune the motor’s power output by adjusting the throttle. Increase or decrease the throttle sensitivity to achieve the desired speed and responsiveness.

  3. Troubleshooting Common Motorization Issues: Monitor the motor for overheating or excessive battery drain. Inspect all connections for loose wires or faulty components. Resolve any issues promptly to prevent further damage.

  4. Test Ride and Fine-tuning: Take the motorized bicycle for a test ride, paying attention to its overall performance and handling. Make any necessary adjustments to the motor or control mechanisms to improve the riding experience.

Now that the motorization system has been tested and adjusted, it is crucial to ensure safety measures are in place for worry-free riding.

Ensure Safety Measures are in Place

Make sure you have all the necessary safety measures in place to ensure a worry-free riding experience. The importance of wearing protective gear cannot be emphasized enough when motorizing a bicycle. A helmet, knee pads, and elbow pads are essential to protect yourself from potential accidents and injuries.

Advertisement

Additionally, it is crucial to understand and abide by local laws and regulations regarding motorized bicycles. Different jurisdictions may have specific rules about speed limits, required equipment, and where motorized bicycles are allowed to be ridden. Familiarize yourself with these regulations to avoid any legal issues.

By prioritizing safety and following the rules, you can enjoy the benefits of a motorized bicycle without compromising your well-being or breaking the law.

Now, let’s move on to learning how to operate and maintain your motorized bicycle smoothly.

Learn How to Operate and Maintain Your Motorized Bicycle

Learning how to operate and maintain your motorized bike is essential for a smooth and hassle-free riding experience. To ensure that your motorized bicycle functions optimally, here are three key tips:

  1. Troubleshooting common issues with motorized bicycles: Familiarize yourself with common problems such as engine starting issues, fuel system malfunctions, or electrical failures. This knowledge will help you diagnose and fix problems efficiently.

  2. Tips for increasing the lifespan of your motorized bicycle: Regularly check and change the engine oil, clean the air filter, and inspect the spark plug. Additionally, avoid overloading the bike and adhere to the manufacturer’s recommended maintenance schedule.

  3. Properly maintaining the bike’s components: Regularly lubricate the chain, inspect the brakes, and ensure the tires are inflated to the correct pressure. These simple maintenance tasks will ensure your motorized bicycle performs at its best.

By following these guidelines, you can enjoy the benefits of your motorized bicycle without any interruptions.

Advertisement

Enjoy the Benefits of Your Motorized Bicycle

To fully experience the advantages of your motorized bike, you’ll love the increased speed and convenience it brings to your daily commute.

Riding a motorized bicycle in your daily commute has numerous benefits. Firstly, it allows you to travel at a faster pace, reducing travel time and making your commute more efficient. With the added power of the motor, you can easily navigate through traffic and reach your destination faster.

Additionally, using a motorized bicycle is a sustainable and eco-friendly option, reducing your carbon footprint and contributing to a cleaner environment.

To ensure the longevity of your motorized bicycle, it is essential to follow best practices for maintenance. Regularly inspect and clean the bike, check tire pressure, and lubricate the chain. Proper maintenance will not only enhance the performance but also extend the lifespan of your motorized bicycle, allowing you to enjoy its benefits for years to come.

Frequently Asked Questions

How much does a motor kit for a bicycle typically cost?

Motor kits for bicycles typically range in cost from around $200 to $1500, depending on the type of motor. There are various types available, including electric hub motors and mid-drive motors.

Advertisement

Are there any legal requirements or restrictions for using a motorized bicycle?

Sure, let’s dive into the legal requirements and restrictions for using a motorized bicycle. In terms of registration, it depends on your location, but some places require you to register your motorized bicycle. As for speed limits, again, it varies, but typically motorized bicycles are subject to the same speed limits as regular bicycles.

Can any type of bicycle be motorized, or are there specific requirements?

Any type of bicycle can be motorized, but there are specific requirements. Motorizing mountain bikes involves adding a motor and battery to the frame, while converting road bikes requires installing a motor kit onto the existing bike.

What kind of maintenance is required for a motorized bicycle?

Maintenance tips for a motorized bicycle include regular oil changes, checking spark plugs, and inspecting the chain for wear. Troubleshooting common issues such as starting problems or strange noises may require adjusting the carburetor or cleaning the fuel system.

Are there any safety concerns or precautions to be aware of when operating a motorized bicycle?

Motorized bicycle safety concerns are critical to understand. It is essential to prioritize safety precautions, such as wearing a helmet, using reflectors, maintaining brakes, and following traffic rules, to ensure a safe and enjoyable ride.

Conclusion

In conclusion, as I reflect on my journey of motorizing my bicycle, I can’t help but feel a sense of liberation and excitement.

Advertisement

Like a phoenix rising from the ashes, my bicycle has transformed into a powerful steed, ready to conquer any path ahead.

The precision and attention to detail required in this process have not only enhanced my technical skills but also my appreciation for the beauty of mechanics.

Now, as I ride into the sunset, I am filled with a sense of pride and joy, knowing that I have unlocked a new world of possibilities with my motorized companion.

Continue Reading

Bike

How To Change Gears On A Gravel Bike

Published

on

By

An image capturing a close-up of a rider's gloved hand gripping a gravel bike's gear lever, fingers delicately adjusting it

Prepare yourself to enhance your gravel biking abilities with this in-depth guide on mastering gear changes like a professional.

Mastering the art of gear shifting is crucial for any cyclist, especially when tackling unpredictable terrains.

In this article, I will walk you through the ins and outs of understanding your bike’s gear system, perfecting your technique, troubleshooting common issues, and ultimately enjoying a smooth ride with perfectly timed gear changes.

So grab your helmet and let’s dive in!

Key Takeaways

  • Gravel bikes have a wide range of gears for different terrains.
  • Proper gear shifting technique ensures a smooth and efficient ride.
  • Familiarize yourself with the gear levers and their correct operation.
  • Choose the correct gear ratio based on the anticipated terrain changes.

Understanding the Gear System on a Gravel Bike

Advertisement

To change gears on your gravel bike, you’ll need to understand the gear system. The gear selection on a gravel bike is crucial for optimizing performance and ensuring a smooth ride on various terrains.

Gravel bikes typically come with a wide range of gears to accommodate different riding conditions, including steep climbs and fast descents.

One important aspect of the gear system is the gear ratios. Gear ratios determine how much power is transferred from your legs to the wheels. Higher gear ratios provide more power but require more effort, making them suitable for flat or downhill sections. Lower gear ratios, on the other hand, offer less power but are easier to pedal, making them ideal for climbing steep hills or navigating rough terrain.

Understanding how to select the right gear ratio for each situation is essential in maximizing efficiency and preventing unnecessary strain on your body. By choosing an appropriate gear ratio, you can maintain a consistent cadence while adapting to changes in terrain without exerting excessive force.

Proper gear shifting technique plays a vital role in achieving seamless transitions between gears without interruption or damage to the drivetrain components.

Advertisement

Importance of Proper Gear Shifting Technique

Remember, it’s crucial to use the correct technique when shifting gears on your gravel bike. Proper gear shifting technique not only ensures a smoother and more efficient ride but also prevents unnecessary wear and tear on your drivetrain. By following these guidelines, you can optimize your gear shifting experience and reap the benefits of efficient gear shifting.

One key aspect of proper gear shifting technique is timing. It’s important to anticipate shifts in terrain or cadence and initiate gear changes before they become necessary. This allows for a seamless transition between gears, minimizing any disruption to your pedaling rhythm.

Another important factor is maintaining consistent pedal pressure while shifting gears. Applying too much force when changing gears can cause the chain to jump or slip, leading to potential damage. On the other hand, releasing pedal pressure entirely can result in a loss of momentum. Finding the right balance between applying pressure and easing up slightly will ensure a smooth transition from one gear to another.

To further emphasize this point, consider the following table:

Gear Shifting Technique Benefits
Anticipating shifts Smoother transitions
Consistent pedal pressure Prevents chain slippage
Balancing pressure Maintains momentum

By implementing these techniques, you’ll experience improved efficiency and durability in your gravel biking adventures.

Advertisement

Transitioning into the subsequent section about familiarizing yourself with the gear levers, it’s essential to understand how they function to make precise gear changes effortlessly.

Familiarize Yourself with the Gear Levers

Before getting started, it’s important to know how the gear levers on your gravel bike work. Familiarizing yourself with the gear lever functions and proper hand placement will ensure smooth and efficient gear shifting while riding.

Most gravel bikes are equipped with a combination of two gear levers, one for controlling the front derailleur and the other for the rear derailleur. The left lever is responsible for shifting between the chainrings, which control the bike’s front gears. On the other hand, the right lever controls the rear gears by moving the derailleur across different cogs on the cassette.

Advertisement

To shift gears using these levers, place your hands firmly on both hoods of your handlebars. Your index fingers should rest lightly on top of each lever, ready to initiate shifts when needed. When you want to shift to an easier gear (a smaller cog or a smaller chainring), push either lever sideways using your thumb or index finger. For harder gears (larger cogs or larger chainrings), pull back on either lever.

Understanding how to operate these gear levers and maintaining proper hand placement is crucial in achieving optimal performance and preventing any potential damage to your gravel bike’s drivetrain components.

With this knowledge in mind, let’s move onto starting with the right gear ratio…

Start with the Right Gear Ratio

Begin with the correct gear ratio to ensure optimal performance and prevent potential damage to your drivetrain components. Gear selection is crucial when changing gears on a gravel bike. By choosing the right gear ratio, you can maximize efficiency and power transfer while minimizing unnecessary strain on your bike’s components.

To start with the right gear ratio, it’s important to consider the terrain you’ll be riding on. If you’re facing a steep climb or challenging off-road section, it’s best to select a lower gear that provides more torque for easier pedaling. On the other hand, if you’re riding on flat or downhill sections, choosing a higher gear will allow you to maintain speed without excessive spinning of the pedals.

Advertisement

Finding the ideal gear ratio may require some trial and error, especially when encountering varying terrains during your ride. Pay close attention to how your bike responds to different gears and adjust accordingly. Anticipate terrain changes by smoothly shifting gears before reaching them, ensuring a seamless transition between ratios.

By starting with the right gear ratio and adjusting as needed, you can optimize your gear selection for maximum efficiency and enjoy a smoother ride on your gravel bike. Anticipating terrain changes will further enhance your overall biking experience.

Anticipate Terrain Changes

To optimize your riding experience, it’s important to anticipate shifts in terrain while on your gravel bike. Understanding the terrain and adapting your gear strategy accordingly can greatly enhance your performance and enjoyment. By being proactive in adjusting gears before encountering changes in the landscape, you can maintain a steady cadence and ensure smooth transitions.

Advertisement

To help you understand how to adapt your gear strategy based on terrain, refer to the table below:

Terrain Type Recommended Gear Strategy
Uphill Shift to a lower gear for easier pedaling
Downhill Shift to a higher gear for increased speed
Flat Maintain a comfortable gear ratio
Loose Gravel Shift to a lower gear for better traction
Sand or Mud Shift to an even lower gear for stability

By anticipating these terrain changes and adjusting gears accordingly, you’ll be able to maintain optimal control of your gravel bike. Remember, it’s always better to shift before you need to rather than struggling with shifting under pressure during challenging sections. This will not only improve your overall riding experience but also prevent unnecessary strain on yourself and the bike. Transitioning into the next section about ‘shift before you need to’ will further enhance your understanding of proper gear management on a gravel bike.

Shift Before You Need to

Make sure you shift gears on your gravel bike in anticipation of upcoming terrain changes. Anticipating terrain changes is essential to maintaining a steady pedaling cadence and ensuring a smooth ride.

Here are four crucial tips for shifting gears effectively:

  • Pay attention to the road ahead: Keep your eyes focused on the trail, looking out for any obstacles or changes in terrain that may require gear adjustments.

  • Shift before you need to: Don’t wait until you’re struggling to pedal uphill or losing control on a descent. Shift gears proactively, allowing yourself enough time to adjust smoothly without interrupting your flow.

  • Know your bike’s gear range: Familiarize yourself with the different gear combinations available on your gravel bike. Understand which gears are best suited for climbing, descending, and cruising on flat terrain.

  • Practice shifting techniques: Experiment with shifting both up and down the gears while riding at varying speeds. This will help you develop a feel for how your bike responds and ensure seamless transitions between gears.

Maintaining a steady pedaling cadence is crucial for efficient riding and preventing unnecessary strain or fatigue. Transitioning into the next section about ‘maintain a steady pedaling cadence,’ it is equally important to find the right gear ratio that allows you to maintain an optimal cadence throughout different terrains.

Advertisement

Maintain a Steady Pedaling Cadence

When it comes to changing gears on a gravel bike, one important aspect to consider is maintaining a steady pedaling cadence. This not only helps in improving your efficiency but also ensures a smoother transition between gears.

To maintain cadence, it is crucial to anticipate gear changes and shift before you actually need to. By doing so, you can avoid sudden spikes or drops in resistance that can disrupt your rhythm. Instead, aim for seamless transitions that allow you to keep spinning at a consistent cadence.

Maintaining a steady pedaling cadence has several benefits. Firstly, it reduces the strain on your muscles and joints by distributing the workload evenly across different gears. Secondly, it allows you to generate power consistently without wasting energy due to abrupt gear changes.

By focusing on maintaining cadence while changing gears on your gravel bike, you will find yourself riding with greater efficiency and endurance. So remember, smooth shifts are key!

In the next section about using both front and rear gears, we will explore another essential technique for optimizing gear changes without any interruption in your ride flow.

Advertisement

Use Both Front and Rear Gears

Using both the front and rear gears on your gravel bike is essential for achieving optimal gear changes without any interruption in your ride flow. When it comes to front gear selection, you have multiple options available.

The smaller chainring is ideal for climbing steep hills or tackling difficult terrain, as it provides a lower gear ratio that allows for easier pedaling. On the other hand, the larger chainring is great for riding on flat roads or when you want to go faster, as it offers a higher gear ratio that maximizes your speed.

In terms of rear gear selection, your gravel bike typically has a wide range of gears to choose from. The smaller cogs provide easier pedaling and are perfect for uphill climbs or rough surfaces where you need more control. Conversely, the larger cogs offer higher resistance and are suitable for riding on flat roads or when you want to pick up speed.

By utilizing both front and rear gears effectively, you can optimize your riding experience by seamlessly transitioning between different terrains and conditions. However, it’s important to note that you should avoid ‘cross chaining,’ which refers to using extreme combinations such as the small chainring with the smallest cog or the large chainring with the largest cog. This can cause excessive wear on your drivetrain components and may result in poor shifting performance.

Transitioning into the next section about ‘don’t cross-chain,’ it’s crucial to understand how improper gear selection can negatively impact your ride quality and potentially damage your bicycle’s drivetrain components.

Advertisement

Don’t Cross Chain

Avoiding cross-chaining is important to maintain the performance and longevity of your drivetrain components. Cross-chaining occurs when you use the extreme combination of gears, such as using the big chainring in the front and the biggest cog in the rear, or vice versa. This puts excessive stress on your chain and can lead to premature wear and tear. Additionally, cross-chaining reduces efficiency and can cause poor shifting.

To prevent cross-chaining, it is essential to understand your gear ratios and make conscious decisions when shifting. When riding on a gravel bike, it’s recommended to avoid extreme gear combinations that strain your drivetrain unnecessarily. Instead, aim for a balanced use of gears that allows for smooth transitions between them.

Regularly inspecting and maintaining your gears is also crucial for optimal performance. Clean your drivetrain regularly to remove dirt and grime that can affect shifting quality. Lubricate the chain appropriately to minimize friction.

By avoiding cross-chaining and practicing good gear maintenance habits, you can ensure a longer lifespan for your drivetrain components while optimizing your cycling experience.

Now let’s delve into adjusting gear shifters for comfort without compromising functionality.

Advertisement

Adjusting Gear Shifters for Comfort

To achieve a more comfortable riding experience, it’s important to make adjustments to your gear shifters. Proper gear shifter maintenance and adjusting gear cable tension are crucial for smooth and efficient shifting.

Here are two key steps you can take to optimize the performance of your gear shifters:

  1. Check and adjust the gear cable tension: Begin by shifting your bike into the highest gear (smallest cog). Locate the barrel adjuster on the derailleur or shifter body. Turn it clockwise to increase tension or counterclockwise to decrease tension until the shifting feels crisp and precise.
  • Fine-tune while riding: Take your bike for a spin around a quiet area, such as an empty parking lot. Shift through all gears while paying attention to any hesitation or lag in shifting. If needed, make additional adjustments using the barrel adjuster until you achieve seamless shifting across all gears.
  1. Evaluate lever position and reach: Ensure that your shift levers are positioned comfortably within reach of your hands while gripping the handlebars. Adjust their angle if necessary, so you can easily access them without straining or stretching.

By maintaining and adjusting your gear shifters correctly, you’ll enhance both comfort and performance on your gravel bike.

Now, let’s move on to practice shifting gears on different surfaces for even greater control during rides without compromising safety or efficiency.

Practice Shifting Gears on Different Surfaces

Start by practicing shifting gears on a variety of surfaces to improve your control and adaptability while riding. It’s important to become familiar with the different gear ratios and how they affect your bike’s performance. Shifting on loose gravel can be particularly challenging, as the surface provides less traction and stability. To navigate this terrain effectively, you need to anticipate changes in resistance and adjust your gears accordingly.

To help illustrate the concept, here is a table showing examples of suitable gear ratios for different surfaces:

Advertisement
Surface Gear Ratio
Paved road High gear (big chainring)
Gravel road Medium gear
Loose gravel Low gear (small chainring)
Uphill Low gear

When shifting on loose gravel, it’s crucial to smoothly transition between gears to avoid any sudden loss of traction. Start by approaching the shift with a steady pedal stroke, then quickly but gently shift into a lower gear before you encounter the loose section. This will allow you to maintain momentum without losing control.

As you practice shifting gears on different surfaces, pay attention to how your bike responds. Listening to your bike can provide valuable feedback about whether you need to make further adjustments or if everything is running smoothly.

Transitioning into the subsequent section about ‘listening to your bike,’ we’ll explore how understanding its cues can enhance your overall riding experience.

Listen to Your Bike

When you’re riding, it’s essential to listen closely to your bicycle for valuable feedback. Your bike can tell you a lot about its condition and how well it’s performing. By paying attention to the sounds it makes, you can detect any potential issues and address them before they become major problems.

Here are some key components of your gear system that you should listen for:

Advertisement
  • Chain noise: A noisy chain could indicate that it needs lubrication or that there is excessive wear.
  • Gear skipping: If your gears are skipping or jumping when you shift, it may be a sign of misalignment or cable tension issues.
  • Grinding sound: This could mean that your drivetrain components are not properly aligned or that there is dirt and debris causing friction.

By regularly listening to these sounds and identifying any abnormalities, you can take proactive steps in bike maintenance to keep your gear system running smoothly.

In the next section, we will discuss fine-tuning your gear shifting skills for an even better riding experience.

Fine-Tuning Your Gear Shifting Skills

Fine-tuning your gear shifting skills can greatly enhance your cycling experience. When it comes to gravel biking, mastering gear shifting techniques is crucial for maintaining control and maximizing efficiency on unpredictable terrain. The key to efficient gear shifting lies in anticipating changes in the trail ahead and adjusting your gears accordingly.

One important technique is preemptive shifting. By planning ahead and shifting into an appropriate gear before you encounter a steep climb or descent, you can maintain momentum and avoid stalling or spinning out. This requires paying close attention to the terrain ahead and using your knowledge of gear ratios to select the optimal gear.

Another technique is called cadence management. Maintaining a consistent pedaling rhythm not only improves efficiency but also reduces strain on your legs. To achieve this, you should shift gears based on your current cadence rather than relying solely on speed or intensity. Experiment with different cadences to find what feels most comfortable for you.

By honing these gear shifting techniques, you can improve your overall performance and enjoyment while riding a gravel bike.

Advertisement

Transitioning now into troubleshooting common gear shifting issues, understanding how to address these problems will ensure a smooth and uninterrupted ride experience without any hiccups along the way.

Troubleshooting Common Gear Shifting Issues

To troubleshoot common gear shifting issues, pay attention to any unusual noises or resistance while pedaling. Here are some common gear shifting problems and how to fix them:

  • Misalignment: If your gears aren’t shifting smoothly, they may be misaligned. To fix this, use the barrel adjuster on your derailleur to make small adjustments until the gears shift smoothly.

  • Chain skipping: If your chain is skipping over the teeth of the cassette or chainring, it could be due to a worn-out chain or cassette. Replace these components if necessary to resolve the issue.

  • Cable tension issues: If your gears aren’t shifting properly, it could be due to incorrect cable tension. Use the barrel adjuster on your shifter or derailleur to fine-tune the cable tension for smooth gear changes.

  • Bent derailleur hanger: A bent derailleur hanger can cause poor shifting performance. Inspect the hanger for any signs of damage and replace if necessary.

By troubleshooting these common gear shifting problems, you can ensure that your gravel bike performs optimally. Enjoy the smooth ride with perfectly timed gear changes in the subsequent section about ‘enjoying the smooth ride with perfectly timed gear changes.’

Enjoy the Smooth Ride with Perfectly Timed Gear Changes

Achieve a smooth and enjoyable ride by mastering the art of perfectly timed gear shifts. When riding a gravel bike, it is essential to have precise control over your gears to navigate various terrains. Perfecting gear transitions allows you to maintain an optimal cadence and power output, ensuring efficiency and comfort throughout your ride.

To achieve perfect gear changes, start by understanding the concept of optimal gear ratios. This involves finding the right balance between the front chainring and rear cassette gears. The goal is to select a combination that provides enough resistance for efficient pedaling without straining your muscles or causing unnecessary fatigue. Experiment with different combinations on different terrains to find what works best for you.

Advertisement

Timing is crucial when shifting gears. Anticipate changes in terrain or gradient ahead of time, allowing yourself ample time to shift smoothly. Avoid shifting under heavy load as this can cause mechanical stress on your drivetrain components. Instead, ease off the pedals momentarily while making the transition.

When executing a gear change, apply steady pressure on the shifter while simultaneously releasing pressure on the pedals momentarily. This allows for smoother shifting as the chain moves from one gear to another seamlessly.

By practicing and perfecting your gear transitions, you will enjoy a smoother ride with optimal power delivery and reduced strain on your body. Remember that mastering this skill takes time and experience, so don’t be discouraged if it doesn’t come naturally at first. Keep experimenting with different techniques until you find what works best for you and enjoy every moment of your gravel bike adventures!

Frequently Asked Questions

What are the different types of gear ratios available on a gravel bike?

There are various gear ratios available on a gravel bike to cater to different riding conditions. Gear ratio selection is crucial as it determines the ease or difficulty of pedaling.

Lower gear ratios, such as 1:1 or 0.8:1, provide more torque for climbing steep hills or navigating rough terrain.

Advertisement

Higher gear ratios, like 2:1 or 2.5:1, offer greater speed on flat surfaces and descents.

Choosing the right gear ratio can optimize efficiency and power output while riding a gravel bike.

How do I know if I’m using the correct gear ratio for a specific terrain?

To determine if you’re using the correct gear ratio for a specific terrain, there are a few factors to consider.

Firstly, observe your cadence (the speed at which you pedal). If it feels too easy or difficult, you may need to adjust the gear ratios accordingly.

Additionally, monitor your speed and power output. If you’re struggling to maintain speed or exerting excessive effort, troubleshooting gear shifting and adjusting gear ratios can help optimize your performance on different terrains.

Advertisement

Can I shift gears while standing up on my gravel bike?

Yes, you can shift gears while standing up on your gravel bike. When climbing steep terrain, it’s important to use the correct shifting technique to maintain momentum and efficiency.

As you approach a climb, anticipate the gear change by slightly easing off the pedals. Then, shift to a lower gear smoothly and quickly, using both your hands and body weight to apply pressure on the pedals.

This will ensure a seamless transition and allow you to conquer those challenging ascents with ease.

How often should I clean and lubricate my gear shifters?

I clean and lubricate my gear shifters regularly to ensure optimal performance and prolong their lifespan.

It is recommended to clean and lubricate the gear shifters every 100-200 miles or whenever they become dirty or sticky.

Advertisement

Start by wiping them down with a damp cloth, then apply a small amount of lubricant to the moving parts.

This will keep the gear shifters functioning smoothly and prevent any unnecessary wear or damage.

Are there any specific techniques for shifting gears smoothly and quickly on a gravel bike?

Shifting gears on a gravel bike requires finesse and precision, much like conducting a symphony. The key is to anticipate the terrain ahead and choose the appropriate gear ratio.

By mastering this art, you can seamlessly transition between gears, ensuring optimum power transfer and a smooth riding experience.

Correct gear ratios allow you to conquer various terrains effortlessly. Whether it’s climbing steep hills or navigating through loose gravel, the right technique is your ticket to gravel biking nirvana.

Advertisement

Conclusion

In conclusion, mastering the art of gear shifting on a gravel bike is essential for a smooth and enjoyable ride.

By understanding the gear system, familiarizing yourself with the levers, and anticipating terrain changes, you can ensure that your gear changes are perfectly timed.

Just like a well-oiled machine, your bike will respond seamlessly to your commands, allowing you to conquer any trail with ease.

So why wait? Embrace the thrill of gravel biking and let your gears dance in perfect harmony as you embark on new adventures.

Advertisement

Continue Reading

Bike

What Equipment Must A Bicycle Have When Used At Night?

Published

on

By

An image showcasing a bicycle equipped with a front and rear light, reflectors on pedals, spokes, and front/rear tires, along with a reflective vest worn by the cyclist, ensuring maximum visibility and safety during nighttime rides

Like a single bright star in the night sky, a bicycle with the appropriate gear guarantees safe travels once the sun goes down. Being an experienced cyclist, I understand the significance of being visible on the road, particularly during nighttime.

In this article, I will guide you through the essential equipment that every bicycle must have when used at night, from powerful lights and reflectors to reflective clothing and properly inflated tires.

Let’s embark on this journey of knowledge to enhance your nighttime cycling experience.

Key Takeaways

  • Reflective gear, such as reflective tape and decals, is essential for increased visibility when cycling at night.
  • High-visibility accessories like flags and vests should be used to maximize visibility.
  • Properly inflated tires and good tread are important for optimal control and safety.
  • Consider the terrain and choose a tread pattern accordingly, and regularly check tire pressure for safe night riding.

White Front Light

You must have a white front light on your bicycle when riding at night. It is essential for your safety and the safety of others on the road.

Advertisement

A white front light helps you see what’s ahead, making sure you can spot any potential hazards, obstacles, or changes in the road surface. Additionally, it allows other road users to see you coming from a distance, reducing the risk of accidents.

A good quality white front light will have a strong beam, illuminating the path ahead effectively. It is important to choose a light that meets the legal requirements for brightness and visibility.

Once you have your white front light secured, the next step is to ensure you have a red rear light, which I will discuss in the next section.

Red Rear Light

A bicycle at night should be equipped with a red rear light. The importance of a red rear light cannot be overstated when it comes to ensuring the safety of both the cyclist and other road users.

Not only does it allow drivers to easily spot the bicycle from a distance, but it also helps them determine the direction in which the cyclist is traveling. In many countries, including the United States, it is a legal requirement for bicycles to have a red rear light when riding at night. This is because it significantly reduces the risk of accidents and enhances visibility.

Advertisement

However, simply having a red rear light is not enough. Reflectors on the front, rear, pedals, and wheels are also crucial in maximizing visibility. These reflectors work in conjunction with the red rear light to make the bicycle more visible from all angles and ensure a safe ride.

Reflectors on the Front, Rear, Pedals, and Wheels

Reflectors on the front, rear, pedals, and wheels are essential for maximizing visibility and ensuring a safe ride. When it comes to reflectors, placement and regulations are important factors to consider.

In most places, bicycles are required to have a white reflector on the front, a red reflector on the rear, and amber reflectors on the pedals. Additionally, reflectors on the wheels can provide extra visibility, especially when they are in motion. These reflective accessories work by bouncing back light from other sources, making you more visible to drivers and pedestrians. By using reflectors in accordance with regulations, you can greatly reduce the risk of accidents while cycling at night. They are a simple yet effective way to enhance your safety on the road.

Advertisement

Transitioning into the next topic, reflective clothing also plays a crucial role in increasing visibility during nighttime rides.

Reflective Clothing

Wearing reflective clothing is essential for increasing visibility and ensuring a safe ride at night. When cycling in the dark, it is crucial to be seen by motorists and other cyclists, and reflective clothing plays a vital role in achieving this. The importance of wearing reflective clothing cannot be overstated. It can make a significant difference in preventing accidents and ensuring your safety on the road.

To choose the right reflective clothing for night time cycling, opt for garments with built-in reflective strips or patches. Look for materials that reflect light well, such as fluorescent or bright colors. Additionally, consider wearing accessories like reflective arm or leg bands to enhance your visibility further. These simple measures can greatly enhance your safety while cycling at night.

Transitioning into the next section, let’s now discuss the importance of wearing a helmet with reflective strips.

Helmet with Reflective Strips

Advertisement

Make sure you choose a helmet that has reflective strips to increase your visibility while cycling at night. Helmet safety is essential, and having reflective strips on your helmet can greatly enhance your safety on the road. These reflective strips are designed to catch the light from car headlights, making you more visible to drivers.

When choosing a helmet, look for ones that have strategically placed reflective strips on the sides, front, and back. This will ensure that you are visible from all angles. Additionally, there are various reflective gear options available that you can attach to your helmet to further enhance your visibility. These include reflective stickers, bands, or even LED lights.

With the right helmet and reflective gear, you can significantly reduce the risk of accidents while cycling at night. As you focus on helmet safety, don’t forget to consider adding a bell or horn for audible signaling, ensuring that you have multiple ways to alert others of your presence on the road.

Bell or Horn for Audible Signaling

Don’t forget to attach a bell or horn to your helmet for audible signaling while cycling. It is important to have a way to alert others of your presence, especially when riding at night. In addition to the helmet with reflective strips and reflective clothing, an audible signaling device is crucial for your safety. To help you visualize the necessary equipment, refer to the table below:

Advertisement
Equipment Importance
Bell or Horn Essential for signaling
Reflective Clothing Increases visibility
Helmet with Reflective Strips Ensures safety
Rearview Mirror Enhances awareness
High Visibility Flag or Vest Promotes visibility
Properly Inflated Tires Ensures a smooth ride
Good Tread Provides better traction
Reflective Tape Enhances visibility
Front Light Illuminates the path ahead
Rear Light Increases visibility from behind
Reflectors Enhance visibility from all angles

By having all these equipment and taking necessary precautions, you can ensure your visibility and safety while cycling at night. Now, let’s discuss the next important aspect: the rearview mirror for increased awareness.

Rearview Mirror for Increased Awareness

Using a rearview mirror while cycling increases awareness of surrounding traffic. It is an essential equipment for night riding, as it allows me to keep an eye on vehicles approaching from behind without having to turn my head. The benefits of using a rearview mirror are numerous.

Firstly, it enhances my safety by providing a constant visual reference of what’s happening behind me.

Secondly, it allows me to anticipate potential hazards and make informed decisions while on the road.

Thirdly, it helps me maintain a steady and straight line while riding, as I can easily adjust my position based on the traffic behind me.

Advertisement

Lastly, it gives me peace of mind knowing that I have a clear view of my surroundings at all times.

Other alternative rearview options include helmet-mounted mirrors and handlebar-mounted mirrors. These options provide similar benefits but may vary in terms of comfort and ease of use.

Now, let’s move on to the next section about reflective tape on the frame and forks.

Reflective Tape on the Frame and Forks

Reflective tape on the frame and forks increases visibility and helps cyclists stay safe on the road. When riding at night, it is crucial to have equipment that enhances visibility, and reflective tape does just that. The tape reflects light from car headlights, making the bicycle more visible to drivers. This is especially important when riding on poorly lit roads or in areas with heavy traffic.

Reflective tape is an effective way to enhance nighttime visibility because it can be easily applied to the frame and forks of a bicycle. It comes in various colors, such as white, silver, or fluorescent, which further increases visibility. Additionally, the tape is durable and weather-resistant, ensuring its effectiveness even in harsh conditions.

Advertisement

While reflective tape is a popular choice, there are alternatives available for improving visibility on bicycle frames and forks. Some cyclists opt for reflective decals or stickers, which can be customized to suit their preferences. These decals work similarly to reflective tape by reflecting light and increasing visibility.

Transitioning into the subsequent section about the high-visibility flag or vest for added visibility, cyclists can further enhance their safety by incorporating a high-visibility flag or vest. These additional measures ensure maximum visibility and alert drivers to the presence of the cyclist on the road.

High-Visibility Flag or Vest for Added Visibility

One effective way to increase visibility and promote cyclist safety on the road is by incorporating high-visibility accessories such as a flag or vest. These accessories are designed to make cyclists more visible to motorists, especially in low-light conditions.

High-visibility flags can be attached to the rear of the bicycle or the back of the cyclist, while vests can be worn over clothing to enhance visibility from all angles. The importance of reflective gear cannot be overstated, as it significantly reduces the risk of accidents by making cyclists more easily seen by drivers.

In addition to reflective tape on the frame and forks, incorporating a high-visibility flag or vest is crucial for cyclists who ride at night or in low-light conditions. By increasing visibility, cyclists can greatly enhance their safety on the road.

Advertisement

Moving on to the next section, it is also important to have properly inflated tires with good tread for optimal control and safety.

Properly inflated tires with good tread for optimal control and safety

When it comes to riding a bicycle at night, ensuring optimal control and safety is crucial. One important aspect to consider is the condition of your tires. Properly inflated tires with good tread are essential for a smooth and safe ride. Maintaining the correct tire pressure is key to achieving optimal performance and control. Underinflated tires can make it difficult to maneuver, while overinflated tires can affect traction and stability. Additionally, choosing the right tread pattern for different road conditions is important. A tire with a more aggressive tread pattern can provide better grip on wet or uneven surfaces, while a smoother tread pattern is more suitable for dry roads. So, before hitting the road at night, take some time to check your tire pressure and tread condition to ensure a safe and enjoyable ride.

Now let’s dive into a more detailed discussion about tire pressure maintenance and choosing the right tread pattern for different road conditions:

Tire Pressure Maintenance Choosing the Right Tread Pattern
1. Regularly check your tire pressure using a gauge. Consider the type of terrain you will be riding on.
2. Consult the manufacturer’s guidelines for the recommended tire pressure range. Look for tires with deeper treads for better grip on wet surfaces.
3. Adjust the pressure accordingly using a pump with a pressure gauge. Opt for tires with a smoother tread pattern for dry roads.
4. Remember to check the pressure before each ride. Experiment with different tread patterns to find the one that suits your needs best.

Frequently Asked Questions

How can I ensure that my bicycle is visible to other road users at night?

To ensure my bicycle is visible to other road users at night, I prioritize the use of reflective gear. Reflective clothing, stickers, and lights are essential for enhancing visibility and ensuring my safety on the road.

Is it necessary to have both a front and rear light on my bike when riding at night?

Yes, it is necessary to have both a front and rear light on your bike when riding at night. The front light ensures visibility and helps me see the road ahead, while the rear light increases my visibility to other road users.

Advertisement

Are there any specific laws or regulations regarding the use of reflective clothing while cycling at night?

Yes, there are laws regarding reflective clothing when cycling at night. It is important to wear reflective clothing as it increases visibility and safety for both the cyclist and other road users.

What are the benefits of using a rearview mirror on a bicycle?

Using a rearview mirror on my bike has been a game-changer. It enhances safety by providing a clear view of approaching vehicles, allowing me to react quickly. The benefits are immense and unquestionable.

Can reflective tape be applied to any part of the bike frame, or are there specific areas where it should be placed for maximum effectiveness?

When applying reflective tape to the bike frame, focus on key areas for maximum effectiveness. These include the front and rear forks, seatstays, chainstays, and rims. Additionally, consider using reflective accessories and lights to further enhance bike visibility at night.

Conclusion

As I pedal through the darkened streets, I am grateful for the equipment that guides and protects me on my nighttime cycling adventures. The white front light illuminates my path, while the red rear light signals my presence to those behind me. Reflectors on my bike and clothing shimmer like stars, capturing the attention of passing drivers.

With a helmet adorned with reflective strips, I feel like a shining knight, ready to conquer any obstacle that comes my way. A rearview mirror grants me a glimpse into the world behind, increasing my awareness and ensuring my safety. Reflective tape on the frame and forks adds an extra layer of visibility, while a high-visibility flag or vest boldly announces my presence.

Advertisement

Lastly, properly inflated tires with good tread provide the control and stability I need to navigate the roads with confidence. As I ride under the moonlit sky, I am a symbol of safety, preparedness, and adventure, embracing the beauty of the night with every turn of the pedals.

Continue Reading
Advertisement

Affiliate disclaimer

As an affiliate, we may earn a commission from qualifying purchases. We get commissions for purchases made through links on this website from Amazon and other third parties.

About us

We are a passionate team driven by the belief that cycling is a fantastic and accessible way to stay active while enjoying the beauty of the outdoors. Our mission is to share our love for cycling with as many people as possible. We provide a welcoming environment for individuals of all ages, abilities, and backgrounds to come together and ride bikes. With Ralf’s visionary leadership, Zane’s expertise in cycling adventures, and Olivia’s dedication to community building, we strive to create a vibrant space where everyone can experience the joy of cycling. Through group rides, workshops, and inclusive events, we inspire and empower individuals to embrace an active lifestyle. Join us in our quest to pedal together, embrace the joy of cycling, and foster connections that last a lifetime.

Advertisement

Trending