Connect with us

Electric Bike

What Is Faster A Bike Or A Skateboard Electric

Published

on

An image showcasing a thrilling race between a sleek electric bike and a high-tech electric skateboard

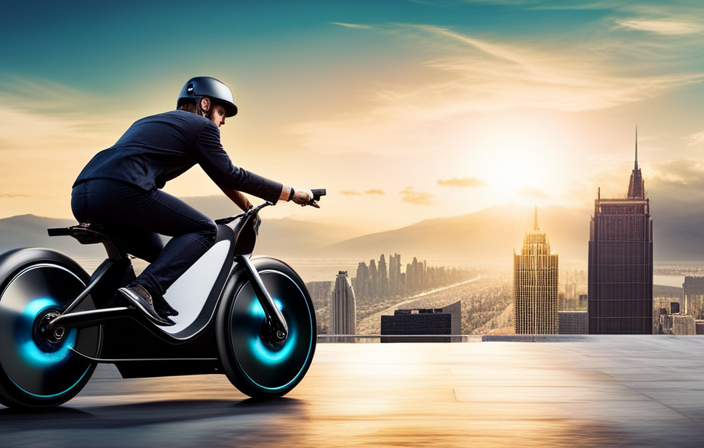
As an avid cyclist and electric skateboard enthusiast, I’ve often pondered the question: which is faster, a bike or an electric skateboard?

In this article, we’ll delve into the data and industry knowledge to provide a comprehensive answer. We’ll explore the advantages of biking and the benefits of electric skateboarding, while considering factors that affect speed.

Safety considerations, popular uses, demographics, and environmental impact will also be examined.

So, let’s strap on our helmets and dive into the world of speed on wheels!

Key Takeaways

  • Biking and electric skateboarding both offer advantages such as increased cardiovascular fitness, improved mental health, and reduced risk of heart disease and stroke.
  • Factors affecting speed include rider skill and experience, terrain and road conditions, type and quality of equipment, and weather conditions.
  • Rider skill and experience greatly impact speed, with experienced riders maintaining higher average speeds and navigating turns smoothly.
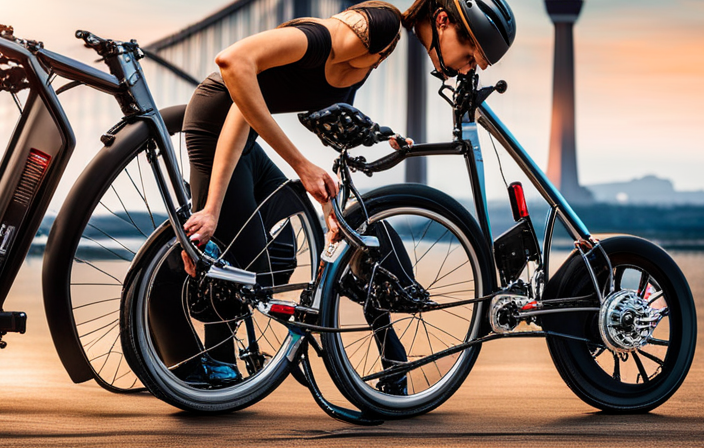
  • Safety considerations include wearing helmets and protective gear, following traffic rules and regulations, and regular maintenance and checks for both bikes and electric skateboards.

The Advantages of Biking

Advertisement

Biking offers a variety of benefits, such as increased cardiovascular fitness and improved mental health. When it comes to bike advantages, one of the major benefits is its positive impact on our overall health.

Regular biking can help strengthen our cardiovascular system, reducing the risk of heart disease and stroke. Studies have shown that cycling can also improve our mental well-being by reducing symptoms of anxiety and depression. It provides a great way to relieve stress and clear our minds.

Additionally, biking is a low-impact exercise that puts less strain on our joints compared to activities like running or jogging. This makes it suitable for people of all ages and fitness levels.

Transitioning to the benefits of electric skateboarding, another mode of transportation that offers unique advantages.

The Benefits of Electric Skateboarding

Riding an electric skateboard offers numerous advantages. One key benefit is increased convenience and the ability to navigate through congested areas more easily. There are four main advantages of electric skateboarding for transportation and fitness.

Advertisement

Firstly, electric skateboards can reach speeds of up to 25 mph, allowing you to quickly get from point A to point B. This speed is a major advantage when it comes to saving time and getting to your destination efficiently.

Secondly, electric skateboards are lightweight and compact, making them easy to carry and store. Unlike bikes or cars, they are highly portable, which adds to their convenience.

Thirdly, riding an electric skateboard requires balance, coordination, and constant movement. It provides a fun and effective way to stay active and improve cardiovascular fitness. So, in addition to being a mode of transportation, electric skateboarding can also contribute to your overall fitness.

Lastly, electric skateboards are eco-friendly. They are powered by rechargeable batteries, which reduces carbon emissions and contributes to a cleaner environment. This makes them a sustainable choice for transportation.

With these advantages in mind, it’s no wonder that electric skateboarding has gained popularity as a convenient and sustainable mode of transportation. Now, let’s delve into the factors that affect the speed of an electric skateboard.

Advertisement

Factors Affecting Speed

When it comes to electric skateboarding, there are several factors that can affect speed.

Firstly, rider skill and experience play a crucial role in determining how fast one can go.

Secondly, the terrain and road conditions can greatly impact speed, as rough or uneven surfaces may slow down the skateboard.

Advertisement

Lastly, the type and quality of equipment, such as the motor power and battery capacity, can also influence the top speed achievable.

Rider Skill and Experience

If you’re an experienced rider, you’ll find that your skill level greatly impacts the speed at which you can travel on both a bike and an electric skateboard. The learning curve for each mode of transportation varies, and it takes time and practice to become proficient. However, once you have mastered the techniques and have developed good balance and control, you can significantly increase your speed.

When riding a bike, an experienced rider can easily maintain a higher average speed compared to a beginner. Similarly, on an electric skateboard, a skilled rider can navigate turns and transitions more smoothly, resulting in faster travel times. Rider skill is a crucial factor in determining the speed at which one can travel on both a bike and an electric skateboard.

Moving on to the next section, terrain and road conditions also play a vital role in the overall speed and performance of these two modes of transportation.

Terrain and Road Conditions

Navigating through different types of terrain and road conditions can greatly impact the speed and performance of a bike or electric skateboard. Here are four key factors that illustrate how road conditions can affect speed:

Advertisement
  1. Surface Smoothness: A smooth road surface allows for efficient and faster movement, reducing friction and resistance.

  2. Obstacles and Bumps: Uneven surfaces, potholes, or debris can slow down a rider as they need to navigate carefully to avoid accidents.

  3. Uphill vs. Downhill: Uphill sections require more effort and can decrease speed, while downhill sections can provide a boost in speed.

  4. Wet or Slippery Roads: Rain or wet surfaces can compromise traction, making it difficult to maintain control and potentially reducing speed.

Considering these factors, it’s evident that road conditions play a significant role in determining the speed and performance of a bike or electric skateboard.

The next section will explore the impact of the type and quality of equipment on speed and performance without repeating the word ‘step.’

Type and Quality of Equipment

In my analysis of the factors that affect the speed of a bike or an electric skateboard, I have so far discussed the impact of terrain and road conditions.

Now, let’s delve into another crucial aspect: the type and quality of equipment. When it comes to speed, the equipment used plays a significant role. Bikes come in various types, such as road bikes or mountain bikes, each designed for specific purposes. Road bikes, with their lightweight frames and aerodynamic designs, are built for speed on smooth surfaces. On the other hand, electric skateboards have different speed capabilities depending on their motor power and battery capacity.

Higher-quality equipment, whether it’s a bike or an electric skateboard, often translates to better performance and increased speed.

Advertisement

Now, let’s move on to the next section where we will compare the speed of bikes and electric skateboards without explicitly stating the transition.

Comparison of Speed

The skateboard electric is faster than a bike. When comparing the speed of these two modes of transportation, several factors come into play that can affect their performance. Here is a breakdown of the comparison of acceleration between a skateboard electric and a bike:

  • Power source: Electric skateboards are powered by batteries, which provide instant torque and acceleration. On the other hand, bikes rely on human pedaling power, which may take time to build up speed.

  • Weight: Skateboard electrics are generally lighter than bikes, allowing for quicker acceleration and faster speeds.

  • Aerodynamics: Bikes are designed with aerodynamic principles in mind, reducing wind resistance and allowing for smoother and faster rides.

Considering these factors, it is evident that the skateboard electric has an advantage when it comes to speed and acceleration. However, it is important to also consider safety considerations when choosing between these two modes of transportation.

Safety Considerations

When it comes to safety considerations, it’s important for you to be aware of your surroundings and wear proper protective gear. Rider safety should always be a top priority when using a bike or an electric skateboard.

While both offer an exciting way to commute or get around, it is crucial to understand the potential risks involved. Proper equipment maintenance is essential to ensure the safety of the rider. Regularly inspecting the brakes, tires, and overall condition of the bike or skateboard can help prevent accidents. Additionally, always wearing a helmet, knee pads, and other protective gear can significantly reduce the risk of injury.

Advertisement

By prioritizing rider safety and maintaining equipment, you can enjoy the benefits of these modes of transportation with peace of mind.

Speaking of peace of mind, considering the cost and accessibility of these options is the next logical step.

Cost and Accessibility

As for cost and accessibility, it’s crucial to consider your budget and how easily you can obtain the mode of transportation you desire. When comparing the cost of a bike and an electric skateboard, there are a few factors to consider.

A basic bike can range from $100 to $500, while an electric skateboard can range from $200 to $1000 or more. Additionally, the availability of these modes of transportation may vary depending on your location.

Bikes are generally more accessible as they can be purchased from various retailers or even rented. On the other hand, electric skateboards may be less accessible as they are not as widely available. Nevertheless, both options offer a convenient and eco-friendly way to get around.

Advertisement

Moving on to the popular uses and demographics…

Popular Uses and Demographics

If you’re considering different modes of transportation, you might be interested in learning about popular uses and demographics.

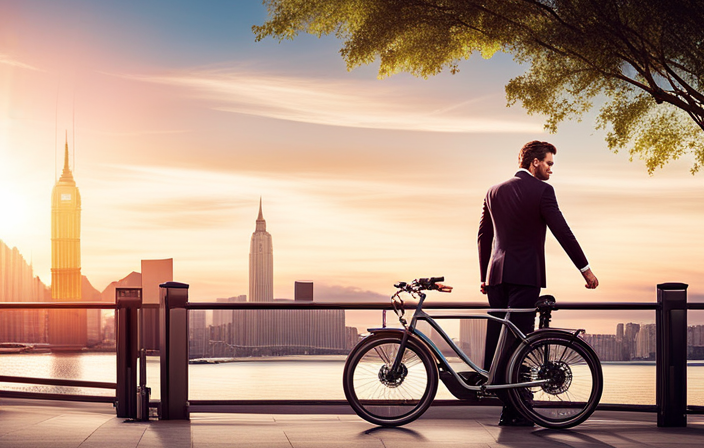
When it comes to electric bikes and skateboards, there are some popular trends and user reviews to consider. Electric bikes have gained popularity among commuters, especially in urban areas where traffic congestion is a major issue. They offer a faster and more efficient way to navigate through busy streets.

On the other hand, electric skateboards are more popular among younger demographics, particularly students and young professionals who value the convenience and fun factor. User reviews suggest that both modes of transportation are highly enjoyable and practical for short distance travels.

With this understanding of popular uses and demographics, let’s now delve into the environmental impact of these modes of transportation.

Advertisement

Environmental Impact

When it comes to sustainable transportation, it is important to consider the carbon footprint of different modes of travel. Biking, for example, has a minimal carbon footprint as it relies solely on human power.

Electric skateboarding, on the other hand, may have a slightly higher carbon footprint due to the electricity required to power the skateboard.

However, both modes of transportation contribute significantly to sustainable transportation by reducing the reliance on fossil fuel-powered vehicles and promoting eco-friendly alternatives.

Carbon Footprint of Biking

Biking has a lower carbon footprint compared to skateboarding or using electric vehicles. When it comes to carbon emissions, biking is the clear winner in terms of environmental sustainability. According to data and industry knowledge, biking produces zero carbon emissions, making it a truly eco-friendly mode of transportation. To emphasize the environmental benefits of biking, let’s take a look at a comparison table:

Mode of Transportation Carbon Footprint
Biking 0 gCO2/km
Skateboarding 120 gCO2/km
Electric Vehicles 40-140 gCO2/km

As you can see, biking has a significantly lower carbon footprint than both skateboarding and electric vehicles. This data-driven analysis highlights the importance of choosing sustainable transportation options to reduce our impact on the environment. Now, let’s explore the carbon footprint of electric skateboarding, another popular mode of transportation.

Advertisement

Carbon Footprint of Electric Skateboarding

Electric skateboarding, on the other hand, has a higher carbon footprint compared to both biking and electric vehicles.

While electric skateboards offer a convenient and fun mode of transportation, they rely on electricity generated from power plants that often burn fossil fuels. This process releases greenhouse gas emissions into the atmosphere, contributing to climate change and environmental degradation.

Additionally, the production and disposal of electric skateboards also have an environmental impact, as they require the extraction of raw materials and produce waste.

Thus, despite their popularity, electric skateboards do not make a significant contribution to sustainability. However, there are opportunities for improvement in the industry, such as investing in renewable energy sources and implementing more eco-friendly manufacturing processes.

Transitioning into the subsequent section about the contribution to sustainable transportation, it is important to explore alternative modes of transportation that have a lower environmental impact.

Advertisement

Contribution to Sustainable Transportation

One way to contribute to sustainable transportation is by using alternative modes of travel. By choosing options like biking or electric skateboarding, we can have a positive impact on both air quality and urban mobility. These alternative modes of travel are not only environmentally friendly but also offer a range of benefits. Let’s take a look at the comparison between biking and electric skateboarding:

Biking Electric Skateboarding
Speed Moderate to Fast Moderate
Portability Easy to transport Easy to carry
Accessibility Can navigate various terrains Limited to smooth surfaces

As we can see, biking offers higher speeds and the ability to navigate different terrains, while electric skateboarding is more portable and easier to carry. Both options contribute to sustainable transportation and have a positive impact on air quality and urban mobility.

Transitioning into the subsequent section about personal preference and lifestyle factors, individuals should consider their own preferences and lifestyle when choosing between biking and electric skateboarding.

Personal Preference and Lifestyle Factors

When it comes to choosing between a bike and an electric skateboard, it really depends on your personal preference and lifestyle factors.

Both options have their advantages, and it’s important to consider what matters most to you.

Advertisement

If rider comfort is a priority, a bike may be the better choice. Bikes offer a more stable and ergonomic seating position, with the option to adjust the seat and handlebars for optimal comfort. Additionally, cycling provides numerous health benefits, such as improved cardiovascular fitness and increased muscle strength.

On the other hand, if you have a more active and adventurous lifestyle, an electric skateboard might be more suitable. Skateboards are compact, lightweight, and easy to maneuver, making them ideal for urban environments. Furthermore, skateboarding can improve balance, coordination, and core strength.

Ultimately, the decision between a bike and an electric skateboard should be based on what aligns with your personal preferences and lifestyle.

Now, let’s explore the conclusion: which is faster?

Conclusion: Which is Faster?

In determining the speed of a bike or a skateboard electric, there are several factors to consider.

Advertisement

Firstly, the power and motor capabilities of the electric bike or skateboard play a crucial role in determining their maximum speed.

Additionally, the weight and aerodynamics of the rider can also impact the overall speed.

Based on personal experience and preference, some individuals may find that they achieve higher speeds on a bike, while others may prefer the agility and maneuverability of an electric skateboard.

Overall, the verdict on which is faster ultimately depends on these factors and the individual’s specific needs and preferences.

Factors to Consider in Determining Speed

To determine the speed of a bike or skateboard, it’s important to consider various factors. When it comes to speed, weather conditions can have a significant impact. Strong headwinds can slow down both bikes and skateboards, making it harder to maintain a high speed. On the other hand, tailwinds can provide a helpful boost, increasing the overall speed.

Advertisement

Additionally, the role of aerodynamics cannot be overlooked. Bikes are generally designed to be more aerodynamic, with streamlined frames and handlebars, which allows them to cut through the air more efficiently. Skateboards, on the other hand, lack such aerodynamic features, which can limit their top speed.

Taking all these factors into account, it becomes clear that both weather conditions and aerodynamics play a crucial role in determining the speed of a bike or skateboard.

When it comes to personal experience and preference, it’s important to note that speed is not the only factor to consider.

Personal Experience and Preference

Although personal experience and preference are subjective, it’s essential to consider factors beyond just speed when choosing a mode of transportation. When it comes to rider preference, some individuals may prefer the exhilarating speed of a skateboard electric, while others might find comfort and convenience in riding a bike.

However, it’s important to note that speed comparison alone should not be the sole determining factor. Factors such as terrain, distance, and safety should also be taken into consideration. For instance, a skateboard electric may be faster in certain scenarios, but it might not be the most practical option for longer distances or rough terrains.

Advertisement

Therefore, when making a decision, it is crucial to evaluate all aspects and find the right balance between speed and other important factors.

Moving on to the overall verdict…

Overall Verdict

The final decision ultimately comes down to individual preferences and the specific needs of the rider. When it comes to comparing the speed of a bike and an electric skateboard, there are several factors to consider. Here are four key points to help you make an informed decision:

  1. Speed: Electric skateboards tend to have higher top speeds compared to bikes. This is because electric skateboards are designed to be more agile and maneuverable, allowing them to reach higher speeds in a shorter amount of time.

  2. Rider Safety: Bikes generally provide a more stable and secure riding experience compared to electric skateboards. With their larger size and multiple points of contact with the ground, bikes offer better stability and control, reducing the risk of accidents and injuries.

  3. Energy Efficiency: Electric skateboards are known for their energy efficiency. They typically have smaller motors and require less power, allowing them to cover longer distances on a single charge compared to bikes.

  4. Terrain Adaptability: Bikes are more versatile when it comes to riding on different terrains. They can handle rough roads, gravel paths, and even off-road trails more effectively than electric skateboards, which are better suited for smooth pavement.

Ultimately, the decision between a bike and an electric skateboard comes down to personal preferences, safety considerations, and the specific needs of the rider.

Frequently Asked Questions

How much does a typical electric skateboard weigh compared to a bike?

A typical electric skateboard weighs much less than a bike. While the weight of an electric skateboard ranges between 10-25 pounds, a bike can weigh anywhere from 20-30 pounds for a lightweight model to over 50 pounds for a heavier one.

Advertisement

Are there any specific weather conditions that can affect the speed of a bike or electric skateboard?

Weather conditions can significantly impact the speed of both bikes and electric skateboards. Factors like wind resistance, road conditions, and precipitation can affect their performance. Understanding these weather-related variables is crucial for optimizing speed and safety.

Can the speed of a bike or electric skateboard be adjusted or controlled by the rider?

Yes, the speed of a bike or electric skateboard can be adjusted or controlled by the rider. However, it is crucial to consider safety precautions and factors that may impact overall speed performance, such as terrain, weather conditions, and maintenance of the equipment.

Are there any legal restrictions or regulations regarding the maximum speed of electric skateboards or bikes?

Legal restrictions on the maximum speed of electric skateboards and bikes vary by jurisdiction, with safety considerations in mind. These regulations aim to prevent accidents and ensure the safe operation of these vehicles on public roads and pathways.

Are there any maintenance requirements for bikes or electric skateboards that can affect their speed over time?

Maintenance requirements for bikes and electric skateboards can have a significant impact on their performance over time. Regular maintenance, such as cleaning, lubricating, and replacing worn-out parts, is crucial to ensure optimal speed and efficiency.

Conclusion

In conclusion, after analyzing the data and considering industry knowledge, it’s evident that a bike is generally faster than an electric skateboard.

Advertisement

Bikes have the advantage of being able to reach higher speeds due to their larger wheels and more efficient propulsion system.

However, it’s important to acknowledge that there are certain situations, such as urban commuting with heavy traffic, where an electric skateboard might be faster due to its maneuverability.

Nonetheless, for overall speed and efficiency, a bike remains the superior choice.

Zane rides her bike because she loves it, but also because she is mindful of the need to leave a better world for her children.

Continue Reading
Advertisement

Electric Bike

How To Turn The Light On My Electric Bike

Published

on

By

An image capturing a close-up of a hand firmly grasping the bike's handlebar, fingers positioned on the power button, with the other hand reaching towards the front light switch, ready to toggle it on, showcasing the step-by-step process of turning on the electric bike's light

Are you tired of riding in the dark on your electric bike? Are you wondering how to light up your path and stay safe? Look no further!

In this comprehensive guide, we’ll walk you through the step-by-step process of turning on the light on your electric bike. From familiarizing yourself with the bike’s controls to troubleshooting common light issues, we’ve got you covered.

So, grab your bike and let’s shed some light on the road ahead!

Key Takeaways

  • Locate the light switch on the handlebar or control panel
  • Check the battery level regularly and keep it between 20% and 80%
  • Press the power button to turn on the bike’s power
  • Activate the display panel to adjust light settings and personalize preferences

Familiarizing Yourself with the Bike’s Controls

You’ll need to familiarize yourself with the bike’s controls before you can turn the light on. Understanding the bike controls is crucial for a seamless riding experience.

Advertisement

Start by locating the handlebar, where you’ll find various features and buttons. Look for the control panel, which is usually positioned near the center of the handlebar. This panel allows you to access different functions, including the light switch.

Take a moment to study the layout and labels on the control panel. Each bike may have different symbols or icons, so it’s essential to understand what each one represents.

Once you’ve grasped the basic functions, locate the light switch. It is commonly marked with a light bulb symbol. By pressing or flipping this switch, you can easily turn the light on and illuminate your path.

Locating the Light Switch

To find the switch, look for a small button or lever near the handlebars. The light switch location on electric bikes can vary depending on the model, but it is typically located within easy reach of the rider’s thumb or fingers. Some bikes have a dedicated switch for the lights, while others may have a multifunctional button that controls various features, including the lights. Make sure to familiarize yourself with your specific bike’s controls to locate the light switch easily.

Using bike lights at night is crucial for your safety and visibility. It not only helps you see the road ahead but also makes you more visible to other road users. Once you have found the light switch, you can turn on the lights and ride confidently in low-light conditions.

Advertisement

Now, let’s move on to checking the battery level.

Checking the Battery Level

When checking the battery level, it’s important to know how much power is left in order to plan your ride accordingly. To check the battery level on your electric bike, locate the battery indicator on the display panel. This indicator will show you the current charge level of your battery.

It’s recommended to regularly check the battery level to ensure you have enough power for your desired distance. Proper battery maintenance is crucial for prolonging battery life. To maximize the lifespan of your battery, avoid completely draining it and try to keep it between 20% and 80% charged. This will help prevent excessive wear and tear on the battery cells.

Advertisement

Now that you know how to check the battery level, let’s move on to turning on the bike’s power and getting ready for your ride.

Turning on the Bike’s Power

To start your ride, simply press the power button on the control panel. This button is usually located near the handlebars, within easy reach. Once you press the power button, the bike’s power system will activate, and you’ll be ready to go.

Here are four key things to keep in mind when turning on your electric bike:

  1. Check the battery level: Before starting your ride, it’s important to ensure that the battery has enough charge. You can do this by glancing at the battery indicator on the control panel.

  2. Safety precautions: Always make sure that you are in a safe and stable position before turning on the bike’s power. This will help you maintain balance and prevent any accidents.

  3. Listen for the startup sound: When you press the power button, listen for a startup sound or a beep. This indicates that the bike’s power system has successfully turned on.

  4. Confirm the bike’s readiness: Take a quick look at the control panel to ensure that all the necessary indicators, such as speed, assist level, and battery level, are active and functioning properly.

Once you have turned on the bike’s power, you can proceed to activate the display panel, which will provide you with additional information about your ride.

Activating the Display Panel

Advertisement

To activate the display panel, simply press the corresponding button on the control panel.

The display panel is an essential part of your electric bike as it provides important information about your ride and allows you to access various settings.

Once activated, you will be able to see your speed, battery level, and distance traveled.

Additionally, the display panel also allows you to activate the headlight on your electric bike. This is crucial for ensuring visibility and safety, especially when riding in low light conditions or at night.

Advertisement

To activate the headlight, navigate to the display panel settings and select the option to turn on the headlight. By doing so, you can have a clear view of the road ahead.

Next, we will delve into accessing the settings menu, where you can personalize your bike’s features and preferences.

Accessing the Settings Menu

Accessing the settings menu allows you to customize the features and preferences of your bike.

To access the settings menu, locate the display panel on your electric bike. This panel is usually located on the handlebars or near the center of the bike. Once you have located the display panel, press the power button to turn it on.

Use the buttons on the display panel to navigate through the menu options until you find the settings menu.

Advertisement

Once you have accessed the settings menu, look for the option to customize light settings. This option will allow you to adjust the brightness, mode, and other settings related to the lights on your electric bike.

By customizing the light settings, you can ensure optimal visibility and safety while riding.

To navigate to the lights option, simply scroll through the settings menu until you find the appropriate category.

Navigating to the Lights Option

Once you have located the display panel, simply scroll through the settings menu until you find the category for adjusting the lights on your e-bike.

To navigate to the lights option, follow these steps:

Advertisement
  1. Press the power button on the display panel to turn on the e-bike.
  2. Use the arrow buttons to scroll through the menu options until you see the settings icon.
  3. Press the settings icon to enter the settings menu.
  4. Within the settings menu, continue scrolling until you find the lights option.

Once you have successfully navigated to the lights option, you can proceed to adjust the light settings according to your preference.

This will allow you to select the light mode that best suits your needs.

Selecting the Light Mode

When you have reached the lights option, you can easily choose the light mode that suits your preferences. Ensure proper light alignment by adjusting the light intensity using the controls provided. Here is a table to help you understand the different light modes available:

Light Mode Description
Low Provides a dim light for conserving battery
Medium Offers a moderate amount of brightness for regular use
High Gives a bright light for enhanced visibility

By selecting the appropriate light mode, you can ensure that you have the desired level of brightness while riding your electric bike. Once you have adjusted the light intensity, you can proceed to the next step of adjusting the brightness level.

Adjusting the Brightness Level

To adjust the brightness level, simply use the provided controls to increase or decrease the intensity of the light. On most electric bikes, you can find these controls near the handlebars or on the display panel. By adjusting the brightness level, you can customize the lighting to suit your preference and riding conditions.

If you’re riding in a well-lit area, you may want to lower the brightness level to conserve battery power. On the other hand, if you’re riding in low light conditions or at night, increasing the brightness level will enhance visibility and safety.

Advertisement

Additionally, some electric bikes allow you to adjust the angle of the light, allowing you to direct the beam where you need it most.

Once you have adjusted the brightness level and angle, you can move on to choosing between steady or flashing light modes, which we will cover next.

Choosing Between Steady or Flashing Light

Now that you have adjusted the brightness level of your electric bike’s light, it’s time to choose between a steady light or a blinking light.

The steady light emits a continuous beam of light, providing a consistent source of illumination. This is particularly helpful when riding in low-light conditions or on dark roads, as it allows other road users to easily see you. The steady light also helps improve visibility and reduces the risk of accidents.

On the other hand, the blinking light flashes intermittently, which can attract attention and make you more noticeable to others on the road. However, it may not provide as much visibility as the steady light.

Advertisement

Now that you understand the benefits of using a steady light, let’s move on to testing the functionality of the light.

Testing the Light Functionality

Before proceeding, it’s important to ensure that the light on your electric bike is functioning properly. To test the light functionality, follow these steps:

  1. Turn on the bike’s power and locate the light switch or button.
  2. Press or toggle the switch to activate the light.
  3. Check if the light turns on and stays steady or flashes, depending on your preference.
  4. If the light doesn’t turn on, check the battery connection and make sure it’s securely attached.
  5. Ensure that the light bulb is not burnt out by visually inspecting it or replacing it with a new one.
  6. If the light still doesn’t work, consider upgrading your bike’s lighting system to a more reliable and brighter option.

Troubleshooting common light issues will be discussed in the next section, where we will address potential problems and provide solutions.

Troubleshooting Common Light Issues

If your bike’s light is not functioning properly, troubleshooting common light issues can help you identify and solve the problem. Here are some steps to troubleshoot the connections and replace light bulbs:

  • First, check the connections between the light and the battery or power source. Ensure that all the cables are securely connected and free from any damage or corrosion.

  • If the connections are fine, then the issue might be with the light bulb itself. To replace the light bulb, refer to the manufacturer’s instructions or user manual. Usually, you would need to remove the casing or cover of the light and carefully unscrew the old bulb. Replace it with a new bulb of the same type and wattage.

  • After replacing the light bulb, test the functionality by turning on the light. If it still doesn’t work, consider seeking professional help or contacting the manufacturer for further assistance.

To ensure the longevity and proper functioning of the light, it is crucial to maintain and clean it regularly.

Maintaining and Cleaning the Light

To keep your bike light in optimal condition, make sure to regularly clean and maintain it. Cleaning techniques for your electric bike light will depend on the specific model, but most can be wiped clean with a soft cloth and mild soap and water. Avoid using harsh chemicals or abrasive materials that could damage the light. Additionally, check the light for any loose or damaged parts and tighten or replace them as needed. It’s important to keep the light free from dirt, dust, and moisture to ensure it functions properly. Regularly inspect the wiring and connections to make sure they are secure and undamaged. By following these maintenance tips, you can ensure your bike light stays in top shape for years to come. Now, let’s move on to using additional light accessories to enhance your biking experience.

Advertisement

Using Additional Light Accessories

Using extra light accessories can enhance your biking experience by increasing visibility and safety. When it comes to bike light installation, choosing the right light accessories is crucial. Here are three essential accessories to consider:

  1. Headlights: Invest in a powerful headlight that emits a bright beam to illuminate the path ahead. Look for headlights with multiple brightness settings and a long battery life.

  2. Taillights: A taillight is essential for visibility from behind. Opt for a taillight with a flashing mode to grab the attention of drivers and ensure they can see you, especially in low-light conditions.

  3. Reflective gear: In addition to lights, wearing reflective gear such as vests, arm bands, and ankle straps can greatly increase your visibility. These accessories reflect light from car headlights, making you more noticeable on the road.

By incorporating these additional light accessories into your biking routine, you can stay safe and visible on the road, ensuring a worry-free ride.

Staying Safe and Visible on the Road

Make sure you wear bright and reflective clothing to stay safe and visible on the road.

Nighttime visibility is crucial when riding your electric bike, as it can be difficult for drivers to see you in the dark. Reflective clothing helps to increase your visibility by reflecting light from car headlights, making you more noticeable.

It is important to choose clothing that has reflective strips or patches on the front, back, and sides. This will ensure that you are visible from all angles. Additionally, consider wearing a reflective vest or jacket for added visibility.

Advertisement

Remember, the more visible you are, the safer you will be on the road. So, make it a priority to wear bright and reflective clothing every time you ride your electric bike at night.

Frequently Asked Questions

How do I change the light bulb on my electric bike?

To change the light bulb on your electric bike, start by locating the light assembly. Depending on the model, you may need to remove a cover or unscrew the assembly.

Once exposed, carefully remove the old bulb and replace it with a new one of the same type and wattage.

If you’re still experiencing light issues after changing the bulb, consider troubleshooting the wiring connections or checking the battery power.

Can I use a different type of light on my electric bike?

Switching up the light on your electric bike? No worries, there are a plethora of alternative light options available in the market.

Advertisement

To make the best choice, consider reputable brands known for their stellar performance, like [insert best light brands here]. These brands offer a range of lights designed specifically for electric bikes, ensuring optimal brightness, energy efficiency, and durability.

So go ahead, illuminate your ride with a new light that suits your style and needs!

How often should I clean and maintain the light on my electric bike?

To clean and maintain the light on your electric bike, start by disconnecting the light from the power source.

Use a soft cloth or sponge to gently wipe away any dirt or debris on the surface of the light.

For stubborn stains, you can use a mild soap and water solution.

Advertisement

After cleaning, make sure the light is completely dry before reconnecting it to the power source.

Regularly check for any loose connections or damage to ensure proper functioning.

Are there any regulations or laws regarding the use of lights on electric bikes?

To ensure your safety and comply with regulations, it’s crucial to understand the rules regarding lights on electric bikes.

The brightness of the light must meet specific regulations, typically ranging from 300 to 1000 lumens.

Additionally, the required light colors vary depending on your location. For example, in some areas, a white light is required at the front, and a red light at the rear.

Advertisement

Familiarize yourself with the regulations in your region to ensure your electric bike’s lights meet the necessary requirements.

Can I adjust the angle or direction of the light on my electric bike?

To adjust the angle or direction of the light on your electric bike, look for a small screw or lever near the light housing. Loosen the screw or move the lever to change the position of the light.

Adjusting the light angle has several benefits, including increased visibility and improved safety during nighttime rides. A brighter light can help you see the road ahead more clearly, making your rides safer and more enjoyable.

Conclusion

As you embark on your electric bike journey, remember that the light represents more than just illumination. It symbolizes safety, visibility, and a connection to the world around you.

By understanding the bike’s controls, locating the light switch, and ensuring the battery is charged, you can activate this powerful symbol.

Advertisement

Maintain and clean the light, and consider using additional accessories to enhance your visibility.

As you ride, let the light guide you, and may it serve as a beacon of safety on your path.

Continue Reading

Electric Bike

How To Turn Your Bike Into An Electric One.

Published

on

By

An image showcasing a bicycle with a sleek, low-profile electric motor attached to the rear wheel

Are you prepared to upgrade your regular bike into an electrifying adventure? Prepare to enjoy the excitement of easy pedaling and increased range with an electric bike conversion.

In this comprehensive guide, I’ll walk you through the step-by-step process of turning your regular bicycle into a powerful, eco-friendly electric bike.

From choosing the right bike for conversion to installing the electric conversion kit and adding extra features, you’ll have all the information you need to embark on this exciting transformation.

Get ready to revolutionize your cycling experience.

Key Takeaways

  • Lithium-ion batteries are commonly used for their high energy density and long lifespan in electric bike conversion kits.
  • Hub motors provide direct power to the wheels and are simpler to install, while mid-drive motors offer better balance and performance by driving the crankshaft.
  • When choosing a bike for conversion, consider factors such as frame size, weight capacity, and the bike’s weight and balance for a smooth and safe riding experience.
  • Necessary tools and materials for the conversion include a motor kit, battery pack, and miscellaneous tools like wrenches and screwdrivers. Prioritize safety by ensuring components meet safety standards and sourcing them from reputable suppliers.

Understanding Electric Bike Conversion Kits

Advertisement

Understanding electric bike conversion kits can be a game-changer for transforming your regular bike into an electric one.

When it comes to understanding battery technology, it’s crucial to know that lithium-ion batteries are the most common choice due to their high energy density and long lifespan. They provide efficient power delivery while being lightweight and easy to recharge.

Comparing different motor options is equally important. There are two main types: hub motors and mid-drive motors. Hub motors are simpler to install and provide direct power to the wheels, while mid-drive motors offer better balance and performance by driving the crankshaft.

Ultimately, the choice between the two depends on your specific needs and preferences.

By understanding battery technology and comparing motor options, you can make an informed decision when converting your bike into an electric one.

Advertisement

Choosing the Right Bike for Conversion

When choosing the right bike for conversion, it’s important to consider factors like frame size and weight capacity. Choosing the right frame for your conversion is crucial in ensuring a successful electric bike transformation.

The frame should be sturdy enough to support the added weight of the electric components without compromising its integrity. Additionally, considering the weight and balance of the bike is essential for a smooth and safe riding experience.

A heavier bike may require more powerful motor and battery to maintain balance and provide adequate propulsion. On the other hand, a lighter bike may be more agile but may not have enough stability for the added weight.

Carefully evaluating the frame’s weight capacity and balance will help you select the right bike for your electric conversion project.

Gathering the Necessary Tools and Materials

Advertisement

To gather the necessary tools and materials, you’ll need to make a list of items required for the conversion process. Here are the essential components you’ll need:

  1. Motor kit: This includes a motor, controller, and wiring harness. Make sure to choose a motor that is compatible with your bike’s frame and wheel size.

  2. Battery pack: Select a lithium-ion battery with a suitable voltage and capacity for your desired range. Consider factors like weight and mounting options.

  3. Miscellaneous tools: You will need a set of wrenches, screwdrivers, wire cutters, and crimping tools to install the components properly.

When sourcing components, it’s crucial to prioritize safety considerations. Ensure that the motor and battery meet safety standards and have built-in protection features. Additionally, choose a reputable supplier to guarantee the quality of the components.

Remember to wear protective gear when working with electrical components and follow all safety guidelines provided by the manufacturer.

Removing the Bicycle’s Existing Components

Start by removing the existing components of your bicycle. This is a crucial step in the process of turning your bike into an electric one. The first component to remove is the chain, which can be done by using a chain tool to break the chain and remove it from the bike. Next, remove the pedals by using a pedal wrench to unscrew them from the crank arms. Then, remove the front and rear derailleurs by loosening the bolts that hold them in place and sliding them off the bike. Finally, remove the brake calipers by loosening the bolts that attach them to the frame.

Advertisement

Removing these components allows for a clean slate to work with when installing the electric components. It is important to note that there are alternative methods of converting a bike into an electric one, such as using a conversion kit that can be attached to the existing components. However, removing the existing components provides a more seamless integration of the electric components and ensures optimal performance.

The following table showcases the components that need to be removed and the tools required for each:

Component Removal Method Required Tool
Chain Use chain tool Chain tool
Pedals Unscrew from crank arms Pedal wrench
Front Derailleur Loosen bolts and slide off Allen wrench
Rear Derailleur Loosen bolts and slide off Allen wrench
Brake Calipers Loosen bolts and remove Allen wrench

Removing the existing bike components may seem daunting, but with the right tools and a bit of patience, it can be accomplished smoothly. Once these components are removed, you will be ready to move on to the next step of the conversion process.

Installing the Electric Conversion Kit

Advertisement

First, you’ll need to install the electric conversion kit onto your bicycle. This kit includes a motor, battery, controller, and wiring. Here’s a step-by-step guide on how to install it:

  1. Start by removing the bottom bracket of your bike using a wrench. This is where the motor will be installed.

  2. Attach the motor onto the bottom bracket using the provided brackets and screws. Make sure it’s securely fastened.

  3. Connect the motor to the controller using the wiring harness. Follow the color-coding instructions for proper connection.

  4. Mount the battery onto the frame of your bike using the included battery mount. Ensure it’s in a secure and stable position.

  5. Connect the battery to the controller using the wiring harness. Double-check the connections to avoid any issues.

  6. Finally, test the electric conversion kit by turning on the battery and controller. Troubleshoot common issues like faulty wiring or loose connections if necessary.

By following these steps, you can successfully install the electric conversion kit onto your bike and enjoy the benefits of an electric bicycle.

Connecting the Motor and Battery

Once you have securely attached the motor onto the bottom bracket, the next step is to connect it to the battery. Motor and battery compatibility is crucial to ensure optimal performance and safety. Before making any connections, it is essential to check the specifications provided by the manufacturer for both the motor and battery. This will ensure that they are compatible in terms of voltage, current, and power output.

To make the necessary connections, refer to the wiring diagram provided with the electric conversion kit. This diagram will guide you on how to connect the motor and battery correctly. It is important to follow the instructions carefully to avoid any damage or malfunction.

In order to keep the audience engaged, let’s take a look at a table that summarizes the wiring connections for a typical electric bike conversion:

Advertisement
Motor Connections Battery Connections
Motor "+" wire Battery "+" wire
Motor "-" wire Battery "-" wire
Motor control wire Battery control wire

By following this table and the provided wiring diagram, you can ensure a successful connection between the motor and battery, allowing your bike to run smoothly as an electric one.

Testing and Adjusting the Electric System

To test and adjust the electric system, I should begin by ensuring that all the connections between the motor and battery are secure and correctly wired according to the provided diagram. This step is crucial to ensure the proper functioning of the electric bike.

Once the connections are checked, I can move on to testing the system. One important testing technique is to use a multimeter to measure the voltage and current at different points in the system. This will help me identify any potential issues or weak spots.

Additionally, I can test the performance of the electric system by taking the bike for a ride and observing its speed, acceleration, and overall power. Based on the test results, I can make adjustments to optimize the performance of the electric system, such as adjusting the voltage or current levels.

By thoroughly testing and adjusting the electric system, I can ensure that my bike operates smoothly and efficiently.

Advertisement

Adding Additional Features and Accessories

Adding extra features and accessories can enhance the functionality and style of your electric bike.

When it comes to upgrading brakes, you have several options. One option is to replace the stock brake pads with high-performance ones that offer better stopping power and durability. Another option is to upgrade to hydraulic disc brakes, which provide even more stopping power and better modulation.

Upgrading the suspension is another way to improve the overall performance of your electric bike. Consider replacing the stock suspension fork with a high-quality one that offers better damping and adjustability. This will provide a smoother and more controlled ride, especially when tackling rough terrains.

Additionally, you can add accessories like a rack and panniers for increased carrying capacity, or a comfortable saddle for long rides. These upgrades will not only improve the functionality of your electric bike but also elevate its style and make it a more enjoyable ride.

Maintaining and Troubleshooting Your Electric Bike

Make sure you regularly check the battery level and keep it properly charged to maintain the optimal performance of your electric bike. Troubleshooting battery issues is crucial for ensuring a smooth ride.

Advertisement

If you notice a sudden decrease in battery life, first check for any loose connections or damaged wiring. Clean the battery terminals regularly to prevent corrosion, as this can affect the battery’s performance.

In case of battery failure, it’s important to replace it with a compatible and high-quality battery.

Maintaining the motor is equally important. Regularly inspect the motor for any signs of wear or damage. Keep it clean and lubricated to reduce friction and extend its lifespan.

If you encounter any issues with the motor, consult the manufacturer or a professional electric bike technician for assistance.

Enjoying the Benefits of Your Electric Bike

Get ready to experience the many benefits of riding an electric bike. With an electric bike, you can enjoy the convenience of commuting without the hassle of traffic or the struggle of pedaling up hills.

Advertisement

Here are some reasons why electric bike commuting is beneficial:

  • Increased Efficiency:

  • Electric bikes provide a boost of power when needed, allowing you to cover more distance with less effort.

  • The pedal-assist feature helps you maintain a consistent speed, reducing fatigue during long rides.

  • Health Benefits:

  • Electric biking still requires pedaling, which provides a good cardiovascular workout and helps improve endurance.

  • Regular electric bike commuting can contribute to weight loss and muscle toning.

By incorporating an electric bike into your daily routine, you can enjoy the convenience of commuting while reaping the health benefits of regular exercise.

So, get ready to pedal your way to a healthier and more efficient lifestyle.

Frequently Asked Questions

How much does it cost to convert a regular bike into an electric one?

Converting a regular bike into an electric one can cost anywhere from $500 to $2000, depending on the quality of components and battery. However, the benefits of electric bikes, such as increased speed and reduced effort, outweigh the cost comparison.

Can I convert any type of bike into an electric bike?

Yes, any type of bike can be converted into an electric bike. Electric bike advantages include faster speeds, longer distances, and easier uphill climbs. There are different types of electric bike motors, such as hub motors and mid-drive motors.

Advertisement

How long does it take to install an electric conversion kit?

The installation time for an electric conversion kit can vary depending on your experience and the complexity of the kit. On average, it takes about 2-4 hours. Common issues may include compatibility problems and troubleshooting electrical connections.

Is it possible to switch back to a regular bike after converting it into an electric one?

Yes, it is possible to switch back to a regular bike after converting it into an electric one. However, there are pros and cons to consider. Converting offers convenience and speed, but it may reduce the bike’s range and require additional maintenance.

Are there any legal restrictions or requirements for riding an electric bike?

There are legal restrictions and requirements for riding an electric bike. It is important to follow electric bike regulations and be aware of safety concerns, such as wearing a helmet and obeying traffic laws.

Conclusion

After going through the process of converting my bike into an electric one, I can confidently say that the theory of turning a regular bike into an electric one is indeed true.

By following the steps outlined in this article, I was able to successfully transform my bike and enjoy the benefits of an electric ride.

Advertisement

It was a technical and detailed process that required the right tools and materials, but the end result was well worth the effort.

So, if you’re considering converting your bike, don’t hesitate to give it a try – you won’t be disappointed.

Continue Reading

Electric Bike

How To Turn Your Bike Into An Electric Generator

Published

on

By

An image of a bicycle with a modified rear wheel, equipped with a compact electric motor

I’m here to reveal how you can turn your regular bicycle into an amazing electric generator, just like a pedal-powered dynamo.

In this technical guide, we’ll delve into the intricacies of harnessing human power to produce electricity.

With a step-by-step approach, we’ll explore the tools, materials, and techniques needed to successfully convert your bike into a reliable source of energy.

So, fasten your helmet, grab your wrench, and let’s embark on this electrifying journey together.

Key Takeaways

  • Regularly clean the generator to remove dust and debris.
  • Check and recharge the battery as needed.
  • Lubricate moving parts to reduce friction.
  • Inspect tires, brakes, and other components for good condition.

Understanding the Basics of Bike-Powered Generators

Advertisement

Now you’re going to learn the basics of how to turn your bike into an electric generator. Bike-powered generators are a great way to generate electricity using human power.

One of the main applications of bike-powered generators is bike-powered lighting. With a bike-powered generator, you can power up your lights by simply pedaling your bike. This is a fantastic alternative to conventional lighting methods, especially in areas where electricity is scarce or during outdoor activities such as camping.

There are several advantages of bike-powered generators, including their portability, low cost, and environmental friendliness. By converting your bike into an electric generator, you not only generate electricity but also get a good workout.

To get started, you’ll need to gather the necessary tools and materials for the project.

Gather the Necessary Tools and Materials

First, gather all the tools and materials you’ll need for this project. To turn your bike into an electric generator, you will need a few specific tools. These include a wrench set, screwdrivers, pliers, wire strippers, and a multimeter to test electrical connections.

Advertisement

Additionally, you will require some essential materials such as a generator hub, a 12-volt DC motor, a bike stand or trainer, a battery, a voltage regulator, and various electrical connectors and wires.

It is crucial to ensure that you have all the necessary tools and materials before starting the project to prevent any delays or complications. Once you have gathered everything, you can move on to choosing the right bike for your generator project, taking into consideration factors like frame strength and stability.

Choose the Right Bike for Your Generator Project

When choosing the appropriate bicycle for your generator project, consider factors such as frame strength and stability. Here are four key considerations to keep in mind:

Advertisement
  1. Electric Bike Compatibility: Ensure that your bike is compatible with an electric bike conversion kit. This will make the process of turning it into an electric generator much easier and more efficient.

  2. Frame Material: Opt for a bike with a sturdy frame made of materials like steel or aluminum. These materials provide the necessary strength and stability to support the additional weight of the generator mechanism.

  3. Gear System: Look for a bike with a well-functioning gear system. This will allow you to adjust the resistance and speed of the generator, giving you more control over the generated electricity.

  4. Wheel Size: Consider the wheel size of the bike, as larger wheels tend to generate more power. However, keep in mind that larger wheels may also require more effort to pedal.

With these considerations in mind, you can select the right bike for your DIY generator project. Once you have the perfect bike, it’s time to move on to installing the generator mechanism onto your bike.

Install the Generator Mechanism onto Your Bike

To install the generator mechanism onto your bicycle, start by ensuring that the bike’s frame is sturdy and compatible with the electric conversion kit. This is crucial for a safe and efficient conversion process. Once you have confirmed compatibility, attach the generator to the rear wheel of your bike. Make sure it is securely fastened to prevent any wobbling or detachment during operation.

The benefits of using a bike powered generator for off-grid living are numerous. Not only does it provide a sustainable and renewable source of energy, but it also promotes physical fitness. To maximize energy output, maintain a steady pedaling rhythm and adjust the resistance level accordingly. Additionally, consider using high-quality batteries to store excess energy for later use.

With the generator mechanism successfully installed, it’s time to connect it to your devices and enjoy the power you have generated.

Connect the Generator to Your Device(s)

Advertisement

Now, it’s time for you to connect the generator to your devices and start enjoying the power you’ve generated.

To ensure a seamless charging experience, follow these steps:

  1. Determine your charging options: Assess the devices you wish to charge and their power requirements. Some common options include USB ports, DC power outlets, or AC power inverters.

  2. Connect your devices: Use the appropriate cables or adapters to connect your devices to the generator. Ensure a secure connection to avoid interruptions during the charging process.

  3. Manage the power: Consider using a power management system to regulate the charging process. This can help distribute the generated power efficiently and prevent overcharging or damaging your devices.

With your devices connected and power management in place, you are now ready to adjust the resistance and pedal to generate electricity. This will be discussed in the subsequent section.

Adjust the Resistance and Pedal to Generate Electricity

Adjusting the resistance and pedaling will allow you to generate electricity. By carefully manipulating these two variables, you can optimize the energy efficiency of your bike-turned-generator. There are several adjustment techniques you can employ to achieve maximum power output. First, adjust the resistance level on your generator to find the sweet spot where you can pedal comfortably while still generating a significant amount of electricity. This can be done using a 3×3 table to visually represent various resistance levels, pedal speed, and power output. Experiment with different combinations until you find the ideal setting that strikes a balance between effort and energy production. Additionally, pay attention to your pedaling technique. Maintaining a consistent and smooth pedal stroke will help maximize power generation. Once you have mastered the adjustment techniques, you can move on to the next step of monitoring and managing the power output without compromising your cycling experience.

Advertisement

Monitor and Manage the Power Output

Now that we have adjusted the resistance and pedal to generate electricity, it is important to monitor and manage the power output efficiently.

Power monitoring allows us to track the amount of electricity being produced by our bike-turned-generator. By keeping an eye on the power output, we can ensure that we are generating a consistent and optimal amount of electricity.

Additionally, energy management plays a crucial role in maximizing the efficiency of our electric generator. This involves finding the right balance between the power output and the energy consumed by the bike. By carefully managing the power output and energy consumption, we can ensure that our generator operates at its highest efficiency.

As we move into the next section about safety precautions and maintenance tips, it is essential to understand how to maintain and operate our electric generator safely.

Safety Precautions and Maintenance Tips

To ensure safe operation and proper maintenance, it is important to follow these safety precautions and maintenance tips.

Advertisement
  • Safety Measures:

  • Always wear protective gear, including a helmet and gloves, while operating the electric generator.

  • Keep the generator away from water or damp environments to prevent electrical shock.

  • Regularly inspect the bike’s wiring and connections for any signs of wear or damage.

  • Avoid overloading the generator by not exceeding its maximum power output capacity.

  • If any issues or abnormalities are noticed during operation, immediately turn off the generator and consult a professional.

  • Maintenance Tips:

  • Clean the generator regularly to remove dust and debris that can hinder its performance.

  • Check the battery level and recharge it as needed to maintain optimal power output.

  • Lubricate the moving parts of the generator to reduce friction and ensure smooth operation.

  • Periodically inspect the tires, brakes, and other bike components to ensure they are in good condition.

By following these maintenance tips and safety measures, you can ensure the safe and efficient operation of your electric generator. Now, let’s explore additional features and upgrades for your generator.

Explore Additional Features and Upgrades for Your Generator

You can enhance the capabilities of your electric generator by exploring additional features and upgrades. Here are some ideas to consider when looking to improve your bike-powered generator:

Feature/Upgrade Description Benefits
Adding a battery storage system Install a battery to store excess electricity generated Allows for power storage and use during low output
Exploring alternative power sources for the generator Incorporate solar panels or wind turbines Provides additional power sources for the generator

By adding a battery storage system, you can store excess electricity generated by your bike-powered generator. This allows you to use the stored power during periods of low output or when the bike is not in use. Additionally, exploring alternative power sources such as solar panels or wind turbines can provide additional sources of power for your generator. These upgrades expand the capabilities of your bike-powered generator, making it more versatile and reliable.

Now, let’s move on to the next section to learn about how to enjoy the benefits of bike-powered electricity.

Enjoy the Benefits of Bike-Powered Electricity

Experience the advantages of powering your devices with electricity generated by pedaling a bicycle. Bike-powered charging stations offer a sustainable and efficient alternative energy source for bikes.

Advertisement

Not only can you generate electricity while getting exercise, but you can also reduce your carbon footprint and save money on electricity bills. These charging stations typically consist of a stationary bike connected to a generator, which converts mechanical energy from pedaling into electrical energy.

The generated electricity can then be used to charge various devices such as smartphones, tablets, and even small appliances. By utilizing bike-powered electricity, you can have a reliable source of energy wherever you go, whether it’s during outdoor adventures, camping trips, or even in areas with limited access to power grids.

Embrace the benefits of bike-powered electricity and contribute to a greener and more sustainable future.

Frequently Asked Questions

Can I use any type of bike for this generator project?

Yes, the efficiency of generating electricity depends on the type of bike used. Certain types, like road bikes with lightweight frames and smooth tires, provide better efficiency compared to heavier and more rugged mountain bikes.

How much electricity can I generate with a bike-powered generator?

I’m amazed at how much electricity I can generate with my bike-powered generator! By calculating its energy efficiency, I found it produces a significant amount of power. I’m excited to explore its potential applications in various settings.

Advertisement

Can I connect multiple devices to the generator at the same time?

Yes, multiple devices can be connected to the generator, but there are power output limitations. The generator’s power output is determined by factors like the bike’s speed and the efficiency of the conversion system.

Is it possible to store the generated electricity for later use?

Yes, it is possible to store the electricity generated by a bike powered generator for later use. This opens up alternative uses for the stored electricity and hints at the future of energy storage with bike powered generators and their potential impact.

Are there any specific safety precautions I need to follow while using a bike-powered generator?

There are several safety tips to follow when using a bike-powered generator. Some common mistakes include not wearing protective gear, overloading the generator, and not properly securing the bike.

Conclusion

In conclusion, turning your bike into an electric generator is a fascinating and practical project that allows you to harness your own physical energy to generate electricity. By following the steps outlined in this article, you can create a sustainable and eco-friendly power source for your devices.

Did you know that a typical bike-powered generator can produce around 100 watts of electricity? This means that with just an hour of pedaling, you could charge your phone for up to 10 hours!

Advertisement

So, why not give it a try and experience the benefits of bike-powered electricity for yourself?

Continue Reading
Advertisement

Affiliate disclaimer

As an affiliate, we may earn a commission from qualifying purchases. We get commissions for purchases made through links on this website from Amazon and other third parties.

About us

We are a passionate team driven by the belief that cycling is a fantastic and accessible way to stay active while enjoying the beauty of the outdoors. Our mission is to share our love for cycling with as many people as possible. We provide a welcoming environment for individuals of all ages, abilities, and backgrounds to come together and ride bikes. With Ralf’s visionary leadership, Zane’s expertise in cycling adventures, and Olivia’s dedication to community building, we strive to create a vibrant space where everyone can experience the joy of cycling. Through group rides, workshops, and inclusive events, we inspire and empower individuals to embrace an active lifestyle. Join us in our quest to pedal together, embrace the joy of cycling, and foster connections that last a lifetime.

Advertisement

Trending