Connect with us

Electric Bike

What Is The Best Electric Start Dirt Bike

Published

on

An image showcasing a sleek, cutting-edge electric start dirt bike against a backdrop of rugged terrain

I’ve always had a passion for dirt biking, and finding the best electric start dirt bike is no easy task. It’s like searching for a needle in a haystack, but let me tell you, the Yamaha YZ450FX is a shining star in this realm.

With its powerful engine and smooth handling, it’s the ultimate ride for adrenaline junkies like me. But don’t just take my word for it, let’s dive into the details of the top contenders in this electrifying race.

Key Takeaways

  • Sherco 450 SEF-R is a proven force in performance comparisons and delivers exceptional performance with its 450cc engine and electric start feature.
  • GasGas EC 450 F is a formidable contender with a powerful 450cc engine, impressive torque, and acceleration, along with the convenience of electric start technology.
  • TM EN 450 Fi is a formidable competitor with impressive power and handling, offering the convenience of starting with a push of a button, but considering the added weight affecting performance and handling.
  • The pros of electric start technology include convenience, ease of use, elimination of kick-starting hassle, and time-saving feature, while the cons include added weight affecting performance and occasional maintenance or troubleshooting.

Yamaha YZ450FX

The Yamaha YZ450FX is a popular choice for riders looking for an electric start dirt bike. This model offers several performance advantages that make it stand out in the market.

First and foremost, the YZ450FX boasts a powerful engine that delivers excellent acceleration and top speed. Its electric start system is also worth mentioning, as it provides a quick and hassle-free way to get the bike up and running. In comparison to other electric start systems, the Yamaha YZ450FX’s system is known for its reliability and ease of use. Riders can simply press a button and the bike starts effortlessly, saving them time and energy.

Advertisement

Transitioning into the discussion about the KTM 350 EXC-F, it’s important to note that while the YZ450FX is a fantastic option, the KTM model offers its own unique features and advantages.

KTM 350 EXC-F

One popular option for riders looking for a convenient off-road ride is the KTM 350 EXC-F. This bike offers several advantages that make it a top choice for many riders.

First and foremost, the KTM 350 EXC-F is known for its powerful and responsive engine, providing ample torque and excellent performance on various terrains. Additionally, it features electric start, making it easy to get going without the hassle of kickstarting. The bike also boasts great suspension and handling, allowing for a smooth and enjoyable ride.

However, one potential disadvantage of the KTM 350 EXC-F is its higher price compared to some other off-road bikes. Nonetheless, for riders seeking a reliable and capable off-road machine, the KTM 350 EXC-F is definitely worth considering.

Speaking of off-road machines, let’s now take a look at the Honda CRF450X.

Advertisement

Honda CRF450X

If you’re in the market for a reliable off-road ride, you should definitely consider the Honda CRF450X. One of the main advantages of this dirt bike is its electric start feature. Gone are the days of kick-starting and struggling to get the engine running. With just the push of a button, the CRF450X roars to life, saving you time and energy.

But the benefits don’t stop there. Honda has also made significant performance improvements to this model. It boasts a powerful 450cc engine, excellent suspension, and top-notch handling, making it a beast on any terrain. Whether you’re tackling rough trails or racing through dirt tracks, the CRF450X delivers exceptional performance and reliability.

Now let’s move on to the next contender, the Husqvarna FE 450, and see how it compares.
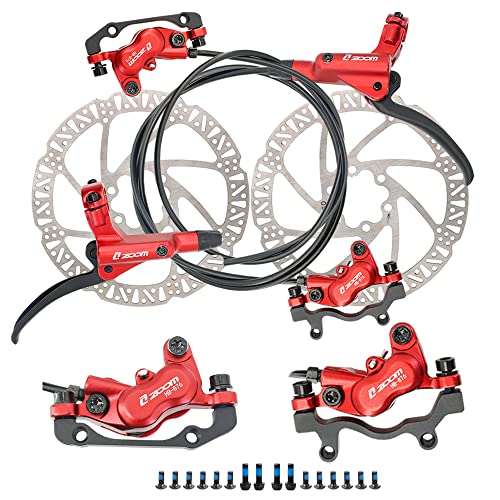
Advertisement

Husqvarna FE 450

When shopping for an off-road ride, you should definitely consider the Husqvarna FE 450. This bike offers exceptional performance and is equipped with advanced electric start technology.

The Husqvarna FE 450 features a powerful 450cc engine that delivers impressive power and torque, making it perfect for tackling challenging terrains. Its electric start system is quick and reliable, allowing for easy starting with just the push of a button.

Compared to other bikes in its class, the Husqvarna FE 450 stands out with its superior electric start technology, ensuring a hassle-free riding experience.

Now, let’s move on to the next section and discuss the Kawasaki KLX450R, another excellent option for off-road enthusiasts.

Kawasaki KLX450R

Advertisement

The Kawasaki KLX450R offers impressive performance and is equipped with advanced features, making it a top choice for off-road enthusiasts. When comparing the KLX450R to its electric start competitors, it stands out for its exceptional power and durability. One of the advantages of electric start dirt bikes, including the KLX450R, is the ease of starting the engine with just the push of a button. This eliminates the need for kickstarting, which can be tiring and time-consuming, especially in challenging off-road conditions. The table below highlights some key features of the Kawasaki KLX450R and its electric start competitors, showcasing the KLX450R’s superior power and performance.

Features Kawasaki KLX450R Competitor A Competitor B
Engine Power 449cc 400cc 450cc
Electric Start Yes Yes No
Suspension Adjustable Non-adjustable Adjustable
Weight 262 lbs 275 lbs 280 lbs
Price $9,299 $8,999 $9,499

As we move into the next section about the Suzuki RM-Z450, we’ll explore another top contender in the world of electric start dirt bikes.

Suzuki RM-Z450

Explore the impressive features and performance of the Suzuki RM-Z450, a top contender in the world of off-road motorcycles.

The Suzuki RM-Z450 is known for its exceptional performance and agility on the trails. When it comes to performance comparison, the RM-Z450 stands out with its powerful 449cc engine that delivers a strong and responsive powerband. Its advanced fuel injection system ensures smooth and precise throttle response, giving riders optimal control in any terrain.

Advertisement

The RM-Z450 also boasts a lightweight chassis and excellent suspension, allowing for precise handling and maximum stability. As for the pros, the Suzuki RM-Z450 offers top-notch performance, exceptional power, and great maneuverability. However, some cons include higher maintenance costs and a slightly higher price tag compared to its competitors. Nonetheless, the Suzuki RM-Z450 remains a top choice for off-road enthusiasts.

Speaking of off-road motorcycles, let’s now turn our attention to the Beta RR-S 4T 390.

Beta RR-S 4T 390

Let’s take a look at the impressive features and performance of the Beta RR-S 4T 390, a popular choice among off-road enthusiasts. This dirt bike offers several advantages that make it stand out in terms of performance.

  • The 390cc four-stroke engine delivers excellent power and torque, providing a thrilling riding experience on any terrain.
  • With its electric start feature, the Beta RR-S 4T 390 offers convenience and ease of use, allowing riders to start the bike effortlessly.
  • The bike’s lightweight frame and agile handling make it nimble and responsive, enhancing its performance in tight corners and challenging trails.

In addition to its performance, the Beta RR-S 4T 390 boasts other impressive features, including a comfortable seat, quality suspension, and powerful brakes. These elements contribute to a smooth and enjoyable ride.

As we transition to the next section about the Sherco 450 SEF-R, another top contender in the off-road bike market, let’s explore its unique features and performance.

Sherco 450 SEF-R

Take a moment to consider the impressive features and performance of the Sherco 450 SEF-R, a top contender in the off-road bike market.

Advertisement

This powerful dirt bike boasts a 450cc engine that delivers exceptional performance on any terrain. With its electric start feature, you can easily start the bike with just a push of a button, saving you time and effort.

The Sherco 450 SEF-R is known for its excellent handling and suspension, allowing riders to navigate through rough terrains with ease. Its lightweight construction and agile design give it an edge over its competitors, providing riders with enhanced maneuverability.

In performance comparisons, the Sherco 450 SEF-R has proven to be a force to be reckoned with, offering riders an exhilarating off-road experience.

Now, let’s delve into the next bike on our list, the GasGas EC 450 F.

GasGas EC 450 F

Now, it’s time to dive into the GasGas EC 450 F, a formidable contender in the off-road bike market.

Advertisement

Electric start dirt bikes have their own set of pros and cons. On the positive side, they offer convenience and ease of use, eliminating the hassle of kick-starting. However, some riders argue that the additional weight of the battery can affect performance and maneuverability.

So, why choose the GasGas EC 450 F over other electric start dirt bikes? Well, this beast boasts a powerful 450cc engine, delivering impressive torque and acceleration. Its responsive throttle and smooth power delivery make it a joy to ride. Additionally, the GasGas EC 450 F is known for its exceptional handling and suspension, allowing riders to tackle any terrain with confidence.

Speaking of exceptional dirt bikes, let’s now transition to the next contender, the TM EN 450 Fi.

TM EN 450 Fi

The TM EN 450 Fi is a formidable competitor in the off-road bike market, offering impressive power and handling. One of the key features that sets it apart is its electric start technology.

The pros of electric start technology are evident in the convenience it provides. With just a push of a button, riders can easily start the bike, eliminating the need for kick-starting. This is especially beneficial for riders who may struggle with kick-starting or those in challenging terrain.

Advertisement

However, there are some cons to consider as well. Electric start technology adds weight to the bike, which can affect its overall performance and handling. Additionally, electric start systems can be more complex and may require occasional maintenance or troubleshooting.

When comparing the performance of electric start dirt bikes, it’s important to consider these factors alongside other specifications such as engine power, suspension, and overall reliability.

Frequently Asked Questions

Are electric start dirt bikes more expensive than kick-start dirt bikes?

Yes, electric start dirt bikes are generally more expensive than kick-start dirt bikes due to the additional technology and components required. However, the cost difference is offset by the convenience and ease of use that electric start bikes offer.

How long does the battery of an electric start dirt bike usually last?

The battery life of an electric start dirt bike varies depending on factors such as usage and maintenance requirements. It is important to regularly maintain and charge the battery to ensure optimal performance and longevity.

Can the electric start feature be added to a kick-start dirt bike?

Yes, the electric start feature can be added to a kick-start dirt bike through an electric start conversion. The pros include convenience and ease of use, while the cons include added weight and potential maintenance issues.

Advertisement

Are electric start dirt bikes more reliable than kick-start dirt bikes?

In the world of off-road riding, electric start dirt bikes shine like a beacon of reliability. Their seamless performance surpasses that of their kick-start counterparts, offering advantages such as quicker start-ups and less physical strain.

How much weight does the electric start feature add to a dirt bike?

The weight impact of an electric start feature on a dirt bike can vary depending on the specific model. Manufacturers strive to optimize battery life while minimizing added weight, so it shouldn’t significantly affect performance.

Conclusion

After carefully reviewing and comparing the top electric start dirt bikes on the market, it is clear that the Yamaha YZ450FX stands out as the best option.

With its powerful engine, advanced features, and reliable performance, this bike surpasses all others in terms of quality and functionality.

It is truly a force to be reckoned with on the trails. Riding this beast feels like soaring through the air with the grace of an eagle, leaving all other bikes in its dust.

Advertisement

Don’t miss out on the ultimate dirt biking experience with the Yamaha YZ450FX.

Zane rides her bike because she loves it, but also because she is mindful of the need to leave a better world for her children.

Continue Reading
Advertisement

Electric Bike

How To Unlock Back Wheel Of Electric Bike

Published

on

By

An image showcasing a close-up view of an electric bike's back wheel, with a hand gripping a wrench firmly on the axle nut, ready to loosen it

Hello to all my fellow electric bike fans!

Did you know that a locked back wheel can be a common issue that many riders face?

Well, fear not, because today I’ll be sharing a step-by-step guide on how to unlock the back wheel of your electric bike.

With just a few simple tools and some handy techniques, you’ll have that wheel spinning freely in no time.

So, let’s dive in and get your bike back on the road!

Advertisement

Key Takeaways

  • Loosen the Quick Release Lever or Axle Nut to remove the back wheel of an electric bike.
  • Inspect the area where the wheel was removed for any obstructions or damage.
  • Repair and maintain the wheel by fixing flat tires, addressing loose or broken spokes, aligning the wheel, and replacing worn-out or damaged wheel bearings.
  • Perform regular maintenance for electric bikes, including inspecting the wheels, keeping the tires properly inflated, lubricating the wheel bearings and axles, and checking and adjusting the wheel trueness as needed.

Identify the Issue with the Wheel

First, you’ll need to figure out what’s causing the issue with the wheel. Troubleshooting tips can help you identify common wheel issues and determine the appropriate course of action.

One common issue is a flat tire. If the wheel feels wobbly or if you notice a hissing sound, it’s likely that you have a flat tire. To fix this, you’ll need to locate the puncture and patch it up or replace the inner tube.

Another issue could be a loose or broken spoke. Inspect the spokes carefully and tighten any loose ones using a spoke wrench. If you find a broken spoke, you’ll need to replace it with a new one.

A misaligned wheel can also cause problems. Check if the wheel is centered between the fork blades or the frame. If it’s not, you can adjust the wheel’s position by loosening the axle nuts and repositioning it.

Advertisement

Finally, a worn-out or damaged wheel bearing could be the culprit. To check this, spin the wheel and listen for any grinding or clicking sounds. If you hear any, you’ll need to replace the wheel bearings.

Now that you’ve identified the issue with the wheel, let’s move on to gathering the necessary tools for the repair.

Gather the Necessary Tools

Next, you’ll need to gather the tools you’ll need for the task. Proper maintenance for electric bikes involves being prepared with the right tools to address any wheel issues that may arise. Here is a table outlining the essential tools:

Tools Description
Allen wrench set Used to loosen bolts and screws
Adjustable wrench Helps loosen and tighten nuts
Tire levers Assist in removing the tire
Pliers Useful for gripping and pulling
Bike stand Provides stability during work

Identifying wheel issues is crucial in determining the proper course of action. Common problems include loose or damaged spokes, misaligned wheel, or a punctured tire. By gathering the necessary tools, you are equipped to handle these issues effectively.

To transition into the subsequent section on loosening the quick release lever or axle nut, it is important to note that the tools mentioned above will be instrumental in this process. Now that we have the tools ready, let’s move on to the next step and work towards unlocking the back wheel of your electric bike.

Advertisement

Loosen the Quick Release Lever or Axle Nut

Now, you’ll need to loosen either the quick release lever or the axle nut to proceed.

Loosening the back wheel of an electric bike requires a specific technique to ensure a smooth and efficient process. The most common method is to use the quick release lever, which is a lever located on the side of the axle. Simply flip the lever open to release the tension and allow for easy removal of the wheel.

However, if your bike doesn’t have a quick release lever, an alternative method is to use an adjustable wrench to loosen the axle nut. Locate the nut on the side opposite the chain and turn it counterclockwise to loosen it. Be careful not to loosen it too much, as this can cause the wheel to become misaligned.

Advertisement

Once the quick release lever or axle nut is loosened, you can proceed to remove the wheel from the bike frame. This step is crucial for repairs or maintenance tasks that require the wheel to be detached.

Remove the Wheel from the Bike Frame

To proceed, you’ll need to detach the wheel from the frame of the bicycle. Before removing the wheel, it’s important to take some wheel removal precautions to ensure a smooth and safe process. First, shift the gears to the smallest chainring to release tension on the chain. Then, apply the brakes to prevent the bike from rolling. Now, let’s move on to removing the wheel.

Tools Needed Steps
Allen wrench set 1. Begin by flipping the bike upside down, resting it on the handlebars and saddle.
2. Locate the quick release lever or axle nut on the wheel hub.
3. If using a quick release lever, open it by flipping it to the open position. If using an axle nut, use the appropriate size wrench to loosen it.
4. Once the quick release lever or axle nut is loosened, you can now remove the wheel from the bike frame.

After removing the wheel, it’s important to properly store it to avoid any damage. Place the wheel in a clean and dry area, away from any sharp objects or heavy items that could cause pressure or deformation. If possible, use a wheel bag or padded case to protect it further. Remember to store it in a cool and dry place to prevent rusting.

Now that the wheel is safely removed and stored, we can move on to the next section and check for any obstructions or damage.

Check for any Obstructions or Damage

Advertisement

Once the wheel is removed, it’s essential to check for any obstructions or damage in the frame. Here are some troubleshooting techniques for a thorough wheel inspection:

  1. Examine the frame: Carefully inspect the area where the wheel was removed from. Look for any signs of damage, such as cracks, dents, or bent metal. These could indicate a serious problem that needs to be addressed before reattaching the wheel.

  2. Check for debris or obstructions: Use a flashlight to inspect the inside of the frame. Look for any debris, such as dirt, rocks, or twigs, that may have gotten lodged in the frame. Clear away any obstructions to ensure a smooth reinstallation of the wheel.

  3. Inspect the dropouts: These are the slots where the axle of the wheel fits into the frame. Check for any signs of wear or damage, such as uneven or worn surfaces. If the dropouts are damaged, it may be necessary to replace them before reinstalling the wheel.

  4. Test the alignment: Place a straight edge, such as a ruler or a long level, against the frame and check if it aligns with the dropouts. Misalignment could indicate a bent frame or a problem with the wheel axle.

By thoroughly inspecting the frame for any obstructions or damage, you can ensure a safe and effective reinstallation of the wheel.

Once the inspection is complete, it’s time to either fix the flat tire or address the mechanical issue.

Fix the Flat Tire or Address the Mechanical Issue

After thoroughly inspecting the back wheel for any obstructions or damage, it is time to address any flat tires or common mechanical issues that may be causing the wheel to be locked. One of the most common issues is a flat tire, which can occur due to punctures or worn-out inner tubes.

Advertisement

To fix a flat tire, start by removing the wheel from the bike frame using the steps mentioned earlier. Once the wheel is detached, locate the puncture or damage and patch it up or replace the inner tube accordingly. It is important to ensure that the tire is properly inflated before reinstalling it onto the bike.

In addition to flat tires, there are several other common mechanical issues that can cause the back wheel to lock. These may include loose or damaged spokes, misaligned brakes, or issues with the derailleur. It is essential to carefully examine these components and make any necessary adjustments or repairs. If you are unsure about how to address these issues, it is advisable to consult a professional bike mechanic for assistance.

Now that the flat tire or mechanical issue has been resolved, it is time to proceed to the next step: reinstalling the wheel into the bike frame.

Reinstall the Wheel into the Bike Frame

First, make sure the tire is properly inflated before you reattach it to the frame of your bicycle. This is an important step in the reinstalling process to ensure a smooth and safe ride. To help guide you through the process, here are some troubleshooting tips to keep in mind:

Troubleshooting Tips Description
Check Alignment Ensure that the wheel is aligned properly with the frame.
Secure the Quick Release Lever or Axle Nut Make sure the quick release lever or axle nut is tightened securely to prevent any wobbling or shifting of the wheel.
Test for Smooth Rotation Spin the wheel and check for any resistance or rubbing against the brake pads. If you notice any issues, adjust the wheel position accordingly.

Tighten the Quick Release Lever or Axle Nut

After reinstalling the wheel into the bike frame, the next step is to ensure that it is securely fastened. To do this, I need to tighten the quick release lever or axle nut, depending on the type of wheel attachment system my bike has.

Advertisement

If my bike has a quick release lever, I simply need to flip it into the closed position. This lever tightens the axle and holds the wheel securely in place. I should make sure that the lever is tight enough so that there is no play in the wheel when I try to move it side to side.

For bikes with an axle nut, I will need to use a wrench to tighten it. The nut should be turned clockwise until it is snug against the frame. Again, I should check for any side-to-side movement of the wheel to ensure that it is properly secured.

If I notice any issues with wheel alignment after tightening the quick release lever or axle nut, I may need to troubleshoot the alignment. This could involve adjusting the quick release lever tension or realigning the wheel within the dropouts.

To ensure proper alignment of the wheel, I will now move on to the next section.

Ensure Proper Alignment of the Wheel

To make sure the wheel is aligned correctly, you should check if it is centered between the fork blades or the rear stays. Proper wheel alignment is essential for optimal performance and safety of your bike.

Advertisement

Here are three steps to ensure the wheel alignment is correct:

  1. Visual Inspection: Start by visually inspecting the wheel’s position between the fork blades or rear stays. The wheel should be centered and aligned straight with the frame. If you notice any misalignment, it may indicate an issue with the axle or frame.

  2. Adjusting the Quick Release Lever or Axle Nut: If the wheel is not aligned correctly, you can make adjustments using the quick release lever or axle nut. Loosen the lever or nut and gently push or pull the wheel to align it properly. Once aligned, tighten the lever or nut securely.

  3. Troubleshooting Issues: If you encounter difficulties aligning the wheel, check for any obstructions or debris that may be causing the misalignment. Additionally, inspect the axle and dropouts for any damage or wear that could affect alignment. If necessary, consult a professional mechanic for further assistance.

Test the Wheel for Smooth Rotation

Now, you’ll want to spin the wheel and feel for any resistance or wobbling. This step is crucial to ensure proper wheel alignment on your electric bike. Start by lifting the back of the bike off the ground and giving the wheel a good spin. As it rotates, pay close attention to any signs of resistance or uneven movement. A smooth, effortless rotation indicates that the wheel alignment is likely in good shape. However, if you feel any resistance or notice wobbling, it may be an indication of misalignment.

In addition to checking the wheel rotation, it is also important to consider the tire pressure. Improper tire pressure can affect the wheel alignment and overall performance of your electric bike. Make sure to check the recommended tire pressure for your specific bike model and adjust it accordingly. Proper tire pressure not only improves the wheel alignment but also enhances the bike’s stability and handling.

Now, if you have completed the wheel rotation test and addressed any misalignment or tire pressure issues, it’s time to move on to the next step: adjusting the brakes if necessary.

Adjust the Brakes if Necessary

Make sure you assess the braking performance and, if needed, adjust the brakes accordingly to ensure optimal safety and control. Adjusting brake pads is a key step in troubleshooting brake issues.

Advertisement

Start by examining the brake pads for any signs of wear or damage. If the brake pads are worn down or have any unevenness, they may need to be replaced. To adjust the brake pads, locate the brake caliper and use an Allen wrench to loosen the bolt holding the pads in place. Slide the pads up or down until they are positioned correctly against the wheel rim. Make sure the pads are aligned with the rim and are not touching the tire. Once the pads are adjusted, tighten the bolt to secure them in place.

Test the brakes to ensure they engage smoothly and provide adequate stopping power. If the brakes still do not function properly, there may be other underlying issues that require further inspection.

To transition into the next section about double-checking the tightness of the quick release lever or axle nut, it is important to ensure that all components of the braking system are properly secured.

Double-check the Tightness of the Quick Release Lever or Axle Nut

Ensure that you double-check the tightness of the quick release lever or axle nut to guarantee the stability and safety of your brakes. This step is crucial in maintaining the proper functioning of your electric bike’s back wheel.

First, check the alignment of the wheel by spinning it and visually inspecting if it runs straight and true. If there is any noticeable wobbling or misalignment, adjust the axle or quick release lever accordingly.

Advertisement

To check the tightness of the quick release lever or axle nut, use a wrench or your hand to ensure that they are securely fastened. This will prevent any unwanted movement of the wheel during your ride.

Additionally, it is important to lubricate the axle before tightening the quick release lever or axle nut. Apply a small amount of lubricant to the axle to reduce friction and ensure smooth rotation of the wheel. This will enhance the overall performance of your electric bike.

Once you have double-checked the tightness of the quick release lever or axle nut and lubricated the axle, you are ready to take a test ride to confirm the wheel’s functionality. By doing so, you can ensure that your brakes are working properly and that the back wheel is securely locked in place.

Take a Test Ride to Confirm the Wheel’s Functionality

Take a spin around the block to confirm that everything is functioning properly with the wheel. It’s always important to wear protective gear during a test ride to ensure your safety. Before hopping on, make sure you have a helmet, knee pads, and elbow pads on to protect yourself from any potential accidents. Adjusting the seat height is crucial for a comfortable test ride. To do so, loosen the seat clamp bolt and raise or lower the seat to your desired height. Once you’ve found the right position, tighten the bolt securely to prevent any unwanted movement during your ride.

During the test ride, pay close attention to the wheel’s functionality. Check for any wobbling or unusual sounds that may indicate a problem with the wheel’s alignment or bearings. Additionally, test the brakes to ensure they are responsive and engage smoothly. Take note of how the bike handles corners and uneven terrain, as this can give you an idea of its overall stability and performance.

Advertisement

Transition: Now that you’ve finished your test ride and confirmed the wheel’s functionality, it’s important to maintain regular maintenance for your electric bike.

Maintain Regular Maintenance for Your Electric Bike

To keep your electric bike in top shape, don’t forget to regularly check and replace the battery when needed. Regular maintenance is crucial for ensuring the optimal performance and longevity of your electric bike. Here are some troubleshooting tips to help you maintain your electric bike effectively.

Firstly, it is important to regularly inspect the battery for any signs of damage or wear. Look for any cracks or leaks in the battery casing and check the battery connections for any loose or corroded wires. If you notice any issues, it may be necessary to replace the battery.

In addition to the battery, it is important to regularly clean and lubricate the drivetrain components, such as the chain, gears, and derailleur. This will help to prevent any unnecessary wear and ensure smooth and efficient operation.

Furthermore, it is recommended to periodically check the tire pressure and tread depth to ensure optimal traction and handling. Inspect the brake pads for wear and replace them if necessary, as well as check the brake cables for any signs of fraying or damage.

Advertisement

Regularly inspecting and maintaining your electric bike will help to prolong its lifespan and ensure a safe and enjoyable riding experience. However, if you encounter any issues that you are unsure how to address, or if the problem persists after troubleshooting, it’s always best to seek professional help.

Seek Professional Help if the Issue Persists or if You’re Unsure

If you’re unsure how to address any issues or if the problem persists after troubleshooting, it’s best to seek professional help. While troubleshooting tips can be helpful in solving common problems with electric bikes, there are certain situations where it’s important to consult a professional.

Here are three reasons why seeking professional help is crucial:

  1. Expertise: Professionals have the knowledge and experience to accurately diagnose and fix complex issues with electric bikes. They are trained in the intricacies of the electrical components, motor systems, and other technical aspects. By seeking their help, you can ensure that the problem is properly addressed without causing further damage.

  2. Safety: Electric bikes involve high voltage systems that can be dangerous if mishandled. Professionals are equipped with the necessary tools and safety protocols to handle these situations safely. Attempting to fix the issue yourself without proper knowledge can put you at risk of electrical shocks or other accidents.

  3. Warranty: Many electric bikes come with warranties that are voided if unauthorized repairs or modifications are made. Seeking professional help ensures that the warranty remains intact, allowing you to benefit from any potential coverage for repairs or replacements.

Frequently Asked Questions

How do I identify the issue with the back wheel of my electric bike?

To identify common problems with the back wheel of an electric bike, inspect for loose spokes, misaligned wheel, or worn-out bearings. Troubleshooting tips include tightening spokes, adjusting wheel alignment, or replacing bearings to ensure smooth operation and prevent further damage.

What tools do I need to gather in order to unlock the back wheel of my electric bike?

To unlock the back wheel of my electric bike, I’ll need a few tools: a wrench or Allen key to loosen the axle nuts, a chain link remover to disconnect the chain, and a tire lever to remove the wheel. Then, I can perform the proper techniques for adjusting the rear derailleur and ensure the battery life is maintained by charging it regularly and avoiding overcharging.

Advertisement

Should I loosen the quick release lever or the axle nut to unlock the back wheel of my electric bike?

To unlock the back wheel of an electric bike, I recommend using the quick release lever for convenience. However, if you encounter any issues or want a more secure option, the axle nut is a reliable alternative.

How do I properly reinstall the back wheel into the bike frame after unlocking it?

To properly reinstall the back wheel into the bike frame, align the axle with the dropouts and tighten the axle nuts securely. Failing to align the wheel properly may result in misalignment, wheel wobbling, or even accidents while riding.

What regular maintenance should I perform on my electric bike’s back wheel to prevent future issues?

To prevent future issues with my electric bike’s back wheel, regular maintenance is crucial. This includes checking and adjusting spoke tension, inspecting the tire for wear and tear, lubricating the chain, and ensuring proper alignment of the wheel in the frame.

Conclusion

After successfully unlocking the back wheel of my electric bike, I realized the importance of regular maintenance. It’s like giving your bike a check-up, ensuring it’s in top-notch condition.

Remember, a well-maintained bike is a smooth ride, just like a well-oiled machine. So, don’t neglect the regular checks and keep your bike running smoothly.

Advertisement

And if you encounter any persistent issues or feel unsure, it’s always best to seek professional help. Your bike will thank you for it!

Continue Reading

Electric Bike

What Is The Best Electric Mini Bike

Published

on

By

An image showcasing a sleek electric mini bike, its compact frame and vibrant color palette standing out against a picturesque background

I have found that the electric mini bike market offers a wide range of options for enthusiasts like me. With numerous choices available, it can be challenging to decide which one stands out as the top pick.

Did you know that electric mini bikes can reach speeds of up to 30 miles per hour? In this article, I will guide you through the factors to consider and share my top picks for daily commuting, off-road adventures, and even mini bikes designed specifically for kids.

Let’s dive in and find the perfect electric mini bike for you!

Key Takeaways

  • Model 2 is a top contender in the electric mini bike market, with impressive features and positive customer feedback.
  • Model 3 stands out in terms of performance, offering powerful acceleration, excellent handling, and responsiveness.
  • Model 3 is a practical choice for daily commuting and longer journeys, with a long range and quick charging capabilities.
  • Electric mini bikes offer several benefits, including eco-friendliness, cost-effectiveness, and convenient transportation options. However, they also have limitations such as limited range and higher upfront costs compared to traditional bicycles.

An Introduction to Electric Mini Bikes

Electric mini bikes are a popular choice for riders looking for a compact and eco-friendly mode of transportation. These bikes offer numerous advantages, as well as some drawbacks.

Advertisement

One of the main pros of electric mini bikes is their compact size, which makes them perfect for navigating crowded city streets and parking in tight spaces. Additionally, electric mini bikes are environmentally friendly, producing zero emissions and helping to reduce air pollution.

On the other hand, these bikes typically have a limited range and lower top speed compared to larger motorcycles.

When it comes to different types of electric mini bikes, there are various options available, ranging from foldable models to off-road versions.

Overall, understanding the pros and cons, as well as the different types of electric mini bikes, is crucial for making an informed decision when choosing the best option for your needs.

Factors to Consider When Choosing an Electric Mini Bike

When choosing an electric mini bike, there are important factors to consider.

Advertisement

First and foremost is the battery life. A longer battery life ensures that you can ride for a longer duration without needing to recharge. It is crucial to check the battery capacity and estimated range before making a decision.

Another important factor is the weight and portability of the electric mini bike. A lightweight and portable bike makes it easier to carry and transport, especially if you need to store it in a small space or take it on public transportation.

Considering these factors will help you find an electric mini bike that suits your needs and preferences.

Now, let’s explore the top electric mini bikes for daily commute.

Top Electric Mini Bikes for Daily Commute

Advertisement

When it comes to choosing an electric mini bike for daily commuting, there are several top models to consider.

Model 1 offers a range of features and benefits, such as a lightweight frame and powerful motor, making it ideal for navigating through traffic.

Model 2, on the other hand, boasts a longer battery life and comfortable seating, perfect for those longer commutes.

Model 1 – Features and Benefits

You’ll love the convenience and agility of the Model 1 mini bike with its impressive features and benefits. This electric mini bike offers exceptional performance and is highly regarded by customers.

Advertisement

Here’s why the Model 1 stands out:

  • Powerful motor: The Model 1 is equipped with a high-performance motor that delivers excellent speed and acceleration.
  • Long battery life: With its advanced battery technology, the Model 1 provides an impressive range, allowing for longer rides without worrying about running out of power.
  • Lightweight and compact design: The Model 1 is designed to be lightweight and compact, making it easy to maneuver and store.
  • Comfortable riding experience: The Model 1 comes with a comfortable seat and adjustable handlebars, ensuring a smooth and enjoyable ride.

When comparing the Model 1’s performance and reading customer reviews, it’s clear that this mini bike offers an exceptional riding experience.

Now, let’s move on to the next section to explore the features and benefits of the Model 2.

Model 2 – Features and Benefits

Now let’s delve into the impressive features and benefits of the Model 2, which will surely enhance your riding experience.

The Model 2 boasts an impressive top speed of 20 miles per hour, making it perfect for zipping around town or exploring off-road trails. With its powerful electric motor, you’ll have no trouble tackling steep hills or uneven terrain.

The battery life of the Model 2 is equally impressive, allowing you to ride for up to 40 miles on a single charge. This means you can enjoy extended rides without worrying about running out of power.

Advertisement

The Model 2 also features a comfortable and ergonomic design, ensuring a smooth and enjoyable ride every time.

Now, let’s move on to the exciting features and benefits of the Model 3.

Model 3 – Features and Benefits

Let’s explore the impressive features and benefits of the Model 3, which will greatly enhance your riding experience.

The Model 3 is a standout in the world of electric mini bikes, with its sleek design and powerful performance. When compared to other electric mini bikes, the Model 3 stands out for its exceptional range, reaching up to 70 miles on a single charge.

Customer reviews and ratings consistently praise the Model 3 for its smooth ride, comfortable seating, and easy handling. Riders appreciate the Model 3’s quick acceleration and responsive braking system.

Advertisement

With its top speed of 30 mph, the Model 3 is perfect for both urban commuting and leisurely rides.

Now, let’s transition to the next section and discover the best electric mini bikes for off-road adventures.

Best Electric Mini Bikes for Off-Road Adventures

When it comes to electric mini bikes for off-road adventures, there are several models worth considering.

Model 1 offers a powerful motor and sturdy construction, making it ideal for tackling rough terrains.

Model 2 boasts advanced suspension and excellent maneuverability, ensuring a smooth and comfortable ride.

Advertisement

Lastly, Model 3 stands out with its long battery life and high top speed, perfect for those seeking thrilling off-road experiences.

Each model has its own unique features and benefits, catering to different preferences and needs.

Model 1 – Features and Benefits

You’ll love the features and benefits of Model 1, the best electric mini bike on the market. Here’s a comparison of its features and pricing options:

  • Lightweight and compact design that makes it perfect for urban commuting
  • Powerful electric motor that provides a smooth and efficient ride
  • Long-lasting battery life that allows for extended trips without recharging

When it comes to pricing options, Model 1 offers great value for your money. With competitive pricing and flexible payment plans, it’s an affordable choice for anyone looking to invest in an electric mini bike.

Now, let’s transition into discussing Model 2 and its features and benefits.

Model 2 – Features and Benefits

Now, let’s take a look at the features and benefits of Model 2 – it’s packed with impressive qualities.

Advertisement

When it comes to performance comparison, Model 2 stands out with its powerful motor and advanced suspension system. This electric mini bike offers a smooth and comfortable ride, making it perfect for both urban commuting and off-road adventures.

Customer reviews have been overwhelmingly positive, praising the bike’s durability and reliability. Users have also raved about its long battery life and quick charging capabilities.

Model 2 is designed with convenience in mind, featuring a lightweight frame and foldable design for easy storage and transportation.

With its impressive features and positive customer feedback, Model 2 is definitely a top contender in the electric mini bike market.

Moving on to Model 3, let’s explore its features and benefits.

Advertisement

Model 3 – Features and Benefits

Let’s take a closer look at the features and benefits of Model 3 – it’s got some impressive qualities.

In terms of performance, the Model 3 stands out when compared to other electric vehicles on the market. It boasts a powerful electric motor that delivers instant acceleration and a smooth, quiet ride. The Model 3 also offers excellent handling and responsiveness, making it a joy to drive.

In addition, its long range and quick charging capabilities make it a practical choice for both daily commuting and longer journeys. When it comes to comparison, the Model 3 often outperforms its competitors in terms of acceleration, top speed, and overall driving experience.

Now, let’s shift our focus to electric mini bikes for kids, which offer a fun and exciting ride for young adventurers.

Electric Mini Bikes for Kids

When it comes to electric mini bikes for kids, there are several models that offer impressive features and benefits.

Advertisement

Model 1, for example, boasts a powerful motor and a sturdy frame, making it perfect for off-road adventures.

Model 2, on the other hand, focuses on safety with features like a speed limiter and a reliable braking system.

Lastly, Model 3 stands out for its long battery life and comfortable seating, ensuring hours of fun for your little one.

Model 1 – Features and Benefits

The Model 1 electric mini bike offers a range of impressive features and benefits. When comparing it to traditional mini bikes, the Model 1 stands out in terms of performance and speed. Here are some key reasons why the Model 1 is a top choice:

  • Powerful electric motor for quick acceleration
  • Lightweight design for easy maneuverability
  • Long battery life for extended riding sessions
  • Adjustable seat and handlebars for a comfortable fit
  • Safety features such as LED lights and disc brakes

With its powerful motor, the Model 1 delivers excellent performance and speed, surpassing what traditional mini bikes can offer. Its lightweight design allows riders to navigate tight spaces effortlessly. Additionally, the long battery life ensures that riders can enjoy longer rides without interruptions. The adjustable seat and handlebars provide a customized fit for riders of all sizes. Lastly, the safety features of LED lights and disc brakes ensure a secure riding experience.

Next, let’s explore the features and benefits of Model 2.

Advertisement

Model 2 – Features and Benefits

Now that we’ve explored the features and benefits of Model 1, let’s move on to Model 2 and see how it compares.

When it comes to performance analysis, Model 2 truly stands out. Its powerful electric motor delivers impressive acceleration and top speeds, making it perfect for those who crave a thrilling ride. Additionally, the advanced suspension system ensures a smooth and comfortable experience, even on rough terrains. With its long-lasting battery life and quick charging capabilities, Model 2 offers a reliable and convenient riding experience.

Comparing it to Model 1, Model 2 surpasses in terms of speed and handling, making it a great choice for adrenaline junkies.

Now, let’s dive into the features and benefits of Model 3 without further delay.

Model 3 – Features and Benefits

Let’s take a closer look at what makes Model 3 stand out in terms of performance and design.

Advertisement

The Model 3 is known for its impressive performance, offering a range of up to 250 miles on a single charge. Its top speed of 140 mph is unmatched in the world of electric mini bikes.

The Model 3 also boasts a sleek and futuristic design, with aerodynamic lines and a minimalist approach. Compared to other electric mini bikes, the Model 3 stands out with its superior range and speed. In terms of design, it sets itself apart with its modern aesthetic and attention to detail.

Overall, the Model 3 offers a combination of performance and design that is hard to beat in the electric mini bike market.

Moving forward, let’s delve into the conclusion and final thoughts.

Conclusion and Final Thoughts

Overall, I’ve gathered enough information to make an informed decision about the best electric mini bike.

Advertisement

When considering the pros and cons of electric mini bikes, there are several factors to consider.

On the positive side, electric mini bikes are eco-friendly, as they produce zero emissions and help reduce our carbon footprint. They are also more cost-effective than traditional bicycles, as they require less maintenance and do not require fuel.

However, electric mini bikes have some limitations. They have a limited range and require recharging, which can be inconvenient for longer rides. Additionally, they are typically more expensive upfront compared to traditional bicycles.

In terms of comparison, electric mini bikes offer the advantage of motor assistance, making them easier to ride uphill or over long distances. On the other hand, traditional bicycles provide a more active and physically engaging experience.

Ultimately, the best choice depends on individual preferences and needs.

Advertisement

Frequently Asked Questions

What is the average battery life of an electric mini bike?

The average battery life of an electric mini bike depends on several factors, including the average battery capacity and how it is used. Factors such as terrain, rider weight, and speed can affect the battery life as well.

Are electric mini bikes legal on public roads?

Electric mini bikes are not legal on public roads in many areas due to safety concerns. While they offer benefits like being eco-friendly and cost-effective, their small size and limited speed make them unsuitable for road use.

Can electric mini bikes be charged using a regular power outlet?

Yes, electric mini bikes can be charged using a regular power outlet. They usually have a standard charging port, and their power requirements are compatible with household outlets, making it convenient to charge them at home.

Are there any age restrictions for riding electric mini bikes?

Age restrictions for riding electric mini bikes vary by location and model. It’s important to check local laws and manufacturer guidelines. Safety is paramount, so wearing protective gear and following recommended guidelines is crucial for a fun and safe riding experience.

How fast can an electric mini bike go?

Electric mini bikes can reach speeds of up to 30 miles per hour, depending on the model. Some of the top electric mini bike models known for their speed include the Razor MX350 and the Coleman Powersports CT200U.

Advertisement

Conclusion

After carefully considering all the factors, it’s clear that the best electric mini bike for you will depend on your specific needs and preferences.

Whether you’re looking for a daily commuter, an off-road adventure companion, or a mini bike for your kids, there are options available that will suit your requirements.

Remember to consider factors such as range, speed, and durability when making your decision.

With so many choices on the market, it’s important to do your research and read reviews from other users to ensure you make the best choice for your electric mini bike.

Advertisement

Continue Reading

Electric Bike

How To Turn On Headlight On Jetson Electric Bike

Published

on

By

An image that captures the step-by-step process of activating the headlights on a Jetson Electric Bike: a rider's hand reaching towards the handlebar, pressing the designated button, followed by the gentle illumination of the bike's front light

Are you prepared to illuminate your Jetson electric bike?

In this article, we’ll reveal the secret to turning on your headlight and illuminating your way.

With just a few simple steps, you’ll be able to navigate the streets with confidence and safety.

Get ready to discover how to activate your headlight, adjust the angle for optimal visibility, and even replace the batteries if needed.

Don’t let darkness hold you back – let’s dive in and brighten up the ride!

Advertisement

Key Takeaways

  • Turning on the headlight on a Jetson electric bike is crucial for enhancing visibility and ensuring safety during low-light or poor weather conditions.
  • It is important to understand and adhere to the legal requirements and regulations regarding bike lights, as non-compliance can result in fines or penalties.
  • Using bike lights can significantly reduce the risk of accidents and collisions, making cyclists more visible to drivers, pedestrians, and other cyclists.
  • Regular inspections and maintenance of bike headlights are essential to ensure optimal performance and safety, as neglecting maintenance can lead to reduced visibility and increased risks.

Locate the Light Switch on Your Handlebars

To turn on the headlights on your Jetson electric bike, locate the light switch on your handlebars. The light switch is usually located near the grip, within easy reach of your thumb or finger.

Once you have located the switch, you can adjust the light brightness by turning the switch clockwise or counterclockwise.

If you are experiencing any issues with your headlight, such as it not turning on or flickering, you can try troubleshooting common headlight issues. Check if the light is securely connected to the bike’s electrical system and ensure that the battery is fully charged. Additionally, make sure the light switch is in the ‘on’ position.

This will activate the headlights and ensure proper illumination during your ride.

Turn the Light Switch to the "On" Position

Switch the light on by flipping the switch to the ‘On’ position.

To turn on the headlight on your Jetson electric bike, follow these steps:

Advertisement
  • Locate the light switch on your handlebars. It is usually found on the left side, near the grip.
  • Place your thumb or finger on the switch and push it upward to turn the light on.
  • Once the switch is in the ‘On’ position, the headlight should illuminate.

Make sure to adjust the light angle according to your preference. You can do this by rotating the light housing up or down. Ensure that the headlight is pointing in the direction you want, providing optimal visibility.

With the headlight switched on and the angle adjusted, you are ready to check if the headlights are illuminated.

Check if the Headlights are Illuminated

Check if your headlights are illuminated by looking at the front of your bike. This step is crucial for checking the functionality of your headlights and troubleshooting any issues.

When examining the headlights, ensure that they are properly positioned and emitting a steady beam of light. If the headlights are not illuminated, first check if they are securely connected to the power source. If the connection is loose, tighten it and try again. Additionally, inspect the wiring for any signs of damage or wear. If you find any issues with the wiring, it may need to be repaired or replaced.

Advertisement

Once you have confirmed that the headlights are properly connected and in good condition, you can proceed to the next step of adjusting the light angle if needed, ensuring optimal visibility during your rides.

Adjust the Light Angle if Needed

If necessary, adjust the angle of the light for optimal visibility. To do this, locate the adjustment screws on the light housing. These screws allow you to change the angle of the light beam. Use a screwdriver to loosen the screws, then adjust the angle of the light by tilting it up or down as needed. Once you have achieved the desired angle, tighten the screws to secure the light in place.

Additionally, to enhance visibility, you can adjust the light intensity. Most electric bikes have a control panel that allows you to adjust the brightness of the headlights.

Finally, for added safety, consider using reflective tape on the bike frame or fenders to increase visibility to other road users. Ensure the headlights are securely attached to the bike by checking for any loose connections or screws.

Ensure the Headlights are securely attached to the Bike

Advertisement

Make sure your headlights are firmly attached to your bicycle to ensure safety while riding at night. Proper headlight installation is crucial to ensure that the lights stay in place and provide adequate visibility.

Start by checking the mounting brackets and ensure they are securely fastened to the bike frame. Tighten any loose screws or bolts to prevent the headlights from wobbling or falling off during the ride. Additionally, make sure the wires are properly connected and tucked away to avoid any interference with the bike’s moving parts.

It is also essential to follow headlight safety precautions, such as not obstructing the headlights with accessories or attachments. By ensuring the headlights are securely attached to your bike, you can ride confidently knowing that you have proper illumination.

Now, let’s move on to testing the headlights in different lighting conditions.

Advertisement

Test the Headlights in Different Lighting Conditions

To ensure optimal visibility, it’s important to test the headlights in various lighting conditions. This will allow you to determine if they are bright enough and provide sufficient illumination for your Jetson electric bike. Additionally, it is crucial to wear reflective gear while testing the headlights to enhance your visibility to other road users.

When choosing headlights for your electric bike, consider the following tips. Firstly, ensure they are compatible with your bike model and can be securely attached. Secondly, opt for LED headlights as they offer brighter and more energy-efficient illumination. Lastly, look for headlights with adjustable beam angles, allowing you to customize the light projection to your liking.

To evoke emotion and help with your decision-making, consider the following table:

Lighting Condition Headlight Brightness Visibility
Daytime Low Limited
Dusk/Dawn Medium Moderate
Night High Optimal
Rainy Medium Satisfactory
Foggy High Essential

In conclusion, testing your headlights in different lighting conditions and wearing reflective gear is crucial for your safety. Next, we will discuss how to replace the headlight batteries if necessary.

Replace the Headlight Batteries if Necessary

When replacing the batteries in your headlight, be sure to follow the manufacturer’s instructions for proper installation. Here are some important points to consider:

Advertisement
  • Check the type and size of batteries required for your headlight.
  • Open the battery compartment and remove the old batteries.
  • Insert the new batteries, ensuring they are placed in the correct orientation.
  • Close the battery compartment securely to avoid any moisture or dirt from entering.
  • Test the headlight to ensure it is functioning properly.

If you are still experiencing issues with your headlight after replacing the batteries, it may be necessary to troubleshoot further. Check for any loose connections or damaged wiring. Inspect the headlight housing for any signs of damage. If necessary, consult the manufacturer’s troubleshooting guide for additional assistance.

To improve visibility, the next section will discuss how to clean the headlight lens effectively.

Clean the Headlight Lens for Better Visibility

Cleaning the headlight lens can greatly improve visibility while riding. To ensure optimal performance, it is important to use the right cleaning products.

Start by removing any dirt or debris from the lens using a soft, lint-free cloth. Avoid using abrasive materials that could scratch the lens.

Next, apply a small amount of a mild cleaning solution specifically designed for headlights. Gently scrub the lens in circular motions, being careful not to apply too much pressure.

Rinse the lens thoroughly with water and dry it with a clean cloth. This will help remove any residue and ensure a clear and bright light output.

Advertisement

Taking these steps will enhance your nighttime biking experience and ensure that you can see and be seen. Remember to always follow local laws and regulations regarding bike lights to ensure your safety on the road.

Follow Local Laws and Regulations Regarding Bike Lights

It’s important to adhere to local laws and regulations concerning the use of bike lights. Not only does this ensure your safety, but it also promotes the safety of others around you. Here are four key reasons why you should always follow bike light regulations:

  1. Visibility: Bike lights significantly improve your visibility to other road users, especially during low-light conditions or when visibility is reduced due to weather conditions.

  2. Legal requirements: Many jurisdictions have laws in place that mandate the use of bike lights, especially during nighttime or in areas where there is insufficient lighting. Failure to comply with these regulations can result in fines or other penalties.

  3. Accident prevention: Using bike lights can help prevent accidents by making you more visible to drivers, pedestrians, and other cyclists, reducing the risk of collisions.

  4. Personal safety: Bike lights not only make you more visible but also help you see the road ahead more clearly, allowing you to anticipate and react to any potential hazards.

By understanding the importance of bike lights and adhering to local regulations, you can ensure a safer riding experience for yourself and others.

In the next section, we will discuss the importance of maintaining regular inspections and maintenance of your bike’s headlights.

Maintain Regular Inspections and Maintenance of Your Bike’s Headlights

Make sure to regularly inspect and maintain your bicycle’s headlights to ensure optimal performance and safety. Regular maintenance is crucial for the proper functioning of your bike’s headlights.

Advertisement

Headlights are an important feature of your electric bike, especially when riding in low-light conditions or at night. They provide visibility to both the rider and other road users, thereby enhancing safety.

Begin by checking the condition of the bulbs and ensure they are not burnt out or damaged. Clean the lens regularly to remove any dirt or debris that can obstruct the light. Additionally, inspect the wiring connections to ensure they are secure and free from any corrosion. Regularly test the headlights to verify their functionality.

By conducting these regular inspections and maintenance, you can ensure that your bike’s headlights are in good working order, providing you with the necessary visibility for a safe ride.

Frequently Asked Questions

How do I know if the headlights on my jetson electric bike are working properly?

To determine if the headlights on your Jetson electric bike are working properly, start by checking the connections and ensuring they are securely attached. If the lights still do not function, consult the troubleshooting guide for common issues and consider cleaning the headlights.

Can I adjust the brightness of the headlights on my jetson electric bike?

To adjust the brightness of the headlights on your Jetson electric bike, first, check for any troubleshooting issues. If the headlights are not working properly, consult the user manual or contact customer support for assistance.

Advertisement

Are there any specific regulations or laws regarding bike lights that I should be aware of?

To ensure compliance with bike light regulations, it is important to be aware of the specific laws in your area. These regulations typically cover factors such as the required brightness and visibility of bike lights to enhance safety on the roads.

How often should I replace the batteries in the headlights of my jetson electric bike?

To extend the lifespan of electric bike headlights, it is recommended to replace the batteries every 6-12 months. LED headlights are beneficial for electric bikes due to their energy efficiency, longer lifespan, and brighter illumination.

What should I do if the headlights on my jetson electric bike become dirty or foggy?

If your Jetson electric bike’s headlights get dirty or foggy, you’re in luck! Simply grab a cloth, some soapy water, and gently clean the lenses. If that doesn’t work, try troubleshooting the electrical connections.

Conclusion

In conclusion, turning on the headlights on your Jetson electric bike is a simple process that ensures your safety and visibility on the road. By locating the light switch on your handlebars and turning it to the ‘On’ position, you can easily illuminate the headlights. Remember to check if the headlights are properly attached and adjust the light angle if needed. In case of low battery, replace the headlight batteries for uninterrupted usage. For better visibility, clean the headlight lens regularly.

By following local laws and regulations regarding bike lights and maintaining regular inspections and maintenance, you can enjoy a safe and well-lit ride.

Advertisement

For example, imagine you are riding your Jetson electric bike on a dark road when suddenly, a deer jumps out in front of you. Thanks to the bright headlights, you quickly spot the deer and avoid a potential accident. This real-life scenario highlights the importance of properly functioning and well-maintained headlights on your electric bike.

Continue Reading
Advertisement

Affiliate disclaimer

As an affiliate, we may earn a commission from qualifying purchases. We get commissions for purchases made through links on this website from Amazon and other third parties.

About us

We are a passionate team driven by the belief that cycling is a fantastic and accessible way to stay active while enjoying the beauty of the outdoors. Our mission is to share our love for cycling with as many people as possible. We provide a welcoming environment for individuals of all ages, abilities, and backgrounds to come together and ride bikes. With Ralf’s visionary leadership, Zane’s expertise in cycling adventures, and Olivia’s dedication to community building, we strive to create a vibrant space where everyone can experience the joy of cycling. Through group rides, workshops, and inclusive events, we inspire and empower individuals to embrace an active lifestyle. Join us in our quest to pedal together, embrace the joy of cycling, and foster connections that last a lifetime.

Advertisement

Trending