Connect with us

Bike

What Is The Difference Between A Mountain Bike And A Gravel Bike

Published

on

An image showcasing a rugged mountain bike conquering a steep, rocky trail, while a sleek gravel bike glides effortlessly along a gravel road, highlighting the contrasting terrains and riding styles of each

Just like a fisherman weighing his options between a calm lake or a fast-flowing river, selecting the perfect bike for your adventures is equally significant. In the realm of cycling, the choice between a mountain bike and a gravel bike holds great importance.
Translated text (United States): Like a fisherman deciding between casting his line in a tranquil lake or a rushing river, choosing the right bike for your adventures can be just as important. In the world of cycling, the decision between a mountain bike and a gravel bike is crucial.

Both bikes offer unique features and capabilities that cater to different terrains and riding styles. So, let’s dive into the depths of these two magnificent machines to understand their differences and find the perfect ride for your next escapade.

Key Takeaways

  • Mountain bikes have suspension systems (hardtail or full-suspension), while gravel bikes typically do not have suspension.
  • Mountain bikes are designed for off-road trails, while gravel bikes are designed for gravel roads and mixed surfaces.
  • Gravel bikes have a more relaxed geometry and are generally more comfortable for long rides.
  • The choice between mountain bikes and gravel bikes depends on factors such as riding style, experience level, terrain availability, and budget considerations.

Anatomy of a Mountain Bike

If you’re new to mountain biking, it’s helpful to understand the anatomy of a mountain bike. Mountain bikes are specifically designed for off-road cycling and have certain features that make them suitable for this rugged terrain.

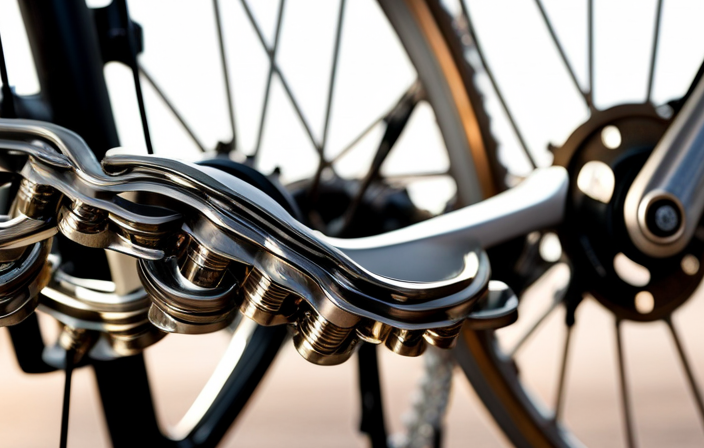
One of the key components is the suspension system, which helps absorb shocks and bumps while riding on uneven surfaces. This allows for a smoother and more comfortable ride, especially when going downhill or over obstacles. There are two main types of suspension systems: hardtail and full-suspension. Hardtail bikes have a front suspension fork, while full-suspension bikes have both front and rear suspensions.

Advertisement

In addition to the suspension system, mountain bikes also have other important elements that contribute to their performance on the trails. These include durable frames made from materials like aluminum or carbon fiber, wide tires with aggressive tread patterns for better traction, powerful disc brakes for reliable stopping power, and multiple gears to handle various terrains and inclines.

Now let’s transition into discussing the anatomy of a gravel bike without skipping a beat.

Anatomy of a Gravel Bike

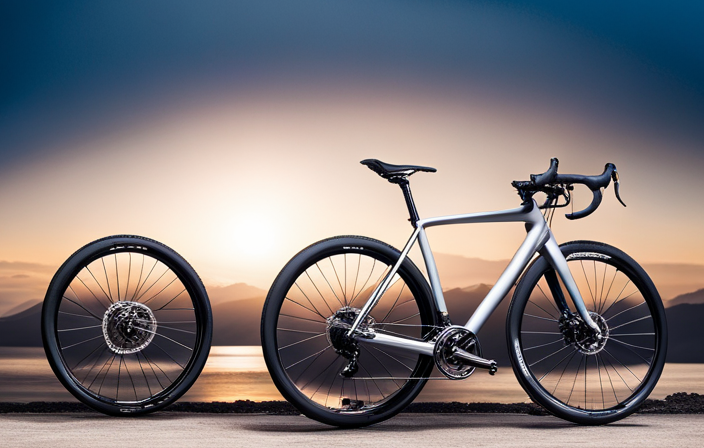
Take a look at the components that make up a gravel bike. A gravel bike is designed to handle various terrains, from smooth pavement to rough dirt roads. It combines features of both road and mountain bikes, making it versatile for different riding conditions.

  • Frame: The frame of a gravel bike is typically made of lightweight aluminum or carbon fiber to provide strength and durability while keeping the weight down.

  • Tires: Gravel bikes have wider tires compared to road bikes, usually ranging from 35mm to 45mm. These tires provide better stability and traction on unpaved surfaces.

  • Disc Brakes: Gravel bikes are equipped with disc brakes for reliable stopping power in all weather conditions. They offer better modulation and control compared to traditional rim brakes.

Other notable features of a gravel bike include a more relaxed geometry for comfort during long rides, wider gear ratios for tackling steep climbs, and mounting points for racks and fenders.

With these components and features, a gravel bike is ready to conquer any adventure on mixed terrain.

Advertisement

Now let’s dive into the different types of terrain and trails suitable for mountain biking.

Terrain and Trail Types for Mountain Biking

Explore the various types of terrain and trails perfect for your mountain biking adventures. Mountain biking offers a thrilling experience that combines the excitement of off-road biking with the skill and technique required for navigating challenging terrains. Unlike road cycling, which is done on smooth paved roads, mountain biking takes you off the beaten path and onto dirt trails, rocky slopes, and forested paths. Whether you’re a beginner or an experienced rider, there’s a trail out there that suits your skills and preferences.

Mountain bike trails can vary in difficulty levels, ranging from easy to advanced. Some trails are designed for beginners, featuring wide paths with gentle slopes and minimal obstacles. These are perfect for riders who are just starting to explore off-road biking techniques. More advanced riders can seek out technical trails that demand better bike handling skills as they navigate steep descents, tight turns, rock gardens, and challenging uphill climbs.

Advertisement

As you venture into different mountain bike trails, you’ll encounter diverse terrain types such as forests, deserts, mountainsides, and even snow-covered landscapes during winter months. Each terrain provides its own set of challenges and rewards for riders to conquer.

Transitioning into the subsequent section about ‘terrain and road types for gravel biking,’ it’s important to note that while both mountain biking and gravel biking share similarities in terms of off-road riding experiences, they differ in terms of specific terrains encountered along the way.

Terrain and Road Types for Gravel Biking

When it comes to gravel biking, there are three main types of terrain and road surfaces that riders encounter: gravel roads, dirt paths, and mixed surfaces.

Gravel roads are typically unpaved and consist of loose rocks or gravel, providing a challenging yet exciting ride.

Dirt paths offer a more natural and adventurous experience, often found in forests or countryside areas.

Advertisement

Mixed surfaces combine different types of terrain, such as asphalt with gravel sections or paved roads with intermittent dirt patches.

Each type of terrain presents its own unique challenges and thrills for gravel bikers to conquer.

Gravel Roads

Gravel roads are often rougher and less maintained compared to paved roads. They are made up of loose gravel, stones, and dirt tracks, which can make for a challenging yet thrilling off-road cycling experience. These roads are usually found in rural areas or remote locations where paved roads are not accessible.

Gravel biking on these terrains requires a sturdy bike with wide tires and good suspension to handle the uneven surfaces and provide stability. The roughness of gravel roads also adds an element of unpredictability to the ride, as you constantly need to adjust your balance and technique.

As we move into the next section about ‘dirt paths’, it’s important to note that while similar to gravel roads, dirt paths offer a different kind of riding experience with their own unique challenges and characteristics.

Advertisement

Dirt Paths

Dirt paths provide a more natural and rugged terrain for cycling enthusiasts. They offer a thrilling experience as you navigate through the uneven surface, making them an ideal choice for those seeking an off-road adventure. Here are four reasons why dirt tracks and off-road paths are worth exploring:

  1. Challenging Terrain: Dirt paths present various obstacles such as rocks, roots, and loose gravel, requiring skillful maneuvering to maintain control on the bike.

  2. Scenic Beauty: Riding along dirt paths allows you to immerse yourself in nature’s breathtaking landscapes, with lush forests, scenic meadows, and tranquil streams surrounding you.

  3. Escape from Traffic: Unlike paved roads, dirt tracks offer a peaceful escape from congested areas and noisy traffic. You can enjoy cycling without worrying about cars zooming by.

  4. Unexplored Routes: Dirt paths often lead to hidden gems that aren’t accessible by traditional means of transportation. Exploring these routes adds excitement and a sense of discovery to your cycling adventures.

As we transition into the next section about mixed surfaces…

Mixed Surfaces

When it comes to riding on mixed surfaces, both mountain bikes and gravel bikes have their advantages. Mountain bikes are designed for off-road trails, with features like suspension and knobby tires that provide excellent traction on rugged terrain. They excel at handling technical sections and steep descents, making them a popular choice for riders who enjoy the thrill of mountain biking.

On the other hand, gravel bikes are specifically designed for riding on gravel roads and mixed surfaces. They have a more relaxed geometry compared to mountain bikes, which provides stability and comfort during long rides. Gravel racing has gained popularity in recent years, with events that combine paved roads, dirt paths, and even some sections of mountain bike trails.

To emphasize the key differences between these two types of bikes when it comes to mixed surfaces, consider the following table:

Advertisement
Mountain Bike Gravel Bike
Designed for off-road trails Specifically built for gravel roads
Suspension and knobby tires More relaxed geometry
Excellent traction on rugged terrain Stability and comfort during long rides

Now let’s move on to discuss how riding style and experience level play a role in choosing between a mountain bike or a gravel bike.

Riding Style and Experience Level

Riding a mountain bike requires a different style and level of experience compared to riding a gravel bike. The riding techniques for each type of bike are distinct, as they are designed for different terrains and purposes. Here are four key differences:

  1. Handling: Mountain bikes are built with suspension systems and wider tires, allowing for better control when maneuvering through rough and technical trails. Gravel bikes, on the other hand, have a more road-oriented design with narrower tires that offer less grip on loose surfaces.

  2. Climbing: Mountain bikers often encounter steep inclines and require strong climbing skills to navigate them successfully. Gravel riders focus more on endurance and sustained efforts over long distances rather than tackling steep ascents.

  3. Descending: Mountain biking involves descending challenging trails at high speeds, requiring advanced technical skills such as body positioning and line selection. In contrast, gravel biking descents are typically less technical and require less intense handling techniques.

  4. Fitness Benefits: Both mountain biking and gravel riding offer excellent fitness benefits, but in different ways. Mountain biking provides an intense full-body workout due to the constant changes in terrain and frequent bursts of effort required for climbs and descents. Gravel biking focuses more on endurance training, building cardiovascular strength over longer distances.

Transitioning into the next section about gear and equipment, it’s essential to choose the right tools based on the specific demands of each discipline without compromising performance or safety.

Gear and Equipment

Choosing the appropriate gear and equipment is crucial in order to meet the specific demands of each discipline while maintaining performance and safety. When it comes to mountain biking and gravel biking, there are some key differences in the gear and equipment needed.

In terms of bike brands, both mountain bikes and gravel bikes offer a wide range of options from various manufacturers. It’s important to choose a reputable brand that specializes in either discipline to ensure you get a bike that is designed for the specific terrain you’ll be riding on.

Advertisement

When it comes to clothing and attire, mountain bikers typically wear more protective gear due to the rough nature of off-road trails. This may include a full-face helmet, knee pads, elbow pads, and body armor. On the other hand, gravel bikers tend to opt for lighter gear such as padded shorts or bibs, jerseys, and cycling shoes.

Transitioning into the next section about maintenance and repairs, it’s important to note that proper upkeep is essential for both types of bikes. Regular maintenance checks should be done on components such as brakes, gears, tires, and suspension systems to ensure optimal performance on the trail or road.

By choosing the right gear and maintaining it properly, you can enhance your riding experience regardless of whether you’re tackling rugged mountains or cruising along gravel roads.

Maintenance and Repairs

To ensure optimal performance, it’s crucial that you regularly maintain and repair your bike. Proper maintenance not only extends the lifespan of your bike but also ensures your safety while riding. Here are some maintenance tips to keep in mind:

  • Cleaning: Regularly clean your bike to remove dirt and grime buildup. Use a mild detergent and water, avoiding high-pressure washers that can damage components.

  • Lubrication: Apply lubricant to the chain, derailleurs, and other moving parts to prevent rusting and ensure smooth operation.

  • Tire pressure: Check tire pressure regularly using a pressure gauge. Incorrect tire pressure can affect ride quality and increase the risk of flats.

Common repairs that you may encounter include fixing flat tires, adjusting brakes and gears, replacing worn-out brake pads or cables, and tightening loose bolts. It’s important to have basic tools like a multitool, tire levers, patch kit, and spare tubes for on-the-go repairs.

Advertisement

Regular maintenance can help identify potential issues before they become major problems. By staying proactive with upkeep and promptly addressing repairs when needed, you’ll keep your bike in top shape for many rides to come.

Now let’s transition into discussing cost and budget considerations when comparing mountain bikes versus gravel bikes without missing a beat.

Cost and Budget Considerations

When it comes to cost and budget considerations, there are a few key points to keep in mind.

Firstly, the price range for mountain bikes can vary significantly depending on factors such as brand, components, and materials used. Generally, you can expect to find mountain bikes ranging from around $500 for entry-level options up to several thousand dollars for high-end models.

On the other hand, gravel bikes tend to be slightly more affordable with prices typically starting around $1,000 and going up from there.

Advertisement

Lastly, it’s worth considering that both types of bikes offer numerous opportunities for upgrades and accessories which can add to the overall cost but also enhance your riding experience.

Price Range for Mountain Bikes

The price range for mountain bikes can vary depending on the brand and features. When comparing costs, it’s important to consider several factors affecting the price. These include the bike’s frame material, suspension type, drivetrain components, and overall build quality.

Here are some key points to note:

  • Frame Material: Mountain bikes can be made from aluminum, carbon fiber, or steel. Carbon fiber frames tend to be more expensive due to their lightweight and durability.

  • Suspension Type: Bikes with full suspension (both front and rear) generally cost more than hardtail bikes with only front suspension.

  • Drivetrain Components: Higher-end mountain bikes often come equipped with premium components such as Shimano XT or SRAM X01 drivetrains, which can contribute to a higher price tag.

  • Build Quality: The overall quality of components like brakes, wheels, and tires also affects the price.

Considering these factors will help you determine the right price range for your desired mountain bike.

Moving forward into the discussion of gravel bike prices…

Advertisement

Price Range for Gravel Bikes

The price range for gravel bikes can vary depending on factors such as brand, features, and overall build quality. Gravel bike price range typically starts around $800 and can go up to $5,000 or more for high-end models.

The cost of a gravel bike is influenced by several factors. Firstly, the brand plays a significant role in determining the price. Well-known brands often come with a higher price tag due to their reputation and quality assurance.

Secondly, the features included in the bike also impact its cost. Components like drivetrain, brakes, suspension systems, and wheelsets contribute to the overall price.

Lastly, the build quality of a gravel bike affects its cost as well. Higher-quality materials and craftsmanship generally result in a more expensive bike.

Moving forward to discussing upgrades and accessories for gravel bikes…

Advertisement

Upgrades and Accessories

To enhance your riding experience, consider adding upgrades and accessories to your gravel bike. Upgrading components can greatly improve the performance and comfort of your bike. Here are a few key upgrades to consider:

  • Upgrading the tires: Choose tires with a more aggressive tread pattern for better grip on loose or muddy terrain.
  • Swapping out the saddle: Finding a comfortable saddle that suits your riding style can make long rides much more enjoyable.
  • Upgrading the brakes: Hydraulic disc brakes offer better stopping power and modulation compared to mechanical ones.
  • Installing a dropper seatpost: This allows you to quickly lower or raise your saddle height, increasing maneuverability on technical descents.
  • Adding fenders and racks: These accessories are useful for commuting or touring, allowing you to carry gear and stay dry in wet conditions.

Choosing the right accessories like lights, bike computers, and hydration systems can also enhance your rides. Transitioning into the subsequent section about ‘community and events’, being well-prepared with these upgrades and accessories will ensure you have an enjoyable time participating in group rides or gravel events.

Community and Events

Join local cycling events and connect with fellow riders in your community. One of the best things about being a cyclist is the sense of camaraderie that comes from participating in group rides and attending community events. These gatherings not only provide an opportunity to meet like-minded individuals who share your passion for cycling, but they also offer a chance to learn from more experienced riders and discover new routes and trails.

Community events are held regularly, ranging from charity rides to organized races. These events often attract cyclists of all skill levels, so whether you’re a beginner or an experienced rider, there’s something for everyone. Participating in these group rides can be incredibly motivating and inspiring, as you get to witness firsthand the dedication and enthusiasm that other cyclists bring to the sport.

Attending these events also allows you to become part of a larger network of cyclists in your area. You can exchange tips on training techniques, bike maintenance, and even find riding buddies for future adventures. The cycling community is known for its inclusivity and supportiveness, so don’t hesitate to reach out and make connections with other riders.

Now let’s transition into discussing the advantages and disadvantages of mountain biking without missing a beat.

Advertisement

Advantages and Disadvantages of Mountain Biking

Explore the advantages and disadvantages of mountain biking to determine if it’s the right fit for you.

Mountain biking offers a thrilling and adventurous outdoor experience that allows you to explore rugged terrains and challenging trails. One of the key advantages of mountain biking is the ability to choose from a wide range of gear options, including different types of suspension systems, tires, and drivetrains. This allows riders to customize their bikes according to their specific preferences and riding style.

Another advantage is the physical fitness aspect. Mountain biking requires a high level of endurance, strength, and balance. It provides an excellent cardiovascular workout while also improving muscle tone and coordination. Additionally, being out in nature while riding can have numerous mental health benefits such as reducing stress levels and boosting mood.

However, there are some disadvantages to consider as well. One major drawback is the cost associated with mountain biking. High-quality bikes, protective gear, maintenance tools, and trail passes can add up quickly. Moreover, trail maintenance is essential for ensuring safe rides but can be time-consuming and physically demanding.

Transitioning into the subsequent section on gravel biking:

Advertisement

While mountain biking has its own set of advantages and disadvantages, exploring gravel biking can offer an alternative experience with its unique features and challenges.

Advantages and Disadvantages of Gravel Biking

Consider the advantages and disadvantages of gravel biking to determine if it’s the right fit for you.

Gravel biking offers a unique riding experience that combines elements of road cycling and mountain biking. One advantage of gravel biking is the versatility it provides in terms of terrain. Gravel bikes are designed to handle a variety of surfaces, from smooth pavement to rough, unpaved roads. This allows riders to explore new routes and venture off the beaten path.

Another advantage is the riding techniques gravel biking can teach you. Riding on uneven surfaces requires balance, control, and adaptability, which can enhance your overall bike handling skills.

When it comes to bike customization, gravel bikes offer plenty of options. You can personalize your bike according to your preferences and riding style. From choosing different tire widths for various terrains to adding accessories like racks or bags for long-distance adventures, you have the freedom to tailor your bike just the way you like it.

Advertisement

Of course, there are also some drawbacks to consider. The wider tires and heavier frame of a gravel bike may make it less efficient on paved roads compared to a traditional road bike. Additionally, navigating technical trails or steep descents may require more skill due to the different geometry and handling characteristics of a gravel bike.

In conclusion, weighing the advantages and disadvantages of gravel biking can help you decide if this type of cycling suits your needs and preferences. Now let’s delve into choosing the right bike for you based on these considerations without delay!

Choosing the Right Bike for You

To find the perfect bike for you, start by evaluating your riding preferences and needs. Consider the type of terrain you will be riding on and your desired riding techniques. Mountain bikes are designed for off-road trails with steep climbs, descents, and obstacles. They have suspension systems to absorb shocks and provide better traction. On the other hand, gravel bikes are built for a mix of pavement and gravel surfaces. They have wider tires for stability and added comfort on rough roads.

When choosing a bike, bike fit is crucial. The frame size should match your height and inseam length to ensure proper posture and efficient pedaling. A professional fitting can help adjust saddle height, handlebar position, and reach to optimize comfort and performance.

If you’re transitioning from mountain biking to gravel biking or vice versa, there are a few tips to keep in mind. Adjusting your riding technique is essential since gravel roads require more stability and control compared to technical mountain trails. Additionally, learning how to navigate different types of terrain will enhance your overall biking experience.

Advertisement

Now let’s explore some tips for transitioning between mountain biking and gravel biking without missing a beat!

Tips for Transitioning Between Mountain Biking and Gravel Biking

When it comes to transitioning between mountain biking and gravel biking, there are a few things to keep in mind.

First and foremost, it’s important to understand that these two disciplines require different skill sets. While mountain biking often involves technical descents and navigating obstacles, gravel biking is more focused on endurance and navigating long stretches of unpaved roads.

To make the transition smoother, here are some tips:

  • Start with shorter rides on gravel roads to get used to the different terrain.
  • Practice maintaining a steady pace on rough surfaces to improve your bike handling skills.
  • Focus on developing your endurance by gradually increasing the distance of your rides.

By following these tips, you’ll be able to build up your skills and confidence as you transition from mountain biking to gravel biking. It’s also worth noting that while some techniques may overlap between the two disciplines, there will still be a learning curve.

Now that we’ve covered how to transition between mountain biking and gravel biking, let’s move on to exploring some inspiring mountain biking destinations.

Advertisement

Inspiring Mountain Biking Destinations

One of the most breathtaking places to go for a thrilling ride is in the heart of the Colorado Rockies. With its majestic mountains and stunning landscapes, this region offers some of the most scenic mountain biking trails in the world. Whether you’re a beginner or an experienced rider, there are trails to suit every skill level.

To fully enjoy these trails, it’s important to have essential mountain biking skills. These include proper body positioning, bike handling techniques, and trail navigation. It’s also crucial to be prepared with the right gear and equipment, such as a helmet, gloves, and knee pads.

Some popular mountain biking destinations in Colorado include Crested Butte, which is known for its challenging terrain and epic views; Fruita, with its diverse trail system that caters to all levels of riders; and Durango, home to famous singletrack trails like Hermosa Creek.

As we transition into exploring scenic gravel biking routes around the world, it’s important to note that both mountain biking and gravel biking offer unique experiences. While mountain biking allows you to conquer technical terrains and embrace adrenaline-filled descents, gravel biking lets you explore remote areas and soak in picturesque landscapes at a more relaxed pace.

Scenic Gravel Biking Routes around the World

Scenic gravel biking routes around the world offer a chance to explore remote areas and enjoy picturesque landscapes at a more relaxed pace. Gravel biking, which falls somewhere between road biking and mountain biking, has gained popularity in recent years due to its versatility and accessibility.

Advertisement

Here are four of the best gravel biking routes for beginners:

  1. Coastal Route in Iceland: This route provides stunning views of fjords, black sand beaches, and glaciers while riding along smooth gravel roads.

  2. Loire Valley in France: Known for its vineyards and historic châteaux, this route takes you through charming villages and scenic countryside on well-maintained gravel paths.

  3. White Rim Trail in Utah, USA: Located in Canyonlands National Park, this 100-mile loop offers breathtaking desert landscapes with towering red rock formations.

  4. Karoo Desert in South Africa: Experience vast open spaces and unique wildlife encounters as you pedal through this arid landscape on gravel tracks.

When it comes to choosing a gravel bike for beginners, there are a few key factors to consider. Look for a bike with wider tires for added stability on uneven terrain, disc brakes for reliable stopping power, and a comfortable frame geometry that allows for longer rides without excessive fatigue.

Some popular options include the Specialized Diverge, Trek Checkpoint ALR 5, Cannondale Topstone Sora, and Giant Revolt Advanced 2. These bikes provide excellent performance on both paved roads and rougher gravel surfaces while offering comfort and control for riders new to the sport of gravel biking.

Frequently Asked Questions

Can a mountain bike be used for gravel biking?

Yes, a mountain bike can be used for gravel biking. While it may not be specifically designed for this type of terrain, it offers several benefits.

The wide tires provide stability and grip on loose surfaces, while the suspension helps absorb bumps for a smoother ride. Additionally, the sturdy frame and components make it durable and capable of handling rough trails.

Advertisement

So if you’re looking to explore off-road gravel paths, a mountain bike can be a great choice.

What are the main differences between a mountain bike and a gravel bike in terms of frame geometry?

In terms of frame geometry, the main differences between a mountain bike and a gravel bike lie in their handling characteristics.

Mountain bikes typically have a more upright seating position and slacker head tube angles, which provide stability and control on rough terrain.

On the other hand, gravel bikes have a more relaxed geometry with longer wheelbases for increased stability on gravel roads.

Both bikes often have suspension systems, although mountain bikes generally have more travel for better off-road performance.

Advertisement

Are there any specific gear ratios or components that are recommended for gravel biking?

When it comes to gravel biking, there are a few key gear ratios and components that I highly recommend.

Firstly, having a wide range of gears is crucial for tackling diverse terrains. Opting for a compact crankset with smaller chainrings and a wide-range cassette will provide the necessary versatility.

Additionally, choosing durable components designed for off-road riding will ensure reliability and minimize maintenance and repair needs.

Lastly, being part of the gravel biking community opens up opportunities for group rides and events that celebrate this unique cycling discipline.

What are some common maintenance and repair issues that gravel bikers may encounter?

When it comes to gravel biking, there are some common maintenance issues and repair problems that riders often encounter.

Advertisement

One of the most frequent challenges is dealing with punctured tires due to the rough terrain.

Additionally, the drivetrain can get clogged up with dirt and mud, requiring regular cleaning and lubrication.

Another issue is wear and tear on brake pads, as they have to work harder on loose surfaces.

Lastly, loose bolts and screws may need tightening after intense rides.

Are there any notable differences in the community and events surrounding mountain biking compared to gravel biking?

In terms of community involvement, mountain biking and gravel biking have their own unique communities.

Advertisement

Mountain biking has a strong and passionate following with well-established clubs and organizations that host events like trail rides, downhill races, and endurance challenges.

On the other hand, the gravel biking community is growing rapidly and is characterized by its inclusive nature. Gravel events often feature a variety of race formats such as gran fondos, gravel grinders, and multi-day stage races.

Conclusion

After exploring the differences between mountain bikes and gravel bikes, it’s clear that these two machines offer unique experiences for riders.

From the rugged trails of the mountains to the smooth roads of gravel routes, each bike has its own purpose and terrain.

Whether you’re seeking adrenaline-pumping descents or scenic adventures, there’s a bike for you.

Advertisement

So grab your helmet, feel the wind against your face as you conquer challenging trails or glide through picturesque landscapes.

Let your bike be your gateway to unforgettable journeys and endless possibilities.

Ralf is a devoted husband and father who loves spending time with his family. He enjoys riding his bicycle as much as possible, and takes every opportunity he can to get out on the open road. Ralf is a kind and gentle person who wants only the best for those around him.

Continue Reading
Advertisement

Bike

How To Motorize A Bicycle

Published

on

By

An image showcasing a bicycle with its frame modified to include a powerful electric motor, complete with a sleek battery pack mounted near the rear wheel and a set of futuristic LED headlights

Imagine elevating your cycling experience by transforming your ordinary bicycle into a powerful machine that effortlessly propels you forward.

In this article, I will guide you through the detailed process of motorizing your bicycle, step by step. From choosing the right motor kit to ensuring safety measures, you will learn everything you need to know to create your very own motorized bicycle.

Get ready to embark on an exciting journey of innovation and adventure.

Key Takeaways

  • Familiarize yourself with local laws and regulations
  • Understand the required equipment for riding
  • Learn where motorized bicycles are allowed
  • Avoid legal issues by following regulations

Choose the Right Motor Kit for Your Bicycle

You should choose the right motor kit for your bicycle. Choosing the right motor kit can greatly enhance your riding experience and make your commute more efficient.

Advertisement

When considering motor power, factors such as terrain, weight, and desired speed need to be taken into account. For hilly terrains or heavier bicycles, a higher motor power will be required to ensure smooth operation and adequate speed. On the other hand, if you plan to use your motorized bicycle mainly on flat surfaces, a lower motor power may suffice.

Additionally, when it comes to battery capacity, it is important to explore the different options available and choose the right capacity based on your riding needs and distance requirements. A larger battery capacity will allow for longer rides without needing to recharge.

Now that we have discussed choosing the right motor kit, let’s move on to gathering the necessary tools and materials for the installation process.

Gather the Necessary Tools and Materials

To get started, it’s important to gather all the tools and materials needed for the project. Here are the essential items you’ll need:

  • Wrench set: You’ll need a set of wrenches to loosen and tighten bolts on your bicycle.
  • Screwdriver set: A variety of screwdrivers will be necessary for removing and installing parts.
  • Wire cutter/stripper: This tool will come in handy when dealing with electrical connections.
  • Allen wrench set: Many motor kits require the use of Allen wrenches for assembly.
  • Battery and charger: Make sure to choose a battery that is compatible with your motor kit.
  • Motor kit: This is the heart of your motorization project. Choose a kit that suits your needs and budget.

Choosing the right motor kit is crucial to ensure a smooth installation process. Additionally, be prepared to troubleshoot common motorization issues that may arise during the project.

Once you have gathered all the necessary tools and materials, you can proceed to prepare your bicycle for motorization by following the next steps.

Advertisement

Prepare Your Bicycle for Motorization

Before starting, make sure that your bike is in good condition and ready for the motor installation. Inspect the frame, wheels, and brakes for any signs of damage or wear. Check the tire pressure and ensure that they’re properly inflated.

Remove any accessories or attachments that may interfere with the motor installation process.

Next, determine the type of bike modification you want to do, whether it’s a gas-powered engine or an electric bike conversion. This will dictate the specific steps and materials needed for the motorization process.

Advertisement

Additionally, make sure you have all the necessary tools and equipment on hand.

Once your bike is prepared, you can move on to the next section and install the motor kit onto your bicycle, transforming it into a motorized ride.

Install the Motor Kit onto Your Bicycle

Once the motor kit is installed onto your bike, it will be transformed into a motorized ride. To install the electric motor, begin by removing the rear wheel from the bicycle frame. Next, attach the motor bracket onto the frame using the provided screws and secure it tightly. Place the motor onto the bracket, aligning the mounting holes, and fasten it securely. Connect the motor’s wiring to the battery and controller according to the provided instructions, ensuring proper connections. Once everything is connected, double-check all the connections and tighten any loose screws. To troubleshoot motor issues, refer to the troubleshooting section in the motor kit manual. Now, we can move on to the next step and connect the motor to the bicycle’s drive system, allowing it to propel the bike forward effortlessly.

Connect the Motor to the Bicycle’s Drive System

Advertisement

Now you can connect the motor to your bike’s drive system and start enjoying effortless propulsion.

To connect the motor to the bicycle’s drivetrain, follow these steps:

  • First, locate the motor mounting bracket on your bike frame. Ensure it is securely attached.
  • Next, align the motor’s sprocket with the bike’s chainring. Use a chain tool to remove the necessary links from the bike’s chain if needed.
  • Connect the motor’s sprocket to the bike’s chainring using a chain connector.
  • Double-check the alignment and tension of the chain. Ensure it is neither too loose nor too tight.
  • Once connected, test the motor by pedaling the bike. The motor should engage and provide assistance.

If you encounter any issues during this process, such as chain slipping or misalignment, consult the motor kit’s troubleshooting guide for assistance.

With the motor now connected to the bicycle’s drive system, we can move on to installing the throttle and control mechanisms.

Install the Throttle and Control Mechanisms

To begin the installation process, attach the throttle and control mechanisms to your bike’s handlebars. The throttle allows you to control the speed of the motor, while the control mechanisms enable you to activate the motor and make necessary adjustments. Proper installation of these components is crucial for a smooth and efficient motorization system.

Below is a table that illustrates the installation steps for the throttle and control mechanisms:

Advertisement
Step Procedure
1 Position the throttle grip on the handlebars and secure it using the provided clamp.
2 Connect the throttle cable to the motor. Ensure a secure and tight connection.
3 Adjust the throttle sensitivity according to your preference using the provided throttle adjustment feature.

Once the throttle and control mechanisms are securely installed, you can proceed to test and adjust the motorization system. This will ensure that everything is functioning properly and any troubleshooting issues can be resolved before hitting the road.

Transitioning into the next section, it is important to thoroughly test and adjust the motorization system to guarantee optimal performance.

Test and Adjust the Motorization System

After securely installing the throttle and control mechanisms, it is essential to thoroughly test and adjust the motorization system for optimal performance. Here are the steps to follow:

  1. Testing the Motor: Start by engaging the motor and observing its response. Ensure it starts smoothly and accelerates without any hitches. Listen for any unusual noises or vibrations.

  2. Adjusting Motor Performance: Fine-tune the motor’s power output by adjusting the throttle. Increase or decrease the throttle sensitivity to achieve the desired speed and responsiveness.

  3. Troubleshooting Common Motorization Issues: Monitor the motor for overheating or excessive battery drain. Inspect all connections for loose wires or faulty components. Resolve any issues promptly to prevent further damage.

  4. Test Ride and Fine-tuning: Take the motorized bicycle for a test ride, paying attention to its overall performance and handling. Make any necessary adjustments to the motor or control mechanisms to improve the riding experience.

Now that the motorization system has been tested and adjusted, it is crucial to ensure safety measures are in place for worry-free riding.

Ensure Safety Measures are in Place

Make sure you have all the necessary safety measures in place to ensure a worry-free riding experience. The importance of wearing protective gear cannot be emphasized enough when motorizing a bicycle. A helmet, knee pads, and elbow pads are essential to protect yourself from potential accidents and injuries.

Advertisement

Additionally, it is crucial to understand and abide by local laws and regulations regarding motorized bicycles. Different jurisdictions may have specific rules about speed limits, required equipment, and where motorized bicycles are allowed to be ridden. Familiarize yourself with these regulations to avoid any legal issues.

By prioritizing safety and following the rules, you can enjoy the benefits of a motorized bicycle without compromising your well-being or breaking the law.

Now, let’s move on to learning how to operate and maintain your motorized bicycle smoothly.

Learn How to Operate and Maintain Your Motorized Bicycle

Learning how to operate and maintain your motorized bike is essential for a smooth and hassle-free riding experience. To ensure that your motorized bicycle functions optimally, here are three key tips:

  1. Troubleshooting common issues with motorized bicycles: Familiarize yourself with common problems such as engine starting issues, fuel system malfunctions, or electrical failures. This knowledge will help you diagnose and fix problems efficiently.

  2. Tips for increasing the lifespan of your motorized bicycle: Regularly check and change the engine oil, clean the air filter, and inspect the spark plug. Additionally, avoid overloading the bike and adhere to the manufacturer’s recommended maintenance schedule.

  3. Properly maintaining the bike’s components: Regularly lubricate the chain, inspect the brakes, and ensure the tires are inflated to the correct pressure. These simple maintenance tasks will ensure your motorized bicycle performs at its best.

By following these guidelines, you can enjoy the benefits of your motorized bicycle without any interruptions.

Advertisement

Enjoy the Benefits of Your Motorized Bicycle

To fully experience the advantages of your motorized bike, you’ll love the increased speed and convenience it brings to your daily commute.

Riding a motorized bicycle in your daily commute has numerous benefits. Firstly, it allows you to travel at a faster pace, reducing travel time and making your commute more efficient. With the added power of the motor, you can easily navigate through traffic and reach your destination faster.

Additionally, using a motorized bicycle is a sustainable and eco-friendly option, reducing your carbon footprint and contributing to a cleaner environment.

To ensure the longevity of your motorized bicycle, it is essential to follow best practices for maintenance. Regularly inspect and clean the bike, check tire pressure, and lubricate the chain. Proper maintenance will not only enhance the performance but also extend the lifespan of your motorized bicycle, allowing you to enjoy its benefits for years to come.

Frequently Asked Questions

How much does a motor kit for a bicycle typically cost?

Motor kits for bicycles typically range in cost from around $200 to $1500, depending on the type of motor. There are various types available, including electric hub motors and mid-drive motors.

Advertisement

Are there any legal requirements or restrictions for using a motorized bicycle?

Sure, let’s dive into the legal requirements and restrictions for using a motorized bicycle. In terms of registration, it depends on your location, but some places require you to register your motorized bicycle. As for speed limits, again, it varies, but typically motorized bicycles are subject to the same speed limits as regular bicycles.

Can any type of bicycle be motorized, or are there specific requirements?

Any type of bicycle can be motorized, but there are specific requirements. Motorizing mountain bikes involves adding a motor and battery to the frame, while converting road bikes requires installing a motor kit onto the existing bike.

What kind of maintenance is required for a motorized bicycle?

Maintenance tips for a motorized bicycle include regular oil changes, checking spark plugs, and inspecting the chain for wear. Troubleshooting common issues such as starting problems or strange noises may require adjusting the carburetor or cleaning the fuel system.

Are there any safety concerns or precautions to be aware of when operating a motorized bicycle?

Motorized bicycle safety concerns are critical to understand. It is essential to prioritize safety precautions, such as wearing a helmet, using reflectors, maintaining brakes, and following traffic rules, to ensure a safe and enjoyable ride.

Conclusion

In conclusion, as I reflect on my journey of motorizing my bicycle, I can’t help but feel a sense of liberation and excitement.

Advertisement

Like a phoenix rising from the ashes, my bicycle has transformed into a powerful steed, ready to conquer any path ahead.

The precision and attention to detail required in this process have not only enhanced my technical skills but also my appreciation for the beauty of mechanics.

Now, as I ride into the sunset, I am filled with a sense of pride and joy, knowing that I have unlocked a new world of possibilities with my motorized companion.

Continue Reading

Bike

How To Change Gears On A Gravel Bike

Published

on

By

An image capturing a close-up of a rider's gloved hand gripping a gravel bike's gear lever, fingers delicately adjusting it

Prepare yourself to enhance your gravel biking abilities with this in-depth guide on mastering gear changes like a professional.

Mastering the art of gear shifting is crucial for any cyclist, especially when tackling unpredictable terrains.

In this article, I will walk you through the ins and outs of understanding your bike’s gear system, perfecting your technique, troubleshooting common issues, and ultimately enjoying a smooth ride with perfectly timed gear changes.

So grab your helmet and let’s dive in!

Key Takeaways

  • Gravel bikes have a wide range of gears for different terrains.
  • Proper gear shifting technique ensures a smooth and efficient ride.
  • Familiarize yourself with the gear levers and their correct operation.
  • Choose the correct gear ratio based on the anticipated terrain changes.

Understanding the Gear System on a Gravel Bike

Advertisement

To change gears on your gravel bike, you’ll need to understand the gear system. The gear selection on a gravel bike is crucial for optimizing performance and ensuring a smooth ride on various terrains.

Gravel bikes typically come with a wide range of gears to accommodate different riding conditions, including steep climbs and fast descents.

One important aspect of the gear system is the gear ratios. Gear ratios determine how much power is transferred from your legs to the wheels. Higher gear ratios provide more power but require more effort, making them suitable for flat or downhill sections. Lower gear ratios, on the other hand, offer less power but are easier to pedal, making them ideal for climbing steep hills or navigating rough terrain.

Understanding how to select the right gear ratio for each situation is essential in maximizing efficiency and preventing unnecessary strain on your body. By choosing an appropriate gear ratio, you can maintain a consistent cadence while adapting to changes in terrain without exerting excessive force.

Proper gear shifting technique plays a vital role in achieving seamless transitions between gears without interruption or damage to the drivetrain components.

Advertisement

Importance of Proper Gear Shifting Technique

Remember, it’s crucial to use the correct technique when shifting gears on your gravel bike. Proper gear shifting technique not only ensures a smoother and more efficient ride but also prevents unnecessary wear and tear on your drivetrain. By following these guidelines, you can optimize your gear shifting experience and reap the benefits of efficient gear shifting.

One key aspect of proper gear shifting technique is timing. It’s important to anticipate shifts in terrain or cadence and initiate gear changes before they become necessary. This allows for a seamless transition between gears, minimizing any disruption to your pedaling rhythm.

Another important factor is maintaining consistent pedal pressure while shifting gears. Applying too much force when changing gears can cause the chain to jump or slip, leading to potential damage. On the other hand, releasing pedal pressure entirely can result in a loss of momentum. Finding the right balance between applying pressure and easing up slightly will ensure a smooth transition from one gear to another.

To further emphasize this point, consider the following table:

Gear Shifting Technique Benefits
Anticipating shifts Smoother transitions
Consistent pedal pressure Prevents chain slippage
Balancing pressure Maintains momentum

By implementing these techniques, you’ll experience improved efficiency and durability in your gravel biking adventures.

Advertisement

Transitioning into the subsequent section about familiarizing yourself with the gear levers, it’s essential to understand how they function to make precise gear changes effortlessly.

Familiarize Yourself with the Gear Levers

Before getting started, it’s important to know how the gear levers on your gravel bike work. Familiarizing yourself with the gear lever functions and proper hand placement will ensure smooth and efficient gear shifting while riding.

Most gravel bikes are equipped with a combination of two gear levers, one for controlling the front derailleur and the other for the rear derailleur. The left lever is responsible for shifting between the chainrings, which control the bike’s front gears. On the other hand, the right lever controls the rear gears by moving the derailleur across different cogs on the cassette.

Advertisement

To shift gears using these levers, place your hands firmly on both hoods of your handlebars. Your index fingers should rest lightly on top of each lever, ready to initiate shifts when needed. When you want to shift to an easier gear (a smaller cog or a smaller chainring), push either lever sideways using your thumb or index finger. For harder gears (larger cogs or larger chainrings), pull back on either lever.

Understanding how to operate these gear levers and maintaining proper hand placement is crucial in achieving optimal performance and preventing any potential damage to your gravel bike’s drivetrain components.

With this knowledge in mind, let’s move onto starting with the right gear ratio…

Start with the Right Gear Ratio

Begin with the correct gear ratio to ensure optimal performance and prevent potential damage to your drivetrain components. Gear selection is crucial when changing gears on a gravel bike. By choosing the right gear ratio, you can maximize efficiency and power transfer while minimizing unnecessary strain on your bike’s components.

To start with the right gear ratio, it’s important to consider the terrain you’ll be riding on. If you’re facing a steep climb or challenging off-road section, it’s best to select a lower gear that provides more torque for easier pedaling. On the other hand, if you’re riding on flat or downhill sections, choosing a higher gear will allow you to maintain speed without excessive spinning of the pedals.

Advertisement

Finding the ideal gear ratio may require some trial and error, especially when encountering varying terrains during your ride. Pay close attention to how your bike responds to different gears and adjust accordingly. Anticipate terrain changes by smoothly shifting gears before reaching them, ensuring a seamless transition between ratios.

By starting with the right gear ratio and adjusting as needed, you can optimize your gear selection for maximum efficiency and enjoy a smoother ride on your gravel bike. Anticipating terrain changes will further enhance your overall biking experience.

Anticipate Terrain Changes

To optimize your riding experience, it’s important to anticipate shifts in terrain while on your gravel bike. Understanding the terrain and adapting your gear strategy accordingly can greatly enhance your performance and enjoyment. By being proactive in adjusting gears before encountering changes in the landscape, you can maintain a steady cadence and ensure smooth transitions.

Advertisement

To help you understand how to adapt your gear strategy based on terrain, refer to the table below:

Terrain Type Recommended Gear Strategy
Uphill Shift to a lower gear for easier pedaling
Downhill Shift to a higher gear for increased speed
Flat Maintain a comfortable gear ratio
Loose Gravel Shift to a lower gear for better traction
Sand or Mud Shift to an even lower gear for stability

By anticipating these terrain changes and adjusting gears accordingly, you’ll be able to maintain optimal control of your gravel bike. Remember, it’s always better to shift before you need to rather than struggling with shifting under pressure during challenging sections. This will not only improve your overall riding experience but also prevent unnecessary strain on yourself and the bike. Transitioning into the next section about ‘shift before you need to’ will further enhance your understanding of proper gear management on a gravel bike.

Shift Before You Need to

Make sure you shift gears on your gravel bike in anticipation of upcoming terrain changes. Anticipating terrain changes is essential to maintaining a steady pedaling cadence and ensuring a smooth ride.

Here are four crucial tips for shifting gears effectively:

  • Pay attention to the road ahead: Keep your eyes focused on the trail, looking out for any obstacles or changes in terrain that may require gear adjustments.

  • Shift before you need to: Don’t wait until you’re struggling to pedal uphill or losing control on a descent. Shift gears proactively, allowing yourself enough time to adjust smoothly without interrupting your flow.

  • Know your bike’s gear range: Familiarize yourself with the different gear combinations available on your gravel bike. Understand which gears are best suited for climbing, descending, and cruising on flat terrain.

  • Practice shifting techniques: Experiment with shifting both up and down the gears while riding at varying speeds. This will help you develop a feel for how your bike responds and ensure seamless transitions between gears.

Maintaining a steady pedaling cadence is crucial for efficient riding and preventing unnecessary strain or fatigue. Transitioning into the next section about ‘maintain a steady pedaling cadence,’ it is equally important to find the right gear ratio that allows you to maintain an optimal cadence throughout different terrains.

Advertisement

Maintain a Steady Pedaling Cadence

When it comes to changing gears on a gravel bike, one important aspect to consider is maintaining a steady pedaling cadence. This not only helps in improving your efficiency but also ensures a smoother transition between gears.

To maintain cadence, it is crucial to anticipate gear changes and shift before you actually need to. By doing so, you can avoid sudden spikes or drops in resistance that can disrupt your rhythm. Instead, aim for seamless transitions that allow you to keep spinning at a consistent cadence.

Maintaining a steady pedaling cadence has several benefits. Firstly, it reduces the strain on your muscles and joints by distributing the workload evenly across different gears. Secondly, it allows you to generate power consistently without wasting energy due to abrupt gear changes.

By focusing on maintaining cadence while changing gears on your gravel bike, you will find yourself riding with greater efficiency and endurance. So remember, smooth shifts are key!

In the next section about using both front and rear gears, we will explore another essential technique for optimizing gear changes without any interruption in your ride flow.

Advertisement

Use Both Front and Rear Gears

Using both the front and rear gears on your gravel bike is essential for achieving optimal gear changes without any interruption in your ride flow. When it comes to front gear selection, you have multiple options available.

The smaller chainring is ideal for climbing steep hills or tackling difficult terrain, as it provides a lower gear ratio that allows for easier pedaling. On the other hand, the larger chainring is great for riding on flat roads or when you want to go faster, as it offers a higher gear ratio that maximizes your speed.

In terms of rear gear selection, your gravel bike typically has a wide range of gears to choose from. The smaller cogs provide easier pedaling and are perfect for uphill climbs or rough surfaces where you need more control. Conversely, the larger cogs offer higher resistance and are suitable for riding on flat roads or when you want to pick up speed.

By utilizing both front and rear gears effectively, you can optimize your riding experience by seamlessly transitioning between different terrains and conditions. However, it’s important to note that you should avoid ‘cross chaining,’ which refers to using extreme combinations such as the small chainring with the smallest cog or the large chainring with the largest cog. This can cause excessive wear on your drivetrain components and may result in poor shifting performance.

Transitioning into the next section about ‘don’t cross-chain,’ it’s crucial to understand how improper gear selection can negatively impact your ride quality and potentially damage your bicycle’s drivetrain components.

Advertisement

Don’t Cross Chain

Avoiding cross-chaining is important to maintain the performance and longevity of your drivetrain components. Cross-chaining occurs when you use the extreme combination of gears, such as using the big chainring in the front and the biggest cog in the rear, or vice versa. This puts excessive stress on your chain and can lead to premature wear and tear. Additionally, cross-chaining reduces efficiency and can cause poor shifting.

To prevent cross-chaining, it is essential to understand your gear ratios and make conscious decisions when shifting. When riding on a gravel bike, it’s recommended to avoid extreme gear combinations that strain your drivetrain unnecessarily. Instead, aim for a balanced use of gears that allows for smooth transitions between them.

Regularly inspecting and maintaining your gears is also crucial for optimal performance. Clean your drivetrain regularly to remove dirt and grime that can affect shifting quality. Lubricate the chain appropriately to minimize friction.

By avoiding cross-chaining and practicing good gear maintenance habits, you can ensure a longer lifespan for your drivetrain components while optimizing your cycling experience.

Now let’s delve into adjusting gear shifters for comfort without compromising functionality.

Advertisement

Adjusting Gear Shifters for Comfort

To achieve a more comfortable riding experience, it’s important to make adjustments to your gear shifters. Proper gear shifter maintenance and adjusting gear cable tension are crucial for smooth and efficient shifting.

Here are two key steps you can take to optimize the performance of your gear shifters:

  1. Check and adjust the gear cable tension: Begin by shifting your bike into the highest gear (smallest cog). Locate the barrel adjuster on the derailleur or shifter body. Turn it clockwise to increase tension or counterclockwise to decrease tension until the shifting feels crisp and precise.
  • Fine-tune while riding: Take your bike for a spin around a quiet area, such as an empty parking lot. Shift through all gears while paying attention to any hesitation or lag in shifting. If needed, make additional adjustments using the barrel adjuster until you achieve seamless shifting across all gears.
  1. Evaluate lever position and reach: Ensure that your shift levers are positioned comfortably within reach of your hands while gripping the handlebars. Adjust their angle if necessary, so you can easily access them without straining or stretching.

By maintaining and adjusting your gear shifters correctly, you’ll enhance both comfort and performance on your gravel bike.

Now, let’s move on to practice shifting gears on different surfaces for even greater control during rides without compromising safety or efficiency.

Practice Shifting Gears on Different Surfaces

Start by practicing shifting gears on a variety of surfaces to improve your control and adaptability while riding. It’s important to become familiar with the different gear ratios and how they affect your bike’s performance. Shifting on loose gravel can be particularly challenging, as the surface provides less traction and stability. To navigate this terrain effectively, you need to anticipate changes in resistance and adjust your gears accordingly.

To help illustrate the concept, here is a table showing examples of suitable gear ratios for different surfaces:

Advertisement
Surface Gear Ratio
Paved road High gear (big chainring)
Gravel road Medium gear
Loose gravel Low gear (small chainring)
Uphill Low gear

When shifting on loose gravel, it’s crucial to smoothly transition between gears to avoid any sudden loss of traction. Start by approaching the shift with a steady pedal stroke, then quickly but gently shift into a lower gear before you encounter the loose section. This will allow you to maintain momentum without losing control.

As you practice shifting gears on different surfaces, pay attention to how your bike responds. Listening to your bike can provide valuable feedback about whether you need to make further adjustments or if everything is running smoothly.

Transitioning into the subsequent section about ‘listening to your bike,’ we’ll explore how understanding its cues can enhance your overall riding experience.

Listen to Your Bike

When you’re riding, it’s essential to listen closely to your bicycle for valuable feedback. Your bike can tell you a lot about its condition and how well it’s performing. By paying attention to the sounds it makes, you can detect any potential issues and address them before they become major problems.

Here are some key components of your gear system that you should listen for:

Advertisement
  • Chain noise: A noisy chain could indicate that it needs lubrication or that there is excessive wear.
  • Gear skipping: If your gears are skipping or jumping when you shift, it may be a sign of misalignment or cable tension issues.
  • Grinding sound: This could mean that your drivetrain components are not properly aligned or that there is dirt and debris causing friction.

By regularly listening to these sounds and identifying any abnormalities, you can take proactive steps in bike maintenance to keep your gear system running smoothly.

In the next section, we will discuss fine-tuning your gear shifting skills for an even better riding experience.

Fine-Tuning Your Gear Shifting Skills

Fine-tuning your gear shifting skills can greatly enhance your cycling experience. When it comes to gravel biking, mastering gear shifting techniques is crucial for maintaining control and maximizing efficiency on unpredictable terrain. The key to efficient gear shifting lies in anticipating changes in the trail ahead and adjusting your gears accordingly.

One important technique is preemptive shifting. By planning ahead and shifting into an appropriate gear before you encounter a steep climb or descent, you can maintain momentum and avoid stalling or spinning out. This requires paying close attention to the terrain ahead and using your knowledge of gear ratios to select the optimal gear.

Another technique is called cadence management. Maintaining a consistent pedaling rhythm not only improves efficiency but also reduces strain on your legs. To achieve this, you should shift gears based on your current cadence rather than relying solely on speed or intensity. Experiment with different cadences to find what feels most comfortable for you.

By honing these gear shifting techniques, you can improve your overall performance and enjoyment while riding a gravel bike.

Advertisement

Transitioning now into troubleshooting common gear shifting issues, understanding how to address these problems will ensure a smooth and uninterrupted ride experience without any hiccups along the way.

Troubleshooting Common Gear Shifting Issues

To troubleshoot common gear shifting issues, pay attention to any unusual noises or resistance while pedaling. Here are some common gear shifting problems and how to fix them:

  • Misalignment: If your gears aren’t shifting smoothly, they may be misaligned. To fix this, use the barrel adjuster on your derailleur to make small adjustments until the gears shift smoothly.

  • Chain skipping: If your chain is skipping over the teeth of the cassette or chainring, it could be due to a worn-out chain or cassette. Replace these components if necessary to resolve the issue.

  • Cable tension issues: If your gears aren’t shifting properly, it could be due to incorrect cable tension. Use the barrel adjuster on your shifter or derailleur to fine-tune the cable tension for smooth gear changes.

  • Bent derailleur hanger: A bent derailleur hanger can cause poor shifting performance. Inspect the hanger for any signs of damage and replace if necessary.

By troubleshooting these common gear shifting problems, you can ensure that your gravel bike performs optimally. Enjoy the smooth ride with perfectly timed gear changes in the subsequent section about ‘enjoying the smooth ride with perfectly timed gear changes.’

Enjoy the Smooth Ride with Perfectly Timed Gear Changes

Achieve a smooth and enjoyable ride by mastering the art of perfectly timed gear shifts. When riding a gravel bike, it is essential to have precise control over your gears to navigate various terrains. Perfecting gear transitions allows you to maintain an optimal cadence and power output, ensuring efficiency and comfort throughout your ride.

To achieve perfect gear changes, start by understanding the concept of optimal gear ratios. This involves finding the right balance between the front chainring and rear cassette gears. The goal is to select a combination that provides enough resistance for efficient pedaling without straining your muscles or causing unnecessary fatigue. Experiment with different combinations on different terrains to find what works best for you.

Advertisement

Timing is crucial when shifting gears. Anticipate changes in terrain or gradient ahead of time, allowing yourself ample time to shift smoothly. Avoid shifting under heavy load as this can cause mechanical stress on your drivetrain components. Instead, ease off the pedals momentarily while making the transition.

When executing a gear change, apply steady pressure on the shifter while simultaneously releasing pressure on the pedals momentarily. This allows for smoother shifting as the chain moves from one gear to another seamlessly.

By practicing and perfecting your gear transitions, you will enjoy a smoother ride with optimal power delivery and reduced strain on your body. Remember that mastering this skill takes time and experience, so don’t be discouraged if it doesn’t come naturally at first. Keep experimenting with different techniques until you find what works best for you and enjoy every moment of your gravel bike adventures!

Frequently Asked Questions

What are the different types of gear ratios available on a gravel bike?

There are various gear ratios available on a gravel bike to cater to different riding conditions. Gear ratio selection is crucial as it determines the ease or difficulty of pedaling.

Lower gear ratios, such as 1:1 or 0.8:1, provide more torque for climbing steep hills or navigating rough terrain.

Advertisement

Higher gear ratios, like 2:1 or 2.5:1, offer greater speed on flat surfaces and descents.

Choosing the right gear ratio can optimize efficiency and power output while riding a gravel bike.

How do I know if I’m using the correct gear ratio for a specific terrain?

To determine if you’re using the correct gear ratio for a specific terrain, there are a few factors to consider.

Firstly, observe your cadence (the speed at which you pedal). If it feels too easy or difficult, you may need to adjust the gear ratios accordingly.

Additionally, monitor your speed and power output. If you’re struggling to maintain speed or exerting excessive effort, troubleshooting gear shifting and adjusting gear ratios can help optimize your performance on different terrains.

Advertisement

Can I shift gears while standing up on my gravel bike?

Yes, you can shift gears while standing up on your gravel bike. When climbing steep terrain, it’s important to use the correct shifting technique to maintain momentum and efficiency.

As you approach a climb, anticipate the gear change by slightly easing off the pedals. Then, shift to a lower gear smoothly and quickly, using both your hands and body weight to apply pressure on the pedals.

This will ensure a seamless transition and allow you to conquer those challenging ascents with ease.

How often should I clean and lubricate my gear shifters?

I clean and lubricate my gear shifters regularly to ensure optimal performance and prolong their lifespan.

It is recommended to clean and lubricate the gear shifters every 100-200 miles or whenever they become dirty or sticky.

Advertisement

Start by wiping them down with a damp cloth, then apply a small amount of lubricant to the moving parts.

This will keep the gear shifters functioning smoothly and prevent any unnecessary wear or damage.

Are there any specific techniques for shifting gears smoothly and quickly on a gravel bike?

Shifting gears on a gravel bike requires finesse and precision, much like conducting a symphony. The key is to anticipate the terrain ahead and choose the appropriate gear ratio.

By mastering this art, you can seamlessly transition between gears, ensuring optimum power transfer and a smooth riding experience.

Correct gear ratios allow you to conquer various terrains effortlessly. Whether it’s climbing steep hills or navigating through loose gravel, the right technique is your ticket to gravel biking nirvana.

Advertisement

Conclusion

In conclusion, mastering the art of gear shifting on a gravel bike is essential for a smooth and enjoyable ride.

By understanding the gear system, familiarizing yourself with the levers, and anticipating terrain changes, you can ensure that your gear changes are perfectly timed.

Just like a well-oiled machine, your bike will respond seamlessly to your commands, allowing you to conquer any trail with ease.

So why wait? Embrace the thrill of gravel biking and let your gears dance in perfect harmony as you embark on new adventures.

Advertisement

Continue Reading

Bike

What Equipment Must A Bicycle Have When Used At Night?

Published

on

By

An image showcasing a bicycle equipped with a front and rear light, reflectors on pedals, spokes, and front/rear tires, along with a reflective vest worn by the cyclist, ensuring maximum visibility and safety during nighttime rides

Like a single bright star in the night sky, a bicycle with the appropriate gear guarantees safe travels once the sun goes down. Being an experienced cyclist, I understand the significance of being visible on the road, particularly during nighttime.

In this article, I will guide you through the essential equipment that every bicycle must have when used at night, from powerful lights and reflectors to reflective clothing and properly inflated tires.

Let’s embark on this journey of knowledge to enhance your nighttime cycling experience.

Key Takeaways

  • Reflective gear, such as reflective tape and decals, is essential for increased visibility when cycling at night.
  • High-visibility accessories like flags and vests should be used to maximize visibility.
  • Properly inflated tires and good tread are important for optimal control and safety.
  • Consider the terrain and choose a tread pattern accordingly, and regularly check tire pressure for safe night riding.

White Front Light

You must have a white front light on your bicycle when riding at night. It is essential for your safety and the safety of others on the road.

Advertisement

A white front light helps you see what’s ahead, making sure you can spot any potential hazards, obstacles, or changes in the road surface. Additionally, it allows other road users to see you coming from a distance, reducing the risk of accidents.

A good quality white front light will have a strong beam, illuminating the path ahead effectively. It is important to choose a light that meets the legal requirements for brightness and visibility.

Once you have your white front light secured, the next step is to ensure you have a red rear light, which I will discuss in the next section.

Red Rear Light

A bicycle at night should be equipped with a red rear light. The importance of a red rear light cannot be overstated when it comes to ensuring the safety of both the cyclist and other road users.

Not only does it allow drivers to easily spot the bicycle from a distance, but it also helps them determine the direction in which the cyclist is traveling. In many countries, including the United States, it is a legal requirement for bicycles to have a red rear light when riding at night. This is because it significantly reduces the risk of accidents and enhances visibility.

Advertisement

However, simply having a red rear light is not enough. Reflectors on the front, rear, pedals, and wheels are also crucial in maximizing visibility. These reflectors work in conjunction with the red rear light to make the bicycle more visible from all angles and ensure a safe ride.

Reflectors on the Front, Rear, Pedals, and Wheels

Reflectors on the front, rear, pedals, and wheels are essential for maximizing visibility and ensuring a safe ride. When it comes to reflectors, placement and regulations are important factors to consider.

In most places, bicycles are required to have a white reflector on the front, a red reflector on the rear, and amber reflectors on the pedals. Additionally, reflectors on the wheels can provide extra visibility, especially when they are in motion. These reflective accessories work by bouncing back light from other sources, making you more visible to drivers and pedestrians. By using reflectors in accordance with regulations, you can greatly reduce the risk of accidents while cycling at night. They are a simple yet effective way to enhance your safety on the road.

Advertisement

Transitioning into the next topic, reflective clothing also plays a crucial role in increasing visibility during nighttime rides.

Reflective Clothing

Wearing reflective clothing is essential for increasing visibility and ensuring a safe ride at night. When cycling in the dark, it is crucial to be seen by motorists and other cyclists, and reflective clothing plays a vital role in achieving this. The importance of wearing reflective clothing cannot be overstated. It can make a significant difference in preventing accidents and ensuring your safety on the road.

To choose the right reflective clothing for night time cycling, opt for garments with built-in reflective strips or patches. Look for materials that reflect light well, such as fluorescent or bright colors. Additionally, consider wearing accessories like reflective arm or leg bands to enhance your visibility further. These simple measures can greatly enhance your safety while cycling at night.

Transitioning into the next section, let’s now discuss the importance of wearing a helmet with reflective strips.

Helmet with Reflective Strips

Advertisement

Make sure you choose a helmet that has reflective strips to increase your visibility while cycling at night. Helmet safety is essential, and having reflective strips on your helmet can greatly enhance your safety on the road. These reflective strips are designed to catch the light from car headlights, making you more visible to drivers.

When choosing a helmet, look for ones that have strategically placed reflective strips on the sides, front, and back. This will ensure that you are visible from all angles. Additionally, there are various reflective gear options available that you can attach to your helmet to further enhance your visibility. These include reflective stickers, bands, or even LED lights.

With the right helmet and reflective gear, you can significantly reduce the risk of accidents while cycling at night. As you focus on helmet safety, don’t forget to consider adding a bell or horn for audible signaling, ensuring that you have multiple ways to alert others of your presence on the road.

Bell or Horn for Audible Signaling

Don’t forget to attach a bell or horn to your helmet for audible signaling while cycling. It is important to have a way to alert others of your presence, especially when riding at night. In addition to the helmet with reflective strips and reflective clothing, an audible signaling device is crucial for your safety. To help you visualize the necessary equipment, refer to the table below:

Advertisement
Equipment Importance
Bell or Horn Essential for signaling
Reflective Clothing Increases visibility
Helmet with Reflective Strips Ensures safety
Rearview Mirror Enhances awareness
High Visibility Flag or Vest Promotes visibility
Properly Inflated Tires Ensures a smooth ride
Good Tread Provides better traction
Reflective Tape Enhances visibility
Front Light Illuminates the path ahead
Rear Light Increases visibility from behind
Reflectors Enhance visibility from all angles

By having all these equipment and taking necessary precautions, you can ensure your visibility and safety while cycling at night. Now, let’s discuss the next important aspect: the rearview mirror for increased awareness.

Rearview Mirror for Increased Awareness

Using a rearview mirror while cycling increases awareness of surrounding traffic. It is an essential equipment for night riding, as it allows me to keep an eye on vehicles approaching from behind without having to turn my head. The benefits of using a rearview mirror are numerous.

Firstly, it enhances my safety by providing a constant visual reference of what’s happening behind me.

Secondly, it allows me to anticipate potential hazards and make informed decisions while on the road.

Thirdly, it helps me maintain a steady and straight line while riding, as I can easily adjust my position based on the traffic behind me.

Advertisement

Lastly, it gives me peace of mind knowing that I have a clear view of my surroundings at all times.

Other alternative rearview options include helmet-mounted mirrors and handlebar-mounted mirrors. These options provide similar benefits but may vary in terms of comfort and ease of use.

Now, let’s move on to the next section about reflective tape on the frame and forks.

Reflective Tape on the Frame and Forks

Reflective tape on the frame and forks increases visibility and helps cyclists stay safe on the road. When riding at night, it is crucial to have equipment that enhances visibility, and reflective tape does just that. The tape reflects light from car headlights, making the bicycle more visible to drivers. This is especially important when riding on poorly lit roads or in areas with heavy traffic.

Reflective tape is an effective way to enhance nighttime visibility because it can be easily applied to the frame and forks of a bicycle. It comes in various colors, such as white, silver, or fluorescent, which further increases visibility. Additionally, the tape is durable and weather-resistant, ensuring its effectiveness even in harsh conditions.

Advertisement

While reflective tape is a popular choice, there are alternatives available for improving visibility on bicycle frames and forks. Some cyclists opt for reflective decals or stickers, which can be customized to suit their preferences. These decals work similarly to reflective tape by reflecting light and increasing visibility.

Transitioning into the subsequent section about the high-visibility flag or vest for added visibility, cyclists can further enhance their safety by incorporating a high-visibility flag or vest. These additional measures ensure maximum visibility and alert drivers to the presence of the cyclist on the road.

High-Visibility Flag or Vest for Added Visibility

One effective way to increase visibility and promote cyclist safety on the road is by incorporating high-visibility accessories such as a flag or vest. These accessories are designed to make cyclists more visible to motorists, especially in low-light conditions.

High-visibility flags can be attached to the rear of the bicycle or the back of the cyclist, while vests can be worn over clothing to enhance visibility from all angles. The importance of reflective gear cannot be overstated, as it significantly reduces the risk of accidents by making cyclists more easily seen by drivers.

In addition to reflective tape on the frame and forks, incorporating a high-visibility flag or vest is crucial for cyclists who ride at night or in low-light conditions. By increasing visibility, cyclists can greatly enhance their safety on the road.

Advertisement

Moving on to the next section, it is also important to have properly inflated tires with good tread for optimal control and safety.

Properly inflated tires with good tread for optimal control and safety

When it comes to riding a bicycle at night, ensuring optimal control and safety is crucial. One important aspect to consider is the condition of your tires. Properly inflated tires with good tread are essential for a smooth and safe ride. Maintaining the correct tire pressure is key to achieving optimal performance and control. Underinflated tires can make it difficult to maneuver, while overinflated tires can affect traction and stability. Additionally, choosing the right tread pattern for different road conditions is important. A tire with a more aggressive tread pattern can provide better grip on wet or uneven surfaces, while a smoother tread pattern is more suitable for dry roads. So, before hitting the road at night, take some time to check your tire pressure and tread condition to ensure a safe and enjoyable ride.

Now let’s dive into a more detailed discussion about tire pressure maintenance and choosing the right tread pattern for different road conditions:

Tire Pressure Maintenance Choosing the Right Tread Pattern
1. Regularly check your tire pressure using a gauge. Consider the type of terrain you will be riding on.
2. Consult the manufacturer’s guidelines for the recommended tire pressure range. Look for tires with deeper treads for better grip on wet surfaces.
3. Adjust the pressure accordingly using a pump with a pressure gauge. Opt for tires with a smoother tread pattern for dry roads.
4. Remember to check the pressure before each ride. Experiment with different tread patterns to find the one that suits your needs best.

Frequently Asked Questions

How can I ensure that my bicycle is visible to other road users at night?

To ensure my bicycle is visible to other road users at night, I prioritize the use of reflective gear. Reflective clothing, stickers, and lights are essential for enhancing visibility and ensuring my safety on the road.

Is it necessary to have both a front and rear light on my bike when riding at night?

Yes, it is necessary to have both a front and rear light on your bike when riding at night. The front light ensures visibility and helps me see the road ahead, while the rear light increases my visibility to other road users.

Advertisement

Are there any specific laws or regulations regarding the use of reflective clothing while cycling at night?

Yes, there are laws regarding reflective clothing when cycling at night. It is important to wear reflective clothing as it increases visibility and safety for both the cyclist and other road users.

What are the benefits of using a rearview mirror on a bicycle?

Using a rearview mirror on my bike has been a game-changer. It enhances safety by providing a clear view of approaching vehicles, allowing me to react quickly. The benefits are immense and unquestionable.

Can reflective tape be applied to any part of the bike frame, or are there specific areas where it should be placed for maximum effectiveness?

When applying reflective tape to the bike frame, focus on key areas for maximum effectiveness. These include the front and rear forks, seatstays, chainstays, and rims. Additionally, consider using reflective accessories and lights to further enhance bike visibility at night.

Conclusion

As I pedal through the darkened streets, I am grateful for the equipment that guides and protects me on my nighttime cycling adventures. The white front light illuminates my path, while the red rear light signals my presence to those behind me. Reflectors on my bike and clothing shimmer like stars, capturing the attention of passing drivers.

With a helmet adorned with reflective strips, I feel like a shining knight, ready to conquer any obstacle that comes my way. A rearview mirror grants me a glimpse into the world behind, increasing my awareness and ensuring my safety. Reflective tape on the frame and forks adds an extra layer of visibility, while a high-visibility flag or vest boldly announces my presence.

Advertisement

Lastly, properly inflated tires with good tread provide the control and stability I need to navigate the roads with confidence. As I ride under the moonlit sky, I am a symbol of safety, preparedness, and adventure, embracing the beauty of the night with every turn of the pedals.

Continue Reading
Advertisement

Affiliate disclaimer

As an affiliate, we may earn a commission from qualifying purchases. We get commissions for purchases made through links on this website from Amazon and other third parties.

About us

We are a passionate team driven by the belief that cycling is a fantastic and accessible way to stay active while enjoying the beauty of the outdoors. Our mission is to share our love for cycling with as many people as possible. We provide a welcoming environment for individuals of all ages, abilities, and backgrounds to come together and ride bikes. With Ralf’s visionary leadership, Zane’s expertise in cycling adventures, and Olivia’s dedication to community building, we strive to create a vibrant space where everyone can experience the joy of cycling. Through group rides, workshops, and inclusive events, we inspire and empower individuals to embrace an active lifestyle. Join us in our quest to pedal together, embrace the joy of cycling, and foster connections that last a lifetime.

Advertisement

Trending