Connect with us

Gravel Bike

What Pedals To Use On Gravel Bike

Published

on

An image showcasing a pair of sturdy flat pedals with metal pins, designed for optimal grip and durability, mounted on a sleek gravel bike

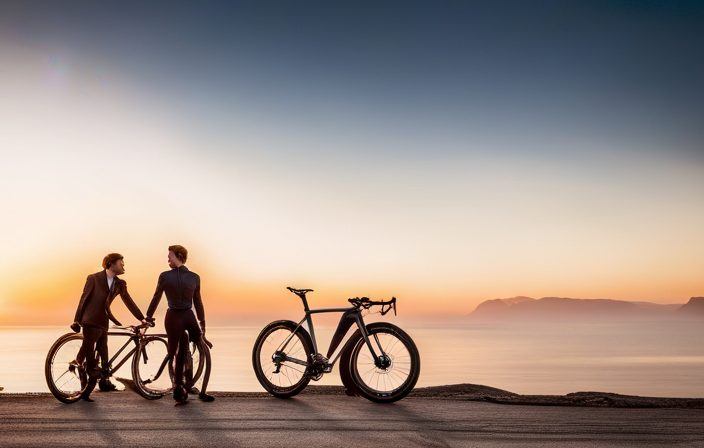
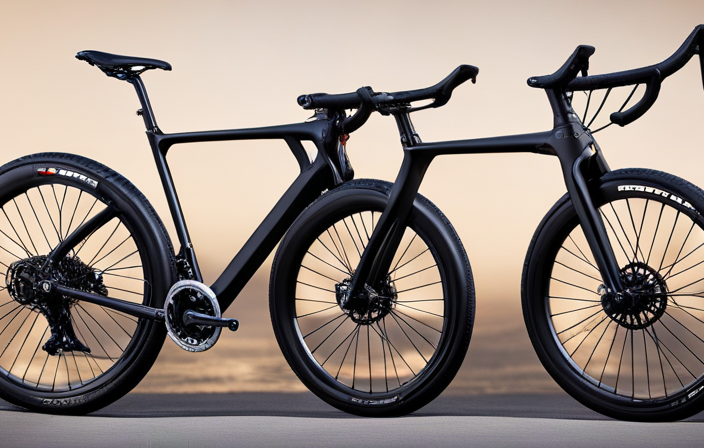
When I initially began using my gravel bike, I soon discovered that the type of pedals I use has a significant effect on my performance and comfort across different terrains.

Picture this: imagine cruising down a dusty gravel road, feeling the rush of wind against your face as you navigate through challenging obstacles.

Now picture yourself effortlessly clipping in and out of your pedals, maintaining stability and control with each pedal stroke.

In this article, I will guide you through the different types of pedals available for your gravel bike, helping you make an informed decision to enhance your riding experience.

Key Takeaways

  • Clipless pedals provide a secure connection between feet and pedals, efficient power transfer, and control over rough terrain.
  • Platform pedals offer increased versatility with any type of shoes, improved stability and control, and easy disengagement in emergencies.
  • Combination pedals combine the benefits of clipless and platform pedals, with a larger platform surface area for stability and control, quick engagement and disengagement, and increased power transfer and efficiency.
  • Toe clips and straps provide extra security and stability, engage more muscles for efficient pedal stroke, and offer increased power and control on a gravel bike.

Clipless Pedals

Advertisement

You should consider using clipless pedals on your gravel bike as they provide a secure connection between your feet and the pedals, allowing for efficient power transfer and better control over rough terrain. Clipless pedals use a cleat system that attaches to the sole of your cycling shoes, creating a strong bond between you and the bike. This connection ensures that every ounce of power you generate is transferred directly to the pedals, maximizing efficiency.

When choosing clipless pedals for your gravel bike, it’s important to also consider shoe selection. Look for shoes that are compatible with the pedal system you choose. Some popular clipless pedal systems include SPD, Look, and Speedplay. Each system has its own advantages and disadvantages, so it’s essential to find one that suits your riding style and preferences.

Clipless pedals offer several benefits for gravel riding. They provide a more secure attachment compared to traditional platform pedals, preventing accidental slips when navigating challenging terrain. The ability to easily engage and disengage from the pedals allows for quick foot adjustments or emergency stops when needed.

Transitioning into the subsequent section about platform pedals, it is worth mentioning their alternative approach to pedal retention.

Platform Pedals

Start by considering the benefits of using platform pedals on your gravel bike. Platform pedals offer a number of advantages that make them a popular choice for off-road riding. Here are some reasons why you might want to consider using platform pedals:

Advertisement
  • Increased versatility: With platform pedals, you can wear any type of shoes you prefer, from sneakers to hiking boots. This allows for more flexibility and comfort during long rides.

  • Improved stability: The larger surface area of platform pedals provides better contact between your foot and the pedal, resulting in increased stability and control over rough terrain.

  • Easy disengagement: Unlike clipless pedals, which require a specific motion to release your foot, platform pedals allow for quick and easy disengagement in case of emergencies or unexpected obstacles.

  • Accessibility for beginners: Platform pedals are a great option for those new to mountain biking or gravel riding. They offer a sense of security and confidence as riders develop their skills.

When choosing the right platform pedals for your gravel bike, consider factors such as weight, grip, durability, and ease of maintenance. Look for models with adjustable pins that allow you to customize the level of grip based on your preferences.

Transitioning into the subsequent section about ‘combination pedals’, it’s important to explore other options that provide the best of both worlds – the efficiency of clipless pedals combined with the convenience and versatility of platform pedals.

Combination Pedals

Consider opting for combination pedals, which offer the benefits of both clipless and platform pedals, allowing you to have the efficiency and power transfer of clipless pedals while still having the option to use regular shoes when needed. With combination pedals, you can easily switch between using cycling shoes with cleats and regular shoes without any hassle.

Advertisement

One advantage of combination pedals is that they provide a larger platform surface area compared to traditional clipless pedals. This gives you more stability and control over your bike, especially when riding on rough terrain. Additionally, the larger platform allows for better power transfer from your legs to the pedals, resulting in improved efficiency.

Another advantage is that combination pedals allow you to quickly engage and disengage from the pedal. This can be particularly useful in situations where you need to react quickly or make sudden stops. Unlike traditional clipless systems, which require a twisting motion to release your foot, combination pedals often have a simple mechanism that allows for easy release.

In summary, combination pedals provide the best of both worlds by combining the benefits of clipless and platform pedals. They offer increased stability, power transfer, and versatility compared to other pedal options. Now let’s move on to discussing toe clips and straps as another alternative for gravel bike riders seeking optimal pedaling performance without committing fully to clipless systems.

Toe Clips and Straps

When it comes to riding with toe clips and straps, I’ve found several benefits.

Firstly, they provide an extra level of security by keeping my feet firmly in place on the pedals, especially during fast descents or rough terrain.

Advertisement

Secondly, using toe clips and straps allows me to engage more muscles while pedaling, resulting in a more efficient and powerful pedal stroke.

Lastly, adjusting the toe clips for comfort and safety is crucial. It ensures proper alignment of the foot and prevents any discomfort or potential injuries.

Benefits of Toe Clips and Straps

You’ll definitely appreciate the added power and control that toe clips and straps provide on your gravel bike. While there are alternative pedal options available, using toe clips can greatly enhance your riding experience, especially for commuting purposes.

One of the key benefits of using toe clips is the ability to exert more force on each pedal stroke, resulting in increased efficiency and speed. Additionally, toe clips help keep your feet securely in place, preventing them from slipping off during bumpy rides or sudden stops. This added stability translates into better control over your bike, allowing you to confidently maneuver through various terrains.

To properly utilize toe clips and straps, it’s essential to practice getting in and out smoothly without interrupting your pedaling cadence. Mastering this skill will ensure a seamless transition into the subsequent section about how to properly use these attachments for optimal performance on your gravel bike.

Advertisement

How to Properly Use Toe Clips and Straps

To make the most out of your riding experience, it’s important to know how to properly utilize toe clips and straps on your feet. These simple yet effective tools can provide a secure connection between your feet and the pedals, improving power transfer and control. However, if you prefer not to use toe clips, there are alternative options available such as clipless pedals or platform pedals with pins for better grip.

When using toe clips and straps, proper foot positioning is crucial. Start by placing the ball of your foot on the center of the pedal, ensuring that your toes are pointing slightly downward. This will allow for efficient pedaling and prevent strain on your calf muscles. Tighten the straps snugly around your shoes, but not too tight to restrict blood flow.

By understanding how to properly use toe clips and straps, you can enhance your riding experience and maximize performance on gravel terrain. Now let’s transition into the subsequent section about adjusting toe clips for comfort and safety without compromising efficiency.

Adjusting Toe Clips for Comfort and Safety

Now that we know how to properly use toe clips and straps, let’s talk about adjusting them for comfort and safety.

One important aspect is toe clip sizing. It’s crucial to choose the right size for your feet to ensure a secure fit without any discomfort or excessive pressure.

Advertisement

Additionally, proper foot placement within the toe clips is essential for optimal power transfer and control while riding. Your feet should be positioned with the ball of your foot over the pedal spindle, allowing for efficient pedaling motion.

It’s also important to make sure that the straps are tightened enough to hold your feet in place but not too tight that they restrict blood flow or cause discomfort.

With these adjustments in place, you’ll have a more comfortable and safer ride on your gravel bike.

Next, let’s dive into using flat pedals…
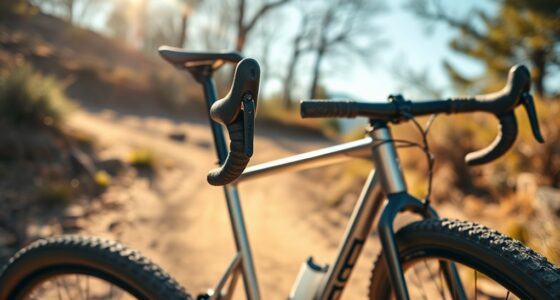
Flat Pedals

Using flat pedals on a gravel bike can provide a more relaxed and versatile riding experience. One of the benefits of using flat pedals is that they allow you to easily place your foot on the ground when needed, providing stability and confidence on uneven terrain. This can be especially helpful for beginners or riders who are not comfortable with being clipped in.

Advertisement

When choosing flat pedals for your gravel bike, there are a few things to consider. Look for pedals that have a large platform area to support your foot and provide optimal power transfer. Additionally, consider the material of the pedal body – lightweight aluminum or durable composite materials are popular choices. It’s also important to choose pedals that have good grip, as this will help prevent your feet from slipping off during wet or muddy conditions.

Transitioning into clip-in pedals can offer additional advantages such as increased pedaling efficiency and better power transfer. However, it’s worth noting that clip-in pedals may require some practice and adjustment period before you feel comfortable with them.

In conclusion, using flat pedals on your gravel bike can enhance your riding experience by providing stability, versatility, and ease of use. However, if you’re looking for increased pedaling efficiency and power transfer, clip-in pedals might be worth considering.

Clip-in Pedals

When you switch to clip-in pedals, you’ll experience increased efficiency and power transfer while riding your gravel bike. Clip-in pedals allow you to connect your cycling shoes directly to the pedal using a cleat system. This provides several benefits for gravel riding.

One of the main advantages of clip-in pedals is the improved power transfer. With your feet securely attached to the pedal, every ounce of energy you generate is efficiently transmitted to the bike. This means that your pedal strokes become more effective, resulting in greater speed and less wasted effort.

Advertisement

In addition to increased efficiency, clip-in pedals also offer better control and stability on rough terrain. By being firmly connected to the bike, you can navigate through challenging sections with more confidence and precision. This can be particularly beneficial when tackling steep climbs or technical descents on gravel roads.

Choosing the right clip-in pedals for your gravel bike is essential. Consider factors such as ease of engagement and disengagement, float options for natural foot movement, and compatibility with different types of cycling shoes.

Transitioning into the next section about pedal weight and durability, it’s important to find a balance between lightweight construction for efficient pedaling and durable materials that can withstand off-road conditions without compromising performance.

Pedal Weight and Durability

For a more enjoyable ride, you’ll want to find clip-in pedals that strike the right balance between weight and durability. When it comes to pedal weight optimization, every gram counts. Lighter pedals can help improve your overall speed and efficiency on the bike. However, it is important to keep in mind that lighter pedals may not always be as durable as their heavier counterparts. Pedal durability testing is crucial to ensure that the pedals can withstand the rigors of off-road riding.

When considering pedal weight and durability, here are three important factors to keep in mind:

Advertisement
  1. Material: Look for pedals made from lightweight yet strong materials such as carbon fiber or titanium. These materials offer a good balance between weight savings and durability.

  2. Design: Opt for a pedal design that incorporates features like sealed bearings and robust construction to enhance longevity without adding excessive weight.

  3. Maintenance: Regularly clean and lubricate your pedals to prevent dirt and grime buildup, which can lead to premature wear and reduced durability.

Finding clip-in pedals that strike the right balance between weight and durability is essential for an optimal gravel biking experience. In the next section, we will explore pedal float and adjustability, which are additional considerations when choosing the perfect pedals for your gravel bike adventure.

Pedal Float and Adjustability

When it comes to pedal float and adjustability, there are a few key points to consider.

First, understanding pedal float is crucial for optimal performance and comfort on your gravel bike.

Adjusting the pedal float can greatly improve your overall riding experience by allowing you to find the perfect balance between stability and freedom of movement.

Lastly, pedal float also plays a significant role in knee alignment, as a properly adjusted pedal can help reduce stress on your joints and prevent any potential injuries.

Advertisement

So, take the time to understand and adjust your pedal float for maximum comfort and efficiency on your rides.

Understanding Pedal Float

To better understand pedal float, you should know that it refers to the amount of rotational movement your foot can have while clipped into the pedal. It is an important feature to consider when choosing pedals for your gravel bike. Pedal float adjustment allows you to customize the amount of rotational movement based on your preference and riding style.

By adjusting the pedal float, you can find a balance between stability and freedom of movement. Understanding the impact of pedal float on power transfer is crucial. Too much float can result in power loss as energy is wasted in unnecessary foot movements, while too little float can lead to discomfort and potential knee issues.

Finding the optimal pedal float for your riding style will help maximize power transfer efficiency and reduce strain on your joints.

Now let’s move on to adjusting pedal float for comfort without compromising performance.

Advertisement

Adjusting Pedal Float for Comfort

When it comes to adjusting pedal float for comfort on a gravel bike, there are a few key factors to consider.

First and foremost, it’s important to understand that pedal float refers to the degree of rotational movement your foot has while clipped into the pedals. This adjustability can greatly impact your riding experience and overall performance.

To optimize pedal float for power transfer, start by finding the right amount of float for your specific needs. Too much or too little float can lead to discomfort or reduced efficiency. Experiment with different settings until you find what feels best for you.

Additionally, consider adjusting the tension on your pedals. Higher tension can provide a more secure connection between foot and pedal, enhancing power transfer.

In summary, adjusting pedal float for performance is all about finding the right balance between comfort and power transfer. By experimenting with different settings and paying attention to how your body responds, you can optimize your riding experience on a gravel bike.

Advertisement

Now let’s explore how pedal float relates to knee alignment in the next section.

Pedal Float and Knee Alignment

Finding the right amount of pedal float and aligning your knees properly can greatly improve your riding experience. Pedal float refers to the degree of rotation allowed for your foot on the pedal, and it offers several benefits. Firstly, it reduces strain on your joints by allowing them to move more naturally. This can help prevent knee pain and injuries, especially during long rides. Secondly, it enhances comfort by accommodating different pedaling styles and foot positions. Adjusting the float correctly is crucial to ensure optimal knee alignment. When your knees are aligned properly while pedaling, you reduce the risk of developing imbalances or overuse injuries. To help you understand how pedal float and knee alignment interact, refer to the table below:

Pedal Float Adjustment Knee Alignment
Too much Excessive outward or inward movement
Too little Restricted natural movement
Optimal Balanced alignment

By finding the right balance between pedal float and knee alignment, you can enhance both comfort and performance on your gravel bike. Now let’s transition into discussing proper maintenance and care for your pedals without missing a beat.

Pedal Maintenance and Care

Proper pedal maintenance and care is crucial for ensuring optimal performance of your gravel bike. To keep your pedals in top shape, there are a few simple steps you can take.

First, it’s important to regularly clean your pedals to remove any dirt or debris that may accumulate during rides. Use a brush or cloth to gently scrub the surface of the pedals and wipe them dry afterwards.

Advertisement

Next, check the tightness of the pedal axles regularly. Over time, they can become loose due to vibrations and normal wear and tear. Using a pedal wrench, tighten them if necessary to prevent any unwanted movements while riding.

Additionally, lubricating the pedal bearings is essential for smooth rotation. Apply a small amount of grease or oil to the bearings according to the manufacturer’s recommendations. This will help reduce friction and extend their lifespan.

Lastly, inspect your pedals for any signs of damage such as cracks or bent spindles. If you notice any issues, it’s important to address them promptly by either replacing or repairing the affected parts.

By following these guidelines for pedal maintenance and care, you can ensure that your gravel bike performs at its best on every ride.

Now let’s move on to discussing pedal traction systems…

Advertisement

Pedal Traction Systems

When it comes to riding a gravel bike, pedal traction is crucial for maintaining control and stability. That’s why it’s important to choose the right pedal traction system that suits your needs and preferences.

Popular options include flat pedals with pins, clipless systems, and hybrid pedals that combine both features. These systems not only enhance foot stability but also provide better control over the bike, allowing you to confidently navigate rough terrains and challenging trails.

Importance of Pedal Traction

To improve your experience on a gravel bike, it’s crucial to ensure good pedal traction. Having a secure grip on the pedals allows for better power transfer and control, especially when riding off-road.

There are several ways to enhance pedal traction:

  • Toe clips: These provide additional support by securing the feet to the pedals, preventing slipping and improving efficiency.

  • Proper shoe choice: Opting for shoes with grippy soles can significantly enhance pedal traction.

  • Pedal grip techniques: Techniques such as keeping your weight centered over the pedals and using a flat-footed position can maximize grip.

  • Adjustable pins: Some pedals come with adjustable pins that allow you to customize the level of grip according to your preference and terrain.

  • Traction pads or covers: These attach to your pedals, providing extra grip and reducing slippage.

Next, let’s explore popular pedal traction systems without compromising safety.

Advertisement

Popular Pedal Traction Systems

One popular pedal traction system is the use of adjustable pins to customize grip levels according to individual preferences and various terrains. These pins can be screwed into the pedal body, allowing riders to increase or decrease the amount of grip they desire. By adjusting the pin height, riders can optimize their pedal grip options for different types of terrain, ensuring maximum control and stability.

This system not only enhances foot stability and control but also improves overall pedal efficiency factors. The adjustable pins ensure that the rider’s feet stay securely in place on the pedals, preventing any unwanted slips or slides while riding on gravel or other challenging surfaces. This increased grip translates into more efficient power transfer from the rider’s legs to the bike, resulting in a smoother and more enjoyable ride experience.

Additionally, this system allows riders to fine-tune their pedal traction based on personal preferences and specific riding conditions, further enhancing their overall performance on a gravel bike.

Transitioning into the next section about enhancing foot stability and control without using ‘step,’ it is important to consider other factors that contribute to a secure connection between foot and pedal.

Enhancing Foot Stability and Control

Another way to improve foot stability and control is by utilizing adjustable pin systems on the pedal traction. These systems consist of removable pins that can be adjusted to customize the grip according to personal preferences. By increasing or decreasing the length of the pins, riders can enhance their foot stability and control while riding on gravel terrain.

Advertisement

To provide a visual representation of these ideas, I have created a table below:

Adjustable Pin Systems Benefits
Customizable grip for enhanced foot stability Allows riders to find their preferred level
Improved control on rough and uneven surfaces Minimizes the risk of slipping off the pedal

In addition to enhancing foot stability and control, it is important to consider pedal weight when choosing pedals for your gravel bike. Lighter pedals can improve overall bike performance, especially during uphill climbs or long rides.

Moving forward into the next section about ‘pedal shoe compatibility,’ it is crucial to ensure that your chosen pedals are compatible with your cycling shoes for optimal power transfer and comfort.

Pedal Shoe Compatibility

When it comes to pedal shoe compatibility, there are a few key points to consider.

First, it’s important to understand the different types of cycling shoes available, such as road shoes, mountain bike shoes, and gravel-specific shoes. Each type has its own unique features and benefits.

Advertisement

Second, you’ll want to ensure that the cleats on your cycling shoes are compatible with the pedals you plan on using. Different pedal systems have different cleat designs, so it’s crucial to check for compatibility before making a purchase.

Lastly, choosing the right cycling shoes goes beyond just finding a comfortable fit – factors like sole stiffness, closure system, and ventilation also play a role in determining which pair is best suited for your riding style and preferences.

Types of Cycling Shoes

There’s a wide variety of cycling shoes available for gravel biking. When it comes to choosing the right pair, it’s important to consider pedal power transfer and pedal efficiency. The type of shoe you choose can greatly impact your performance on the bike. Here are three common types of cycling shoes that are popular among gravel riders:

Shoe Type Description Pros
Road Shoes Designed for maximum pedaling efficiency on smooth surfaces. They often feature stiff soles and lightweight materials. Excellent power transfer, great for long rides or racing.
Mountain Bike Shoes These shoes have a more rugged design with grippy soles and added protection. They offer good power transfer while still being comfortable off the bike. Versatile, suitable for various terrains and conditions.
Gravel-specific Shoes Specifically designed for gravel riding, these shoes strike a balance between road and mountain bike options. They provide efficient pedaling while offering extra grip and durability on rough terrain. Ideal for gravel-specific riding.

Now that we’ve covered the different types of cycling shoes, let’s move on to discussing cleat compatibility with pedals…

Cleat Compatibility with Pedals

Cleat compatibility with different types of cycling shoes is an important factor to consider for optimal performance. Proper cleat positioning and alignment can greatly enhance power transfer, minimize discomfort, and reduce the risk of injury. Here are four key points to keep in mind when it comes to cleat compatibility:

Advertisement
  1. Cleat Type: There are various types of cleats available, including Look Keo, Shimano SPD-SL, and Speedplay. Ensure that your pedals support the specific type of cleats you plan to use.

  2. Cleat Alignment: Correctly aligning your cleats is crucial for maintaining proper biomechanics and preventing knee or foot pain. Experiment with different positions until you find the one that feels most comfortable and efficient.

  3. Float Adjustment: Some pedal systems offer adjustable float, allowing for a small degree of lateral movement while clipped in. This can help accommodate natural foot movement throughout the pedal stroke.

  4. Pedal Compatibility: Not all pedals are compatible with every type of shoe/cleat system. Check the manufacturer’s recommendations to ensure a proper fit.

Considering these factors will help you choose the right cycling shoes that work seamlessly with your preferred pedal system without compromising comfort or performance efficiency.

Choosing the Right Cycling Shoes

To choose the right cycling shoes, make sure you consider factors such as comfort, fit, and style. When it comes to materials, cycling shoes are typically made from synthetic leather or mesh. Synthetic leather offers durability and is resistant to water, while mesh provides breathability for hot weather rides.

It’s important to find a shoe that fits properly. Cycling shoe sizes can sometimes be different from regular shoe sizes, so it’s best to try them on before purchasing. Look for a snug fit without any pressure points or excessive movement.

Additionally, consider the closure system of the shoes. Some options include traditional laces, Velcro straps, or even dial closures for precise adjustments.

Now let’s move on to discussing pedal axle length and its importance in gravel biking setups…

Advertisement

Pedal Axle Length

When choosing pedals for your gravel bike, make sure the axle length is suitable for your riding style and shoe preferences. The pedal spindle dimensions play a crucial role in determining how well the pedal fits on your bike. It’s important to consider the width of your shoe sole as well, as this will affect how your foot sits on the pedal.

The length of the pedal axle also affects performance and comfort. If you have wider feet or prefer a wider stance, a longer axle may be more comfortable. On the other hand, a shorter axle can provide better pedaling efficiency and stability.

Additionally, it’s essential to take into account pedal axle strength when selecting pedals for your gravel bike. A stronger axle is beneficial for riders who put more power through their legs or those who ride in rough terrain where impacts are common.

Considering these factors when choosing pedals will ensure that you find ones that suit your specific needs and preferences.

Now let’s transition into discussing the price range of pedals without missing a beat in exploring all aspects of finding the right pedals for your gravel bike.

Advertisement

Pedal Price Range

Finding the right pedal for your needs means considering the price range that fits your budget and preferences. When it comes to pedal prices, there is a wide range of options available in the market.

Here are three sub-lists to help you understand the different price ranges and what they offer:

  1. Budget-friendly options: These pedals are made from durable materials like nylon or composite, which makes them lightweight and affordable. They usually have a shorter lifespan compared to higher-end options but still provide good performance for casual riders.

  2. Mid-range pedals: These pedals offer a balance between affordability and quality. They are often made from aluminum or alloy, providing better durability and reliability than budget options. Mid-range pedals also come with features like adjustable tension settings and larger platforms for enhanced stability.

  3. High-end pedals: If you’re looking for top-notch performance and durability, high-end pedals are worth considering. Made from lightweight materials like carbon fiber or titanium, these pedals offer excellent power transfer and optimal efficiency on the bike. They often feature longer spindle lengths, allowing for better biomechanics during pedaling.

When choosing your pedal within your preferred price range, it’s important to consider other factors such as pedal material options and spindle length compatibility with your gravel bike’s crankset. Once you’ve found the perfect pedal within your desired price range, you can move onto the next step of installation and adjustment without any hassle.

Pedal Installation and Adjustment

When it comes to pedal installation and adjustment on a gravel bike, there are a few key factors to consider. First and foremost is the pedal float adjustment, which allows for lateral movement of the foot while clipped into the pedals. This adjustment is crucial in ensuring comfort and efficiency while pedaling. It’s important to find the right balance between too much float, which can lead to instability, and too little float, which can result in discomfort and potential injury.

In addition to float adjustment, proper pedal maintenance is essential for optimal performance and longevity. Regular cleaning and lubrication will help prevent dirt and debris from affecting the smooth rotation of the pedals. It’s also important to periodically check for any loose or worn components that may need tightening or replacement.

Advertisement

To provide a visual representation of these ideas, here is a 2-column table:

Pedal Adjustment Maintenance Tips
Float adjustment Regular cleaning
Lubrication
Component check

Now that we’ve covered pedal installation and adjustment as well as maintenance tips, let’s move on to discussing pedal upgrades and accessories.

Pedal Upgrades and Accessories

Upgrading your pedals and adding accessories can enhance your riding experience. With a wide range of pedal grip options and customization choices available, you can find the perfect setup to suit your riding style and terrain.

Here are some pedal upgrades and accessories that can take your gravel bike to the next level:

  • Flat Pedals: Flat pedals provide a large platform for better stability and control on rough terrain. Look for options with pins or spikes that offer superior grip.

  • Clipless Pedals: If you prefer a secure connection between your shoes and pedals, clipless pedals are a great choice. They allow for efficient power transfer and prevent foot slippage.

  • Toe Cages/Straps: Toe cages or straps can be added to flat pedals to increase efficiency by allowing you to pull up as well as push down on the pedals.

  • Pedal Extenders: These handy accessories move the position of your feet outward, providing more clearance between the crank arm and your heels. This is especially helpful if you have wider feet or need additional space for bulky shoes.

  • Reflectors/Lights: Adding reflectors or lights to your pedals increases visibility during low-light conditions, ensuring safety on the road or trail.

By exploring these pedal upgrades and accessories, you can customize your gravel bike for optimal performance, comfort, and safety. So go ahead, get creative, and find the perfect combination that suits all of your cycling needs!

Advertisement

Frequently Asked Questions

Are there any specific pedals that are better for gravel racing vs. casual gravel riding?

When it comes to gravel bike pedal options, there are differences between the best pedals for gravel racing and casual riding.

For gravel racing, I recommend using clipless pedals. They provide a secure connection between your shoe and the pedal, allowing for efficient power transfer and reducing the risk of slipping.

On the other hand, for casual gravel riding, flat pedals with grip pins are a popular choice. They offer more freedom of movement and make it easier to put a foot down when needed.

Can I use my mountain bike pedals on my gravel bike?

Yes, you can use mountain bike pedals on your gravel bike. Mountain bike pedals typically have a larger platform and are designed to provide more grip and stability, which can be beneficial when riding on rough terrain.

However, road bike pedals are usually lighter and more efficient for long rides on smoother surfaces. It ultimately depends on your personal preference and the type of riding you will be doing with your gravel bike.

Advertisement

What are the advantages and disadvantages of using clipless pedals on a gravel bike?

Clipless pedals on a gravel bike offer both advantages and disadvantages.

The allegory of a tightrope walker comes to mind. With clipless pedals, you are securely attached to the bike, providing better power transfer and control. However, this can be a double-edged sword. In technical terrain or during sudden stops, it may be difficult to quickly unclip and maintain balance.

Additionally, choosing the right pedal float is crucial for comfort and preventing knee pain.

How do I choose the right pedal float for my gravel bike?

When choosing pedal float for your gravel bike, it’s important to consider the benefits of different options.

Pedal float refers to the degree of rotational movement allowed by the pedals before they release from the cleats.

Advertisement

A higher float allows for more natural foot movement and reduces stress on your joints, while a lower float provides a more secure connection.

Finding the right pedal float will depend on your personal preference, riding style, and any existing joint issues you may have.

Are there any pedal maintenance tips specifically for riding in muddy or wet conditions?

When riding in muddy or wet conditions, it’s crucial to maintain your pedals properly.

To keep them functioning optimally, clean and lubricate them regularly.

Ensure that the pedal threads are greased to prevent corrosion.

Advertisement

Additionally, check for any debris stuck in the cleats or platform pedals and remove it carefully.

Platform pedals have advantages on gravel bikes as they offer more stability and allow you to easily place your foot down when needed.

Conclusion

After researching and exploring the different types of pedals available for gravel bikes, I have come to the conclusion that choosing the right pedal ultimately depends on personal preference and riding style.

Whether you prefer clipless pedals for efficient power transfer, platform pedals for versatility and ease of use, or combination pedals for a mix of both, there are options to suit every rider.

Additionally, considering factors such as pedal axle length, price range, installation and adjustment process, as well as potential upgrades and accessories can further enhance your riding experience.

Advertisement

So go ahead and experiment with different pedal options to find what works best for you.

Zane rides her bike because she loves it, but also because she is mindful of the need to leave a better world for her children.

Continue Reading
Advertisement

Gravel Bike

How To Properly Size A Gravel Bike

Published

on

By

An image showcasing a cyclist astride a gravel bike, demonstrating the ideal frame size with a slightly bent knee at the bottom of the pedal stroke, a relaxed grip on the handlebars, and proper clearance between the rider and the top tube

Are you ready to tackle challenging gravel bike trails? Hang onto your handlebars as I unveil the key to a smooth ride: getting the right size.

It’s not just about guessing or settling for what’s available – it’s about finding that harmonious balance between you and your machine. In this article, I’ll guide you through the precise steps of measuring, calculating, and fine-tuning every aspect of your gravel bike’s size for an optimized riding experience.

Get ready to take control of your adventure like never before!

Key Takeaways

  • Proper sizing affects comfort, performance, and riding experience.
  • Measure inseam length for accurate frame size.
  • Reach, stack height, and top tube length fine-tune bike fit.
  • Test ride different sizes to find the best fit.

Understand the Importance of Proper Sizing

You need to understand the importance of proper sizing when choosing a gravel bike. The right fit can greatly affect your comfort, performance, and overall riding experience. Bike fit is crucial because it ensures that you are in the correct position to maximize power transfer and minimize strain on your body.

Advertisement

One of the most common sizing mistakes people make is choosing a bike based solely on their height. While height can give you a general idea of frame size, it doesn’t account for individual proportions such as inseam length or torso length. A bike that is too small or too large can lead to discomfort, pain, and reduced efficiency.

To ensure proper sizing, start by measuring your inseam length. This measurement will help determine the appropriate frame size for your gravel bike. Stand with your feet shoulder-width apart and measure from the floor to your crotch. With this measurement in hand, consult a size chart provided by the manufacturer or visit a professional bike fitter who can guide you in selecting the right frame size for your specific measurements.

Now that we understand the importance of proper sizing, let’s move on to how to measure your inseam length accurately without any guesswork.

Measure Your Inseam Length

To accurately measure your inseam length, start by standing barefoot against a wall. Place a book between your legs, pressing it firmly against your groin. Make sure the spine of the book is parallel to the floor. Have someone measure from the top of the book down to the ground using a measuring tape or ruler. This measurement will give you an accurate inseam length.

Once you have determined your inseam length, you can use it as a starting point for finding the right size gravel bike. Bike fit is crucial for comfort and efficiency while riding, so taking accurate measurements is essential.

Advertisement

When considering bike sizing, keep in mind that different brands and models may have slightly different sizing charts. It’s important to consult each manufacturer’s guidelines to find the best fit for you.

Now that you have measured your inseam length, it’s time to consider your riding style and terrain. This will help determine other aspects of bike fit such as top tube length and handlebar height. By taking these factors into account along with your inseam measurement, you can ensure that your gravel bike is properly sized for optimal performance on any ride.

Consider Your Riding Style and Terrain

Considering your riding style and the type of terrain you will be encountering is crucial when determining the right fit for your gravel bike. Your riding style will directly affect your position on the bike, which in turn impacts comfort and efficiency. If you prefer a more aggressive riding position with a lower handlebar height, you may want to consider a smaller frame size. On the other hand, if you prefer a more relaxed and upright position, a larger frame size would be more suitable.

Advertisement

The type of terrain you plan to ride on also plays a significant role in determining the appropriate sizing for your gravel bike. If you anticipate tackling rough and technical off-road trails, a smaller frame size with a shorter wheelbase can provide better maneuverability. However, if long-distance endurance rides or smooth gravel roads are more your style, a larger frame size with increased stability may be preferred.

When considering bike fit and sizing charts, it’s important to note that each manufacturer might have slight variations in their measurements. Take the time to review specific sizing charts provided by different brands to ensure an accurate fit for your body proportions.

In the subsequent section about determining your frame size, we will dive deeper into calculating specific measurements based on your inseam length and other factors.

Determine Your Frame Size

Taking into account your body proportions and riding preferences is essential when determining the right fit for your gravel bike. One of the key factors in finding the correct frame size is measuring your inseam accurately. To do this, stand barefoot against a wall with your legs slightly apart and place a book between your legs, snug against your crotch. Measure from the top of the book to the floor to get an accurate inseam measurement.

Once you have your inseam measurement, you can use it to choose the correct frame size for your gravel bike. Most manufacturers provide sizing charts that correlate inseam measurements with recommended frame sizes. These charts take into consideration factors such as seat tube length and top tube length to ensure a proper fit.

Advertisement

It’s important to note that different manufacturers may have slightly different sizing conventions, so be sure to consult each manufacturer’s specific sizing chart for accurate results. Additionally, keep in mind that there may be some variations depending on personal preference and riding style.

Now that you have determined your frame size based on your inseam measurement, let’s move on to the next step: taking into account reach and stack height when choosing the right gravel bike for you.

Take into Account Reach and Stack Height

Once you know your frame size, it’s important to consider the reach and stack height to ensure a comfortable fit for your riding style. The reach refers to the horizontal distance between the bottom bracket and the top of the head tube, while the stack height is the vertical distance between these two points. Proper reach and stack height are crucial in bike sizing because they directly affect your riding position and overall comfort on the bike.

Advertisement

When determining reach and stack height for gravel biking, there are several factors to consider. Firstly, your body proportions play a significant role. Longer arms may require a longer reach, while shorter arms may necessitate a shorter one. Additionally, considering your flexibility is important as well. If you have limited flexibility, opting for a higher stack height can alleviate strain on your back and neck.

To help you visualize how reach and stack height impact your riding experience, here is a table:

Reach Stack Height
Longer Reach Higher Stack Height
Shorter Reach Lower Stack Height
Increased Comfort Decreased Discomfort
Optimal Riding Position Reduced Strain

Considering the top tube length will further fine-tune your bike fit in relation to your individual needs. By ensuring proper reach, stack height, and top tube length, you’ll be one step closer to finding that perfect gravel bike fit.

Consider the Top Tube Length

The top tube length is an important factor to consider when finding the right fit for your riding style and body proportions. It plays a crucial role in determining your overall comfort and control on the bike. When considering the top tube length, it’s essential to take into account both the reach and stack height measurements.

The reach measurement refers to the distance from the center of the bottom bracket to the top of the head tube. It determines how stretched out or upright you will be on the bike. A shorter top tube length will result in a more relaxed and upright position, while a longer one will provide a more aggressive and aerodynamic stance.

Advertisement

On the other hand, stack height measures how high or low your handlebars are relative to your saddle. A higher stack height can lead to a more comfortable and relaxed riding position, ideal for long-distance rides or endurance events.

When considering these factors, it’s also crucial to check the standover height, which is how much clearance you have when standing over your bike with both feet flat on the ground. This ensures that you can easily dismount and maneuver your bike without any discomfort or restrictions.

Considering all these aspects will help you find a gravel bike with an optimal top tube length that suits your body proportions, riding style, and preferences. Now let’s move on to checking the standover height…

Check the Standover Height

Make sure you check the standover height to ensure comfortable dismounting and maneuvering when both feet are flat on the ground. Standover clearance refers to the amount of space between your crotch and the top tube of the bike frame when you straddle it. To measure this, stand with your feet shoulder-width apart and wear the shoes you plan to ride in. Lift one leg slightly and swing it over the bike as if mounting or dismounting.

The ideal standover clearance is about 2-3 inches for road bikes, but gravel bikes may require more due to their off-road nature. A higher standover clearance allows for easier handling and control on rough terrain.

Advertisement

When considering sizing options, make sure there is enough room between your inseam and the top tube while maintaining a proper riding position. Some manufacturers offer multiple frame sizes with different standover heights, so choose one that suits your body proportions best.

To test ride different sizes, visit a local bike shop or participate in demo events organized by manufacturers or cycling clubs. This will give you a better understanding of how each size feels under real riding conditions before making a final decision on which size gravel bike to purchase.

Test Ride Different Sizes

When you test ride different sizes, it gives you a better understanding of how each one feels under real riding conditions before you make a final decision on which size to purchase. This test ride experience is crucial in determining the optimal fit for your gravel bike.

Here are some key points to consider during your test ride:

  • Comfort: Pay attention to how comfortable you feel on each size. Does the bike feel too big or too small? A proper fit should allow for easy maneuverability and control.

  • Stability: Notice how stable the bike feels when riding at various speeds and on different terrains. A well-sized bike will provide a balanced and confident riding experience.

  • Handling: Test the bike’s responsiveness when cornering or navigating tight spaces. The right size should offer precise handling without feeling twitchy or sluggish.

  • Power Transfer: Observe how efficiently your pedaling power is transferred to the wheels. An optimal fit will maximize energy transfer, allowing you to ride more efficiently.

By test riding different sizes, you can gather valuable insights into how each option performs and find the best fit for your needs.

Advertisement

Once you have identified a few potential sizes, it’s time to consult with a professional bike fitter who can provide further guidance in selecting the perfect size for your gravel bike setup.

Consult with a Professional Bike Fitter

Consider consulting with a professional bike fitter to ensure the optimal fit for your gravel bike setup. A bike fit assessment conducted by a trained expert can provide valuable insights into your body’s biomechanics and help determine the ideal frame size, stem length, handlebar width, and saddle position for you. Professional bike fitting services are equipped with specialized tools and expertise to analyze your riding style, flexibility, and any potential imbalances or discomfort you may experience on the bike.

During a professional bike fit session, the fitter will take various measurements of your body proportions and assess your range of motion. They may also observe your pedaling technique to identify any areas that need improvement. Based on this comprehensive analysis, they will make precise adjustments to optimize your position on the gravel bike.

By consulting with a professional bike fitter, you can avoid common pitfalls like choosing a frame size that is too small or large for you, which could lead to discomfort or decreased performance. Additionally, they can recommend appropriate components such as saddles or handlebars that suit your individual needs.

Once you have completed the initial assessment and received recommendations from the professional fitter, it is time to consider adjustments and components that will further enhance your gravel biking experience.

Advertisement

Consider Adjustments and Components

To enhance your experience, you could explore different adjustments and components for your gravel biking setup. When it comes to bike fit, there are a few key areas to consider.

First, saddle position is crucial for comfort and power transfer. Make sure your saddle height is set correctly so that your legs can fully extend with a slight bend at the knee when the pedal is at its lowest point. Additionally, the fore-aft position of the saddle should be adjusted to achieve proper weight distribution between the front and rear wheels.

Next, handlebar width and reach can greatly affect your riding comfort and control. Experiment with different handlebar widths to find the one that feels most natural for you. You may also want to consider adjusting the stem length to achieve a comfortable reach to the handlebars.

In terms of components, selecting tires that suit your riding style and terrain is essential for optimal performance. Consider choosing wider tires with more aggressive tread patterns for off-road adventures, while opting for narrower tires with smoother tread patterns if you plan on spending more time on pavement.

Taking note of the bike’s geometry is crucial in ensuring a proper fit. The frame geometry determines factors such as stack height (vertical distance from bottom bracket to top of head tube) and reach (horizontal distance from bottom bracket to top of head tube). These measurements play a significant role in determining how comfortable you will be on long rides or during technical sections.

Advertisement

Transitioning into taking note of the bike’s geometry in order to properly size your gravel bike, it’s important to understand how these frame measurements can impact your overall riding experience.

Take Note of the Bike’s Geometry

Now that we have considered adjustments and components, let’s move on to the next important aspect of properly sizing a gravel bike: taking note of the bike’s geometry.

Bike fit is crucial for comfort, efficiency, and overall performance, so it’s essential to understand how the geometry of a bike can affect your riding experience.

Here are some important factors to consider when evaluating the bike’s geometry:

  1. Frame Size: The frame size determines the overall fit of the bike. It should be proportional to your body measurements and allow for proper reach and standover height.

  2. Top Tube Length: This measurement affects your riding position and comfort. A longer top tube provides a more stretched-out position, while a shorter one offers a more upright stance.

  3. Head Tube Angle: The head tube angle influences steering responsiveness and stability. Steeper angles provide quicker handling, while shallower angles offer stability at higher speeds.

  4. Bottom Bracket Drop: This measurement impacts pedal clearance during cornering and affects how low you feel on the bike.

By considering these aspects of the bike’s geometry, you can ensure a better fit and an optimal riding experience.

Advertisement

Now let’s move on to our next topic where we will discuss why it is important to consider the bike’s wheel size.

Consider the Bike’s Wheel Size

Take note of the wheel size on the bike to ensure a comfortable and enjoyable ride. The wheel diameter plays a crucial role in determining how the bike performs on different surfaces. For gravel biking, it is common to see wheel sizes ranging from 650b to 700c.

Smaller wheels, like the 650b, offer better maneuverability and acceleration while sacrificing some top-end speed. On the other hand, larger wheels, such as the standard 700c, provide better stability and roll over obstacles more easily.

Another important factor to consider is tire clearance. Gravel bikes are designed with wider tire clearances compared to road bikes. This allows for fitting tires with more tread and larger volume, which improves traction and comfort on rough terrains. When choosing a wheel size, make sure it accommodates your desired tire width without any clearance issues.

Considering both wheel size and tire clearance will help you find the right balance between agility and stability for your gravel bike adventures. In the next section about handlebar width, we will explore another aspect that contributes to a well-sized gravel bike setup.

Advertisement

Without compromising on performance or comfort…

Consider the Bike’s Handlebar Width

Ensure that your handlebar width suits your riding style and preferences for a comfortable and controlled experience.

When it comes to bike fit, handlebar comfort is crucial. Here are some factors to consider when determining the right handlebar width:

  • Shoulder Width: Your handlebars should be slightly wider than your shoulder width. This allows for better control and stability while riding.

  • Riding Style: Different riding styles require different handlebar widths. For example, if you prefer an aggressive riding position, narrower handlebars may be more suitable. On the other hand, if you enjoy long-distance rides or gravel adventures, wider handlebars provide better stability.

  • Maneuverability: Wider handlebars offer increased leverage, making it easier to maneuver through technical terrain or tight corners.

  • Comfort: Handlebar width can affect your overall comfort on the bike. It’s important to find a width that allows for relaxed hand positioning without strain or discomfort.

Finding the optimal handlebar width requires considering these factors along with personal preference. Once you have determined the appropriate handlebar width, you can move on to evaluating the bike’s stem length in order to achieve a well-balanced setup.

Consider the Bike’s Stem Length

Choosing the right stem length is crucial for achieving a well-balanced setup on your bike. When it comes to gravel biking, finding the optimal stem length can greatly affect your comfort, control, and overall riding experience. The stem connects the handlebars to the fork steerer tube, determining your reach and position on the bike.

Advertisement

To choose the right stem length for your gravel bike, you need to consider various factors such as your body measurements, riding style, and personal preferences. A shorter stem provides quicker handling and more responsive steering, ideal for technical terrains or aggressive riding. On the other hand, a longer stem offers more stability and less twitchy handling, suitable for long-distance endurance rides.

Adjusting the stem angle can also help fine-tune your fit on the bike. By angling it up or down slightly, you can modify your riding position and alleviate strain on your back or wrists. It’s essential to experiment with different angles until you find what feels most comfortable for you.

Once you have chosen the right stem length and adjusted its angle accordingly, you can further fine-tune the fit with saddle and handlebar adjustments. These additional adjustments will ensure that all components work together harmoniously to provide an ergonomic and efficient riding experience.

Transitioning into adjusting saddle and handlebar positions allows riders to optimize their setup without compromising comfort or performance.

Fine-Tune the Fit with Saddle and Handlebar Adjustments

To optimize your riding experience, it’s important to make adjustments to the saddle and handlebar positions. Fine-tuning these elements will ensure a comfortable and efficient ride on your gravel bike.

Advertisement

Let’s start with the saddle position. Finding the right height is crucial for proper leg extension and power transfer. Start by sitting on the saddle with one foot at the bottom of the pedal stroke. Your knee should have a slight bend, around 25-30 degrees. Adjust accordingly until you achieve this angle.

Next, let’s focus on handlebar height. This adjustment affects both comfort and control. Begin by loosening the stem bolts and raising or lowering the handlebars to your desired position. Keep in mind that a higher handlebar offers a more upright riding posture, which can be beneficial for long rides or those seeking greater comfort. Conversely, a lower handlebar promotes an aerodynamic position suitable for faster-paced riding.

Once you’ve made these adjustments, take some time to test out your new setup on various terrains. Pay attention to any discomfort or strain in your back, neck, or wrists – these are signs that further adjustments may be necessary.

Remember, finding the ideal saddle position and handlebar height is essential for achieving optimal performance and preventing injuries while enjoying your gravel bike adventures!

Frequently Asked Questions

What are the benefits of consulting with a professional bike fitter?

Consulting with a professional bike fitter offers numerous benefits. Firstly, they possess the expertise to ensure proper bike sizing, which is crucial for optimal performance and comfort. Through their precise measurements and analysis, they can identify any issues that may impact your riding experience.

Advertisement

Additionally, a professional bike fitting can help prevent injuries by ensuring correct body alignment and reducing strain on joints. Overall, the importance of proper bike sizing cannot be overstated, making a consultation with a professional bike fitter invaluable.

How does the bike’s geometry impact the sizing process?

The bike’s geometry plays a crucial role in the bike fit and sizing process. It determines how the bike will handle, its stability, and comfort. A slight change in geometry can have a significant impact on your riding experience.

Factors like head tube angle, top tube length, and seat tube angle all affect how you fit on the bike. Therefore, understanding the geometry is essential for finding the right size and achieving optimal performance.

What factors should I consider when choosing the bike’s wheel size?

When considering wheel size for a gravel bike fit, there are several important factors to take into account.

Firstly, the terrain you’ll be riding on plays a crucial role. Smaller wheels provide nimbleness and agility, while larger wheels offer better momentum and stability over rough surfaces.

Advertisement

Additionally, tire clearance is essential as wider tires require larger wheel sizes.

Lastly, personal preference and riding style should also influence your decision on wheel size considerations for optimal gravel bike fit.

How does the bike’s handlebar width affect the overall fit?

The handlebar width plays a crucial role in bike fit. It symbolizes control and comfort while riding.

A wider handlebar provides better stability and control, especially on rough terrains. However, it may affect aerodynamics and maneuverability.

On the other hand, a narrower handlebar allows for more precise steering and improved aerodynamics.

Advertisement

Finding the right balance between these factors is essential to ensure an optimal bike fit and enhance your overall riding experience.

What adjustments can be made to the saddle and handlebars for a more customized fit?

To achieve a more customized fit on a gravel bike, adjustments can be made to the saddle height and handlebar reach.

The saddle height refers to the vertical position of the seat, which affects leg extension and power output. By adjusting the saddle height correctly, optimal pedaling efficiency can be achieved.

Handlebar reach refers to the horizontal distance between the saddle and handlebars. Adjusting this allows for a comfortable riding position and proper weight distribution on the bike.

Conclusion

In conclusion, properly sizing a gravel bike is crucial for a comfortable and efficient riding experience. By measuring your inseam length and considering your riding style and terrain, you can determine the appropriate frame size that suits you.

Advertisement

Additionally, taking into account factors such as reach and stack height, wheel size, handlebar width, stem length, and fine-tuning the fit with saddle and handlebar adjustments will ensure a customized fit.

Remember that 90% of cyclists who ride bikes that are too big or small experience discomfort or pain. Therefore, investing time in finding the right size is essential for an enjoyable gravel biking journey.

Continue Reading

Gravel Bike

Mountain Bike Tire Pressure When Riding On Gravel Roads

Published

on

By

An image capturing the moment a mountain biker's tire encounters a gravel road, showcasing the tire's tread gripping the loose stones, while dust particles dance around in the air

Riding on gravel trails can be an exciting experience. However, it is important to pay attention to your mountain bike’s tire pressure in order to navigate the uneven terrain safely. Just like a tightrope walker on a thin wire, maintaining the perfect balance is essential for achieving peak performance and control.

In this article, we delve into the intricate world of tire pressure, exploring its impact on gravel riding. We provide you with valuable insights to help you conquer any off-road challenge with confidence.

So grab your helmet and let’s dive into the fascinating realm of mountain bike tire pressure on gravel roads!

Key Takeaways

  • Adjusting tire pressure based on factors like rider weight and terrain conditions enhances comfort and stability.
  • Wider tires with higher volume provide improved stability and traction on gravel roads.
  • Lower tire pressures increase grip and control during cornering.
  • Finding the right tire pressure for specific conditions ensures control and stability.

Understanding the Basics of Tire Pressure

You should understand the basics of tire pressure before riding on gravel roads. Tire pressure plays a crucial role in determining your bike’s performance and safety on different terrains.

Advertisement

When it comes to road biking, there are specific tire pressure recommendations that you can follow. Generally, higher tire pressures are recommended for smoother pavement surfaces, as they provide lower rolling resistance and better efficiency. However, when riding on gravel roads, lower tire pressures are typically preferred.

Understanding the effects of tire pressure on cornering is essential for safe navigation on gravel roads. Lower tire pressures allow for a larger contact patch between the tire and the road surface, increasing traction and grip while cornering. This increased grip helps to prevent sliding or skidding, ensuring better control over your bike.

Transitioning into factors affecting tire pressure on gravel roads, it is important to consider various elements such as rider weight, terrain conditions, and personal preference. These factors influence the optimal tire pressure that you should use when riding off-road.

By properly adjusting your tire pressure based on these factors, you can enhance your comfort, stability, and overall performance while tackling challenging gravel roads without sacrificing control or jeopardizing your safety.

Factors Affecting Tire Pressure on Gravel Roads

When it comes to tire pressure on gravel roads, there are three key factors that come into play: tire width and volume, rider weight, and riding style, as well as the terrain and surface conditions.

Advertisement

Tire width and volume determine the amount of air in the tires, affecting both stability and traction.

Rider weight plays a role in determining how much pressure is needed to support the bike on uneven surfaces.

Finally, the terrain and surface conditions impact tire pressure by influencing how much grip is needed for optimal performance.

It’s important to consider all these factors when adjusting tire pressure for a smooth and safe ride on gravel roads.

Tire Width and Volume

With increased tire width and volume, riders can experience improved stability and traction when riding on gravel roads. When it comes to tire pressure for wet conditions, wider tires with higher volume allow for lower pressures, which increase the contact patch with the ground and enhance grip. This is crucial in wet conditions where maintaining control is essential.

Advertisement

On the other hand, when riding on sandy terrain, narrower tires with lower volume and higher pressures are preferred to prevent sinking into the loose surface. These tires cut through the sand more efficiently and provide better maneuverability. However, it’s important to note that finding the optimal tire pressure involves a balance between stability, traction, and comfort based on individual rider weight and riding style.

Adjusting tire pressure according to these factors will ensure a smoother ride while tackling gravel roads.

Transitioning into the subsequent section about ‘rider weight and riding style’, it is crucial to consider these aspects as they greatly influence tire performance on different surfaces.

Rider Weight and Riding Style

Consider your weight and riding style as factors that significantly impact the performance of your tires on various surfaces. When it comes to adjusting tire pressure for downhill rides, it is crucial to find the right balance between grip and rolling resistance. Higher pressures provide better rolling efficiency but can decrease traction, while lower pressures increase grip but may result in higher rolling resistance. A general rule of thumb is to reduce tire pressure by 2-3 psi when descending, allowing for more contact with the ground and improved control. On the other hand, cornering requires a different approach. Higher tire pressures help prevent sidewall collapse and maintain stability during aggressive turns. It’s important to experiment with different pressures based on personal preference and terrain conditions to find what works best for you. Taking these factors into account will ensure optimal performance when riding on gravel roads.

Moving forward, let’s delve into how terrain and surface conditions further influence our tire pressure choices without compromising safety or ride quality.

Advertisement

Terrain and Surface Conditions

The type of surface you’re riding on can greatly impact the optimal tire pressure for your ride. When it comes to gravel roads, understanding the terrain and surface conditions is crucial in determining the right tire pressure. Gravel road maintenance plays a significant role in how bumpy or smooth the surface is. If the gravel has been recently graded and compacted, you may be able to run slightly higher tire pressures to increase efficiency and reduce rolling resistance. However, if the gravel road is wet or loose, lower tire pressures are recommended to improve traction and prevent sliding.

Wet gravel can be especially tricky as it tends to create a slippery surface that requires more grip from your tires. Finding the right tire pressure for these specific conditions is essential for maintaining control and stability while riding on gravel roads.

Transitioning into the subsequent section about the importance of finding the right tire pressure: It’s important to understand that finding the right tire pressure not only depends on terrain and surface conditions but also factors such as rider weight, riding style, and personal preferences.

Importance of Finding the Right Tire Pressure

To find the right tire pressure for riding on gravel roads, it is important to understand the importance of having the correct amount of air in your tires. Finding optimal tire pressure is crucial as it directly affects your performance and overall ride experience. Adjusting pressure based on different terrain and surface conditions can greatly enhance your bike’s handling capabilities.

Here are three factors to consider when finding the right tire pressure for gravel road riding:

Advertisement
  1. Traction: Maintaining adequate tire pressure ensures better traction on loose surfaces like gravel. Lower pressures allow the tire to conform to irregularities in the road, increasing grip and reducing slippage.

  2. Comfort: Adjusting your tire pressure can significantly impact ride comfort. Higher pressures result in a stiffer ride, transmitting more vibrations from rough terrains. Lower pressures absorb these vibrations, providing a smoother journey.

  3. Rolling Resistance: Tire pressure affects rolling resistance, which influences speed and efficiency while pedaling on gravel roads. Higher pressures reduce rolling resistance by minimizing tire deformation, enabling faster speeds with minimal effort.

Understanding these factors will help you fine-tune your mountain bike’s tire pressure for optimal performance on gravel roads. The relationship between tire pressure and performance is intricate and deserves careful consideration when seeking an enjoyable off-road cycling experience.

The Relationship Between Tire Pressure and Performance

When it comes to mountain biking, finding the right tire pressure is crucial for optimal performance. The relationship between tire pressure and performance can be seen in three key areas: traction and grip, rolling resistance, and comfort and control.

Maintaining the proper tire pressure ensures maximum traction and grip on various terrains. It reduces rolling resistance for a smoother ride and enhances overall comfort and control while riding.

Traction and Grip

Riding with lower tire pressure on gravel roads increases traction and grip. When the tire pressure is lower, the tire conforms better to the uneven surface of the gravel road, allowing for more contact points between the tire and the ground. This increased contact improves traction and stability, enabling me to maintain control and balance even on loose or slippery surfaces. The added grip gives me confidence in my bike’s handling capabilities, especially during cornering or braking maneuvers.

Lower tire pressure also helps in absorbing vibrations from rough terrain, reducing fatigue and providing a smoother ride. However, it is important to find a balance as too low of a tire pressure can lead to pinch flats or sidewall damage.

Advertisement

Transitioning into the next section about rolling resistance, maintaining optimal tire pressure not only improves traction but also affects how efficiently I can roll over gravel roads without expending excessive energy.

Rolling Resistance

Lowering tire pressure on gravel roads increases rolling resistance, making it more difficult to maintain speed and momentum.

When riding on gravel, the increased traction and grip provided by lower tire pressure can be beneficial, but it comes at a cost. The lower pressure causes the tires to deform more as they roll over the uneven surface, resulting in increased friction between the tires and the ground. This extra resistance slows down the bike and requires more effort from the rider to maintain speed.

Additionally, lower tire pressure can also affect puncture resistance. With less air in the tires, there is a higher risk of pinch flats or snake bites when hitting sharp rocks or potholes.

Therefore, finding an optimal balance between lower tire pressure for traction and grip while still maintaining sufficient rolling resistance is crucial for achieving both comfort and control on gravel roads without sacrificing speed or puncture protection.

Advertisement

Comfort and Control

Finding the right balance between traction and grip while still maintaining sufficient rolling resistance is crucial for achieving comfort and control on gravel roads.

When it comes to mountain bike tire pressure, there are a few factors to consider. For downhill trails, a lower tire pressure can provide increased traction and better handling on steep descents. This allows the tires to deform around obstacles, maximizing grip.

On the other hand, riding in wet conditions calls for slightly higher tire pressure to prevent excessive sinking into soft terrain and to improve mud shedding capabilities.

It’s important to find the sweet spot that offers enough cushioning for a comfortable ride while maintaining control over the bike. Determining the ideal tire pressure involves considering factors such as rider weight, trail conditions, and personal preference.

By finding this balance, riders can enjoy optimal comfort and control on gravel roads without compromising performance or safety.

Advertisement

How to Determine the Ideal Tire Pressure

To determine the ideal tire pressure for riding on gravel roads, it’s important to consider factors such as terrain and rider weight. By finding the right balance, you can optimize comfort and control during your off-road adventures. Determining pressure involves understanding how different tire pressures affect performance on gravel surfaces.

Terrain Type Rider Weight Ideal Tire Pressure
Loose Gravel Light 30-35 psi
Medium 35-40 psi
Heavy 40-45 psi
Packed Gravel Light 25-30 psi
Medium 30-35 psi
Heavy 35-40 psi
Rough Gravel Light 20-25 psi
Medium 25-30 psi
Heavy 30-35 psi

Maintaining tire pressure is crucial for optimal performance. Regularly check your tires using tools like a digital pressure gauge or a floor pump with an integrated gauge. Adjust the pressure according to the conditions you will be riding in, ensuring that you have enough traction without sacrificing too much comfort.

Moving forward into the section about tools and techniques for checking tire pressure, it’s essential to ensure accurate readings to maintain peak performance while exploring gravel roads.

Tools and Techniques for Checking Tire Pressure

When it comes to checking tire pressure, there are a few tools and techniques that I rely on.

First, using a pressure gauge is essential for precise measurements. It allows me to accurately determine the exact pressure of my tires.

Advertisement

Second, feeling for tire firmness can also be helpful, as I can quickly assess if the tires need more or less air based on how they feel when pressed with my hand.

Lastly, if I am using tubeless tires, I make sure to regularly check and replenish the tubeless sealant to ensure optimal performance and prevent any potential leaks.

These tools and techniques help me maintain the ideal tire pressure for a smooth and efficient ride.

Using a Pressure Gauge

Check your pressure gauge to ensure that you have the correct tire pressure for riding on gravel roads. Accuracy is crucial when using a pressure gauge, so it’s important to choose a high-quality one. Cheaper gauges may not provide accurate readings, leading to incorrect tire pressures. To check the accuracy of your gauge, compare its reading with that of another reliable gauge or use an alternative method such as a digital gauge or an air compressor with a built-in pressure display.

Once you have confirmed the accuracy of your gauge, it’s time to measure the tire pressure. Attach the gauge securely onto the valve stem and press down firmly until you hear a hiss indicating that air has been released into the gauge. The reading will show you the current tire pressure in PSI (pounds per square inch).

Advertisement

With this information, you can now assess whether your tires are properly inflated for riding on gravel roads. Transitioning into feeling for tire firmness allows for another practical way of checking if your tire pressures are suitable for off-road conditions without relying solely on numbers and gauges.

Feeling for Tire Firmness

Assessing the firmness of your tires by applying pressure with your hand will help determine if they are suitable for off-road conditions. When riding on gravel roads, it is crucial to have the right tire pressure to ensure optimal performance and prevent any mishaps. To accurately assess tire firmness, follow these tire pressure troubleshooting techniques:

Firmness Level Description Suitable for Off-Road?
Too Soft Tire feels excessively squishy and can bottom out easily on rough terrain. No
Ideal Firmness Tire feels slightly firm but still provides enough cushioning for a smooth ride. Yes
Overinflated Tire feels overly hard, resulting in reduced traction and a harsh ride. No

By feeling for tire firmness using this method, you can quickly identify if adjustments need to be made to your tire pressure before heading out on gravel roads. Next, we will explore the importance of using tubeless sealant in maintaining optimal tire performance.

Using Tubeless Sealant

Using tubeless sealant is essential for maintaining optimal performance of your tires. When applying tubeless sealant, there are several benefits that come along with it.

  • Increased puncture resistance: The sealant fills small holes and punctures as they occur, preventing air leakage and flat tires.
  • Enhanced traction: Tubeless tires allow for lower tire pressures, increasing grip on loose gravel surfaces.
  • Improved rolling efficiency: With the absence of inner tubes, friction is reduced, resulting in a smoother and faster ride.
  • Self-sealing properties: The sealant automatically seals punctures while riding, minimizing the need for immediate repairs.
  • Weight reduction: Eliminating inner tubes reduces overall weight, making your bike more agile and responsive.

By understanding the application process and appreciating the benefits of using tubeless sealant, you can ensure a hassle-free gravel riding experience.

Now let’s delve into some tips for adjusting tire pressure on the go.

Advertisement

Tips for Adjusting Tire Pressure on the Go

When riding on gravel roads, it’s important to be able to adjust tire pressure on the go. This skill becomes crucial when facing steep descents or navigating through wet conditions. Adjusting tire pressure correctly can greatly enhance your performance and ensure a safer ride.

When tackling steep descents, lowering your tire pressure can improve traction and control. By reducing the air volume in your tires, you increase the contact patch with the ground, allowing for better grip on loose gravel surfaces. It’s essential to find the right balance between low enough pressure for traction and high enough pressure to avoid pinch flats.

In wet conditions, adjusting tire pressure is equally important. Lowering your tire pressure slightly will provide more surface area contact with the ground, increasing traction and reducing the chances of slipping or sliding. However, be mindful not to go too low as this may result in decreased stability and an increased risk of punctures from sharp rocks or debris.

As you venture into different terrains, always remember that adjusting tire pressure is a continuous process that requires observation and experimentation. It’s crucial to monitor how your bike performs under varying conditions and fine-tune accordingly.

Transitioning into common mistakes to avoid when adjusting tire pressure…

Advertisement

Common Mistakes to Avoid

When it comes to adjusting tire pressure on the go, there are a few common mistakes that should be avoided.

One of these is overinflating or underinflating the tires, which can negatively impact performance and handling on gravel roads.

Another mistake is ignoring changing conditions, such as changes in terrain or weather, which can greatly affect tire pressure needs.

Lastly, neglecting regular maintenance, such as checking tire pressure before each ride and ensuring proper tire condition, can lead to potential issues while riding on gravel roads.

Overinflating or Underinflating

If you’re not careful, overinflating or underinflating your mountain bike tires can lead to a less enjoyable ride on gravel roads.

Advertisement

Overinflating your tires can be dangerous as it reduces the contact patch between the tire and the ground, resulting in decreased traction. This lack of traction can make it difficult to maintain control and navigate through loose gravel, leading to a higher risk of accidents.

On the other hand, underinflating your tires can have its disadvantages too. It increases rolling resistance and makes pedaling harder, causing unnecessary fatigue. Moreover, underinflation reduces stability and maneuverability, making it more challenging to handle your bike on uneven surfaces.

So finding the right tire pressure for riding on gravel roads is crucial for an optimal cycling experience. Ignoring changing conditions such as varying terrains or weather conditions can also impact your ride in unexpected ways.

Ignoring Changing Conditions

Ignoring changing conditions, such as varying terrains or weather, can impact your ride on gravel roads in unexpected ways. Adjusting pressure according to the conditions is crucial for maintaining control and maximizing performance. Here are some key considerations for tire pressure maintenance:

  • Tire Width: Wider tires require lower pressure to increase grip and stability on rough surfaces.
  • Terrain Type: Decrease pressure for loose gravel to enhance traction, while increasing pressure on hard-packed gravel minimizes rolling resistance.
  • Weather Conditions: Lower pressure in wet conditions improves traction, but higher pressure may be needed in dry conditions to prevent pinch flats.
  • Rider Weight: Heavier riders should increase tire pressure to avoid bottoming out.
  • Personal Preference: Experiment with different pressures to find what works best for you.

By adjusting tire pressure accordingly, you can ensure a smoother and safer ride on gravel roads. Neglecting regular maintenance, including tire pressure adjustments, can lead to further issues down the line.

Neglecting Regular Maintenance

Make sure you don’t neglect regular maintenance to avoid potential issues down the line.

Advertisement

When riding on gravel roads, it is crucial to adjust your tire pressure according to the conditions you encounter. Wet conditions, for example, require a lower tire pressure to increase traction and prevent sliding. Adjusting your tire pressure can greatly impact your cornering performance as well.

Lower pressures allow the tires to conform better to uneven surfaces, providing more grip when navigating turns. Neglecting regular maintenance can lead to improper tire pressure, which in turn can affect your handling and control on gravel roads.

Maintaining proper tire pressure ensures optimal performance and safety while riding off-road. It’s important not only for cornering but also for overall comfort and efficiency on rough terrains.

Benefits of Proper Tire Pressure on Gravel Roads

To ensure a smooth and comfortable ride on gravel roads, it is important to maintain proper tire pressure. Determining the ideal pressure for your mountain bike tires on gravel can make a significant difference in your overall riding experience. Proper inflation offers several benefits that contribute to better performance and increased safety.

Firstly, maintaining the correct tire pressure allows for optimal traction on loose surfaces. Gravel roads can vary in terms of compactness and texture, but having the right amount of air in your tires ensures that they conform to the terrain, providing maximum grip. This prevents unnecessary skidding or sliding, allowing you to confidently navigate through gravel patches without losing control.

Advertisement

Additionally, riding with proper tire pressure helps absorb shocks and vibrations caused by rough terrain. With enough cushioning effect from properly inflated tires, you’ll experience less discomfort and fatigue during long rides on gravel roads. This means you can focus more on enjoying the scenery and less on dealing with jarring impacts.

Furthermore, maintaining accurate tire pressure enhances rolling efficiency. When your tires are inflated to their recommended levels, they roll smoothly over gravel surfaces with minimal resistance. This reduces energy wastage and enables you to cover longer distances effortlessly.

In conclusion, ensuring proper tire pressure when riding on gravel roads is crucial for a smooth and enjoyable experience. The benefits of determining the ideal pressure include improved traction, enhanced comfort, reduced fatigue, and increased efficiency while rolling over different types of gravel road surfaces. Now let’s delve into how to handle these various terrains effectively without compromising our ride quality.

How to Handle Different Gravel Road Surfaces

Navigating through different types of gravel road surfaces can be challenging, but with the right techniques, you can handle them effectively.

When it comes to riding on gravel roads, having the correct tire pressure is crucial. Different tire pressures are required for different types of gravel roads. For loose or sandy surfaces, a lower tire pressure is recommended to increase traction and prevent skidding. This allows the tires to grip the surface better and provides more stability. On the other hand, for compacted or hard-packed gravel roads, a higher tire pressure is necessary to reduce rolling resistance and maintain speed.

Advertisement

To handle loose or sandy surfaces, it is important to distribute your weight evenly on both wheels and keep a relaxed grip on the handlebars. This helps in maintaining balance and control over your bike as you navigate through these tricky terrains. Additionally, it is advisable to pedal smoothly without any sudden jerks or accelerations.

For compacted or hard-packed gravel roads, maintaining a steady speed can help in riding more efficiently. With higher tire pressure, there will be less resistance from the surface which allows for smoother pedaling and faster speeds.

Transitioning into adjusting tire pressure for different riding styles:

Now that we have discussed how to handle different gravel road surfaces effectively using appropriate techniques, let’s move on to another important aspect – adjusting tire pressure for different riding styles without compromising safety or performance.

Adjusting Tire Pressure for Different Riding Styles

Transitioning into adjusting tire pressure for different riding styles, it’s important to consider the terrain and your desired level of performance. When it comes to mountain bike suspension, choosing the right tire pressure is crucial. The amount of air in your tires directly affects how well your bike absorbs shocks and maintains traction on varying surfaces.

Advertisement

For riders who prefer a more aggressive style on gravel roads, lower tire pressures are recommended. This allows the tires to conform to the uneven surface, providing better grip and control. However, keep in mind that running too low of a pressure can increase the risk of pinch flats or rim damage.

On the other hand, if you prefer a faster-paced ride with less rolling resistance, higher tire pressures are suitable. This reduces the amount of tire deformation during contact with the ground, resulting in improved efficiency and speed. However, be cautious not to go too high as this may compromise traction and comfort.

To find the optimal tire pressure for your riding style, start by experimenting within a range recommended by your bike manufacturer or experienced riders. Fine-tune from there based on personal preferences and feedback from each ride.

Transitioning into the subsequent section about ‘tire pressure recommendations for various tire widths,’ it’s essential to understand how different widths affect overall performance without compromising safety or comfort.

Tire Pressure Recommendations for Various Tire Widths

When considering different tire widths, it’s important to understand the recommended tire pressures for optimal performance and safety. For wet conditions, it is generally recommended to lower the tire pressure slightly to increase traction. This allows the tire to conform better to the surface, improving grip and reducing the chances of slipping. However, it’s important not to go too low as this can lead to pinch flats or a loss of control.

Advertisement

On sandy terrain, a higher tire pressure is typically suggested. This helps prevent the tires from sinking into the sand and improves rolling efficiency. By maintaining a firmer contact with the ground, you’ll be able to navigate sandy areas more easily without getting bogged down.

It’s worth noting that these recommendations may vary depending on personal preference and riding style. Some riders may prefer slightly higher or lower pressures based on their own experiences and comfort levels.

In conclusion, adjusting your tire pressure according to different terrains can greatly enhance your riding experience. By following these recommendations for wet conditions and sandy terrain, you can optimize your performance while maintaining safety on your mountain bike rides.

Now let’s move on to some tips for maintaining optimal tire pressure on long rides.

Tips for Maintaining Optimal Tire Pressure on Long Rides

To maintain optimal tire pressure on long rides, it is important to regularly check and adjust the air in your tires. This is especially crucial when riding on gravel roads, as the terrain can be unpredictable.

Advertisement

Here are some tips to help you maintain the right tire pressure for a smooth and safe ride:

  • Check tire pressure before every ride: Use a reliable pressure gauge to ensure your tires are inflated to the recommended PSI. This will help prevent pinch flats and improve traction on rough surfaces.

  • Adjust tire pressure for wet conditions: When riding in wet conditions, it is advisable to slightly lower your tire pressure to increase grip. This will provide better traction and reduce the risk of sliding or skidding.

  • Maintain tire pressure on steep descents: When going downhill, it is crucial to have adequate tire pressure for stability and control. Lowering the air pressure slightly can enhance grip without compromising speed.

  • Monitor temperature changes: Tire pressure can fluctuate with temperature variations. If you notice significant changes, make necessary adjustments to maintain optimal performance.

  • Carry a portable pump or CO2 inflator: In case of unexpected drops in tire pressure during your ride, it is recommended to have a portable pump or CO2 inflator handy. This will allow you to quickly add air if needed.

By following these tips, you can ensure that your mountain bike tires maintain optimal performance throughout long rides.

Now let’s move on to troubleshooting common tire pressure issues without skipping a beat.

Troubleshooting Common Tire Pressure Issues

Maintaining optimal tire pressure on long rides is crucial for a smooth and enjoyable biking experience. However, there may be times when you encounter common tire pressure issues that need troubleshooting. Understanding how to address these problems can help you find the right tire pressure for your mountain bike on gravel roads.

One common issue is having too low or too high tire pressure. This can cause discomfort, reduced traction, and increased risk of flats. To troubleshoot this problem, you can refer to the following table:

Advertisement
Tire Pressure Issue Possible Cause Solution
Low tire pressure Poor inflation or small punctures Inflate the tires to the recommended PSI or patch any punctures
High tire pressure Over-inflation or hot weather Release some air from the tires or wait for them to cool down

By addressing these issues promptly, you can ensure a more comfortable and safer ride on gravel roads. Finding the right tire pressure is essential for optimal performance and control. It may require some trial and error to determine what works best for your specific riding style and terrain conditions.

In conclusion, troubleshooting tire pressure issues is an important part of maintaining an optimal biking experience on gravel roads. By understanding possible causes and solutions for low or high tire pressures, you can fine-tune your bike’s performance. Now let’s move on to our final thoughts and recommendations for mountain bike tire maintenance.

Final Thoughts and Recommendations

In conclusion, when it comes to riding on gravel roads, there are a few final thoughts and recommendations that can greatly enhance your biking experience.

One important consideration is adjusting tire pressure for wet conditions. Wet gravel roads can be slippery, so reducing tire pressure slightly can improve traction and prevent sliding. However, be careful not to lower the pressure too much as it may increase the risk of pinch flats or rim damage.

Another crucial aspect to consider is the impact of tire pressure on cornering performance. Higher tire pressures provide better stability and reduce rolling resistance on straightaways, but they can compromise cornering ability. Lowering the tire pressure slightly allows for increased contact patch with the ground, providing better grip during turns.

Advertisement

It’s essential to find a balance between comfort, traction, and performance when adjusting tire pressure for gravel road riding. Experimenting with different pressures and observing how your bike handles in various conditions will help you determine the optimal range for your specific needs.

Remember that these final thoughts and recommendations are based on general guidelines, but individual preferences may vary. So always trust your own judgment and make adjustments accordingly to ensure an enjoyable and safe biking experience on gravel roads.

Frequently Asked Questions

How does tire pressure affect the comfort of the ride on gravel roads?

When it comes to choosing the right tire pressure for different types of gravel surfaces, it’s important to consider the impact on bike handling and stability.

A lower tire pressure provides more comfort by absorbing bumps and vibrations on rough gravel roads. However, too low of a pressure can increase the risk of pinch flats or sidewall damage.

It’s crucial to find a balance that offers both comfort and sufficient support for optimal bike control and stability on various gravel terrains.

Advertisement

Can I use the same tire pressure for both front and rear tires when riding on gravel?

When it comes to tire pressure on gravel, one size does not fit all. Different types of gravel surfaces require different tire pressures for optimal performance.

Additionally, when participating in the demanding sport of gravel racing, it is crucial to adhere to recommended tire pressures to ensure both speed and control.

However, it is important to note that using the same tire pressure for both front and rear tires may not always be ideal, as individual preferences and riding styles can differ.

Are there any specific tire pressure recommendations for riding on wet gravel roads?

When riding on wet gravel roads, it’s important to adjust your tire pressure accordingly. The recommended tire pressure for different types of gravel surfaces can vary.

Generally, a slightly lower tire pressure is preferred for wet conditions to increase traction and prevent slippage. However, it’s crucial to strike a balance as too low of a tire pressure can lead to increased rolling resistance.

Advertisement

Experimenting with different pressures will help find the optimal setting for your specific riding conditions.

Does tire pressure affect the grip and traction on loose gravel surfaces?

Tire pressure plays a crucial role in off-road performance, akin to a tightrope walker’s balance on a thin rope. It greatly affects grip and traction on loose gravel surfaces.

Finding the optimal tire pressure for different gravel road conditions is key. Lower pressure increases contact area, enhancing grip but risking pinch flats, while higher pressure reduces traction.

Experimentation is necessary to strike the perfect balance and conquer those challenging gravel roads with confidence and control.

What are the signs that indicate I have too low or too high tire pressure when riding on gravel roads?

When it comes to the effects of tire pressure on mountain bike performance, finding the optimal tire pressure for gravel riding is crucial.

Advertisement

Riding with too low tire pressure on gravel roads can result in a sluggish and unstable ride, making it difficult to maintain control and reducing overall traction.

On the other hand, riding with too high tire pressure can lead to reduced grip and an uncomfortable ride.

It’s important to find the right balance by experimenting with different pressures based on your weight, terrain conditions, and personal preference.

Conclusion

In conclusion, understanding the importance of tire pressure when riding on gravel roads is crucial for optimal performance and safety.

By finding the right tire pressure and maintaining it throughout your ride, you can ensure a smooth and enjoyable experience.

Advertisement

While some may argue that monitoring tire pressure can be time-consuming or unnecessary, the benefits far outweigh any inconvenience.

With improved traction, control, and reduced risk of flats or damage to your tires, taking the time to properly inflate them is well worth it.

So don’t hesitate to invest in a good pump and gauge and make tire pressure a priority on your next gravel adventure.

Continue Reading

Gravel Bike

What Kimd Of Bike To Buy For Gravel Trails

Published

on

By

An image showcasing a sturdy bike with wide tires, equipped with disc brakes and a suspension fork, conquering a scenic gravel trail surrounded by lush greenery and rocky terrain

Ready to tackle the gravel trails but unsure which bike is best for the adventure? Look no further!

In this article, I’ll be your guide through the world of bikes designed specifically for those rough and rugged terrain. From mountain bikes built to tackle any obstacle, to versatile adventure bikes perfect for long distances, we’ll explore all the options available.

So, saddle up and get ready to find your ideal ride for those exhilarating gravel trails!

Key Takeaways

  • High-quality touring bikes with wide tires and durable construction are ideal for gravel trails.
  • Different touring bike brands offer unique advantages, so choose based on preferences and needs.
  • Wide tires on soft surfaces provide increased comfort, improved control, better traction, reduced fatigue, and enhanced durability.
  • The right tire tread is important for different terrains to maintain stability and prevent sliding.

Mountain Bikes

If you’re looking to ride on gravel trails, you’ll want to consider a mountain bike. Mountain bikes are designed for off-road riding and can handle the rough terrain that gravel trails often present. They have sturdy frames, wide tires with aggressive tread patterns, and suspension systems that absorb shocks and bumps. These features make them ideal for navigating through uneven surfaces and maintaining control on loose gravel.

Advertisement

When it comes to mountain biking techniques, there are a few things to keep in mind. First, always maintain a balanced body position by keeping your weight centered over the bike. This will help you maneuver through obstacles more easily. Second, use proper braking technique by applying both brakes evenly to avoid skidding or losing control. Lastly, practice shifting gears smoothly to ensure efficient power transfer when climbing or descending.

Maintenance tips for mountain bikes include regularly cleaning and lubricating the chain to prevent rust and improve performance. It’s also important to check tire pressure before each ride and inspect the brakes for wear.

Now let’s transition into discussing gravel bikes without missing a beat. Gravel bikes offer some unique advantages when it comes to riding on gravel trails…

Gravel Bikes

When considering off-road paths, a gravel bike is an excellent choice. Gravel bikes are specifically designed to handle the challenges of riding on gravel trails, making them perfect for adventurous riders looking to explore new terrains. These bikes have several features that set them apart from other types of bicycles.

One key feature of gravel bikes is their wider tires, typically ranging from 35mm to 45mm in width. This allows for better traction and stability on loose surfaces, ensuring a smooth and comfortable ride. Additionally, gravel bikes often have a more relaxed geometry compared to road or mountain bikes, providing a more upright position that enhances comfort during long rides.

Advertisement

When it comes to brands, there are several reputable options available in the market. Some popular gravel bike brands include Specialized, Trek, Giant, and Cannondale. These brands offer a wide range of models with varying components and price points to suit different budgets and preferences.

Transitioning into the next section about cyclocross bikes, it’s important to note that while both gravel bikes and cyclocross bikes are suitable for off-road riding, they have slight differences in design and intended use.

Cyclocross Bikes

When it comes to off-road riding, one of the best options is a Cyclocross bike. These bikes are known for their agility and responsiveness, making them perfect for navigating through gravel trails and other challenging terrains.

Advertisement

Additionally, Cyclocross bikes are typically lighter in weight compared to other types of bikes, allowing for faster acceleration and easier maneuverability. Another advantage is their narrower tires, which provide better efficiency on hard surfaces, allowing riders to maintain speed with less effort.

Overall, if you’re looking for a bike that can handle off-road adventures with ease while still offering great performance on smoother surfaces, a Cyclocross bike is definitely worth considering.

Agile and Responsive for Off-Road Riding

For off-road riding, it’s essential to choose a bike that’s agile and responsive. One key aspect to consider is the benefit of suspension systems for off-road riding. These systems allow the bike to absorb bumps and uneven surfaces, providing a smoother and more comfortable ride. They also help maintain better control and traction on rough terrains, enhancing overall performance.

Another factor that plays a crucial role in agility and control is proper bike fit. A bike that fits well ensures an optimal riding position, allowing for quick maneuvering and precise handling on gravel trails. It’s important to find the right frame size, handlebar width, and saddle height that suit your body dimensions.

By prioritizing agility and control through suspension systems and proper fit, you’ll be able to tackle off-road trails with confidence and ease.

Advertisement

Speaking of ease, let’s now transition into discussing the importance of lighter weight for faster acceleration without skipping a beat.

Lighter Weight for Faster Acceleration

To achieve faster acceleration, prioritize a lighter weight when choosing your off-road bike. A lighter bike allows for quicker maneuverability and easier pedaling, resulting in faster speeds. Every ounce counts on gravel trails, helping you gain and maintain momentum. A lighter bike also improves climbing capabilities, requiring less effort on steep inclines. Manufacturers reduce overall weight to create agile and responsive frames and components for off-road riding, enhancing your experience on challenging terrain.

With faster acceleration and improved climbing abilities, a lighter-weight off-road bike enhances your performance on gravel trails.

When it comes to efficiency on hard surfaces, narrower tires are key.

Narrower Tires for Better Efficiency on Hard Surfaces

Choosing a lighter off-road bike with narrower tires can greatly improve efficiency on hard surfaces. When it comes to gravel trails, opting for narrower tires over wider ones has its advantages. Here are four reasons why:

Advertisement
  1. Increased speed: Narrower tires have less rolling resistance, allowing you to accelerate faster and maintain higher speeds on hard surfaces.

  2. Better traction: With less surface area in contact with the ground, narrower tires can dig into loose gravel and provide better grip.

  3. Improved maneuverability: The reduced width of the tires makes it easier to navigate corners and switch directions quickly.

  4. Less maintenance: Narrower tires tend to pick up fewer rocks and debris from the trail, minimizing the need for frequent cleaning.

Considering these benefits, a bike equipped with narrower tires is a great choice for efficient riding on hard-packed gravel trails.

Now let’s delve into the world of adventure bikes without skipping a beat.

Adventure Bikes

When looking for an adventure bike, you should consider the type of gravel trails you plan on riding. Adventure bikes are specifically designed to handle a variety of terrains, making them perfect for gravel trails. These bikes have features that enhance their performance and durability in off-road conditions.

One of the main benefits of adventure bikes is their versatility. They typically come with wider tires that provide better traction on loose surfaces like gravel. This allows you to navigate through uneven terrain with ease and confidence. Adventure bikes also have a more relaxed geometry compared to road bikes, providing a comfortable riding position for long hours on the saddle.

In addition to their tire width and geometry, adventure bikes often come equipped with disc brakes for reliable stopping power in all weather conditions. They also have mounting points for racks and panniers, allowing you to carry your gear on multi-day adventures.

Advertisement

Transitioning into the subsequent section about touring bikes, it’s important to note that while adventure bikes excel on gravel trails, touring bikes are specifically designed for long-distance rides on paved roads.

Touring Bikes

If you’re planning on taking long rides on paved roads, touring bikes are a great option. These bikes are specifically designed for long-distance travel and offer a comfortable riding experience. One of the key features of touring bikes is their ability to carry heavy loads, making them ideal for bikepacking or extended trips. They usually come with racks and panniers that allow you to easily transport your gear.

When it comes to choosing the best touring bike brand, there are several options available in the market. Some popular brands include Trek, Surly, and Salsa Cycles. These brands have a reputation for producing high-quality touring bikes that can withstand rough terrains and provide stability during long rides.

To help you better understand the different features offered by various touring bike brands, here’s a comparison table:

Brand Frame Material Tire Size
Trek Aluminum 700c
Surly Steel 26"
Salsa Carbon Fiber 650b

Each brand offers its unique advantages based on your preferences and needs. Now let’s move on to the next section about ‘fat bikes’ which are perfect for off-road adventures while still maintaining versatility and comfort."

Advertisement

Fat Bikes

When it comes to riding on soft surfaces like sand, snow, or mud, wide tires are essential for maximum traction. Fat bikes are designed with extra-wide tires that provide excellent grip and stability on these types of terrain.

The wide tires also allow the bike to float over these soft surfaces, making it easier to ride in challenging conditions. Additionally, fat bikes are built with durable construction to withstand rough conditions, ensuring that they can handle anything you throw at them.

Wide Tires for Maximum Traction on Soft Surfaces

For maximum traction on soft surfaces, wide tires are essential. When riding on gravel trails or any kind of loose terrain, having wider tires allows for a larger contact patch with the ground, which in turn provides better grip and stability.

The tire width you choose will depend on the specific terrain you plan to ride on. For example, if you’re mainly riding on packed gravel or hard-packed dirt, a tire width between 35-40mm would be suitable. On the other hand, if you anticipate encountering softer surfaces like sand or mud, opting for a tire width of 45-50mm would be more appropriate.

Wide tires also allow for lower tire pressure options, which further enhances their performance on soft surfaces. By decreasing the tire pressure within the recommended range (usually indicated on the sidewall), you increase the tire’s ability to conform and grip uneven terrain.

Advertisement

With their increased surface area and lower pressure capabilities, wide tires provide excellent flotation over sand, snow, and mud without sacrificing speed or agility. They effortlessly glide over these challenging terrains while providing exceptional traction and control.

Floats Over Sand, Snow, and Mud

Wide tires with their increased surface area and lower pressure capabilities effortlessly glide over sand, snow, and mud while providing exceptional traction and control. When it comes to conquering these soft surfaces, it’s crucial to understand the concept of floats vs sinks.

Wide tires excel in floating on top of loose terrain like sand or snow, preventing them from sinking in and getting stuck. Additionally, the best tire tread for different terrains plays a significant role in performance. Aggressive knobs are perfect for muddy conditions as they dig into the ground for maximum grip. On the other hand, smaller knobs with wider spacing work well on sandy trails by allowing the tire to float better. Lastly, a more closely spaced tread pattern is ideal for snowy conditions to maintain stability and prevent sliding.

Now let’s dive into discussing durable construction for rough conditions without any delay.

Durable Construction for Rough Conditions

With durable construction in mind, you’ll want to look for tires that can withstand rough conditions and provide long-lasting performance. When it comes to gravel trails, a bike with a sturdy frame is essential. Look for durable frame materials such as aluminum or steel, which can handle the bumps and vibrations of rough terrain. Additionally, consider suspension options to further enhance durability. Suspension forks absorb shocks and impacts, ensuring a smoother ride and reducing stress on the frame. A rear suspension system can also be beneficial for added comfort and control over uneven surfaces. By investing in a bike with durable construction and reliable suspension options, you can confidently tackle any rough conditions that come your way while enjoying the thrill of riding on gravel trails.

Advertisement
Pros Cons
Increased comfort Added weight
Improved control Higher cost
Better traction Maintenance requirements
Reduced fatigue Limited efficiency on smooth roads
Enhanced durability Decreased pedaling efficiency

Frequently Asked Questions

Can I use a mountain bike for gravel trails?

Yes, you can use a mountain bike for gravel trails. It has its pros and cons.

The pros include the ability to handle rough terrain with ease and provide better control on descents.

However, the cons include slower speeds on flat surfaces and less efficiency compared to a hybrid bike.

When choosing tire width for a mountain bike on gravel trails, consider wider tires (around 2 inches) for improved stability and traction, while narrower tires offer more speed but less stability.

What is the main difference between a gravel bike and a cyclocross bike?

Comparing gravel bikes to cyclocross bikes is like comparing a sturdy SUV to a nimble rally car. Both are designed for off-road adventures, but with different focuses.

Advertisement

Gravel bikes excel in long-distance comfort and versatility, making them ideal for exploring various terrain types.

On the other hand, cyclocross bikes prioritize speed and agility, perfect for intense races on rough courses.

Ultimately, the choice between the two depends on your specific off-road preferences and riding style.

Are adventure bikes suitable for long-distance rides on gravel trails?

Adventure bikes can be a great option for long-distance rides on gravel trails. They offer a comfortable riding position and are designed to handle rough terrains.

The pros of using a gravel bike for long distance rides include their versatility, allowing you to tackle different surfaces with ease. However, there are alternative bike options for gravel trails such as mountain bikes or cyclocross bikes that may provide better performance in certain situations.

Advertisement

Consider your specific needs and preferences when choosing the right bike.

Can I use a touring bike for off-road gravel trails?

Yes, you can use a touring bike for off-road gravel trails. While it may not be as nimble as a dedicated gravel bike, a touring bike offers stability and durability, making it suitable for rough terrains. It is important to choose a model with wider tires and sturdy construction.

Additionally, while hybrid bikes can handle some off-road trails, they may not be ideal for more challenging terrains.

As for speed, a gravel bike is generally faster than a mountain bike on gravel trails due to its lighter frame and more efficient rolling resistance.

Are fat bikes recommended for gravel trails or are they more suited for snow or sand terrains?

Fat bikes are versatile and can handle a variety of terrains, including gravel trails. Their wide tires provide excellent traction on loose surfaces, making them suitable for off-road adventures.

Advertisement

However, fat bikes may not be as efficient or fast on smoother trails compared to gravel bikes. Gravel bikes are specifically designed for off-road riding and offer a more efficient and comfortable experience on gravel trails.

Ultimately, the choice between fat bikes and gravel bikes depends on personal preference and the specific terrain you plan to ride on.

Conclusion

In conclusion, it’s important to choose a bike that suits your needs and riding style when considering what kind of bike to buy for gravel trails. Whether it’s a mountain bike for technical terrain or a gravel bike for smoother paths, there are plenty of options available.

One interesting statistic to note is that sales of adventure bikes have increased by 60% in the past year, reflecting the growing popularity of this versatile and capable type of bike.

So, go out there and find the perfect ride to conquer those gravel trails!

Advertisement

Continue Reading
Advertisement

Affiliate disclaimer

As an affiliate, we may earn a commission from qualifying purchases. We get commissions for purchases made through links on this website from Amazon and other third parties.

About us

We are a passionate team driven by the belief that cycling is a fantastic and accessible way to stay active while enjoying the beauty of the outdoors. Our mission is to share our love for cycling with as many people as possible. We provide a welcoming environment for individuals of all ages, abilities, and backgrounds to come together and ride bikes. With Ralf’s visionary leadership, Zane’s expertise in cycling adventures, and Olivia’s dedication to community building, we strive to create a vibrant space where everyone can experience the joy of cycling. Through group rides, workshops, and inclusive events, we inspire and empower individuals to embrace an active lifestyle. Join us in our quest to pedal together, embrace the joy of cycling, and foster connections that last a lifetime.

Advertisement

Trending