Were you aware that more than 40% of cyclists encounter a mechanical problem while riding?
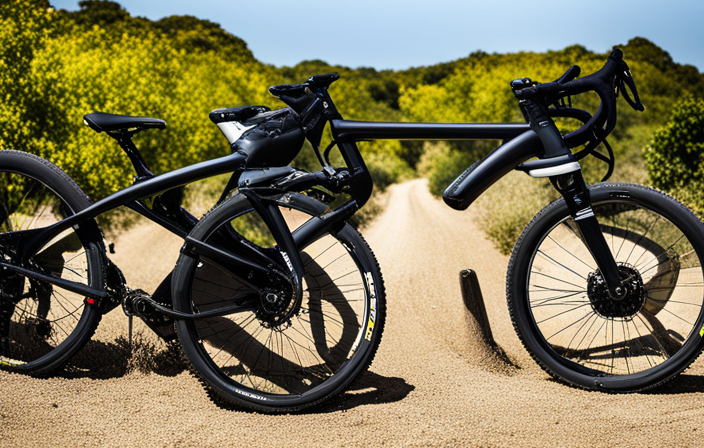
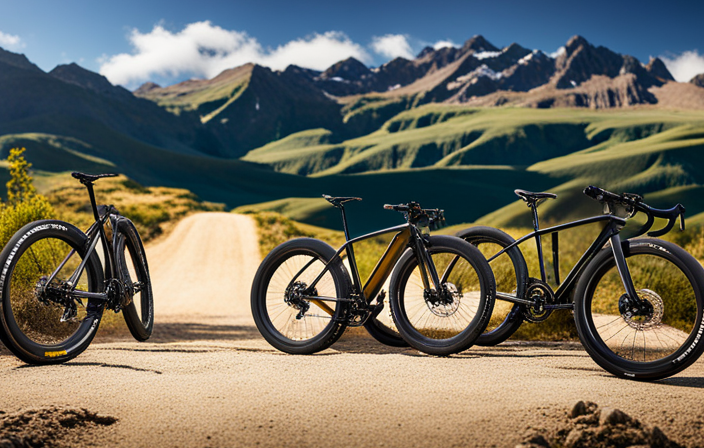
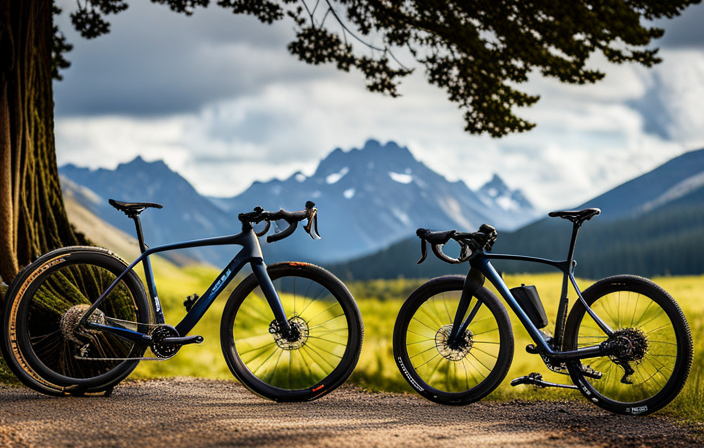
As an experienced gravel cyclist, I’ve learned the importance of being prepared for any situation.
In this article, I’ll share my knowledge on what to carry on a gravel bike to ensure a smooth and enjoyable ride.
From essential repair tools and spare parts to snacks and navigation devices, we’ll cover everything you need to stay safe and prepared on those rugged gravel roads.
Let’s dive in!
Key Takeaways
- Multitool with Allen keys, screwdrivers, and other tools
- Tire levers for easy tire removal
- Small pump or CO2 inflator for flat tire prevention
- Spare tubes or patch kits for quick tire repair
Repair Tools
You’ll need a few essential repair tools to bring along on your gravel bike rides. Bike maintenance is crucial when riding off-road, and having the right tools can save you from being stranded in the middle of nowhere.
One of the most important tools to have is a multitool. This compact device usually includes Allen keys, screwdrivers, and other tools that can help you make basic adjustments on your bike.
It’s also a good idea to carry tire levers and a small pump or CO2 inflator for flat tire prevention. These tools will allow you to easily remove and replace your tires if needed.
As someone who has experienced countless flat tires on gravel rides, I cannot stress enough how important it is to be prepared. Carrying spare tubes or patch kits is essential. Even if you’re confident in your ability to fix a flat tire, having an extra tube can save time and frustration.
Incorporating these repair tools into your kit will ensure that you’re ready for any unexpected issues that may arise during your gravel adventures.
Speaking of being prepared, let’s move on to the next section about spare parts without missing a beat.
Spare Parts
Make sure to pack spare parts in case of any necessary repairs while riding on rough terrain. When it comes to gravel biking, being prepared is key. You never know when a flat tire or other mechanical issue might occur, so having spare parts on hand can save you from being stranded in the middle of nowhere.
One of the most important spare parts to carry is a spare tube. A puncture can happen at any time, and having a spare tube allows you to quickly replace the damaged one and get back on the road. I always make sure to carry at least one spare tube with me on every ride.
Another essential item is a puncture repair kit. This small and lightweight kit contains everything you need to fix minor punctures on the go. It typically includes patches, glue, and tire levers for easy removal and reinstallation of the tire. With a puncture repair kit, you can quickly fix any small holes or cuts in your tire and continue riding without much delay.
Having these spare parts ensures that you can handle common issues that may arise during your gravel adventures. But what about more serious tire damage? In the next section, we’ll discuss the importance of carrying a tire repair kit for those situations where a simple patch won’t suffice.
Tire Repair Kit
Carrying a tire repair kit is crucial for handling more serious tire damage on rough terrain. As someone who loves gravel biking, I’ve learned the importance of being prepared for any situation that may arise. When it comes to bike maintenance, having a tire repair kit can be a game-changer. It allows me to quickly fix punctures and cuts in my tires, keeping me rolling without having to end my ride prematurely.
Here are four essential items that every tire repair kit should include:
-
Tire patches: These adhesive patches are perfect for repairing small punctures in the tire’s tread. They provide a reliable and long-lasting fix.
-
Tire levers: These handy tools help remove the tire from the rim, making it easier to access and patch up any damage.
-
Tubeless sealant: This liquid sealant is a must-have for tubeless setups. It quickly seals small punctures by filling them with sealant, allowing you to continue riding without needing to install a new tube.
-
Valve core tool: This tool helps remove and tighten the valve core when adding or releasing air from the tires. Having one in your kit ensures you can easily adjust your tire pressure on the go.
With these items in my tire repair kit, I feel confident tackling any potential issues with my tires while out on the trail. But what good would fixing a flat be if I couldn’t inflate my tires afterward? Let’s dive into the next section about pumps or CO2 inflators…
Pump or CO2 Inflator
When it comes to dealing with tire repairs, having a pump or CO2 inflator is essential for quickly re-inflating your tires and getting back on the road. Both options have their pros and cons, so it’s important to choose the one that best suits your needs.
A pump is a reliable choice as it doesn’t require any additional cartridges or refills. It may take longer to fully inflate a tire compared to a CO2 inflator, but it allows you to make multiple attempts if needed without worrying about running out of air. Additionally, pumps are generally more durable and can handle rough handling during rides.
On the other hand, CO2 inflators are lightweight and compact, making them ideal for riders who prefer minimalistic setups. They provide quick and effortless inflation with just a push of a button. However, they do require extra cartridges which can be an added cost and inconvenience when they run out.
Some popular brands for pumps include Lezyne, Topeak, and Blackburn. For CO2 inflators, brands like Genuine Innovations and PRO Bike Tool are widely recommended by gravel bikers.
Now let’s move on to the next essential item in our kit: the multi-tool…
Multi-tool
You’ll want to have a multi-tool in your kit for quick and efficient adjustments on the go. A multi-tool is an essential piece of equipment for gravel bike maintenance, allowing you to make necessary repairs or adjustments while out on the trail. Whether it’s tightening loose bolts, adjusting seat height, or fixing a minor mechanical issue, a multi-tool provides all the necessary tools in one compact package.
When it comes to choosing a multi-tool for your gravel bike, there are a few key features to consider. Look for one that includes Allen wrenches in various sizes, as these are commonly used for most components on your bike. Additionally, having screwdrivers (both flathead and Phillips) can come in handy for adjusting derailleur limits or tightening screws.
Investing in a high-quality multi-tool will ensure durability and longevity even when subjected to rough riding conditions. Look for options made from lightweight materials like aluminum or titanium that won’t add unnecessary weight to your pack.
Now let’s transition into the next section about chain lubricant. Keeping your chain properly lubricated is crucial for smooth shifting and extending its lifespan.
Chain Lubricant
To ensure smooth shifting and prolong the life of your chain, it’s important to regularly apply chain lubricant. The right lubricant can make a world of difference in your gravel biking experience. There are several different options available on the market, each with their own unique properties. Some popular choices include wet lubricants, dry lubricants, and wax-based lubricants. Wet lubricants are great for wet and muddy conditions as they provide excellent protection against moisture. Dry lubricants, on the other hand, work well in dusty environments as they create a protective barrier that prevents dirt from sticking to the chain. Wax-based lubricants offer a clean and efficient solution by providing long-lasting performance.
Proper application technique is also crucial when it comes to chain lubrication. Start by cleaning your chain thoroughly using a degreaser or a dedicated chain cleaner tool. Once clean, apply the desired amount of lube evenly along the entire length of the chain while rotating the pedals backward. This ensures that every link is coated properly.
Table:
| Type of Lubricant | Recommended Conditions | Benefits |
|---|---|---|
| Wet Lubricant | Wet and muddy | Moisture protection |
| Dry Lubricant | Dusty | Dirt prevention |
| Wax-based Lubricant | All conditions | Long-lasting performance |
Finding the right combination of lube and technique may take some trial and error, but once you’ve found what works best for you and your bike, you’ll notice a significant improvement in shifting performance and overall durability.
When it comes to gravel biking adventures, being prepared is key. So let’s move on to discussing what essential items should be included in your first aid kit.
First Aid Kit
Make sure you have a well-stocked first aid kit for any unexpected situations on your gravel biking adventures. When it comes to a first aid kit, it’s not just about having one, but also having the right contents.
Some essential items to include in your kit are adhesive bandages of various sizes, gauze pads, antiseptic wipes, medical tape, and tweezers for removing splinters or ticks. Additionally, pack some pain relievers like ibuprofen or acetaminophen and any personal medications you may need.
In terms of storage options for your first aid kit, there are a few choices available. You can opt for a compact pouch that easily fits in your saddlebag or backpack. These pouches usually have multiple compartments to keep everything organized and accessible. Another option is to use a waterproof container with dividers that can be attached to your bike frame or handlebars using straps or Velcro.
Having a well-prepared first aid kit gives you peace of mind knowing that you’re prepared for any injuries or mishaps on the trails. So don’t forget to check your first aid supplies regularly and replenish them as needed.
Now let’s move on to the next important item: the helmet.
Helmet
Wearing a helmet is crucial for your safety while riding. As an experienced gravel cyclist, I never leave home without my trusty helmet. It provides essential protection for my head in case of a fall or accident. But the helmet is just the beginning of what you should carry on your gravel bike adventures.
In addition to the helmet, it’s important to have a well-stocked repair kit with you at all times. This includes spare parts like tubes and a tire repair kit, as well as tools such as a pump or CO2 inflator and a multi-tool for any on-the-go adjustments. Don’t forget to bring chain lubricant too, to keep everything running smoothly.
Safety should always be a priority, so having a first aid kit is essential in case of minor injuries. Lights and reflective gear are also important for visibility, especially if you’re riding during low light conditions or at night. And don’t forget to stay hydrated by carrying a water bottle and cage with you.
As we transition into the next section about lights, it’s important to note that they play a vital role in ensuring your safety on the road.
Lights
As I mentioned before, a helmet is an essential piece of equipment when riding a gravel bike. But let’s not forget about another important aspect of safety: lights. Bike lights are crucial for visibility, especially when riding in low light conditions or at night. Not only do they allow you to see the road ahead, but they also make you more visible to other road users.
When it comes to choosing bike lights for your gravel adventures, there are several factors to consider. First and foremost, you want lights that are bright enough to illuminate the path ahead and ensure your safety. Look for lights with high lumens output and different brightness settings so you can adjust them according to your needs.
Battery life is also an important consideration. You don’t want your lights dying on you mid-ride, leaving you in the dark. Opt for lights with long battery life or ones that can be easily recharged on the go.
In addition to these main points, here are three sub-lists that highlight why bike lights are indispensable:
- Increased visibility: Lights make you more visible to motorists and other cyclists.
- Safety during low-light conditions: They help you navigate through dimly lit areas or during dusk and dawn rides.
- Nighttime adventures: With proper lighting, exploring trails after sunset becomes a thrilling experience.
Now that we have covered the importance of bike accessories like helmets and lights, let’s move on to another crucial aspect of staying safe while cycling – reflective gear.
Reflective Gear
Reflective gear is essential for enhancing visibility and ensuring safety while cycling in low light conditions or at night. When riding a gravel bike, it’s crucial to make yourself as visible as possible to other road users. Reflective clothing and bike accessories play a vital role in achieving this goal.
Wearing reflective clothing such as jackets, vests, or even ankle bands can significantly improve your visibility on the road. These garments are designed with reflective materials that reflect light back towards its source, making you more noticeable to drivers and pedestrians. Additionally, attaching reflective accessories like stickers or tape to your bike frame, wheels, or helmet can further enhance your visibility from different angles.
Investing in high-quality reflectors for your bicycle is also important. These small yet powerful accessories can be attached to various parts of your bike and provide an extra layer of visibility. Whether it’s reflector pedals, spoke reflectors, or even reflective strips on your tires, these additions will greatly increase your safety when riding in low light conditions.
Transitioning into the next section about water bottle and cage:
Now that we’ve covered the importance of reflective gear for enhancing visibility during nighttime rides, let’s move on to another crucial item you should carry – a reliable water bottle and cage.
Water Bottle and Cage
After making sure you are visible on the road with reflective gear, it’s time to think about staying hydrated during your gravel bike adventures. Hydration is key when riding long distances, especially in hot weather. Having a water bottle and cage on your bike allows you to have quick and easy access to fluids while riding.
When it comes to hydration options, there are a few things to consider. First, make sure your water bottle is easy to reach and securely held by the cage. The last thing you want is for your bottle to fall out mid-ride! Second, consider the size of the bottle. It should be large enough to hold an adequate amount of water but not too bulky that it becomes cumbersome.
If you prefer not using a traditional water bottle and cage setup, there are alternative options available. One popular choice is a hydration pack or backpack with a built-in bladder system. This allows for hands-free drinking through a tube that connects to the bladder.
In summary, having proper hydration options on your gravel bike is crucial for maintaining performance and comfort during long rides. Now that we’ve covered staying hydrated, let’s move on to another essential aspect of gravel biking: snacks and nutrition…
Snacks and Nutrition
One important aspect of gravel biking is ensuring you have enough snacks and proper nutrition to fuel your rides. As an experienced gravel cyclist, I know the importance of staying hydrated and properly fueled during long rides.
Hydration tips are essential to keep in mind when planning your snacks for a gravel bike ride. It’s crucial to bring enough water or electrolyte drinks to stay hydrated throughout your ride. Investing in a hydration pack or carrying extra water bottles can help ensure you have enough fluids to sustain you.
In addition to hydration, pre-ride fueling is another key consideration. Before hitting the trails, it’s important to consume a balanced meal that includes carbohydrates, protein, and healthy fats. This will provide you with the necessary energy for endurance riding. Some great pre-ride snack options include oatmeal with fruits and nuts, yogurt with granola, or a peanut butter and banana sandwich.
Proper nutrition not only keeps you energized but also helps prevent bonking or hitting the wall during your ride. Snacks like energy bars, trail mix, bananas, or nut butter packets are great choices to carry on your gravel bike. These portable options provide quick energy boosts without weighing you down.
As we move into discussing maps or GPS devices in the next section, it’s essential to have all aspects of your ride planned out – including knowing where you’re going and how much food and water you’ll need along the way.
Maps or GPS Device
Make sure you have a good map or GPS device to navigate your routes and ensure you don’t get lost during your rides. Having the right tools for navigation is crucial when exploring new gravel roads or venturing into unfamiliar territory. Both maps and GPS devices have their pros and cons, so it’s important to choose what works best for you.
Maps offer a tangible experience that can be satisfying for those who enjoy the traditional approach to navigation. They provide a big picture view of the area and allow you to plan your route in advance. However, they can be cumbersome to carry and require regular stops to check directions.
On the other hand, GPS devices are compact, easy to use, and provide real-time data about your location and progress. They offer turn-by-turn directions, which can be extremely helpful when navigating complex road systems. Some of the best brands in this field include Garmin, Wahoo Fitness, and Lezyne.
Having a reliable map or GPS device will give you peace of mind while riding your gravel bike. So before you head out on your next adventure, make sure you’re equipped with one that suits your needs.
Speaking of being prepared, another important aspect of gravel biking is ensuring you have the right gear to handle changing weather conditions…
Extra Layers of Clothing
When it comes to long rides on a gravel bike, being prepared for changing weather conditions is essential. That’s why carrying extra layers of clothing is crucial. As an experienced cyclist, I’ve learned the importance of having different layer options to adapt to various temperatures and weather conditions along the way.
To ensure I’m adequately prepared, I always pack a few key items:
- Lightweight windbreaker: This helps shield me from chilly winds and provides an extra layer of protection without adding bulk.
- Arm warmers: These can easily be rolled up or down depending on how hot or cold it gets, allowing me to regulate my body temperature effectively.
- Packable rain jacket: Even if the forecast doesn’t call for rain, unexpected showers can happen. Having a waterproof jacket that can be compactly stowed away is a smart precaution.
By having these layer options in my kit, I feel confident knowing that I’ll be comfortable throughout my ride regardless of any sudden changes in weather.
Now let’s move on to discussing another important item to bring along – your phone and ID.
Phone and ID
Having your phone and ID with you is essential for any long ride, as it ensures that you have a way to communicate and identify yourself if needed. When riding on gravel roads, it’s important to be prepared for any situation that may arise, and having your phone and ID can provide peace of mind.
In the event of an emergency or if you need assistance, having your phone allows you to quickly call for help. It’s also crucial to have your ID on hand in case you are stopped by law enforcement or need to prove your identity.
In addition to your phone and ID, it’s a good idea to carry emergency contacts with you. This could be a list of names and numbers stored on your phone or written down on a piece of paper. If something were to happen while out on the gravel roads, having these contacts readily available can expedite getting the help you need.
Furthermore, it’s wise to bring some cash and credit cards along with you. While most rides won’t require any monetary transactions, having cash can come in handy if there is a nearby convenience store or café where you want to stop for a quick snack or drink. Credit cards are useful for larger purchases or unexpected expenses that may arise during the ride.
Overall, bringing your phone and ID, along with emergency contacts and some cash/credit cards, ensures that you are well-prepared for any situation during your gravel bike ride.
Frequently Asked Questions
Are there any specific tools or spare parts that are essential for gravel biking but not mentioned in the article?
Essential tools and spare parts are crucial for a seamless gravel biking experience. While the article may have covered some essentials, there are a few often overlooked items worth mentioning.
A compact multitool is invaluable for on-the-go repairs, while tire levers and a spare tube can be lifesavers when dealing with flat tires. Additionally, carrying chain links, a pump or CO2 inflator, and an extra set of brake pads can ensure you’re prepared for any unexpected mishaps on your gravel adventures.
How often should I check and replace the chain lubricant for my gravel bike?
I can’t stress enough how important it is to regularly check and replace the chain lubricant on your gravel bike.
It’s like giving your bike a fresh coat of paint, keeping everything running smoothly and efficiently.
I recommend checking the chain lubricant every 200-300 miles or every 2-3 weeks, depending on your riding conditions.
As for the best lubricant for gravel bikes, I personally swear by a dry lube formula that repels dirt and grime, ensuring a clean and quiet ride.
What are some alternative options for inflating tires on a gravel bike if I don’t have a pump or CO2 inflator?
When it comes to alternative tire inflation options for a gravel bike, there are a few emergency repair methods to consider.
One option is using a hand pump or mini pump, which can be easily carried in your jersey pocket or saddle bag.
Another option is utilizing a tire sealant, which can temporarily plug small punctures and allow you to continue riding.
Additionally, some riders opt for carrying a spare tube and tire levers for quick and easy tube replacements on the go.
Are there any specific safety precautions or tips to keep in mind when using lights and reflective gear while gravel biking?
When it comes to choosing lights and reflective gear for your gravel bike, it’s important to consider the right size and fit. Look for lights that are visible from all angles and have different brightness settings.
As for reflective gear, opt for high visibility colors and materials with reflective strips. To mount them on your bike, use secure and adjustable attachments. Positioning is key; place lights on both the front and rear of your bike, while reflective gear should be visible on your body or backpack.
Safety is paramount when riding in low light conditions, so make sure you’re easily seen by others on the road.
What are some important factors to consider when choosing a water bottle and cage for a gravel bike?
Choosing the right water bottle and cage for a gravel bike is crucial for a comfortable and efficient ride.
Look for a cage that securely holds your bottle, even on rough terrain.
Consider the material of the bottle, such as lightweight plastic or insulated stainless steel, to keep your drink cool during long rides.
Additionally, make sure to regularly maintain your chain lubricant on a gravel bike to ensure smooth shifting and prevent rust.
Conclusion
So there you have it, folks! Now you know exactly what to carry on your gravel bike adventures.
With the right repair tools, spare parts, and tire repair kit, you’ll be prepared for any mechanical mishaps that may come your way.
And don’t forget your trusty pump or CO2 inflator to keep those tires properly inflated. A multi-tool is a must-have for quick adjustments on the go.
And of course, always bring some snacks and nutrition to keep your energy levels up.
With maps or a GPS device in hand, you’ll never get lost out there in the wild. Extra layers of clothing will keep you comfortable in changing weather conditions.
Lastly, don’t leave home without your phone and ID for safety reasons.
So grab your gear, hop on that gravel bike, and let the adventure begin! Remember: ‘Life’s a journey, not a destination.’ Happy riding!