
To true a wheel at home, start by inspecting your wheel for wobbles or hops, then secure it in a truing stand or on your bike. Use a spoke wrench to make small, symmetrical adjustments to your spokes, turning nipples about a quarter turn at a time. Recheck the wheel’s alignment frequently, and guarantee proper tension with a tension meter if possible. With patience and attention to detail, you’ll achieve a smooth, true wheel—continue to explore for more expert tips.
Key Takeaways
- Secure the wheel in a truing stand or on the bike, ensuring it’s stable before adjustments.
- Spin the wheel to identify wobbles, hops, or uneven rim movement requiring correction.
- Use a spoke wrench to make small, symmetrical tension adjustments to the affected spokes.
- Regularly re-spin the wheel to check progress and avoid over-tightening spokes.
- Finalize when the wheel spins true, feels smooth, and all spokes have even tension.

Having a true wheel at home can considerably improve your cycling experience, whether you’re a casual rider or a serious enthusiast. When your wheels are perfectly trued, your bike rides smoother, handles better, and reduces undue wear on tires and components. It’s a skill worth mastering, especially if you want to keep your bike in top shape without relying on professional shops every time something goes wrong. Truing your wheel yourself is entirely feasible, but it requires attention to detail, patience, and a good understanding of safety precautions.
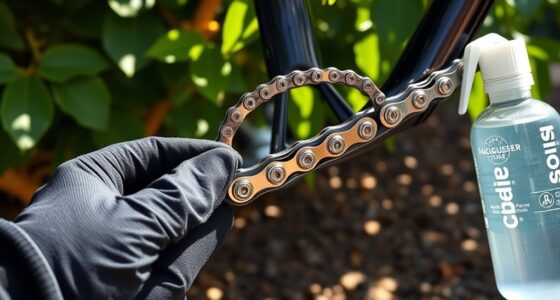
Start by preparing your workspace and tools. Make sure you have a sturdy work surface, a truing stand or a bike with removable wheels, and a spoke wrench suited to your wheel’s nipples. Before you even begin, it’s essential to perform some safety precautions. Wear eye protection if you’re working with tools that could snap spokes or small parts. Keep your workspace clean and well-lit to avoid accidents or losing small parts. Also, double-check that your bike is stable and secure, so it won’t tip over while you’re working on it. If you’re using a truing stand, secure the wheel properly, and if working on the bike, ensure it’s mounted securely or supported on a stand.
Prepare your workspace with a sturdy surface, proper tools, and safety gear before truing your bike wheel.
When you start the DIY maintenance process, spin the wheel and observe how it rolls. Look for any wobbles or hops, which indicate uneven tension or bent spokes. To true the wheel, you’ll adjust the tension of individual spokes by turning the nipples with the spoke wrench. Small, incremental adjustments are key—turn each nipple a quarter turn or less, then spin the wheel again to check progress. As you tighten or loosen spokes, work symmetrically on both sides to maintain the wheel’s alignment. Always keep track of which spokes you’ve adjusted to avoid over-tightening or creating new issues.
While truing your wheel, keep safety in mind. Never force a spoke beyond its elastic limit; doing so can snap it, causing injury or damage. Regularly check for cracks or signs of fatigue in spokes and rims. If you encounter a bent rim or a severely damaged spoke, it’s best to consult a professional or replace the affected parts. Remember to recheck your work multiple times, as small tweaks can have a significant impact on wheel alignment. It’s also helpful to use a spoke tension meter to ensure even tension across all spokes. Once your wheel spins true and feels smooth, you’ve successfully completed your DIY maintenance. Maintaining proper safety precautions and patience will give you a reliable, well-trued wheel that enhances your cycling experience.
Frequently Asked Questions
Can I Use a True a Wheel on Any Type of Flooring?
Yes, you can use a True a Wheel on many flooring types, but wheel compatibility varies. For hardwood or tile, choose wheels with soft, rubberized surfaces to prevent scratches. For carpeted floors, sturdier wheels work well. Always check the wheel specifications to guarantee they’re suitable for your flooring type. This prevents damage and makes movement smoother, so you get the best performance regardless of your flooring.
How Often Should I Perform Maintenance on My True a Wheel?
You should perform maintenance on your True a Wheel every three to six months. Regularly, you’ll want to do routine inspections for wear and tear, and keep up with lubrication schedules to guarantee smooth operation. Did you know that properly maintained wheels can last twice as long? Staying consistent with these checks prevents issues before they start, saving you time and money in the long run.
Is There a Weight Limit for Users of the True a Wheel?
Yes, there is a weight limit for users of the True a Wheel. To guarantee your safety and ideal exercise capacity, follow the safety guidelines provided by the manufacturer. The weight limit helps prevent damage to the device and reduces injury risk. Always check the specific weight limit for your model before use, and if you’re close to the maximum, consider consulting a fitness professional for personalized advice.
Does the True a Wheel Come With a Warranty?
Like a safety net beneath a high wire, the True a Wheel comes with a product warranty that offers peace of mind. You can rely on their customer support for any issues that may arise, ensuring your experience remains smooth. This warranty typically covers defects and repairs, giving you confidence in your investment. Reach out to their customer support team whenever needed—they’re there to help keep your ride in top shape.
Are Replacement Parts Readily Available for Purchase?
Yes, replacement parts like spare parts for the True a Wheel are readily accessible for purchase. You can easily find these spare parts through authorized retailers or the manufacturer’s website. Additionally, there are various accessory options to customize or enhance your experience. This availability guarantees you can quickly replace worn or damaged components, keeping your equipment in top shape and extending its lifespan.
Conclusion
Now that you’ve learned how to create a true wheel at home, imagine the possibilities that await once you finish. Will you trust your skills enough to test it out? Or will something unexpected happen just as you’re about to ride? Keep your eyes peeled and stay alert—your homemade wheel might hold surprises you never saw coming. The adventure isn’t over yet; it’s only just beginning. Are you ready to see what’s next?