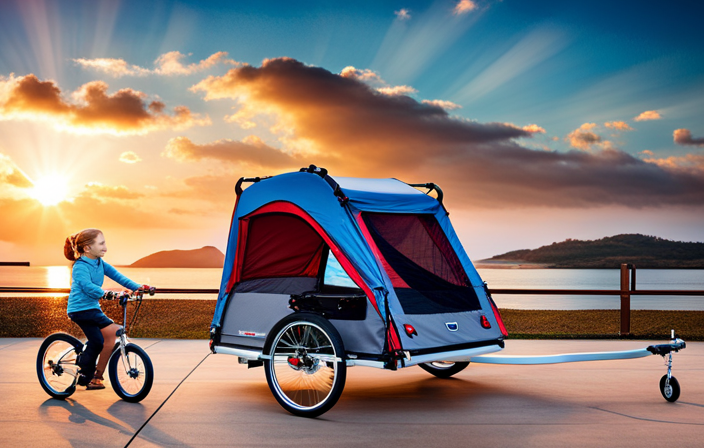
As someone who loves cycling, I have always been intrigued by the adaptability of bike trailers. These reliable companions offer a great way to transport additional gear, groceries, or even pets on our biking excursions.
But have you ever wondered where these trailers actually connect to our bikes? Well, fear not! In this article, I will delve into the various attachment points for old bike trailers, from the rear axle to the handlebar stem.
So, let’s dive in and uncover the secrets of connecting these trailers to our beloved bikes!
Key Takeaways
- Old bike trailers can connect to a bike using various attachment methods such as rear axle attachment, frame mount attachment, seatpost attachment, and quick release skewer attachment.
- When connecting an old bike trailer, it is important to consider compatibility with the rear axle attachment and seatpost attachment.
- Alternative attachment methods for old bike trailers include chainstay attachment, seatstay attachment, fork attachment, handlebar attachment, and headtube attachment.
- Specific attachment methods for old bike trailers include adtube angles and lengths, frame triangle attachment, pannier rack attachment, cargo rack attachment, handlebar stem attachment, headtube attachment, seat post attachment, and rear axle attachment.
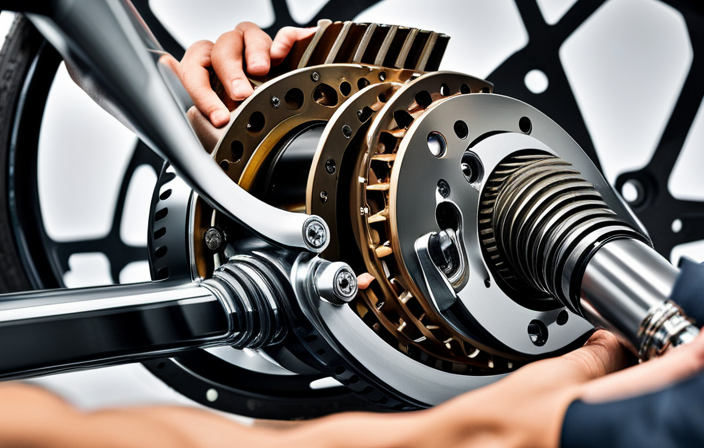
Rear Axle Attachment
The old bike trailer connects to the bike’s rear axle. This attachment point is essential for ensuring stability and security while towing the trailer. When considering rear axle compatibility, it is crucial to check the design and specifications of both the bike and the trailer. Different bikes may have varying axle sizes and configurations, so it is important to ensure that the trailer’s attachment mechanism is compatible with the bike’s rear axle.
Another crucial consideration is the trailer weight capacity. The rear axle attachment must be capable of supporting the weight of the trailer and its contents. Exceeding the weight capacity can strain the bike’s rear axle, leading to potential damage or instability during the ride.
Transitioning to the subsequent section about frame mount attachment, it is important to note that this alternative attachment method is commonly used for newer bike trailers. Instead of connecting to the rear axle, frame mount attachment involves attaching the trailer to the bike’s frame. This method provides additional stability and weight distribution, making it suitable for heavier loads or off-road terrain.
While the rear axle attachment is a more traditional and widely used method, frame mount attachment offers an alternative for those seeking enhanced stability and weight distribution.
Frame Mount Attachment
Attach the frame mount to your bicycle to connect your bike trailer. The frame mount attachment is a popular choice for connecting bike trailers because of its numerous benefits. One of the main benefits is stability. By attaching the trailer to the frame of the bike, it creates a solid connection that ensures the trailer stays securely in place. This is especially important when riding on rough terrain or going at high speeds.
Comparing the frame mount attachment with other options, such as the rear axle attachment or seatpost attachment, the frame mount offers better weight distribution. The weight of the trailer is evenly distributed across the frame of the bike, making it easier to handle and reducing the strain on the rear wheel. This results in a smoother and more comfortable ride for both the rider and the passenger in the trailer.
In addition, the frame mount attachment provides better maneuverability. Since the trailer is attached to the frame, it follows the same path as the bike, allowing for easier navigation around corners and tight spaces. This is particularly advantageous in crowded urban areas or when cycling in narrow paths.
Transitioning to the next section about seatpost attachment, another option worth considering is attaching the trailer to the seatpost. Stay tuned to learn more about how this attachment method works and its unique benefits.
Seatpost Attachment
To connect your trailer using the seatpost attachment, simply slide the attachment onto your seatpost and tighten it securely. The seatpost attachment is a popular method for connecting bike trailers because it offers a secure and stable connection between the trailer and the bike.
Here are some key things to keep in mind when using the seatpost attachment:
-
Bike trailer compatibility: Before using the seatpost attachment, make sure that your bike trailer is compatible with this attachment method. Some trailers may not be designed to work with seatpost attachments, so it’s important to check the manufacturer’s instructions.
-
Alternative attachment methods: If the seatpost attachment is not suitable for your bike or trailer, there are alternative attachment methods available. These include frame mount attachments, quick release skewer attachments, and axle-mounted attachments.
-
Stability and safety: When using the seatpost attachment, it’s crucial to ensure that it is tightened securely to prevent any wobbling or movement during the ride. This will help to maintain stability and ensure the safety of both the rider and the trailer.
-
Weight distribution: When attaching the trailer to the seatpost, it’s important to ensure that the weight is evenly distributed. This will help to maintain balance and stability while riding.
Now, let’s move on to the next attachment method, the quick release skewer attachment, which offers another convenient and secure way to connect your bike trailer.
Quick Release Skewer Attachment
If you’re looking for another convenient and secure attachment method, consider using the quick release skewer attachment for your bike trailer. This attachment is a popular choice among cyclists due to its ease of use and reliability.
One of the main benefits of using a quick release skewer attachment is its quick and easy installation. With just a simple twist of the lever, you can attach or detach your bike trailer in a matter of seconds. This is especially useful for those who frequently switch between using their bike trailer and riding solo.
Maintenance for a quick release skewer attachment is relatively straightforward. It is important to regularly inspect the skewer for any signs of wear or damage. If you notice any issues, it is recommended to replace the skewer to ensure the safety and stability of your bike trailer. Additionally, it is important to keep the quick release mechanism clean and well-lubricated to ensure smooth operation.
Now, let’s move on to the next attachment method: the thru-axle attachment.
Thru-Axle Attachment
When using a thru-axle attachment on your bike, you’ll experience enhanced stability and improved handling on rough terrains. Thru axle compatibility is becoming increasingly popular among cyclists due to its numerous advantages. Here are three reasons why you should consider using a thru-axle attachment:
-
Enhanced Stability: Thru axles provide a more secure connection between the wheel and the frame compared to traditional quick release skewers. This increased stability translates to better control and handling, especially when riding over uneven surfaces or during high-speed descents.
-
Improved Power Transfer: Thru axles are stiffer and more rigid than quick release skewers, resulting in improved power transfer from your legs to the bike. This means that your pedaling efforts are more efficiently translated into forward motion, allowing you to ride faster and with less effort.
-
Reduced Flex and Vibration: Thru axles help to reduce flex and vibration in the wheel, resulting in a smoother and more comfortable ride. This is particularly beneficial when carrying heavy loads or when riding off-road where the terrain can be rough and unpredictable.
With the advantages of thru axle attachment in mind, let’s now explore another option for connecting old bike trailers to your bike: the trailer hitch attachment.
Trailer Hitch Attachment
Consider using a trailer hitch attachment for a convenient and secure way to connect your bike trailer. Trailer hitch attachments are a popular choice among cyclists because they provide a stable connection between the bike and the trailer. One important factor to consider when using a trailer hitch attachment is trailer hitch compatibility. Not all trailers are compatible with all bike hitches, so it’s crucial to ensure that your trailer hitch is the right fit for your specific bike and trailer.
When it comes to trailer hitch installation tips, there are a few key things to keep in mind. First, make sure to follow the manufacturer’s instructions carefully. This will ensure that the hitch is installed correctly and securely. Additionally, it’s important to regularly check the hitch for any signs of wear or damage. If you notice any issues, it’s best to replace the hitch immediately to prevent any accidents or damage to your bike or trailer.
Transitioning into the subsequent section about chainstay attachment, another popular method for connecting bike trailers is through a chainstay attachment. This attachment allows the trailer to be connected directly to the bike’s chainstay, providing a secure and stable connection.
Chainstay Attachment
To ensure a secure and stable connection between your trailer and your bike, you’ll want to explore the option of a chainstay attachment. This type of attachment connects the trailer to the chainstay of the bike frame, providing a strong and reliable connection.
When considering a chainstay attachment, it’s important to ensure compatibility with your bike’s chainstay length. Chainstay length adjustment is crucial for proper alignment and balance when towing a trailer. A longer chainstay attachment may cause the trailer to sway or tilt to one side, while a shorter attachment may not provide enough clearance for turning.
To help you understand the importance of chainstay compatibility and length adjustment, let’s take a look at the following table:
| Chainstay Length | Compatible Attachment |
|---|---|
| Short | Shorter attachment |
| Medium | Medium attachment |
| Long | Longer attachment |
| Extra Long | Extra-long attachment |
As you can see, choosing the right attachment based on your bike’s chainstay length is essential for a smooth and secure towing experience. Now that we’ve covered the chainstay attachment, let’s move on to the next section about seatstay attachment, which provides another option for connecting your bike trailer.
Seatstay Attachment
The seatstay attachment offers an alternative method of connecting your trailer to the frame of your bicycle. Most people are familiar with the chainstay attachment when it comes to attaching a trailer to their bike, but the seatstay attachment provides alternative options.
The seatstays are the frame tubes that connect the rear wheel to the seat tube. This attachment method involves securing the trailer hitch to the seatstays using a clamp or a bracket.
One advantage of using the seatstay attachment is that it can provide better stability and weight distribution compared to the chainstay attachment. By connecting the trailer to the seatstays, the weight is distributed more evenly between the front and rear wheels of the bike, resulting in a smoother ride and better handling.
To attach the trailer to the seatstays, you will need a hitch that is specifically designed for this type of attachment. The hitch will typically have a clamp or bracket that securely attaches to the seatstays. Once the hitch is attached, you can connect the trailer to it using a quick-release mechanism or a pin and clip system.
Now, let’s move on to the next attachment method, the fork attachment, which offers yet another option for connecting your bike trailer.
Fork Attachment
Now that we’ve explored the seatstay attachment method for connecting old bike trailers, let’s move on to another popular option: fork attachment. This method involves connecting the trailer to the front fork of the bike, providing a stable and secure connection.
When it comes to fork attachment, it’s important to ensure compatibility between your trailer and bike. Most trailers come with universal attachments that can fit a variety of fork sizes, but it’s always a good idea to double-check before making a purchase. Look for trailers that offer adjustable attachments or ones specifically designed for your bike’s fork size.
Installation tips for fork attachment are fairly straightforward. Start by removing the front wheel of your bike and attaching the trailer’s fork mount to the front fork. Make sure to tighten the mount securely using the provided bolts or quick-release mechanisms. Once the mount is securely in place, you can reattach the front wheel of your bike.
Now that we have covered fork attachment, let’s move on to the next section: handlebar attachment. This method provides an alternative connection point for old bike trailers without the need for rear attachments.
Handlebar Attachment
If you’re considering handlebar attachment for your trailer, it’s important to ensure compatibility with your bike’s handlebars. This type of attachment allows you to connect the trailer to your bike’s handlebars, providing a stable and secure connection.
Here are a few key points to consider when it comes to handlebar attachment compatibility and stability:
-
Handlebar diameter: Check the diameter of your bike’s handlebars and make sure that the handlebar attachment is designed to fit that size. Different handlebars may have varying diameters, so it’s crucial to choose an attachment that matches your bike’s specific measurements.
-
Attachment mechanism: Look for a handlebar attachment that offers a secure and reliable mechanism for connecting the trailer. Common attachment mechanisms include clamps, quick-release systems, or brackets that can be tightened with screws. Ensure that the attachment mechanism is sturdy and won’t loosen during your rides.
-
Weight capacity: Consider the weight capacity of the handlebar attachment and make sure it can support the weight of your trailer and its contents. Overloading the attachment can compromise stability and safety.
-
Adjustability: Opt for a handlebar attachment that offers adjustability, allowing you to find the optimal position for your trailer. This ensures a comfortable and balanced ride.
With these considerations in mind, you can choose a handlebar attachment that is compatible with your bike’s handlebars and provides the stability needed for a smooth and secure towing experience.
Now, let’s move on to the next section about headtube attachment and explore another option for connecting your bike trailer.
Headtube Attachment
Consideration should be given to the weight capacity and adjustability of the headtube attachment for a secure and comfortable towing experience. When it comes to connecting an old bike trailer to a bike, the headtube attachment plays a crucial role.
The headtube is the part of the bike frame where the front fork is connected. It is important to ensure that the headtube attachment is compatible with your bike’s headtube size and shape. This will ensure a proper and secure connection between the trailer and the bike.
One important aspect to consider is the strength of the headtube attachment. It should be able to withstand the weight of the trailer and any cargo you might be carrying. A strong and sturdy attachment will prevent any wobbling or instability while towing.
In addition to strength, adjustability is key. The headtube attachment should allow for easy adjustment to accommodate different headtube angles and lengths. This will ensure a comfortable towing experience, as it allows you to find the optimal position for the trailer.
As we move on to the next section about frame triangle attachment, it is important to note that the headtube attachment is just one part of the overall connection system. Transitioning to the frame triangle attachment, we will explore how this component adds stability and support to the towing setup.
Frame Triangle Attachment
The strength and adjustability of the frame triangle attachment are important factors to consider for a secure and stable towing setup. When connecting an old bike trailer to a bike, the frame triangle attachment is a popular choice due to its versatility and ability to evenly distribute the weight of the trailer. This attachment connects the trailer to the bike frame at three points: the seat tube, the down tube, and the chainstay. By utilizing these three points of connection, the frame triangle attachment provides a strong and stable towing experience.
One alternative to the frame triangle attachment is the seat post attachment, which connects the trailer to the bike’s seat post. While this attachment is simpler and easier to install, it may not provide the same level of stability as the frame triangle attachment. Another alternative is the rear axle attachment, which connects the trailer directly to the bike’s rear axle. This attachment is often used for heavier trailers or when a more secure connection is desired.
In terms of weight distribution, the frame triangle attachment excels at evenly distributing the weight of the trailer between the bike’s front and rear wheels. This helps to maintain stability and control while towing. When considering which attachment to use, it is important to factor in the weight of the trailer and the desired towing experience.
Moving on to the next section about pannier rack attachment…
Pannier Rack Attachment
When using a pannier rack attachment, it’s important to ensure that it is securely fastened to the bike’s rear rack for a stable towing experience. Here are four key points to consider when using a pannier rack attachment:
-
Pannier Rack Compatibility: Before attaching a pannier rack to your bike, make sure it is compatible with your bike’s rear rack. Different bikes and racks have varying designs and dimensions, so it’s essential to choose a pannier rack that fits properly.
-
Secure Fastening: Once you have selected a compatible pannier rack, ensure that it is securely fastened to the bike’s rear rack. Use the appropriate bolts, screws, or clamps to secure the attachment firmly in place. This will prevent any wobbling or shifting during towing.
-
Weight Distribution: Proper weight distribution is crucial for maintaining balance and stability while towing. Place heavier items closer to the bike’s center of gravity to prevent excessive strain on the rear rack and ensure a smoother ride.
-
Regular Maintenance: Regularly check the pannier rack attachment for any signs of wear or damage. Inspect the bolts, screws, or clamps for tightness and replace any worn-out components. This will help maintain the integrity of the attachment and ensure safe towing.
Now, let’s move on to the next section about cargo rack attachment, which offers another option for attaching old bike trailers without using the frame triangle.
Cargo Rack Attachment
Attaching a cargo rack to your bicycle can provide an alternative method for connecting and towing items without using the frame triangle. Cargo racks are designed to be sturdy and durable, capable of carrying heavy loads while maintaining stability.
When attaching a cargo rack, it is important to consider weight distribution. Placing heavier items closer to the bike’s center of gravity will help maintain balance and make it easier to ride.
Cargo racks are typically mounted on the rear of the bike, either above or below the rear wheel. This placement allows for better weight distribution and reduces the chances of the bike becoming top-heavy.
It is important to properly secure the cargo rack to the bike frame, ensuring that it is stable and won’t shift during rides. Additionally, cargo racks often come with adjustable straps or bungee cords to secure items, providing an added layer of safety.
Now, let’s move on to the next section about handlebar stem attachment, which offers another option for connecting old bike trailers.
Handlebar Stem Attachment
To properly attach a handlebar stem, you’ll want to ensure a secure connection without compromising the stability of your bicycle. Here are some key steps to follow:
-
Determine stem compatibility: Start by checking the diameter of your handlebars and the stem clamp size. It’s crucial to ensure that the stem is compatible with your handlebars to guarantee a proper fit.
-
Prepare the handlebars: Before attaching the stem, make sure your handlebars are clean and free from any debris or grease. This will provide a better surface for the stem to grip onto.
-
Align the stem: Position the stem on the handlebars so that it is centered and aligned with your riding position. This will ensure optimal comfort and control while riding.
-
Secure the stem: Tighten the stem bolts evenly, using a torque wrench if possible. Be careful not to overtighten, as this can damage the stem or handlebars. Check the stability of the connection by giving it a gentle shake to ensure it is secure.
Frequently Asked Questions
Can I attach an old bike trailer to my rear axle?
Yes, you can attach an old bike trailer to your rear axle using alternative attachment methods.
One option is to use a coupler that attaches to the rear axle of your bike, allowing you to easily connect the trailer.
Another option is to use a hitch that attaches to the bike frame near the rear wheel.
Each method has its pros and cons, so it’s important to consider factors such as stability, ease of attachment, and compatibility with your specific bike and trailer.
Is it possible to connect an old bike trailer to my pannier rack?
Yes, it’s possible to connect an old bike trailer to your pannier rack.
There are alternative hitching options available for old bike trailers.
One option is to convert your pannier rack to accommodate the trailer.
This can be done by attaching a special bracket or adapter to the pannier rack, which allows you to securely connect the trailer.
It’s a convenient solution for those who prefer to use their pannier rack instead of the rear axle for trailer attachment.
How can I attach an old bike trailer to my handlebar stem?
If you’re looking to attach an old bike trailer to your handlebar stem, safety should be your top priority. Before attempting this, make sure your handlebar stem is sturdy enough to handle the extra weight. You’ll need a trailer attachment that is compatible with your specific handlebar stem size.
It’s crucial to follow the manufacturer’s instructions for attaching the trailer securely. Remember to distribute the weight evenly and always test the attachment before riding to ensure stability and safety.
Is there a way to connect an old bike trailer to my cargo rack?
There are alternative attachment methods for connecting an old bike trailer to a cargo rack.
One option is to use a hitch adapter that allows you to attach the trailer to the cargo rack.
Another method is to modify the trailer by adding brackets or clamps that can securely attach it to the rack.
Make sure to follow the trailer manufacturer’s instructions and consider consulting with a bike mechanic for additional tips and guidance on attaching the trailer to the cargo rack.
Can I attach an old bike trailer to my frame triangle?
Yes, you can attach an old bike trailer to your frame triangle. One option is to use a seatpost attachment for the old bike trailer. This attachment clamps onto the seatpost of your bike and provides a secure connection for the trailer.
Another option is to attach the trailer to the front fork of your bike. Both methods allow you to connect your old bike trailer to your bike and enjoy the benefits of additional cargo space.
Conclusion
In conclusion, there are various attachment options available when it comes to connecting old bike trailers. Each method serves a specific purpose, including the rear axle, frame mount, seatpost, quick release skewer, thru-axle, frame triangle, pannier rack, cargo rack, or handlebar stem attachment. By choosing the right attachment, you can ensure a secure and stable connection between your bike and trailer.
So, don’t let your old bike trailer go to waste. Explore these attachment options and embark on new adventures with ease and confidence.