
Are you interested in learning about how your Razor electric bike functions on the inside? Want to know where that important chain is located? Get ready to explore the intriguing chain system of your bike.
With this guide, we will unravel the secrets of this vital component, exploring its location, maintenance, troubleshooting, and even replacement. Whether you’re a seasoned rider or a first-time owner, understanding the chain of your Razor electric bike is key to keeping it running smoothly.
So, let’s unravel the mystery and discover where that chain is hiding!
Key Takeaways
- The chain in a Razor Electric Bike is essential for transferring power from the motor to the wheels.
- The location and maintenance of the drive train, which consists of the chain and chain tensioner, is crucial for proper functioning of the bike.
- Components of the chain system, such as the chain guard, rear wheel assembly, chain sprocket, and chain cover, play important roles in ensuring the smoothness, efficiency, and safety of the bike.
- The choice of transmission system, whether it is a direct drive system, geared hub system, or mid-drive system, affects the performance and capabilities of the electric bike.
Understanding the Components of a Razor Electric Bike
The chain for a Razor electric bike is an essential component to understand. It plays a crucial role in transferring power from the motor to the wheels, allowing you to ride smoothly and efficiently.
When exploring battery capacity, it’s important to consider the chain’s durability and strength to ensure optimal performance. Additionally, understanding the charging system is vital as it directly affects the chain’s lifespan. Proper charging practices will help maintain the chain’s integrity and prevent premature wear and tear.
Moving on to examining the inner workings of the motor, you’ll gain insight into how the chain interacts with other components, such as the gears and sprockets. This understanding will give you a comprehensive view of how the chain operates within the Razor electric bike.
Examining the Inner Workings of the Motor
Examining the inner workings of the motor reveals its complex mechanism.
The motor in a Razor electric bike is a key component that powers the bike’s movement. It consists of various parts that work together to convert electrical energy into mechanical power.
The motor mechanism involves a series of coils and magnets that interact to create a rotating magnetic field. This field then interacts with the permanent magnets on the bike’s axle, causing it to rotate and propel the bike forward.
Analyzing the motor power source, you’ll find that it is typically a rechargeable battery that provides the necessary electrical energy. This battery powers the motor and allows for extended periods of riding.
As we transition into exploring the transmission system, we’ll see how the motor’s power is transferred to the bike’s wheels.
Exploring the Transmission System
Take a closer look at how the transmission system transfers power from the motor to your wheels. The transmission system is a crucial component of an electric bike, as it determines how efficiently power is transferred and impacts overall performance. Here are three alternative transmission systems that are commonly used in electric bikes:
-
Direct drive: This system uses a single gear ratio to transfer power directly from the motor to the wheels. It provides a smooth and quiet ride but may lack the torque needed for steep hills.
-
Geared hub: This system uses multiple gears to transfer power. It allows for better hill climbing and acceleration but can be heavier and require more maintenance.
-
Mid-drive: This system is located in the middle of the bike and transfers power through the bike’s chain. It provides better weight distribution and allows for a wider range of gears.
Exploring alternative transmission systems is essential to optimize electric bike performance. Now, let’s move on to locating the drive train.
Locating the Drive Train
Now let’s find out where the drive train is located. The drive train of a razor electric bike is responsible for transferring power from the motor to the wheels, and it consists of several components, including the chain and chain tensioner. The chain tensioner helps maintain proper tension on the chain, preventing it from slipping or coming off. To locate the drive train, you need to locate the rear wheel. The chain is attached to the rear wheel and runs along the frame towards the front of the bike. If you are experiencing any issues with the chain, such as it being loose or making strange noises, you can use the chain tensioner to troubleshoot and adjust the tension accordingly. Now, let’s move on to identifying the chain guard.
Identifying the Chain Guard
To locate the chain guard, you can simply look for the protective covering that is positioned around the chain and gears. The chain guard is an essential component of the electric bike as it serves to protect the chain from debris and also prevents accidental contact with the moving parts.
When identifying the chain guard, make sure it is securely fastened to the frame and there are no loose or damaged parts. Additionally, the chain guard should be properly aligned with the chain and gears to ensure smooth and efficient operation. If you notice any issues with the chain guard, such as misalignment or damage, it may be necessary to adjust the chain tension or replace the chain guard altogether.
Now that you have identified the chain guard, let’s move on to checking the rear wheel assembly.
Checking the Rear Wheel Assembly
Once you’ve located the chain guard, it’s time to examine the rear wheel assembly. This part of the electric bike is crucial for a smooth and efficient ride. To ensure optimal performance, start by checking the chain tension. A loose chain can not only cause annoying noises but also affect the overall performance of the bike.
Use a chain tension gauge or simply measure the distance between the chain and the bottom of the chain guard. If the tension is too loose, you can adjust it by loosening the rear axle nuts and moving the wheel back slightly. On the other hand, if the tension is too tight, you may experience excessive wear on the chain and sprockets.
Troubleshooting chain noise is important to maintain a quiet and smooth ride. Once you’ve checked the rear wheel assembly, it’s time to understand the role of the chain tensioner in ensuring proper chain tension.
Understanding the Chain Tensioner
Understanding the chain tensioner is crucial for maintaining proper tension and a smooth ride. Here are three reasons why paying attention to the chain tensioner adjustment and common chain problems is essential:
-
Safety: A loose chain can easily slip off the sprocket, causing a sudden loss of power and potentially leading to accidents. Keeping the chain properly tensioned ensures a secure connection between the motor and the wheels, promoting a safer riding experience.
-
Performance: When the chain is too loose, power transmission becomes inefficient, resulting in decreased acceleration and a reduction in overall performance. By regularly adjusting the chain tensioner, you can optimize the bike’s power delivery and enjoy a more responsive ride.
-
Chain longevity: Incorrect chain tension can cause excessive wear and premature stretching, leading to more frequent chain replacements. By understanding how to properly adjust the chain tensioner, you can extend the lifespan of the chain, saving both time and money.
Now, let’s move on to examining the chain sprocket and its role in maintaining a well-functioning electric bike.
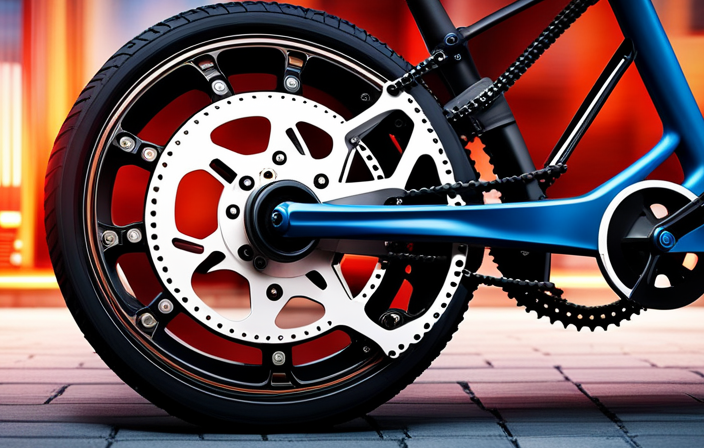
Examining the Chain Sprocket
The chain sprocket plays a crucial role in the smooth operation of an e-bike. It is responsible for transferring power from the motor to the rear wheel, allowing the bike to move forward.
Examining the chain sprocket is important to ensure that it is in good condition and properly aligned. One common issue to look out for is chain wear, which can cause the sprocket teeth to become worn down and affect the bike’s performance.
If you notice any noise coming from the chain, it is essential to troubleshoot the issue and determine whether the sprocket is the cause. By regularly inspecting and maintaining the chain sprocket, you can prevent potential problems and prolong the lifespan of your electric bike.
Now, let’s move on to locating the chain cover to further explore the bike’s components.
Locating the Chain Cover
To find the chain cover, simply locate the area where the sprocket and rear wheel meet. The chain cover is a protective casing that encloses the chain and sprocket mechanism of the razor electric bike. It is designed to prevent dirt, debris, and other external factors from damaging the chain and affecting its performance.
If you are troubleshooting chain problems, it is important to locate the chain cover first, as it may need to be removed in order to access and inspect the chain and sprocket. The chain cover is typically held in place by screws or clips, so you may need a screwdriver or other tools to remove it.
Once the chain cover is removed, you will have a clear view of the chain linkage and can proceed with understanding its functionality and any potential issues.
Understanding the Chain Linkage
Once the chain cover is removed, you’ll have a clear view of how the linkage operates. The chain linkage is an integral part of the razor electric bike, responsible for transferring power from the motor to the wheels. Understanding how it works is crucial for proper maintenance and performance.
Here are three key aspects to consider:
-
Chain lubrication: Regularly lubricating the chain is essential to minimize friction and ensure smooth operation. Use a high-quality lubricant, applying it evenly across the chain’s length.
-
Chain tension adjustment: Maintaining proper chain tension is vital for optimal performance and longevity. Check the tension regularly using the manufacturer’s guidelines and adjust it as necessary.
-
Checking the chain alignment: After understanding the chain linkage and performing lubrication and tension adjustments, it’s crucial to ensure the chain alignment is correct. This step will help prevent premature wear and improve overall performance.
Now, let’s move on to the next section about checking the chain alignment.
Checking the Chain Alignment
After removing the chain cover, it’s important to check the alignment of the chain to ensure proper maintenance and performance. Start by examining the tension of the chain. It should have a slight amount of play but not be too loose or too tight. Adjust the tension if necessary by loosening the axle nuts and moving the wheel forward or backward until the tension is correct.
Once the tension is set, check the alignment of the chain. It should run straight from the front sprocket to the rear sprocket without any sideways deviation. If the chain is misaligned, loosen the axle nuts and adjust the wheel until the chain is straight.
Proper chain alignment and tension are crucial for smooth and efficient operation of your electric bike.
Moving on to maintaining and lubricating the chain, it’s important to…
Maintaining and Lubricating the Chain
Make sure you regularly maintain and lubricate your chain to keep it in optimal condition for smooth and efficient operation. Proper lubrication techniques are essential for prolonging the life of your chain and ensuring its optimal performance.
Here are three key reasons why you should prioritize chain maintenance:
-
Improved efficiency: Applying lubricant to your chain reduces friction between the moving parts, allowing for smoother and more efficient pedaling.
-
Reduced wear: Lubrication helps prevent the chain from wearing down prematurely, saving you money on replacement parts.
-
Corrosion prevention: Lubricating the chain creates a protective barrier, guarding against rust and corrosion that can weaken the chain.
By following these maintenance practices, you can avoid common chain problems such as excessive noise, skipping gears, and chain breakage.
Next, we will discuss troubleshooting common chain issues and how to address them effectively.
Troubleshooting Common Chain Issues
To troubleshoot common issues with your chain, you can start by checking for any signs of excessive noise or gears skipping while you’re riding. These problems can be indicative of a chain skipping issue, which may be caused by a few different factors. One possible cause is improper chain tension, so it’s important to check and adjust the tension if necessary. Another common issue is a worn or damaged chain, which can lead to skipping. To fix chain tension issues, refer to the manufacturer’s instructions for your specific model, as the process may vary. If the issue is a worn or damaged chain, you may need to replace it. In the next section, we will discuss the steps for replacing a damaged or broken chain.
Replacing a Damaged or Broken Chain
If you notice a damaged or broken chain on your Razor electric bike, it’s important to take immediate steps to replace it. Fortunately, there are several repairing options available to you.
If the chain is only slightly damaged, you may be able to repair it by removing any kinks or twists using a chain tool. However, if the chain is severely damaged or broken, it’s best to buy a new chain altogether. When purchasing a new chain, make sure to choose one that is compatible with your Razor electric bike model. It’s also a good idea to opt for a high-quality chain that is durable and long-lasting.
Taking proper care of your chain by regularly cleaning, lubricating, and inspecting it can help prevent future issues. By following these steps, you can ensure that your Razor electric bike’s chain stays in optimal condition.
Now, let’s move on to some tips for proper chain care and maintenance.
Tips for Proper Chain Care and Maintenance
When it comes to maintaining your chain, it’s essential to regularly clean and lubricate it to ensure optimal performance. Proper chain adjustment is also crucial in preventing chain wear.
To start, make sure your chain has the correct tension. It should have a slight amount of slack, but not too loose that it can easily come off. You can adjust the tension by loosening the axle nuts or using the chain tensioner if your bike has one.
Additionally, regularly inspect your chain for signs of wear such as stretched links or rust. If you notice any issues, it’s important to replace the chain immediately to prevent further damage.
Lastly, keep your chain clean by removing any dirt or debris using a brush or rag, and then lubricate it with a chain-specific lubricant. By following these tips, you can extend the lifespan of your chain and ensure smooth and efficient rides.
Frequently Asked Questions
How do I adjust the chain tension on a Razor electric bike?
To adjust the chain tension on your Razor electric bike, start by locating the chain tensioner. This is usually located on the rear wheel axle. Use a wrench to loosen the lock nuts on the tensioner, then turn the tensioner bolt to either increase or decrease the tension as needed.
Make sure the chain is properly aligned, not too loose or too tight. Troubleshooting common chain issues can help prevent future problems and ensure a smooth ride.
Can I use any type of chain lubricant on my Razor electric bike?
You can use any type of chain lubricant on your razor electric bike, but it’s recommended to use a lubricant specifically designed for electric bikes. These lubricants are formulated to handle the unique demands of electric bike chains, providing long-lasting protection and reducing friction.
When cleaning your chain, it’s important to remove any dirt and debris before applying the lubricant. Use a degreaser or a mild detergent to clean the chain. Then, thoroughly dry it before applying the lubricant.
What tools do I need to replace a damaged or broken chain on my Razor electric bike?
To replace a damaged or broken chain on your Razor electric bike, you’ll need a few essential tools. Firstly, you’ll need a chain tool. This tool is used to break the old chain and install the new one. Additionally, having a pair of pliers can be helpful for manipulating the chain links.
It’s also a good idea to have a rag or brush on hand for cleaning and lubricating the chain during the replacement process. Regular chain maintenance is crucial for optimal performance and longevity of your bike.
How often should I check the chain alignment on my Razor electric bike?
To ensure optimal performance and prevent damage to your Razor electric bike, it is crucial to regularly check the chain alignment. By doing so, you can identify any misalignment or excessive wear that may occur over time.
Checking the chain alignment should be done at least once a month, or more frequently if you ride your bike frequently or in harsh conditions. Proper chain maintenance is essential for a smooth and safe riding experience.
Are there any specific safety precautions I should take when maintaining the chain on my Razor electric bike?
To ensure safe operation while maintaining the chain on your Razor electric bike, there are a few key safety precautions you should keep in mind.
Before starting any maintenance, always remember to disconnect the battery to avoid any accidental starts.
When cleaning the chain, use a degreaser and a brush to remove dirt and grime.
After cleaning, make sure to thoroughly dry the chain before applying a high-quality lubricant.
Regularly inspect the chain for wear and tightness, and adjust as necessary to maintain proper alignment.
Conclusion
In conclusion, maintaining the chain on your Razor electric bike is crucial for a smooth and efficient ride. By regularly lubricating and inspecting the chain, you can prevent common issues such as rust and breakage.
Remember to locate the chain guard, which protects the chain from debris and damage. If you encounter any problems, troubleshoot and replace a damaged chain promptly.
With proper care and maintenance, your Razor electric bike’s chain will continue to provide a reliable and enjoyable riding experience. Keep up with chain care to ensure a seamless journey!