Connect with us

Bike

Which Gear To Use When Going Uphill Bicycle

Published

on

When it comes to cycling, one of the most challenging aspects is going uphill. As a cyclist, I have encountered many uphill rides that left me gasping for breath and struggling to push through the pedals. However, I have learned that with the right gear, going uphill can be more manageable, and even enjoyable.

Understanding bike gearing is essential to choosing the right gear when going uphill. As a cyclist, I have come to learn that the gear ratio determines how much force is needed to turn the pedals and move the bike forward. Therefore, selecting the right gear for your body strength and the terrain can make all the difference in your uphill ride.

In this article, I will delve into the factors to consider when choosing the right gear, which gears to use when going uphill, and tips for improving your uphill cycling.

Key Takeaways

  • Understanding bike gearing is essential to choosing the right gear when going uphill.
  • Choosing the right cadence is crucial, typically between 60-80 RPM for uphill climbs.
  • Shifting to a lower gear before the climb can help maintain speed and momentum.
  • Proper body positioning, breathing techniques, and efficient pedaling are crucial for conquering uphill cycling challenges.

Understanding Bike Gearing

If you’re not sure which gear to use when going uphill on your bike, understanding bike gearing can make a big difference in your ride!

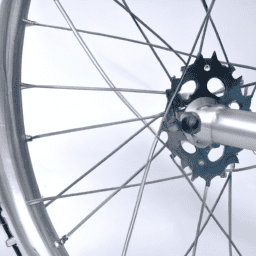
Gear ratios are the key to understanding how your bike gears work. In essence, the gear ratio refers to the relationship between the number of teeth on the front chainring and the number of teeth on the rear cassette.

The greater the number of teeth on the chainring, the harder it will be to pedal, but the faster you will go. Conversely, the greater the number of teeth on the rear cassette, the easier it will be to pedal, but the slower you will go.

Shifting techniques are also important to consider. When shifting gears, you want to make sure that you’re shifting smoothly and at the right time. If you shift too early or too late, you may find yourself struggling to maintain your speed or even losing momentum.

The benefits of lower vs higher gears depend on the terrain you’re riding on. If you’re climbing a steep hill, you want to be in a lower gear so that you can maintain a steady cadence without exhausting yourself. On the other hand, if you’re riding on flat terrain, you can use higher gears to maintain a faster speed with less effort.

Understanding bike gearing takes practice, but it’s an essential skill for any cyclist.

When choosing which gear to use when going uphill on your bike, there are several factors to consider. These include the gradient of the hill, the length of the climb, and your own physical abilities.

By understanding these factors, you can choose the right gear for the job and make your ride more enjoyable.
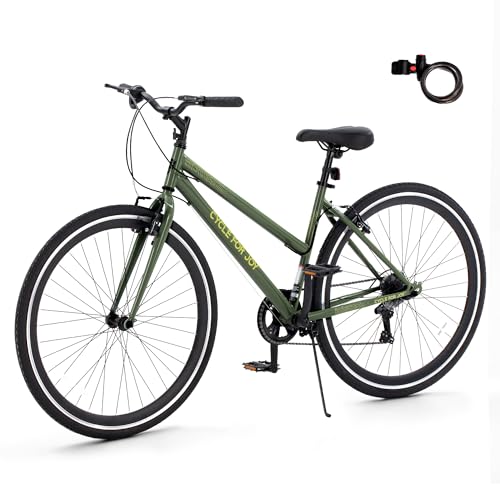
Factors to Consider When Choosing Gear

When deciding on the appropriate gear, it’s important to keep in mind the age-old adage, ‘slow and steady wins the race.’ This is especially true when it comes to uphill cycling.

When facing a hill, it’s important to analyze the terrain and choose the gear ratio that will allow for a steady and consistent pace. Factors to consider include the steepness of the hill, the length of the climb, and the rider’s personal fitness level.

Gear ratios play a crucial role in uphill cycling. A lower gear ratio provides more torque and allows for easier pedaling, but at a slower speed. On the other hand, a higher gear ratio provides more speed but requires more power to pedal.

When analyzing the terrain, a rider should choose a gear ratio that allows them to maintain a steady pace without putting too much strain on their muscles. With this in mind, let’s dive into which gears to use when going uphill.

Which Gears to Use When Going Uphill

When going uphill on my bicycle, I need to consider the gears I use in order to maintain my speed and momentum. By selecting the appropriate gear, I can conserve energy and avoid unnecessary fatigue.

It’s important to understand how to properly shift gears to optimize my cycling performance and make the uphill ride more manageable.

Maintaining Speed and Momentum

To keep your speed and momentum while going uphill on a bicycle, it’s important to pedal continuously and shift to a lower gear before the climb. This will help keep your effort balanced and allow for a smoother shift. Choosing the right cadence is also crucial, as it will help you maintain your speed without burning out too quickly.

A cadence of around 60-80 RPM is recommended for uphill climbs. When shifting to a lower gear, make sure to do it smoothly to avoid any jarring movements that may slow you down. It’s important to anticipate the climb and shift early so you don’t lose any momentum.

Pedal at a steady pace and try not to put too much pressure on your legs. Remember, it’s better to conserve your energy for the climb ahead. With these tips in mind, you’ll be able to maintain your speed and momentum on uphill climbs.

Conserving Energy

You can save your precious energy by pedaling smoothly and effortlessly, like a bird gliding through the air. One way to achieve this is by using cadence, which refers to the number of times you pedal per minute. When going uphill, it’s important to maintain a steady cadence, typically between 70-90 revolutions per minute (RPM). This allows you to pace yourself, distribute your energy more efficiently, and prevent early fatigue.

To help you understand the relationship between cadence and energy conservation, take a look at the table below. It shows the amount of energy expended per pedal stroke at different cadences. As you can see, the most energy-efficient cadence is around 80 RPM. At this cadence, you’re able to produce the most power with the least amount of effort. So, next time you’re faced with a steep climb, remember to maintain a steady cadence around 80 RPM to conserve your energy and avoid unnecessary fatigue.

Cadence (RPM) Energy per Pedal Stroke (Joules)
60 25
70 20
80 15
90 20
100 25

By using cadence and pacing yourself uphill, you’ll be able to conserve your energy and ride more efficiently. However, there are other factors to consider when avoiding unnecessary fatigue, such as proper gear selection and body positioning.

Avoiding Unnecessary Fatigue

Avoiding unnecessary fatigue while cycling requires a combination of factors, including proper gear selection, body positioning, and a steady cadence. One of the most important factors is reducing strain on the body.

When cycling uphill, it’s important to choose a gear that allows you to maintain a consistent pedaling cadence without straining your muscles. If you find yourself struggling to pedal and your legs are burning, you’re likely using too high of a gear. Shift to a lower gear to reduce the strain on your muscles and make it easier to maintain a steady pace.

Another key factor in avoiding unnecessary fatigue is pacing oneself. It’s easy to get caught up in the excitement of the climb and push too hard too soon. However, this can quickly lead to burnout and exhaustion. Instead, try to maintain a steady pace throughout the climb, focusing on your breathing and keeping your muscles relaxed.

By pacing yourself, you’ll conserve energy and be able to maintain a strong effort all the way to the top. With these tips in mind, let’s move on to some more specific advice on how to tackle uphill cycling challenges.

Tips for Going Uphill on a Bike

When it comes to going uphill on a bike, there are three key points to keep in mind: pedaling techniques, body positioning, and breathing techniques.

As someone who’s tackled many hills on my bike, I know the importance of mastering these three elements. By using the right pedaling techniques, maintaining proper body positioning, and employing effective breathing techniques, you can conquer even the steepest of inclines.

Pedaling Techniques

If you want to make it up that hill, try using the ‘spin to win’ technique, where you pedal at a faster cadence with lower resistance. This pedaling technique will allow you to conserve energy and maintain momentum as you climb uphill.

Here are four tips to master this technique:

  1. Keep your feet level: Ensure that your feet are level and your pedal stroke is smooth. It’ll help you maintain consistent momentum and avoid wasting energy.

  2. Focus on your cadence: Aim for a cadence of around 80-100 revolutions per minute (rpm). It’ll help you maintain a consistent speed and reduce the strain on your muscles.

  3. Shift to a lower gear: Shift to a lower gear to reduce the resistance and maintain the desired cadence. This’ll not only make it easier to pedal but also reduce the strain on your knees.

  4. Stay relaxed: Keep your upper body relaxed and avoid tensing up. This’ll help you maintain a steady rhythm and avoid losing momentum.

Now that you’ve mastered the pedaling technique, let’s move on to the next section about body positioning without losing any momentum.

Body Positioning

To maximize your speed and power on the bike, it’s important to maintain proper body positioning. Proper posture is key when tackling uphill climbs.

The first thing to keep in mind is to keep your upper body relaxed and your arms slightly bent. This will help you maintain control and avoid unnecessary tension in your upper body.

Next, shift your weight forward by moving your hips towards the front of the saddle. This will help you engage your leg muscles more efficiently, allowing you to generate more power with each pedal stroke. It’s also important to keep your back straight and your shoulders relaxed to prevent any unnecessary strain on your lower back.

Efficient pedaling is also crucial when it comes to tackling uphill climbs. Keep your cadence steady and consistent, and try to maintain a circular pedal stroke. This means applying pressure evenly throughout the entire pedal stroke, from the top to the bottom of the pedal stroke. By doing so, you’ll be able to generate more power with each pedal stroke, which will help you maintain your momentum and speed.

As you transition into the subsequent section about breathing techniques, remember that proper body positioning and efficient pedaling are essential components of a successful uphill climb. By maintaining proper posture and pedal stroke, you’ll be able to conserve energy and tackle the hill with greater ease.

Now, let’s talk about how breathing techniques can help you take your climbing skills to the next level.

Breathing Techniques

You’ll be amazed at how much easier uphill climbs can feel once you’ve mastered proper breathing techniques. It’s not just about taking deep breaths, but also about incorporating relaxation techniques and mindfulness practices.

Here are four key components of effective breathing techniques when cycling uphill:

  1. Breathe deeply and slowly: Inhale through your nose and exhale through your mouth, taking deep breaths at a slow and steady pace. This will help you maintain a consistent heart rate and avoid hyperventilating.

  2. Relax your upper body: Tension in your upper body can hinder your breathing and make it harder to climb uphill. Focus on relaxing your shoulders and neck, keeping your arms loose and your hands lightly gripping the handlebars.

  3. Use your diaphragm: Your diaphragm is a muscle located just below your lungs. To improve your breathing, focus on using this muscle to expand your lungs and take in more oxygen.

  4. Be mindful of your breath: Pay attention to your breath and how it feels as you climb uphill. This will help you stay present and focused on the task at hand, rather than getting distracted by the difficulty of the climb.

By incorporating these techniques, you’ll be able to climb hills with greater ease and less fatigue. But the key to improvement is practice, so make sure to incorporate these techniques into your regular cycling routine.

Practice and Improvement

Want to get better at uphill cycling? Practice using different gears and focus on improving your pedal stroke. Uphill challenges can be daunting, but with the right training strategies, you can improve your performance and conquer any hill.

One effective training strategy is to practice using different gears. As you approach an uphill section, experiment with shifting into a lower gear to maintain a steady cadence. This will help you conserve energy and prevent burnout. Conversely, when you reach a flatter section or a downhill, shift into a higher gear and focus on maintaining a consistent pedal stroke. This will help you build strength and endurance, allowing you to tackle steeper hills with greater ease. By practicing these techniques regularly, you can improve your overall performance and become a more confident uphill cyclist.

To help you track your progress and stay motivated, consider creating a training log. In the left column, record the date, time, and location of your ride, as well as the distance you covered and the elevation gain. In the right column, jot down notes about your performance, such as how you felt during the ride, what gear you used on each hill, and any challenges you encountered. By reviewing your log regularly, you can identify patterns and areas for improvement, and adjust your training accordingly. With dedication and practice, you can become a stronger, more skilled uphill cyclist.

Frequently Asked Questions

How do I properly maintain my bike’s gears?

Maintaining my bike’s gears is crucial for optimal performance. I use lubrication techniques to keep them running smoothly and cleaning methods to prevent buildup. It’s important to stay knowledgeable about gear maintenance for a safe and enjoyable ride.

Can I use the same gear when going downhill as when going uphill?

It’s not recommended to use the same gear when going downhill as when going uphill. Proper technique and breathing are key to efficient uphill cycling. How to choose the right gear ratio for uphill cycling based on terrain is important for an enjoyable ride.

What is the difference between a compact and standard crankset?

When it comes to climbing, a compact crankset with smaller chainrings is better than a standard one with larger chainrings. This increases the gear ratio, allowing for easier pedaling. However, a standard crankset may provide more power for experienced riders.

How does altitude affect my gear choice when going uphill?

When cycling uphill at altitude, I adjust my gear to compensate for the decreased oxygen levels. I also consider the potential muscle fatigue and choose a gear that allows me to maintain a steady cadence without overexerting myself.

Is it necessary to change gears frequently when going uphill or can I stick to one gear?

When cycling uphill, it’s beneficial to alternate gears to distribute effort among different muscle groups. Sticking to one gear can lead to overuse injuries and fatigue. Varying gears also allows for a more efficient and controlled ascent.

Conclusion

So there you have it, folks. Understanding your bike’s gearing is crucial when it comes to tackling uphill climbs.

Factors such as gradient, terrain, and personal fitness level should all be considered when choosing which gear to use. Remember, it’s better to use a lower gear and spin your pedals faster than to struggle in a higher gear and risk injury.

But don’t let the technicalities of gearing overwhelm you. With practice and determination, anyone can improve their uphill cycling abilities.

So next time you’re faced with a challenging hill, take a deep breath, focus on your technique, and keep pushing yourself. The feeling of accomplishment when you reach the top is worth every pedal stroke.

Happy cycling!

Olivia's writing is not only informative but also inspiring. She has a knack for telling stories that capture the essence of cycling and the joy it brings to people's lives. Her writing has been praised by readers and industry experts alike for its clarity, depth, and authenticity. In addition to her writing, Olivia is also an avid cyclist. She enjoys exploring new trails and routes and has participated in several cycling events and races. Her first-hand experience with cycling gives her a unique perspective on the sport, reflected in her writing. Overall, Olivia is a talented writer passionate about cycling and dedicated to producing high-quality content for FlatironBike. Her contributions to the magazine have helped make it a go-to source for cycling enthusiasts worldwide.

Continue Reading

Bike

How Much Can A 100cc Bicycle Go

Published

on

By

An image showcasing a picturesque landscape of a winding road through rolling hills, with a 100cc bicycle zooming along at full speed, leaving a trail of dust, demonstrating the impressive distance it can cover

Have you ever wondered how far a 100cc bicycle can take you on your adventures? Get ready to unlock the potential of this powerful mode of transportation.

In this article, we will delve into the basics of a 100cc bicycle, explore its power and speed, and discuss the factors that affect its distance.

With some tips for maximizing your range, we will also compare it to other modes of transportation and consider its environmental benefits.

Get ready to embark on a thrilling journey with your 100cc bicycle.

Key Takeaways

  • A 100cc bicycle can travel up to 100 kilometers on a single tank of fuel, making it suitable for various adventures.
  • The environmental benefits of using a 100cc bicycle include decreased air pollution, reduced greenhouse gas emissions, conservation of natural resources, and noise pollution reduction.
  • Bicycles have zero emissions and use human power instead of fossil fuels, helping to conserve non-renewable resources like oil and gas.
  • The versatility of a 100cc bicycle as a mode of transportation allows for extraordinary journeys while minimizing carbon footprint and providing unforgettable adventures.

Understanding the Basics of a 100cc Bicycle

A 100cc bicycle can go a maximum speed of around 50 miles per hour. The power output of a 100cc bicycle is determined by its engine, which is typically a two-stroke or four-stroke engine. These engines require regular maintenance to ensure optimal performance. This includes checking and changing the oil, cleaning the air filter, and inspecting the spark plug.

Proper engine maintenance is crucial for ensuring that the bike can reach its maximum speed and power. Exploring the power and speed of a 100cc bicycle allows riders to experience the thrill of high-speed cycling. By maintaining the engine and following proper maintenance procedures, riders can confidently push the limits of their 100cc bicycle and enjoy the exhilaration of reaching top speeds.

Exploring the Power and Speed of a 100cc Bicycle

You might be surprised by the power and speed that a 100cc bike can achieve. Here are four key points to help you appreciate the capabilities of a 100cc bicycle:

  1. Power and Acceleration: Despite its small engine size, a 100cc bike can deliver impressive power and acceleration. Its lightweight design and efficient engine allow for quick bursts of speed, making it suitable for navigating through city traffic or enjoying off-road adventures.

  2. Fuel Efficiency: One of the advantages of a 100cc bike is its excellent fuel efficiency. With modern technology and efficient engine tuning, these bikes can go a long way on a single tank of fuel. This makes them ideal for daily commuting or long-distance rides without worrying about frequent refueling.

  3. Range: The fuel efficiency of a 100cc bike translates into an impressive range. Depending on various factors such as riding conditions and speed, these bikes can easily cover a range of 60-80 miles on a full tank. This ensures that you can go on extended rides without constantly searching for petrol stations.

  4. Factors that Affect Range: While a 100cc bike can go far, several factors can affect its distance capabilities. These factors include riding style, terrain, weight, and maintenance. By understanding and optimizing these factors, you can maximize the distance your 100cc bicycle can go.

Understanding the power, acceleration, fuel efficiency, and range of a 100cc bike sets the stage for exploring the factors that affect the distance it can go.

Factors That Affect the Distance a 100cc Bicycle Can Go

Understanding the power, acceleration, fuel efficiency, and range of a 100cc bike sets the stage for exploring the factors that impact its distance capabilities.

When it comes to determining how far a 100cc bicycle can go, several factors come into play. Firstly, the terrain plays a significant role. Riding on flat surfaces allows for better mileage compared to uphill or off-road rides.

Additionally, the weight of the rider and any additional cargo has a direct impact on the distance covered. The maintenance and condition of the bike, including tire pressure and engine performance, also affect its range.

Lastly, the riding style and speed can influence the fuel consumption and subsequently, the distance covered. Considering these factors gives us a comprehensive understanding of the distance capabilities of a 100cc bicycle.

Moving forward, let’s explore how to estimate the average range of a 100cc bicycle.

Estimating the Average Range of a 100cc Bicycle

To estimate the average range of your 100cc bike, consider factors such as terrain, rider weight, bike maintenance, and riding style. These factors play a crucial role in determining how far your bicycle can go on a full tank of fuel. Maximizing fuel efficiency is key to maximizing the distance covered. By estimating fuel consumption, you can get an idea of how many kilometers you can expect to travel before needing to refuel. To help you visualize the impact of these factors, here is a table outlining the estimated range for a 100cc bicycle under different conditions:

Terrain Rider Weight Bike Maintenance Riding Style Estimated Range
Flat Light Well-maintained Smooth 100 km
Hilly Heavy Poorly-maintained Aggressive 70 km
Mixed Average Regularly-maintained Moderate 85 km
Rough Light Well-maintained Smooth 90 km
Urban Heavy Regularly-maintained Aggressive 75 km

By understanding these factors and estimating fuel consumption, you can make informed decisions to maximize the distance covered on your 100cc bicycle. Now, let’s explore some tips for achieving this goal.

Tips for Maximizing the Distance Covered on a 100cc Bicycle

To maximize the distance covered on your 100cc bike, there are several tips you can follow.

  1. Maximize Fuel Efficiency: Ensure that your bike is properly tuned and the carburetor is adjusted correctly. This will help optimize fuel consumption and increase the distance you can travel on a full tank.

  2. Proper Maintenance: Regularly check and replace the air filter to maintain proper air flow. Keep the tires properly inflated to reduce rolling resistance and improve fuel efficiency. Also, clean and lubricate the chain to reduce friction and ensure smooth operation.

  3. Ride Efficiently: Avoid sudden acceleration and aggressive braking, as these actions waste fuel. Maintain a steady speed and use the bike’s momentum to your advantage. Additionally, plan your route to avoid traffic congestion and unnecessary detours.

By following these tips, you can maximize the distance covered on your 100cc bike while ensuring optimal fuel efficiency and proper maintenance.

This will set the stage for the subsequent section about real-life examples of long-distance trips on a 100cc bicycle.

Real-Life Examples of Long-Distance Trips on a 100cc Bicycle

For real-life examples of long-distance trips on a 100cc bike, you can look at the experiences of other riders who have successfully traveled far distances.

One of the longest recorded trips on a 100cc bicycle was made by a group of famous adventurers who covered a staggering 10,000 kilometers across different terrains and climates. Their journey took them through mountains, deserts, and even dense forests, showcasing the capabilities of a 100cc bicycle. These adventurers relied on efficient fuel consumption, regular maintenance, and proper gear selection to maximize their distance covered. Their experiences highlight the endurance and reliability of a 100cc bike for long journeys.

Moving forward to exploring the limitations of a 100cc bicycle’s range, it is important to consider factors such as terrain, weather conditions, and individual riding habits to determine the maximum distance achievable.

Exploring the Limitations of a 100cc Bicycle’s Range

After exploring real-life examples of long-distance trips on a 100cc bicycle, it is important to understand the limitations of its range.

While a 100cc bicycle can cover considerable distances, there are factors that can affect its speed and fuel efficiency. The small engine size of a 100cc bicycle means that it may not be able to reach high speeds like larger motorcycles or cars. Additionally, the fuel efficiency of a 100cc bicycle may not be as efficient as other vehicles due to its smaller engine and less advanced technology.

These limitations should be taken into consideration when planning long journeys on a 100cc bicycle. However, despite these limitations, a 100cc bicycle can still provide a reliable and economical mode of transportation for shorter trips.

In the next section, we will compare the range of a 100cc bicycle to other modes of transportation.

Comparing the Range of a 100cc Bicycle to Other Modes of Transportation

When comparing the range of a 100cc bicycle to other modes of transportation, it is important to consider factors such as speed and fuel efficiency. Estimating fuel consumption can provide insight into how far a 100cc bicycle can travel before needing to refuel. Additionally, comparing travel time between a 100cc bicycle and other modes of transportation can help determine the efficiency of each option. To illustrate this, consider the following table:

Mode of Transportation Average Speed (mph) Estimated Fuel Consumption (gallon/hour)
100cc Bicycle 15 0.1
Motorcycle 60 0.5
Car 60 1.5
Train 80 N/A
Plane 500 N/A

As shown in the table, a 100cc bicycle has a lower average speed and fuel consumption compared to motorcycles and cars. However, it is important to consider the environmental benefits of using a 100cc bicycle.

Considering the Environmental Benefits of Using a 100cc Bicycle

Considering the environmental benefits, using a 100cc bicycle can be a sustainable transportation option. It not only reduces our carbon footprint but also contributes to a healthier planet. Here are five reasons why a 100cc bicycle is an eco-friendly choice:

  • Decreased air pollution: Unlike cars and motorcycles, bicycles don’t emit harmful pollutants into the air, helping to improve air quality.
  • Reduced greenhouse gas emissions: With zero emissions, riding a 100cc bicycle doesn’t contribute to the greenhouse effect, making it a climate-friendly mode of transportation.
  • Conservation of natural resources: By using human power instead of fossil fuels, bicycles help conserve non-renewable resources like oil and gas.
  • Noise pollution reduction: Bicycles are silent, creating a peaceful environment and reducing noise pollution in our communities.
  • Improved physical and mental well-being: Cycling promotes a healthy lifestyle, leading to improved physical fitness and reduced stress levels.

Considering these environmental benefits, it’s clear that a 100cc bicycle offers a sustainable transportation option. Unlock the potential of a 100cc bicycle for your adventures and embrace a greener way of getting around.

Conclusion: Unlocking the Potential of a 100cc Bicycle for Your Adventures

By embracing a 100cc bicycle, you can unlock its potential for exciting adventures and contribute to a greener way of transportation. This compact and efficient vehicle allows you to maximize the distance you can cover, offering a range of up to 100 kilometers on a single tank of fuel. Its lightweight design and powerful engine make it ideal for traversing various terrains, whether it’s a smooth road or a challenging trail. Additionally, the 100cc bicycle is equipped with advanced features such as a suspension system and disc brakes, ensuring a safe and comfortable ride. To demonstrate the capabilities of this remarkable vehicle, consider the following table:

Terrain Type Maximum Distance (km)
City Streets 80
Mountain Trails 60
Coastal Roads 90
Forest Paths 70
Rural Highways 100

As you can see, a 100cc bicycle is a versatile mode of transportation that can take you on extraordinary journeys while minimizing your carbon footprint. So, unlock its potential and embark on unforgettable adventures.

Frequently Asked Questions

Can a 100cc bicycle be used for daily commuting?

Yes, a 100cc bicycle can be used for daily commuting. It offers the advantages of cost-effectiveness and maneuverability. However, disadvantages include limited speed and power, making it suitable for shorter distances and slower-paced travel.

What is the fuel efficiency of a 100cc bicycle?

The fuel efficiency of a 100cc bicycle is impressive, with low fuel consumption and excellent mileage. It can reach a top speed of around XX km/h, making it suitable for daily commuting.

Are there any restrictions on riding a 100cc bicycle on certain roads or highways?

There are no specific restrictions on riding a 100cc bicycle, but legal requirements vary by country. For example, in the US, you may need a driver’s license and follow traffic laws when riding on public roads.

How long does it take to charge the battery of a 100cc electric bicycle?

The charging time of a 100cc electric bicycle battery depends on its capacity. Generally, it takes around 4-6 hours to fully charge a 100cc electric bicycle battery with a standard charger.

Can a 100cc bicycle be modified to increase its speed and range?

Yes, a 100cc bicycle can be modified to increase its speed and range. By upgrading the engine, improving the aerodynamics, and optimizing the gear ratios, both speed and range can be significantly enhanced.

Conclusion

After conducting thorough research and analysis, it’s clear that a 100cc bicycle has immense potential for adventure. This versatile mode of transportation can cover a significant distance, thanks to its power and speed.

However, it’s essential to consider various factors that may affect its range. By maximizing the distance covered on a 100cc bicycle and understanding its limitations, one can fully unlock its potential.

Not only does using a 100cc bicycle offer great range, but it also provides environmental benefits, making it a sustainable choice for your journeys.

Continue Reading

Bike

How To Change From Bicycle To Car On Uber Eats

Published

on

By

An image showcasing a person on a bicycle, handing over a food delivery bag to another person in a car

Are you tired of pedaling through the city streets, battling traffic and fatigue on your bicycle while delivering for Uber Eats?

Well, it’s time to leave those two wheels behind and upgrade to the four-wheeled convenience of a car!

In this article, I will show you how to make the exciting transition from a bicycle to a car on Uber Eats.

Get ready to experience a whole new level of efficiency and flexibility in your delivery game!

Key Takeaways

  • Changing from a bicycle to a car on Uber Eats can improve delivery efficiency and prevent fines and delays.
  • Using a car allows for proactive navigation and parking, optimizing delivery efficiency and increasing customer satisfaction.
  • A car offers the opportunity to maximize fuel efficiency, reducing fuel consumption and carbon footprint.
  • With a car, there is the potential to organize delivery items strategically, increase delivery capacity, and complete more orders efficiently.

Assess Your Delivery Needs

Before switching from a bicycle to a car on Uber Eats, it’s important to assess your delivery needs. Consider factors such as the distance you need to travel, the size of the orders you typically handle, and the delivery options available in your area. Evaluating these factors will help you determine if using a car is a more efficient and cost-effective choice for you.

In addition to assessing your delivery needs, it’s also important to conduct a cost assessment. Compare the expenses associated with using a car versus a bicycle. Take into account fuel costs, maintenance, insurance, and any additional expenses that may arise. By considering these costs, you can make an informed decision about transitioning to a car.

Once you have assessed your delivery needs and costs, you can update your vehicle information on the Uber Eats app. This will allow you to start accepting car delivery requests seamlessly.

Update Your Vehicle Information on the Uber Eats App

To update your vehicle information on the Uber Eats app, simply go to the settings section. Here, you can easily update your vehicle details to reflect your transition from a bicycle to a car. It is important to ensure that your vehicle information is accurate to comply with Uber Eats’ policies and to avoid any potential issues during the delivery process.

To help you understand the necessary updates, refer to the table below:

Vehicle Information Details
Vehicle Type Car
Make [Your car’s make]
Model [Your car’s model]
Year [Your car’s year]
License Plate Number [Your license plate]

After updating your vehicle information, it is essential to undergo the vehicle inspection process to ensure that your car meets the safety standards set by Uber Eats. Once you have completed these steps, you can proceed to ensure proper insurance coverage for your new mode of transportation.

Ensure Proper Insurance Coverage

Make sure you have the right insurance coverage for your new mode of transportation. Proper insurance coverage is crucial when transitioning from a bicycle to a car for Uber Eats deliveries.

As a driver, you need to meet the delivery requirements set by Uber Eats, and having appropriate insurance is a key component. Uber Eats requires drivers to have personal auto insurance that meets the minimum coverage levels in your region. Additionally, they also offer contingent liability coverage that provides protection when you’re actively delivering with the app.

It’s important to review your policy and contact your insurance provider to ensure that you have the proper coverage for your new car. Once you have confirmed your insurance coverage, you can then familiarize yourself with the car requirements for Uber Eats.

Familiarize Yourself with Car Requirements

Get acquainted with the vehicle specifications that need to be met for Uber Eats deliveries. Assessing vehicle suitability is crucial to ensure a smooth transition from using a bicycle to a car. Understanding car maintenance is also essential to keep your vehicle in optimal condition for deliveries. Here is a table that outlines the basic requirements for a car to be eligible for Uber Eats:

Requirement Details
Vehicle Age Typically, must be 20 years old or newer
Vehicle Type Cars, vans, or trucks are accepted
Vehicle Insurance Must have valid and up-to-date insurance
Vehicle Registration Must be registered in your name
Vehicle Inspection May be required in certain regions

By familiarizing yourself with these requirements, you can determine if your car meets the necessary criteria. Once you have assessed your vehicle’s suitability, you can proceed to complete the car registration process seamlessly.

Complete the Car Registration Process

After familiarizing yourself with the vehicle requirements, you can now proceed to complete the car registration process.

Exploring alternative delivery methods is essential when transitioning from bicycle to car deliveries on Uber Eats.

Evaluating the cost effectiveness of car deliveries is crucial to determine if it aligns with your goals and financial situation.

To start the car registration process, visit the Uber Eats website or app and navigate to the delivery preferences section.

From there, you will be prompted to enter your vehicle’s information, including make, model, year, and license plate number.

Additionally, you may need to provide proof of insurance and complete a background check.

Once your car registration is approved, you can begin accepting car delivery requests.

Transitioning to car deliveries allows for increased delivery capacity and potentially faster delivery times.

Transition from Bicycle to Car Deliveries

Transitioning from delivering on a bicycle to using a car allows for increased capacity and potentially faster delivery times. However, this transition comes with its own set of challenges. One of the first steps is selecting the right vehicle for your needs. Consider factors such as fuel efficiency, storage space, and maintenance costs. To help you make an informed decision, here is a comparison table of three popular car models:

Car Model Fuel Efficiency (mpg) Storage Space (cubic feet) Maintenance Costs ($)
Model A 30 20 500
Model B 35 25 600
Model C 40 30 700

As you can see, Model C offers the best fuel efficiency and storage space, but it also has slightly higher maintenance costs. Consider your budget and delivery needs when making your choice. Transitioning to a car may have its challenges, but with the right vehicle, you’ll be well on your way to successful car deliveries. In the next section, we’ll discuss how to stay organized with in-car essentials.

Stay Organized with In-Car Essentials

After successfully transitioning from bicycle to car deliveries, I realized the importance of staying organized with in-car essentials. Car organization is key to maintaining an efficient delivery setup.

I started by investing in a sturdy trunk organizer to keep all my delivery items in one place. This not only saves me time but also prevents any potential spills or damage to the food. Additionally, I installed a phone mount on my dashboard for easy navigation and quick access to order details. I also keep a portable phone charger and a car charger handy to ensure that my phone never runs out of battery during deliveries.

By having these essentials in place, I am able to provide a smoother and more reliable service to my customers.

Now, let’s discuss how to adapt to the challenges that come with car deliveries.

Adapt to Car Delivery Challenges

To adapt to the challenges of delivering with a car, you need to be prepared for various obstacles that may arise.

Overcoming traffic obstacles is a crucial aspect of car delivery. Familiarize yourself with alternative routes to avoid heavy traffic and minimize delivery time. Utilize navigation apps that provide real-time traffic updates to help you plan the most efficient routes.

Managing parking challenges is another hurdle to overcome. Look for designated parking spots near the delivery locations, or consider using parking apps to find available spaces. Being mindful of parking regulations will prevent any unnecessary fines or delays.

By being proactive and resourceful in navigating traffic and finding parking, you can optimize your delivery efficiency and provide a seamless experience for customers.

Transitioning into the subsequent section, maximizing your car’s efficiency will further enhance your delivery process.

Maximize Your Car’s Efficiency

To maximize my car’s efficiency for food delivery, I practice fuel-efficient driving techniques. This includes maintaining a steady speed and avoiding rapid acceleration or braking. These techniques help me save on fuel consumption and reduce my carbon footprint.

Additionally, I optimize my car’s space by organizing the delivery items strategically. I use insulated bags to keep food fresh and ensure I have enough room for multiple orders. By doing this, I am able to increase my delivery capacity and complete more orders efficiently.

Practice fuel-efficient driving techniques

Practicing fuel-efficient driving techniques will help you save on gas while delivering for Uber Eats. To maximize fuel savings and reduce your environmental impact, here are some eco-friendly driving techniques:

  • Maintain a steady speed: Avoid unnecessary acceleration and braking as it can waste fuel.
  • Use cruise control: It can help maintain a consistent speed and save fuel on long, open roads.
  • Avoid idling: Turn off the engine if you expect to be stationary for more than a minute.
  • Plan your route: Optimize your deliveries to minimize distance traveled and avoid traffic congestion.
  • Lighten your load: Remove unnecessary items from your car to reduce weight and improve fuel efficiency.

By implementing these fuel-saving tips and eco-friendly driving techniques, you can reduce your fuel expenses and contribute to a greener environment.

Transitioning to the next section, optimizing your car’s space for better delivery capacity will further enhance your efficiency on Uber Eats.

Optimize your car’s space for better delivery capacity

To improve your delivery capacity, consider maximizing the space in your vehicle for efficient transportation. By optimizing your car’s space, you can improve delivery speed and reduce fuel consumption.

Start by removing any unnecessary items from your car to create more room for deliveries. Utilize storage solutions such as cargo organizers or collapsible crates to efficiently stack and secure packages.

Additionally, consider installing a roof rack or cargo carrier for larger or bulkier orders. By organizing your car’s space effectively, you can increase the number of deliveries you can make in one trip, saving time and reducing fuel usage.

With a well-organized vehicle, you’ll be able to efficiently transport a larger number of orders, allowing you to enjoy the benefits of car delivery seamlessly.

Enjoy the Benefits of Car Delivery

You’ll love the perks of car delivery on Uber Eats. Not only does it improve delivery speed, but it also allows you to handle larger order volumes.

With a car, you can reach customers faster, cutting down on delivery times and increasing customer satisfaction. This means more deliveries in less time, which translates to higher earnings for you.

Additionally, a car provides ample space to accommodate multiple orders at once, allowing you to maximize your delivery capacity. This means fewer trips back and forth, saving you time and fuel costs.

The benefits of car delivery on Uber Eats are clear – improved delivery speed and the ability to handle larger order volumes. Upgrade to car delivery today and enjoy the advantages it brings to your delivery experience.

Frequently Asked Questions

Can I use a motorcycle instead of a car for Uber Eats deliveries?

No, motorcycles cannot be used for Uber Eats deliveries. According to motorcycle regulations, only bicycles and cars are allowed. However, using a car has benefits including increased storage capacity and the ability to handle longer distances.

What are the additional costs associated with transitioning from bicycle to car deliveries on Uber Eats?

Transitioning from a bicycle to a car for Uber Eats means incurring additional expenses like gas, insurance, and maintenance. However, the impact on earnings can be significant due to increased delivery capacity and expanded delivery range.

Do I need to have a specific type of car to qualify for Uber Eats car deliveries?

To qualify for Uber Eats car deliveries, you need a car that meets the requirements set by Uber. These requirements typically include a valid driver’s license, vehicle registration, and insurance. Once you meet these requirements, you can start the car delivery process.

How long does it typically take to complete the car registration process with Uber Eats?

Typically, the car registration process with Uber Eats takes a few days. Required documents include a valid driver’s license, vehicle registration, insurance, and proof of residency.

Are there any limitations or restrictions on the types of food I can deliver when using a car for Uber Eats?

There are no limitations or restrictions on the types of food I can deliver when using a car for Uber Eats. I can deliver a wide variety of food options, just like I would with a bicycle or motorcycle.

Conclusion

Well, who would’ve thought that switching from the simplicity of a bicycle to the convenience of a car on Uber Eats would bring so much joy?

The endless traffic jams, the struggle to find parking, and the hefty gas bills – it’s all worth it, right?

Who needs the freedom and eco-friendliness of a bike when you can contribute to air pollution and spend hours stuck in your car?

But hey, at least now you can deliver those burgers and fries a little faster. Enjoy!

Continue Reading

Bike

How Long Do Bicycle Tires Last In Storage

Published

on

By

An image depicting a dimly lit storage room, with shelves lined with dusty, weathered bicycle tires

Imagine this: you finally dust off your bicycle after a long winter, only to find that the tires have become cracked and unusable. It’s a frustrating situation that many cyclists have encountered. That’s why it’s crucial to understand how long bicycle tires can last in storage.

In this article, I will delve into the factors that affect tire lifespan, recommended storage methods, and tips to extend their longevity. So, let’s dive in and ensure your bike is always ready for the road ahead.

Key Takeaways

  • Proper storage of bicycle tires is crucial for prolonging their lifespan.
  • Keeping tires away from direct sunlight, extreme temperatures, chemicals, and sharp objects is important.
  • Using tire covers or bags can help protect tires from dust and debris during storage.
  • Recycling and proper disposal of old or damaged tires is important for reducing landfill waste, conserving natural resources, saving energy, and reducing pollution and soil contamination.

Factors That Affect the Lifespan of Bicycle Tires in Storage

You might be wondering how long your bicycle tires can last in storage and what factors can affect their lifespan. Well, one important factor is the recommended storage temperature. Extreme temperatures can cause the rubber to deteriorate faster, so it is best to store your tires in a cool and dry environment.

Additionally, UV exposure can also have a negative impact on tire lifespan. The sun’s rays can break down the rubber compounds over time, leading to cracking and dryness. To protect your tires from UV damage, it is recommended to store them in a dark place or use tire covers.

Now that you know the factors that affect tire lifespan in storage, let’s move on to the recommended storage methods for bicycle tires.

Recommended Storage Methods for Bicycle Tires

Before storing bicycle tires, it’s important to clean and dry them thoroughly. This will prevent any moisture or dirt from causing damage during storage.

Using tire bags or covers is also recommended to protect the tires from dust and debris, which can lead to deterioration over time.

Lastly, it’s crucial to store the tires in a cool, dry, and dark place to maintain their quality and extend their lifespan.

Clean and Dry the Tires Before Storage

After cleaning and drying the tires, make sure to store them in a cool and dry place. Proper storage is crucial to ensure the longevity of your bicycle tires. Here are some cleaning methods and storage containers you can use:

  • Use a mild soap and water solution to clean the tires. Avoid using harsh chemicals as they can damage the rubber.
  • Gently scrub the tires with a soft brush or cloth to remove dirt and grime.
  • Rinse the tires thoroughly and allow them to air dry completely before storage.
  • Store the tires in airtight plastic bags or containers to prevent moisture buildup.
  • Place the containers in a cool and dry area, away from direct sunlight and extreme temperatures.

By following these cleaning methods and using appropriate storage containers, you can protect your tires from unnecessary wear and tear.

Next, I will discuss the importance of using tire bags or covers to protect the tires from dust and debris.

Use Tire Bags or Covers to Protect from Dust and Debris

To protect your tires from dust and debris, it’s recommended to use tire bags or covers. Tire maintenance is crucial to ensure the longevity of your bicycle tires. One important aspect of tire maintenance is tire rotation. Regularly rotating your tires helps distribute the wear evenly, increasing their lifespan.

By using tire bags or covers, you provide an additional layer of protection against dust and debris that can accumulate during storage. These bags or covers act as a barrier, preventing any unwanted particles from settling on the tires and causing damage. However, it’s important to note that tire bags or covers should not be used as a substitute for proper tire storage.

It’s essential to store your tires in a cool, dry, and dark place to avoid any deterioration caused by extreme temperature or exposure to sunlight.

Store Tires in a Cool, Dry, and Dark Place

Make sure you store your tires in a cool, dry, and dark place to protect them from any potential damage. The storage temperature plays a crucial role in preserving the quality of your bicycle tires. Extreme heat or cold can cause the rubber to deteriorate, leading to cracks and reduced performance.

It is recommended to store your tires at a temperature between 50°F and 75°F (10°C to 24°C) to ensure optimal conditions. Additionally, humidity can also have a negative impact on tire longevity. High humidity levels can promote the growth of mold and mildew, which can weaken the tire structure. Therefore, it is essential to store your tires in a dry environment, preferably with a humidity level below 60%.

By following these guidelines, you can prolong the lifespan of your stored bicycle tires and ensure they are ready for use when needed.

Now, let’s delve into how long bicycle tires can last in storage.

How Long Can Bicycle Tires Last in Storage?

Bicycle tires can last for a long time in storage if properly stored. It is recommended to store tires in a cool, dry, and dark place to prevent damage and degradation. The recommended storage temperature for bicycle tires is between 40°F and 100°F (4°C and 38°C). Extreme temperatures can cause the rubber to deteriorate quickly, leading to cracks and reduced performance.

Additionally, it is important to store tires either vertically or horizontally to prevent deformation. Storing them in an upright position can help maintain their shape and prevent flat spots from forming.

To extend the lifespan of bicycle tires in storage, it is crucial to follow these guidelines and regularly inspect and rotate the tires. By taking these precautions, you can ensure that your stored bicycle tires remain in good condition and ready for use when needed.

Tips to Extend the Lifespan of Bicycle Tires in Storage

If you want to ensure your stored bicycle tires remain in good condition and ready for use, there are a few tips you can follow.

First, consider storing your tires in a cool and dry place to minimize the impact of temperature on their lifespan. Extreme heat or cold can cause the rubber to degrade faster, leading to premature wear and tear.

Second, if you have limited space, try to store your tires in a vertical position rather than stacking them horizontally. This will help prevent any unnecessary pressure or distortion on the tires.

Lastly, it’s a good idea to periodically check on your stored tires and rotate them to prevent flat spots from forming. Taking these precautions will help extend the lifespan of your bicycle tires in storage.

Now, let’s move on to the next section and talk about proper handling and care when taking tires out of storage.

Proper Handling and Care When Taking Tires Out of Storage

When taking tires out of storage, it’s important to check for signs of damage or deterioration. This includes looking for any cracks, cuts, or bulges in the tire.

Additionally, it’s crucial to inflate the tires to the recommended pressure to ensure proper performance and prevent any potential issues.

Lastly, inspect the tread wear and replace the tires if necessary, as worn-out tread can affect traction and safety while riding.

Check for Signs of Damage or Deterioration

Before storing your bicycle tires, always check for any signs of damage or deterioration. Several factors can affect the durability of tires, such as exposure to extreme temperatures, moisture, and improper storage techniques. Inspect the tires thoroughly for signs of age and degradation, including cracks, bulges, or dry rot.

Pay close attention to the sidewalls and tread area, as these are common areas for damage. Additionally, check the tire pressure to ensure it is within the recommended range. Properly inflated tires will help prevent damage during storage and ensure optimal performance when you are ready to use them again.

Remember, maintaining the condition of your tires is crucial for safe and enjoyable rides.

Now, let’s move on to the next section, where I will explain how to properly inflate your tires to the recommended pressure.

Inflate Tires to the Recommended Pressure

To properly inflate your tires, make sure you check the recommended pressure and use a tire pump with a pressure gauge. Proper inflation techniques are crucial for the longevity and performance of your bicycle tires. When tires are not inflated to the correct pressure, they can become prone to damage and wear more quickly.

Regularly checking tire pressure has numerous benefits. Firstly, it ensures optimal traction and control, especially when riding on different surfaces or in varying weather conditions. Secondly, it helps prevent punctures by reducing the risk of pinch flats. Additionally, properly inflated tires improve energy efficiency, making your rides smoother and more enjoyable.

By incorporating this simple maintenance routine into your cycling routine, you can extend the lifespan of your tires and enhance your overall riding experience.

Now, let’s move on to inspecting tread wear and replacing if necessary.

Inspect Tread Wear and Replace if Necessary

Check the tread wear on your bicycle tires regularly and replace them if necessary to ensure optimal performance and safety.

Inspecting tread wear is an essential part of maintaining your bicycle tires. Look for signs of uneven wear, such as bald spots or excessive wear on one side of the tire. If you notice any of these signs, it is time to replace your tires.

By replacing worn tires, you can prevent potential accidents and maintain better control while riding. Additionally, maintaining proper tire pressure is crucial for optimal performance. Ensure that your tires are inflated to the recommended pressure, as underinflated tires can affect your bike’s handling and increase the risk of flats.

When storing your bicycle tires, it is important to keep them in proper conditions, away from direct sunlight and extreme temperatures. This will help prolong their lifespan.

Now, let’s discuss recycling and disposal options for old or damaged bicycle tires.

Recycling and Disposal Options for Old or Damaged Bicycle Tires

There are various options for recycling and disposing of old or damaged bicycle tires.

When it comes to recycling options, one of the best choices is to take the tires to a local recycling facility that accepts rubber materials. These facilities have the capability to properly process the tires and turn them into new products or materials.

Another option is to check with your local bike shop or municipality to see if they have a tire recycling program in place. They may be able to collect and recycle the tires for you.

If recycling is not an option, proper disposal methods should be followed. This includes contacting your local waste management facility to inquire about their procedures for disposing of tires. They may require you to drop off the tires at a designated location or schedule a pick-up.

It is important to ensure that old or damaged bicycle tires are disposed of correctly to minimize their impact on the environment.

Frequently Asked Questions

Can I store my bicycle tires outside in extreme weather conditions?

Extreme weather can significantly reduce the lifespan of bicycle tires in storage. To protect them, store tires in a dry, temperature-controlled environment. If storing outside is necessary, use tire covers and ensure they are elevated to avoid direct contact with the ground.

What is the recommended storage temperature for bicycle tires?

The recommended storage temperature for bicycle tires is between 40-70°F. To properly clean tires before storage, use soap and water to remove debris and let them dry thoroughly.

Are there any specific storage containers or bags that are best for storing bicycle tires?

The best way to store bicycle tires is to use airtight containers or bags to prevent moisture and dust. Before storage, clean the tires thoroughly with mild soap and water. To prevent mold and mildew, ensure the tires are completely dry before storing.

Can bicycle tires be stored vertically or should they always be stored horizontally?

Bicycle tires can be stored vertically or horizontally, but vertical storage may lead to tire degradation. When stored vertically, the weight of the tire can cause deformation and stress on the sidewalls, potentially reducing their lifespan.

Is it necessary to inflate bicycle tires before storing them?

It’s best to inflate bicycle tires before storing them to prevent dry rot. Using tire sealant for long term storage has advantages, such as maintaining tire pressure and preventing air leaks.

Conclusion

Well folks, it turns out that bicycle tires in storage are quite the delicate creatures. With factors like temperature, humidity, and even the tire’s age playing a role in their lifespan, it’s no wonder they can’t handle the pressure.

But fear not, fellow cyclists, for there are recommended storage methods and tips to keep those tires in top shape. And just how long can they last? Well, that depends on a variety of factors, but with proper care and handling, you can certainly squeeze some extra miles out of them.

So remember, treat your tires right and they’ll keep you rolling for years to come. And if all else fails, there’s always recycling and disposal options for those worn-out wheels.

Happy cycling, everyone!

Continue Reading

Affiliate disclaimer

As an affiliate, we may earn a commission from qualifying purchases. We get commissions for purchases made through links on this website from Amazon and other third parties.

About us

We are a passionate team driven by the belief that cycling is a fantastic and accessible way to stay active while enjoying the beauty of the outdoors. Our mission is to share our love for cycling with as many people as possible. We provide a welcoming environment for individuals of all ages, abilities, and backgrounds to come together and ride bikes. With Ralf’s visionary leadership, Zane’s expertise in cycling adventures, and Olivia’s dedication to community building, we strive to create a vibrant space where everyone can experience the joy of cycling. Through group rides, workshops, and inclusive events, we inspire and empower individuals to embrace an active lifestyle. Join us in our quest to pedal together, embrace the joy of cycling, and foster connections that last a lifetime.

Trending