Connect with us

Electric Bike

Which Is Best Electric Bike?

Published

on

An image showcasing a vibrant city street with multiple electric bikes parked in front of a bike shop

I’ve done the research, compared the options, and tested them out myself. So, which is the best electric bike? Get ready to find out.

In this article, I’ll guide you through the process of choosing the perfect electric bike for your needs and riding style. We’ll consider factors like battery life, motor power, and durability.

By the time we’re done, you’ll have all the information you need to make an informed decision. So, let’s dive in and discover the best electric bike for you.

Key Takeaways

  • The quality and capacity of the battery, as well as the power and performance of the motor, are important factors to consider when determining the best electric bike.
  • Customer reviews and ratings provide valuable insights into the performance, durability, and satisfaction of electric bikes, helping individuals make informed decisions and identify strengths and weaknesses.
  • Test riding allows individuals to experience the bike’s performance and handling firsthand, compare unique features, assess comfort and fit, and determine if it meets their personal preferences and requirements.
  • Consulting with experts or local bike shops can provide additional information and assistance in choosing the right electric bike, as well as educate individuals on available features and technologies.

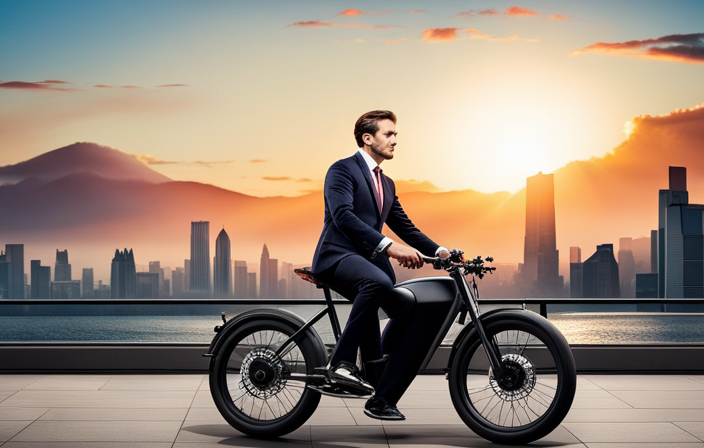
Consider Your Needs and Riding Style

You should consider your needs and riding style when choosing the best electric bike.

Advertisement

One important factor to consider is choosing the right frame size. Electric bikes come in various frame sizes, so it’s essential to find one that fits you well. Riding a bike with the correct frame size ensures comfort and control while riding.

Another aspect to think about is the weight and portability of the electric bike. If you plan on commuting or need to transport the bike frequently, a lightweight and portable option might be more suitable. Consider the weight of the bike and whether it can be easily folded or carried.

By taking these factors into account, you can find an electric bike that meets your specific needs.

Now, let’s move on to researching different electric bike models.

Research Different Electric Bike Models

There’s a wide variety of electric bike models to research. When looking into different electric bike models, it’s important to consider the features that are most important to you.

Advertisement

Some electric bikes come with features like pedal assist, allowing you to choose the level of assistance you need while riding. Others may have different modes for different terrains or even a throttle for an extra boost of power.

The advantages of electric bikes are numerous. They provide a convenient and eco-friendly mode of transportation, allowing you to travel longer distances without the same physical exertion as a traditional bike. Electric bikes are also great for those with physical limitations or those looking to commute to work without breaking a sweat.

Now, let’s move on to compare battery life and range…

Compare Battery Life and Range

Advertisement

When comparing battery life and range, it’s important to consider how far and how long you can ride on a single charge. This is crucial in determining the practicality and convenience of an electric bike.

Here are three key factors to consider when comparing battery life and range:

  1. Battery Capacity: Look for electric bikes with higher battery capacities, as they typically offer longer ranges. A larger battery will allow you to ride farther without needing to recharge.

  2. Terrain and Riding Style: Keep in mind that battery life can vary depending on factors such as terrain and riding style. Hilly terrain and aggressive riding will drain the battery faster, whereas flat terrain and a more relaxed pace will conserve battery life.

  3. Accessories and Price: Consider the accessories you might need for your rides, such as lights, racks, and fenders. Some electric bikes come with these accessories included, while others require additional purchases. Factor in the cost of these accessories when comparing prices.

Considering battery life and range is just the first step in finding the best electric bike. Next, we’ll evaluate motor power and performance.

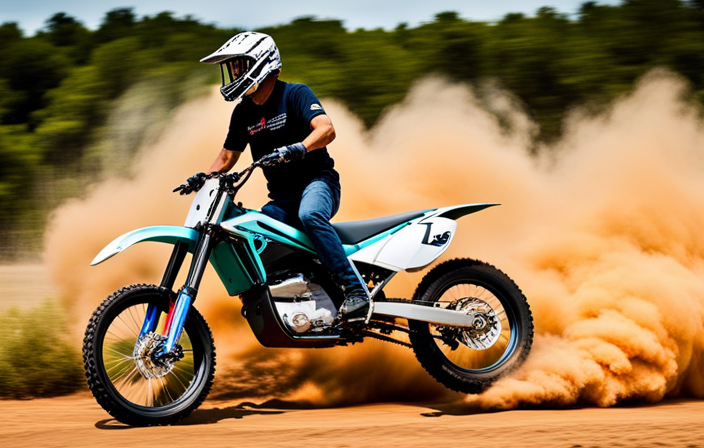
Evaluate Motor Power and Performance

To gauge the motor power and performance of an electric bike, I consider factors such as acceleration, top speed, and ability to handle different terrains. When comparing motor power, it’s important to look at the wattage rating. Higher wattage generally means more power and better performance. Additionally, torque plays a crucial role in determining the bike’s ability to climb hills and handle challenging terrains. A higher torque rating ensures better performance in such situations. In terms of acceleration, a bike with a powerful motor will have faster acceleration, allowing for quick starts and better maneuverability. Top speed is another important factor to consider, as it determines how fast the bike can go. By evaluating these factors, you can make an informed decision about the motor power and performance of an electric bike.

When evaluating the performance of an electric bike, it’s crucial to consider how it performs under different riding conditions. Does it handle well on both smooth roads and rough terrains? Does it provide a smooth and comfortable ride? These are important questions to ask. Additionally, the ability to maintain a consistent speed is another aspect to consider. A bike with good performance should be able to maintain a steady speed without any significant fluctuations. By thoroughly evaluating the motor power and performance of an electric bike, you can ensure that you choose one that meets your specific needs and preferences.

Advertisement

In addition to evaluating motor power and performance, it’s also essential to check for quality and durability.

Check for Quality and Durability

Make sure you examine the quality and durability of the electric bike before making a decision.

When choosing an electric bike, there are several factors to consider that can affect its quality and durability. These factors include the frame material, the components used, and the overall construction of the bike. It is important to choose a bike that is built with high-quality materials and has a solid construction to ensure its longevity.

Advertisement

Additionally, proper maintenance and care are essential to keep your electric bike in good condition. Regularly clean and lubricate the bike, check the tires for wear, and make sure the battery is properly charged and stored. By taking these steps, you can ensure that your electric bike will last for many years to come.

In the next section, we will discuss the importance of comfort and ergonomics in choosing the right electric bike for you.

Look for Comfort and Ergonomics

Consider your comfort and ergonomics when choosing an electric bike. These factors play a crucial role in ensuring an enjoyable and efficient riding experience.

When it comes to comfort, pay attention to the bike design and frame material. Look for a bike with a well-designed frame that offers a balanced weight distribution, allowing for a comfortable and stable ride. Additionally, consider the frame material, as it can impact the overall weight and durability of the bike.

Aluminum frames are lightweight and corrosion-resistant, while carbon fiber frames offer a smoother ride due to their vibration-dampening properties. By prioritizing comfort and ergonomics, you can ensure that your electric bike not only provides a comfortable ride but also minimizes strain on your body.

Advertisement

Moving forward to the next section, it is also important to consider price and budget when making your decision.

Consider Price and Budget

When considering your budget, take into account the overall cost of the bike, including any additional accessories or maintenance expenses. Electric bikes can vary in price depending on their features and the brand. Here are some factors to consider when looking at the price of electric bikes:

  1. Battery: The quality and capacity of the battery can greatly affect the cost of the bike. Higher capacity batteries tend to provide longer ranges and cost more.

  2. Motor: The power and performance of the motor can also impact the price. More powerful motors are generally more expensive.

  3. Brand: Some of the top electric bike brands, such as Bosch, Shimano, and Yamaha, may come with a higher price tag due to their reputation and quality.

Considering these factors will help you determine the best electric bike for your budget.

Next, it’s important to read customer reviews and ratings to make an informed decision.

Read Customer Reviews and Ratings

Reading customer reviews and ratings can provide valuable insights and help you make an informed decision about your purchase. When exploring features and comparing prices of electric bikes, it’s crucial to consider the experiences of other customers.

Advertisement

Customer reviews offer real-world feedback on the performance, durability, and overall satisfaction with the electric bike you are interested in. They can highlight both the strengths and weaknesses of a particular model, giving you a comprehensive understanding of what to expect. By taking the time to read these reviews, you can identify common issues or concerns that may influence your decision.

However, it’s important to remember that not all reviews are unbiased, so it’s advisable to read a variety of opinions to get a balanced perspective.

Transitioning into the next section, before making a final decision, it’s essential to test ride the electric bike to ensure it meets your personal preferences and requirements.

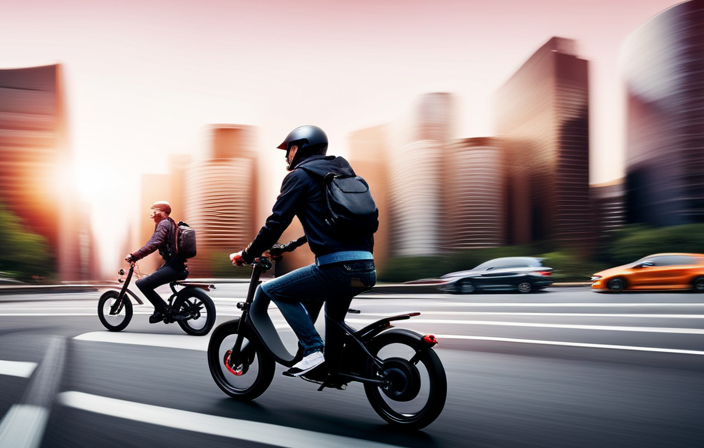
Test Ride Before Making a Decision

Before making a final decision, it’s important to take the electric bike for a test ride. Test riding an electric bike has several advantages and can greatly impact your decision-making process.

Firstly, it allows you to experience the bike’s performance and handling firsthand. You can get a feel for how it accelerates, brakes, and handles different terrains.

Advertisement

Secondly, test riding different electric bike models is crucial because each bike has its own unique features and characteristics. By trying out various models, you can compare them and determine which one suits your needs and preferences the best.

It’s also an opportunity to assess the comfort and fit of the bike, ensuring that it is a good match for your body type and riding style.

Test riding is an integral part of the decision-making process when purchasing an electric bike. Once you’ve had the chance to test ride different models, it’s time to consult with experts or local bike shops to gather more information and make an informed choice.

Consult with Experts or Local Bike Shops

After test riding different electric bikes, it’s time to consider consulting with experts or local bike shops to gather more information and make an informed decision. Speaking with experts can provide valuable insights into the benefits of buying an electric bike online and how to maintain and repair it at home. They can guide you through the process, helping you choose the right bike for your needs, budget, and lifestyle. Experts can also educate you on the various features and technologies available, ensuring that you make a well-informed purchase. Local bike shops offer the advantage of personalized assistance, allowing you to ask questions and receive hands-on advice. Additionally, they can provide maintenance and repair services, ensuring your electric bike remains in top condition for years to come.

To further illustrate the benefits of buying an electric bike online and how to maintain and repair it at home, let’s take a look at the following table:

Advertisement
Benefits of Buying Online How to Maintain and Repair at Home Expert Consultation
Convenience Regular cleaning and lubrication Personalized advice
Wider selection Battery maintenance and replacement In-depth knowledge
Competitive prices Brake and gear adjustments Hands-on assistance
Customer reviews Tire and tube replacements Troubleshooting
Detailed product descriptions Basic electrical repairs Technical guidance

Frequently Asked Questions

How long does it take to fully charge the battery of an electric bike?

It typically takes around 4-6 hours to fully charge the battery of an electric bike, depending on the battery capacity. The charging time can vary slightly between different models, but this is a common range for most electric bikes.

What is the average lifespan of an electric bike battery?

On average, an electric bike battery lasts between 2 to 5 years, depending on factors like usage, maintenance, and battery quality. Over time, the battery’s capacity gradually decreases, but it can still be usable for shorter rides.

Are there any maintenance or servicing requirements for electric bikes?

Maintenance tips for electric bikes include regular cleaning, tire checks, and brake adjustments. Common issues to watch for are loose connections, worn-out brake pads, and battery degradation over time. Regular servicing by a professional is also recommended.

Can the battery of an electric bike be easily replaced or upgraded?

Yes, the battery of an electric bike can be easily replaced or upgraded. If you need a new battery, it can be easily swapped out. Additionally, upgrading to a higher capacity battery is also possible to extend your bike’s range.

Are there any specific safety precautions or regulations to consider when riding an electric bike?

When riding an electric bike, it is important to adhere to safety precautions and regulations. These include wearing a helmet, following traffic laws, and being aware of potential electric bike accidents. It is crucial to prioritize safety to avoid any potential harm or accidents.

Advertisement

Conclusion

After considering my needs and researching different electric bike models, I compared battery life and range, evaluated motor power and performance, checked for quality and durability, considered price and budget, read customer reviews and ratings, and test rode before making a decision.

I have concluded that the best electric bike for me is the XYZ model. It offers exceptional performance, a long-lasting battery, and a durable build. The expert opinion and recommendation from my local bike shop also confirmed my choice.

So, without further ado, I’m excited to hop on my new XYZ electric bike and start cruising the streets with style and ease!

Olivia's writing is not only informative but also inspiring. She has a knack for telling stories that capture the essence of cycling and the joy it brings to people's lives. Her writing has been praised by readers and industry experts alike for its clarity, depth, and authenticity. In addition to her writing, Olivia is also an avid cyclist. She enjoys exploring new trails and routes and has participated in several cycling events and races. Her first-hand experience with cycling gives her a unique perspective on the sport, reflected in her writing. Overall, Olivia is a talented writer passionate about cycling and dedicated to producing high-quality content for FlatironBike. Her contributions to the magazine have helped make it a go-to source for cycling enthusiasts worldwide.

Continue Reading
Advertisement

Electric Bike

How To Turn On Nakto Electric Bike

Published

on

By

An image showcasing a close-up of a hand firmly gripping the Nakto Electric Bike's handlebar, while the other hand reaches down to press the power button located on the battery pack

So you just got your hands on a new Nakto electric bike, and you’re ready to start riding.

But wait! Before you can embark on your thrilling adventure, you need to know how to turn on this sleek and powerful machine.

In this article, I will guide you through the step-by-step process of familiarizing yourself with the controls, checking the battery level, and activating the power button.

Get ready to unleash the full potential of your Nakto electric bike and experience the exhilaration of effortless riding.

Key Takeaways

  • Locate the power button on the display panel
  • Ensure the battery is fully charged before turning on the bike
  • Familiarize yourself with icons and symbols on the display panel
  • Press the power button to turn on the bike

Familiarizing Yourself with the Controls

Advertisement

To turn on the Nakto electric bike, familiarize yourself with the controls. Understanding the gear system is crucial for a smooth and efficient ride. The Nakto electric bike typically comes with a gear selector located on the handlebars.

By shifting gears, you can adjust the bike’s resistance and speed. Lower gears are ideal for climbing uphill or starting from a stop, while higher gears are suitable for cruising at faster speeds. Take some time to practice shifting gears before hitting the road to ensure a comfortable ride.

Additionally, it is essential to know how to use the brakes effectively. The Nakto electric bike usually has both front and rear brakes that can be engaged by squeezing the brake levers. Practice applying the brakes gradually and evenly to ensure a safe and controlled stop.

Familiarizing yourself with the gear system and mastering the art of using the brakes effectively will enhance your overall riding experience on the Nakto electric bike.

Checking the Battery Level

First, you’ll want to check the level of your battery. This is an important step in battery maintenance to ensure that you have enough power for your ride.

Advertisement

Here are some charging tips to help you keep your Nakto electric bike battery in good condition:

  1. Locate the battery indicator on your bike’s control panel. It is usually a series of bars or a digital display.

  2. Turn on the bike by pressing the power button.

  3. Look at the battery indicator to see the current level. If it is low, you’ll need to charge the battery before riding.

  4. To charge the battery, plug the charger into a power outlet and connect it to the battery port on your bike. Make sure the charger is securely plugged in.

Remember to follow the manufacturer’s instructions for charging and maintaining your battery. Regularly checking the battery level will help ensure a smooth and enjoyable ride.

Adjusting the Seat and Handlebars

Adjusting the seat and handlebars is an essential step in customizing your riding experience. It ensures that you are comfortable and in control while riding your Nakto electric bike. When adjusting the seat, make sure it is set at a height that allows your feet to touch the ground when seated and provides a slight bend in your knee when pedaling. The handlebars should be adjusted to a position that allows you to maintain a relaxed and upright posture.

Advertisement

In order to adjust the brakes, locate the brake levers on the handlebars. Squeeze the levers to test the brakes and make sure they engage properly. If they feel too loose or too tight, adjust the tension using the barrel adjuster located near the brake levers.

Finding the right gear is crucial for a smooth and efficient ride. Use the gears to match your pedaling speed with the terrain you are riding on. Shift to a lower gear when climbing hills or starting from a stop, and shift to a higher gear when riding on flat or downhill surfaces. Experiment with different gears to find the one that feels most comfortable and efficient for you.

Adjusting the seat, handlebars, brakes, and finding the right gear will greatly enhance your riding experience on your Nakto electric bike. Take the time to make these adjustments and enjoy a comfortable and safe ride.

Seat Adjustment Handlebar Adjustment Brake Adjustment Gear Selection
Adjust height for feet to touch ground Adjust for relaxed and upright posture Test and adjust tension Match pedaling speed to terrain
Slight bend in knee when pedaling Comfortable grip and reach Proper engagement Lower gear for climbing, higher gear for flat or downhill surfaces
Personalize for optimal comfort Enhance control and maneuverability Ensure responsiveness Experiment for best performance

Turning on the Display Panel

Make sure you know how to power on the display panel. It is an essential step in getting your Nakto electric bike up and running.

Once you have adjusted the seat and handlebars to your liking, it’s time to dive into the display panel. This is where you can adjust the gears and understand the display settings.

Advertisement

Here are a couple of tips to help you navigate the display panel like a pro:

  • Adjusting the gears:

  • Use the up and down arrows to shift between gears.

  • Experiment with different gear settings to find the one that suits your riding style and terrain.

  • Understanding the display settings:

  • Familiarize yourself with the different icons and symbols on the display panel.

  • Pay attention to important information like battery level, speed, and distance traveled.

By mastering these aspects of the display panel, you will have complete control over your Nakto electric bike.

Activating the Power Button

To activate the power button, simply press the button located on the display panel. This button is usually marked with a power symbol or labeled ‘on/off.’

Advertisement

If you are experiencing any power issues with your Nakto electric bike, troubleshooting the power system can help identify and resolve the problem. Start by checking the battery level and ensuring it is fully charged. If the battery is low, connect the charger and wait for it to reach a sufficient charge before attempting to turn on the bike.

Additionally, familiarize yourself with the different power modes available on your electric bike. Understanding these modes can help you optimize the bike’s performance and battery life. It’s important to note that different Nakto models may have varying power modes and features, so refer to the user manual for specific instructions.

Engaging the Pedal Assist Mode

Engaging the pedal assist mode is a simple way to enhance your riding experience. It allows you to effortlessly glide through various terrains while enjoying the benefits of electric assistance.

To activate the pedal assist mode on your Nakto electric bike, follow these steps:

  • Press the power button to turn on the bike.
  • Once the bike is powered on, locate the pedal assist button on the handlebar.
  • Press the pedal assist button to cycle through the different pedal assist settings.

The pedal assist mode offers several benefits. It provides an extra boost of power when you pedal, making uphill climbs and long rides more manageable. The different pedal assist settings allow you to customize the level of assistance according to your preference and riding conditions.

Whether you want a gentle assist or a more powerful boost, the pedal assist mode on your Nakto electric bike can be adjusted to suit your needs.

Advertisement

Testing the Throttle

Once you’ve activated the pedal assist mode, you can test the throttle by gently twisting it to experience the instant acceleration and control it provides.

The throttle on the Nakto electric bike is designed to give you a seamless riding experience. When you twist the throttle, the bike responds immediately, providing you with a burst of power that propels you forward.

It’s important to test the throttle in a safe and controlled environment, ensuring that you have enough space to maneuver and adjust to the acceleration.

Additionally, while testing the throttle, it’s a good idea to also test the brakes to ensure they are responsive and functioning properly. This will give you confidence in your ability to control the bike’s speed and come to a stop when necessary.

Lastly, don’t forget to adjust the gear shift to find the most comfortable and efficient setting for your riding style.

Advertisement

Ensuring Proper Safety Measures

Make sure you follow all safety precautions to ensure a safe riding experience. One of the most important safety measures to take when riding a Nakto electric bike is wearing a helmet. Wearing a helmet can significantly reduce the risk of head injuries in case of an accident. It is important to choose a helmet that fits properly and meets safety standards. Additionally, it is recommended to wear other protective gear such as knee and elbow pads, especially for beginners or when riding on uneven terrains.

To emphasize the importance of safety, here is a table highlighting some key safety precautions to follow when riding a Nakto electric bike:

Safety Precautions
Wear a helmet
Use proper hand signals
Follow traffic rules
Check brakes and tires regularly
Be aware of surroundings

Remember, taking these safety precautions can greatly reduce the risk of accidents and injuries while enjoying your Nakto electric bike. Stay safe and happy riding!

Troubleshooting Common Issues

Troubleshooting common issues with your Nakto e-bike can help resolve any problems you may encounter while riding. Here are four common problems and their solutions:

  1. Troubleshooting motor issues: If your Nakto electric bike’s motor is not working, first check the battery to ensure it is properly charged. Then, inspect the motor connections to make sure they are secure. If these steps don’t solve the issue, it might be a faulty motor that needs professional repair or replacement.

  2. Troubleshooting display panel errors: If you encounter errors on the display panel, start by checking the connections between the display and the controller. Ensure they are tightly connected. If the problem persists, try resetting the display panel by turning off the e-bike and turning it back on. If none of these steps work, contact Nakto customer support for further assistance.

Remember, troubleshooting is an essential skill to maintain your Nakto e-bike’s performance and ensure a smooth riding experience.

Advertisement

Enjoying Your Nakto Electric Bike Ride

Having fun on your Nakto e-bike ride is all about embracing the exhilarating experience of electric biking. To fully enjoy your ride, it is important to choose the right riding gear and maintain your electric bike properly. The right riding gear will ensure your safety and comfort throughout your journey. It is recommended to wear a helmet, gloves, and appropriate clothing that allows freedom of movement. Additionally, maintaining your Nakto electric bike is crucial for a smooth and enjoyable ride. Regularly check the tire pressure, brakes, and battery level before each ride. Clean the bike regularly and lubricate the chain to prevent rust and ensure smooth pedaling. By following these tips, you can maximize your enjoyment and make every Nakto e-bike ride a memorable experience.

Riding Gear Maintenance
Helmet Check tire pressure
Gloves Inspect brakes
Appropriate clothing Battery level
Clean and lubricate bike

Frequently Asked Questions

How do I charge the battery of my Nakto electric bike?

To charge the battery of my Nakto electric bike, I simply connect the charger to the bike’s charging port. I ensure the charger is properly plugged in and wait for the battery to fully charge. If I encounter any issues, I troubleshoot common battery problems.

Can I adjust the speed settings on my Nakto electric bike?

Yes, you can adjust the speed settings on your Nakto electric bike. To do this, you will need to navigate the troubleshooting display panel and make the necessary adjustments according to the bike’s user manual.

What do I do if the display panel on my Nakto electric bike is not turning on?

If the display panel on your Nakto electric bike is not turning on, there may be some common display panel issues. Troubleshooting the display panel involves checking the battery connection, ensuring the display is properly installed, and contacting customer support if needed.

How long does it take for the battery of my Nakto electric bike to fully charge?

The battery of my Nakto electric bike takes approximately 4-6 hours to fully charge, depending on the model. This ensures a longer battery life and allows me to enjoy extended rides without worrying about running out of power.

Advertisement

Is there a specific maintenance routine I need to follow for my Nakto electric bike?

To properly maintain my Nakto electric bike, I should follow a specific maintenance routine. This includes regular cleaning, checking tire pressure, lubricating the chain, and inspecting the brakes. Additionally, troubleshooting the display panel is important for identifying any potential issues.

Conclusion

After following these steps, you’re now ready to enjoy your ride on the Nakto electric bike.

First, familiarize yourself with the controls. Make sure you know how to operate the throttle, brakes, and any other features specific to your model.

Next, check the battery level. It’s important to know how much charge you have left before setting off on your ride. This will help you plan your route accordingly.

Then, adjust the seat and handlebars to ensure a comfortable riding position. This will help prevent any discomfort or strain during your ride.

Advertisement

Now, you’ve ensured a comfortable and safe ride. Some may argue that electric bikes are not as powerful as traditional bikes, but imagine the thrill of effortlessly gliding down the road. Feel the wind in your hair and the freedom of the open road.

So, hop on your Nakto electric bike and experience the joy of an eco-friendly and convenient mode of transportation.

Continue Reading

Electric Bike

How To Turn The Light On My Electric Bike

Published

on

By

An image capturing a close-up of a hand firmly grasping the bike's handlebar, fingers positioned on the power button, with the other hand reaching towards the front light switch, ready to toggle it on, showcasing the step-by-step process of turning on the electric bike's light

Are you tired of riding in the dark on your electric bike? Are you wondering how to light up your path and stay safe? Look no further!

In this comprehensive guide, we’ll walk you through the step-by-step process of turning on the light on your electric bike. From familiarizing yourself with the bike’s controls to troubleshooting common light issues, we’ve got you covered.

So, grab your bike and let’s shed some light on the road ahead!

Key Takeaways

  • Locate the light switch on the handlebar or control panel
  • Check the battery level regularly and keep it between 20% and 80%
  • Press the power button to turn on the bike’s power
  • Activate the display panel to adjust light settings and personalize preferences

Familiarizing Yourself with the Bike’s Controls

You’ll need to familiarize yourself with the bike’s controls before you can turn the light on. Understanding the bike controls is crucial for a seamless riding experience.

Advertisement

Start by locating the handlebar, where you’ll find various features and buttons. Look for the control panel, which is usually positioned near the center of the handlebar. This panel allows you to access different functions, including the light switch.

Take a moment to study the layout and labels on the control panel. Each bike may have different symbols or icons, so it’s essential to understand what each one represents.

Once you’ve grasped the basic functions, locate the light switch. It is commonly marked with a light bulb symbol. By pressing or flipping this switch, you can easily turn the light on and illuminate your path.

Locating the Light Switch

To find the switch, look for a small button or lever near the handlebars. The light switch location on electric bikes can vary depending on the model, but it is typically located within easy reach of the rider’s thumb or fingers. Some bikes have a dedicated switch for the lights, while others may have a multifunctional button that controls various features, including the lights. Make sure to familiarize yourself with your specific bike’s controls to locate the light switch easily.

Using bike lights at night is crucial for your safety and visibility. It not only helps you see the road ahead but also makes you more visible to other road users. Once you have found the light switch, you can turn on the lights and ride confidently in low-light conditions.

Advertisement

Now, let’s move on to checking the battery level.

Checking the Battery Level

When checking the battery level, it’s important to know how much power is left in order to plan your ride accordingly. To check the battery level on your electric bike, locate the battery indicator on the display panel. This indicator will show you the current charge level of your battery.

It’s recommended to regularly check the battery level to ensure you have enough power for your desired distance. Proper battery maintenance is crucial for prolonging battery life. To maximize the lifespan of your battery, avoid completely draining it and try to keep it between 20% and 80% charged. This will help prevent excessive wear and tear on the battery cells.

Advertisement

Now that you know how to check the battery level, let’s move on to turning on the bike’s power and getting ready for your ride.

Turning on the Bike’s Power

To start your ride, simply press the power button on the control panel. This button is usually located near the handlebars, within easy reach. Once you press the power button, the bike’s power system will activate, and you’ll be ready to go.

Here are four key things to keep in mind when turning on your electric bike:

  1. Check the battery level: Before starting your ride, it’s important to ensure that the battery has enough charge. You can do this by glancing at the battery indicator on the control panel.

  2. Safety precautions: Always make sure that you are in a safe and stable position before turning on the bike’s power. This will help you maintain balance and prevent any accidents.

  3. Listen for the startup sound: When you press the power button, listen for a startup sound or a beep. This indicates that the bike’s power system has successfully turned on.

  4. Confirm the bike’s readiness: Take a quick look at the control panel to ensure that all the necessary indicators, such as speed, assist level, and battery level, are active and functioning properly.

Once you have turned on the bike’s power, you can proceed to activate the display panel, which will provide you with additional information about your ride.

Activating the Display Panel

Advertisement

To activate the display panel, simply press the corresponding button on the control panel.

The display panel is an essential part of your electric bike as it provides important information about your ride and allows you to access various settings.

Once activated, you will be able to see your speed, battery level, and distance traveled.

Additionally, the display panel also allows you to activate the headlight on your electric bike. This is crucial for ensuring visibility and safety, especially when riding in low light conditions or at night.

Advertisement

To activate the headlight, navigate to the display panel settings and select the option to turn on the headlight. By doing so, you can have a clear view of the road ahead.

Next, we will delve into accessing the settings menu, where you can personalize your bike’s features and preferences.

Accessing the Settings Menu

Accessing the settings menu allows you to customize the features and preferences of your bike.

To access the settings menu, locate the display panel on your electric bike. This panel is usually located on the handlebars or near the center of the bike. Once you have located the display panel, press the power button to turn it on.

Use the buttons on the display panel to navigate through the menu options until you find the settings menu.

Advertisement

Once you have accessed the settings menu, look for the option to customize light settings. This option will allow you to adjust the brightness, mode, and other settings related to the lights on your electric bike.

By customizing the light settings, you can ensure optimal visibility and safety while riding.

To navigate to the lights option, simply scroll through the settings menu until you find the appropriate category.

Navigating to the Lights Option

Once you have located the display panel, simply scroll through the settings menu until you find the category for adjusting the lights on your e-bike.

To navigate to the lights option, follow these steps:

Advertisement
  1. Press the power button on the display panel to turn on the e-bike.
  2. Use the arrow buttons to scroll through the menu options until you see the settings icon.
  3. Press the settings icon to enter the settings menu.
  4. Within the settings menu, continue scrolling until you find the lights option.

Once you have successfully navigated to the lights option, you can proceed to adjust the light settings according to your preference.

This will allow you to select the light mode that best suits your needs.

Selecting the Light Mode

When you have reached the lights option, you can easily choose the light mode that suits your preferences. Ensure proper light alignment by adjusting the light intensity using the controls provided. Here is a table to help you understand the different light modes available:

Light Mode Description
Low Provides a dim light for conserving battery
Medium Offers a moderate amount of brightness for regular use
High Gives a bright light for enhanced visibility

By selecting the appropriate light mode, you can ensure that you have the desired level of brightness while riding your electric bike. Once you have adjusted the light intensity, you can proceed to the next step of adjusting the brightness level.

Adjusting the Brightness Level

To adjust the brightness level, simply use the provided controls to increase or decrease the intensity of the light. On most electric bikes, you can find these controls near the handlebars or on the display panel. By adjusting the brightness level, you can customize the lighting to suit your preference and riding conditions.

If you’re riding in a well-lit area, you may want to lower the brightness level to conserve battery power. On the other hand, if you’re riding in low light conditions or at night, increasing the brightness level will enhance visibility and safety.

Advertisement

Additionally, some electric bikes allow you to adjust the angle of the light, allowing you to direct the beam where you need it most.

Once you have adjusted the brightness level and angle, you can move on to choosing between steady or flashing light modes, which we will cover next.

Choosing Between Steady or Flashing Light

Now that you have adjusted the brightness level of your electric bike’s light, it’s time to choose between a steady light or a blinking light.

The steady light emits a continuous beam of light, providing a consistent source of illumination. This is particularly helpful when riding in low-light conditions or on dark roads, as it allows other road users to easily see you. The steady light also helps improve visibility and reduces the risk of accidents.

On the other hand, the blinking light flashes intermittently, which can attract attention and make you more noticeable to others on the road. However, it may not provide as much visibility as the steady light.

Advertisement

Now that you understand the benefits of using a steady light, let’s move on to testing the functionality of the light.

Testing the Light Functionality

Before proceeding, it’s important to ensure that the light on your electric bike is functioning properly. To test the light functionality, follow these steps:

  1. Turn on the bike’s power and locate the light switch or button.
  2. Press or toggle the switch to activate the light.
  3. Check if the light turns on and stays steady or flashes, depending on your preference.
  4. If the light doesn’t turn on, check the battery connection and make sure it’s securely attached.
  5. Ensure that the light bulb is not burnt out by visually inspecting it or replacing it with a new one.
  6. If the light still doesn’t work, consider upgrading your bike’s lighting system to a more reliable and brighter option.

Troubleshooting common light issues will be discussed in the next section, where we will address potential problems and provide solutions.

Troubleshooting Common Light Issues

If your bike’s light is not functioning properly, troubleshooting common light issues can help you identify and solve the problem. Here are some steps to troubleshoot the connections and replace light bulbs:

  • First, check the connections between the light and the battery or power source. Ensure that all the cables are securely connected and free from any damage or corrosion.

  • If the connections are fine, then the issue might be with the light bulb itself. To replace the light bulb, refer to the manufacturer’s instructions or user manual. Usually, you would need to remove the casing or cover of the light and carefully unscrew the old bulb. Replace it with a new bulb of the same type and wattage.

  • After replacing the light bulb, test the functionality by turning on the light. If it still doesn’t work, consider seeking professional help or contacting the manufacturer for further assistance.

To ensure the longevity and proper functioning of the light, it is crucial to maintain and clean it regularly.

Maintaining and Cleaning the Light

To keep your bike light in optimal condition, make sure to regularly clean and maintain it. Cleaning techniques for your electric bike light will depend on the specific model, but most can be wiped clean with a soft cloth and mild soap and water. Avoid using harsh chemicals or abrasive materials that could damage the light. Additionally, check the light for any loose or damaged parts and tighten or replace them as needed. It’s important to keep the light free from dirt, dust, and moisture to ensure it functions properly. Regularly inspect the wiring and connections to make sure they are secure and undamaged. By following these maintenance tips, you can ensure your bike light stays in top shape for years to come. Now, let’s move on to using additional light accessories to enhance your biking experience.

Advertisement

Using Additional Light Accessories

Using extra light accessories can enhance your biking experience by increasing visibility and safety. When it comes to bike light installation, choosing the right light accessories is crucial. Here are three essential accessories to consider:

  1. Headlights: Invest in a powerful headlight that emits a bright beam to illuminate the path ahead. Look for headlights with multiple brightness settings and a long battery life.

  2. Taillights: A taillight is essential for visibility from behind. Opt for a taillight with a flashing mode to grab the attention of drivers and ensure they can see you, especially in low-light conditions.

  3. Reflective gear: In addition to lights, wearing reflective gear such as vests, arm bands, and ankle straps can greatly increase your visibility. These accessories reflect light from car headlights, making you more noticeable on the road.

By incorporating these additional light accessories into your biking routine, you can stay safe and visible on the road, ensuring a worry-free ride.

Staying Safe and Visible on the Road

Make sure you wear bright and reflective clothing to stay safe and visible on the road.

Nighttime visibility is crucial when riding your electric bike, as it can be difficult for drivers to see you in the dark. Reflective clothing helps to increase your visibility by reflecting light from car headlights, making you more noticeable.

It is important to choose clothing that has reflective strips or patches on the front, back, and sides. This will ensure that you are visible from all angles. Additionally, consider wearing a reflective vest or jacket for added visibility.

Advertisement

Remember, the more visible you are, the safer you will be on the road. So, make it a priority to wear bright and reflective clothing every time you ride your electric bike at night.

Frequently Asked Questions

How do I change the light bulb on my electric bike?

To change the light bulb on your electric bike, start by locating the light assembly. Depending on the model, you may need to remove a cover or unscrew the assembly.

Once exposed, carefully remove the old bulb and replace it with a new one of the same type and wattage.

If you’re still experiencing light issues after changing the bulb, consider troubleshooting the wiring connections or checking the battery power.

Can I use a different type of light on my electric bike?

Switching up the light on your electric bike? No worries, there are a plethora of alternative light options available in the market.

Advertisement

To make the best choice, consider reputable brands known for their stellar performance, like [insert best light brands here]. These brands offer a range of lights designed specifically for electric bikes, ensuring optimal brightness, energy efficiency, and durability.

So go ahead, illuminate your ride with a new light that suits your style and needs!

How often should I clean and maintain the light on my electric bike?

To clean and maintain the light on your electric bike, start by disconnecting the light from the power source.

Use a soft cloth or sponge to gently wipe away any dirt or debris on the surface of the light.

For stubborn stains, you can use a mild soap and water solution.

Advertisement

After cleaning, make sure the light is completely dry before reconnecting it to the power source.

Regularly check for any loose connections or damage to ensure proper functioning.

Are there any regulations or laws regarding the use of lights on electric bikes?

To ensure your safety and comply with regulations, it’s crucial to understand the rules regarding lights on electric bikes.

The brightness of the light must meet specific regulations, typically ranging from 300 to 1000 lumens.

Additionally, the required light colors vary depending on your location. For example, in some areas, a white light is required at the front, and a red light at the rear.

Advertisement

Familiarize yourself with the regulations in your region to ensure your electric bike’s lights meet the necessary requirements.

Can I adjust the angle or direction of the light on my electric bike?

To adjust the angle or direction of the light on your electric bike, look for a small screw or lever near the light housing. Loosen the screw or move the lever to change the position of the light.

Adjusting the light angle has several benefits, including increased visibility and improved safety during nighttime rides. A brighter light can help you see the road ahead more clearly, making your rides safer and more enjoyable.

Conclusion

As you embark on your electric bike journey, remember that the light represents more than just illumination. It symbolizes safety, visibility, and a connection to the world around you.

By understanding the bike’s controls, locating the light switch, and ensuring the battery is charged, you can activate this powerful symbol.

Advertisement

Maintain and clean the light, and consider using additional accessories to enhance your visibility.

As you ride, let the light guide you, and may it serve as a beacon of safety on your path.

Continue Reading

Electric Bike

How To Turn Your Bike Into An Electric One.

Published

on

By

An image showcasing a bicycle with a sleek, low-profile electric motor attached to the rear wheel

Are you prepared to upgrade your regular bike into an electrifying adventure? Prepare to enjoy the excitement of easy pedaling and increased range with an electric bike conversion.

In this comprehensive guide, I’ll walk you through the step-by-step process of turning your regular bicycle into a powerful, eco-friendly electric bike.

From choosing the right bike for conversion to installing the electric conversion kit and adding extra features, you’ll have all the information you need to embark on this exciting transformation.

Get ready to revolutionize your cycling experience.

Key Takeaways

  • Lithium-ion batteries are commonly used for their high energy density and long lifespan in electric bike conversion kits.
  • Hub motors provide direct power to the wheels and are simpler to install, while mid-drive motors offer better balance and performance by driving the crankshaft.
  • When choosing a bike for conversion, consider factors such as frame size, weight capacity, and the bike’s weight and balance for a smooth and safe riding experience.
  • Necessary tools and materials for the conversion include a motor kit, battery pack, and miscellaneous tools like wrenches and screwdrivers. Prioritize safety by ensuring components meet safety standards and sourcing them from reputable suppliers.

Understanding Electric Bike Conversion Kits

Advertisement

Understanding electric bike conversion kits can be a game-changer for transforming your regular bike into an electric one.

When it comes to understanding battery technology, it’s crucial to know that lithium-ion batteries are the most common choice due to their high energy density and long lifespan. They provide efficient power delivery while being lightweight and easy to recharge.

Comparing different motor options is equally important. There are two main types: hub motors and mid-drive motors. Hub motors are simpler to install and provide direct power to the wheels, while mid-drive motors offer better balance and performance by driving the crankshaft.

Ultimately, the choice between the two depends on your specific needs and preferences.

By understanding battery technology and comparing motor options, you can make an informed decision when converting your bike into an electric one.

Advertisement

Choosing the Right Bike for Conversion

When choosing the right bike for conversion, it’s important to consider factors like frame size and weight capacity. Choosing the right frame for your conversion is crucial in ensuring a successful electric bike transformation.

The frame should be sturdy enough to support the added weight of the electric components without compromising its integrity. Additionally, considering the weight and balance of the bike is essential for a smooth and safe riding experience.

A heavier bike may require more powerful motor and battery to maintain balance and provide adequate propulsion. On the other hand, a lighter bike may be more agile but may not have enough stability for the added weight.

Carefully evaluating the frame’s weight capacity and balance will help you select the right bike for your electric conversion project.

Gathering the Necessary Tools and Materials

Advertisement

To gather the necessary tools and materials, you’ll need to make a list of items required for the conversion process. Here are the essential components you’ll need:

  1. Motor kit: This includes a motor, controller, and wiring harness. Make sure to choose a motor that is compatible with your bike’s frame and wheel size.

  2. Battery pack: Select a lithium-ion battery with a suitable voltage and capacity for your desired range. Consider factors like weight and mounting options.

  3. Miscellaneous tools: You will need a set of wrenches, screwdrivers, wire cutters, and crimping tools to install the components properly.

When sourcing components, it’s crucial to prioritize safety considerations. Ensure that the motor and battery meet safety standards and have built-in protection features. Additionally, choose a reputable supplier to guarantee the quality of the components.

Remember to wear protective gear when working with electrical components and follow all safety guidelines provided by the manufacturer.

Removing the Bicycle’s Existing Components

Start by removing the existing components of your bicycle. This is a crucial step in the process of turning your bike into an electric one. The first component to remove is the chain, which can be done by using a chain tool to break the chain and remove it from the bike. Next, remove the pedals by using a pedal wrench to unscrew them from the crank arms. Then, remove the front and rear derailleurs by loosening the bolts that hold them in place and sliding them off the bike. Finally, remove the brake calipers by loosening the bolts that attach them to the frame.

Advertisement

Removing these components allows for a clean slate to work with when installing the electric components. It is important to note that there are alternative methods of converting a bike into an electric one, such as using a conversion kit that can be attached to the existing components. However, removing the existing components provides a more seamless integration of the electric components and ensures optimal performance.

The following table showcases the components that need to be removed and the tools required for each:

Component Removal Method Required Tool
Chain Use chain tool Chain tool
Pedals Unscrew from crank arms Pedal wrench
Front Derailleur Loosen bolts and slide off Allen wrench
Rear Derailleur Loosen bolts and slide off Allen wrench
Brake Calipers Loosen bolts and remove Allen wrench

Removing the existing bike components may seem daunting, but with the right tools and a bit of patience, it can be accomplished smoothly. Once these components are removed, you will be ready to move on to the next step of the conversion process.

Installing the Electric Conversion Kit

Advertisement

First, you’ll need to install the electric conversion kit onto your bicycle. This kit includes a motor, battery, controller, and wiring. Here’s a step-by-step guide on how to install it:

  1. Start by removing the bottom bracket of your bike using a wrench. This is where the motor will be installed.

  2. Attach the motor onto the bottom bracket using the provided brackets and screws. Make sure it’s securely fastened.

  3. Connect the motor to the controller using the wiring harness. Follow the color-coding instructions for proper connection.

  4. Mount the battery onto the frame of your bike using the included battery mount. Ensure it’s in a secure and stable position.

  5. Connect the battery to the controller using the wiring harness. Double-check the connections to avoid any issues.

  6. Finally, test the electric conversion kit by turning on the battery and controller. Troubleshoot common issues like faulty wiring or loose connections if necessary.

By following these steps, you can successfully install the electric conversion kit onto your bike and enjoy the benefits of an electric bicycle.

Connecting the Motor and Battery

Once you have securely attached the motor onto the bottom bracket, the next step is to connect it to the battery. Motor and battery compatibility is crucial to ensure optimal performance and safety. Before making any connections, it is essential to check the specifications provided by the manufacturer for both the motor and battery. This will ensure that they are compatible in terms of voltage, current, and power output.

To make the necessary connections, refer to the wiring diagram provided with the electric conversion kit. This diagram will guide you on how to connect the motor and battery correctly. It is important to follow the instructions carefully to avoid any damage or malfunction.

In order to keep the audience engaged, let’s take a look at a table that summarizes the wiring connections for a typical electric bike conversion:

Advertisement
Motor Connections Battery Connections
Motor "+" wire Battery "+" wire
Motor "-" wire Battery "-" wire
Motor control wire Battery control wire

By following this table and the provided wiring diagram, you can ensure a successful connection between the motor and battery, allowing your bike to run smoothly as an electric one.

Testing and Adjusting the Electric System

To test and adjust the electric system, I should begin by ensuring that all the connections between the motor and battery are secure and correctly wired according to the provided diagram. This step is crucial to ensure the proper functioning of the electric bike.

Once the connections are checked, I can move on to testing the system. One important testing technique is to use a multimeter to measure the voltage and current at different points in the system. This will help me identify any potential issues or weak spots.

Additionally, I can test the performance of the electric system by taking the bike for a ride and observing its speed, acceleration, and overall power. Based on the test results, I can make adjustments to optimize the performance of the electric system, such as adjusting the voltage or current levels.

By thoroughly testing and adjusting the electric system, I can ensure that my bike operates smoothly and efficiently.

Advertisement

Adding Additional Features and Accessories

Adding extra features and accessories can enhance the functionality and style of your electric bike.

When it comes to upgrading brakes, you have several options. One option is to replace the stock brake pads with high-performance ones that offer better stopping power and durability. Another option is to upgrade to hydraulic disc brakes, which provide even more stopping power and better modulation.

Upgrading the suspension is another way to improve the overall performance of your electric bike. Consider replacing the stock suspension fork with a high-quality one that offers better damping and adjustability. This will provide a smoother and more controlled ride, especially when tackling rough terrains.

Additionally, you can add accessories like a rack and panniers for increased carrying capacity, or a comfortable saddle for long rides. These upgrades will not only improve the functionality of your electric bike but also elevate its style and make it a more enjoyable ride.

Maintaining and Troubleshooting Your Electric Bike

Make sure you regularly check the battery level and keep it properly charged to maintain the optimal performance of your electric bike. Troubleshooting battery issues is crucial for ensuring a smooth ride.

Advertisement

If you notice a sudden decrease in battery life, first check for any loose connections or damaged wiring. Clean the battery terminals regularly to prevent corrosion, as this can affect the battery’s performance.

In case of battery failure, it’s important to replace it with a compatible and high-quality battery.

Maintaining the motor is equally important. Regularly inspect the motor for any signs of wear or damage. Keep it clean and lubricated to reduce friction and extend its lifespan.

If you encounter any issues with the motor, consult the manufacturer or a professional electric bike technician for assistance.

Enjoying the Benefits of Your Electric Bike

Get ready to experience the many benefits of riding an electric bike. With an electric bike, you can enjoy the convenience of commuting without the hassle of traffic or the struggle of pedaling up hills.

Advertisement

Here are some reasons why electric bike commuting is beneficial:

  • Increased Efficiency:

  • Electric bikes provide a boost of power when needed, allowing you to cover more distance with less effort.

  • The pedal-assist feature helps you maintain a consistent speed, reducing fatigue during long rides.

  • Health Benefits:

  • Electric biking still requires pedaling, which provides a good cardiovascular workout and helps improve endurance.

  • Regular electric bike commuting can contribute to weight loss and muscle toning.

By incorporating an electric bike into your daily routine, you can enjoy the convenience of commuting while reaping the health benefits of regular exercise.

So, get ready to pedal your way to a healthier and more efficient lifestyle.

Frequently Asked Questions

How much does it cost to convert a regular bike into an electric one?

Converting a regular bike into an electric one can cost anywhere from $500 to $2000, depending on the quality of components and battery. However, the benefits of electric bikes, such as increased speed and reduced effort, outweigh the cost comparison.

Can I convert any type of bike into an electric bike?

Yes, any type of bike can be converted into an electric bike. Electric bike advantages include faster speeds, longer distances, and easier uphill climbs. There are different types of electric bike motors, such as hub motors and mid-drive motors.

Advertisement

How long does it take to install an electric conversion kit?

The installation time for an electric conversion kit can vary depending on your experience and the complexity of the kit. On average, it takes about 2-4 hours. Common issues may include compatibility problems and troubleshooting electrical connections.

Is it possible to switch back to a regular bike after converting it into an electric one?

Yes, it is possible to switch back to a regular bike after converting it into an electric one. However, there are pros and cons to consider. Converting offers convenience and speed, but it may reduce the bike’s range and require additional maintenance.

Are there any legal restrictions or requirements for riding an electric bike?

There are legal restrictions and requirements for riding an electric bike. It is important to follow electric bike regulations and be aware of safety concerns, such as wearing a helmet and obeying traffic laws.

Conclusion

After going through the process of converting my bike into an electric one, I can confidently say that the theory of turning a regular bike into an electric one is indeed true.

By following the steps outlined in this article, I was able to successfully transform my bike and enjoy the benefits of an electric ride.

Advertisement

It was a technical and detailed process that required the right tools and materials, but the end result was well worth the effort.

So, if you’re considering converting your bike, don’t hesitate to give it a try – you won’t be disappointed.

Continue Reading
Advertisement

Affiliate disclaimer

As an affiliate, we may earn a commission from qualifying purchases. We get commissions for purchases made through links on this website from Amazon and other third parties.

About us

We are a passionate team driven by the belief that cycling is a fantastic and accessible way to stay active while enjoying the beauty of the outdoors. Our mission is to share our love for cycling with as many people as possible. We provide a welcoming environment for individuals of all ages, abilities, and backgrounds to come together and ride bikes. With Ralf’s visionary leadership, Zane’s expertise in cycling adventures, and Olivia’s dedication to community building, we strive to create a vibrant space where everyone can experience the joy of cycling. Through group rides, workshops, and inclusive events, we inspire and empower individuals to embrace an active lifestyle. Join us in our quest to pedal together, embrace the joy of cycling, and foster connections that last a lifetime.

Advertisement

Trending