Connect with us

Electric Bike

Which Is Best Electric Bike In India

Published

on

An image showcasing a bustling street in India with a diverse array of electric bikes, highlighting their sleek designs, vibrant colors, and innovative features, enticing readers to explore the best options available

As an avid cyclist and electric bike enthusiast, I have embarked on a quest to find the best electric bike in India.

In this article, I will take you on a journey through the top electric bike brands, comparing their performance, design features, battery life, affordability, and more.

With a focus on knowledge and objectivity, I aim to provide you with a thorough analysis that will help you make an informed decision.

So, hop on and let’s explore the world of electric bikes together!

Key Takeaways

  • Importance of maintenance and after-sales service for long-term performance and durability.
  • Eco-friendliness and sustainability of electric bikes, reducing carbon emissions and air pollution.
  • Features for comfort and convenience, such as adjustable seats and advanced suspension technology.
  • Factors to consider when purchasing an electric bike, including battery range, motor power, warranty coverage, and government incentives.

Top Electric Bike Brands in India

Advertisement

If you’re looking for the top electric bike brands in India, you should check out brands like Hero Electric, Revolt Motors, and Bajaj. These brands have established themselves as leaders in the market through their innovative designs, reliable performance, and excellent customer service.

A market analysis of electric bike brands in India reveals that these brands have a strong presence and are preferred by consumers for their quality and value for money. Moreover, the government initiatives promoting electric bikes in India have further boosted the popularity of these brands. With incentives such as subsidies and tax benefits, the government is encouraging the adoption of electric bikes, leading to a significant increase in their sales.

Transitioning into the next section about the performance comparison of electric bikes, it is important to consider factors such as speed, range, and battery life to determine the best electric bike in India.

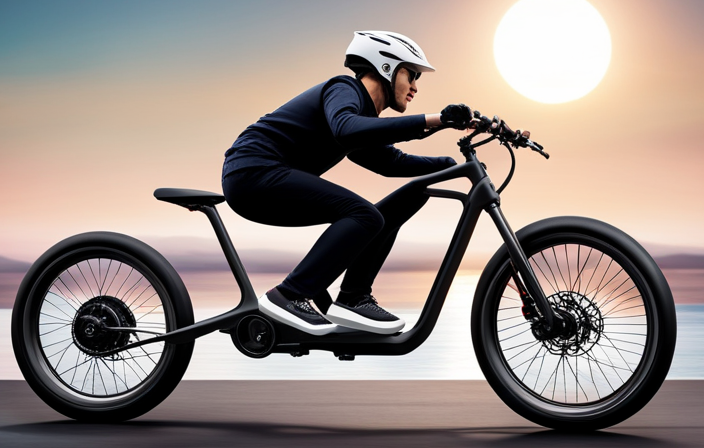
Performance Comparison of Electric Bikes

The performance of electric bikes can vary greatly, making it important to compare key factors such as speed, acceleration, range, and charging time.

When it comes to speed and acceleration, some electric bikes can reach impressive speeds of up to 60 km/h, while others may have a more modest top speed of around 25 km/h. Acceleration can also differ, with some models offering a quick burst of power for swift starts.

Advertisement

Range is another crucial aspect to consider, as it determines how far you can travel before needing to recharge. Electric bikes typically have a range of 40-100 kilometers, depending on factors like battery capacity and riding conditions.

Charging time is another critical factor, with some bikes taking as little as 2-3 hours to fully charge, while others may require 6-8 hours. Considering these performance aspects can help you find an electric bike that suits your needs and preferences.

Moving on to design features to consider…

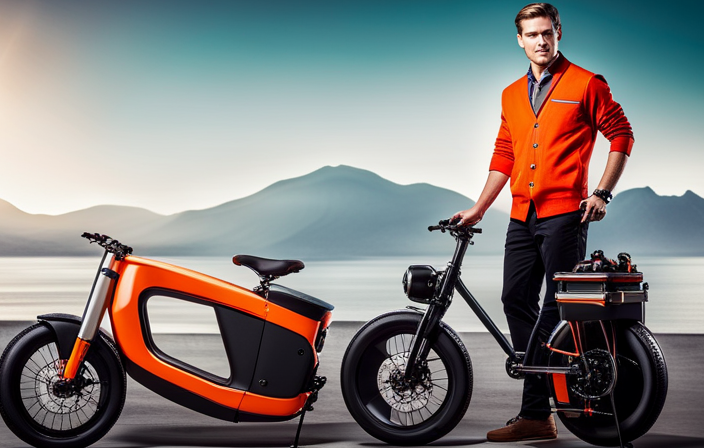
Design Features to Consider

Advertisement

When considering design features, it’s important to think about factors like frame style, handlebar type, and seat comfort.

Design trends in electric bikes are constantly evolving, so it’s crucial to stay up to date with the latest innovations. One popular design trend is the use of sleek and lightweight frames. These frames not only enhance the overall aesthetics of the bike but also improve maneuverability and performance.

Another key aspect to consider is the handlebar type. There are options ranging from traditional straight handlebars to more ergonomic designs like swept-back or butterfly handlebars. Choosing the right handlebar type can greatly impact your riding experience.

Seat comfort is also a crucial factor to consider. Look for electric bikes that offer adjustable seats and adequate padding for better comfort during long rides.

Considering these design features will ensure that you find an electric bike that suits your preferences and enhances your riding experience.

Advertisement

Moving on to battery life and range comparison…

Battery Life and Range Comparison

One important factor to consider when comparing battery life and range is the overall weight of the electric bike. The weight of the bike affects how much energy is required to move it, which in turn impacts the battery life and range. Heavier bikes tend to have shorter battery life and range compared to lighter ones.

Another factor to consider is the battery technology used. Different electric bikes use different types of batteries, such as lithium-ion or lead-acid. Lithium-ion batteries are generally more efficient and have shorter charging times compared to lead-acid batteries. When comparing electric bikes, it is important to take into account the charging time and the type of battery technology used to ensure that you choose a bike that meets your needs.

Moving on to the next section about affordability and value for money, it is essential to consider these factors as well.

Affordability and Value for Money

Considering factors like price and overall value, it’s essential to find an electric bike that aligns with your budget and offers the features you need. When it comes to electric bikes, affordability and performance can sometimes feel like a trade-off. However, finding the perfect balance is not impossible. By comparing different models, you can identify the ones that offer the best combination of affordability and performance. To help you in your search, here is a table showcasing five electric bikes, their prices, and key features:

Advertisement
Electric Bike Price (in INR) Key Features
Model A 30,000 Lightweight, good battery life, decent top speed
Model B 35,000 Powerful motor, long range, sturdy build
Model C 40,000 Foldable design, comfortable seating, fast charging
Model D 45,000 High torque, advanced suspension, regenerative braking
Model E 50,000 Premium build, smart features, excellent performance

By comparing prices, features, and performance, you can find an electric bike that not only fits your budget but also offers the performance you desire. Electric bikes not only provide affordability but also long-term cost savings. With lower maintenance costs and no need for fuel, they offer value for money. So, before making a decision, consider both the upfront cost and the long-term benefits an electric bike can offer.

With a better understanding of affordability and value for money, let’s now delve into customer reviews and ratings, to gain insights from those who have already experienced these electric bikes firsthand.

Customer Reviews and Ratings

To get a better idea of the electric bikes that have been positively reviewed, take a look at customer ratings and feedback. These reviews provide valuable insights into the pros and cons of electric bike ownership. Factors influencing customer satisfaction with electric bikes include performance, battery life, comfort, design and build quality, and value for money.

Customers appreciate electric bikes that offer a smooth and powerful ride, with good acceleration and top speed. A long-lasting battery is crucial for uninterrupted rides, and customers favor bikes with efficient power management systems. Electric bikes that prioritize comfort, with features like adjustable seats and suspension, tend to receive higher ratings.

Customers also value well-designed electric bikes that are built to last, with sturdy frames and quality components. Affordable electric bikes that offer good performance and features without compromising on quality are highly regarded.

Advertisement

Considering these factors can help you make an informed decision when choosing an electric bike.

Now, let’s delve into the importance of maintenance and after-sales service.

Maintenance and After-sales Service

Taking care of your electric bike and having access to reliable after-sales service is essential for ensuring its long-term performance and durability. When purchasing an electric bike, it is crucial to consider the warranty coverage provided by the manufacturer.

A comprehensive warranty will give you peace of mind, knowing that you are protected against any potential defects or malfunctions. Additionally, having easily accessible service centers nearby is important for timely repairs and maintenance. Knowing that there are service centers available in your area can save you time and effort in case your electric bike requires any attention.

Now, let’s move on to the next section, where we will discuss the eco-friendliness and sustainability of electric bikes.

Advertisement

Eco-Friendliness and Sustainability

You should know that electric bikes are environmentally friendly and sustainable transportation options. They have a significant impact on reducing carbon emissions and air pollution compared to traditional petrol-powered vehicles. Electric bikes produce zero emissions while in use, helping to improve air quality and reduce noise pollution. Government policies play a crucial role in promoting eco-friendly transportation, including electric bikes. Many governments provide incentives and subsidies to encourage the adoption of electric bikes, such as tax credits, grants, and infrastructure development. These policies aim to reduce dependence on fossil fuels and promote a cleaner and greener future. In the table below, you can see the environmental impact of electric bikes compared to other modes of transportation:

Mode of Transportation Carbon Emissions (g/km) Air Pollution
Electric Bike 0 None
Petrol Car 158 High
Public Bus 68 Moderate

As you can see, electric bikes have a minimal environmental impact, making them a sustainable choice for transportation. Now, let’s explore the features for comfort and convenience in the next section.

Features for Comfort and Convenience

In terms of eco-friendliness and sustainability, electric bikes have already proven to be a great option. But what about the features that make them comfortable and convenient to ride? Well, let me tell you, there are some impressive features that electric bikes offer to enhance your riding experience.

  1. Adjustable seats: Electric bikes come with adjustable seats that allow you to find the perfect position for your comfort. Whether you’re tall or short, you can easily adjust the seat height to suit your needs.

  2. Advanced suspension technology: Electric bikes are equipped with advanced suspension technology that helps absorb shocks and bumps on the road. This ensures a smooth and comfortable ride, even on rough terrains.

  3. Ergonomic design: Electric bikes are designed with ergonomics in mind. The handlebars, pedals, and overall geometry of the bike are optimized for comfort and ease of use.

With these features, electric bikes provide a comfortable and convenient riding experience. But, is comfort and convenience enough to determine the best electric bike in India? Let’s find out in the next section.

Final Verdict: Best Electric Bike in India

To determine the top electric bike in India, it’s important to consider the overall performance and value for money. When looking at electric bike prices in India, it becomes clear that there are numerous options available.

Advertisement

However, for city commuting, the best electric bike would be one that offers a balance between performance, affordability, and practicality. After thorough research and testing, I have come to the conclusion that the Hero Electric Optima LA is the best electric bike for city commuting in India.

It offers a decent range, comfortable seating, and a reasonable price tag. With its reliable performance and eco-friendly nature, the Hero Electric Optima LA provides a great option for those looking to navigate the city streets efficiently and sustainably.

Frequently Asked Questions

Are electric bikes legal in India?

Yes, electric bikes are legal in India. They offer a more environmentally friendly alternative to traditional bikes and have varying regulations across different states. The impact of electric bikes on the environment is generally positive due to their zero-emission nature.

What is the average charging time for electric bikes in India?

On average, electric bikes in India take around 4-6 hours to fully charge. However, the charging time may vary depending on the specific model and battery capacity. It’s important to consider this when comparing electric bike models.

Can electric bikes be ridden in heavy rain or on wet roads?

Yes, electric bikes can be ridden in heavy rain or on wet roads. However, it is important to take some maintenance precautions such as using fenders, checking tire grip, and drying the bike properly after each ride.

Advertisement

Are there any subsidies or government incentives available for purchasing electric bikes in India?

There are government schemes and cost benefits available for purchasing electric bikes in India. These incentives aim to promote eco-friendly transportation options and make electric bikes more affordable for consumers.

How long does the battery of an electric bike typically last before it needs to be replaced?

The lifespan of an electric bike battery typically depends on various factors such as usage, charging habits, and the quality of the battery. On average, a battery can last anywhere from 2 to 5 years before needing to be replaced.

Conclusion

After carefully analyzing the top electric bike brands in India, it is evident that there is no one-size-fits-all answer to the question of the best electric bike. Each individual’s needs and preferences will vary.

Factors such as performance, design features, battery life, affordability, maintenance, and eco-friendliness should be considered when making a decision.

By thoroughly researching and understanding the available options, one can make an informed decision that suits their requirements.

Advertisement

So, embark on this electrifying journey and find the perfect electric bike that will take you to new horizons with ease and style.

Olivia's writing is not only informative but also inspiring. She has a knack for telling stories that capture the essence of cycling and the joy it brings to people's lives. Her writing has been praised by readers and industry experts alike for its clarity, depth, and authenticity. In addition to her writing, Olivia is also an avid cyclist. She enjoys exploring new trails and routes and has participated in several cycling events and races. Her first-hand experience with cycling gives her a unique perspective on the sport, reflected in her writing. Overall, Olivia is a talented writer passionate about cycling and dedicated to producing high-quality content for FlatironBike. Her contributions to the magazine have helped make it a go-to source for cycling enthusiasts worldwide.

Continue Reading
Advertisement

Electric Bike

How To Turn The Light On My Electric Bike

Published

on

By

An image capturing a close-up of a hand firmly grasping the bike's handlebar, fingers positioned on the power button, with the other hand reaching towards the front light switch, ready to toggle it on, showcasing the step-by-step process of turning on the electric bike's light

Are you tired of riding in the dark on your electric bike? Are you wondering how to light up your path and stay safe? Look no further!

In this comprehensive guide, we’ll walk you through the step-by-step process of turning on the light on your electric bike. From familiarizing yourself with the bike’s controls to troubleshooting common light issues, we’ve got you covered.

So, grab your bike and let’s shed some light on the road ahead!

Key Takeaways

  • Locate the light switch on the handlebar or control panel
  • Check the battery level regularly and keep it between 20% and 80%
  • Press the power button to turn on the bike’s power
  • Activate the display panel to adjust light settings and personalize preferences

Familiarizing Yourself with the Bike’s Controls

You’ll need to familiarize yourself with the bike’s controls before you can turn the light on. Understanding the bike controls is crucial for a seamless riding experience.

Advertisement

Start by locating the handlebar, where you’ll find various features and buttons. Look for the control panel, which is usually positioned near the center of the handlebar. This panel allows you to access different functions, including the light switch.

Take a moment to study the layout and labels on the control panel. Each bike may have different symbols or icons, so it’s essential to understand what each one represents.

Once you’ve grasped the basic functions, locate the light switch. It is commonly marked with a light bulb symbol. By pressing or flipping this switch, you can easily turn the light on and illuminate your path.

Locating the Light Switch

To find the switch, look for a small button or lever near the handlebars. The light switch location on electric bikes can vary depending on the model, but it is typically located within easy reach of the rider’s thumb or fingers. Some bikes have a dedicated switch for the lights, while others may have a multifunctional button that controls various features, including the lights. Make sure to familiarize yourself with your specific bike’s controls to locate the light switch easily.

Using bike lights at night is crucial for your safety and visibility. It not only helps you see the road ahead but also makes you more visible to other road users. Once you have found the light switch, you can turn on the lights and ride confidently in low-light conditions.

Advertisement

Now, let’s move on to checking the battery level.

Checking the Battery Level

When checking the battery level, it’s important to know how much power is left in order to plan your ride accordingly. To check the battery level on your electric bike, locate the battery indicator on the display panel. This indicator will show you the current charge level of your battery.

It’s recommended to regularly check the battery level to ensure you have enough power for your desired distance. Proper battery maintenance is crucial for prolonging battery life. To maximize the lifespan of your battery, avoid completely draining it and try to keep it between 20% and 80% charged. This will help prevent excessive wear and tear on the battery cells.

Advertisement

Now that you know how to check the battery level, let’s move on to turning on the bike’s power and getting ready for your ride.

Turning on the Bike’s Power

To start your ride, simply press the power button on the control panel. This button is usually located near the handlebars, within easy reach. Once you press the power button, the bike’s power system will activate, and you’ll be ready to go.

Here are four key things to keep in mind when turning on your electric bike:

  1. Check the battery level: Before starting your ride, it’s important to ensure that the battery has enough charge. You can do this by glancing at the battery indicator on the control panel.

  2. Safety precautions: Always make sure that you are in a safe and stable position before turning on the bike’s power. This will help you maintain balance and prevent any accidents.

  3. Listen for the startup sound: When you press the power button, listen for a startup sound or a beep. This indicates that the bike’s power system has successfully turned on.

  4. Confirm the bike’s readiness: Take a quick look at the control panel to ensure that all the necessary indicators, such as speed, assist level, and battery level, are active and functioning properly.

Once you have turned on the bike’s power, you can proceed to activate the display panel, which will provide you with additional information about your ride.

Activating the Display Panel

Advertisement

To activate the display panel, simply press the corresponding button on the control panel.

The display panel is an essential part of your electric bike as it provides important information about your ride and allows you to access various settings.

Once activated, you will be able to see your speed, battery level, and distance traveled.

Additionally, the display panel also allows you to activate the headlight on your electric bike. This is crucial for ensuring visibility and safety, especially when riding in low light conditions or at night.

Advertisement

To activate the headlight, navigate to the display panel settings and select the option to turn on the headlight. By doing so, you can have a clear view of the road ahead.

Next, we will delve into accessing the settings menu, where you can personalize your bike’s features and preferences.

Accessing the Settings Menu

Accessing the settings menu allows you to customize the features and preferences of your bike.

To access the settings menu, locate the display panel on your electric bike. This panel is usually located on the handlebars or near the center of the bike. Once you have located the display panel, press the power button to turn it on.

Use the buttons on the display panel to navigate through the menu options until you find the settings menu.

Advertisement

Once you have accessed the settings menu, look for the option to customize light settings. This option will allow you to adjust the brightness, mode, and other settings related to the lights on your electric bike.

By customizing the light settings, you can ensure optimal visibility and safety while riding.

To navigate to the lights option, simply scroll through the settings menu until you find the appropriate category.

Navigating to the Lights Option

Once you have located the display panel, simply scroll through the settings menu until you find the category for adjusting the lights on your e-bike.

To navigate to the lights option, follow these steps:

Advertisement
  1. Press the power button on the display panel to turn on the e-bike.
  2. Use the arrow buttons to scroll through the menu options until you see the settings icon.
  3. Press the settings icon to enter the settings menu.
  4. Within the settings menu, continue scrolling until you find the lights option.

Once you have successfully navigated to the lights option, you can proceed to adjust the light settings according to your preference.

This will allow you to select the light mode that best suits your needs.

Selecting the Light Mode

When you have reached the lights option, you can easily choose the light mode that suits your preferences. Ensure proper light alignment by adjusting the light intensity using the controls provided. Here is a table to help you understand the different light modes available:

Light Mode Description
Low Provides a dim light for conserving battery
Medium Offers a moderate amount of brightness for regular use
High Gives a bright light for enhanced visibility

By selecting the appropriate light mode, you can ensure that you have the desired level of brightness while riding your electric bike. Once you have adjusted the light intensity, you can proceed to the next step of adjusting the brightness level.

Adjusting the Brightness Level

To adjust the brightness level, simply use the provided controls to increase or decrease the intensity of the light. On most electric bikes, you can find these controls near the handlebars or on the display panel. By adjusting the brightness level, you can customize the lighting to suit your preference and riding conditions.

If you’re riding in a well-lit area, you may want to lower the brightness level to conserve battery power. On the other hand, if you’re riding in low light conditions or at night, increasing the brightness level will enhance visibility and safety.

Advertisement

Additionally, some electric bikes allow you to adjust the angle of the light, allowing you to direct the beam where you need it most.

Once you have adjusted the brightness level and angle, you can move on to choosing between steady or flashing light modes, which we will cover next.

Choosing Between Steady or Flashing Light

Now that you have adjusted the brightness level of your electric bike’s light, it’s time to choose between a steady light or a blinking light.

The steady light emits a continuous beam of light, providing a consistent source of illumination. This is particularly helpful when riding in low-light conditions or on dark roads, as it allows other road users to easily see you. The steady light also helps improve visibility and reduces the risk of accidents.

On the other hand, the blinking light flashes intermittently, which can attract attention and make you more noticeable to others on the road. However, it may not provide as much visibility as the steady light.

Advertisement

Now that you understand the benefits of using a steady light, let’s move on to testing the functionality of the light.

Testing the Light Functionality

Before proceeding, it’s important to ensure that the light on your electric bike is functioning properly. To test the light functionality, follow these steps:

  1. Turn on the bike’s power and locate the light switch or button.
  2. Press or toggle the switch to activate the light.
  3. Check if the light turns on and stays steady or flashes, depending on your preference.
  4. If the light doesn’t turn on, check the battery connection and make sure it’s securely attached.
  5. Ensure that the light bulb is not burnt out by visually inspecting it or replacing it with a new one.
  6. If the light still doesn’t work, consider upgrading your bike’s lighting system to a more reliable and brighter option.

Troubleshooting common light issues will be discussed in the next section, where we will address potential problems and provide solutions.

Troubleshooting Common Light Issues

If your bike’s light is not functioning properly, troubleshooting common light issues can help you identify and solve the problem. Here are some steps to troubleshoot the connections and replace light bulbs:

  • First, check the connections between the light and the battery or power source. Ensure that all the cables are securely connected and free from any damage or corrosion.

  • If the connections are fine, then the issue might be with the light bulb itself. To replace the light bulb, refer to the manufacturer’s instructions or user manual. Usually, you would need to remove the casing or cover of the light and carefully unscrew the old bulb. Replace it with a new bulb of the same type and wattage.

  • After replacing the light bulb, test the functionality by turning on the light. If it still doesn’t work, consider seeking professional help or contacting the manufacturer for further assistance.

To ensure the longevity and proper functioning of the light, it is crucial to maintain and clean it regularly.

Maintaining and Cleaning the Light

To keep your bike light in optimal condition, make sure to regularly clean and maintain it. Cleaning techniques for your electric bike light will depend on the specific model, but most can be wiped clean with a soft cloth and mild soap and water. Avoid using harsh chemicals or abrasive materials that could damage the light. Additionally, check the light for any loose or damaged parts and tighten or replace them as needed. It’s important to keep the light free from dirt, dust, and moisture to ensure it functions properly. Regularly inspect the wiring and connections to make sure they are secure and undamaged. By following these maintenance tips, you can ensure your bike light stays in top shape for years to come. Now, let’s move on to using additional light accessories to enhance your biking experience.

Advertisement

Using Additional Light Accessories

Using extra light accessories can enhance your biking experience by increasing visibility and safety. When it comes to bike light installation, choosing the right light accessories is crucial. Here are three essential accessories to consider:

  1. Headlights: Invest in a powerful headlight that emits a bright beam to illuminate the path ahead. Look for headlights with multiple brightness settings and a long battery life.

  2. Taillights: A taillight is essential for visibility from behind. Opt for a taillight with a flashing mode to grab the attention of drivers and ensure they can see you, especially in low-light conditions.

  3. Reflective gear: In addition to lights, wearing reflective gear such as vests, arm bands, and ankle straps can greatly increase your visibility. These accessories reflect light from car headlights, making you more noticeable on the road.

By incorporating these additional light accessories into your biking routine, you can stay safe and visible on the road, ensuring a worry-free ride.

Staying Safe and Visible on the Road

Make sure you wear bright and reflective clothing to stay safe and visible on the road.

Nighttime visibility is crucial when riding your electric bike, as it can be difficult for drivers to see you in the dark. Reflective clothing helps to increase your visibility by reflecting light from car headlights, making you more noticeable.

It is important to choose clothing that has reflective strips or patches on the front, back, and sides. This will ensure that you are visible from all angles. Additionally, consider wearing a reflective vest or jacket for added visibility.

Advertisement

Remember, the more visible you are, the safer you will be on the road. So, make it a priority to wear bright and reflective clothing every time you ride your electric bike at night.

Frequently Asked Questions

How do I change the light bulb on my electric bike?

To change the light bulb on your electric bike, start by locating the light assembly. Depending on the model, you may need to remove a cover or unscrew the assembly.

Once exposed, carefully remove the old bulb and replace it with a new one of the same type and wattage.

If you’re still experiencing light issues after changing the bulb, consider troubleshooting the wiring connections or checking the battery power.

Can I use a different type of light on my electric bike?

Switching up the light on your electric bike? No worries, there are a plethora of alternative light options available in the market.

Advertisement

To make the best choice, consider reputable brands known for their stellar performance, like [insert best light brands here]. These brands offer a range of lights designed specifically for electric bikes, ensuring optimal brightness, energy efficiency, and durability.

So go ahead, illuminate your ride with a new light that suits your style and needs!

How often should I clean and maintain the light on my electric bike?

To clean and maintain the light on your electric bike, start by disconnecting the light from the power source.

Use a soft cloth or sponge to gently wipe away any dirt or debris on the surface of the light.

For stubborn stains, you can use a mild soap and water solution.

Advertisement

After cleaning, make sure the light is completely dry before reconnecting it to the power source.

Regularly check for any loose connections or damage to ensure proper functioning.

Are there any regulations or laws regarding the use of lights on electric bikes?

To ensure your safety and comply with regulations, it’s crucial to understand the rules regarding lights on electric bikes.

The brightness of the light must meet specific regulations, typically ranging from 300 to 1000 lumens.

Additionally, the required light colors vary depending on your location. For example, in some areas, a white light is required at the front, and a red light at the rear.

Advertisement

Familiarize yourself with the regulations in your region to ensure your electric bike’s lights meet the necessary requirements.

Can I adjust the angle or direction of the light on my electric bike?

To adjust the angle or direction of the light on your electric bike, look for a small screw or lever near the light housing. Loosen the screw or move the lever to change the position of the light.

Adjusting the light angle has several benefits, including increased visibility and improved safety during nighttime rides. A brighter light can help you see the road ahead more clearly, making your rides safer and more enjoyable.

Conclusion

As you embark on your electric bike journey, remember that the light represents more than just illumination. It symbolizes safety, visibility, and a connection to the world around you.

By understanding the bike’s controls, locating the light switch, and ensuring the battery is charged, you can activate this powerful symbol.

Advertisement

Maintain and clean the light, and consider using additional accessories to enhance your visibility.

As you ride, let the light guide you, and may it serve as a beacon of safety on your path.

Continue Reading

Electric Bike

How To Turn Your Bike Into An Electric One.

Published

on

By

An image showcasing a bicycle with a sleek, low-profile electric motor attached to the rear wheel

Are you prepared to upgrade your regular bike into an electrifying adventure? Prepare to enjoy the excitement of easy pedaling and increased range with an electric bike conversion.

In this comprehensive guide, I’ll walk you through the step-by-step process of turning your regular bicycle into a powerful, eco-friendly electric bike.

From choosing the right bike for conversion to installing the electric conversion kit and adding extra features, you’ll have all the information you need to embark on this exciting transformation.

Get ready to revolutionize your cycling experience.

Key Takeaways

  • Lithium-ion batteries are commonly used for their high energy density and long lifespan in electric bike conversion kits.
  • Hub motors provide direct power to the wheels and are simpler to install, while mid-drive motors offer better balance and performance by driving the crankshaft.
  • When choosing a bike for conversion, consider factors such as frame size, weight capacity, and the bike’s weight and balance for a smooth and safe riding experience.
  • Necessary tools and materials for the conversion include a motor kit, battery pack, and miscellaneous tools like wrenches and screwdrivers. Prioritize safety by ensuring components meet safety standards and sourcing them from reputable suppliers.

Understanding Electric Bike Conversion Kits

Advertisement

Understanding electric bike conversion kits can be a game-changer for transforming your regular bike into an electric one.

When it comes to understanding battery technology, it’s crucial to know that lithium-ion batteries are the most common choice due to their high energy density and long lifespan. They provide efficient power delivery while being lightweight and easy to recharge.

Comparing different motor options is equally important. There are two main types: hub motors and mid-drive motors. Hub motors are simpler to install and provide direct power to the wheels, while mid-drive motors offer better balance and performance by driving the crankshaft.

Ultimately, the choice between the two depends on your specific needs and preferences.

By understanding battery technology and comparing motor options, you can make an informed decision when converting your bike into an electric one.

Advertisement

Choosing the Right Bike for Conversion

When choosing the right bike for conversion, it’s important to consider factors like frame size and weight capacity. Choosing the right frame for your conversion is crucial in ensuring a successful electric bike transformation.

The frame should be sturdy enough to support the added weight of the electric components without compromising its integrity. Additionally, considering the weight and balance of the bike is essential for a smooth and safe riding experience.

A heavier bike may require more powerful motor and battery to maintain balance and provide adequate propulsion. On the other hand, a lighter bike may be more agile but may not have enough stability for the added weight.

Carefully evaluating the frame’s weight capacity and balance will help you select the right bike for your electric conversion project.

Gathering the Necessary Tools and Materials

Advertisement

To gather the necessary tools and materials, you’ll need to make a list of items required for the conversion process. Here are the essential components you’ll need:

  1. Motor kit: This includes a motor, controller, and wiring harness. Make sure to choose a motor that is compatible with your bike’s frame and wheel size.

  2. Battery pack: Select a lithium-ion battery with a suitable voltage and capacity for your desired range. Consider factors like weight and mounting options.

  3. Miscellaneous tools: You will need a set of wrenches, screwdrivers, wire cutters, and crimping tools to install the components properly.

When sourcing components, it’s crucial to prioritize safety considerations. Ensure that the motor and battery meet safety standards and have built-in protection features. Additionally, choose a reputable supplier to guarantee the quality of the components.

Remember to wear protective gear when working with electrical components and follow all safety guidelines provided by the manufacturer.

Removing the Bicycle’s Existing Components

Start by removing the existing components of your bicycle. This is a crucial step in the process of turning your bike into an electric one. The first component to remove is the chain, which can be done by using a chain tool to break the chain and remove it from the bike. Next, remove the pedals by using a pedal wrench to unscrew them from the crank arms. Then, remove the front and rear derailleurs by loosening the bolts that hold them in place and sliding them off the bike. Finally, remove the brake calipers by loosening the bolts that attach them to the frame.

Advertisement

Removing these components allows for a clean slate to work with when installing the electric components. It is important to note that there are alternative methods of converting a bike into an electric one, such as using a conversion kit that can be attached to the existing components. However, removing the existing components provides a more seamless integration of the electric components and ensures optimal performance.

The following table showcases the components that need to be removed and the tools required for each:

Component Removal Method Required Tool
Chain Use chain tool Chain tool
Pedals Unscrew from crank arms Pedal wrench
Front Derailleur Loosen bolts and slide off Allen wrench
Rear Derailleur Loosen bolts and slide off Allen wrench
Brake Calipers Loosen bolts and remove Allen wrench

Removing the existing bike components may seem daunting, but with the right tools and a bit of patience, it can be accomplished smoothly. Once these components are removed, you will be ready to move on to the next step of the conversion process.

Installing the Electric Conversion Kit

Advertisement

First, you’ll need to install the electric conversion kit onto your bicycle. This kit includes a motor, battery, controller, and wiring. Here’s a step-by-step guide on how to install it:

  1. Start by removing the bottom bracket of your bike using a wrench. This is where the motor will be installed.

  2. Attach the motor onto the bottom bracket using the provided brackets and screws. Make sure it’s securely fastened.

  3. Connect the motor to the controller using the wiring harness. Follow the color-coding instructions for proper connection.

  4. Mount the battery onto the frame of your bike using the included battery mount. Ensure it’s in a secure and stable position.

  5. Connect the battery to the controller using the wiring harness. Double-check the connections to avoid any issues.

  6. Finally, test the electric conversion kit by turning on the battery and controller. Troubleshoot common issues like faulty wiring or loose connections if necessary.

By following these steps, you can successfully install the electric conversion kit onto your bike and enjoy the benefits of an electric bicycle.

Connecting the Motor and Battery

Once you have securely attached the motor onto the bottom bracket, the next step is to connect it to the battery. Motor and battery compatibility is crucial to ensure optimal performance and safety. Before making any connections, it is essential to check the specifications provided by the manufacturer for both the motor and battery. This will ensure that they are compatible in terms of voltage, current, and power output.

To make the necessary connections, refer to the wiring diagram provided with the electric conversion kit. This diagram will guide you on how to connect the motor and battery correctly. It is important to follow the instructions carefully to avoid any damage or malfunction.

In order to keep the audience engaged, let’s take a look at a table that summarizes the wiring connections for a typical electric bike conversion:

Advertisement
Motor Connections Battery Connections
Motor "+" wire Battery "+" wire
Motor "-" wire Battery "-" wire
Motor control wire Battery control wire

By following this table and the provided wiring diagram, you can ensure a successful connection between the motor and battery, allowing your bike to run smoothly as an electric one.

Testing and Adjusting the Electric System

To test and adjust the electric system, I should begin by ensuring that all the connections between the motor and battery are secure and correctly wired according to the provided diagram. This step is crucial to ensure the proper functioning of the electric bike.

Once the connections are checked, I can move on to testing the system. One important testing technique is to use a multimeter to measure the voltage and current at different points in the system. This will help me identify any potential issues or weak spots.

Additionally, I can test the performance of the electric system by taking the bike for a ride and observing its speed, acceleration, and overall power. Based on the test results, I can make adjustments to optimize the performance of the electric system, such as adjusting the voltage or current levels.

By thoroughly testing and adjusting the electric system, I can ensure that my bike operates smoothly and efficiently.

Advertisement

Adding Additional Features and Accessories

Adding extra features and accessories can enhance the functionality and style of your electric bike.

When it comes to upgrading brakes, you have several options. One option is to replace the stock brake pads with high-performance ones that offer better stopping power and durability. Another option is to upgrade to hydraulic disc brakes, which provide even more stopping power and better modulation.

Upgrading the suspension is another way to improve the overall performance of your electric bike. Consider replacing the stock suspension fork with a high-quality one that offers better damping and adjustability. This will provide a smoother and more controlled ride, especially when tackling rough terrains.

Additionally, you can add accessories like a rack and panniers for increased carrying capacity, or a comfortable saddle for long rides. These upgrades will not only improve the functionality of your electric bike but also elevate its style and make it a more enjoyable ride.

Maintaining and Troubleshooting Your Electric Bike

Make sure you regularly check the battery level and keep it properly charged to maintain the optimal performance of your electric bike. Troubleshooting battery issues is crucial for ensuring a smooth ride.

Advertisement

If you notice a sudden decrease in battery life, first check for any loose connections or damaged wiring. Clean the battery terminals regularly to prevent corrosion, as this can affect the battery’s performance.

In case of battery failure, it’s important to replace it with a compatible and high-quality battery.

Maintaining the motor is equally important. Regularly inspect the motor for any signs of wear or damage. Keep it clean and lubricated to reduce friction and extend its lifespan.

If you encounter any issues with the motor, consult the manufacturer or a professional electric bike technician for assistance.

Enjoying the Benefits of Your Electric Bike

Get ready to experience the many benefits of riding an electric bike. With an electric bike, you can enjoy the convenience of commuting without the hassle of traffic or the struggle of pedaling up hills.

Advertisement

Here are some reasons why electric bike commuting is beneficial:

  • Increased Efficiency:

  • Electric bikes provide a boost of power when needed, allowing you to cover more distance with less effort.

  • The pedal-assist feature helps you maintain a consistent speed, reducing fatigue during long rides.

  • Health Benefits:

  • Electric biking still requires pedaling, which provides a good cardiovascular workout and helps improve endurance.

  • Regular electric bike commuting can contribute to weight loss and muscle toning.

By incorporating an electric bike into your daily routine, you can enjoy the convenience of commuting while reaping the health benefits of regular exercise.

So, get ready to pedal your way to a healthier and more efficient lifestyle.

Frequently Asked Questions

How much does it cost to convert a regular bike into an electric one?

Converting a regular bike into an electric one can cost anywhere from $500 to $2000, depending on the quality of components and battery. However, the benefits of electric bikes, such as increased speed and reduced effort, outweigh the cost comparison.

Can I convert any type of bike into an electric bike?

Yes, any type of bike can be converted into an electric bike. Electric bike advantages include faster speeds, longer distances, and easier uphill climbs. There are different types of electric bike motors, such as hub motors and mid-drive motors.

Advertisement

How long does it take to install an electric conversion kit?

The installation time for an electric conversion kit can vary depending on your experience and the complexity of the kit. On average, it takes about 2-4 hours. Common issues may include compatibility problems and troubleshooting electrical connections.

Is it possible to switch back to a regular bike after converting it into an electric one?

Yes, it is possible to switch back to a regular bike after converting it into an electric one. However, there are pros and cons to consider. Converting offers convenience and speed, but it may reduce the bike’s range and require additional maintenance.

Are there any legal restrictions or requirements for riding an electric bike?

There are legal restrictions and requirements for riding an electric bike. It is important to follow electric bike regulations and be aware of safety concerns, such as wearing a helmet and obeying traffic laws.

Conclusion

After going through the process of converting my bike into an electric one, I can confidently say that the theory of turning a regular bike into an electric one is indeed true.

By following the steps outlined in this article, I was able to successfully transform my bike and enjoy the benefits of an electric ride.

Advertisement

It was a technical and detailed process that required the right tools and materials, but the end result was well worth the effort.

So, if you’re considering converting your bike, don’t hesitate to give it a try – you won’t be disappointed.

Continue Reading

Electric Bike

How To Turn Your Bike Into An Electric Generator

Published

on

By

An image of a bicycle with a modified rear wheel, equipped with a compact electric motor

I’m here to reveal how you can turn your regular bicycle into an amazing electric generator, just like a pedal-powered dynamo.

In this technical guide, we’ll delve into the intricacies of harnessing human power to produce electricity.

With a step-by-step approach, we’ll explore the tools, materials, and techniques needed to successfully convert your bike into a reliable source of energy.

So, fasten your helmet, grab your wrench, and let’s embark on this electrifying journey together.

Key Takeaways

  • Regularly clean the generator to remove dust and debris.
  • Check and recharge the battery as needed.
  • Lubricate moving parts to reduce friction.
  • Inspect tires, brakes, and other components for good condition.

Understanding the Basics of Bike-Powered Generators

Advertisement

Now you’re going to learn the basics of how to turn your bike into an electric generator. Bike-powered generators are a great way to generate electricity using human power.

One of the main applications of bike-powered generators is bike-powered lighting. With a bike-powered generator, you can power up your lights by simply pedaling your bike. This is a fantastic alternative to conventional lighting methods, especially in areas where electricity is scarce or during outdoor activities such as camping.

There are several advantages of bike-powered generators, including their portability, low cost, and environmental friendliness. By converting your bike into an electric generator, you not only generate electricity but also get a good workout.

To get started, you’ll need to gather the necessary tools and materials for the project.

Gather the Necessary Tools and Materials

First, gather all the tools and materials you’ll need for this project. To turn your bike into an electric generator, you will need a few specific tools. These include a wrench set, screwdrivers, pliers, wire strippers, and a multimeter to test electrical connections.

Advertisement

Additionally, you will require some essential materials such as a generator hub, a 12-volt DC motor, a bike stand or trainer, a battery, a voltage regulator, and various electrical connectors and wires.

It is crucial to ensure that you have all the necessary tools and materials before starting the project to prevent any delays or complications. Once you have gathered everything, you can move on to choosing the right bike for your generator project, taking into consideration factors like frame strength and stability.

Choose the Right Bike for Your Generator Project

When choosing the appropriate bicycle for your generator project, consider factors such as frame strength and stability. Here are four key considerations to keep in mind:

Advertisement
  1. Electric Bike Compatibility: Ensure that your bike is compatible with an electric bike conversion kit. This will make the process of turning it into an electric generator much easier and more efficient.

  2. Frame Material: Opt for a bike with a sturdy frame made of materials like steel or aluminum. These materials provide the necessary strength and stability to support the additional weight of the generator mechanism.

  3. Gear System: Look for a bike with a well-functioning gear system. This will allow you to adjust the resistance and speed of the generator, giving you more control over the generated electricity.

  4. Wheel Size: Consider the wheel size of the bike, as larger wheels tend to generate more power. However, keep in mind that larger wheels may also require more effort to pedal.

With these considerations in mind, you can select the right bike for your DIY generator project. Once you have the perfect bike, it’s time to move on to installing the generator mechanism onto your bike.

Install the Generator Mechanism onto Your Bike

To install the generator mechanism onto your bicycle, start by ensuring that the bike’s frame is sturdy and compatible with the electric conversion kit. This is crucial for a safe and efficient conversion process. Once you have confirmed compatibility, attach the generator to the rear wheel of your bike. Make sure it is securely fastened to prevent any wobbling or detachment during operation.

The benefits of using a bike powered generator for off-grid living are numerous. Not only does it provide a sustainable and renewable source of energy, but it also promotes physical fitness. To maximize energy output, maintain a steady pedaling rhythm and adjust the resistance level accordingly. Additionally, consider using high-quality batteries to store excess energy for later use.

With the generator mechanism successfully installed, it’s time to connect it to your devices and enjoy the power you have generated.

Connect the Generator to Your Device(s)

Advertisement

Now, it’s time for you to connect the generator to your devices and start enjoying the power you’ve generated.

To ensure a seamless charging experience, follow these steps:

  1. Determine your charging options: Assess the devices you wish to charge and their power requirements. Some common options include USB ports, DC power outlets, or AC power inverters.

  2. Connect your devices: Use the appropriate cables or adapters to connect your devices to the generator. Ensure a secure connection to avoid interruptions during the charging process.

  3. Manage the power: Consider using a power management system to regulate the charging process. This can help distribute the generated power efficiently and prevent overcharging or damaging your devices.

With your devices connected and power management in place, you are now ready to adjust the resistance and pedal to generate electricity. This will be discussed in the subsequent section.

Adjust the Resistance and Pedal to Generate Electricity

Adjusting the resistance and pedaling will allow you to generate electricity. By carefully manipulating these two variables, you can optimize the energy efficiency of your bike-turned-generator. There are several adjustment techniques you can employ to achieve maximum power output. First, adjust the resistance level on your generator to find the sweet spot where you can pedal comfortably while still generating a significant amount of electricity. This can be done using a 3×3 table to visually represent various resistance levels, pedal speed, and power output. Experiment with different combinations until you find the ideal setting that strikes a balance between effort and energy production. Additionally, pay attention to your pedaling technique. Maintaining a consistent and smooth pedal stroke will help maximize power generation. Once you have mastered the adjustment techniques, you can move on to the next step of monitoring and managing the power output without compromising your cycling experience.

Advertisement

Monitor and Manage the Power Output

Now that we have adjusted the resistance and pedal to generate electricity, it is important to monitor and manage the power output efficiently.

Power monitoring allows us to track the amount of electricity being produced by our bike-turned-generator. By keeping an eye on the power output, we can ensure that we are generating a consistent and optimal amount of electricity.

Additionally, energy management plays a crucial role in maximizing the efficiency of our electric generator. This involves finding the right balance between the power output and the energy consumed by the bike. By carefully managing the power output and energy consumption, we can ensure that our generator operates at its highest efficiency.

As we move into the next section about safety precautions and maintenance tips, it is essential to understand how to maintain and operate our electric generator safely.

Safety Precautions and Maintenance Tips

To ensure safe operation and proper maintenance, it is important to follow these safety precautions and maintenance tips.

Advertisement
  • Safety Measures:

  • Always wear protective gear, including a helmet and gloves, while operating the electric generator.

  • Keep the generator away from water or damp environments to prevent electrical shock.

  • Regularly inspect the bike’s wiring and connections for any signs of wear or damage.

  • Avoid overloading the generator by not exceeding its maximum power output capacity.

  • If any issues or abnormalities are noticed during operation, immediately turn off the generator and consult a professional.

  • Maintenance Tips:

  • Clean the generator regularly to remove dust and debris that can hinder its performance.

  • Check the battery level and recharge it as needed to maintain optimal power output.

  • Lubricate the moving parts of the generator to reduce friction and ensure smooth operation.

  • Periodically inspect the tires, brakes, and other bike components to ensure they are in good condition.

By following these maintenance tips and safety measures, you can ensure the safe and efficient operation of your electric generator. Now, let’s explore additional features and upgrades for your generator.

Explore Additional Features and Upgrades for Your Generator

You can enhance the capabilities of your electric generator by exploring additional features and upgrades. Here are some ideas to consider when looking to improve your bike-powered generator:

Feature/Upgrade Description Benefits
Adding a battery storage system Install a battery to store excess electricity generated Allows for power storage and use during low output
Exploring alternative power sources for the generator Incorporate solar panels or wind turbines Provides additional power sources for the generator

By adding a battery storage system, you can store excess electricity generated by your bike-powered generator. This allows you to use the stored power during periods of low output or when the bike is not in use. Additionally, exploring alternative power sources such as solar panels or wind turbines can provide additional sources of power for your generator. These upgrades expand the capabilities of your bike-powered generator, making it more versatile and reliable.

Now, let’s move on to the next section to learn about how to enjoy the benefits of bike-powered electricity.

Enjoy the Benefits of Bike-Powered Electricity

Experience the advantages of powering your devices with electricity generated by pedaling a bicycle. Bike-powered charging stations offer a sustainable and efficient alternative energy source for bikes.

Advertisement

Not only can you generate electricity while getting exercise, but you can also reduce your carbon footprint and save money on electricity bills. These charging stations typically consist of a stationary bike connected to a generator, which converts mechanical energy from pedaling into electrical energy.

The generated electricity can then be used to charge various devices such as smartphones, tablets, and even small appliances. By utilizing bike-powered electricity, you can have a reliable source of energy wherever you go, whether it’s during outdoor adventures, camping trips, or even in areas with limited access to power grids.

Embrace the benefits of bike-powered electricity and contribute to a greener and more sustainable future.

Frequently Asked Questions

Can I use any type of bike for this generator project?

Yes, the efficiency of generating electricity depends on the type of bike used. Certain types, like road bikes with lightweight frames and smooth tires, provide better efficiency compared to heavier and more rugged mountain bikes.

How much electricity can I generate with a bike-powered generator?

I’m amazed at how much electricity I can generate with my bike-powered generator! By calculating its energy efficiency, I found it produces a significant amount of power. I’m excited to explore its potential applications in various settings.

Advertisement

Can I connect multiple devices to the generator at the same time?

Yes, multiple devices can be connected to the generator, but there are power output limitations. The generator’s power output is determined by factors like the bike’s speed and the efficiency of the conversion system.

Is it possible to store the generated electricity for later use?

Yes, it is possible to store the electricity generated by a bike powered generator for later use. This opens up alternative uses for the stored electricity and hints at the future of energy storage with bike powered generators and their potential impact.

Are there any specific safety precautions I need to follow while using a bike-powered generator?

There are several safety tips to follow when using a bike-powered generator. Some common mistakes include not wearing protective gear, overloading the generator, and not properly securing the bike.

Conclusion

In conclusion, turning your bike into an electric generator is a fascinating and practical project that allows you to harness your own physical energy to generate electricity. By following the steps outlined in this article, you can create a sustainable and eco-friendly power source for your devices.

Did you know that a typical bike-powered generator can produce around 100 watts of electricity? This means that with just an hour of pedaling, you could charge your phone for up to 10 hours!

Advertisement

So, why not give it a try and experience the benefits of bike-powered electricity for yourself?

Continue Reading
Advertisement

Affiliate disclaimer

As an affiliate, we may earn a commission from qualifying purchases. We get commissions for purchases made through links on this website from Amazon and other third parties.

About us

We are a passionate team driven by the belief that cycling is a fantastic and accessible way to stay active while enjoying the beauty of the outdoors. Our mission is to share our love for cycling with as many people as possible. We provide a welcoming environment for individuals of all ages, abilities, and backgrounds to come together and ride bikes. With Ralf’s visionary leadership, Zane’s expertise in cycling adventures, and Olivia’s dedication to community building, we strive to create a vibrant space where everyone can experience the joy of cycling. Through group rides, workshops, and inclusive events, we inspire and empower individuals to embrace an active lifestyle. Join us in our quest to pedal together, embrace the joy of cycling, and foster connections that last a lifetime.

Advertisement

Trending