Imagine this: you’re gliding on your electric bike, feeling the breeze against your face and reveling in the liberating sensation of the open road. Then, unexpectedly and without any forewarning, your bike shuts off, stranding you and sparking frustration. This is an all too familiar situation for numerous electric bike users, and it can seriously dampen your spirits.
In this article, I’ll delve into the reasons why your electric bike might be cutting out and provide you with some practical solutions to get you back on the road in no time. So let’s dive in and unravel the mysteries of your electric bike’s sudden power loss.
Key Takeaways
- Check handlebar controls, wiring, and connections for any issues or damage that may be causing the electric bike to cut out.
- Evaluate the motor power output and use a multimeter to measure the voltage output to troubleshoot any potential problems with the voltage regulator or loose connections.
- Inspect the cooling system components, such as the fan, radiator, and coolant levels, to ensure they are functioning properly and preventing overheating of the electric motor.
- Regularly check for software or firmware updates specific to your electric bike model, as these updates may address overheating issues and improve overall performance.

TOBWOLF 1 Pair MTB Disc Brake Set, Hydraulic Disc Brake Kit with 160mm Rotors, Left Front 81cm & Right Rear 147cm, Aluminum Oil Pressure Calipers Levers for Mountain Bike E-Bike Fat Bike Road Bike
【Important NOTE】-- This set works on the principle of Left Front and Right Rear, which means the left...
As an affiliate, we earn on qualifying purchases.
Check the Battery Connection
You should check if the battery connection is secure. Proper battery maintenance is crucial to ensure the optimal performance of your electric bike.
If the battery connection is loose or not properly connected, it can cause the bike to cut out unexpectedly. To troubleshoot this issue, start by turning off the bike and removing the battery. Inspect the battery terminals for any signs of corrosion or damage. Clean the terminals if necessary and ensure they are securely connected to the bike’s wiring harness.
Additionally, check for any loose or frayed wires that could be affecting the connection. Once you have verified the battery connection, you can move on to the next step of inspecting the battery charge, which is essential for diagnosing the cutting out issue.
JFOYH zoom HB876 4-Piston Pre-Bled Hydraulic Disc Brake Set for Mountain Bike, Bike Disc Brake Kit with 160mm Rotors, Front and Rear Levers(PM Adapter Included) - Left-Front&Right-Rear
Experience Powerful Braking: Our 4-piston dual-way brake system provides exceptional braking force, allowing you to stop on a...
As an affiliate, we earn on qualifying purchases.
Inspect the Battery Charge
Check if the battery charge is sufficient. Start by checking the charging port for any signs of damage or loose connections. Make sure the charging cable is securely plugged into the port and the power source.
If everything appears to be in order, it’s time to inspect the battery cells. Remove the battery from the bike and visually examine each cell for any signs of swelling, leakage, or damage. Check the voltage of the battery using a multimeter to ensure it is within the recommended range. If the battery charge is low or the cells show any abnormalities, it may be necessary to replace the battery.
Now that we’ve checked the battery charge, let’s move on to examining the motor connections to troubleshoot the electric bike cutting out issue.

4-Pistons E-Bike Hydraulic Disc Brake Set, 2-PIN Electric Power-Off Hydraulic Brakes Set with 160mm Rotors, Pre-Bled with Mineral Oil Brakes Kit for eBike, MTB, Electric Scooters
【4-Piston Powerful Braking】2026 Upgrade Hydraulic Disc Brake Set Features with a 4-piston pistons, which makes the dual-side breaking...
As an affiliate, we earn on qualifying purchases.
Examine the Motor Connections
To troubleshoot the issue, start by inspecting the motor connections. Properly connected motor wiring is crucial for the smooth performance of an electric bike. Carefully examine the wiring connections at the motor, ensuring they are tight and secure. Check for any signs of loose or frayed wires that may be causing the cutouts. It is also important to inspect the connectors and make sure they are plugged in securely. Any loose or damaged connectors should be replaced immediately.
To convey a deeper understanding, here is a table summarizing the key steps to inspect motor connections:
| Steps to Inspect Motor Connections |
|---|
| 1. Turn off the electric bike and disconnect the battery. |
| 2. Remove any protective covers or casings around the motor. |
| 3. Visually inspect the motor connectors for any loose or damaged wires. |
| 4. Ensure all connectors are securely plugged in. |
| 5. Replace any damaged connectors or wires. |
By following these steps, you can troubleshoot motor performance issues and identify any connection problems. Once the motor connections have been inspected, we can move on to testing the throttle and pedal assist system.

Faireach 800D Heavy Duty Bike Cover for Transport 2 Bikes, Outdoor Bike Covers for 2 Bikes on Rear Bike Rack, Waterproof Windproof Electric Bicycle Cover with Straps & Storage Bag
800D Heavy Duty & Super Waterproof Bike Cover: Crafted from premium 800D Oxford fabric with PU coating, Faireach...
As an affiliate, we earn on qualifying purchases.
Test the Throttle and Pedal Assist System
Next, it is important to test the throttle and pedal assist system to further troubleshoot any issues with the electric bike’s performance.
Begin by checking the throttle sensitivity. Make sure it is responding correctly when you twist it. A malfunctioning throttle may cause the bike to cut out unexpectedly.
If the throttle is working fine, move on to troubleshooting the pedal assist settings. Ensure that the pedal assist is engaging properly and providing the desired level of assistance. Adjust the settings if necessary.
Additionally, check for any loose or damaged wires in the throttle and pedal assist system. Loose or damaged wires can cause intermittent power cutouts. Carefully inspect all connections and fix any issues you find.
By thoroughly testing the throttle and pedal assist system, you can pinpoint and address any problems that may be causing your electric bike to cut out.
Now, let’s look for loose or damaged wires in the next section.
Look for Loose or Damaged Wires
Inspect the throttle and pedal assist system for any loose or damaged wires that could be causing issues. Start by visually examining the wires connected to the throttle and pedal assist components. Look for any signs of wear, fraying, or loose connections. If you notice any damaged wires, they’ll need to be repaired or replaced.
Additionally, inspect the battery terminals for any signs of corrosion or loose connections. Clean the terminals if necessary and ensure they are securely fastened. Loose or damaged wires can disrupt the flow of electricity, leading to motor performance problems or even a complete cut out.
Once you have inspected and addressed any issues with the throttle and pedal assist system, proceed to the next step and check for faulty brakes or brake sensors.
Check for Faulty Brakes or Brake Sensors
Make sure your brakes and brake sensors are functioning properly to ensure safe and efficient operation of your electric bike. Faulty brake sensors can cause your bike to cut out unexpectedly, compromising your safety.
To troubleshoot this issue, start by checking the brake levers and ensure they are properly adjusted and making full contact with the brake sensors. Inspect the brake cables for any signs of damage or wear, and replace them if necessary. Additionally, check the brake sensors themselves for any loose connections or damage. If you find any issues, tighten the connections or replace the faulty sensor.
Remember to test the brakes after making any adjustments to ensure they are operating correctly.
Once you have addressed the brake and brake sensor concerns, it’s time to inspect the controller and wiring for any potential issues.
Inspect the Controller and Wiring
To ensure safe and efficient operation, you should check the controller and wiring for any potential issues with your electric bike.
Start by inspecting the motor performance, ensuring that it is functioning properly and delivering the expected power. Look for any signs of damage or loose connections in the wiring that may be causing the bike to cut out.
Additionally, verify the battery capacity to ensure it is not the source of the problem. Check for any loose or corroded connections between the battery and the controller. It is important to thoroughly inspect all wiring and connections to identify any faults that may be interrupting the power flow.
By addressing any issues with the controller and wiring, you can help prevent your electric bike from cutting out unexpectedly.
Moving forward, let’s now verify the power switch and key fob.
Verify the Power Switch and Key Fob
Once you’ve checked the controller and wiring, it’s important to verify the power switch and key fob. Here are three key aspects to consider during power switch troubleshooting and key fob malfunction:
-
Power switch functionality: Ensure the power switch is securely connected and functioning properly. Check for any loose connections or signs of damage. If necessary, consult the user manual for guidance on how to test the power switch.
-
Key fob battery: Examine the key fob battery to ensure it has sufficient power. Replace it if necessary. A low or dead battery can cause intermittent cutouts or failure to start the electric bike.
-
Key fob signal strength: Verify the key fob’s signal strength by standing within close proximity to the electric bike. Weak or inconsistent signals may indicate a malfunctioning key fob or interference from external sources.
Once these power switch and key fob issues have been addressed, we can move on to examining the display and control panel for any further troubleshooting.
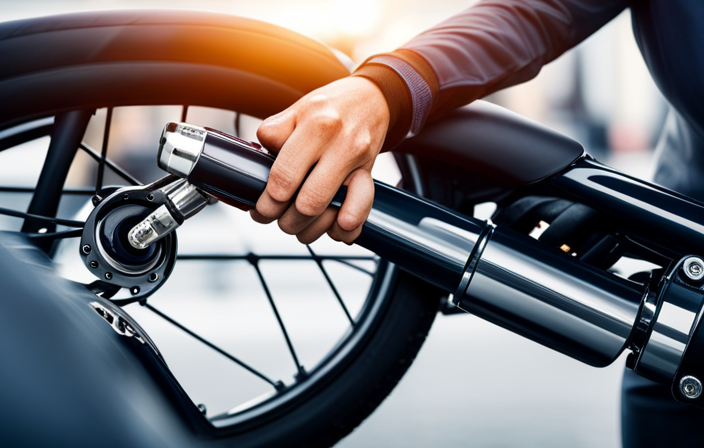
Examine the Display and Control Panel
Take a close look at the display and control panel to identify any issues or malfunctions. Start by checking the handlebar controls to ensure they’re properly connected and functioning correctly. Look for any loose wires or damaged connections that may be causing the electric bike to cut out.
Additionally, evaluate the motor power output displayed on the control panel. If the power output is fluctuating or inconsistent, it could indicate a problem with the motor or its connection to the control panel. By examining the display and control panel, you can gather important information about the bike’s electrical system and pinpoint any potential issues.
Once you have thoroughly examined the display and control panel, you can move on to testing the voltage regulator.
Test the Voltage Regulator
After examining the display and control panel of my electric bike and finding no issues, I moved on to testing the voltage regulator. The voltage regulator is responsible for maintaining a steady voltage output to the electrical components of the bike.
Voltage regulator troubleshooting is crucial in diagnosing why the electric bike is cutting out. Common issues with voltage regulators include a faulty regulator, loose connections, or a blown fuse.
To test the voltage regulator, I used a multimeter to measure the voltage output. I carefully followed the manufacturer’s instructions to ensure accurate readings. If the voltage output is inconsistent or significantly lower than expected, it may indicate a problem with the voltage regulator. This will require further investigation and possibly replacement.
Moving forward, I will now look for overheating issues in order to continue troubleshooting the cutting out problem.
Look for Overheating Issues
To identify any potential overheating issues, I will now examine the electrical components of the bike.
First, I will inspect the cooling system to ensure it is functioning properly. This includes checking the fan, radiator, and coolant levels. If any of these components are damaged or not working efficiently, it can lead to overheating.
Next, I will troubleshoot the electric motor. I will check for any signs of excessive heat, such as discoloration or burning smells. Additionally, I will inspect the motor’s wiring to ensure there are no loose connections or frayed wires that could cause overheating.
Finally, I will check for software or firmware updates that may address any known issues related to overheating.
By following these steps, I can identify and address any potential overheating issues with my electric bike.
Now, let’s move on to the next section about checking for software or firmware updates.
Check for Software or Firmware Updates
Now, let’s see if there are any software or firmware updates available to address any potential issues. Keeping your electric bike’s software up to date is crucial for optimal performance and troubleshooting. By regularly checking for updates, you can ensure that any bugs or glitches are fixed, and new features or improvements are implemented. To facilitate this process, refer to the table below for a step-by-step guide on how to check and install software or firmware updates on your electric bike:
| Step | Instructions |
|---|---|
| 1 | Power on your electric bike and navigate to the settings menu. |
| 2 | Look for the ‘Software Update’ or ‘Firmware Update’ option. |
| 3 | If an update is available, select ‘Download’ or ‘Install’. |
| 4 | Follow the on-screen prompts to complete the update process. |
| 5 | Once the update is installed, restart your electric bike and test for any improvements or issue resolutions. |
By ensuring your electric bike’s software is up to date, you can improve battery maintenance and troubleshoot any potential issues more effectively. Now, let’s move on to the next step and consult the manufacturer’s troubleshooting guide.
Consult the Manufacturer’s Troubleshooting Guide
Before consulting the manufacturer’s troubleshooting guide, it is important to familiarize yourself with the current subtopic of checking for software or firmware updates.
When experiencing issues with your electric bike cutting out, it is worth investigating if there are any software or firmware updates available for your specific model. These updates often address common issues and can improve the overall performance and stability of your bike.
Start by visiting the manufacturer’s website and navigating to the support or downloads section. Look for any available updates for your bike’s software or firmware. Follow the instructions provided by the manufacturer to install the updates onto your electric bike.
Once the updates are installed, test your bike to see if the cutting out issue has been resolved. If the problem persists, it may be necessary to seek professional assistance to further diagnose and repair the issue.
Seek Professional Assistance if Needed
If the issue persists, it might be necessary to get professional help to diagnose and repair the problem.
Professional expertise can be invaluable when it comes to troubleshooting and identifying the root cause of the electric bike cutting out. A trained technician will have the knowledge and experience to accurately diagnose the issue and recommend the appropriate repairs.
They may also have access to specialized tools and equipment that can aid in the diagnosis process.
Additionally, seeking professional assistance can save you time and frustration, as they can quickly identify and resolve the problem.
Once the issue is resolved, it is important to take preventive measures to avoid future issues. This can include regular maintenance, following the manufacturer’s guidelines, and implementing troubleshooting tips to address any minor issues that may arise.
Take Preventive Measures to Avoid Future Issues
After seeking professional assistance for your electric bike cutting out, it is important to take preventive measures to avoid future issues. Regular maintenance practices are crucial in ensuring the longevity and optimal performance of your electric bike. Here are four key practices to follow:
-
Keep the battery charged: Regularly charge your battery to avoid depletion and ensure a consistent power supply.
-
Clean and lubricate moving parts: Regularly clean and lubricate the chain, gears, and other moving parts to prevent friction and ensure smooth operation.
-
Check tire pressure: Maintaining proper tire pressure not only improves your bike’s efficiency but also prevents unnecessary strain on the motor.
-
Understand the warranty coverage: Familiarize yourself with the warranty terms and conditions to ensure you are aware of the services and repairs covered.
By implementing these practices and understanding your warranty coverage, you can minimize the likelihood of your electric bike cutting out and enjoy a hassle-free riding experience.
Frequently Asked Questions
How do I check the battery connection on my electric bike?
To check the battery connection on my electric bike, I would start by turning off the bike and removing the battery. Then, I would inspect the battery terminals for any signs of damage or corrosion. Next, I would use a multimeter to check the battery voltage and ensure it is within the recommended range. If the voltage is low, I would troubleshoot the battery connection by tightening any loose connections or replacing any faulty wiring.
What should I do if the battery charge is low on my electric bike?
If the battery charge is low on my electric bike, I must replace the battery or charge it. Ensure a compatible replacement, connect it properly, and charge it fully before using the bike.
How can I test the throttle and pedal assist system on my electric bike?
To test the throttle sensitivity on my electric bike, I would start by checking the wiring connections and ensuring they are secure. Then, I would use a multimeter to measure the voltage output from the throttle.
For troubleshooting pedal assist levels, I would check the pedal assist sensor and make sure it is properly aligned and functioning. I would also inspect the wiring and connections for any damage or loose connections. If necessary, I would refer to the bike’s user manual for specific troubleshooting steps.
What should I do if I find loose or damaged wires on my electric bike?
If I find loose or damaged wires on my electric bike, I should first disconnect the power source. Then, I would carefully inspect the wires for any visible damage or loose connections. I would repair or replace the damaged wires to ensure proper functioning and troubleshoot any electrical issues.
How can I prevent future issues with my electric bike?
To prevent future issues with your electric bike, follow these maintenance tips: regularly check and tighten all connections, keep the battery charged, clean and lubricate the chain, and refer to the troubleshooting guide for any potential problems.
Conclusion
Well, after going through all those steps, you might be wondering why your electric bike is still cutting out. It’s almost as if it enjoys playing games with you, teasing you with its intermittent issues.
But fear not, my fellow rider, for troubleshooting is part of the electric bike experience. Embrace the challenges, learn from them, and remember to always take preventive measures to avoid future issues.
So, keep pedaling and never let a little electrical hiccup dampen your two-wheeled adventures. Happy riding!