Connect with us

Electric Bike

X-Treme Rocky Road 48v 500w Fat Tire Electric Bike How To Turn On

Published

on

An image showcasing the X-Treme Rocky Road 48v 500w Fat Tire Electric Bike being powered on

Are you fed up with having difficulty starting your X-Treme Rocky Road 48V 500W Fat Tire Electric Bike? Don’t worry, riders! In this helpful guide, I will take you through the process of starting your bike step by step.

From unpacking and assembling to finding the power button and ensuring the battery is charged, I’ve got you covered.

So buckle up, get ready to ride, and let’s dive into the electrifying world of the X-Treme Rocky Road Electric Bike!

Key Takeaways

  • Carefully cut through packaging tape without damaging parts
  • Locate the power button with a power symbol or the word ‘power’
  • Ensure the battery is fully charged by following manufacturer’s instructions
  • Press and hold the power button on the control panel until the display screen lights up

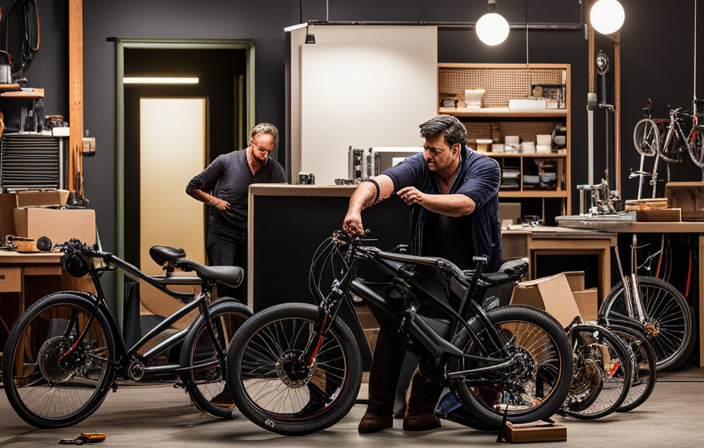
Unpack and Assemble the Bike

To turn on the x-treme rocky road 48v 500w fat tire electric bike, you need to unpack and assemble it.

Advertisement

Before diving into the assembly process, let me share some unpacking tips. Start by carefully cutting through the packaging tape, making sure not to damage any parts. Once unpacked, lay out all the components and refer to the instruction manual for guidance.

Now, let’s talk about the assembly process. Begin by attaching the front wheel, making sure it’s properly aligned and tightened. Next, mount the handlebars securely, adjusting them to a comfortable position. Troubleshooting common assembly issues, such as loose screws or misaligned parts, will ensure a smooth setup.

Finally, locate the power button, which is conveniently placed on the handlebar. With the bike unpacked and assembled, it’s time to power it up and hit the road.

Locate the Power Button

Find the power button on your x-treme rocky road 48v 500w fat tire electric bike. To turn on your bike, you need to locate the power button, which is usually located on the control panel or handlebars. Here are some important things to know about the power button:

  • Look for a button with a power symbol or the word ‘power’ written on it.
  • The power button may be illuminated or have a light indicator to show if the bike is on or off.
  • Some bikes have a key ignition system, so make sure to insert and turn the key to activate the power.

If you are having trouble turning on your bike, there could be a few issues to troubleshoot. Check the battery level and make sure it is fully charged. Additionally, ensure that all connections are secure and that the bike is properly assembled.

Once you have located the power button and resolved any issues, you can move on to ensuring the battery is fully charged.

Advertisement

Ensure the Battery is Fully Charged

Make sure the battery on your X-treme Rocky Road 48V 500W fat tire electric bike is fully charged. Before turning on the bike, it is important to ensure that the battery has enough power to operate the bike efficiently.

To charge the battery, connect the charger to a power outlet and then plug it into the charging port on the bike. It is essential to follow the battery charging precautions provided by the manufacturer to prevent any potential hazards. If you encounter any issues while charging the battery, such as slow charging or the battery not holding a charge, it is recommended to troubleshoot the problem or seek assistance from a professional.

Once the battery is fully charged, you can proceed to press and hold the power button to turn on the electric bike.

Advertisement

Press and Hold the Power Button

Hold down the power button to start it.

Press and hold the power button located on the control panel of your X-Treme Rocky Road 48V 500W fat tire electric bike. This button is usually labeled with a power symbol. Make sure to press and hold it for a few seconds until you see the display screen light up.

If the bike doesn’t turn on, there are a few troubleshooting steps you can try.

First, check if the battery is properly connected and fully charged, as discussed in the previous subtopic.

Next, ensure that the power button is not stuck or damaged.

Advertisement

Lastly, try resetting the bike by disconnecting and reconnecting the battery.

Avoid common mistakes like not pressing the power button long enough or not having the battery properly connected.

Once you have successfully turned on the bike, wait for the display screen to turn on, indicating that the bike is ready to use.

Wait for the Display Screen to Turn On

Advertisement

Once the power button is pressed and held, you just need to wait for the display screen to turn on.

The display screen is an essential component of the x-treme rocky road 48v 500w fat tire electric bike as it provides important information about the bike’s performance and settings.

It shows details such as speed, battery level, distance traveled, and even allows you to adjust various settings.

If the display screen does not turn on after pressing the power button, there may be some troubleshooting steps you can take.

Check if the battery is properly connected, ensure that the bike is turned on, or try resetting the display screen.

Advertisement

Once the display screen turns on, you can proceed to adjust the settings if necessary.

Adjust the Settings if Necessary

If needed, you can easily adjust the settings on the display screen of the x-treme rocky road 48v 500w fat tire electric bike. This allows you to customize your riding experience and troubleshoot any issues that may arise. The display screen is user-friendly and provides easy access to various settings. Here is a table outlining the available settings:

Setting Description Adjustments
Power Level Control the amount of power the motor provides Increase or decrease power level
Speed Limit Set a maximum speed for the bike Increase or decrease speed limit
Trip Distance Keep track of the distance you have traveled Reset trip distance

By adjusting these settings, you can fine-tune the performance of your electric bike to suit your preferences. Once you have made any necessary adjustments, you can then mount the bike and prepare to ride.

Mount the Bike and Prepare to Ride

To start your ride, simply hop on the bike and get ready to go. Before mounting the bike, it’s important to ensure you are following the proper techniques for a safe and comfortable ride. Here are some mounting techniques to keep in mind:

  • Position the bike upright and hold the handlebars firmly.
  • Place one foot on the ground and swing your other leg over the frame.
  • Take a comfortable seat on the saddle and position your feet on the pedals.

Once you are securely on the bike, it’s essential to take safety precautions. Make sure you are wearing a helmet and any other necessary protective gear. Check that the brakes are functioning properly and adjust your seat height if needed. Now, you’re ready to move on to the next step: testing the motor and pedal assist function.

Test the Motor and Pedal Assist Function

Make sure you test the motor and pedal assist function before starting your ride. This is an important step to ensure that everything is working properly and to troubleshoot any potential issues.

Advertisement

To test the motor, turn on the bike by pressing the power button located on the display panel. Once the bike is powered on, give the throttle a gentle twist and listen for the motor to engage. You should feel a smooth and steady acceleration. If the motor doesn’t engage or if there are any strange noises, you may need to check the connections or consult the user manual for motor troubleshooting tips.

Next, test the pedal assist function by selecting a level on the display panel and pedaling the bike. You should feel a boost in power as the pedal assist kicks in. Experiment with different levels to find the one that suits your riding style.

Finally, practice operating the brakes and gears to ensure they are functioning properly. Transitioning into the next section, it’s important to have a good understanding of the bike’s controls before heading out on your ride.

Practice Operating the Brakes and Gears

Before heading out on your ride, take the time to practice operating the brakes and gears. Proper hand positioning on the brake levers and gear shifters is crucial for safe and efficient riding. When gripping the brake levers, place your index and middle fingers on the brake lever, with your other fingers wrapping around the handlebar. This allows for quick and easy access to the brakes when needed. As for the gear shifters, position your thumb and index finger on the levers, allowing for smooth shifting between gears. Understanding the different gear ratios and when to use them for optimal performance is also important. Lower gears are ideal for climbing steep hills or accelerating from a stop, while higher gears are best for maintaining speed on flat terrain. With practice, you’ll become familiar with the right gear for each riding situation. Now, enjoy your ride on the x-treme rocky road electric bike!

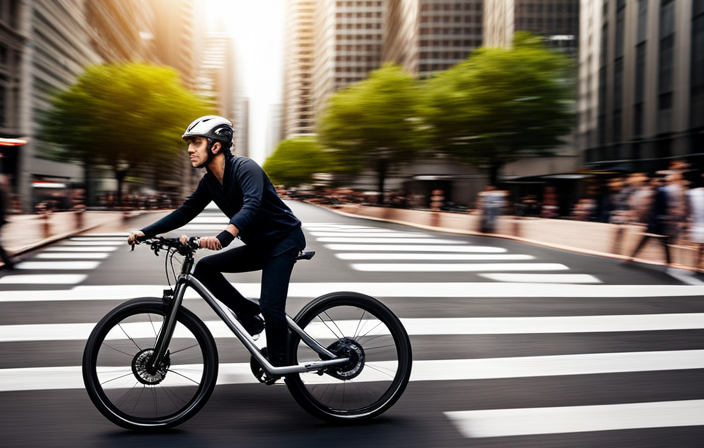
Enjoy Your Ride on the X-Treme Rocky Road Electric Bike!

Enjoy your ride on the X-Treme Rocky Road Electric Bike! As a proud owner of this amazing electric bike, you’re in for some truly enjoyable ride experiences. With its powerful 500w motor and fat tires, this bike can conquer any terrain with ease.

Advertisement

But to ensure that you continue to have a smooth and trouble-free ride, it’s important to take proper care of your bike.

Regular maintenance is key to keeping your X-Treme Rocky Road in top shape. Make sure to regularly check the tire pressure, as the fat tires may require a slightly different PSI compared to regular bikes. Additionally, keep an eye on the chain and gears, and lubricate them as needed to prevent any unnecessary wear and tear.

Another important aspect of maintaining your electric bike is to keep the battery charged and stored properly. Follow the manufacturer’s instructions for the best battery care practices.

By following these maintenance and care tips, you can ensure that your ride on the X-Treme Rocky Road Electric Bike remains enjoyable and hassle-free for years to come.

Frequently Asked Questions

How long does it take to fully charge the battery of the X-Treme Rocky Road Electric Bike?

The charging time for the battery of the x-treme rocky road electric bike can vary depending on the current charge level and the charger used. You can check the battery indicator to see when it is fully charged.

Advertisement

Is there a specific order in which the bike should be assembled?

Sure, there is a specific order to assemble the bike. First, attach the handlebars, then the front wheel, followed by the pedals, seat, and finally the battery. This ensures a safe and efficient assembly process.

How do I know if the battery is fully charged?

To determine if the battery is fully charged, check the battery charge indicator on the bike. It will display the current level of charge. If you encounter any issues with battery charging, consult the troubleshooting section of the user manual for assistance.

Can I adjust the pedal assist level on the bike?

Sure, I can adjust the pedal assist level on the bike. It’s great because it allows me to customize the amount of assistance I receive while pedaling. This feature enhances my riding experience and makes it easier to conquer hills or ride longer distances.

Are there any safety precautions I should be aware of before riding the X-Treme Rocky Road Electric Bike?

Before riding the electric bike, it’s important to follow safety precautions. Use proper riding techniques, such as maintaining balance and using hand signals. Regular maintenance is also crucial, including checking tire pressure, brakes, and keeping the bike clean.

Conclusion

After following the simple steps to turn on the X-Treme Rocky Road electric bike, I was ready to hit the road in no time.

Advertisement

The unpacking and assembly process was a breeze, and locating the power button was a piece of cake.

Once I ensured the battery was fully charged, I pressed and held the power button, anxiously waiting for the display screen to turn on.

As I mounted the bike and tested the motor and pedal assist function, I couldn’t help but feel a rush of excitement.

Operating the brakes and gears was a smooth experience, and before I knew it, I was off on an exhilarating ride.

The X-Treme Rocky Road electric bike truly delivers an unmatched experience, combining power, comfort, and style.

Advertisement

Zane rides her bike because she loves it, but also because she is mindful of the need to leave a better world for her children.

Continue Reading
Advertisement

Electric Bike

How To Sell Electric Bike

Published

on

By

An image showcasing a person confidently riding an electric bike through a bustling city street, effortlessly maneuvering through traffic

Are you prepared to hit the road and earn some money? Selling your electric bike has never been simpler!

In this article, I’ll show you the step-by-step process to sell your electric bike successfully. From cleaning and inspecting your bike to arranging test rides for potential buyers, I’ve got you covered.

So, buckle up and get ready to ride towards a successful sale!

Key Takeaways

  • Research market for competitive pricing and consider slightly lower prices to attract buyers and maximize chances of making a sale.
  • Utilize effective marketing strategies, such as highlighting unique features and advantages, using descriptive language, and increasing visibility and desirability of the electric bike.
  • Expand network and connect with cycling enthusiasts, showcase and sell the electric bike at expos and events, and collaborate with local shops to learn trends and demand.
  • Respond promptly and negotiate effectively, maintain a calm and professional demeanor, build rapport and trust for a successful sale, and personalize the experience for customers.

Clean and Inspect Your Electric Bike

Now it’s time for you to clean and inspect your electric bike to ensure it’s in the best condition possible. Bike maintenance is crucial when it comes to selling your electric bike.

Advertisement

Start by giving your bike a thorough clean, removing any dirt, dust, or debris that may have accumulated. Pay close attention to the chain, brakes, and tires, as these areas tend to get the dirtiest.

Once your bike is clean, it’s time to troubleshoot any common issues. Check the battery to make sure it’s charging properly and replace it if needed. Test the brakes to ensure they are working effectively. Finally, inspect the tires for any signs of wear and tear.

By properly maintaining and troubleshooting your electric bike, you’ll increase its value and appeal to potential buyers.

Now, let’s move on to gathering all necessary documents and information for the selling process.

Gather All Necessary Documents and Information

First, make sure you have all the necessary documents and information ready. Document preparation is an essential step in selling your electric bike. Gather your bike’s title, registration, and any service or maintenance records. These documents will provide potential buyers with confidence and assurance about the bike’s history and condition.

Advertisement

Additionally, research market prices to determine a fair selling price. This step is crucial to ensure you get the best value for your bike. Look at online marketplaces, local listings, and consult with electric bike experts to understand the current market trends and prices.

Determine a Fair Selling Price

By researching market prices and consulting with experts, you can determine a fair selling price for your e-bike. When it comes to determining value, it’s important to consider factors such as the brand, model, age, condition, and any additional features or upgrades.

Researching similar e-bikes that are currently listed for sale can give you a good idea of the market value. However, don’t forget to take into account the condition and uniqueness of your own e-bike. Once you have an idea of its value, you can negotiate the price with potential buyers. Keep in mind that negotiation is a common part of the selling process, so be prepared to be flexible.

Advertisement

Now that you have determined the value and potential selling price for your e-bike, it’s time to showcase it with high-quality photos that will attract interested buyers.

Take High-Quality Photos

Taking high-quality photos is essential in attracting potential buyers to your e-bike listing. When it comes to selling your electric bike, visuals are everything. Creative angles and lighting techniques can make all the difference in showcasing the features and capturing the attention of buyers.

To create compelling images, try experimenting with different angles to highlight the sleek design or unique features of your e-bike. Consider using natural light or investing in affordable lighting equipment to enhance the details and colors in your photos.

Remember, a high-quality image can make your e-bike stand out among the competition and entice potential buyers to click on your listing.

Now, let’s move on to the next section where I’ll explain how to write a compelling and detailed description that will further captivate buyers.

Advertisement

Write a Compelling and Detailed Description

To captivate potential buyers, entice them with a compelling and detailed description of your e-bike. When crafting your description, it is crucial to use effective marketing strategies to showcase the unique features and benefits of your electric bike. Building trust with potential buyers is also essential, so be honest and transparent in your description. Provide accurate specifications, such as battery life, motor power, and range, to give buyers a clear understanding of what they can expect. Additionally, highlight any special features, such as adjustable seat height or integrated lights, that set your e-bike apart from others on the market. Here is an example table to demonstrate how you can effectively present the key details:

Specification Description
Battery Life Up to 60 miles
Motor Power 500W
Range 20-40 miles
Special Features Adjustable seat height, integrated lights

Advertise Your Electric Bike Online

When advertising your e-bike online, it’s essential to utilize effective marketing strategies to reach potential buyers. Online marketing is a powerful tool that allows you to target a specific audience and showcase the unique features and benefits of your electric bike.

To maximize your reach, you can leverage various platforms such as social media, online classifieds, and e-commerce websites. By utilizing these channels, you can create compelling advertisements that highlight the key selling points of your e-bike, such as its eco-friendly nature, powerful motor, and long battery life.

Advertisement

Additionally, you can use targeted keywords and optimize your listings for search engines to increase visibility. By implementing these online marketing strategies, you can attract more potential buyers and increase the chances of selling your electric bike successfully.

Utilizing social media platforms is another effective way to reach a wider audience and engage with potential buyers.

Utilize Social Media Platforms

Start by creating engaging content that showcases the unique features and benefits of your e-bike on social media platforms. Social media marketing is a powerful tool for reaching potential buyers and generating interest in your electric bike.

Utilizing platforms like Facebook, Instagram, and Twitter allows you to connect directly with your target audience and build brand awareness. To maximize your reach, consider partnering with influencers in the cycling or eco-friendly space. Influencer partnerships can help promote your e-bike to a larger audience and lend credibility to your brand.

By sharing appealing photos, videos, and testimonials, you can effectively highlight the key selling points of your electric bike. This will create excitement and encourage potential buyers to engage with your content and ultimately make a purchase.

Advertisement

Transitioning into the next section, listing your electric bike on online marketplaces provides another avenue for reaching potential buyers and increasing your chances of a successful sale.

List Your Electric Bike on Online Marketplaces

Now that you have utilized social media platforms to generate interest in your electric bike, it’s time to take your selling efforts to the next level by listing your bike on online marketplaces.

This strategy allows you to reach a wider audience of potential buyers who are actively searching for electric bikes. To maximize your chances of making a sale, here are some effective pricing strategies and tips for writing a compelling description:

  • Pricing Strategies:

  • Research the market to determine a competitive price.

  • Consider offering a slightly lower price to attract buyers.

  • Tips for Writing a Compelling Description:

  • Highlight the unique features and advantages of your electric bike.

  • Use descriptive language to paint a vivid picture for potential buyers.

By utilizing these effective pricing strategies and writing a compelling description, you can increase the visibility and desirability of your electric bike on online marketplaces.

Now, let’s move on to the next section where we will explore the benefits of attending local bike expos and events.

Advertisement

Attend Local Bike Expos and Events

To expand your network and connect with fellow cycling enthusiasts, consider attending local bike expos and events in your area. Not only are these gatherings a great way to immerse yourself in the local bike community, but they also provide an opportunity to showcase and sell your electric bike.

At these events, you can set up a booth or display your bike prominently to attract potential buyers. To grab the attention of the audience, you can offer promotional giveaways such as branded water bottles or cycling accessories.

By participating in these expos and events, you can not only sell your electric bike but also build relationships with other enthusiasts who can help spread the word about your product.

Transitioning into the next section, let’s explore how you can network with electric bike enthusiasts in more detail.

Network with Electric Bike Enthusiasts

Attending local bike expos and events will allow you to connect with other electric bike enthusiasts and build a strong network within the cycling community. By collaborating with local bike shops, you can learn about the latest trends, technologies, and market demand. This valuable partnership will enhance your knowledge and credibility as a seller.

Advertisement

Additionally, organizing group rides and events will not only showcase the capabilities of electric bikes but also attract potential buyers. Through these activities, you can establish yourself as a trusted expert in the field and create a sense of community among electric bike enthusiasts.

Building relationships with fellow enthusiasts will not only provide opportunities for knowledge sharing but also potential referrals and partnerships. As you network and establish connections, you will be better equipped to respond promptly to inquiries and negotiate offers, ensuring a successful selling experience.

Respond Promptly to Inquiries and Negotiate Offers

When someone reaches out with an inquiry or offer, I believe it is crucial to respond promptly and negotiate effectively to secure a successful transaction.

Effective communication is key in any negotiation, and it involves actively listening, understanding the other person’s perspective, and finding common ground.

Negotiation tactics can vary depending on the situation, but some proven strategies include maintaining a calm and professional demeanor, being prepared with relevant information and facts, and being flexible yet firm in your position.

Advertisement

By employing these tactics, you can build rapport and trust with potential buyers, increasing the likelihood of a successful sale.

Once negotiations are finalized, the next step is to arrange test rides for potential buyers, allowing them to experience the electric bike firsthand and further solidify their interest.

Arrange Test Rides for Potential Buyers

Once negotiations are finalized, you can arrange test rides for potential buyers to let them experience the bike firsthand and solidify their interest. Test rides are a crucial part of the selling process as they allow customers to get a feel for the bike’s performance and features. It is also an excellent opportunity to showcase the bike’s capabilities and highlight its unique selling points. By offering test rides, you are implementing effective marketing strategies that demonstrate confidence in your product and provide a personalized experience for customers. This approach not only increases customer satisfaction but also helps build trust and loyalty. To further illustrate the benefits of test rides, consider the following comparison table:

Test Ride No Test Ride
Allows customers to experience the bike firsthand Customers rely solely on descriptions and specifications
Solidifies customer interest and likelihood of purchase Customers may be hesitant to commit without trying the bike
Provides an opportunity to address any concerns or questions Customers may have lingering doubts or uncertainties
Enhances customer satisfaction and confidence in the product Customers may feel less confident in their decision

Complete the Sale and Transfer Ownership

To finalize the sale and transfer ownership, you’ll need to complete the necessary paperwork and payment transactions. This step is crucial to ensure a smooth and legal transition of the electric bike to its new owner. Here’s what you need to know:

  • Price Negotiation:

  • Determine a fair price for your electric bike based on its condition, mileage, and market value.

  • Be open to negotiation and consider any reasonable offers from potential buyers.

  • Set a minimum price that you are willing to accept to avoid underselling your bike.

  • Legal Requirements:

  • Gather all relevant documents, including the original purchase receipt, maintenance records, and the bike’s title.

  • Check your local regulations to ensure compliance with any specific requirements for selling vehicles.

  • Complete a bill of sale, outlining the terms of the transaction, and ensure both parties sign it.

Provide After-Sale Support and Assistance

If the buyer has any questions or concerns after purchasing the bike, you can count on me to offer assistance and support. Providing excellent customer service is a top priority for me. To ensure the buyer’s satisfaction, I offer a warranty on all electric bikes sold. This warranty covers any manufacturing defects or malfunctions that may occur within a specified period. Additionally, I provide maintenance services to keep the bike in optimal condition. From regular tune-ups to repairs, I am here to help. To give you a better understanding of the services I offer, here’s a table showcasing the warranty and maintenance services:

Advertisement
Warranty Services Maintenance Services
1-year coverage Regular tune-ups
Manufacturing defects Battery replacement
Malfunctions Brake adjustments
Tire replacements

Leave a Positive Review and Ask for Feedback

When you leave a positive review and ask for feedback, it helps others make an informed decision about their purchase and allows me to continually improve my services.

Positive reviews have a significant impact on my business, as they create trust and credibility among potential customers. They provide social proof that my electric bikes are of high quality and meet customers’ expectations.

Moreover, positive reviews highlight the benefits and features of the electric bikes, showcasing their performance, durability, and value for money.

By asking for feedback, I can gather valuable insights and suggestions from my customers, enabling me to identify areas for improvement and make necessary adjustments to enhance their overall experience.

Your feedback is crucial in ensuring that I continue to offer top-notch service and maintain customer satisfaction.

Advertisement

Frequently Asked Questions

Can you provide any tips on how to effectively advertise an electric bike online?

To effectively advertise an electric bike online, it’s crucial to implement effective digital marketing strategies. These include optimizing website content for search engines, creating engaging social media campaigns, and utilizing targeted online ads to enhance the online visibility of electric bikes.

How can I determine a fair selling price for my electric bike?

Determining the value of your electric bike requires researching the market. By analyzing similar models, considering factors like age, condition, and brand reputation, you can determine a fair selling price that attracts buyers and maximizes your profit.

Are there any specific documents or information I need to gather before selling my electric bike?

Before selling my electric bike, I must gather specific documents, such as the bike’s registration, maintenance records, and warranty information. It’s crucial to have this information ready to provide potential buyers, ensuring a smooth and confident selling process.

What steps should I take to ensure a smooth and secure transfer of ownership?

To ensure a smooth and secure transfer of ownership, I recommend securing payment before handing over the electric bike. Additionally, it’s important to transfer the insurance policy to the buyer’s name to avoid any potential issues in the future.

Is there any after-sale support or assistance available for electric bike sellers?

Looking to provide exceptional customer satisfaction? Our after-sales service is here to support you every step of the way. With our knowledgeable team, we’ll ensure your electric bike selling experience is smooth and worry-free.

Advertisement

Conclusion

In conclusion, selling an electric bike requires careful preparation and attention to detail.

By cleaning and inspecting the bike, gathering all necessary documents, and determining a fair price, you set yourself up for a successful sale.

Taking high-quality photos and writing a compelling description will attract potential buyers, while arranging test rides allows them to experience the bike firsthand.

Completing the sale, providing after-sale support, and leaving a positive review are the final steps to ensure a smooth transaction.

Remember, ‘A smooth ride starts with a well-maintained bike.’

Advertisement

Continue Reading

Electric Bike

How To Set Up A Electric Bike

Published

on

By

An image showing a person wearing a helmet, standing beside an electric bike

Picture the excitement of smoothly gliding through urban streets or conquering challenging landscapes on your own electric bike. With the appropriate know-how and equipment, assembling your electric bike can be a fulfilling and empowering journey.

In this article, I will guide you step-by-step through the process of choosing the perfect electric bike, assembling the components, and ensuring everything is properly connected. Get ready to unleash the power of electric biking and embark on unforgettable adventures.

Let’s dive in!

Key Takeaways

  • Consider riding style and terrain preferences
  • Gather the necessary tools and equipment
  • Assemble the bike frame and components
  • Install the electric motor and battery

Choosing the Right Electric Bike for Your Needs

When choosing the right electric bike for your needs, it’s important to consider factors such as your riding style and terrain preferences. Start by comparing different electric bike models to find one that suits you best.

Advertisement

Understanding the range and battery life of electric bikes is essential, as it determines how far you can go on a single charge. Additionally, be aware of tips for maintaining your electric bike, as regular maintenance ensures optimal performance.

Don’t fall for common misconceptions about electric bikes, such as thinking they’re only for lazy riders. Electric bikes offer numerous benefits for commuting, including saving money on fuel and reducing your carbon footprint.

Prioritize safety considerations when riding, such as wearing a helmet and following traffic rules. Properly charging your electric bike battery is crucial for longevity.

Lastly, learn tips for riding in different weather conditions and keep an eye on the future of electric bikes in the transportation industry.

Gathering the Necessary Tools and Equipment

First, you’ll need to gather all the tools and equipment necessary to set up your electric bike. Choosing the right tools is crucial to ensure a smooth and successful installation process. Some essential tools you will need include a set of Allen wrenches, a torque wrench, wire cutters, and a multimeter. These tools will help you with tasks such as tightening bolts, measuring torque, cutting and stripping wires, and checking electrical connections.

Advertisement

Additionally, it’s important to understand the electric bike components before getting started. Familiarize yourself with the battery, motor, controller, and wiring system. This knowledge will help you troubleshoot any issues that may arise during the setup process.

With the right tools and understanding of the components, you’ll be well-equipped to set up your electric bike effectively.

Assembling the Bike Frame and Components

To assemble the frame and components, you’ll need to gather all the necessary tools and equipment. This step is crucial in ensuring a smooth and successful assembly process. Here is a table that lists the essential tools and equipment you’ll need:

Advertisement
Tools Equipment
Allen wrench set Bike stand
Screwdriver set Work gloves
Adjustable wrench Safety glasses
Torque wrench Cleaning supplies
Cable cutters Lubricants

Once you have all the tools and equipment ready, you can start the assembly process. Begin by attaching the bike frame components, such as the handlebars, fork, and seat post, following the manufacturer’s instructions. Ensure that all bolts and screws are tightened securely using the appropriate tools. Next, install the drivetrain components, including the chain, derailleur, and cassette. Pay attention to the proper alignment and adjustment of these components to ensure smooth and efficient shifting. Lastly, don’t forget to check and adjust the brakes for optimal performance. With careful attention to detail, your bike frame assembly and component installation will be successfully completed.

Installing the Electric Motor and Battery

You’ll need to install the electric motor and battery onto the bike frame. Here’s a step-by-step guide to help you get it done:

  1. Start by finding the ideal location for the battery on the bike frame. Make sure it’s secure and won’t interfere with any moving parts.

  2. Once you’ve found the right spot, use the provided brackets or straps to attach the battery to the frame. Double-check that it’s tightly secured to prevent any wobbling during rides.

  3. Next, locate the motor and connect it to the bike frame according to the manufacturer’s instructions. This may involve using mounting brackets or bolts.

  4. Now it’s time to wire the motor to the controller. Follow the wiring diagram that came with your electric bike kit, ensuring all connections are secure and properly insulated.

By following these steps, you’ll have your electric motor and battery installed securely onto your bike frame, ready to power your electric bike adventures.

Connecting the Wiring and Controls

Advertisement

Once the motor and battery are securely installed, the next step is to connect the wiring and controls.

This is a crucial step in setting up an electric bike as it ensures proper functionality and performance. Start by carefully following the manufacturer’s instructions for wiring connections. It’s important to double-check that all connections are secure and properly insulated to prevent any electrical hazards.

Additionally, take the time to learn about troubleshooting common issues that may arise with the wiring and controls. This knowledge will allow you to quickly identify and fix any potential problems.

To optimize battery performance, make sure to properly charge and maintain the battery according to the manufacturer’s recommendations. Regularly checking the battery’s voltage and ensuring it is within the recommended range will help extend its lifespan.

By paying attention to these details, you can ensure a smooth and successful setup of your electric bike.

Advertisement

Adjusting the Brakes and Gears

After securely installing the motor and battery, the next step is to adjust the brakes and gears for optimal performance.

First, adjust the brake pads by loosening the screw holding them in place and aligning them with the brake rims. Make sure they are evenly spaced and not rubbing against the rims.

Next, adjust the brake cables by loosening the cable clamp bolt and pulling the cable tight before re-tightening the bolt. This will ensure smooth and effective braking.

Moving on to the gears, start by adjusting the derailleur. Shift to the smallest gear and align the derailleur so that it is parallel to the smallest chainring.

Finally, adjust the seat position to ensure a comfortable and efficient riding experience.

Advertisement

Additionally, make sure to regularly maintain the electric motor by checking for loose connections, cleaning any debris, and lubricating the moving parts.

Testing and Troubleshooting

To ensure the electric bike is functioning properly, it’s important to test and troubleshoot any issues that may arise.

When troubleshooting common issues, start by checking the battery connections to ensure they are secure. Loose connections can cause the bike to not start or lose power. Additionally, inspect the battery for any visible damage or signs of wear. If the battery is damaged, it may need to be replaced.

To optimize battery performance, make sure to charge it fully before each ride and avoid leaving it in extreme temperatures. It’s also a good idea to periodically clean the battery contacts to ensure a good connection.

By testing and troubleshooting regularly, you can address any problems and keep your electric bike running smoothly.

Advertisement

Adding Accessories and Personalizing Your Electric Bike

You can easily personalize your electric bike by adding accessories that suit your preferences and needs.

When it comes to accessories selection, the options are plentiful. One of the most popular accessories is a bike rack, which allows you to carry items like groceries or camping gear with ease.

Another useful accessory is a phone mount, which enables you to securely attach your phone and use navigation apps while riding.

If you often ride at night, adding lights to your electric bike is a must for safety.

Additionally, you can personalize your bike with a comfortable saddle, ergonomic grips, or even a colorful basket for extra style.

Advertisement

Don’t forget to consider your specific needs and riding habits when choosing accessories to make the most of your electric bike experience.

Maintenance Tips for Long-Term Performance

One important maintenance tip for ensuring long-term performance is regularly cleaning and lubricating the moving parts of your e-bike. This includes the chain, gears, and brakes. A maintenance schedule can help you stay on top of these tasks.

Cleaning the chain and gears will prevent dirt and debris from building up, which can cause premature wear and tear. Lubricating these parts will reduce friction and ensure smooth operation.

Additionally, it is important to take proper care of the battery. Follow the manufacturer’s guidelines for charging and storing the battery. Avoid overcharging or letting the battery completely discharge. Regularly inspect the battery for any signs of damage or corrosion.

By following these maintenance tips, you can ensure that your electric bike performs optimally for years to come.

Advertisement

Enjoying Your Electric Bike and Exploring the Open Road!

Exploring the open road on your e-bike is a thrilling and enjoyable experience! There’s nothing quite like the feeling of the wind in your hair and the freedom to go wherever you please.

One of the greatest advantages of having an electric bike is the ability to explore scenic routes that may have been too challenging on a traditional bicycle. Whether it’s a leisurely ride through the countryside or a more challenging mountain trail, an e-bike allows you to effortlessly conquer any terrain.

Not only is it a fun way to enjoy the outdoors, but it also offers numerous benefits for fitness. Riding an electric bike can provide a low-impact cardiovascular workout, helping to improve your overall health and stamina.

So, hop on your e-bike, discover new roads, and embrace the joy of exploring the world around you!

Frequently Asked Questions

How long does it take to charge the electric bike battery?

The charging time of an electric bike battery depends on its capacity. Typically, it takes around 3-6 hours to fully charge a standard battery. However, larger capacity batteries may take longer to charge.

Advertisement

What is the maximum weight limit for an electric bike?

When it comes to electric bikes, the sky’s the limit, but the weight capacity isn’t. Electric bikes have weight restrictions, so it’s important to check the electric bike weight capacity before hitting the road.

Can I ride an electric bike in the rain?

Yes, you can ride an electric bike in the rain. However, there are some riding tips you should follow, such as reducing your speed and being cautious on wet surfaces. Additionally, regular maintenance tips include drying and lubricating your bike after riding in the rain.

How often should I check the tire pressure on my electric bike?

I recommend checking the tire pressure on my electric bike at least once a week. Maintaining optimal pressure ensures a smooth and safe ride. Use a tire pressure gauge to measure and adjust the pressure accordingly.

Are there any special regulations or laws I should be aware of when riding an electric bike?

When riding an electric bike, it is important to be aware of any special regulations or laws regarding electric bike safety and speed limits. Familiarize yourself with local laws to ensure a safe and legal ride.

Conclusion

So there you have it, my friends. Setting up an electric bike may seem like a daunting task, but with the right information and tools, it can be a rewarding experience.

Advertisement

Just like the feeling of gliding through the open road on your electric bike is as exhilarating as soaring through the sky like a bird.

Take your time, follow the steps carefully, and soon enough, you’ll be enjoying the convenience and thrill of your very own electric bike.

Happy riding!

Continue Reading

Electric Bike

How To Set Up The Electric Start On A Cateye Pocket Bike

Published

on

By

An image showcasing a close-up of a Cateye pocket bike's intricate electric start mechanism

Picture this situation: You have recently bought a new cateye pocket bike that comes with an electric start function. The anticipation is palpable as you imagine easily starting your bike with just the push of a button.

But how do you set up this electric start system? In this article, I will guide you through the step-by-step process of setting up the electric start on your cateye pocket bike.

From familiarizing yourself with the components to practicing safe start-up procedures, you’ll be ready to enjoy the convenience of an electric start in no time.

Key Takeaways

  • Regularly charging the battery prolongs its life and ensures efficient electric start.
  • Maintaining electrical connections is essential for electric start efficiency and prevents corrosion buildup.
  • Applying dielectric grease to cleaned connections prevents future corrosion and improves reliability.
  • Following safe start-up procedures and seeking professional assistance if needed ensures a smooth and safe electric start.

Familiarize Yourself with the Electric Start Components

Familiarize yourself with the electric start components by checking the user manual. This step is crucial for effective electric start troubleshooting, as it provides detailed information on the various components and their functions.

Advertisement

The electric start system consists of a battery, starter motor, ignition switch, and wiring harness. Understanding these components will enable you to diagnose and resolve any issues that may arise.

Electric start offers several benefits, including convenience and ease of use. Unlike kick-start systems, electric start eliminates the need for physical exertion, making it ideal for riders of all ages and physical abilities.

Now that you are familiar with the electric start components, it is time to move on to the next step: checking the battery and electrical connections.

Check the Battery and Electrical Connections

Firstly, make sure you check the battery and all electrical connections on your pocket bike. This is crucial for ensuring the electric start system functions properly. To do this, follow these steps:

  1. Checking battery voltage: Use a multimeter to measure the voltage of the pocket bike’s battery. A fully charged battery should read around 12.6 volts. If the voltage is significantly lower, it may indicate a weak or dead battery that needs to be replaced.

  2. Inspecting electrical wiring: Carefully examine all the wiring connections in the electric start system. Look for any loose or damaged wires, corrosion, or frayed insulation. Ensure that all connections are tight and secure.

  3. Testing electrical components: Test the various electrical components such as the starter motor, solenoid, and ignition switch. Check for any signs of damage or malfunction and replace any faulty components.

By checking the battery and inspecting the electrical wiring, you can identify and address any issues that may prevent the electric start from working properly. Once these steps are complete, you can proceed to ensure the kill switch is in the correct position to continue setting up the electric start system.

Advertisement

Ensure the Kill Switch is in the Correct Position

Make sure you’ve got the kill switch in the correct position to ensure everything is ready to go.

The kill switch is a crucial component in setting up the electric start on a Cateye pocket bike. To check the kill switch position, locate it on the handlebars and ensure it is in the ‘ON’ or ‘RUN’ position.

This allows the electrical current to flow properly and enables the electric start system to function. Understanding the electric start components is essential for troubleshooting any potential issues. Familiarize yourself with the battery, starter motor, starter relay, and ignition switch.

Advertisement

These components work together to initiate the engine start-up process. Once the kill switch is correctly positioned, you can proceed to the next step of turning on the ignition key, which will activate the electrical system and prepare the bike for starting.

Turn on the Ignition Key

To begin, make sure you turn the ignition key to activate the electrical system. This step is crucial for the successful operation of the electric start on your Cateye pocket bike. The ignition key serves as the main switch that powers up the entire electrical circuit, allowing the electric start components to function properly.

To help you visualize this process, refer to the table below:

Ignition Key Position Function
Off Disables the electrical system
On Powers up the electrical system
Start Activates the electric start button for engine ignition

By turning the ignition key to the "On" position, you ensure that the necessary electrical power is available for the electric start system to work. Once the key is turned, you can proceed to the next step of pressing the electric start button to initiate the engine ignition.

Press the Electric Start Button

Advertisement

After turning the ignition key, simply press the electric start button to initiate the engine ignition.

The electric start button is a convenient feature that provides several benefits. Firstly, it eliminates the need for manual kick-starting, saving you time and effort. Additionally, it ensures a smooth and reliable start every time, especially in colder weather conditions.

If you encounter any issues with the electric start, troubleshooting can help identify and resolve the problem. Common issues may include a dead battery, faulty wiring connections, or a malfunctioning starter motor. Troubleshooting these problems can be done by checking the battery charge, inspecting the wiring for any loose connections, or testing the starter motor with a multimeter.

By addressing these issues, you can ensure that your electric start is functioning properly, allowing for easy and hassle-free engine ignition.

Advertisement

Moving onto troubleshooting common issues…

Troubleshooting Common Issues

If you encounter any problems, troubleshooting can help identify and resolve the issues with the electric start on your bike. When troubleshooting battery issues, first check if the battery is properly connected and fully charged. Use a multimeter to measure the battery voltage and ensure it meets the recommended level. If the battery is in good condition, inspect the ignition switch for any problems. Make sure the switch is securely connected and functioning correctly. If necessary, replace the ignition switch with a new one. To assist you in troubleshooting, refer to the following table:

Issue Possible Cause Solution
Electric start not working Battery not connected or not charged Connect and charge the battery
Electric start not working Faulty ignition switch Replace the ignition switch
Electric start not working Wiring problem Inspect and repair the wiring

By troubleshooting these common issues, you can get your electric start system up and running smoothly. In the next section, we will discuss how to maintain the electric start system.

Maintain the Electric Start System

To maintain the electric start system on my Cateye pocket bike, I need to regularly charge the battery. This ensures that the battery is always at optimal levels and ready to provide power to the electric start system.

Additionally, I must keep the electrical connections clean to ensure proper conductivity and prevent any potential issues with starting the bike. Regularly inspecting and cleaning the connections will help maintain the efficiency and reliability of the electric start system.

Advertisement

Regularly Charge the Battery

You should regularly charge the battery for the electric start on a Cateye pocket bike. Battery maintenance is crucial for prolonging battery life and ensuring that the electric start system functions properly.

To keep the battery in optimal condition, follow these steps:

  • Use a smart charger: Invest in a smart charger specifically designed for motorcycle batteries. This type of charger will automatically adjust the charging rate and prevent overcharging, which can damage the battery.

  • Charge the battery after each use: After riding your pocket bike, make it a habit to recharge the battery immediately. This will help maintain its charge and prevent the battery from draining completely.

By regularly charging the battery, you can prolong its life and ensure that the electric start on your Cateye pocket bike works efficiently.

Additionally, keeping the electrical connections clean is another important aspect of maintaining the electric start system.

Keep the Electrical Connections Clean

Regularly cleaning the electrical connections is essential for maintaining the efficiency of the electric start system on a Cateye pocket bike.

Advertisement

To ensure optimal performance, it is crucial to use proper cleaning techniques and prevent corrosion buildup.

Start by disconnecting the battery and inspecting the connections for any signs of dirt, grime, or corrosion.

Use a wire brush or electrical contact cleaner to gently remove any contaminants from the terminals, wires, and connectors.

Be careful not to damage the connections while cleaning.

After cleaning, apply a thin layer of dielectric grease to the connections to prevent future corrosion.

Advertisement

This will help maintain a strong and reliable electrical connection, ensuring that the electric start system functions smoothly.

With clean and corrosion-free connections, you can now proceed to the next section about practicing safe start-up procedures.

Practice Safe Start-up Procedures

First, make sure to follow safe start-up procedures when setting up the electric start on your Cateye pocket bike. The importance of safety precautions cannot be overstated as not following proper start-up procedures can lead to potential risks.

To ensure a safe start-up, follow these steps:

  1. Before starting the bike, make sure the area around you is clear of any obstacles or people.
  2. Double-check that the bike is in neutral and the ignition switch is turned off.
  3. Hold the front brake lever firmly while pressing the starter button to activate the electric start.

By following these procedures, you can minimize the chances of accidents or injuries during the start-up process. Remember, safety should always be your top priority. If you are unsure about any step or encounter any difficulties, it’s advisable to seek professional assistance.

With proper precautions and guidance, you can enjoy a safe and smooth start-up of your Cateye pocket bike.

Advertisement

Seek Professional Assistance if Needed

If assistance is required, it is advisable to seek professional help when dealing with the start-up process of your Cateye pocket bike. A professional mechanic or technician will have the expertise and knowledge to handle any issues that may arise during the set-up of the electric start.

They can provide guidance on troubleshooting techniques to identify and resolve any problems that may occur. They will also ensure that all the necessary connections and components are properly installed, reducing the risk of any potential damage or malfunctions.

By relying on professional assistance, you can have peace of mind knowing that your Cateye pocket bike’s electric start is set up correctly and ready for use. Once everything is in order, you can confidently enjoy your electric start Cateye pocket bike!

Enjoy Your Electric Start Cateye Pocket Bike!

Go ahead and hop on your new Cateye pocket bike with electric start and enjoy the thrill of the ride! With the convenience of electric start, you can quickly and effortlessly ignite your bike’s engine, eliminating the hassle of kick-starting.

Here are some benefits of having an electric start on your Cateye pocket bike:

Advertisement
  • Instant ignition: With just a push of a button, your bike’s engine will roar to life, saving you precious time and effort.

  • Smooth operation: Electric start ensures a seamless and consistent engine start, providing a smooth and reliable ride every time.

  • Easy troubleshooting: If you encounter any starting issues, troubleshooting is simplified with electric start. Check the battery, connections, and starter motor for any faults.

  • Enhanced safety: Electric start reduces the risk of injury that may occur during kick-starting, making it a safer option for riders.

  • User-friendly: Electric start is user-friendly, especially for beginners or riders who may have physical limitations.

So, get ready for an exhilarating ride on your Cateye pocket bike with electric start. Remember to follow the troubleshooting tips if you encounter any starting issues, and enjoy the convenience and ease that electric start brings to your biking experience.

Frequently Asked Questions

What are the different components of the electric start system on a cateye pocket bike?

The electric start system on a cateye pocket bike consists of several components. These include the starter motor, starter relay, ignition switch, battery, and wiring harness. Understanding these components is crucial for troubleshooting and replacing the system.

How can I check if the battery and electrical connections are functioning properly?

To troubleshoot the electric start system on a cateye pocket bike, start by testing the battery and electrical connections. Check the battery’s voltage with a multimeter and ensure the connections are secure and free of corrosion.

What is the correct position for the kill switch on a cateye pocket bike?

The correct positioning of the kill switch on a cateye pocket bike is crucial for troubleshooting. It acts as a gatekeeper, ensuring safety and preventing any potential mishaps. Its precise placement guarantees quick access and control in emergency situations.

How do I turn on the ignition key on a cateye pocket bike?

To turn on the ignition key on a cateye pocket bike, first ensure that the kill switch is in the correct position. If the ignition still doesn’t work, troubleshoot ignition issues by following these tips for maintaining the electrical system on a cateye pocket bike.

Advertisement

What should I do if the electric start button on my cateye pocket bike is not working?

If the electric start button on my Cateye pocket bike is not working, I can try some troubleshooting tips. First, check the battery and connections. If they are fine, I may need to replace the electric start button.

Conclusion

In conclusion, setting up the electric start on a Cateye pocket bike is a straightforward process. It can be easily accomplished by following the steps outlined in this article.

First, familiarize yourself with the components. Understand how the ignition key and electric start button work together to start the bike. This knowledge will help you troubleshoot any issues that may arise.

Next, check the battery and electrical connections. Ensure that the battery is fully charged and securely connected. Loose connections can prevent the electric start from functioning properly.

Also, make sure the kill switch is in the correct position. The kill switch should be in the "on" position for the electric start to work. Double-check this before attempting to start the bike.

Advertisement

Once you have completed these steps, you can confidently turn on the ignition key and press the electric start button. The bike should start smoothly, thanks to your preparation and attention to detail.

Remember to maintain the electric start system regularly. Keep the battery charged and the connections clean and tight. This will help prevent any future issues with the electric start.

Lastly, always practice safe start-up procedures. Wear appropriate protective gear and ensure that the bike is in a safe and stable position before starting it.

With these steps in place, starting your Cateye pocket bike will be as smooth as gliding on freshly polished chrome.

Advertisement

Continue Reading
Advertisement

Affiliate disclaimer

As an affiliate, we may earn a commission from qualifying purchases. We get commissions for purchases made through links on this website from Amazon and other third parties.

About us

We are a passionate team driven by the belief that cycling is a fantastic and accessible way to stay active while enjoying the beauty of the outdoors. Our mission is to share our love for cycling with as many people as possible. We provide a welcoming environment for individuals of all ages, abilities, and backgrounds to come together and ride bikes. With Ralf’s visionary leadership, Zane’s expertise in cycling adventures, and Olivia’s dedication to community building, we strive to create a vibrant space where everyone can experience the joy of cycling. Through group rides, workshops, and inclusive events, we inspire and empower individuals to embrace an active lifestyle. Join us in our quest to pedal together, embrace the joy of cycling, and foster connections that last a lifetime.

Advertisement

Trending