
Are you ready to hit the road on your electric bike, but suddenly find yourself with a flat tire? Don’t worry, I’ve got you covered.
In this detailed guide, I’ll walk you through the step-by-step process of changing your electric bike tire. From gathering the necessary tools to adjusting the brakes, I’ll provide you with all the technical knowledge you need to get back on the road in no time.
So, let’s dive in and learn how to change a tire on an electric bike!
Key Takeaways
- Proper tire maintenance is important for the lifespan of the tires and for a safer ride.
- Reinstalling the wheel correctly involves realigning brakes, checking wheel alignment, and tightening axle nuts.
- Brake adjustment is essential for properly aligning brake pads, adjusting brake cable tension, and testing brakes for correct operation.
- Tire and brake testing should include testing suspension, checking tire pressure, inspecting tire tread, and testing brake engagement.

ZTZ 700C Road Bike Wheelset, Ultralight Aluminum Alloy 30mm Road Bike Wheel, 20H Front/24H Rear High-Strength Bike Rims, 700c Clincher, Rim Brake, Compatible 8-12 Speed Cassettes (Front+Rear Wheels)
Featherweight and Strong: This 700c road bike wheelset is crafted from high-strength aluminum alloy with 20H front/24H rear...
As an affiliate, we earn on qualifying purchases.
Gather the Necessary Tools
You’ll need to gather the necessary tools to change the tire on your electric bike.
First, let’s talk about choosing the right tire. It’s important to select a tire that matches the size and type recommended by the manufacturer. This ensures proper fit and performance. Additionally, consider the terrain you ride on most frequently. If you encounter rough surfaces, opt for a tire with good traction.
Next, let’s discuss safety precautions during the tire change. Before starting, make sure to turn off the electric bike and engage the parking brake. This prevents any accidental movement and potential injury. Also, wear protective gloves and eyewear to shield yourself from any debris or sharp objects.
Now that we have the tools and safety measures in place, let’s move on to turning off the electric bike.

SUPERTEAM Carbon Wheelset 700C Tubeless Gravel Wheelset Disc Braking 45TU-28 (Rim Depth 45MM, Center Lock Thru AXLE 12 * 100-12 * 142)
Material: Toray T700c Full Carbon Fiber
As an affiliate, we earn on qualifying purchases.
Turn off the Electric Bike
First, make sure to power down your e-bike. This is an important safety precaution to prevent any accidental engagement of the motor while you’re working on the tire.
Locate the power button or switch on your electric bike and turn it off. Once the bike is powered down, it is also a good idea to properly store it in a secure position, such as on a bike stand or against a wall. This will ensure stability and reduce the risk of the bike tipping over while you’re changing the tire.
Now that the bike is off and safely stored, we can move on to the next step of releasing the brakes. This will allow us to remove the wheel and replace the tire.

700c Clincher Carbon Wheelset Disc Brake 50mm Depth 28mm Width Quality Carbon ud Finish Rim Road Cycling Tubeless Compatible Clincher
1:Customers who purchase this product will receive a 1000-day guarantee. We will provide the necessary repair support, excluding...
As an affiliate, we earn on qualifying purchases.
Release the Brakes
To release the brakes, simply squeeze the brake lever and slide the brake pads away from the tire.
Proper maintenance for electric bike brakes is crucial to ensure optimal performance and safety. Regularly inspect the brake pads for wear and replace them if necessary.
Understanding the different types of electric bike tires is also important. There are two main types: tube tires and tubeless tires. Tube tires require an inner tube to hold the air, while tubeless tires have an airtight seal on the rim, eliminating the need for an inner tube.
Before moving on to the next step, it’s important to note that releasing the brakes is essential to prevent any potential accidents when loosening the axle nuts.
Now, let’s move on to loosening the axle nuts.

SUPERTEAM Carbon Disc Brake Road Bike Wheelset 28mm Tubeless Wheels 50mm Rim Depth (FIT for SHIMAN0 8-12 Speed, Thru-Axle Type 12 * 100/12 * 142mm)
Material:Carbon Wheels are Light but the Strength is Very Strong, and the Impact Absorption Performance is Good,It Can...
As an affiliate, we earn on qualifying purchases.
Loosen the Axle Nuts
Once you’ve released the brakes, start by loosening the axle nuts. To properly loosen the axle nuts, you’ll need a wrench that fits the size of the nuts. Place the wrench on the nuts and turn counterclockwise to loosen them. It’s important to use steady pressure and avoid applying too much force, as this can strip the nuts or damage the axle. Additionally, make sure to hold the wheel steady with your other hand to prevent it from spinning while you loosen the nuts.
When loosening the axle nuts, there are some common mistakes to avoid. One is using the wrong size wrench, which can lead to stripped nuts or a damaged axle. Another mistake is overtightening the nuts, as this can make it difficult to remove the wheel later on. Lastly, be cautious not to overtighten the nuts when putting the wheel back on, as this can cause issues with the bike’s performance.
Now that the axle nuts are loosened, it’s time to move on to the next step and remove the wheel from the bike.
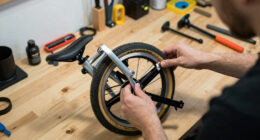
Remove the Wheel from the Bike
Now that the axle nuts are loosened, it’s time to take off the wheel from the bike. Here are three important steps to follow when removing the wheel:
-
Lift the bike: Carefully lift the bike off the ground, ensuring stability and balance. This will prevent any damage to the bike or the wheel during the removal process.
-
Remove the quick-release lever: If your electric bike has a quick-release lever, simply flip it open to release the wheel from the bike frame. If not, use a wrench to loosen the nuts holding the wheel in place.
-
Slide the wheel out: Slowly slide the wheel out of the bike frame, making sure to guide the chain and derailleur out of the way. Be cautious not to damage any components while removing the wheel.
By following these steps, you can successfully remove the wheel from your electric bike.
Next, we will move on to deflating the tire.
Deflate the Tire
First, make sure to release the air from the tire. To deflate the tire, simply press on the valve stem with a valve removal tool or a small screwdriver. Once the valve is depressed, the air will start to escape. While deflating the tire, it is important to check for any punctures or damage that may have caused the flat. After the tire is completely deflated, it is time to clean the rim surface. Use a clean cloth or a brush to remove any dirt or debris from the rim. This will ensure a proper seal when reinstalling the tire. Now that the tire is deflated and the rim is clean, we can move on to the next step of removing the tire from the rim.
Remove the Tire from the Rim
To remove the tire from the rim, you’ll need to use a tire lever. Carefully slide it between the tire and the rim, working your way around the circumference to loosen the tire. Once the tire is loose, you can easily pull it off the rim.
This step is necessary if you need to replace the inner tube or choose the right tire size for your electric bike. When replacing the inner tube, make sure to select a tube that matches the size of your tire. Choosing the right tire size is important to ensure a proper fit and optimal performance.
After removing the tire from the rim, you can proceed to inspect the inner tube for any damage or punctures.
Inspect the Inner Tube
Once you’ve removed the tire from the rim, take a moment to inspect the inner tube for any signs of damage or punctures. This step is crucial in determining whether the tube can be patched or if it needs to be replaced altogether. Here are three things to look out for during the inspection:
- Examine the entire surface of the tube carefully, feeling for any noticeable bumps, cuts, or holes.
- Inflate the tube slightly to help identify any leaks. Submerge it in water and watch for bubbles, indicating a puncture.
- Check the valve stem for any cracks or damage, as this can also lead to air leakage.
Knowing how to patch a bike inner tube can save you time and money. However, if the tube is severely damaged or has multiple punctures, it’s best to replace it. Preventing flat tires on an electric bike can be achieved by using puncture-resistant tires or adding tire liners.
Now, let’s move on to the next step: installing the new tire onto the rim.
Install the New Tire onto the Rim
Make sure you position the new tire onto the rim evenly and securely. To properly install the new tire onto the rim of your electric bike, follow these steps:
| Step | Description |
|---|---|
| Step 1 | Place one side of the tire onto the rim, starting from the valve stem. |
| Step 2 | Use your hands to work the other side of the tire onto the rim, moving away from the valve stem. |
| Step 3 | Ensure that the tire bead is seated properly all around the rim. |
| Step 4 | Use tire levers if necessary to assist in seating the tire onto the rim. |
| Step 5 | Check that the tire is evenly and securely positioned on the rim before proceeding. |
By following these steps, you will successfully install the new tire onto the rim of your electric bike. Once the tire is properly installed, you can proceed to the next section on reinflating the tire.
Reinflate the Tire
Now, it’s time to refill the air in your tire. Follow these four steps to reinflate the tire and ensure it is properly pressurized:
-
Locate the valve stem on the inner tube of the tire.
-
Remove the valve cap and attach the nozzle of the air pump securely to the valve stem.
-
Start pumping air into the tire slowly, periodically checking the tire pressure using a gauge. Be cautious not to overinflate the tire, as it could lead to damage or a blowout.
-
Once the tire reaches the recommended pressure level, usually indicated on the side of the tire, remove the pump nozzle and quickly replace the valve cap.
With the tire reinflated and at the correct pressure, you are now ready to reinstall the wheel onto the bike, ensuring a safe and smooth ride.
Reinstall the Wheel onto the Bike
After successfully reinflating the tire, it’s time to reinstall the wheel onto the bike.
First, realign the brakes by squeezing the brake lever and sliding the wheel into the brake pads. Ensure that the wheel sits evenly between the pads without rubbing against them.
Next, check the wheel alignment by spinning it and observing if it wobbles or rubs against the brake pads. If any issues are noticed, adjust the wheel’s position until it spins freely without any interference.
Once the brakes and wheel alignment are properly set, it’s time to move on to the next step.
Now, we can tighten the axle nuts to secure the wheel in place. This will ensure that the wheel remains stable and doesn’t come loose during your ride.
Tighten the Axle Nuts
To secure the wheel in place, tighten the axle nuts.
Proper maintenance of axle nuts is crucial for the overall safety and performance of your electric bike. It is important to regularly check the tightness of these nuts to prevent any potential accidents or damage.
Begin by using a wrench to tighten the nuts in a clockwise direction. Make sure they are tightened securely, but be cautious not to overtighten them as this can cause damage to the axle or bearings.
Once the nuts are tightened, give the wheel a gentle spin to ensure it rotates smoothly and without any wobbling. Regular tire checks and proper maintenance of axle nuts are essential for maintaining the longevity and optimal functioning of your electric bike.
Now, let’s move on to the next section and learn how to adjust the brakes for a safer ride.
Adjust the Brakes
Make sure you adjust your brakes properly for a safer ride. Properly aligning the brake pads and adjusting the tension on the brake cables are essential steps in ensuring that your electric bike’s brakes are functioning optimally. To properly align the brake pads, start by loosening the brake pad fixing bolt. Next, position the brake pad so that it contacts the rim evenly when the brake lever is pulled. Finally, tighten the fixing bolt to secure the brake pad in place. Adjusting the tension on the brake cables involves loosening the cable fixing bolt and pulling the cable tighter or releasing tension as needed. Once you have completed these steps, you can proceed to the next section about testing the tire and brakes to ensure they are working correctly.
Test the Tire and Brakes
You should now check the tire and brakes to ensure they are working correctly. Here are the steps you need to follow:
-
Test the suspension: Push down on the front and rear of the bike to check if the suspension is working properly. It should compress and rebound smoothly without any strange noises.
-
Check the tire pressure: Use a tire pressure gauge to measure the pressure of both tires. The recommended pressure should be specified in the owner’s manual. Adjust the pressure if necessary.
-
Inspect the tire tread: Look for any signs of wear or damage on the tire tread. Make sure there are no punctures or cuts that could cause a flat tire.
-
Test the brakes: Squeeze the brake levers to check if they engage smoothly and firmly. Ensure that both the front and rear brakes are working properly.
-
Listen for any unusual noises: While riding the bike, listen for any strange noises coming from the tires or brakes.
Now that you have tested the tire and brakes, you can confidently get back on the road.
Get Back on the Road
Once the tire and brakes have been tested, it’s time to hit the road again. Proper tire maintenance is crucial for electric bikes to ensure optimal performance and safety. Neglecting tire maintenance can lead to decreased traction, increased rolling resistance, and potential accidents. Changing a tire on an electric bike can present some challenges due to the added weight of the motor and battery. It’s important to have the necessary tools, such as tire levers, a pump, and a spare inner tube or patch kit. Additionally, be mindful of the tire pressure recommended by the manufacturer and check it regularly. This will help to prolong the lifespan of the tire and provide a smooth and comfortable ride. Following these steps and maintaining your bike’s tires will contribute to a safer and more enjoyable electric biking experience.
| Importance of proper tire maintenance for electric bikes | Common challenges when changing a tire on an electric bike |
|---|---|
| – Ensures optimal performance and safety | – Added weight of the motor and battery |
| – Decreased traction and increased rolling resistance | – Having the necessary tools |
| – Potential accidents | – Checking tire pressure regularly |
| – Prolongs tire lifespan and provides a comfortable ride |
Frequently Asked Questions
How do I know if my electric bike tire needs to be changed?
I can tell if my electric bike tire needs to be changed by looking for signs of wear such as tread depth, cracks, and bulges. It’s important to replace the tire when these signs are present to ensure safe and efficient riding.
Can I use the same tools to change the tire on an electric bike as I would on a regular bike?
Yes, you can use the same tools to change the tire on an electric bike as you would on a regular bike. However, it’s important to note that electric bike tires may require higher pressure due to their heavier weight and increased power.
Is it possible to change the tire on an electric bike without turning off the power?
No, it is not safe or recommended to change the tire on an electric bike without turning off the power. Doing so while riding poses serious safety risks. Always prioritize safety precautions when performing any maintenance on your electric bike.
How often should I inspect my electric bike’s inner tube?
I once neglected to inspect my electric bike’s inner tube, only to have it burst during a ride. Now, I religiously inspect it every month. Look for signs of damage such as cracks, bulges, or punctures.
Are there any special considerations or precautions to take when reinstalling the wheel onto an electric bike?
When reinstalling the wheel on an electric bike, there are a few special considerations. Firstly, ensure you have the necessary special tools. Secondly, take safety precautions such as wearing gloves and using a torque wrench to tighten the bolts correctly.
Conclusion
So there you have it – a step-by-step guide on how to change a tire on an electric bike. With the right tools and a little bit of know-how, you can tackle this task with ease.
Just remember to:
- Turn off the bike
- Release the brakes
- Loosen the axle nuts
- Remove the wheel
- Tighten the nuts
- Adjust the brakes
- Test everything before hitting the road again.
Now you’re ready to conquer any flat tire that comes your way, like a pro cyclist on a mission.
Happy riding!