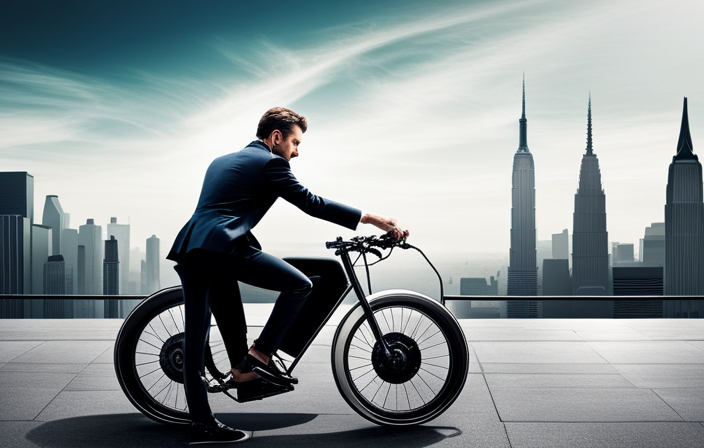
Picture the excitement of smoothly gliding along the road on your reliable road bike, powered by electricity. By having the proper knowledge and a few key tools, you can convert your beloved bike into a stylish, effective electric vehicle.
In this article, I will guide you through the step-by-step process of turning your road bike into an electric bike. Get ready to experience the joy of an upgraded ride like never before.
Key Takeaways
- Assess the compatibility of the road bike for conversion, including frame material, fork strength, brakes, and wheelset strength.
- Choose the right conversion kit, considering factors such as motor type (hub or mid-drive), battery capacity and range, controller compatibility, motor power and efficiency, and cost.
- Consider battery capacity and range by selecting a lithium-ion battery with suitable voltage, Ah rating, and Wh capacity, while also considering the availability of charging infrastructure.
- Gather the necessary tools and components for the conversion process, including wrenches, screwdrivers, Allen keys, torque wrench, cable cutters, spoke wrench, and a sturdy workbench or stand. Follow manufacturer’s instructions for proper installation and ensure secure attachment of the motor, battery, and other components. Test the electric bike for functionality and performance before enjoying the benefits of electric assist cycling.

Under Armour Squeeze Water Bottles, 32 oz Water Bottles, Sideline Sports Water Bottle with Quick-Shot Lid, Quick & Easy Hydration, Gym Water Bottles, Squeeze Bottle, 1 32oz Bottle
- Easy Hydration: Quick-shot lid and one-way valve
- On-the-Go Use: One-hand operation for active hydration
- Measurement Markings: Ounces and milliliters for tracking
As an affiliate, we earn on qualifying purchases.
Assess Your Road Bike’s Compatibility
You’ll need to assess if your road bike is compatible for conversion into an electric bike. Assessing compatibility involves evaluating the frame, components, and overall design of your road bike.
First, check if your bike has a steel or aluminum frame, as these materials are more suitable for the additional weight and forces of an electric motor.
Next, consider the fork, brakes, and wheelset, ensuring they are strong enough to handle the increased speed and torque.
Additionally, evaluate the drivetrain and gearing system to ensure they can accommodate the motor and battery.
Lastly, assess if there is enough space on the frame to mount the battery and motor.
Once you have assessed compatibility and identified any necessary modifications, you can move on to choosing the right conversion kit to transform your road bike into an electric bike.
Choose the Right Conversion Kit
When choosing a conversion kit for turning a road bike into an electric bike, there are three key points to consider.
First, decide whether to go for a hub motor or a mid-drive motor, depending on your specific needs and preferences.
Second, carefully consider the battery capacity and range, as this will determine how far and how long you can ride before needing to recharge.
Lastly, make sure to look for a compatible controller and display that will allow you to easily control and monitor the electric components of your bike.
Select a hub motor or mid-drive motor
To select a hub motor or mid-drive motor, you should first consider the terrain you’ll be riding on. This decision will impact the motor options available to you and the installation process. Here are some factors to consider:
- Motor power: Determine the power output you need based on the terrain’s steepness and your desired speed.
- Efficiency: Evaluate the motor’s efficiency to ensure it maximizes battery life and provides a smooth riding experience.
- Weight distribution: Consider how the motor’s location affects the bike’s balance and handling.
- Maintenance: Assess the maintenance requirements of each motor type to ensure you can properly care for it.
- Cost: Compare the prices of hub motors and mid-drive motors to find the best option for your budget.
After selecting the appropriate motor, it’s crucial to consider battery capacity and range to ensure your electric bike meets your desired riding needs.
Consider battery capacity and range
Make sure you consider the battery capacity and range of your electric bike to ensure it meets your desired riding needs. Battery technology has advanced significantly in recent years, offering a wide range of options for electric bike conversions.
Lithium-ion batteries are commonly used due to their high energy density and long lifespan. When choosing a battery, consider factors such as voltage, ampere-hour (Ah) rating, and watt-hours (Wh) capacity. A higher capacity battery will provide a longer range, but it also adds weight to your bike.
Additionally, consider the availability of charging infrastructure in your area. Look for charging stations or outlets that can accommodate your electric bike’s battery charger.
In the next section about ‘look for a compatible controller and display,’ we will explore the next steps in converting your road bike into an electric bike.
Look for a compatible controller and display
Finding a controller and display that are compatible with your electric bike conversion is essential. When choosing a controller, it is important to find one that is compatible with the voltage and power requirements of your battery. Look for a controller that offers features such as regenerative braking and programmable settings.
Additionally, make sure the display is compatible with the controller and can provide you with important information such as battery level, speed, and distance traveled. Troubleshooting common issues with the controller and display, such as connectivity problems or error messages, is crucial to ensure smooth operation of your electric bike.
Once you have found the right controller and display, you can move on to the next step of gathering the necessary tools and components for your conversion process.
Gather the Necessary Tools and Components
Start by gathering all the necessary tools and components to turn your road bike into an electric bike. First, assess the compatibility of your bike with an electric conversion kit. Look for a conversion kit that is suitable for your road bike’s frame and wheel size. You will need a conversion kit that includes a motor, battery, controller, and display. Make sure to choose a kit that fits your specific needs and preferences.
To complete the conversion, you will need a range of tools such as wrenches, screwdrivers, and Allen keys. Additionally, you may need a torque wrench, cable cutters, and a spoke wrench. It is important to have a sturdy workbench or stand to securely hold your bike during the conversion process.
With all the necessary tools and components at hand, you can now move on to the next step of the conversion process, which involves removing and replacing the front wheel or bottom bracket.
Remove and Replace the Front Wheel or Bottom Bracket
After gathering all the necessary tools and components, it’s time to start the process of transforming my road bike into an electric bike. The first step in this process is to remove and replace either the front wheel or the bottom bracket, depending on the type of electric conversion kit I am using.
To replace the front wheel, I will loosen the quick-release lever or unscrew the axle nuts to remove the wheel. Then, I will attach the electric motor wheel by aligning the motor with the fork dropouts and securing it in place.
Alternatively, if I decide to upgrade the bottom bracket, I will start by removing the crankset and the bottom bracket itself. Then, I will install the new bottom bracket that is compatible with the electric motor kit.
Now that I have successfully replaced the front wheel or upgraded the bottom bracket, I can move on to the next step of installing the motor and battery, which will provide the power for my electric bike.
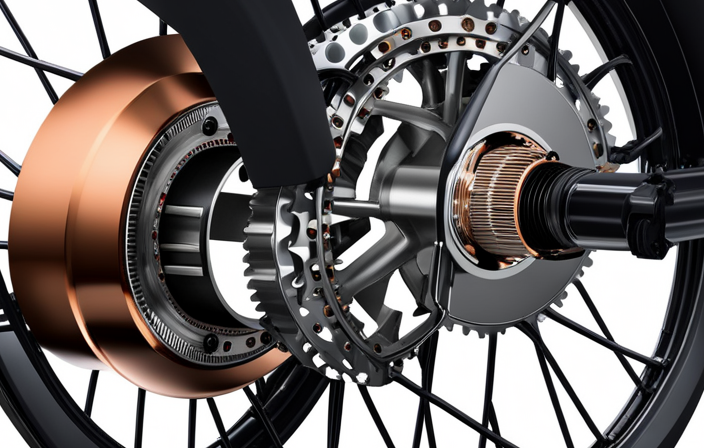
Install the Motor and Battery
To install the motor on the front wheel or bottom bracket, first, I’ll need to remove the existing wheel or bottom bracket. Then, I’ll attach the motor in its place, making sure it’s securely fastened and aligned properly.
Next, I’ll connect the necessary wires and cables to ensure the motor is properly integrated with the bike’s electrical system.
To attach the battery, I’ll need to choose between mounting it on the frame or the rear rack. I’ll carefully select a suitable location that provides both stability and accessibility. Once the location is determined, I’ll securely attach the battery using the appropriate mounting hardware.
Finally, I’ll connect the battery to the motor, following the manufacturer’s instructions to ensure a proper electrical connection.
Mount the motor on the front wheel or bottom bracket
First, you’ll want to decide whether to mount the motor on the front wheel or the bottom bracket.
There are different mounting options available, each with their own advantages and disadvantages.
Mounting the motor on the front wheel is a popular choice as it provides a simple and straightforward installation process. It also allows for easy maintenance and repair of the motor. However, this option may affect the balance and handling of the bike, especially at higher speeds.
On the other hand, mounting the motor on the bottom bracket can provide a more natural and balanced feel while riding. It also allows for better weight distribution and improved traction. However, this option may require more complex installation and may limit the type of bottom bracket that can be used.
Once you have decided on the mounting option, you can move on to attaching the battery to the frame or rear rack, ensuring a secure and stable connection.
Attach the battery to the frame or rear rack
To continue the process of transforming a road bike into an electric one, let’s move on to the current subtopic: attaching the battery to the frame or rear rack.
This step is crucial as it determines the power source for your electric bike. When attaching the battery, you have two options: you can either secure it to the frame or mount it onto a rear rack.
Each method has its pros and cons, so choose the one that suits your preferences and bike design. Attaching the battery to the frame provides better weight distribution and stability, while mounting it onto a rear rack offers convenience and easier access for charging.
Whichever option you choose, ensure that the battery is securely fastened to prevent any damage or loss while riding.
Now, let’s move on to the next step: connecting the wiring and controller, which will bring your electric bike to life.
Connect the Wiring and Controller
To connect the motor to the controller, begin by identifying the corresponding wiring connections on both components. Make sure to match the correct wires according to their color codes or labels. Securely fasten the connections using electrical tape or wire connectors to ensure a stable and reliable connection.
Once the motor and controller are connected, attach the controller to either the handlebars or frame of the bike. This can be done using mounting brackets or zip ties, ensuring that the controller is securely positioned and easily accessible for operation.
Connect the motor to the controller
Next, connect the motor to the controller. This step is crucial in turning your road bike into an electric bike. Begin by locating the motor wires and the corresponding connectors on the controller. Match the wires by color and connect them securely, ensuring a tight fit. It’s important to follow the manufacturer’s instructions for your specific motor and controller combination to ensure proper connections. Once connected, double-check all the connections to ensure they are secure and tight.
Troubleshooting common motor and controller issues is essential for a successful conversion. If you encounter any problems, such as the motor not running or the controller not responding, check the connections first. Ensure that all the wires are properly connected and that there are no loose or damaged wires. Additionally, refer to the troubleshooting guide provided by the manufacturer for specific issues and solutions.
Now, with the motor and controller properly connected, we can move on to the next step of attaching the controller to the handlebars or frame.
Attach the controller to the handlebars or frame
After successfully connecting the motor to the controller, it is now time to attach the controller to either the handlebars or the frame of your road bike.
There are various mounting options available depending on your preference and the design of your bike. One popular option is to attach the controller to the handlebars using a clamp. This allows for easy access and control while riding.
Another option is to mount the controller to the frame using zip ties or Velcro straps, ensuring it is securely fastened and protected from any potential damage.
Whichever method you choose, make sure the controller is positioned in a convenient and accessible location.
Once the controller is securely attached, we can move on to the next step: testing and adjusting the electric bike conversion.
Test and Adjust the Electric Bike Conversion
Now you’ll need to test and adjust your electric bike conversion. To ensure that your conversion is working properly, there are several testing methods you can use. First, check that all the electrical connections are secure and properly insulated. Next, turn on the electric system and test the throttle, brakes, and display to make sure they are all functioning correctly. Additionally, take your bike for a test ride to assess its performance and make any necessary adjustments. While testing, keep an eye out for any issues such as strange noises, excessive heat, or a lack of power. If you encounter any problems, refer to the troubleshooting tips in your conversion kit manual. Once you are satisfied with the performance of your electric bike, you can move on to the next section to ensure safety and compliance.
Ensure Safety and Compliance
To ensure your safety and comply with regulations, it is important to take the necessary steps to ensure that your electric bike conversion meets all the required standards. Here are some key considerations to keep in mind:
-
Safety regulations: Familiarize yourself with the safety regulations specific to electric bikes in your region. This may include requirements for lights, reflectors, and audible signaling devices.
-
Legal requirements: Check your local laws regarding electric bikes to ensure you are in compliance. This may include restrictions on speed, power output, and where you can ride.
-
Component compatibility: Ensure that all the components of your electric bike conversion are compatible and properly installed. This includes the motor, battery, and wiring.
By following these safety regulations and legal requirements, you can enjoy your upgraded electric road bike with peace of mind, knowing that you are riding safely and legally.
Enjoy Your Upgraded Electric Road Bike
I’m excited to discuss the benefits of electric assist cycling and how it can enhance your experience on your upgraded electric road bike.
With electric assist, you can easily conquer longer distances and enjoy tackling challenging terrains that were previously out of reach.
The added power and support from the electric motor allows for a more enjoyable and efficient ride, opening up a whole new world of cycling possibilities.
Experience the benefits of electric assist cycling
By adding an electric assist to your road bike, you can instantly experience the benefits of easier cycling. The right conversion kit can enhance your riding experience in several ways:
-
Increased speed: With electric assistance, you can effortlessly reach higher speeds, allowing you to cover more ground in less time.
-
Reduced effort: The electric motor provides assistance when pedaling, making it easier to tackle uphill climbs or ride against strong headwinds.
-
Extended range: Electric bikes have a longer range compared to traditional bikes, enabling you to explore new routes and go on longer rides without worrying about running out of energy.
-
Versatility: Electric conversion kits come in various types and power levels, allowing you to choose the one that best suits your needs and preferences.
With the benefits of electric assist cycling in mind, let’s explore how you can further enhance your riding experience by tackling challenging terrains and venturing into longer distances.
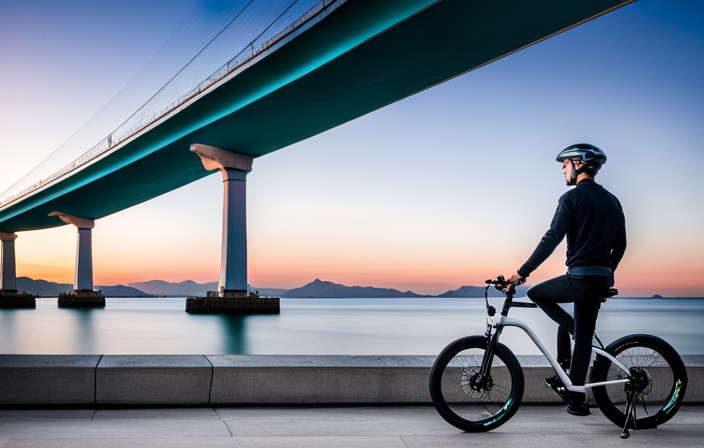
Explore longer distances and tackle challenging terrains
Experience the thrill of conquering challenging terrains and exploring longer distances with the added power and versatility of electric assist cycling. Electric bikes provide the perfect solution for those looking to venture beyond their usual routes and discover new scenic paths. With the assistance of an electric motor, you can effortlessly tackle steep inclines and rough terrains that would have been daunting on a regular road bike. This opens up a world of possibilities for adventure and exploration.
Not only does electric assist cycling allow you to take on more challenging routes, but it also helps improve your overall fitness. By pedaling with the support of the motor, you can push yourself further and engage in longer rides, gradually increasing your endurance and stamina. The electric assist function can be adjusted to suit your fitness level, allowing you to gradually build up your strength and capabilities.
Table:
| Benefits of Electric Assist Cycling |
|---|
| Enhanced climbing ability |
| Extended range |
| Reduced fatigue |
| Increased enjoyment |
As you continue to explore scenic routes and improve your fitness, it is important to maintain and service your electric bike regularly to ensure optimal performance.
Maintain and Service Your Electric Bike
When it comes to maintaining and servicing your electric bike, it’s crucial to regularly check and replace components as needed. This ensures optimal performance and prevents any potential issues from arising.
Additionally, for more complex issues, it’s recommended to schedule professional maintenance to guarantee that your electric bike is in top shape and running smoothly.
Regularly check and replace components as needed
To regularly maintain your electric bike, make sure you check and replace components as needed. This is crucial to ensure optimal performance and longevity of your bike.
One important aspect of maintenance is to regularly inspect and replace worn components. These can include brake pads, chain, cassette, and tires. Worn brake pads can compromise your ability to stop safely, while a worn chain and cassette can lead to poor shifting and decreased power transfer. Additionally, worn tires can negatively impact traction and increase the risk of flats.
By replacing these components as needed, you can maintain the efficiency and safety of your electric bike. However, for more complex issues or if you are unsure about any maintenance tasks, it’s advisable to schedule professional maintenance to ensure the proper functioning of your bike.
Schedule professional maintenance for complex issues
If you are unsure about any maintenance tasks, it’s advisable to schedule professional maintenance for complex issues. While regular check-ups and component replacements are important for keeping your electric road bike in good condition, there are some issues that require the expertise of a professional. These complex issues can range from electrical problems to motor malfunctions, and attempting to fix them yourself without the necessary knowledge and experience can lead to further damage. When you schedule professional maintenance, trained technicians will be able to diagnose and repair any complex issues with precision and efficiency, ensuring that your electric road bike continues to perform at its best. So, don’t hesitate to seek professional help when faced with complex maintenance problems to avoid any potential complications.
| Professional Maintenance Benefits |
|---|
| 1. Expert diagnosis and repair |
| 2. Precision and efficiency |
| 3. Avoidance of further damage |
| 4. Enhanced performance |
| 5. Peace of mind |
Frequently Asked Questions
What are the potential risks or drawbacks of converting a road bike into an electric bike?
Converting a road bike into an electric bike can pose potential safety concerns, such as increased weight and altered balance. Additionally, it may impact the bike’s resale value, as some buyers prefer original, non-modified bikes.
Are there any specific weight limitations or restrictions for the conversion kit or battery?
There are weight limitations for conversion kits and batteries. Most conversion kits can handle a maximum weight of around 250 pounds, while battery restrictions vary depending on the specific model and capacity.
Can the conversion kit be easily removed in case I want to switch back to a regular road bike?
Yes, the conversion kit can be easily removed, allowing you to switch back to a regular road bike. It is compatible with different road bikes, ensuring a seamless transition between electric and non-electric modes.
Are there any legal requirements or regulations I should be aware of when riding an electric bike on public roads?
When riding an electric bike on public roads, it is important to be aware of the legal requirements and safety regulations. These include things like speed limits, helmet usage, and proper lighting for visibility.
How does converting a road bike into an electric bike affect the bike’s overall performance and handling?
Converting a road bike into an electric bike can significantly impact its overall performance and handling. The addition of an electric motor and battery alters the bike’s weight distribution, acceleration, and braking, which can affect its agility, stability, and responsiveness on the road.
Conclusion
So there you have it, folks! After diligently following all the steps and putting in some elbow grease, I successfully transformed my road bike into an electric powerhouse.
It was certainly a journey filled with challenges and triumphs, but the end result is truly worth it. Now, I can effortlessly cruise through the streets with the wind at my back, feeling like a modern-day knight riding a steed.
Remember, though, to always prioritize safety and adhere to the necessary regulations.
So hop on your upgraded electric road bike and enjoy the ride! And don’t forget to regularly maintain and service your new electric companion to keep it running smoothly for years to come.