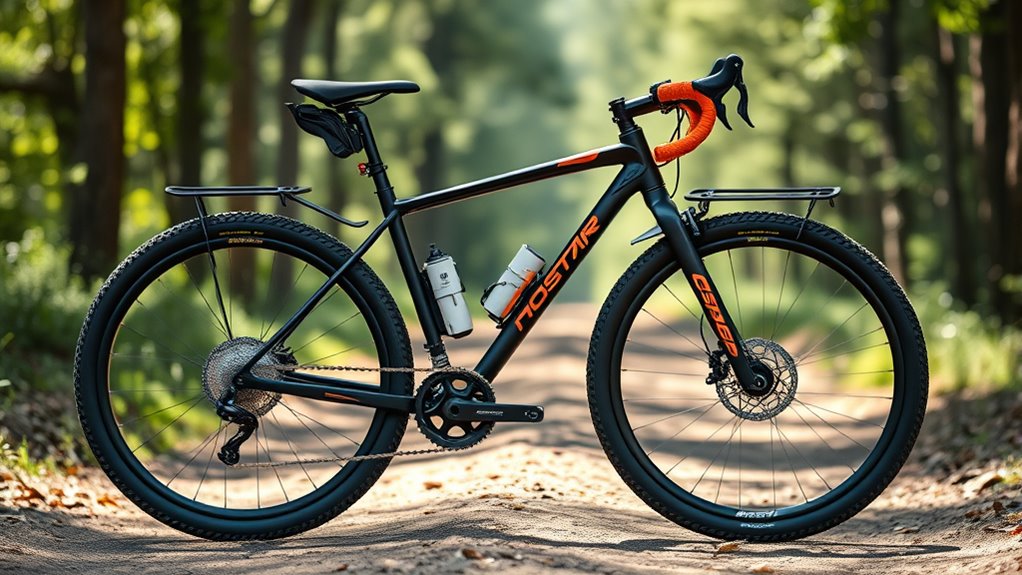

To convert your hybrid bike into a light gravel machine, start by upgrading to wider, tubeless-compatible tires around 40-45mm for better traction and comfort. Swap your handlebars for drop bars and verify the stem and brakes are compatible. Check your frame clearance and adjust or replace the fork if needed. Upgrade the gearing with gravel-specific shifters and derailleurs, and consider disc brakes for improved stopping power. If you explore further, you’ll find how to optimize your setup perfectly.
Key Takeaways
- Ensure frame and fork have at least 45mm clearance to accommodate wider gravel tires safely.
- Upgrade to tubeless-compatible, wider tires (700×40-45mm or 650b x 48mm) for better grip and comfort.
- Install disc brakes if not already present, and verify compatible brake mounts for improved stopping power.
- Replace the handlebar with a flared drop bar and adjust the stem for better control on rough terrain.
- Upgrade drivetrain components, such as shifters and derailleurs, to support wider gear ranges suitable for gravel riding.
RegalRider Hybrid Bike, 700C Men's Bike, 7-Speed Commuter Bicycle, Low Step-Through Frame, Adjustable Seat & Handlebar, Reflectors, 90% Pre-Assembled
Ride in Easiness - Hybrid bike for adults features lightweight 700C aluminum double-wall rims paired with high-grip tires....
As an affiliate, we earn on qualifying purchases.
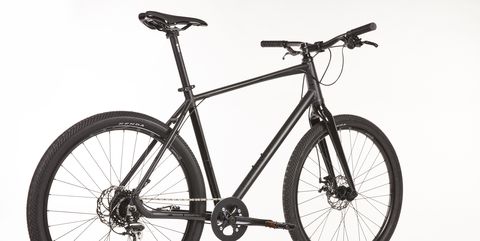
Evaluating Your Hybrid Bike for Gravel Conversion

Before converting your hybrid bike for gravel riding, you need to assess whether its frame and components are suitable. Check the hybrid’s frame material, geometry, and frame clearance to ensure it can handle wider gravel tires, typically up to 45mm. Measure existing tire and fork clearance to confirm enough space for mud and debris. Verify brake compatibility—rim or disc brakes—and ensure they can support gravel-specific components. Examine the wheel size and hub compatibility to accommodate wider, tubeless-ready gravel wheels. Also, evaluate your current handlebar and stem setup, noting clamp diameters and reach, to see if they can be replaced with drop bars for better control. An upgrade in components might be necessary to optimize your hybrid for gravel adventures. Additionally, consider the overall bike fit to ensure comfort and control during rough terrain rides. Ensuring the frame clearance supports wider tires is crucial for avoiding punctures and handling muddy conditions effectively. Proper gear ratios can also improve performance on varying terrain types and obstacles. Being aware of the privacy policy and how your data is managed while researching upgrades can help you make informed decisions about online purchases and product reviews. Moreover, understanding the content creation features of platforms like TikTok can help you share your conversion process with a broader community.

WEIZE Beach Cruiser Bike, 26 inch Commuter Bicycle for Adult Men and Women,High-Carbon Steel/Front & Rear Fenders, Comfortable City Bikes with Rear Rack&Basket, Ergonomic Upright Design,White
【Classic & High-Carbon Steel】: The combination of three-spray and four-bake process with excellent welding technology makes it a...
As an affiliate, we earn on qualifying purchases.
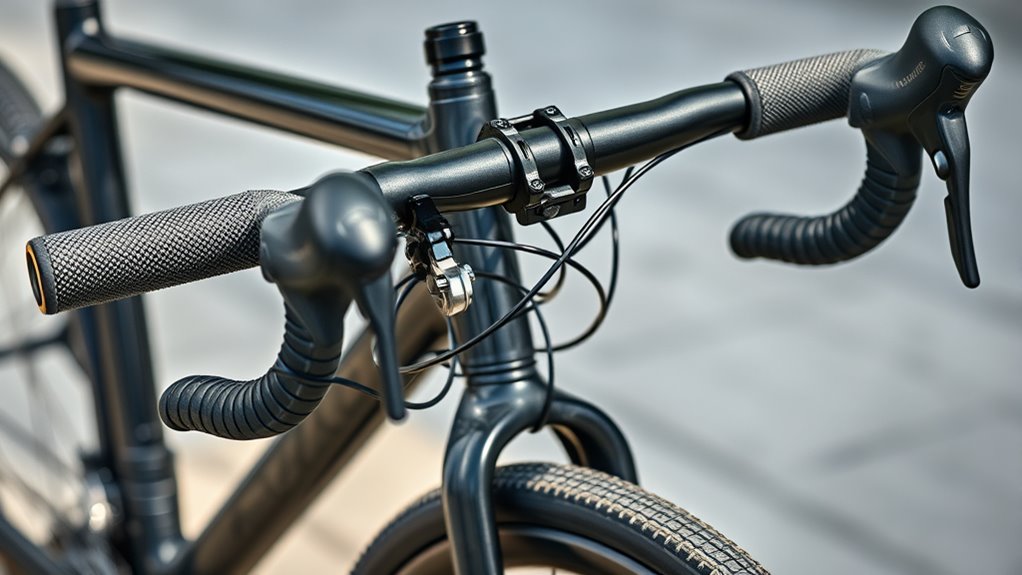
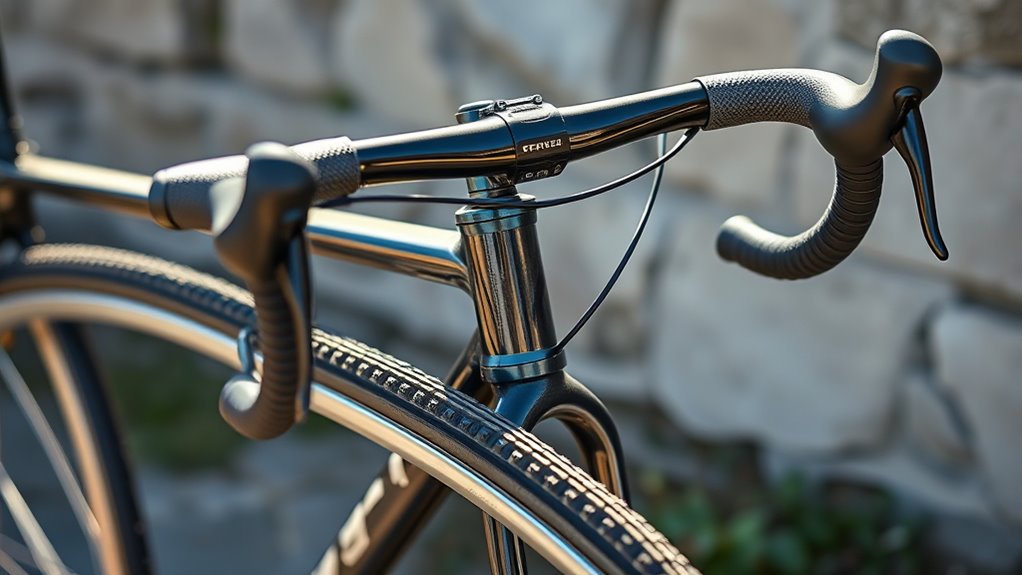
Selecting Drop Handlebars and Compatible Stems

Choosing the right drop handlebars and compatible stems is vital for converting your hybrid bike into a capable gravel machine. To guarantee a smooth drop bar conversion, verify handlebar clamp diameter matches your drop handlebars—most have a 26.0mm diameter, but hybrid bikes often use 25.4mm, so adapters or specific stems are necessary. Selecting a stem that fits your steerer tube size and offers the appropriate handlebar width is fundamental for comfort and control. Use the table below to understand key compatibility factors:
| Aspect | Details | Tips |
|---|---|---|
| Handlebar Clamp | 26.0mm (standard drop bars) | Use adapters if hybrid bars are 25.4mm |
| Stem Compatibility | Fits steerer tube (1-1/8″, tapered) | Check your steerer tube size |
| Bar Width | 44cm to 53cm for gravel | Choose based on riding style |
| Drop Bar Conversion | Flared drop bars recommended | Improve control on rough terrain |
| Compatibility Check | Confirm stem and handlebar fit | Ensure all dimensions match |
Additionally, understanding the compatibility of components ensures a safe and effective conversion. Proper component compatibility plays a crucial role in achieving a secure and comfortable ride, especially when upgrading to drop bars.

TST Electric Bike for Adults, 1500W Peak Motor 60 Miles Fat Tire E Bike 48V 15Ah Removable Battery 20" Electric Bike with Full Suspension SGS UL 2849 Certification Black
【Excellent Motor Performance】This electric bike is equipped with a high-performance 750W motor(1500W peak power) with 2 to 3...
As an affiliate, we earn on qualifying purchases.
Assessing Frame Geometry and Tire Clearance

Before upgrading your tires, you need to check your bike’s frame geometry and tire clearance. Measure the space between the fork crown and the frame to see what width fits without rubbing, and confirm your rims support wider tires. Keeping these factors in mind helps make certain of better handling and comfort on your gravel rides. Additionally, understanding your juice cleansing options can help optimize your nutrition and recovery after long rides. When considering modifications, be aware of zoning laws that may impact where you can safely and legally ride or store your bike. It is also helpful to know the tire yield from your current setup to determine if larger tires are feasible. Exploring self watering plant pots can provide insights into efficient resource use, which might be relevant if you’re setting up a sustainable bike storage or maintenance area. Being mindful of environmental impacts related to your upgrades helps ensure your modifications align with sustainable practices.
Frame Geometry Compatibility
Evaluating frame geometry is essential when converting a hybrid bike into a gravel machine, as it directly impacts handling, comfort, and tire clearance. Your frame’s geometry, including the head tube angle and top tube length, influences ride position and stability. Hybrids often have slacker head tube angles and longer top tubes, which may lead to handling challenges on rough terrain. Check for fork compatibility to ensure it can accommodate wider tires and larger wheel sizes. Adequate tire clearance depends on measuring the space between the frame, fork, and existing tires—most hybrids fit up to 45mm widths if clearance is sufficient. Additionally, understanding the bike’s frame geometry can help you select components that optimize performance and comfort. Considering frame compatibility is crucial to ensure that your modifications will work seamlessly without compromising ride quality. Ensuring the frame’s geometry and space for wider tires will help create a comfortable, capable gravel setup without sacrificing ride quality. Proper assessment of clearance and fit can prevent issues during riding and ensure your bike performs well on varied terrains.
Tire Clearance Limits
To determine if your hybrid bike can handle wider gravel tires, start by measuring the width of the fork crown and arch. This helps you assess the tire clearance available for larger tire widths, ensuring at least 3-5mm space for mud and debris. Check the frame geometry by measuring the distance between the seat stays, chain stays, and fork blades to confirm if wider tires will fit comfortably. Most steel frames with generous tire clearance can typically fit tires up to 45mm wide, while aluminum or carbon frames may be limited to 35-40mm. Remember, the maximum tire size depends on both tire and rim combination, but wheel size alone isn’t enough—frame clearance remains the primary constraint in your gravel conversion. Additionally, understanding your suspension and filtration systems can help optimize performance when riding on varied terrain, especially as modern climate control advancements improve comfort and efficiency in different environmental conditions. Proper frame tolerance levels are crucial for ensuring your bike maintains its structural integrity when accommodating wider tires, similar to how Volkswagen Tuning optimizes engine and chassis components for better performance and handling. Considering the air quality within your riding environment can also help you choose appropriate tires and accessories to enhance your gravel riding experience.
Handling and Comfort
Evaluating your hybrid bike’s frame geometry and tire clearance is essential for a successful gravel conversion. Frame geometry, including top tube length and head tube angle, directly affects handling and rider comfort on rough terrain. Upright, relaxed geometries typical of hybrids may reduce stability on gravel, so consider adjustments to the handlebar position, stem length, or handlebar height to improve control and ergonomics. Proper tire clearance ensures wider tires, up to 45mm, fit without rubbing, maintaining handling confidence. Adequate space in the fork and frame also helps prevent issues with suspension or rubbing under load. Additionally, understanding the tire size compatibility of your bike is crucial to ensure the new tires fit properly and perform well. Optimizing these factors results in better handling, increased comfort, and a more enjoyable gravel riding experience. Always measure and assess before making modifications.

Brightpeak 700C Lightweight Aluminum Road Bike – 21 Speed Commuter Bicycle with Dual V Brakes for Men & Women (Black, Red)
Durable & Versatile Design: Strong aluminum alloy frame offers an optimal rigid/weight ratio, built to withstand tough road...
As an affiliate, we earn on qualifying purchases.
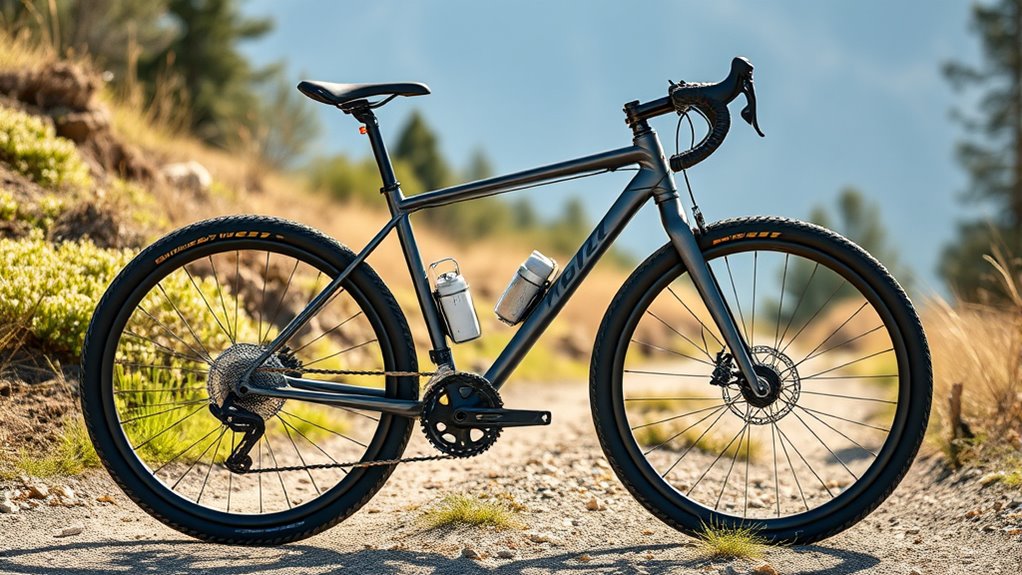
Choosing Suitable Gravel Tires and Wheelsets
Choosing the right gravel tires and wheelsets is essential for transforming your hybrid bike into a capable gravel machine. You need to take into account frame clearance, as most hybrid rims handle tires up to 45mm wide, but space varies. Widening your tires, like 700x40c or 650b x 48mm, improves comfort and grip, but make sure your wheel width and rim compatibility support these sizes. Measure current clearance by removing the wheel and inspecting the space between the tire and frame or fork. Selecting tubeless-compatible gravel tires with appropriate tread patterns and casing strength reduces flats and enhances traction. Upgrading wheelsets for wider rims helps support larger tire sizes and maintains proper fit. Proper tire and wheelset choice directly impacts performance on rough terrain and the overall riding experience.
- Consider tire width and rim compatibility
- Check frame clearance before choosing wider tires
- Opt for tubeless-compatible gravel tires
- Match wheelsets to support desired tire sizes
Upgrading Shifters and Derailleurs for Gravel Gearing
Upgrading shifters and derailleurs is a crucial step in optimizing your hybrid bike for gravel riding. You’ll want to select components compatible with wider cassettes, like 11-36T or 11-42T, requiring the right derailleur capacity and cage length. Compatibility depends on matching shifters and derailleurs via cable pull ratio and gear count, so careful selection is key. Gravel-specific options like bar-end shifters or long-throw models make shifting easier and mud-resistant. Consider this setup:
| Shifters | Derailleurs | Compatible Cassettes |
|---|---|---|
| Bar-end shifters | Medium/Long cage | 11-36T, 11-42T |
| Flat-bar shifters | Wide-range compatible | Larger sprockets |
| Gravel-specific | 10- or 11-speed | Wider gear ranges |
This component upgrade boosts durability and performance on rough terrain.
Modifying Braking Systems for Compatibility and Performance

To optimize your hybrid for gravel, you need to take into account brake compatibility and performance upgrades. Choosing the right levers and cables ensures smooth operation, especially when switching between linear pull and road-style brakes. Upgrading to more powerful brakes, like disc brakes, can also boost stopping power and reliability on rougher terrain.
Brake Type Compatibility
Converting your hybrid bike’s braking system requires guaranteeing the components are compatible regarding lever pull ratio and mounting standards. Brake compatibility hinges on matching the type of brakes—linear-pull brakes, caliper types, or disc brakes—with suitable levers and mounts. If you keep linear-pull brakes, long-pull levers work best, but switching to road brake levers demands calipers with a compatible short-pull design or brake lever conversion. Disc brake standards vary, so frame mounts must match hydraulic or mechanical systems. Proper cable pull ratio is vital for effective braking performance.
- Match brake type with compatible levers and calipers
- Consider caliper types and mounting standards for disc brakes
- Use long-pull levers with linear-pull brakes for simplicity
- Ensure cable pull ratio aligns with brake lever specifications
Lever and Cable Choices
Choosing the right levers and cables is key to achieving smooth, reliable braking after modifying your hybrid bike. If you’re using V-brakes, linear pull brake levers like the Tektro RL520 are ideal for maximum performance, but make sure they’re compatible with your setup. Brake levers with integrated shifters, or brifters, are designed mainly for road calipers and may need adapters for linear pull or V-brakes. Cable routing plays a vital role; using travel agents or pulley systems can help tailor cable pull ratios to fit your brake levers. If you upgrade to disc brakes, select compatible hydraulic or mechanical brake levers and cables. Proper compatibility guarantees smooth modulation, easier maintenance, and improved stopping power, especially as you shift from hybrid to gravel-ready braking systems.
Upgrading for Power
Upgrading your hybrid bike’s braking system for gravel riding involves more than just swapping parts; it requires guaranteeing compatibility between new components and your frame. To boost power and performance, switching to disc brakes is ideal, offering better modulation and stopping power on rough terrain. You’ll need to check for proper mounting points for calipers and ensure your wheel hubs are compatible with rotors. A brake conversion might involve replacing linear-pull or V-brake calipers with post-mount or flat-mount disc calipers, along with matching rotors and levers. Hydraulic disc brakes deliver superior modulation and power but require compatible hoses and levers. Prioritize high-quality components like Shimano Deore or Tektro to maintain durability and performance in muddy, variable conditions.
- Compatibility of frame and fork with disc brake mounts
- Selecting the right rotors for your riding style
- Choosing between mechanical and hydraulic disc brakes
- Ensuring calipers and levers match for ideal performance
Replacing or Adjusting the Fork and Suspension Components
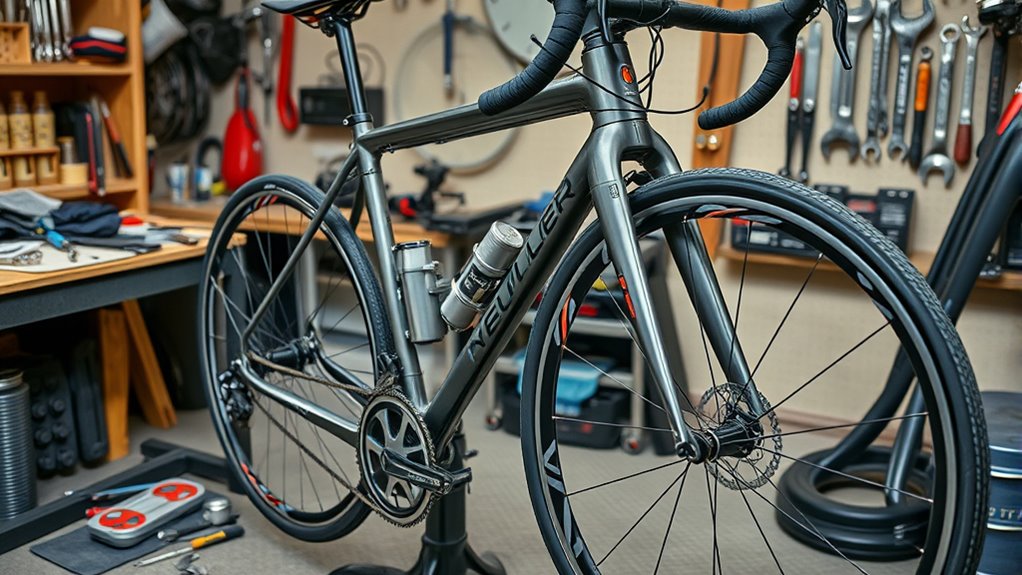
To replace or adjust the fork on your hybrid bike, you need to first verify compatibility with the bike’s head tube diameter, steerer tube type, and axle standards. This guarantees the new fork fits securely and maintains proper handling. When selecting a suspension fork, consider travel length—around 30-50mm works well for gravel riding—and confirm it fits within your frame’s tire clearance and disc brake mounts. If upgrading to a suspension fork, you might need to adjust or replace headset bearings and spacers to match the new steerer tube type, whether threaded or threadless. Proper compatibility prevents rubbing and handling issues. Remember, ensuring the fork’s compatibility with your bike’s disc brake system and frame geometry is essential for safe, smooth riding on gravel terrains.
Installing New Pedals, Seats, and Cockpit Accessories
Upgrading your pedals, seat, and cockpit accessories can greatly improve your gravel riding experience. Make certain your new pedals match your riding style, whether flat, clipless, or hybrid, and choose a saddle that fits your comfort needs. Also, select handlebar grips and shifters that enhance control and guarantee proper component compatibility for a safe, comfortable ride.
Pedal Compatibility and Types
When converting a hybrid bike to a gravel machine, paying attention to pedal compatibility and types is vital for safe, efficient riding. Most hybrid bikes use flat or toe-clip-compatible pedals, but gravel riding benefits from clipless pedals with SPD or similar systems for better control. Before installing new pedals, check your crank threads—most modern bikes use 9/16-inch, but some older models have 1/2-inch threads. Compatibility with your pedal system is essential to ensure proper fit and performance. Upgrading to clipless pedals improves power transfer and security, especially on rough terrain.
- Verify crank threads before purchase
- Choose between flat pedals and clipless SPD systems
- Confirm compatibility with your pedal system
- Match pedal type to your riding style
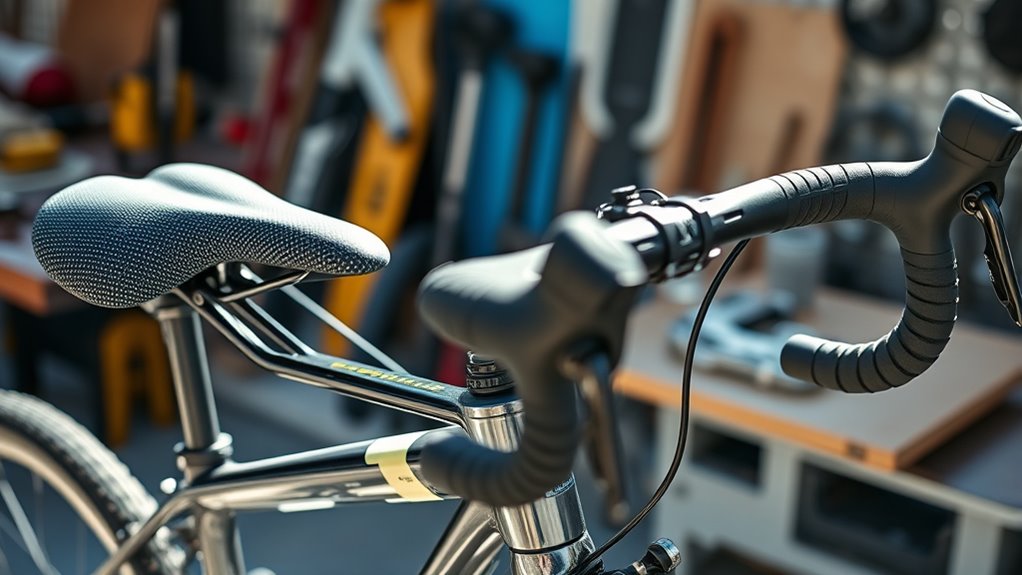
Seat Position Adjustment
Adjusting your seat position is vital for optimizing comfort and efficiency on a gravel bike. Start by setting the seat height to about 0.88 to 1.0 times your inseam measurement to ensure proper pedaling biomechanics. Next, fine-tune the saddle position by moving it forward or backward on its rails to improve weight distribution and riding comfort, especially when adjusting your handlebar setup. A well-chosen saddle with appropriate padding and shape supports long rides over rough terrain, reducing fatigue. Remember, saddle adjustment plays a key role in bike fit and overall ergonomics. Proper seat height and saddle position enhance control and comfort, making your gravel rides more enjoyable. Don’t forget to check your handlebar setup to complement your seat adjustments for the best riding ergonomics.
Choosing Cockpit Components
Choosing the right cockpit components is essential for optimizing your gravel bike’s handling and comfort. Upgrading your handlebar, shifters, and grips can markedly improve control on rough terrain. Ensuring compatibility with your stem and handlebar width prevents fit issues. Consider adding bar ends or flare drop bars for better leverage and control during technical sections. Replacing your bar tape with cushioned or textured options enhances grip and reduces fatigue. When selecting components, check that shifters and brake levers mount securely and match your handlebar diameter. Proper cable routing and adjustment after installation keep shifting smooth and braking reliable. A well-chosen cockpit setup boosts confidence, comfort, and performance on gravel adventures.
Fine-Tuning Fit and Handling After Modifications
After making modifications to your hybrid bike, fine-tuning the fit and handling is essential for peak performance on gravel terrain. Start with stem adjustment to optimize steering responsiveness and rider comfort. Adjust the handlebar position by adding spacers or changing components to improve reach and drop, enhancing control and posture. Fine-tune saddle height and fore-aft position for efficient pedaling and reduced fatigue. Focus on bar ergonomics to ensure a comfortable grip, especially during long rides. Regularly check and adjust these elements to improve ride quality and handling stability. Small tweaks in stem angle, handlebar position, and saddle setup can considerably enhance your bike’s responsiveness and comfort, giving you better confidence and control on rough gravel surfaces.
Tips for Budget-Friendly Upgrades and Cost Management
To upgrade your hybrid bike for gravel riding without breaking the bank, focus on cost-effective components and strategic planning. Budget upgrades rely on used components like microshift shifters (~$50) and inexpensive brake levers (~$30), helping you manage costs effectively. Reusing your existing tires and wheels is smart; simply upgrade to wider, tubeless-compatible gravel tires (700×40-45mm) for better performance without extra expense. Handlebar replacement with affordable drop bar kits, often found secondhand for under $50, can enhance comfort and control. Limit major frame upgrades by choosing hybrid frames with ample tire clearance and disc mounts. Plan your phased upgrades—start with tires and handlebars—to spread expenses while ensuring component compatibility and smooth progress.
Frequently Asked Questions
Can I Convert a Hybrid Bike to Gravel?
You can convert your hybrid bike into a gravel bike if it has disc mounts and enough clearance for wider tires. Upgrade the tires, swap riser bars for drop bars, and make sure your components match. Keep in mind, compatibility and frame geometry matter, so choose compatible parts carefully. While it’s doable, sometimes starting with a purpose-built gravel bike might save you time and effort in the long run.
Can a Hybrid Bike Be Used as a Gravel Bike?
You might wonder if a hybrid bike can serve as a gravel bike. While hybrids often have similar frame geometries and tire clearances, they’re not originally designed for rougher terrain. However, with some modifications like installing wider tires, dropping handlebars, and ensuring proper clearance, you can make your hybrid suitable for gravel riding. Just check if your frame supports these upgrades, and you’ll have a versatile, lightweight gravel alternative.
How Do I Turn My Bike Into a Gravel Bike?
To turn your bike into a gravel bike, start by swapping your flat handlebars for drop bars for better control on rough terrain. Upgrade your tires to wider gravel-specific ones, like 700×40-45mm, ensuring your frame and fork can handle the size. Check compatibility with disc brakes, and adjust or replace shifters and brake levers for drop bar compatibility. Finally, consider adding gravel accessories like fenders and frame bags.
What Are the Disadvantages of Hybrid Bikes?
Hybrid bikes have some notable disadvantages. You might notice they offer a more relaxed, upright riding position, which isn’t ideal for handling rough terrain. Their narrower tires and limited clearance make it hard to use wider, rugged tires. The braking systems may lack the modulation needed for off-road control, and the flat handlebars give less leverage on uneven surfaces. Overall, hybrids aren’t built for serious gravel or mountain riding, limiting their versatility.
Conclusion
With the right upgrades, your hybrid bike can transform into a formidable gravel machine that outperforms even the wildest terrains. By carefully selecting components and fine-tuning your setup, you’ll unlock a new level of adventure and exploration. Don’t settle for a mere bike—think of your transformation as unleashing a beast capable of conquering mountains and conquering dirt with the ferocity of a tidal wave. Gear up and embrace the thrill of the gravel!