
I’ve got an X-Treme e-bike and I’m ready to assemble it!
In this guide, I’ll walk you through the step-by-step process of putting together your own electric bicycle.
We’ll start by unboxing the package and checking the contents.
Then, we’ll familiarize ourselves with the different parts of the e-bike and gather the necessary tools.
From there, we’ll tackle tasks like installing the front fork and handlebars, checking and inflating the tires, and testing everything to ensure it’s in working order.
So, let’s get started and enjoy the ride!
Key Takeaways
- Inspect the packaging for any damage and follow the unboxing instructions carefully.
- Check all the contents of the package to ensure that there are no loose or detached parts and that all necessary parts are included.
- Familiarize yourself with the different types of e-bike motors and batteries to understand their positioning and characteristics.
- Prepare your tools and workspace by gathering all the necessary tools, sorting and labeling the parts, and ensuring enough space for assembly.

Varstrom 48V 1000W 1500W Rear & Front Hub Motor Kit - Ebike Conversion Kit for 26"/27.5"/28"/29"/700C Front Rear Wheel,Electric Bike Conversion Set with Display & Ebike Battery (Optional)
【POWERFUL 48V 1000W Front Hub Motor Kit】: 48V 1000W front wheel motor kit is designed for a variety...
As an affiliate, we earn on qualifying purchases.
Unboxing your X-Treme e-bike
Now, it’s time to unbox your X-Treme e-bike and start assembling it.
Unboxing your e-bike is an exciting process, and knowing the correct techniques can help you avoid common issues that may arise during this stage.
To begin, carefully inspect the packaging for any signs of damage during transit. If you notice any visible damage, take pictures as evidence before proceeding.
Next, locate the unboxing instructions that came with your e-bike. These instructions will guide you through the unboxing process step by step. Follow them closely to ensure you don’t miss any important details.
As you remove the components from the packaging, be mindful of any protective coverings or plastic wrap that may be present. It’s crucial to remove these before proceeding with the assembly.
Additionally, keep an eye out for any loose or detached parts that may have come loose during shipping. Troubleshooting these issues early on will save you time and frustration later.
With your e-bike unboxed, it’s time to move on to the next section and check the contents of the package to ensure everything is included and in good condition.

EVAPLUS 54.6V 1.5A Smart Charger for 48V Lithium Batteries - UL Certified, Fast Charging with Multi-Safety Protection, Compatible with Electric Bikes/Scooters, DC 5.5 * 2.5/2.1mm Connector
Universal Fast Charging Performance: Designed specifically for 48V lithium-ion batteries (13S configuration), this 54.6V 1.5A smart charger delivers...
As an affiliate, we earn on qualifying purchases.
Checking the contents of the package
First, make sure you check the contents of the package to ensure that all the necessary parts are included. This step is crucial as it sets the foundation for a smooth assembly process. Here are some important points to consider when checking the package contents:
-
Importance of checking the package contents: It is essential to verify that all the required parts are present before starting the assembly. This helps avoid delays and frustration later on when you realize that something is missing.
-
Common mistakes to avoid: Double-checking the package contents can prevent common mistakes such as missing screws, bolts, or small components. It is always better to be safe than sorry.
-
Tips for organizing the parts efficiently during assembly: To ensure a streamlined assembly process, it is helpful to organize the parts efficiently. Consider using small containers or bags to group similar parts together. Labeling them can also be beneficial, especially if you are new to e-bike assembly.

PEXMOR Electric Bike Conversion Kit, 20"/24" Front Wheel Ebike Conversion Kit, 36V 750W Electric Bike Hub Motor Kit w/3 Mode Controller/PAS/LCD Display/Twist Throttle Electric Bicycle Ebike Kit
【POWERFUL BRUSHLESS MOTOR】-The 36V 750W ebike front wheel conversion motor kit features a powerful brushless hub motor.It runs...
As an affiliate, we earn on qualifying purchases.
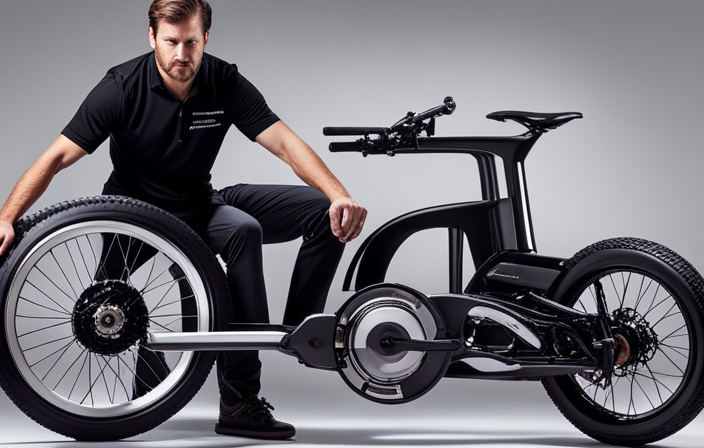
Familiarizing yourself with the different parts of the e-bike
Before you start assembling the e-bike, take some time to familiarize yourself with the different parts. Understanding the different types of e-bike motors and batteries will help you during the assembly process.
There are various types of e-bike motors available, including hub motors, mid-drive motors, and friction drive motors. Hub motors are the most common and are typically located in the front or rear wheel. Mid-drive motors, on the other hand, are positioned in the center of the bike frame and provide a more balanced ride. Friction drive motors are attached to the side of the tire and are known for their simplicity and ease of installation.
When it comes to e-bike batteries, there are different types to consider. Lithium-ion batteries are the most popular choice due to their high energy density and long lifespan. They are lightweight and provide a good balance between power and range. Other options include lead-acid batteries, which are heavier and have a shorter lifespan, and nickel-cadmium batteries, which are less common due to their lower energy density.
Now that you have a basic understanding of the different parts of the e-bike, it’s time to prepare the tools you will need for assembly.

Ktaxon Electric Bike Conversion Kit, 48V 1000W Ebike Conversion Kit, 26" Front/Rear Wheel E-Bike Conversion Kits with PAS, LCD Display, Aluminum Alloy Frame and Gearless Hub Motor (Front Wheel)
【UNMATCHED MOTOR KIT】With 48V 1000W brushless and gearless hub motor, this ebike conversion kit creates efficient and noiseless...
As an affiliate, we earn on qualifying purchases.
Preparing the tools you will need for assembly
To prepare for assembly, gather the tools you’ll need, such as a wrench, screwdriver, and Allen key. These essential tools will help you efficiently organize the parts and ensure a smooth assembly process. Before starting, it’s important to choose the right workspace for your e-bike assembly. Find a well-lit area with enough space to lay out the parts and move around comfortably.
Now, let’s dive into organizing the parts efficiently.
-
Sort the parts: Begin by carefully unpacking the components and arranging them in separate piles. This will make it easier to locate each part during the assembly process.
-
Label the parts: Use small labels or sticky notes to mark the parts with their corresponding names or numbers. This will prevent any confusion and streamline the assembly.
-
Use storage containers: Invest in small containers or trays to keep the smaller parts organized and easily accessible. This will help prevent any loss or misplacement of crucial components.
Installing the front fork and handlebars
Now let’s move on to installing the front fork and handlebars. This step is crucial in ensuring the stability and control of your electric bicycle. Follow these best practices to ensure a smooth installation process.
First, gather the necessary tools: a wrench, Allen keys, and a torque wrench. These will help you properly secure the front fork and handlebars.
To begin, place the front fork into the designated slot on the frame. Make sure it is aligned properly and tighten the bolts using the torque wrench to the manufacturer’s recommended torque specifications. This will ensure that the front fork is securely attached to the frame.
Next, attach the handlebars to the front fork using the Allen keys. Be sure to tighten the bolts evenly to avoid any wobbling or instability while riding.
Troubleshooting common issues during this step may include misalignment of the front fork or handlebars. Double-check the alignment and make any necessary adjustments before tightening the bolts.
With the front fork and handlebars securely installed, you can now move on to attaching the front wheel and brake system seamlessly.
Transitioning into the next section, attaching the front wheel and brake system, we will now focus on assembling the key components that contribute to the overall functionality and safety of your electric bicycle.
Attaching the front wheel and brake system
Make sure you align the front wheel with the fork properly before tightening the bolts. This is crucial for ensuring a safe and smooth ride. Once the wheel is aligned, tighten the bolts using a wrench, making sure they are secure but not overly tightened.
Now, let’s move on to the brake system.
The brake system is an essential component of any bicycle, including the X-Treme e-bike. To attach the brake system, start by adjusting the brake pads. Check if they are properly aligned with the rim of the front wheel. If they are not, loosen the brake pad’s mounting bolt and position them correctly. Once aligned, tighten the bolt securely.
Troubleshooting common brake issues is also important. If you experience squeaking or rubbing sounds when applying the brakes, it may indicate misaligned brake pads. Adjust them accordingly. Additionally, if the brakes feel soft or do not provide enough stopping power, it could be due to worn brake pads. In this case, replace the brake pads with new ones.
Now that the front wheel and brake system are properly attached and adjusted, we can move on to the next step of assembling your X-Treme e-bike: mounting the seat and adjusting the height.
Mounting the seat and adjusting the height
Once you have mounted the seat onto the seat post, you will want to adjust the height to ensure a comfortable riding position. This step is crucial for both your comfort and your safety while riding the X-Treme e-bike electric bicycle.
Here are some key points to consider when adjusting the seat height:
-
Choosing the right seat height: The seat height should be adjusted so that your feet can comfortably reach the ground when you are sitting on the seat. This will help you maintain balance and control while riding.
-
Adjusting the seat angle: The seat angle can greatly affect your riding experience. It is important to find the right angle that provides support and comfort for your back and hips. Experiment with different angles until you find the one that feels the most natural for you.
-
Consider your leg extension: When adjusting the seat height, make sure that your legs are not fully extended or completely bent at the bottom of the pedal stroke. Aim for a slight bend in your knees for optimal pedaling efficiency.
-
Test it out: After making adjustments, take the bike for a short ride to see how it feels. Pay attention to any discomfort or strain in your knees, back, or hips. If necessary, make further adjustments until you find the perfect seat height and angle.
-
Seek professional advice if needed: If you are unsure about how to properly adjust the seat height or angle, don’t hesitate to seek guidance from a professional bike shop or an experienced rider.
Now that you have properly adjusted the seat, it’s time to move on to the next step: installing the pedals and ensuring they are secure. This will complete the assembly process and get you one step closer to enjoying your new X-Treme e-bike electric bicycle.
Installing the pedals and ensuring they are secure
After adjusting the seat height and angle, it’s important to properly install the pedals and ensure they are secure. Securing the pedals is a crucial step in assembling an X-treme e-bike electric bicycle.
To begin, locate the left pedal marked with an ‘L’ and the right pedal marked with an ‘R’. It’s important to note that these pedals are not interchangeable. Place the left pedal on the left crank arm and tighten it clockwise using a pedal wrench. Repeat the same process for the right pedal, but tighten it counterclockwise. Ensure that both pedals are tightened securely to prevent any wobbling or loosening during use.
If you encounter any issues during pedal installation, there are a few troubleshooting steps you can take. First, double-check if you have the correct pedals for each side. If the pedals still won’t thread into the crank arms, inspect the threads for any dirt or debris and clean them if necessary. It’s also important to ensure that the crank arms are not cross-threaded, as this can prevent proper installation. If you’re still experiencing difficulties, consult the manufacturer’s instructions or contact customer support for further assistance.
Now that the pedals are properly secured, we can move on to the next step: connecting the battery and charging it.
Connecting the battery and charging it
To connect the battery and charge it, you’ll need to locate the battery compartment and carefully plug in the battery. The battery compartment is usually located near the rear wheel or under the seat of the electric bicycle. It is important to ensure that the battery is securely connected to prevent any power loss during your ride.
Once you have located the battery compartment, gently remove the cover or access panel. Inside, you will find the connectors for the battery. The connectors are usually color-coded, with red indicating the positive terminal and black indicating the negative terminal. Align the connectors on the battery with the corresponding connectors in the compartment and plug them in firmly.
After connecting the battery, it is time to charge it. Most electric bicycles come with a charger specifically designed for their batteries. Plug the charger into a standard electrical outlet and connect the other end to the charging port on the battery. The charging process typically takes several hours, so it is best to leave the battery charging overnight or whenever you are not using the bike.
With the battery connected and charging, we can now move on to attaching the motor and ensuring proper alignment.
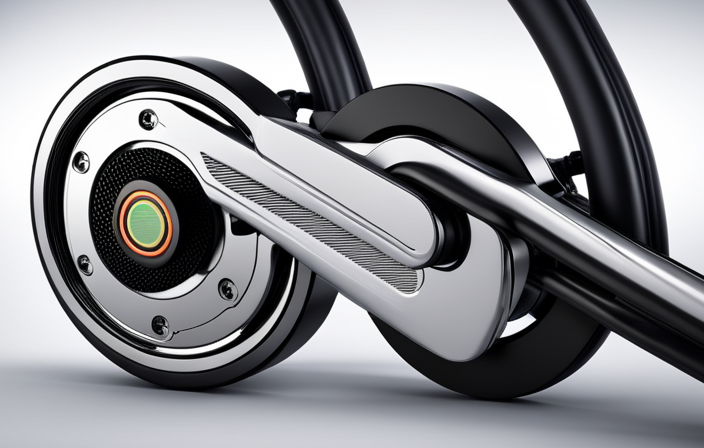
Attaching the motor and ensuring proper alignment
Before attaching the motor, it’s important to ensure that it is aligned properly. Proper motor alignment is crucial for optimal performance and longevity of your electric bicycle. Here are some key steps to follow for motor alignment and attachment:
-
Check the motor position: Make sure the motor is positioned correctly on the frame and that it aligns with the chain and sprocket.
-
Align the motor mounting brackets: Ensure that the motor mounting brackets are properly aligned with the frame and securely tightened.
-
Check the chain tension: Adjust the chain tension to ensure it is neither too loose nor too tight. This will help in smooth operation and prevent damage to the motor and drivetrain.
-
Secure the motor with bolts: Use the provided bolts and washers to securely attach the motor to the frame. Make sure all bolts are tightened properly to avoid any vibrations or movement during operation.
-
Test the motor: After attaching the motor, test it by turning the pedals and engaging the motor. Check for any unusual noises or vibrations that could indicate misalignment or other issues.
By following these steps, you can ensure that your motor is properly aligned and securely attached to your electric bicycle. Once you have completed this process, you can move on to adjusting the brakes and gears for optimal performance.
Now that the motor is securely attached and properly aligned, it’s time to focus on adjusting the brakes and gears for optimal performance.
Adjusting the brakes and gears for optimal performance
Now that the motor is securely attached and properly aligned, it’s time to focus on adjusting the brakes and gears for optimal performance. Properly adjusted brakes and gears are essential for a smooth and efficient ride on your electric bike.
When it comes to adjusting the brakes, start by checking the brake pads for wear and tear. Replace them if necessary, ensuring that the pads make proper contact with the rim when the brake lever is squeezed. Next, adjust the brake cable tension by loosening or tightening the barrel adjuster until the brakes engage smoothly without excessive play.
Troubleshooting common issues with electric bike brakes includes checking for any loose or damaged brake components, such as cables or calipers.
Moving on to the gears, it’s important to ensure that the shifting is smooth and precise. Begin by checking the cable tension and making any necessary adjustments using the barrel adjuster. Additionally, inspect the derailleur alignment and hanger, ensuring they are straight and properly adjusted.
Troubleshooting gear issues involves checking for any bent or damaged derailleur components and making the necessary repairs or replacements.
With the brakes and gears properly adjusted, you can now move on to the next step of checking the tires and inflating them to the correct pressure, ensuring a safe and comfortable ride.
Checking the tires and inflating them to the correct pressure
Make sure you check the tires and inflate them to the correct pressure for a safe and comfortable ride. Checking tire pressure is an important step in maintaining the overall performance and longevity of your e-bike.
Proper tire inflation ensures optimal traction, reduces the risk of punctures, and improves energy efficiency. To begin, locate the recommended tire pressure range indicated on the sidewall of your bike’s tires. Use a tire pressure gauge to measure the current pressure.
If the pressure is too low, inflate the tires using a bicycle pump until they reach the appropriate level. It is crucial to inflate both tires evenly to maintain balance and stability. Overinflating the tires can lead to a harsh ride and increased risk of tire damage.
Once the tires are properly inflated, check for any visible signs of wear or damage, such as cracks or bulges. If you notice any abnormalities, it is best to replace the tire before riding.
With the tires now properly inflated and in good condition, let’s move on to testing the e-bike to ensure everything is working properly.
Testing the e-bike to ensure everything is working properly
To ensure everything is working properly, you should take a test ride on your e-bike. This step is crucial in the assembly process because it allows you to identify any potential issues or malfunctions that may have occurred during the setup.
E-bike troubleshooting is an essential skill to possess, as it helps you diagnose and fix common issues that may arise with the assembly. Some common problems you may encounter include loose connections, faulty wiring, or even a malfunctioning motor.
By taking your e-bike for a test ride, you can observe how it performs, paying close attention to the motor, brakes, and overall handling. If you notice any abnormalities, it is important to address them promptly.
Once you have identified any problems, you can move on to making any necessary adjustments or tweaks to ensure that your e-bike is in perfect working condition.
Making any necessary adjustments or tweaks
Once you’ve identified any issues during the test ride, you can quickly address them by adjusting or tweaking the necessary components. One important adjustment to consider is the saddle position. A proper saddle position ensures comfort and optimal pedaling efficiency. Start by loosening the saddle clamp bolt underneath the seat. Adjust the height and angle of the saddle to your liking, making sure it aligns with your hips. Once you’ve found the right position, tighten the clamp bolt securely.
Another crucial adjustment is fine-tuning the motor speed. Depending on your riding preferences, you may want to adjust the motor speed to match your desired level of assistance. Most e-bikes come with a control panel or display that allows you to adjust the motor settings. Experiment with different levels of assistance to find the one that suits you best. Remember to follow the manufacturer’s instructions for adjusting the motor speed to ensure optimal performance.
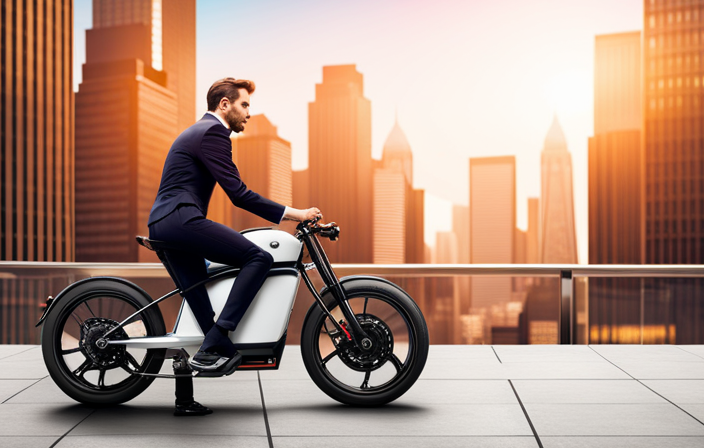
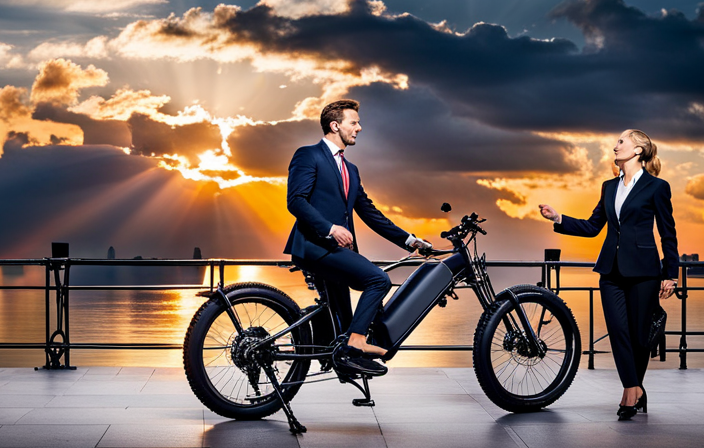
Enjoying your first ride on your X-Treme e-bike!
Now that you’re ready to hit the road on your X-Treme e-bike, get ready to experience the thrill of effortless riding and the joy of exploring new horizons.
One of the great features of the X-Treme e-bike is the ability to explore different riding modes. By simply pressing a button on the handlebar, you can switch between pedal-assist mode, where the motor helps you as you pedal, or throttle mode, where you can ride without pedaling at all. This versatility allows you to adapt to different terrains and riding conditions with ease.
When it comes to maintaining and cleaning your X-Treme e-bike, there are a few tips to keep in mind. Regularly inspect your bike for any loose bolts or parts, and tighten them as needed. Check the tire pressure and make sure they are properly inflated for a smoother ride. Keep the chain clean and lubricated to prevent rust and ensure smooth shifting. Additionally, wipe down the bike after each ride to remove any dirt or debris that may have accumulated.
By exploring different riding modes and following proper maintenance and cleaning practices, you can ensure that your X-Treme e-bike continues to provide you with a thrilling and enjoyable riding experience for years to come.
Happy riding!
Frequently Asked Questions
How long does it take to charge the battery of the X-Treme e-bike?
The charging time for the battery of the x-treme e-bike depends on various factors such as the battery capacity and the type of charger being used.
On average, it takes around 4-6 hours to fully charge the battery.
It’s important to note that frequent charging can affect the battery lifespan, so it’s recommended to follow the manufacturer’s guidelines for optimal charging practices to ensure the longevity of the battery.
Can I use the e-bike while the battery is being charged?
Using the e-bike while charging can have negative effects on both the battery and the overall performance. It is not recommended to ride the e-bike while it is being charged. Doing so can increase the charging time and potentially damage the battery.
Additionally, using the e-bike while charging may overheat the battery, leading to reduced battery life and potential safety hazards. It is best to wait until the battery is fully charged before using the e-bike.
Are there any specific maintenance tasks I should perform regularly on my X-Treme e-bike?
Regular maintenance tasks are crucial for maintaining the optimal performance and longevity of your X-Treme e-bike. While it may seem time-consuming, it’s essential for ensuring a smooth and safe ride.
Some key tasks include:
- Checking and adjusting the brakes
- Inspecting the tires for wear and tear
- Cleaning and lubricating the chain
- Tightening any loose bolts
Regular maintenance is vital to prevent potential issues and ensure your e-bike stays in top shape.
How do I adjust the height of the seat on the e-bike?
To adjust the height of the seat on your e-bike, start by loosening the seat clamp bolt located underneath the seat.
Once loose, raise or lower the seatpost to your desired height, making sure it aligns with your comfort level and leg extension.
Then, tighten the seat clamp bolt securely.
Test the saddle position by sitting on the bike and adjusting as needed until you find the right fit for optimal riding comfort and performance.
What is the maximum weight limit for the X-Treme e-bike?
The maximum weight limit for the X-treme e-bike is 300 pounds. This weight limit ensures optimal performance and safety while riding the electric bicycle.
It is crucial to adhere to this limit to avoid putting excessive strain on the bike’s components and compromising its durability.
The e-bike has been designed and tested to handle weights up to 300 pounds, providing a comfortable and reliable riding experience for riders within this range.
Conclusion
After carefully assembling my X-Treme e-bike, I can confidently say that this electrifying experience has exceeded my expectations! The process was a breeze, thanks to the comprehensive guide provided.
From unboxing to testing, every step was detailed and straightforward. The alluring allure of the e-bike’s power paired with the precision of its parts truly makes for an exceptional ride.
So, what are you waiting for? Embark on an electrifying adventure with an X-Treme e-bike and embrace the exhilaration it brings!