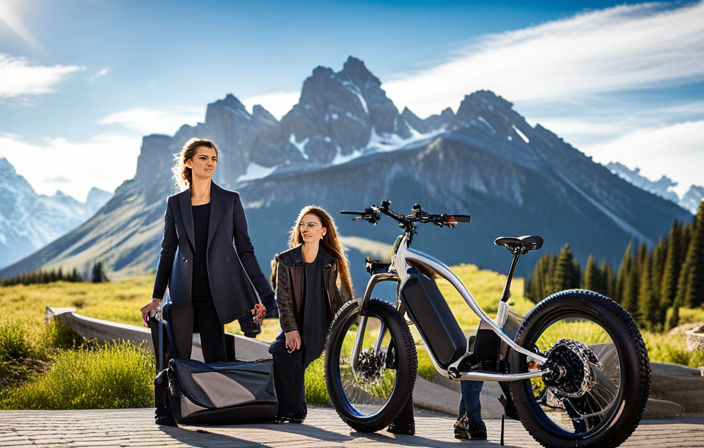
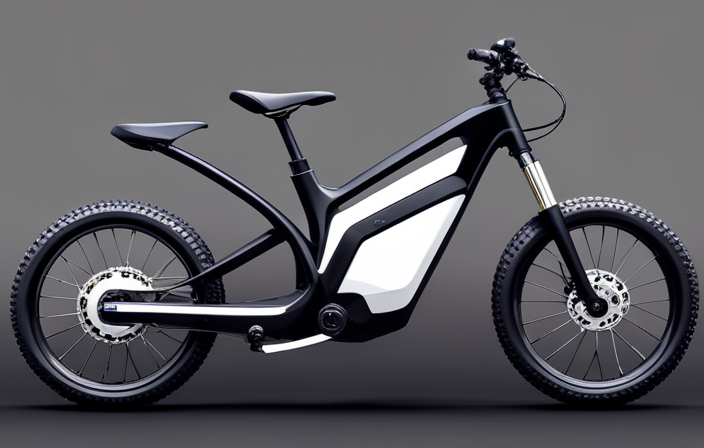
Get ready to conquer the mountains with the Alpine Trails Electric Bike! Assembling this powerful machine is an exhilarating journey, akin to climbing the peaks of adventure.
In this guide, I will take you through the step-by-step process of putting together your electric bike, ensuring that every component is securely attached and ready for action.
So, tighten your helmet, fasten your seatbelt, and let’s dive into the world of assembling the Alpine Trails Electric Bike.
Key Takeaways
- Unbox and check the contents of the box before starting the assembly process.
- Ensure that you have all the necessary tools and a suitable workspace prepared.
- Attach the handlebars and adjust the stem correctly for a comfortable riding position.
- Install the wheels, adjust the brakes, attach the pedals, and adjust the gears properly for smooth operation.

Under Armour Squeeze Water Bottles, 32 oz Water Bottles, Sideline Sports Water Bottle with Quick-Shot Lid, Quick & Easy Hydration, Gym Water Bottles, Squeeze Bottle, 1 32oz Bottle
- Easy Hydration: Quick-shot lid and one-way valve
- On-the-Go Use: One-hand operation for active hydration
- Measurement Markings: Ounces and milliliters for tracking
As an affiliate, we earn on qualifying purchases.
Unboxing and Checking the Contents of the Box
Let’s start by unboxing and checking the contents of the box to make sure everything is included.
When unboxing your Alpine Trails electric bike, it’s important to follow some unboxing tips to avoid any potential issues.
Begin by carefully opening the box and removing all the packaging materials. Inspect each component, including the frame, wheels, battery, charger, and user manual, to ensure they are in good condition.
Take note of any damages or missing parts and contact customer support if necessary. Common issues during unboxing can include loose screws or bolts, so make sure to tighten them as needed.
Now that we have checked the contents and ensured everything is intact, let’s move on to preparing the tools and workspace for assembly.
Preparing the Tools and Workspace
First, gather the tools and set up your workspace. It’s important to have a clean and organized workspace to ensure a smooth assembly process. Make sure to have the following tools ready:
| Tools | Quantity |
|---|---|
| Allen wrenches | 1 set |
| Adjustable wrench | 1 |
| Screwdriver | 1 |
Once you have gathered the necessary tools, it’s essential to organize your workspace. Clear any clutter and make sure you have enough space to work comfortably. Lay out all the components of the electric bike in an orderly manner, making it easier to locate the parts you need during the assembly process.
In addition to workspace organization, it’s important to maintain your tools. Ensure they are clean and in good condition before starting the assembly. Check for any signs of wear or damage, and replace any tools that are not in optimal working condition.
Now that your workspace is ready and your tools are in good shape, you are prepared to move on to the next step of attaching the handlebars and adjusting the stem.
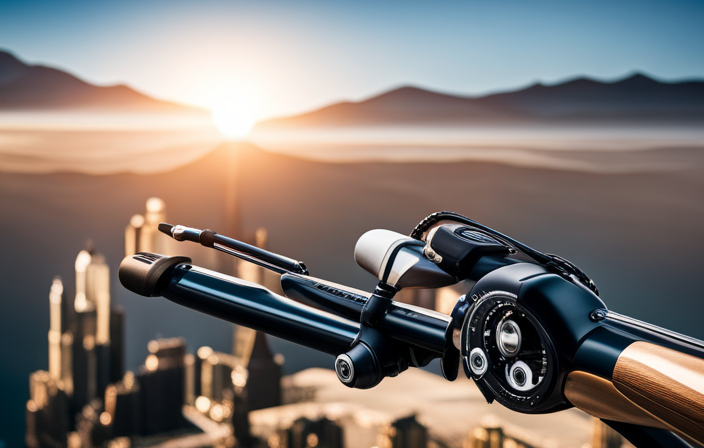
Attaching the Handlebars and Adjusting the Stem
To attach the handlebars and adjust the stem, you will need to follow these steps:
-
Start by loosening the stem bolts using an Allen wrench.
- Insert the Allen wrench into the bolt heads and turn counterclockwise to loosen.
- Loosen both bolts evenly to prevent damage to the stem.
-
Adjust the handlebar height to your desired position.
- Raise or lower the stem to achieve the desired height.
- Ensure the handlebars are straight and aligned with the front wheel.
-
Once the handlebars are in the correct position, tighten the stem bolts.
- Use the Allen wrench to tighten the bolts clockwise.
- Make sure the bolts are tightened evenly to avoid imbalance.
By adjusting the handlebar height and tightening the stem bolts, you can ensure a comfortable and secure riding position.
Now, let’s move on to installing the wheels and adjusting the brakes.
Installing the Wheels and Adjusting the Brakes
Once you have attached the handlebars and adjusted the stem, it’s time to move on to installing the wheels and adjusting the brakes.
First, ensure that the wheel axles are fully inserted into the dropouts of the frame. Then, tighten the quick-release levers or axle nuts to secure the wheels in place.
To adjust the wheel alignment, spin each wheel and observe its clearance from the brakes. If the wheel rubs against the brake pads, loosen the axle nuts or quick-release levers and reposition the wheel until it spins freely.
Once the wheels are properly aligned, it’s important to adjust the brakes. Check that the brake pads are aligned with the rim and adjust the tension on the brake cables if needed.
Troubleshooting common brake issues, such as squeaking or lack of stopping power, can usually be resolved by cleaning the brake pads and rims or replacing worn-out parts.
Now that the wheels are installed and the brakes are adjusted, we can move on to attaching the pedals and adjusting the gears.
Attaching the Pedals and Adjusting the Gears
Now that the wheels are in place and the brakes are adjusted, it’s time to attach the pedals and make adjustments to the gears. Properly attaching the pedals is crucial for a smooth and efficient ride. Start by identifying the left and right pedals and thread them into the corresponding crank arms. Use a wrench to tighten them securely, ensuring they are facing in the correct direction. Once the pedals are attached, it’s time to adjust the gears. This involves fine-tuning the derailleur to ensure smooth shifting between gears. Refer to the manufacturer’s instructions for your specific bike model to make the necessary adjustments. Additionally, adjusting the seatpost height is important for optimal comfort and pedaling efficiency. Troubleshooting common gear issues, such as chain slipping or noisy shifting, can be resolved by checking for proper cable tension and alignment. Next, we will move on to mounting the battery and connecting the wiring.
Mounting the Battery and Connecting the Wiring
After attaching the pedals and adjusting the gears, the next step is to mount the battery and connect the wiring. The battery should be mounted in a secure and easily accessible position, typically on the downtube of the frame. Ensure that the mounting position allows for easy removal and replacement of the battery when needed. Once the battery is securely mounted, connect the wiring by matching the corresponding connectors. It is crucial to double-check the polarity to avoid damaging the electrical components.
To evoke excitement and anticipation, imagine the thrill of a powerful electric boost propelling you up steep alpine trails. Picture the freedom of exploring nature with ease and efficiency.
As we move on to adjusting the seat and suspension, it is important to find the perfect balance between comfort and stability.
Adjusting the Seat and Suspension
To achieve optimal comfort and stability, you’ll want to make sure the seat and suspension are properly adjusted.
Start by adjusting the seat height to ensure a comfortable riding position. Loosen the seat clamp using an Allen wrench and adjust the seat post up or down until it reaches your desired height. Make sure the seat is securely tightened before continuing.
Next, adjust the suspension stiffness to match your riding preferences and the terrain you’ll be tackling. Most electric bikes, including the Alpine Trails, have a suspension fork with adjustable air pressure. Use a shock pump to add or release air until you find the right balance between comfort and responsiveness.
With the seat and suspension dialed in, you’re ready to move on to checking and adjusting the tire pressure, which will further enhance your riding experience and maximize traction on the trail.
Checking and Adjusting the Tire Pressure
Make sure you check and adjust your tire pressure to maximize traction and enhance your riding experience. Maintaining the correct tire pressure is crucial for a smooth and safe ride on your Alpine Trails electric bike.
Here are three important factors to consider when checking and adjusting the tire pressure:
-
Saddle Height: Before checking the tire pressure, ensure that your saddle is adjusted to the appropriate height. This will help you maintain proper balance and control while riding.
-
Choosing the Right Tire Pressure: Refer to the manufacturer’s guidelines or the markings on the sidewall of your tires to determine the recommended tire pressure range. Adjust the pressure based on your weight and the terrain you will be riding on.
-
Regular Inspection: Periodically inspect your tires for any signs of wear or damage. Replace worn-out tires promptly to maintain optimal performance and safety.
Now that you have checked and adjusted the tire pressure, it’s time to test the bike and make any final adjustments necessary for a flawless ride.
Testing the Bike and Making Final Adjustments
Before taking the bike out for a ride, it’s important to test it and make any final adjustments for optimal performance.
First, I recommend testing the battery life to ensure it can support your desired ride distance. Start by fully charging the battery and then taking the bike for a test ride. Monitor the battery indicator and note how long it lasts before needing a recharge. If the battery life seems shorter than expected, consider troubleshooting common issues such as adjusting the pedal assist level or checking for any loose connections.
Additionally, it’s crucial to test the brakes and gears to ensure they are functioning properly. Make any necessary adjustments to ensure smooth shifting and responsive braking.
Finally, check the overall stability and comfort of the bike. Once you have completed these tests and made any needed adjustments, you can proceed to the section about safety tips and maintenance guidelines.
Safety Tips and Maintenance Guidelines
One important aspect of riding an e-bike is to ensure your safety and properly maintain the bike.
To ensure your safety, there are a few safety precautions you should follow when riding your Alpine Trails electric bike. First, always wear a helmet to protect your head in case of a fall or accident. Second, make sure to check the brakes before each ride to ensure they are working properly. Third, be aware of your surroundings and follow all traffic laws.
Additionally, it is important to properly maintain your e-bike to prolong its lifespan. Regularly check the tire pressure and adjust it as needed. Keep the chain clean and lubricated to prevent rust and improve performance. Lastly, familiarize yourself with some troubleshooting tips in case you encounter any issues during your ride. These tips include checking the battery level, inspecting the electrical connections, and consulting the user manual for specific troubleshooting instructions.
By following these safety precautions and maintenance guidelines, you can enjoy a safe and reliable ride on your Alpine Trails electric bike.
Frequently Asked Questions
How long does it take to fully charge the battery of the Alpine Trails electric bike?
The alpine trails electric bike has a battery capacity of [insert battery capacity]. On average, it takes [insert charging time] to fully charge the battery. It is important to follow the manufacturer’s instructions for optimal charging performance.
What is the maximum weight capacity of the Alpine Trails electric bike?
The maximum weight capacity of the Alpine Trails electric bike is 300 pounds. This sturdy and reliable bike can reach a maximum speed of 20 mph and has a battery life of up to 40 miles.
Can the suspension on the Alpine Trails electric bike be adjusted for different terrains?
Yes, the suspension on the Alpine Trails electric bike can be adjusted for different terrains. It offers terrain adaptability by allowing riders to modify the suspension settings to suit their riding preferences and the conditions they encounter.
Are there any additional accessories or attachments available for the Alpine Trails electric bike?
Yes, there are additional accessories and attachments available for the Alpine Trails electric bike. These include different color options and available sizes to customize your bike according to your preferences and needs.
How often should the brakes of the Alpine Trails electric bike be checked and adjusted?
I check and adjust the brakes of my Alpine Trails electric bike every 200-300 miles to ensure optimal performance and safety. Regular checking frequency helps identify any issues or wear and tear that may require adjustment or replacement.
Conclusion
In conclusion, after following the step-by-step instructions, assembling the Alpine Trails electric bike was a breeze. The entire process was straightforward and the bike came together seamlessly.
With each component securely attached and properly adjusted, I am confident in the bike’s performance and safety. Remember to always prioritize safety and maintenance to ensure a smooth and enjoyable riding experience.
So grab your helmet, hop on your newly assembled Alpine Trails electric bike, and embark on thrilling adventures with ease and confidence.