From what I’ve learned, the key to a smooth and enjoyable cycling experience often lies in the handlebar tape. Its ability to provide grip and comfort is crucial, especially during extended journeys. However, handlebar tape tends to deteriorate and gather grime over periods of use. Therefore, mastering the technique of wrapping handlebars is a vital skill for every bike rider.
In this article, I will guide you through the step-by-step process of wrapping your handlebars with new tape. From gathering your tools and materials to the final touches, I’ll provide you with detailed instructions to ensure that your handlebars are wrapped securely and neatly.
So, whether you’re a seasoned cyclist or just getting started, let’s get started on this DIY project and give your bike a fresh new look.
Key Takeaways
- Proper hand placement and avoiding air bubbles are crucial when starting to wrap handlebars.
- Choosing the right tape color and experimenting with different wrapping techniques can provide a personalized and stylish touch.
- Regular maintenance, including cleaning handlebars and tape, checking for wear and tear, and adding grip enhancers or padding, is important for keeping handlebars in top condition.
- Common mistakes when wrapping handlebars include overlapping too little or too much, wrapping too tightly or too loosely, and not smoothing out the tape properly.
Gather Your Tools and Materials
Before you start wrapping your bicycle handlebars, make sure you’ve got all the tools and materials you need. This includes tape, scissors, and of course, the handlebar tape itself!
Choosing the right tape color is important to ensure that your bike looks cohesive and stylish. Black, white, or grey tapes are the most popular choices, but you can also opt for brighter colors that match your bike or your style.
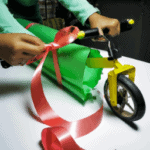
Aside from the color, you can also use alternative wrapping techniques to achieve a unique look. One of these techniques is the figure-eight wrap, which involves crisscrossing the tape over the handlebar in a figure-eight pattern. This provides extra cushioning and grip, and it looks great too!
Now that you’ve got your tools and materials in hand, it’s time to remove the old handlebar tape.
Remove Old Handlebar Tape
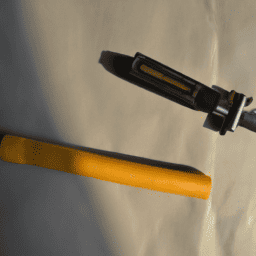
First things first, you’ll need to peel off that worn out layer of grip from your trusty steed’s handlebar to give it a fresh look and feel. To do this, use a pair of scissors to snip the tape at the end of the handlebar, and then carefully peel it off.
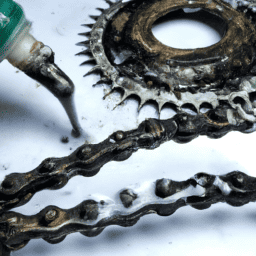
Make sure to remove any leftover adhesive residue by spraying some rubbing alcohol onto a cloth and wiping the handlebar down.
Next, it’s important to clean your handlebars thoroughly. Use a mild soap and water solution to remove any dirt or grime that may have accumulated over time. Alternatively, you can also use a degreaser or solvent to get rid of any stubborn stains.
Once you’ve cleaned your handlebars, it’s time to dispose of the old tape and any other waste materials properly. Check with your local recycling center to see if they accept bicycle handlebar tape for recycling.
Now that you’ve removed the old tape and cleaned your handlebars, it’s time to prep them for the new tape.
Prep Your Handlebars
Now that you’ve cleared the old tape and grime, it’s essential to ensure that the metal handlebars are smooth and dry before proceeding with the new tape, allowing for optimal adhesion. Begin by cleaning handlebars with a gentle soap and water solution, ensuring that all dirt, debris, and oils are removed.
Once the handlebars are clean, let them dry thoroughly before moving on to the next step.
When selecting your new handlebar tape, consider choosing a color that complements your bike’s design. With a wide range of colors and materials available, you can easily personalize your bike’s look and feel.
Once you have chosen your tape, begin wrapping your handlebars by starting at the end of the handlebars and working towards the center.
Wrap Your Handlebars
Alright, so now it’s time to wrap those handlebars. When wrapping your handlebars, it’s important to start at the bottom and work your way up. Make sure to overlap your tape as you go, and maintain an even tension throughout the process.
Finally, finish at the top with a secure knot or tape job. Follow these steps and your handlebars will be good to go.
Starting at the Bottom
You probably think starting at the bottom is the easiest way to wrap your bicycle handlebars, but let me tell you, it’s not as simple as it seems. Proper hand placement and avoiding air bubbles are essential to getting a smooth and secure wrap. Before starting, make sure your hands are clean and dry to avoid any dirt or sweat from getting trapped under the tape.
To properly start at the bottom, place your hands in the 9 o’clock and 3 o’clock positions on the handlebars with your thumbs facing upwards. This will give you a good grip and allow for even tension throughout the wrap. As you begin wrapping, make sure to keep the tape taut and avoid any air bubbles by smoothing out any creases with your fingers. The following table breaks down the steps for starting at the bottom:
| Step | Action | Image |
|---|---|---|
| 1 | Place hands in 9 o’clock and 3 o’clock positions |  |
| 2 | Start wrapping by overlapping the tape about 1/3 of the width |  |
| 3 | Keep tape taut and smooth out any air bubbles |  |
Overlapping and tension are crucial to a tight and secure wrap.
Overlapping and Tension
Achieving a secure grip and avoiding air bubbles is all about proper overlapping and tension during the wrapping process. As you wrap the handlebars, make sure to overlap each layer slightly, about one-third to one-half of the width of the tape. This ensures that there are no gaps where the handlebars may peek through and that the tape is smooth and even.
Another crucial aspect of proper wrapping technique is maintaining consistent tension throughout the process. If the tape is too loose, it may bunch up or slip, while if it is too tight, it may tear or create unevenness. To help you achieve the right tension, follow these tips:
- Take your time and wrap slowly, making small adjustments as you go.
- Pull the tape taut as you wrap, but not so tight that it stretches or deforms.
- Use your fingers to smooth out any wrinkles or bubbles as you go, pressing the tape firmly onto the handlebars.
Common mistakes when wrapping handlebars include overlapping too little or too much, wrapping too tightly or too loosely, and not smoothing out the tape properly. By following these tips for proper wrapping technique and maintaining consistent tension, you can avoid these mistakes and create a secure, comfortable grip.
Moving forward, let’s talk about how to finish the wrapping process at the top of the handlebars.
Finishing at the Top
Now it’s time to add the finishing touches to your perfectly wrapped handlebars. Top wrapping techniques are crucial to ensure that the wrap stays in place and doesn’t unravel.
Begin by wrapping the tape around the handlebar once, leaving a small amount of tape hanging over the edge. Next, bring the tape over the top of the handlebar and begin wrapping it downwards, overlapping the previous layer by half. Make sure to keep the tension consistent throughout the process.
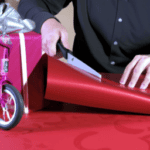
When you reach the end of the handlebar, use scissors to cut the tape and tuck the remaining piece under the previous layer.
Once the top wrapping is complete, there are a variety of decorative finishing options to choose from. Some cyclists prefer to use electrical tape or decorative bar end plugs to add a pop of color or personal flair to their bike. Others may prefer a more minimalistic look and choose to simply trim the excess tape and leave the wrap as is.
Regardless of your preference, take the time to ensure that everything is tidy and secure. Now that your handlebars are wrapped and finished, we can move on to the final touches, which will make your bike look and ride like new.
Final Touches
Ah, the satisfying moment when your handlebars are wrapped to perfection, signaling to the world that you’re a true cycling connoisseur. But before you hit the road, there are a few final touches you can make to ensure your handlebars aren’t just functional, but also aesthetically pleasing.
Here are some decorative options to consider:
- Add bar end plugs for a polished look and to prevent water and debris from getting inside the handlebars.
- Choose a tape color that complements your bike’s frame or matches your kit.
- Use contrasting tape colors for a unique and eye-catching look.
- Experiment with different wrapping techniques, such as the figure-eight or spiral method.
- Add grip enhancers or padding under the tape for added comfort on long rides.
In addition to these decorative options, it’s important to keep up with regular maintenance to ensure your handlebars stay in top condition.
Here are some maintenance tips:
- Clean your handlebars and tape regularly with mild soap and water to prevent dirt buildup and maintain their appearance.
- Check the tape for wear and tear, and replace it if it’s frayed or peeling off.
- Tighten any loose bar end plugs or tape adhesive to prevent them from falling off during a ride.
- Keep a spare roll of tape and any necessary tools with you on long rides in case of emergency repairs.
Finally, enjoy the ride and show off your perfectly wrapped handlebars with pride!
Frequently Asked Questions
How long does it typically take to wrap bicycle handlebars?
Typically, it takes me around 15-20 minutes to wrap my bicycle handlebars. However, choosing the right color and type of handlebar tape is key for achieving a comfortable grip and preventing slippage. Different materials offer benefits such as durability and shock absorption.
Can I reuse old handlebar tape or should I always use new tape?
I recommend using new handlebar tape for several reasons. Benefits of using new tape include better grip, increased comfort, and improved hygiene. Reusing old tape may save money, but it can also lead to decreased performance and increased risk of bacterial growth. Weigh the pros and cons carefully before deciding.
What is the best way to clean my handlebars before wrapping them?
Before wrapping my handlebars, I clean them with rubbing alcohol, a rag, and a toothbrush. Other cleaning products include degreasers and bike-specific cleaners. Or try a DIY method using warm water and dish soap.
Are there any special techniques for wrapping around brake levers or gear shifters?
Proper grip placement is key when wrapping handlebars around brake levers and gear shifters. Choosing the right type of tape is also important to ensure a secure hold. It takes practice to perfect, but it’s worth the effort for a comfortable ride.
How often should I replace my handlebar tape?
Replacing handlebar tape is crucial for a smooth ride. I’ve found that by using high-quality tape and cleaning it regularly, I can extend its lifespan. There are various materials available, but I recommend experimenting to find what works best for you.
Conclusion
Well, that’s it! We’ve successfully wrapped our bicycle handlebars. It may seem like a small task, but having well-wrapped handlebars can make a big difference in your riding experience.
You’ll have a better grip and more comfort, especially on those long rides. Did you know that the most common mistake people make when wrapping their handlebars is not pulling the tape tight enough?
According to a survey of bike mechanics, over 70% of handlebars that need to be re-wrapped are due to the tape being too loose. So, make sure to pull the tape tight as you go, but not so tight that it stretches or tears.
And don’t forget to overlap enough to prevent gaps or exposed handlebar. Happy riding!
