As someone who loves cycling, I understand there’s nothing quite like the sensation of effortlessly riding along the pavement on a bike that’s in top condition. However, just like everything else, bicycles need regular upkeep and fixing. A frequent challenge encountered by riders is having to take off worn or damaged grips from their handlebars.
While it may seem like a daunting task, with the right tools and techniques, it can be done quickly and easily. Think of it like peeling off a band-aid – it may seem intimidating at first, but with a steady hand and a bit of patience, the end result is worth the effort.
In this article, I will guide you through the step-by-step process of removing bicycle grips. From gathering the necessary tools to cutting and removing the grip, I will provide you with all the information you need to successfully tackle this task and get your bike back on the road in no time. So, let’s get started!
Key Takeaways
- There are two main types of bike grips: lock-on and slip-on.
- Removing lock-on grips requires a hex wrench, while slip-on grips can be removed with a screwdriver or pliers.
- Properly cleaning the handlebar before installing new grips is crucial to prevent slipping while riding.
- Upgrading grips can improve comfort, reduce fatigue, and enhance handling.

Under Armour Squeeze Water Bottles, 32 oz Water Bottles, Sideline Sports Water Bottle with Quick-Shot Lid, Quick & Easy Hydration, Gym Water Bottles, Squeeze Bottle, 1 32oz Bottle
- Easy Hydration: Quick-shot lid and one-way valve
- On-the-Go Use: One-hand operation for active hydration
- Measurement Markings: Ounces and milliliters for tracking
As an affiliate, we earn on qualifying purchases.
Gather the Necessary Tools
You’re gonna need some tools if you wanna get those grips off your bike! First, you’ll need to identify the type of grips you have. There are two main types of grips: lock-on grips and slip-on grips. Lock-on grips have a collar that secures them in place, while slip-on grips are held in place by friction. Knowing what type of grip you have will help you determine which tools you need.
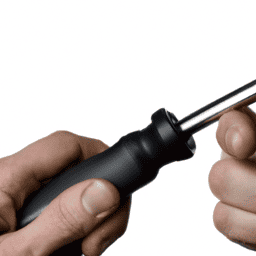
Next, you’ll need to gather the necessary tools. For lock-on grips, you’ll need a 2.5mm or 3mm hex wrench to remove the collar that holds the grip in place. Slip-on grips, on the other hand, require a more delicate touch. You’ll need a flathead screwdriver or a pair of pliers to pry the grip off the handlebar. It’s important to use caution when removing slip-on grips, as the handlebar can be easily scratched or damaged.
Common grip materials include rubber, foam, and silicone. Once you’ve gathered your tools, it’s time to move on to the next step: loosening the grip.
Loosen the Grip
Gently squeeze the grip with your palm and fingers, and you’ll feel it start to loosen and slide off the handlebar. If the grip is still tight, try using the twist and spray technique. Hold the grip with one hand and twist it back and forth while spraying a small amount of rubbing alcohol or water underneath the grip. This will help break down any adhesive that may be holding the grip in place.
Once the grip has started to loosen, continue to slide it off the handlebar. Be careful not to damage the grip or the handlebar. If the grip is still difficult to remove, repeat the twist and spray technique until the grip comes off easily.
With the grip removed, it’s time to move on to the next step and cut the grip.
Note: It’s important to use caution when using rubbing alcohol or any other liquid on the handlebars as it may damage the finish.
Cut the Grip
Now it’s time to get your trusty pair of scissors and carefully cut the grip along its length, making sure to avoid cutting the handlebar underneath. This is an effective method for removing grips that are stuck and won’t budge with other techniques. However, before you start cutting, it’s important to take some safety precautions to avoid any accidents or injuries.
One alternative method is to use a utility knife or a razor blade. This can be a bit trickier than using scissors, as you need to be extra careful not to damage the handlebar or yourself. Another option is to use compressed air to loosen the grip by spraying it between the grip and the handlebar. Regardless of the method you choose, make sure to wear gloves to protect your hands from any sharp edges or debris. Once you’ve successfully removed the grip, it’s time to move on to the next step of removing any residue left behind.
To remove any residue, you can use rubbing alcohol or WD-40 on a cloth. Rub it gently on the handlebar to remove any leftover adhesive or debris. It’s important to thoroughly clean the handlebar before installing new grips to ensure a secure and safe fit.
Remove Any Residue
Like a surgeon carefully removing tumor remnants, it’s essential to cleanse any leftover debris or adhesive from the handlebar surface before installing fresh grips. Failure to do so could result in a loose grip that slips while riding, making it difficult to steer or brake.
To ensure a clean grip surface, I use rubbing alcohol to dissolve any stubborn residue. After cutting off the old grip, I pour a small amount of rubbing alcohol onto a clean cloth and vigorously rub the handlebar surface. I pay particular attention to any sticky or dirty areas, gently scrubbing until all grime is removed.
Once I’m satisfied with the cleanliness of the handlebar, I leave it to dry for a few minutes before proceeding to install new grips.
Install New Grips
It’s crucial to properly install new grips on your handlebars to ensure a secure and comfortable grip while riding.
When choosing new grips, it’s important to consider the type of riding you will be doing. If you’re a mountain biker, you may want to choose thicker grips with more cushioning to absorb shock while riding on rough terrain. If you’re a road cyclist, thinner grips with less cushioning may be more appropriate for a better feel of the handlebars.
Upgrading your grips can offer a range of benefits, including improved comfort, reduced fatigue, and better handling.
New grips can provide a more secure grip on the handlebars, which can prevent slipping and improve control of the bike. Additionally, grips with better shock absorption can reduce the strain on your hands and arms, making longer rides more comfortable.
Overall, choosing the right grips and properly installing them can greatly enhance your cycling experience.
Frequently Asked Questions
Can I reuse the old grips after removing them?
If you’re able to remove your bicycle grips without damaging them, then reusing them is possible. However, it’s important to weigh the pros and cons, as worn or damaged grips can negatively affect your grip on the handlebars. Alternative methods for removing grips include using compressed air or lubricant.
How often should I replace my bicycle grips?
For proper maintenance, I replace my bicycle grips every 6-12 months or when signs of wear appear, such as cracks, tears, or loss of grip. Regularly cleaning and checking for wear can prolong their lifespan.
What types of materials are commonly used for bicycle grips?
Ergonomic and foam grips are common materials for bicycle grips. Lock-on grips provide easy installation and removal, but add weight and cost. Durability and comfort are important factors to consider when choosing a grip material.
Are there any special techniques to install new grips?
To properly install new bicycle grips, start by selecting the right size for your handlebars. Then, choose the grip pattern that best suits your riding style. Apply a small amount of rubbing alcohol to the handlebars before sliding the grips on. Secure the grips in place with a secure adhesive.
How do I know if I need to replace my handlebar tape as well?
To determine if handlebar tape needs replacing, inspect for signs of wear such as tears, fraying, or discolouration. Clean tape with soap and water before inspection. When choosing new tape, consider material, thickness, and colour.
Conclusion
In conclusion, removing bicycle grips may seem like a daunting task, but with the right tools and techniques, it can be accomplished easily and efficiently. As a seasoned cyclist, I’ve had my fair share of experience with changing grips on my bike. I can confidently say that it’s a skill worth learning.
Removing grips can be compared to peeling an orange. Just like an orange peel must be carefully removed to fully enjoy the juicy fruit inside, bicycle grips must be removed with care to avoid damaging the handlebars or any other components. With the proper tools and technique, the grip can be loosened and peeled off smoothly. Just like how the orange peel can be removed without losing any of the fruit inside.
Remember, when removing bicycle grips, it’s important to use a solvent or lubricant to help loosen the grip, cut it off carefully to avoid damaging the handlebars, and remove any residue left behind.
By following these steps, you can easily remove old grips and install new ones to improve your cycling experience. So go ahead and give it a try. Just like peeling an orange, you’ll be able to enjoy the sweet rewards of your efforts.