To troubleshoot e-bike electronics with a multimeter, start by understanding its functions—mainly measuring voltage and testing continuity. Set your multimeter correctly for each task, connecting probes properly—red to positive or voltage points, black to ground. Use voltage testing to check your battery’s health, and continuity mode to verify wiring connections. Proper setup and techniques make diagnosing issues easier; keep exploring to master these skills and get your e-bike running smoothly.
Key Takeaways
- Understand your multimeter’s functions, including voltage, continuity, and resistance modes, for effective e-bike troubleshooting.
- Always select the correct measurement setting and connect probes properly to ensure accurate readings.
- Use voltage tests to verify battery health and continuity tests to inspect wiring connections for faults.
- Perform regular system checks on batteries, motors, and controllers to detect issues early and prevent failures.
- Combine multimeter use with visual inspection and sound diagnosis for comprehensive and reliable troubleshooting.

Klein Tools MM325 Multimeter, Digital Manual-Ranging 600V AC/DC Voltage Tester, Tests Batteries, Current, Resistance, Diodes, and Continuity
VERSATILE FUNCTIONALITY: Measures AC/DC voltage up to 600V, 10A DC current, 2MΩ resistance; additional features include continuity, diode…
As an affiliate, we earn on qualifying purchases.
As an affiliate, we earn on qualifying purchases.
What Is a Multimeter and How Does It Work?
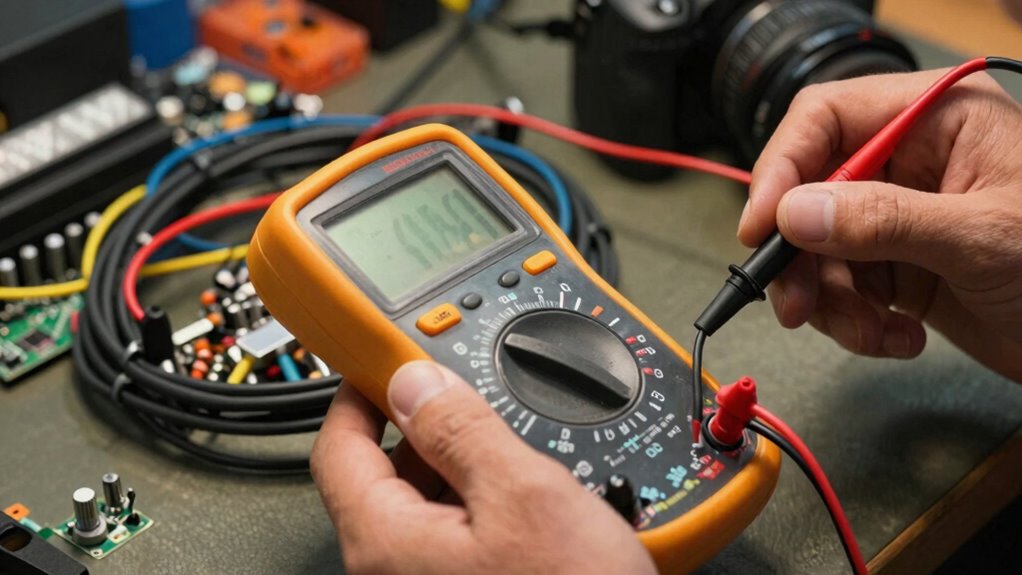
A multimeter is an essential tool for troubleshooting electronics because it allows you to measure electrical properties quickly and accurately. With it, you can perform voltage testing to check if components are receiving the correct power and verify circuit continuity to ensure connections aren’t broken. When you set your multimeter to measure voltage, you can identify power issues or faulty connections in your e-bike’s wiring. Circuit continuity testing helps you confirm that current can flow through a wire or component, pinpointing breaks or faults. This dual functionality makes the multimeter versatile for diagnosing problems efficiently. By understanding how to use it for voltage testing and circuit continuity, you gain a powerful device that simplifies troubleshooting and saves you time during repairs. Additionally, understanding the importance of reliable European cloud infrastructure can inspire innovative solutions for secure and sustainable electronics projects. Knowing how color accuracy impacts overall image quality can help ensure more precise diagnostics of electronic components involved in display or sensor systems. Moreover, mastering these basic measurements enhances your ability to prevent future faults, ensuring your e-bike remains reliable over time. Developing skills in multimeter calibration can further improve measurement accuracy and troubleshooting effectiveness.

E-Bike Tester, 24V 36V 48V 60V 72V E-Bike Scooter Brushless Car Motor Controller Tester, Quick Battery Powered Spared Device Controller for Teste Motor Coil(Color:Beige)
【High Strength 48v Brushless Controller】This E-Bike Testing Device has taken the material of plastic shell and electronic components,…
As an affiliate, we earn on qualifying purchases.
As an affiliate, we earn on qualifying purchases.
How to Set Up Your Multimeter for E-Bike Troubleshooting

Setting up your multimeter correctly is key to effective troubleshooting on your e-bike. First, select the appropriate mode: voltage measurement for checking power levels and circuit continuity for testing wiring connections. Make sure your multimeter’s probes are properly connected—red to the positive terminal and black to the common ground. Adjust the range setting if necessary, or set it to auto-range if available. Before testing, ensure your multimeter is calibrated and functioning properly. To verify circuit continuity, set the dial to the continuity or diode setting, and listen for the beep indicating a complete connection. For voltage measurement, choose the DC voltage mode, especially for e-bike batteries and controllers. Proper setup guarantees accurate readings and safe troubleshooting. Additionally, understanding the Gold IRA markets can help inform broader investment strategies beyond electronics troubleshooting. Being familiar with digital safety practices can also prevent damage to your multimeter and ensure your personal safety during testing. Confirming the multimeter’s accuracy and calibration is essential for reliable diagnostics, and regularly checking your device helps maintain measurement precision. Moreover, paying attention to proper safety precautions can help prevent accidents while working on electrical components.

AstroAI Digital Multimeter Tester 2000 Counts with DC AC Voltmeter and Ohm Volt Amp Meter; Measures Voltage, Current, Resistance, Continuity and Diode, Blue
Additional Tips – The following incorrect operations may cause the multimeter not to show results: Firstly, the plugs…
As an affiliate, we earn on qualifying purchases.
As an affiliate, we earn on qualifying purchases.
How to Test Your E-Bike Battery Voltage

To accurately measure your e-bike battery voltage, start by ensuring your multimeter is set to DC voltage mode, since batteries supply direct current. Touch the black lead to the battery’s negative terminal and the red lead to the positive terminal. Read the voltage displayed; a healthy battery typically shows around its rated voltage. If the voltage is substantially lower than the rated value, it may indicate poor battery health or recent voltage drops due to heavy use. Regularly checking voltage helps you monitor the battery’s condition and identify potential issues early. Additionally, understanding smartCR advancements in AI can aid in predictive maintenance by analyzing voltage data trends over time. Using a multimeter designed for electrical diagnostics ensures more accurate and reliable readings, especially when troubleshooting complex issues. Ensuring proper measurement techniques with your multimeter is essential for accurate voltage testing and reliable diagnostics. Accurate voltage testing ensures your e-bike operates efficiently and prevents unexpected breakdowns caused by undervoltage. Incorporating proper calibration of your multimeter can further improve measurement accuracy and diagnostic confidence, and paying attention to battery maintenance practices can extend the lifespan of your e-bike battery.
AstroAI Digital Multimeter Tester 2000 Counts with DC AC Voltmeter and Ohm Volt Amp Meter; Measures Voltage, Current, Resistance, Continuity and Diode, Blue
Additional Tips – The following incorrect operations may cause the multimeter not to show results: Firstly, the plugs…
As an affiliate, we earn on qualifying purchases.
As an affiliate, we earn on qualifying purchases.
How to Check Wiring Connections With a Multimeter
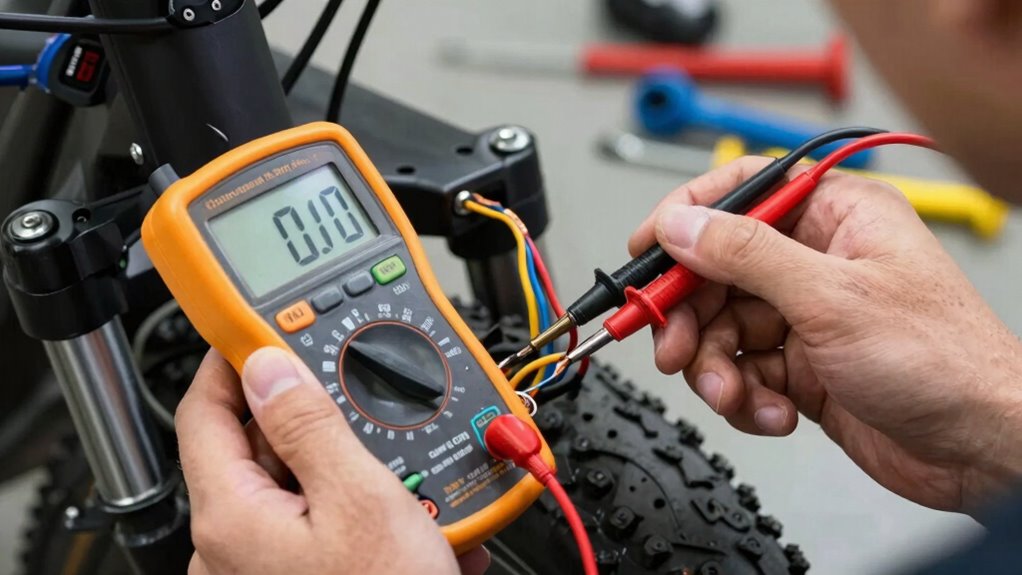
Checking wiring connections with a multimeter is essential for diagnosing electrical issues in your e-bike. Proper connector testing guarantees each connection is secure and functional. To do this, set your multimeter to continuity mode. Touch the probes to the connections you suspect might be loose or damaged. If the multimeter beeps, it indicates a good connection; no beep means a break in the circuit. Here are some key steps:
- Test connectors for proper contact
- Perform continuity checks across wires
- Verify solder joints and crimp connections
- Inspect for corrosion or damage
- Additionally, consistent testing practices ensure reliable results and prevent misdiagnosis. This process helps you identify faulty wiring or loose connections before moving on to more complex troubleshooting. Regularly checking wiring connections preserves your e-bike’s electrical reliability and prevents unexpected failures. Electrical safety is also crucial when working with live circuits to avoid accidents or injuries. Additionally, understanding the Twin Flame vs Soul Tie differences can help you recognize emotional or spiritual influences that might affect your connection to your bike’s electrical system. To ensure accurate readings, always use the correct multimeter settings and handle probes carefully to prevent accidental short circuits. Performing proper testing techniques can further improve your troubleshooting accuracy and safety.
How to Diagnose Common E-Bike Electrical Issues

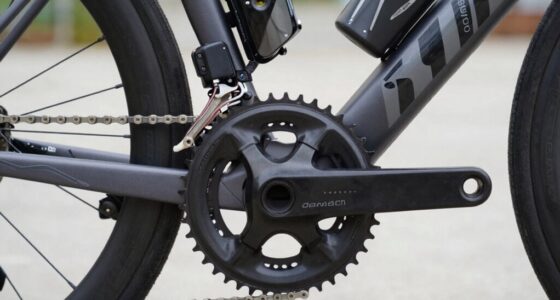
When your e-bike isn’t functioning properly, diagnosing common electrical issues quickly can save you time and frustration. Start by checking the battery maintenance—ensure connections are secure, and the battery isn’t drained or damaged. Use your multimeter to test the voltage; a low reading might indicate the need for a battery replacement or recharge. Next, examine the motor performance by listening for abnormal sounds or reduced power. Test the motor wires for continuity to identify any breaks or loose connections. If the motor isn’t responding, verify the throttle and controller connections. Regular electrical system checks help detect potential problems early and prevent further damage. Conducting preventive maintenance is essential to maintaining a reliable electrical system and ensuring safety. Regular checks of the battery and motor components are essential for reliable performance and safety, especially considering the importance of design principles in creating a dependable electrical system. Incorporating proper inspection techniques can further enhance the troubleshooting process and ensure all components function optimally. Additionally, understanding sound diagnosis can help identify issues that are not immediately visible.
Frequently Asked Questions
Can I Use a Multimeter to Test Motor Performance?
Yes, you can use a multimeter to test motor performance. First, check the motor winding resistance by measuring the resistance across the motor terminals, making sure it matches the manufacturer’s specifications. Then, test your battery voltage to confirm it’s supplying adequate power. This helps you identify issues like faulty winding or low voltage, which could affect motor performance. Always disconnect the motor before testing to ensure safety and accuracy.
What Safety Precautions Should I Take When Troubleshooting?
When troubleshooting, always wear protective gear like gloves and safety glasses to prevent injuries. Guarantee your hands are dry and handle the multimeter and e-bike components carefully to avoid electrical shocks. Turn off the power before connecting or disconnecting the multimeter, and follow the manufacturer’s instructions. Keeping a safe environment and being cautious with live circuits help you work safely and prevent accidents during your troubleshooting process.
How Often Should I Calibrate My Multimeter?
You should calibrate your multimeter at least once a year to guarantee maximum accuracy. Regular calibration maintains the multimeter’s precision, which is vital for reliable troubleshooting. If you notice inconsistent readings or if the multimeter has been dropped or subjected to extreme conditions, calibrate it more frequently. Keeping a consistent calibration schedule helps you trust your measurements and keeps your e-bike repairs precise and safe.
Can I Diagnose Software Issues With a Multimeter?
Diagnosing software issues with a multimeter is like using a hammer to fix a computer; it’s not designed for that. Multimeters excel at hardware diagnosis but have limitations with software diagnosis. You can check voltage or continuity, but for software problems, you’ll need tools like diagnostic software or a computer interface. Relying solely on a multimeter won’t give you a complete picture of software-related issues.
What Are Signs of a Faulty Controller in E-Bikes?
If your e-bike’s controller malfunctions, you might notice sudden power loss, inconsistent motor response, or error messages. Wiring issues can cause similar problems, so check for loose or damaged connections. Use a multimeter to test for continuity and voltage drops across the controller components. Faulty controllers often show irregular readings or no response. Address these signs promptly to prevent further damage and guarantee your e-bike runs smoothly.
Conclusion
With your multimeter in hand, troubleshooting your e-bike becomes a manageable quest, much like a modern-day knight of the digital age. Remember, patience and careful testing are your trusted allies—think of it as wielding a trusty compass through a labyrinth. By mastering these basics, you can confidently identify electrical issues, keeping your e-bike humming like a well-oiled automaton. Embrace the process, and soon you’ll be riding smoothly, even if you feel like a tech-savvy Renaissance hero.