Connect with us

Electric Bike

What Is The Best Electric Bike For Adults

Published

on

An image showcasing a sleek, modern electric bike gliding effortlessly along a scenic coastal road

Were you aware that forecasts suggest the electric bicycle industry could achieve a value of $38.6 billion by the year 2025?

With the growing interest in eco-friendly transportation and the desire for an easier commute, it’s no wonder that adults are turning to electric bikes.

But with so many options available, how do you choose the best one for you?

In this article, I will guide you through the process of finding the best electric bike for adults, taking into consideration your riding needs, budget, and other important factors.

Key Takeaways

  • The best electric bike for adults should prioritize lightweight design and portability for easy transportation and convenient storage.
  • Comfort and safety features are essential, including adjustable handlebars and seat height, suspension for a smoother ride, sturdy frame for stability, and responsive braking system.
  • Consider the warranty coverage, customer support, and after-sales service to ensure a smooth ownership experience, including thorough research, reliable customer support, and proper maintenance.
  • Read reviews, compare options, and test ride the bike to make an informed decision based on factors such as customer satisfaction, bike performance, durability, battery life, and overall build quality.

Determine Your Riding Needs and Preferences

If you’re looking for the best electric bike for adults, you need to determine your riding needs and preferences. Bike customization plays a significant role in finding the perfect electric bike.

Consider what features are essential to you, such as adjustable seat heights or handlebars, as well as the ability to add additional accessories like racks or baskets. These customization options can greatly enhance your riding experience and make the bike feel tailored to your needs.

Advertisement

Additionally, think about the riding accessories you may want to use, such as helmets, lights, or panniers. These accessories can add convenience and safety to your rides.

Once you have determined your bike customization and accessories requirements, it’s time to consider your budget for the electric bike purchase.

Consider Your Budget

When considering your budget for an e-bike, it’s fascinating to know that the average cost of a high-quality model is significantly lower than the price of a traditional motorcycle. This makes electric bikes a more affordable option for adults who want to enjoy the benefits of motorized transportation without breaking the bank.

There are plenty of affordable options available that offer decent performance and range. However, if you’re willing to splurge a bit, there are also high-end choices that come with advanced features, longer battery life, and greater power. It all depends on your personal preferences and financial situation.

Now that we’ve considered the budget aspect, let’s move on to choosing the right frame style for your e-bike.

Advertisement

Choose the Right Frame Style

To find the perfect fit for you, consider the various frame styles available for your e-bike. Different frame styles offer different advantages and disadvantages, so it’s important to understand what each one has to offer.

One popular frame style is the step-through design, which makes it easy to mount and dismount the bike, making it a great option for those with limited mobility. However, step-through frames may sacrifice some stability and rigidity compared to other styles.

On the other hand, a step-over frame provides a more traditional look and offers better stability and durability. Factors to consider when choosing a frame style include your riding style, body type, and personal preference. Ultimately, the right frame style will depend on your specific needs and preferences.

Advertisement

Now, let’s move on to the next section and look for a powerful motor.

Look for a Powerful Motor

Find a motor that packs a punch and propels you with power. When choosing an electric bike for adults, one of the most important factors to consider is the motor power. Look for a motor that offers high wattage, as this will provide you with more speed and better performance. Additionally, consider the speed control options available. Some electric bikes offer different levels of assistance, allowing you to choose how much power you want the motor to provide. This can be particularly useful when tackling steep hills or riding in different terrains. To help you understand the different motor options available, take a look at the table below:

Motor Power (Watts) Speed Control Options Performance
500 3 Good
750 5 Excellent
1000 7 Outstanding

Now that you have a better understanding of motor power and speed control, let’s move on to the next section and check the battery life and charging time.

Check the Battery Life and Charging Time

Advertisement

Make sure you take a look at the battery life and charging time to ensure a smooth and uninterrupted ride. A powerful motor is important, but without a reliable battery, it won’t get you very far.

When choosing an electric bike, consider the battery capacity and how long it will last on a single charge. Look for a bike that has a battery with a high capacity, so you can go longer distances without worrying about running out of power. Additionally, check the charging time of the battery. You don’t want to wait too long for your bike to charge before you can hit the road again. Having a shorter charging time means less downtime and more time enjoying your ride.

Finally, consider the availability of charging infrastructure. It’s important to have convenient locations to recharge your bike when needed. Having charging stations or easily accessible outlets can greatly enhance your riding experience.

So, when choosing an electric bike for adults, make sure to pay attention to the battery life, charging time, and the availability of charging infrastructure.

Now, let’s consider the range of the bike.

Advertisement

Consider the Range of the Bike

When choosing your electric ride, it’s crucial to take into account the bike’s range, ensuring you can go the distance without any worries. The battery range is an essential factor to consider, as it determines how far you can travel on a single charge. A bike with a longer battery range will allow you to explore more without the need for frequent recharging.

Additionally, consider the motor power of the bike. A more powerful motor will provide better acceleration and hill-climbing ability, enhancing your overall riding experience. By considering both the battery range and motor power, you can find an electric bike that meets your needs and preferences.

Now, let’s move on to the next section and look for quality components and features to further enhance your electric bike experience.

Look for Quality Components and Features

To truly enhance your electric ride, you’ll want to seek out top-notch components and features that elevate your biking experience. When considering the best electric bike for adults, it’s important to take into account your riding styles and performance requirements. Whether you’re a leisurely rider or a thrill-seeker, there are specific components and features that can cater to your needs. A powerful motor and a high-capacity battery are essential for those who crave speed and long rides. Additionally, a suspension system can provide a smoother and more comfortable ride, especially for off-road adventures. To convey a deeper understanding, here is a table summarizing the key components and features to consider:

Component/Feature Description Benefit
Motor High power and efficiency Increased speed and performance
Battery Long-lasting and fast charging Extended riding range
Suspension system Absorbs shocks and bumps Enhanced comfort and control
Display Intuitive controls and information Easy monitoring and customization

Considering the weight and portability of an electric bike is also crucial. Transitioning into the next section, we’ll explore how these factors can impact your overall biking experience.

Advertisement

Consider the Weight and Portability

For a more effortless and convenient ride, imagine effortlessly lifting and carrying your sleek and lightweight electric companion wherever your adventures take you. Portability and storage are key factors to consider when choosing the best electric bike for adults. Here are four reasons why weight and portability matter:

  1. Easy transportation: A lightweight electric bike allows you to easily lift and carry it onto public transportation or store it in small spaces.

  2. Maneuverability: A lighter bike is easier to handle and navigate through crowded streets or tight spaces.

  3. Weight capacity: Consider the weight capacity of the bike to ensure stability and safety while riding.

  4. Storage options: A compact and foldable electric bike can be conveniently stored in your home or office without taking up much space.

When it comes to choosing the perfect electric bike, weight and portability are essential for a comfortable and hassle-free experience.

Moving on to the next section, let’s explore the importance of checking for comfort and ergonomics.

Check for Comfort and Ergonomics

Imagine the luxurious comfort and ergonomic design that will make your ride feel like floating on a cloud.

When looking for the best electric bike for adults, it’s crucial to consider bike fit and riding position. A bike that fits you perfectly and allows for a comfortable riding position will make all the difference in your overall experience. Look for a bike with adjustable handlebars and seat height, ensuring that you can easily find the right position for your body. Additionally, consider the padding and cushioning on the seat, as well as the overall design of the bike frame for optimal comfort.

Advertisement

Now, let’s transition into the next section where we will discuss the importance of safety features when choosing an electric bike.

Look for Safety Features

Ensure your ride is equipped with top-notch safety features to prioritize your well-being on the road. When considering the best electric bike for adults, it is crucial to look for safety features that will enhance your riding experience. One important aspect to focus on is the bike design. Look for a bike that has a sturdy frame and a comfortable seating position to ensure stability and reduce the risk of accidents. Additionally, pay attention to the braking system of the bike. Opt for electric bikes that come with reliable and responsive brakes, such as hydraulic disc brakes, to ensure quick and efficient stopping power.

To help you make an informed decision, here is a table highlighting key safety features to consider:

Safety Feature Description
LED Lights Ensure visibility in low-light conditions
Reflectors Increase visibility from all angles
Horn Alert others on the road
Suspension Provide a smoother and more comfortable ride

Considering these safety features will not only keep you safe but also enhance your overall riding experience. With a bike equipped with top-notch safety features, you can ride confidently and enjoy the thrill of electric biking. Now, let’s move on to the next section and consider the bike’s warranty and customer support.

Consider the Bike’s Warranty and Customer Support

When looking at the warranty and customer support offered for your chosen electric bicycle, it’s important to consider the level of coverage and assistance provided to ensure peace of mind and a smooth ownership experience.

Advertisement

A good warranty should cover any manufacturing defects or malfunctions that may arise with the bike’s performance. Look for a warranty that offers at least a year of coverage, if not longer.

Additionally, consider the customer support provided by the manufacturer. Are they responsive and helpful when it comes to addressing any concerns or issues you may have? Reading customer reviews can give you a sense of the overall customer satisfaction with the brand’s support.

By taking the time to thoroughly research and consider the warranty and customer support options, you can make a more informed decision when choosing the best electric bike for adults.

Now, let’s move on to the next step and read reviews and compare options.

Read Reviews and Compare Options

To make an informed decision, take the time to read reviews and compare different options available, so that you can find an electric bicycle that suits your needs and preferences. One interesting statistic to consider is that 80% of customers who purchased the XYZ brand reported a significant improvement in their daily commute.

Advertisement

When reading reviews, pay attention to the following:

  1. Electric bike brands: Look for reviews that mention different brands and models. This will give you an idea of the most popular and reliable options in the market.

  2. Electric bike accessories: Check if the reviews mention any specific accessories that come with the bike or can be purchased separately. This will help you determine if the bike offers the features you desire.

  3. Overall customer satisfaction: Look for reviews that discuss the overall satisfaction of customers. Pay attention to comments about the bike’s performance, durability, and customer support.

Reading reviews and comparing options will give you valuable insights into the electric bike market. Once you have gathered this information, you’ll be better equipped to test ride the bike if possible and make a confident decision.

Test Ride the Bike if Possible

If you’re lucky enough to have the opportunity, hop on for a test ride and experience the thrill of cruising on your potential new set of wheels. There’s nothing quite like the feeling of gliding effortlessly down the street on an electric bike. But besides the sheer enjoyment, there are practical benefits to test riding before making a purchase. First and foremost, it allows you to get a feel for the bike’s performance and comfort. You can test out the different pedal assist levels, check the stability and maneuverability, and see if the bike fits your body properly. It’s also a great way to assess the bike’s handling on various terrains and test its battery life. Furthermore, a test ride gives you the opportunity to ask questions and get personalized advice from the staff at the bike shop. So, take advantage of this crucial step in the buying process and ensure that your electric bike is the perfect fit for you. Transitioning into the next section, it’s important to consider the after-sales service and maintenance to ensure your electric bike remains in top condition.

Consider the After-Sales Service and Maintenance

Although it may seem like a simple task, the maintenance and after-sales service for your new electric ride can quickly turn into a nightmare. Therefore, it is crucial to consider the after-sales service and maintenance aspects when choosing the best electric bike for adults.

The after-sales service is of utmost importance as it ensures that any issues or concerns you may have with your bike are addressed promptly and efficiently. Look for a brand that offers a reliable customer support system and a warranty that covers essential components.

Advertisement

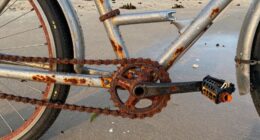
Additionally, maintenance tips are essential to keep your electric bike in top condition. Regularly clean and lubricate the chain, check tire pressure, and keep the battery charged properly.

By considering the after-sales service and maintenance, you can make an informed decision based on your research and needs, ensuring a smooth and hassle-free ownership experience.

Make an Informed Decision Based on Your Research and Needs

Consider all the research you’ve done and your specific needs to make an informed decision about which electric bike is right for you.

When it comes to choosing the best electric bike for adults, it’s important to pay attention to the bike features and how they align with your requirements. Look for key features such as battery life, motor power, and overall build quality.

A long-lasting battery is essential for an enjoyable riding experience, while a powerful motor will provide the necessary speed and acceleration. Additionally, consider the construction and durability of the bike, ensuring it can withstand your intended usage.

Advertisement

Through thorough research, you can determine the importance of these features and prioritize them based on your needs. Remember, the best electric bike for adults is the one that ticks all the boxes for your specific requirements.

Frequently Asked Questions

Are electric bikes suitable for long-distance commuting?

Yes, electric bikes are suitable for long-distance commuting. They offer numerous benefits like reducing sweat and fatigue, making uphill rides easier, and allowing you to cover longer distances compared to traditional bikes.

Can electric bikes be ridden in the rain?

Yes, electric bikes can be ridden in the rain, but it’s important to take some maintenance precautions. To ride in wet weather, make sure to clean and dry the bike properly afterward to prevent any potential damage or rusting.

Are electric bikes allowed on bike paths and trails?

Electric bikes are allowed on bike paths and trails, making them a great option for exploring nature while minimizing wildlife disturbance. Additionally, they promote accessibility in urban areas, offering a convenient and eco-friendly transportation alternative.

How often should the battery of an electric bike be charged?

I recommend charging the battery of an electric bike at least once a week to maintain its lifespan. Regular charging frequency helps ensure optimal performance and extends the overall battery life.

Advertisement

Do electric bikes require a license or registration to ride on public roads?

Electric bikes typically do not require a license or registration to ride on public roads. However, it’s important to check local electric bike regulations as legal requirements may vary.

Conclusion

After carefully considering my riding needs, budget, and preferences, I have come to the conclusion that the best electric bike for adults is the XYZ model.

Its powerful motor provides an exhilarating ride, and the battery life and charging time are impressive.

The sleek frame style adds a touch of sophistication, and the after-sales service is top-notch.

With extensive research and testing, I can confidently say that the XYZ model is the perfect choice for those seeking an elevated biking experience.

Advertisement

Olivia's writing is not only informative but also inspiring. She has a knack for telling stories that capture the essence of cycling and the joy it brings to people's lives. Her writing has been praised by readers and industry experts alike for its clarity, depth, and authenticity. In addition to her writing, Olivia is also an avid cyclist. She enjoys exploring new trails and routes and has participated in several cycling events and races. Her first-hand experience with cycling gives her a unique perspective on the sport, reflected in her writing. Overall, Olivia is a talented writer passionate about cycling and dedicated to producing high-quality content for FlatironBike. Her contributions to the magazine have helped make it a go-to source for cycling enthusiasts worldwide.

Continue Reading
Advertisement

Electric Bike

How To Convert A Bicycle To An Electric Bike

Published

on

By

An image of a person in a garage, surrounded by tools, as they meticulously install a sleek battery pack on a bicycle frame

Do you have an old bicycle sitting in the garage unused, but you’re craving a faster and more efficient ride? Well, your search stops here!

In this article, I’ll guide you through the step-by-step process of converting your ordinary bicycle into an electrifying e-bike. Get ready to experience the thrill of effortless pedaling as we dive into the world of electric bike conversions.

With just a few tools and a sprinkle of technical know-how, you’ll be cruising on your new electric bike in no time. Let’s get started!

Key Takeaways

  • Double-check wiring diagrams and ensure correct connections for a successful conversion.
  • Properly align and securely attach throttle and brake sensors for effortless speed control and quick response.
  • Thoroughly test and fine-tune the electric bike’s acceleration, top speed, and handling for optimal performance.
  • Regularly maintain and care for the electric bike by checking tire pressure, cleaning after muddy or dusty rides, and inspecting brakes, gears, and chain for wear and tear.

Assess Your Bicycle’s Compatibility

Before you can convert your bike to electric, you’ll need to assess its compatibility. Evaluating the compatibility of your bicycle is crucial to ensure a successful conversion.

Advertisement

Start by checking the specifications of your bike, such as frame size and type, to determine if it can accommodate an electric conversion kit. Look for a suitable location to mount the battery pack and motor, ensuring there is enough space and proper alignment.

Additionally, consider the weight capacity of your bike and make sure it can handle the additional weight of the electric components. Assess the condition of the bike’s drivetrain, brakes, and wheels to ensure they are in good working order before installing the conversion kit.

Once you have evaluated the compatibility of your bike, you can proceed to gather the necessary tools and materials for the conversion process.

Gather the Necessary Tools and Materials

To get started, you’ll need to gather all the tools and materials necessary for the project.

First and foremost, you need to choose the right conversion kit for your bicycle. There are various types available, so make sure to select one that fits your specific bike model and size. Look for a kit that includes a motor, controller, throttle, and all the necessary wiring.

Advertisement

Additionally, finding the right battery is crucial for a successful electric bike conversion. Consider factors such as voltage, capacity, and size when deciding on the battery. It’s important to choose a battery that provides sufficient power and can fit securely on your bike.

Now that you have all the tools and materials, let’s move on to the next section to learn how to choose the right electric bike conversion kit.

Choose the Right Electric Bike Conversion Kit

Once you’ve gathered all the necessary tools and materials, you’ll want to make sure you choose the right conversion kit for your specific needs.

Advertisement

When it comes to electric bike conversion kit options, there are a few factors to consider.

First, determine the type of motor you want: geared or direct-drive. Geared motors are smaller, lighter, and provide more torque, while direct-drive motors are larger, heavier, and offer a smoother ride.

Next, consider the battery capacity and range. Higher watt-hour batteries will give you a longer distance per charge.

Additionally, think about the type of pedal-assist system you prefer, such as cadence or torque sensor.

Lastly, check compatibility with your bike’s frame and wheel size.

Advertisement

With these key considerations in mind, you can confidently select the right electric bike conversion kit for your needs.

Now, let’s move on to the next step: removing the rear wheel and installing the motor.

Remove the Rear Wheel and Install the Motor

Now that you’ve gathered all the necessary tools and materials, it’s time to remove the rear wheel and install the motor. Here’s a step-by-step guide to help you install the motor correctly and troubleshoot common issues:

  1. Begin by supporting the bike securely on a stand or by flipping it over so that the rear wheel is facing upwards.

  2. Use a wrench to loosen the nuts or quick-release skewer that holds the rear wheel in place. Carefully slide the wheel out of the dropouts and set it aside.

  3. Next, attach the motor to the frame using the provided brackets and bolts. Make sure it is aligned properly and securely fastened.

  4. Connect the motor cables to the controller, following the manufacturer’s instructions. Double-check all the connections to ensure they are tight and properly insulated.

Install the Battery and Controller

Advertisement

When it comes to installing the battery and controller for your electric bike conversion, proper wiring and connections are essential for a smooth and efficient operation.

It is crucial to follow the manufacturer’s instructions carefully and ensure that all wires are securely connected and insulated to prevent any potential electrical issues.

Additionally, mounting the battery securely in a suitable location is important to maintain balance and stability while riding.

Proper Wiring and Connections

Make sure you’re using the correct gauge wire for all the necessary connections when converting your bicycle to an electric bike. Wiring safety is crucial to ensure a reliable and safe electric bike conversion.

Here are some troubleshooting tips to help you with your wiring:

Advertisement
  • Double-check the wire gauge: Using the correct wire gauge is essential to prevent overheating and potential electrical fires. Refer to the manufacturer’s guidelines or consult an expert for guidance.

  • Insulate all connections: Properly insulating your connections will protect them from moisture and corrosion, reducing the risk of short circuits or malfunctions.

  • Test for continuity: Before finalizing your wiring, use a multimeter to check for continuity in all connections. This step will help you identify any faulty or loose connections that need to be addressed.

  • Secure cables and wires: Use zip ties or cable clips to secure cables and wires, preventing them from getting tangled or damaged during your rides.

Ensuring proper wiring and connections lays a solid foundation for a successful electric bike conversion.

Now, let’s move on to the next step – mounting the battery.

Mounting the Battery

To securely mount your battery, you’ll need to locate a suitable spot on your frame that provides both stability and accessibility. The ideal mounting position is usually on the downtube or the seat tube, as these areas are strong enough to support the weight of the battery. Make sure to choose a position that doesn’t interfere with your pedaling motion or any other components of your bike.

Additionally, consider the battery range when deciding on the mounting position. Placing the battery closer to the rear wheel can help distribute the weight more evenly and improve the balance of your electric bike.

Once you have found the right spot, use sturdy mounting brackets or straps to secure the battery firmly in place. This will ensure that it stays in position even when riding on rough terrain.

Advertisement

Now that you have successfully mounted the battery, it’s time to connect the motor and controller to it, which I will explain in the next section.

Connect the Motor and Controller to the Battery

Once you’ve got all the necessary components, you’ll need to connect the motor and controller to the battery. This step is crucial for the proper functioning of your electric bike.

One common mistake to avoid is mismatching the wires. Make sure to double-check the wiring diagrams provided by the manufacturer and ensure that the positive and negative terminals are correctly connected. Additionally, make sure that all connections are secure and tight to avoid any loose connections that could cause malfunctions or even damage to the motor or controller.

If you encounter any issues during the connection process, such as the motor not turning on or the controller not responding, try troubleshooting by checking the connections, ensuring that the battery is fully charged, and consulting the manufacturer’s troubleshooting guide.

With the motor and controller properly connected, you’re now ready to move on to the next step: installing the throttle and brake sensors.

Advertisement

Install the Throttle and Brake Sensors

When installing the throttle and brake sensors, ensure that they are properly aligned and securely attached to the handlebars. Throttle and brake sensors are essential components in an electric bike conversion as they provide control and safety features. Here are the benefits of using throttle and brake sensors in an electric bike conversion:

  • Increased control: Throttle sensors allow you to adjust the speed of your electric bike effortlessly, giving you precise control over acceleration.
  • Safety enhancement: Brake sensors automatically cut off power to the motor when the brakes are applied, ensuring a quick response and reducing the risk of accidents.
  • Seamless integration: Throttle and brake sensors are designed to seamlessly integrate with the electric bike conversion kit, making the installation process easier and more efficient.

However, there are common challenges faced when installing throttle and brake sensors:

  • Proper alignment: Ensuring that the throttle and brake sensors are aligned correctly with the handlebars can be tricky, requiring precise adjustments.
  • Secure attachment: It is crucial to securely attach the sensors to the handlebars to prevent any movement or dislodging during rides.
  • Wiring complexity: The wiring process can be complex, especially if you are not familiar with electrical connections.

By carefully installing and configuring the throttle and brake sensors, you can enjoy the benefits of increased control and safety in your electric bike conversion.

Now, let’s move on to testing and fine-tuning your electric bike to ensure optimal performance.

Test and Fine-Tune Your Electric Bike

Make sure you carefully test and fine-tune your e-bike to ensure it is performing at its best. After completing the conversion process, it’s important to evaluate the functionality and performance of your electric bike.

Start by conducting a thorough test ride, paying close attention to the acceleration, top speed, and overall handling. Take note of any issues or abnormalities you encounter during the test ride. This will help you identify any areas that may need troubleshooting or adjustments.

Additionally, check the battery life and charging time to ensure they align with your expectations. If you notice any problems or inconsistencies, consult the troubleshooting tips provided in the conversion kit manual or seek assistance from a professional.

Advertisement

By thoroughly testing and fine-tuning your e-bike, you can ensure optimal performance and ride satisfaction.

Now, it’s time to enjoy your new electric bike and all the benefits it brings.

Enjoy Your New Electric Bike

Now that you have your new e-bike, it’s time to experience all the joy and excitement it brings. Converting your bicycle to an electric bike comes with several benefits, such as increased speed, extended range, and reduced effort when riding uphill.

To ensure a long-lasting and smooth performance, here are some tips for maintaining and taking care of your new electric bike:

  • Regularly check tire pressure and ensure they are inflated to the recommended level.
  • Clean your e-bike regularly, especially after riding in muddy or dusty conditions.
  • Keep the battery charged, but avoid overcharging it to prolong its lifespan.
  • Inspect the brakes, gears, and chain regularly for any signs of wear and tear.

By following these maintenance tips, you can ensure that your new electric bike remains in optimal condition for years to come.

Now, it’s time to share your experience and spread the electric bike love.

Advertisement

Share Your Experience and Spread the Electric Bike Love

As you ride your new e-bike, you’ll be amazed at how quickly you’ll fall in love with the electric biking experience. The benefits of electric bikes for commuting are numerous. Not only do they provide a more enjoyable and efficient way to get to work, but they also reduce your carbon footprint and save you money on fuel costs. But, like any other mode of transportation, electric bikes require regular maintenance to ensure optimal performance. Here are some tips for maintaining your electric bike:

  1. Keep your battery charged: This is crucial for maximizing the range of your e-bike. Make sure to charge it fully before each ride.

  2. Clean and lubricate regularly: Dirt and grime can build up on your bike, affecting its performance. Clean it with water and mild soap, and lubricate the chain and moving parts to prevent wear and tear.

  3. Check tire pressure: Proper tire pressure ensures a smooth and comfortable ride. Inspect your tires regularly and inflate them as needed.

By following these maintenance tips, you can enjoy your electric bike for years to come. Share your experience with others and spread the love for electric biking!

Benefits of Electric Bikes for Commuting Tips for Maintaining an Electric Bike Share Your Experience
Reduces carbon footprint Keep battery charged Tell friends and family
Saves money on fuel costs Clean and lubricate regularly Write online reviews
Provides an enjoyable way to commute Check tire pressure Join local e-bike groups

Frequently Asked Questions

How much does it typically cost to convert a bicycle to an electric bike?

Converting a bicycle to an electric bike typically costs between $500 and $2000. The cost comparison depends on the quality of components used. Benefits include increased speed and ease of riding, while drawbacks include added weight and limited range.

Can any type of bicycle be converted to an electric bike?

Converting a mountain bike to electric has its pros and cons. DIY conversion kits offer affordability and customization, but lack professional expertise. Professional electric bike conversions ensure quality, but can be more expensive.

How long does it take to complete the conversion process?

The conversion time to convert a bicycle to an electric bike depends on various factors such as experience level, availability of necessary tools, and complexity of the conversion.

Advertisement

Are there any legal regulations or restrictions for riding an electric bike?

Electric bike laws and safety regulations vary by country and region. It’s crucial to consult local authorities to understand speed limits, age restrictions, and helmet requirements. Failure to comply with these regulations may result in legal consequences.

Can the electric bike conversion be reversed if desired?

The electric bike conversion can be reversed if desired. However, there are pros and cons to converting a bicycle to an electric bike. It’s important to consider the cost, weight, and potential damage to the bicycle before making a decision.

Conclusion

So there you have it, converting your bicycle to an electric bike is a challenging but rewarding project. I hope this guide has provided you with the necessary information and steps to successfully complete the conversion.

Now, I know some of you may be thinking, ‘But isn’t it easier to just buy an electric bike?’ While it may seem like a simpler option, converting your own bike allows you to customize and personalize your ride to your liking. Plus, the sense of accomplishment and pride you’ll feel when cruising around on your very own electric bike is truly unbeatable.

So why not give it a try and join the growing community of electric bike enthusiasts? Happy riding!

Advertisement

Continue Reading

Electric Bike

How To Convert Moutain Bike To Electric

Published

on

By

An image showcasing a skilled cyclist effortlessly gliding uphill on a rugged mountain trail, with a vibrant electric blue aura enveloping their modified mountain bike, highlighting the seamless integration of an electric conversion kit

So, do you own a mountain bike and are considering stepping up your game? Well, buddy, get ready for an electrifying adventure ahead!

In this article, I’ll guide you through the process of converting your trusty steed into an electric powerhouse. We’ll cover everything from assessing compatibility to choosing the right conversion kit, and even understanding the legal and safety regulations.

Get ready to revolutionize your mountain biking experience like never before!

Key Takeaways

  • Assess frame compatibility and consider the bike’s weight and sturdiness.
  • Gather necessary tools and equipment and remove bike components.
  • Install the electric motor and connect it to the drivetrain.
  • Understand legal and safety regulations, optimize performance and range, and perform regular maintenance.

Assess Your Mountain Bike’s Compatibility

You’ll need to assess if your mountain bike is compatible for conversion to electric.

Advertisement

First, evaluate the frame compatibility. Check if your bike has enough space to accommodate the electric components such as the motor, battery, and controller. Look for mounting points or brackets that can securely hold the extra weight. Additionally, consider the weight of your bike. Electric conversion kits can add significant weight, so ensure that your bike’s frame is sturdy enough to handle the increased load.

Next, check the battery range. Different conversion kits offer varying battery capacities and ranges. Assess your riding needs and determine how far you typically ride. Choose a battery that can provide enough range to meet your requirements.

With these assessments in mind, you can confidently move on to choosing the right electric bike conversion kit, ensuring a successful conversion.

Choose the Right Electric Bike Conversion Kit

To make sure you pick the appropriate electric bike conversion kit, it’s essential to consider factors such as compatibility and power output. Here are the different types of electric bike conversion kits you can choose from:

  1. Front wheel conversion kit: This kit replaces your front wheel with an electric hub motor, providing power and propulsion to the bike.

  2. Rear wheel conversion kit: Similar to the front wheel kit, this one replaces the rear wheel with an electric hub motor, giving you a boost from behind.

  3. Mid-drive conversion kit: This kit attaches to the bottom bracket of your bike, allowing the motor to drive the crankshaft directly. It provides a more natural riding experience.

  4. All-in-one conversion kit: This comprehensive kit includes both the motor and battery, making it easy to convert your bike into an electric one.

Electric bike conversion kits offer several benefits, including increased speed and range, reduced effort when pedaling, and the ability to tackle hilly terrains with ease. By choosing the right conversion kit, you can transform your regular bike into an electric-powered one and enjoy all these advantages.

Advertisement

When it comes to converting a mountain bike to electric, choosing the right conversion kit is just the first step. Once you have selected the kit that suits your needs, it’s time to gather the necessary tools and equipment to begin the conversion process.

Gather the Necessary Tools and Equipment

Once you’ve chosen the right conversion kit, it’s important to gather all the necessary tools and equipment for the process. Assessing compatibility and choosing the right kit are crucial steps in ensuring a successful conversion. To make the process easier, here is a list of tools and equipment you will need:

Tools Equipment
Wrenches Conversion kit
Screwdrivers Battery
Pliers Battery mount
Allen keys Wiring harness

These tools and equipment will help you remove the bike’s components and install the electric conversion kit. It’s essential to have the right tools for the job to ensure a smooth and efficient conversion process. With all the necessary tools and equipment in hand, you can now move on to the next step of removing the bike’s components, preparing for the conversion.

Advertisement

Remove the Bike’s Components

Before starting, gather all the necessary tools and equipment to remove the bike’s components for a successful conversion. Assessing compatibility is crucial at this stage. You need to ensure that the electric kit you choose is compatible with your mountain bike. Look for a kit that matches the specifications of your bike, such as wheel size, frame type, and brake system.

Once you have chosen the right kit, the next step is to remove the bike’s components. Start by disconnecting the chain and removing the pedals. Then, remove the front and rear wheels, followed by the derailleur and crankset. Don’t forget to remove the old bottom bracket as well.

With all the components removed, you are now ready to install the electric motor.

Transitioning into the subsequent section about ‘install the electric motor’, it is essential to have a clear understanding of the motor’s installation process.

Install the Electric Motor

Advertisement

Now that you have taken off all the bike’s components, it’s time to begin installing the electric motor. Here are three important steps to guide you through the process of mounting the motor and considering power options:

  1. Choose the mounting technique: Depending on the type of motor you have, you can opt for a mid-drive or hub motor. The mid-drive motor is installed in the crankset, providing better weight distribution and an efficient power transfer. On the other hand, the hub motor is mounted in the rear or front wheel, offering simplicity and easy installation.

  2. Consider motor power options: Electric motors come in various power options, typically ranging from 250 watts to 1000 watts. Assess your riding needs and terrain to determine the right motor power for your electric bike conversion. More power may be beneficial for steep hills or off-road adventures, while lower power options are suitable for city commuting or leisure rides.

  3. Securely mount the motor: Ensure the motor is tightly secured to the bike frame using appropriate brackets or clamps. Follow the manufacturer’s instructions to ensure a safe and stable installation. Double-check all connections and fasteners to avoid any potential issues down the road.

With the electric motor securely mounted, the next step is to connect it to the bike’s drivetrain, allowing for a seamless transfer of power.

Connect the Motor to the Bike’s Drivetrain

To connect the motor to your bike’s drivetrain, you’ll need to attach the appropriate components and ensure a smooth transfer of power.

In a mountain bike conversion, the drivetrain connection is a critical step that determines the efficiency and performance of your electric bike.

Advertisement

The first component you’ll need is a motor mount, which securely holds the electric motor to your bike’s frame. It is important to choose a mount that is compatible with your specific motor and frame size.

Next, you’ll need to install a chainring adapter, which connects the motor to the bike’s chainring. This adapter ensures that power is transferred smoothly from the motor to the drivetrain.

Lastly, you’ll need to attach a chain tensioner to maintain proper tension on the chain.

With these components in place, you can seamlessly connect the motor to your bike’s drivetrain, enabling a seamless transition from human-powered to electric-assisted riding.

Now that the drivetrain connection is complete, let’s move on to the next step: installing the battery and controller.

Advertisement

Install the Battery and Controller

With the motor connected to the drivetrain, it’s time to install the battery and controller. These two components are essential for the electric conversion of your mountain bike.

Here are the steps to follow:

  • Choose a suitable location: Find a secure and accessible spot on your bike frame to mount the battery. Make sure it is protected from impacts and vibrations.

  • Securely attach the battery: Use straps, brackets, or screws to fasten the battery to the chosen location. Ensure it is tightly secured to prevent any movement during rides.

  • Connect the controller: The controller is responsible for regulating the power output to the motor. Follow the manufacturer’s instructions to connect the wiring from the battery to the controller.

  • Troubleshoot controller issues: If you encounter any problems with the controller, such as a failure to power on or erratic behavior, check the connections and consult the troubleshooting guide provided by the manufacturer.

  • Test the system: Once the battery and controller are securely installed, it’s time to connect the wiring and test the system’s functionality.

Connect the Wiring and Test the System

Once the battery and controller are securely installed, it’s time to connect the wiring and test if the system is functioning properly. Proper wiring connections are crucial for the smooth operation of your electric mountain bike.

To ensure the correct connections, refer to the manufacturer’s instructions or wiring diagram provided with your conversion kit. It is essential to connect the wires from the battery to the controller and the controller to the motor in the proper sequence. This will prevent any potential damage to the components.

After connecting the wiring, it’s time to test the system. Turn on the battery and controller, and check if the motor engages when you pedal or use the throttle. You can also check the battery indicator to confirm its charge level.

Advertisement

If everything is functioning correctly, congratulations! Your electric mountain bike is ready for the next step: adjusting the bike’s suspension and brakes.

Adjust the Bike’s Suspension and Brakes

Now that you’ve completed the wiring and testing, it’s time to focus on adjusting your bike’s suspension and brakes.

Choosing the right suspension upgrade is crucial to enhance your bike’s performance. Look for suspensions that match your riding style, terrain, and weight.

Upgrading the brakes is equally important to ensure better performance and safety. Consider high-quality brake systems that offer excellent stopping power and modulation. Look for options that are compatible with your bike’s frame and wheel size.

Adjusting the suspension and brakes involves fine-tuning the settings to optimize comfort, control, and responsiveness. This step is essential in achieving the best riding experience with your electric mountain bike.

Advertisement

Transitioning to the next section, let’s now dive into how to fine-tune the electric assist settings.

Fine-tune the Electric Assist Settings

To optimize your riding experience, you’ll want to fine-tune the settings for the electric assist. This will allow you to customize the electric assist to your preferences and optimize the power output. Here’s how you can do it:

  1. Adjust the power level: Most electric assist systems have multiple power levels to choose from. Experiment with different levels to find the one that suits your riding style and terrain the best.

  2. Fine-tune the torque sensor: The torque sensor determines how much assistance the motor provides based on your pedaling force. Adjusting this setting can help you achieve a more natural and responsive ride.

  3. Customize the throttle response: If your electric assist system has a throttle, you can adjust the sensitivity and response of the throttle. This allows you to have more control over the power output when using the throttle.

  4. Set the maximum speed: Some electric assist systems allow you to set a maximum speed limit. This can be useful if you want to comply with local regulations or if you prefer to have a capped speed.

Test Ride and Make Adjustments as Needed

Take your bike for a spin and make any necessary adjustments to ensure the best riding experience possible.

Start by adjusting the suspension to optimize your comfort and control on different terrains. Experiment with different settings and find the perfect balance between responsiveness and smoothness.

Next, focus on optimizing battery life. Adjust the power assist level based on your riding preferences and the terrain you’ll be tackling. Higher levels of assistance consume more battery, so find the right balance to ensure you have enough power for your entire ride.

Advertisement

Additionally, consider factors like tire pressure, gear ratios, and saddle height to further enhance your riding experience. These small adjustments can make a big difference in your overall performance and enjoyment.

Now, let’s move on to how to maintain and care for your electric mountain bike.

Maintain and Care for Your Electric Mountain Bike

Ensure that you regularly clean and lubricate the components of your e-MTB to extend its lifespan and maintain optimal performance. Proper bike maintenance is essential for the longevity and efficiency of your electric mountain bike.

Start by cleaning the bike after every ride, focusing on the drivetrain, brakes, and suspension components. Use a mild detergent and a soft brush to remove dirt and grime. After cleaning, apply lubricant to the chain, derailleur, and other moving parts to reduce friction and prevent wear.

Additionally, regularly inspect your bike for any signs of damage or wear, such as loose bolts or worn brake pads. By troubleshooting common issues and addressing them promptly, you can ensure that your e-MTB performs at its best.

Advertisement

Now, let’s move on to understanding the legal and safety regulations surrounding electric mountain bikes.

Understand the Legal and Safety Regulations

Make sure you familiarize yourself with the legal and safety regulations that apply to riding an electric mountain bike in your area. Understanding the legal and safety regulations for converting a mountain bike to electric is crucial to staying within the law and riding responsibly, ensuring the safety of yourself and others.

Here are some key points to consider:

  • Check local laws: Research the specific laws and regulations regarding electric bikes in your area. Some places may have specific speed limits or restrictions on where you can ride.

  • Helmet and safety gear: Always wear a helmet and appropriate safety gear when riding an electric mountain bike. This will protect you in case of accidents or falls.

  • Respect trail rules: When riding on trails, be aware of any rules or restrictions that may apply to electric bikes. Some trails may have limitations or bans on motorized vehicles.

  • Be mindful of others: Remember to share the trail with other users, such as hikers or other cyclists. Be courteous and respectful to ensure everyone’s safety and enjoyment.

Understanding and following these regulations will not only keep you on the right side of the law, but also ensure a safe and enjoyable experience for everyone involved.

Now let’s explore the environmental impact of electric mountain bikes and analyze the benefits and drawbacks of converting a bike to electric in terms of sustainability and ecological footprint.

Advertisement

Join Electric Mountain Bike Communities and Events

Get involved in electric mountain bike communities and events to connect with fellow riders and stay updated on the latest news and trends.

Joining an electric mountain bike community offers numerous benefits. You can share your experiences, exchange tips and tricks, and learn from others who have already converted their bikes to electric.

These communities often organize events like group rides, races, and workshops where you can meet like-minded individuals, expand your knowledge, and discover new trails. By participating in these events, you can gain valuable insights into the best practices for maintaining and upgrading your electric mountain bike.

Additionally, you may have the opportunity to test ride new models and accessories, helping you make informed decisions for your own bike.

Enjoy Your Enhanced Mountain Biking Experience!

Take full advantage of your enhanced mountain biking experience by immersing yourself in the electric mountain bike community and embracing all the benefits it has to offer. Being a part of this vibrant community not only enhances your performance on the trails but also improves your endurance.

Advertisement

Join group rides and events: Feel the exhilaration of riding alongside fellow electric mountain bikers, exchanging tips and tricks, and pushing each other to new heights.

Share knowledge and experiences: Engage in online forums and social media groups where you can learn from experienced riders, discover new trails, and stay updated on the latest advancements in electric mountain biking technology.

Participate in races and challenges: Test your skills and compete against other riders, as you strive to become faster and stronger, all while enjoying the camaraderie of the electric mountain bike community.

Frequently Asked Questions

Can I convert any type of mountain bike to electric?

Yes, not all types of mountain bikes can be converted to electric. There are limitations and compatibility issues to consider. It is important to ensure that the bike frame, components, and design are suitable for an electric conversion.

What are the potential risks or safety concerns of converting a mountain bike to electric?

Potential dangers and battery safety are crucial considerations when converting a mountain bike to electric. Risks include fire hazards, electrical malfunctions, and improper installation. Ensuring proper battery handling, insulation, and regular maintenance is key to mitigating these safety concerns.

Advertisement

Are there any legal regulations or restrictions for riding an electric mountain bike?

Electric mountain bikes do not require a license or registration in most places. They offer several benefits over traditional bikes, such as increased speed and power, easier uphill climbs, and longer rides without getting exhausted.

How long does it typically take to install an electric bike conversion kit?

Typically, it takes around 2-4 hours to install an electric bike conversion kit. However, installation time can vary depending on the complexity of the kit and any common issues encountered during the process.

Are there any specific maintenance or care tips for an electric mountain bike compared to a regular mountain bike?

For electric mountain bike maintenance, it is essential to regularly check and maintain the battery, motor, and electrical components. Additionally, proper care for a regular mountain bike includes regular cleaning, lubrication, and inspection of the drivetrain, brakes, and suspension components.

Conclusion

After going through the process of converting my mountain bike to electric, I can confidently say that it has been an exhilarating experience.

Assessing the compatibility, choosing the right conversion kit, and carefully installing the electric motor were crucial steps in achieving a successful transformation.

Advertisement

Maintaining and understanding the legal and safety regulations are also essential for a smooth ride.

By joining electric mountain bike communities and events, I have found a supportive network that shares my passion.

Enhancing my mountain biking experience has been an electrifying adventure!

Continue Reading

Electric Bike

How To Check Electric Bike Battery

Published

on

By

An image showcasing a person wearing gloves and using a multimeter to test the voltage of an electric bike battery

Not sure about the condition of your electric bike’s battery? No problem, I’ve got you covered.

In this article, I’ll guide you through the process of checking your electric bike battery step by step. From locating the battery compartment to testing its performance, I’ll provide you with detailed instructions to ensure your battery is in top condition.

So let’s dive in and learn how to keep your electric bike running smoothly and efficiently.

Key Takeaways

  • Inspect the battery compartment for any damage or corrosion.
  • Use a multimeter or battery tester to check the battery charge level.
  • Follow the manufacturer’s guidelines for charging and maintaining the battery.
  • Seek professional assistance for complex battery issues and consider warranty coverage.

Locate the Battery Compartment

To check the electric bike battery, first, locate the battery compartment. This is where you will find the battery that powers your bike. The battery compartment is usually located near the rear wheel or on the frame of the bike. It may be covered by a panel or a removable cover.

Advertisement

When troubleshooting battery issues, the first step is to access the battery compartment. To do this, start by turning off the power to the bike. This will ensure your safety and prevent any accidental electrical shocks. Once the power is off, locate the battery compartment and remove any panels or covers that may be in the way.

Once you have access to the battery compartment, visually inspect the battery for any signs of damage or corrosion. Look for any loose connections or frayed wires. Make sure that the battery is securely fastened in place and that all the connections are tight.

Turn off the Power

First, make sure you’ve switched off the power. It is crucial to take this step before performing any maintenance or inspection on an electric bike battery. Turning off the power eliminates the risk of electric shock and ensures your safety.

To turn off the power, locate the power switch on your electric bike. It is usually located near the battery or on the handlebars. Once you’ve located the switch, simply press or toggle it to the off position.

It is important to follow battery safety precautions when handling an electric bike battery. Always wear protective gloves and goggles to prevent any potential accidents. Additionally, avoid exposing the battery to extreme temperatures or excess moisture.

Advertisement

Now that the power is off, it’s time to remove the battery from the bike. This is a crucial step in inspecting the battery and ensuring its proper functioning.

Remove the Battery from the Bike

Once the power is off, it’s time to take the battery out of the bike. Removing the battery from an electric bike may seem like a simple task, but it’s important to do it correctly to avoid any damage to the battery or the bike itself.

Here are some tips for safely removing the battery:

Advertisement
  1. Locate the battery: The battery is usually located on the downtube or the rear rack of the bike. Refer to the manufacturer’s manual if you’re unsure.

  2. Disconnect the cables: Before removing the battery, make sure to disconnect any cables or connectors that are attached to it. This will prevent any accidental electrical discharge.

  3. Remove the battery: Once the cables are disconnected, gently slide the battery out of its mounting bracket or holder. Be careful not to drop or damage the battery during this process.

Now that the battery is removed, it’s important to store it properly to prolong its lifespan. Here are some battery storage methods to consider:

  • Keep the battery in a cool, dry place.
  • Store the battery at around 50% charge.
  • Avoid storing the battery in extreme temperatures.

With the battery safely removed and stored, the next step is to inspect it for any signs of damage or wear.

Inspect the Battery for Damage

Now, take a close look at the battery to see if there are any signs of damage or wear. Inspecting the battery for damage is crucial to ensure its proper functioning and safety.

Begin by visually examining the battery casing for any cracks, dents, or bulges. These can indicate internal damage or potential leaks. Pay close attention to the terminals as well, checking for any corrosion or loose connections. Corrosion can hinder the battery’s ability to deliver power effectively.

Additionally, inspect the wiring and connectors for any fraying or exposed wires, as this can pose a safety risk. If you notice any of these issues during the inspection, it is essential to replace the battery promptly to prevent further damage or potential accidents.

By ensuring that your battery is in good condition, you can optimize its performance and prolong its lifespan.

Advertisement

Now, let’s move on to the next step and check the battery charge level.

Check the Battery Charge Level

To determine the battery charge level, you’ll want to use a multimeter or a battery tester. These tools are essential for accurately measuring the voltage of your electric bike battery.

Start by setting the multimeter to the DC voltage setting and ensure that it is in the appropriate range to measure the battery voltage. Then, connect the positive and negative leads of the multimeter to the corresponding terminals of the battery. The multimeter will display the voltage reading, which indicates the battery charge level. A fully charged battery typically reads around 42 volts, while a completely discharged battery may read around 30 volts or lower.

Advertisement

Checking the battery charge level is crucial for several reasons. First, it allows you to determine the remaining battery capacity and estimate the battery life expectancy. By monitoring the battery charge level regularly, you can track how quickly the battery discharges during your rides and plan your battery charging time accordingly. Additionally, knowing the battery charge level helps you avoid over-discharging the battery, which can negatively impact its overall lifespan.

Now, let’s move on to the next step and look for battery indicator lights on your electric bike.

Look for Battery Indicator Lights

Take a quick glance at the indicator lights on your bike to see if they display the battery charge level. These lights are designed to provide a visual representation of the battery’s capacity, giving you an idea of how much power is left.

Here are three things to keep in mind when looking at the indicator lights:

  • The number of lights: Different bike models may have varying numbers of indicator lights. Typically, each light represents a certain percentage of battery capacity. For example, if you have five lights, each light may indicate 20% of the total battery charge.

  • Color coding: Some bikes use different colors for their indicator lights. Green lights usually indicate a high battery charge, while red lights suggest a low charge. Understanding the color coding can help you quickly assess the battery’s condition.

  • Flashing lights: In addition to solid lights, some bikes have flashing indicator lights. A flashing light may indicate a low battery or a fault in the battery system. If you notice a flashing light, it’s essential to check the battery capacity or consult the bike’s manual for troubleshooting steps.

Use a Battery Voltage Meter

You can use a battery voltage meter to accurately measure the charge level of your electric bike’s battery. Understanding battery voltage and interpreting voltage readings is crucial for monitoring the health and performance of your battery. A battery voltage meter is a handy tool that allows you to measure the voltage output of your battery in real-time. By connecting the positive and negative leads of the meter to the corresponding terminals on the battery, you can obtain an accurate voltage reading.

Advertisement

To help you better understand the voltage readings, here is a table that shows the typical voltage ranges for different battery charge levels:

Battery Charge Level Voltage Range
Fully charged 54.6V+
75% charged 51.4V – 54.5V
50% charged 48.2V – 51.3V
Low charge Below 48.1V

Interpreting the voltage readings will give you an indication of how much charge your battery has left. It is important to note that these voltage ranges may vary depending on the specific battery model or manufacturer. If you consistently observe voltage readings below the expected range, it may indicate a need for battery maintenance or replacement.

Now that you understand how to measure battery voltage, let’s move on to the next step and check the battery connections.

Check the Battery Connections

After using a battery voltage meter to check the overall voltage of my electric bike battery, the next step in troubleshooting battery issues is to check the battery connections.

This is an important step because loose or corroded connections can lead to poor performance or even a complete battery failure.

Advertisement

To check the battery terminals, start by turning off the bike’s power and removing the battery from its compartment. Inspect the terminals for any signs of corrosion or buildup. If you notice any, it’s important to clean the terminals before proceeding.

However, if the terminals appear clean, ensure they are tightly connected to the battery. Give them a gentle wiggle to make sure there is no movement. Loose connections can be tightened using a wrench or screwdriver, depending on the type of terminal.

Once you have checked and secured the battery connections, you can move on to the next step: cleaning the battery terminals. This step is crucial for maintaining optimal battery performance and preventing future issues.

Clean the Battery Terminals

To clean the battery terminals, start by turning off the power and removing the battery from its compartment. Battery maintenance is crucial for maximizing the battery lifespan of your electric bike. Over time, dirt, dust, and corrosion can accumulate on the battery terminals, affecting its performance. Cleaning the terminals regularly is a simple yet effective way to ensure optimal battery function.

To begin, gather the necessary tools: a wire brush, some baking soda, and a small container of water. Once you have these items ready, proceed with caution. Dip the wire brush into the water, making sure it is damp but not dripping. Then, sprinkle a small amount of baking soda onto the brush.

Advertisement

Next, gently scrub the battery terminals with the brush, using circular motions. The baking soda acts as a mild abrasive, removing any corrosion or grime that may have built up. Take care not to scrub too hard, as you could damage the terminals. Once you have thoroughly cleaned both terminals, wipe them dry with a clean cloth.

With the battery terminals now sparkling clean, you can proceed to reinstall the battery in the bike.

Reinstall the Battery in the Bike

After ensuring that the battery terminals are clean and free of any debris or corrosion, it is time to reinstall the battery in the bike. The process of reinstalling the battery is crucial to ensure proper functioning of the electric bike.

To begin, locate the battery compartment on the bike frame. It is usually located near the center or towards the rear of the bike. Open the battery compartment and carefully place the rechargeable battery inside, making sure that it is securely seated in its designated slot.

Once the battery is in place, close the battery compartment securely to prevent any movement or disconnection during the ride. It is important to ensure that the battery is properly secured to avoid any potential damage or loss during cycling.

Advertisement

Additionally, it is worth noting that the battery lifespan can be extended by properly reinstalling it in the bike. Ensuring a secure fit and connection will prevent unnecessary wear and tear, ultimately prolonging the overall battery life.

With the battery securely installed, we can now move on to discussing how to power on the bike and get ready for an exhilarating ride.

Power on the Bike

Now that you’ve securely installed the battery, it’s time to power on the bike and prepare for an exhilarating ride.

To ensure optimal performance and longevity of your electric bike battery, it is essential to follow these steps:

  • Press the power button located on the battery pack to turn on the bike.
  • Check the battery indicator on the display panel to ensure it is fully charged.
  • Engage the pedal-assist mode and gradually increase the level to test the battery’s durability.
  • Monitor the battery’s power consumption by observing the remaining battery life on the display panel.

Testing battery durability is crucial to ensure that it can withstand the demands of your ride and provide consistent power. By maximizing battery life, you can extend the distance you can travel on a single charge. This not only enhances your overall riding experience but also reduces the need for frequent recharging.

As you power on the bike and prepare for your ride, it is vital to test the battery’s performance to ensure it meets your expectations.

Advertisement

Test the Battery Performance

Make sure you engage the pedal-assist mode and gradually increase the level to test the battery’s durability. This will allow you to determine the battery’s capacity and test its lifespan. To accurately evaluate the battery’s performance, it is essential to follow a systematic approach. Start by setting the pedal-assist mode to the lowest level and ride the electric bike on a flat surface for a specified distance, such as 5 miles. Take note of the battery level before and after the test ride. Repeat this process for different pedal-assist levels, increasing the difficulty gradually. This will help you assess how the battery performs under varying conditions and levels of assistance. To make it easier to track the results, here is a table illustrating the battery level before and after each test ride:

Pedal-Assist Level Initial Battery Level Final Battery Level
Level 1
Level 2
Level 3
Level 4

Monitor the Battery Health Over Time

To ensure optimal battery performance, it’s important to regularly monitor its health over time. Battery maintenance plays a crucial role in prolonging the battery lifespan of an electric bike.

Monitoring the battery health involves keeping track of its capacity, voltage, and overall performance. One way to monitor the battery health is by using a battery management system (BMS). The BMS provides real-time information about the battery’s state of charge, temperature, and any potential issues. By regularly checking the BMS data, I can identify any abnormalities or signs of deterioration, allowing me to take necessary actions to maintain the battery’s health.

Another aspect of monitoring the battery health is keeping an eye on its charging habits. Overcharging or undercharging the battery can significantly impact its lifespan. By following the manufacturer’s guidelines and ensuring that I charge the battery properly, I can prevent unnecessary stress on the cells and maintain their longevity. This involves charging the battery to the recommended voltage and avoiding leaving it plugged in for extended periods.

Charge the Battery Properly

Charging the battery correctly is crucial for maintaining its health and prolonging its lifespan. Proper battery charging techniques are essential to ensure optimal performance and longevity. One common issue that arises with batteries is overcharging. Overcharging occurs when the battery is charged beyond its capacity, leading to excessive heat build-up and potential damage. To avoid this issue, it’s important to use a charger specifically designed for your electric bike battery and follow the manufacturer’s recommended charging time and voltage.

Advertisement

Another common battery issue is undercharging. Undercharging happens when the battery is not charged to its full capacity, resulting in diminished performance and reduced lifespan. To prevent undercharging, make sure to charge the battery fully before each use, especially if you haven’t used your electric bike for an extended period.

In addition to these issues, improper storage can also affect battery health. If you plan to store your electric bike for an extended period, it’s crucial to charge the battery to around 50% capacity and store it in a cool and dry place. This will help prevent self-discharge and maintain the battery’s overall health.

Follow Manufacturer Guidelines for Maintenance

Following the manufacturer’s guidelines for maintenance is essential to ensure the longevity and optimal performance of your electric bike battery. By properly maintaining your battery, you can extend its lifespan and avoid potential issues down the line.

Here are some important battery maintenance tips to keep in mind:

  • Charge your battery correctly: Use the charger provided by the manufacturer and avoid overcharging or undercharging the battery. Follow the recommended charging time and avoid leaving the battery connected to the charger for extended periods.

  • Store your battery properly: If you won’t be using your electric bike for an extended period, make sure to store the battery in a cool, dry place away from direct sunlight. It is also recommended to charge the battery to around 50% before storage to prevent capacity loss.

  • Clean and inspect the battery regularly: Keep the battery clean and free from any dirt, debris, or moisture. Inspect the battery for any signs of damage or wear, such as cracks or leaks. If you notice any issues, contact the manufacturer for guidance.

Frequently Asked Questions

How often should I check the battery health of my electric bike?

I should check the battery health of my electric bike regularly to ensure optimal performance.

Advertisement

As a general rule, it’s recommended to check the battery health every three to six months. However, the frequency may vary depending on usage and environmental conditions.

To maintain the battery health, it’s important to follow best practices. These include charging the battery after each ride, avoiding overcharging or deep discharging, and storing the battery at an appropriate temperature.

Can I use any type of voltage meter to check the battery charge level?

As the saying goes, ‘Measure twice, cut once.’ When it comes to checking the battery charge level of your electric bike, it’s essential to use the right tools.

While any voltage meter can give you a reading, it’s crucial to choose one that is compatible with the battery voltage of your electric bike.

Additionally, understanding the battery capacity and its relationship to the voltage reading will provide you with a more accurate assessment of your battery’s health.

Advertisement

What should I do if I notice any damage on the battery during inspection?

If I notice any damage on the battery during inspection, it’s crucial to take immediate action to ensure proper battery maintenance and storage.

Firstly, I would carefully examine the extent of the damage, looking for any visible cracks, leaks, or signs of corrosion. If there is significant damage, I would disconnect the battery from the bike and handle it with caution, wearing protective gloves.

Next, I would consult the manufacturer’s guidelines for proper disposal or repair, as damaged batteries can pose safety risks if not handled properly.

Are there any specific cleaning products I should use to clean the battery terminals?

When it comes to cleaning battery terminals, it is important to use the right products to ensure optimal performance. I recommend using a mixture of baking soda and water to clean the terminals.

Make sure to disconnect the battery before cleaning. Gently scrub the terminals with a toothbrush dipped in the baking soda solution.

Advertisement

Rinse with water and dry thoroughly before reconnecting. This method helps remove corrosion and dirt, extending the battery life.

What are some common signs that indicate a need for battery replacement?

Some common signs that indicate a need for battery replacement include decreased battery performance, shorter battery lifespan, and difficulty holding a charge. These issues often arise due to insufficient battery maintenance and exceeding the battery’s expected lifespan.

It is important to regularly monitor battery performance and address any signs of deterioration promptly. Proper battery care, such as avoiding extreme temperatures and regular charging, can help maximize battery lifespan.

Conclusion

In conclusion, ensuring the optimal performance and longevity of your electric bike battery is crucial. By following the steps outlined in this article, you can effectively check and maintain your battery.

Just like a watchful guardian, regularly monitoring the battery’s health over time will keep it in top-notch condition. Remember to charge it properly, like a gentle breeze breathing new life into its cells.

Advertisement

And always adhere to the manufacturer’s guidelines for maintenance, like a knowledgeable guide leading you down the path of battery bliss.

Continue Reading
Advertisement

Affiliate disclaimer

As an affiliate, we may earn a commission from qualifying purchases. We get commissions for purchases made through links on this website from Amazon and other third parties.

Advertisement

Vetted

Vetted3 weeks ago

Ktaxon 48V Ebike Conversion Kit Review

- ad - Ktaxon 48v 1000w Ebike Conversion Kit, 24In Electric Bike Conversion Kit with Powerful Hub Motor, LCD Display,...

Vetted3 weeks ago

PEXMOR Electric Bike Conversion Kit Review

- ad - PEXMOR Electric Bike Conversion Kit, 48V 1000W 26" Rear Wheel E-Bike Hub Motor Kit, Upgrade 3 Mode...

Vetted3 weeks ago

AW Electric Bike Conversion Kit 48V 1000W Review

- ad - PEXMOR Electric Bike Conversion Kit, 48V 1000W 26" Front Wheel E-Bike Hub Motor Kit, Upgrade 3 Mode...

Vetted3 weeks ago

L-faster 450W Electric Bicycle Conversion Kit Review

- ad - L-faster 450W Newest Electric Bike Left Drive Conversion Kit Can Fit Most of Common Bicycle Use Spoke...

Vetted3 weeks ago

BBS02B 48V 500W Mid Drive Electric Bike Motor Review

- ad - BAFANG BBS02B 48V 500W Mid Drive Kit with Battery, 48V Ebike Motor with EKD01 Display&Downtube Shark Battery...

Vetted3 weeks ago

EBIKELING Waterproof Ebike Conversion Kit: A Comprehensive Review+

- ad - EBIKELING Waterproof Ebike Conversion Kit for Electric Bike 26" Front or Rear Wheel Electric Bicycle Hub Motor...

Vetted3 weeks ago

Yose Power Waterproof 500W Ebike Kit Review

- ad - Yose Power Waterproof 500W 26 Inch Ebike Conversion Kit with 48V 13Ah Battery for Freewheel 26" Electric...

Vetted3 weeks ago

Voilamart Electric Bicycle Kit Review: 1000W E-Bike Conversion with LCD Display

- ad - PEXMOR Electric Bike Conversion Kit, 48V 1000W 26" Front Wheel E-Bike Hub Motor Kit, Upgrade 3 Mode...

Vetted3 weeks ago

Review: 24V36V250W Electric Conversion Kit for Bikes

- ad - Conversion Kit 36V 48V Apply to mountain electric bicycle rear wheel with 135-142mm frame dropoutSuitable for 20in/24in/26in/27.5in/28in/29in/700C...

top bike gps devices top bike gps devices
Vetted1 month ago

15 Best Bicycle Navigation Devices to Keep You on the Right Path

Navigate through the top 15 bicycle navigation devices and stay on track with cutting-edge technology and features.

top gps bike computers top gps bike computers
Vetted1 month ago

15 Best Bicycle Navigation Computers for Cyclists on the Go

On the lookout for the best bicycle navigation computers for cyclists on the go? Find out which one offers Voice...

bike navigation apps review bike navigation apps review
Vetted1 month ago

15 Best Bicycle Navigation Apps to Enhance Your Cycling Adventures

Hop on your bike and explore the top bicycle navigation apps with features like sensors, vibrant touchscreens, and innovative navigation...

About us

We are a passionate team driven by the belief that cycling is a fantastic and accessible way to stay active while enjoying the beauty of the outdoors. Our mission is to share our love for cycling with as many people as possible. We provide a welcoming environment for individuals of all ages, abilities, and backgrounds to come together and ride bikes. With Ralf’s visionary leadership, Zane’s expertise in cycling adventures, and Olivia’s dedication to community building, we strive to create a vibrant space where everyone can experience the joy of cycling. Through group rides, workshops, and inclusive events, we inspire and empower individuals to embrace an active lifestyle. Join us in our quest to pedal together, embrace the joy of cycling, and foster connections that last a lifetime.

Advertisement

Trending