
To adjust your bike for ideal comfort and efficiency, start by setting your saddle height using your inseam and the heel method, ensuring your knee bends 30-40° at the bottom of the pedal stroke. Fine-tune the saddle fore-aft position and tilt for comfort, and match handlebar height and reach to keep your elbows slightly bent. Check cleats and pedal alignment for smooth pedaling, and use tools or partner help for precise adjustments. Keep fine-tuning as you go along for best results.
Key Takeaways
- Properly set saddle height and fore-aft position to optimize power transfer and reduce joint strain.
- Ensure handlebar height and reach allow a relaxed, ergonomic riding posture with slight elbow bend.
- Adjust cleats for correct knee over pedal alignment and minimal twisting to improve pedaling efficiency.
- Use tools and partner assistance to accurately measure angles and maintain stability during adjustments.
- Regularly reassess and fine-tune your bike fit to maintain comfort and maximize riding efficiency.
Understanding the Importance of Proper Bike Fit

Understanding the importance of a proper bike fit is essential for a comfortable and efficient ride. A well-adjusted bike ensures your saddle height is correct, which directly affects your comfort and pedaling efficiency. Proper adjustment of the saddle position and ergonomic setup helps you maintain a natural posture, reducing strain on your joints, muscles, and tendons. When your bike fit is off, you may experience saddle soreness, fatigue, and decreased performance, making rides less enjoyable. Investing time in setting your bike correctly allows you to ride longer with less discomfort and lowers the risk of injury. Regularly checking your bike’s gear shifting components ensures smooth operation and optimal performance. Additionally, understanding proper bike fit is crucial for preventing injuries and enhancing overall riding experience. Remember, a proper bike fit isn’t just about comfort; it’s about optimizing your overall riding experience and efficiency. Ensuring your bike’s ergonomic setup aligns with your body mechanics can significantly improve your comfort on longer rides. Paying attention to your bike’s contact points can further improve comfort and reduce fatigue during extended rides.
How to Measure and Set Your Saddle Height Correctly

To set your saddle height accurately, start by measuring your inseam and using formulas like LeMond or Hamley for guidance. Next, position your heel on the pedal at the bottom of the stroke so your leg is nearly straight with a slight knee bend. Ensuring your saddle level will also help maintain proper alignment and prevent discomfort during rides. It is also beneficial to check your bike fit regularly to accommodate any physical changes or riding preferences. Finally, verify your setup with a smartphone or inclinometer to guarantee your knee bend and saddle level promote comfortable, efficient pedaling.
Accurate Measurement Techniques
Accurately measuring and setting your saddle height is essential for comfortable and efficient riding. Start by using proper measurement techniques, such as aligning the saddle’s front-to-back midpoint with the bottom bracket center and recording the distance in millimeters. The heel method is a simple way to find your initial saddle height: pedal with your heel on the pedal at the 6 o’clock position and adjust until your leg is nearly fully extended without rocking your hips. To refine the setting, check your knee bend at full pedal extension, aiming for about 30-40° of flexion, using smartphone photos or a goniometer. Additionally, apply formulas like the LeMond or Hamley methods based on your inseam to calculate an initial saddle height, then fine-tune for comfort. Incorporating proper bike fit techniques can further enhance comfort and efficiency. Using self waterings plant pots as a metaphor, ensuring your bike’s saddle is correctly adjusted can help prevent discomfort and overexertion during rides. Remember that ergonomic positioning plays a crucial role in maintaining comfort over long distances. For precise adjustments, consider using headphones to listen for audio cues when making small changes to your saddle position. Moreover, understanding bike ergonomics can contribute significantly to optimizing your riding posture and overall performance.
Pedal and Knee Alignment
Ensuring proper pedal and knee alignment is essential for an efficient and comfortable ride. Start by adjusting your saddle height using your inseam measurement, either with the LeMond or Hamley method. Position the saddle so that when your foot is on the pedal at 3 o’clock, your knee has a slight bend of about 30-40 degrees. Use the heel method: pedal with your heel on the pedal; your leg should be fully extended without rocking hips. Confirm knee alignment by checking that your kneecap stays directly over the pedal axle when the crank is horizontal. Fine-tune the saddle height during a test ride, making sure there’s no excessive knee bend or hyperextension. Proper knee alignment optimizes pedaling efficiency and reduces knee strain. Additionally, maintaining trust in your technique can help ensure consistent and effective adjustments over time. Regularly checking your bike fit ensures ongoing comfort and performance. Remember that biomechanical principles play a crucial role in achieving optimal alignment and comfort. Being aware of tuning principles can guide you in making small but impactful adjustments to your riding posture.
Adjusting Saddle Fore-Aft Position for Better Power Transfer
Adjusting your saddle fore-aft position is key to optimizing your pedaling efficiency and comfort. A proper saddle adjustment ensures your knee is aligned over the pedal spindle at the 3 o’clock position, promoting better power transfer and reducing knee strain. To fine-tune this, use the “Kops knee over pedal” method or measure from the wall to the saddle and bottom bracket, considering your leg length and riding style. Moreover, understanding cycling product reviews can help you choose the right saddle that complements your adjustments. This awareness of digital literacy can also assist in researching additional accessories and tools to improve your cycling experience. Here are key steps:
- Move the saddle forward or backward in small increments.
- Check knee alignment over the pedal during the pedal stroke.
- Pedal repeatedly to assess comfort and smoothness.
This saddle fore-aft adjustment enhances your bike fit, improves pedaling efficiency, and minimizes unnecessary movement.
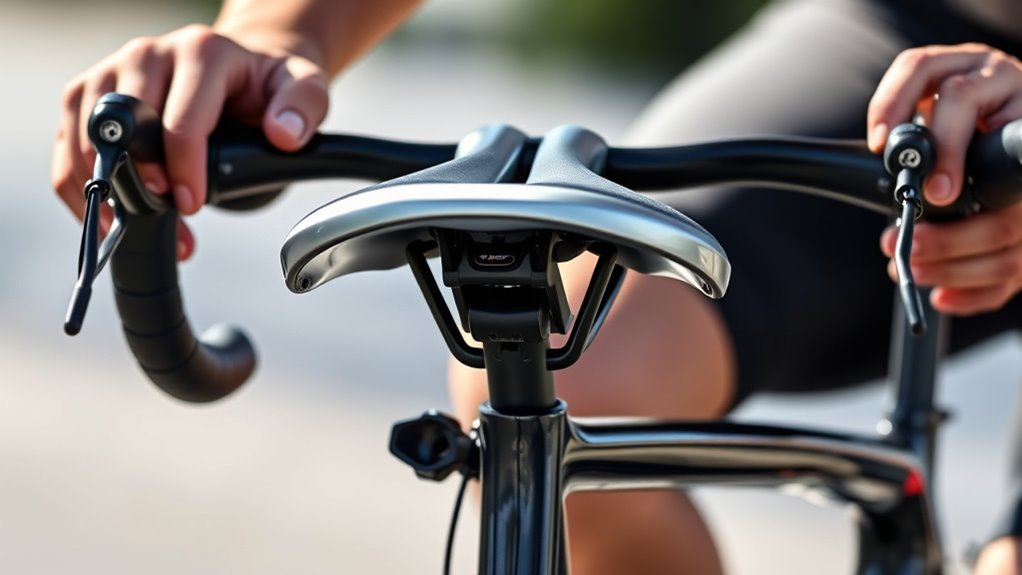
Finding the Ideal Saddle Tilt for Comfort

Finding the right saddle tilt can substantially improve your comfort and riding efficiency. Adjusting your saddle tilt influences pressure distribution, supporting sit bones while reducing soft tissue pressure. Typically, a saddle tilt between zero and six degrees works well; slight variations depend on your personal fit and comfort. Using a carpenter’s level or smartphone inclinometer helps measure and set the tilt accurately. A slight forward tilt shifts pressure toward your sit bones, easing hand numbness, while a slight rearward tilt can reduce soreness in your buttocks. Fine-tuning saddle tilt through small adjustments and testing ensures a personalized fit that enhances ride quality. Proper saddle tilt not only boosts comfort but also improves overall ride efficiency, making your cycling experience more enjoyable and less tiring. Additionally, understanding proper bike fit can help prevent discomfort and potential injuries during rides. Incorporating adjustments to saddle tilt based on your body’s response can further optimize comfort and performance. Recognizing floating on water as a concept related to balance and buoyancy can also inform how you position yourself on the bike for better stability.
Customizing Handlebar Height and Reach for Ergonomic Riding
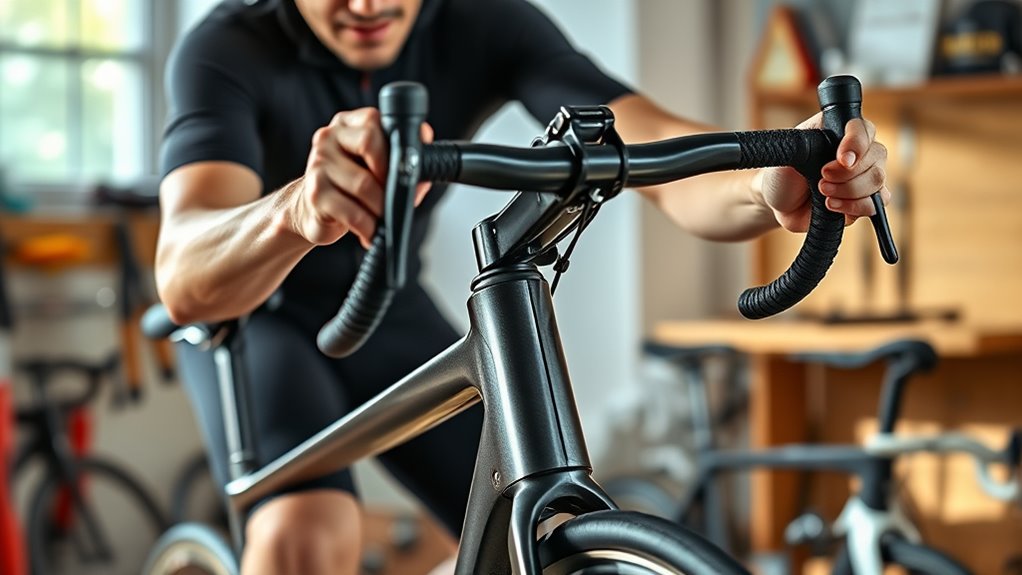
Optimizing your handlebar height and reach can considerably enhance your riding comfort and efficiency. To achieve this, focus on three key adjustments:
- Set the handlebar height 0.5 to 6 cm below your saddle level for a balance of comfort and aerodynamics, depending on your riding style.
- Ensure the reach allows a slight elbow bend when gripping the hoods, typically 2-4 inches from the saddle, promoting ergonomic riding.
- Use a 6mm Allen key to adjust stem length or spacers, gradually raising or lowering the handlebars, and tilt the handlebars to reduce wrist strain and align wrists and elbows for a relaxed riding posture.
Matching handlebar width to shoulder width also helps maintain a neutral arm position, preventing discomfort during rides.
Selecting and Positioning the Right Saddle for Your Body
Choosing the right saddle begins with selecting one that matches your body shape and hip flexibility, prioritizing comfort over weight savings. Use a saddle selector tool or test multiple saddles through local bike shop loaner programs to find the correct saddle. Once you have it, adjust the seat height so your leg nearly straight at the bottom of the pedal stroke. Set the saddle setback so your knee is over the pedal spindle at the 3 o’clock position for proper seat position. Start with the saddle level, then fine-tune the seat tilt slightly forward or backward to reduce pressure and improve comfort. Consistently ride with this well-fitting saddle to maintain ideal comfort and efficiency, avoiding frequent swaps that can disrupt your riding posture.
Fine-Tuning Shoe-Pedal Connection and Cleat Alignment
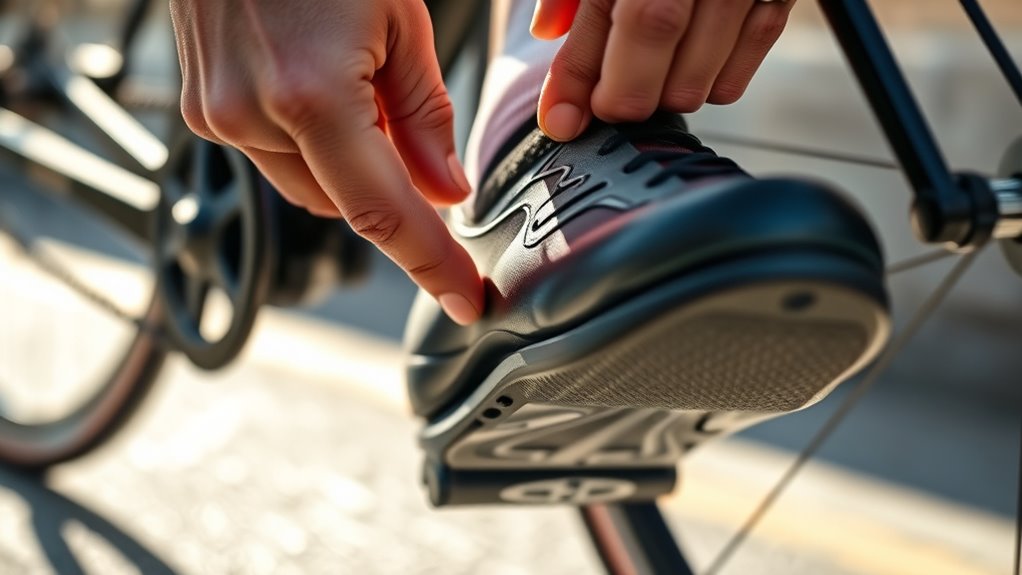
To guarantee efficient power transfer and reduce discomfort, it’s vital to refine your shoe-pedal connection and cleat alignment. First, position cleats so the middle indicator aligns about 5mm behind the ball of your foot, optimizing power transfer and comfort. Second, adjust the cleat angle to minimize twisting or tension in your ankles, knees, and hips, supporting better biomechanics. Third, choose a large, stable pedal size to enhance grip and stability, reducing foot movement. If you experience discomfort, widen your stance with pedal axle extenders to improve biomechanics and joint alignment. Always set cleats straight ahead initially and fine-tune based on your individual biomechanics to prevent strain and ensure smooth pedaling. Proper alignment boosts efficiency and comfort in every ride.
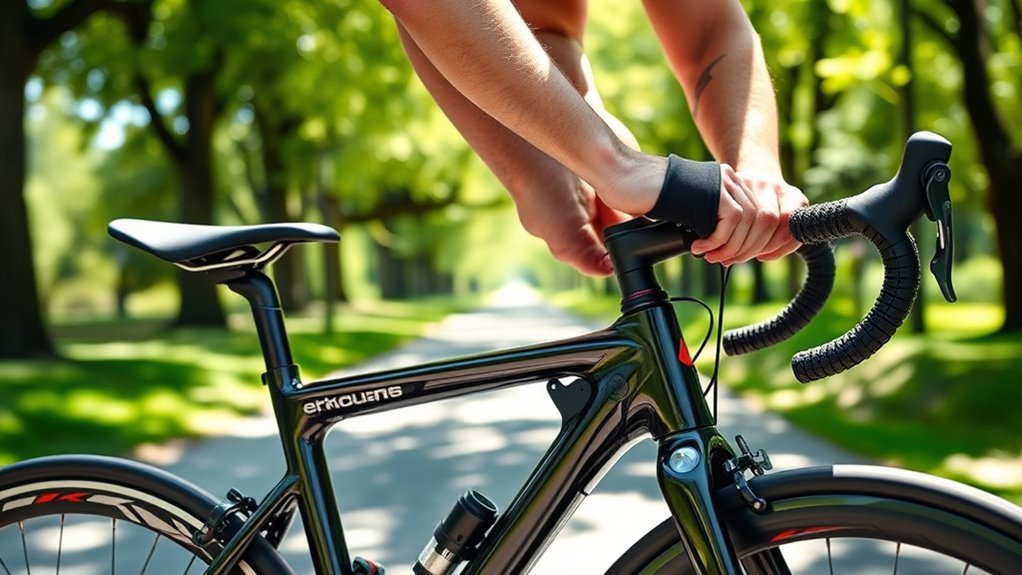
Choosing the Proper Handlebar Width and Drop Bar Options

When setting up your bike for comfort and control, selecting the right handlebar width and drop bar options is key. Your handlebar width should match your shoulder width or be slightly narrower to promote a relaxed upper body and reduce shoulder tension. Drop bars come in different styles: shallow drops are better for casual riding, offering comfort, while wider drop bars enhance control on rough terrain and descents. The depth of the drop influences aerodynamics and comfort, with shallower drops suited for longer, relaxed rides. Proper handlebar and drop bar choices help maintain a natural arm position, minimizing strain on your wrists, shoulders, and neck. Use the following table for quick ideas:
| Handlebar Width | Drop Bar Style |
|---|---|
| Matches shoulder | Shallow drops for comfort |
| Slightly narrower | Deeper drops for control |
| Wider for stability | Suitable terrain varies |
| Narrower for agility | Arm position optimized |
| Comfort focus | Control focus |
Using Partner Assistance and Tools for Precise Adjustments
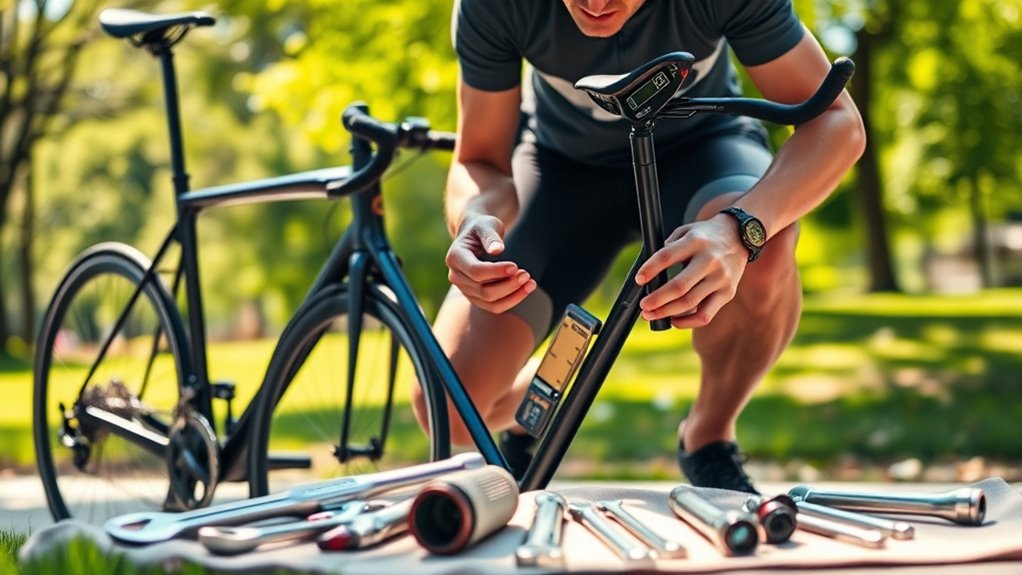
Using partner assistance can substantially enhance the accuracy and safety of your handlebar and saddle adjustments. With a partner, you gain stability, preventing unwanted movement that could cause misalignment. They can hold the handlebars steady while you make precise adjustments, ensuring your handlebar height and saddle tilt are correct. Incorporating tools like a level or smartphone inclinometer helps measure angles accurately, especially for saddle tilt and handlebar position. Your partner’s feedback during these adjustments highlights subtle discomforts or misalignments you might miss alone. Once everything feels right, lock in your adjustments to maintain stability during rides. This collaborative approach ensures your bike fit is accurate, comfortable, and safe, leading to a smoother, more efficient riding experience.
Ongoing Tips for Maintaining and Improving Your Bike Fit

Regularly reassessing your bike fit is essential, especially after changes in flexibility, injury recovery, or riding style. Small, incremental bike adjustments—such as your saddle height and handlebar position—help maximize comfort and efficiency. Use your body’s feedback, like discomfort or fatigue, to identify where adjustments are needed. Keep detailed records of your fit measurements and changes so you can track progress or revert if necessary. Over time, these ongoing tweaks will enhance your ergonomics and prevent discomfort. Consider periodic professional fitting, especially if you experience persistent issues or after significant physical changes. Staying proactive with your bike fit ensures you enjoy smoother rides, improved comfort, and ideal performance over the long term.
Frequently Asked Questions
How Do I Adjust My Bike for Comfort?
To adjust your bike for comfort, start by setting your saddle height so that your heel touches the pedal at the lowest point with a slight knee bend. Position the saddle forward or back to align your knee over the pedal spindle. Tilt it slightly for comfort. Finally, raise or lower your handlebars gradually, ensuring they feel natural and reduce wrist or shoulder strain. Make small adjustments and test ride after each to find what works best.
How Can I Improve the Efficiency of My Bike?
Did you know that proper bike fit can boost your pedaling efficiency by up to 10%? To improve your bike’s efficiency, focus on saddle height and fore-aft position to optimize knee extension and power transfer. Fine-tune handlebar reach and height for a relaxed arm position, and verify your cleats and pedals are correctly aligned. Regular adjustments based on your ride feedback help keep you comfortable and efficient every time.
How Can I Increase the Energy Efficiency of My Bike?
To increase your bike’s energy efficiency, focus on proper saddle height and fore-aft positioning to improve pedaling biomechanics. Make sure your cleats are aligned correctly under the ball of your foot to reduce foot and ankle movements. Keep your handlebar reach comfortable, and adjust your riding position to cut down on wind resistance. Regularly maintain your bike by lubricating chains and checking tire pressure to minimize rolling resistance and boost efficiency.
What Is the Correct Height for Bike Seat and Handlebars?
You want to find the right bike seat and handlebar height for comfort and performance. For the seat, set it so you have a slight knee bend (30-40 degrees) at the pedal’s lowest point, ensuring efficient pedaling and less joint strain. For handlebars, position them 0.5 to 6 cm below your saddle, depending on your flexibility. Test ride and tweak until you feel relaxed and supported during your ride.
What Is the Best Seat Adjustment on a Bike?
Imagine your bike seat as a throne for your ride—finding the perfect fit makes every journey smoother. You want a slight knee bend at the bottom of your pedal stroke, about 30-40°, to harness power without strain. Position the saddle so your knee lines up over the pedal spindle, and tilt it just enough for comfort. Small tweaks and testing help you tune it until every pedal feels natural and effortless.
Conclusion
So there you have it—your secret recipe for a perfectly tuned bike. Because nothing screams “elite cyclist” like spending hours fiddling with your saddle tilt or squinting at your handlebar height. Remember, a comfy, efficient ride is just a few adjustments away—if you’re brave enough to embrace the chaos. Now go forth, tweak away, and pretend you’re a pro—until your back protests or your knees rebel. Happy riding!