
A proper bike fit is key to comfort, efficiency, and avoiding injuries. You want the right frame size based on your height and inseam, along with saddle height and position that support proper knee bend and power transfer. Handlebar reach and height should be tailored to your posture, while cleats need correct alignment for smooth pedaling. Fine-tuning these elements can prevent pain and fatigue. Keep exploring to learn how to optimize your ride for the long run.
Key Takeaways
- Proper bike fit enhances comfort, efficiency, and injury prevention by aligning your body correctly on the bike.
- Selecting the right frame size based on height, inseam, and bike geometry ensures optimal riding posture.
- Adjust saddle height, fore/aft position, and handlebar reach to customize fit and maintain proper knee bend and comfort.
- Handlebar height and angle adjustments improve control, reduce strain, and promote an ergonomic riding position.
- Recognizing signs of discomfort and ensuring proper cleat alignment are essential for a safe, efficient, and enjoyable ride.
Why Proper Bike Fit Matters

A proper bike fit is essential because it directly affects your efficiency and comfort on the bike. When your saddle position and saddle height are correctly adjusted, you improve body alignment, which boosts power transfer and reduces fatigue. A proper bike fit involves precise fit adjustments, including handlebar position, ensuring your upper body remains relaxed and your riding posture is optimized. Correct bike sizing helps you maintain better control and handling, especially on varied terrain. When everything is aligned properly, you decrease the risk of overuse injuries like knee, back, and neck pain. Better riding comfort lets you ride longer with less discomfort. Investing in a proper bike fit from the start promotes healthier cycling habits, preventing long-term joint and muscle issues. Additionally, understanding fit adjustments can significantly enhance your overall riding experience and prevent common discomforts. Being aware of bike sizing options can lead to more comfortable rides and improved performance, especially when navigating different terrains or participating in various activities. Moreover, learning about body positioning can further optimize your riding efficiency and reduce strain. Properly adjusted saddle position is crucial for maintaining comfort during extended rides and avoiding soreness. Incorporating water-based cycling techniques, such as aquatic cycling, can also aid in recovery and improve flexibility, complementing your bike fit efforts.
Choosing the Right Frame Size
Choosing the right bike frame size is key to guaranteeing comfort, efficiency, and safety while riding. To find your correct size, consider these steps:
- Check your standover height against the bike’s top tube clearance—aim for at least 1-2 inches for mountain bikes and about 2 inches for road bikes.
- Use manufacturer sizing charts that match your height and inseam measurement to the recommended frame size.
- Guarantee the bike’s geometry, especially the top tubes, aligns with your riding style, and factor in your cycling shoes for a precise fit.
- Remember that a proper bike fit can enhance your overall riding experience and reduce fatigue. Additionally, consulting with a professional bike fitter can help tailor the fit to your unique body measurements and riding preferences.
- Recognizing the importance of industry transformations, staying updated on advancements in bike fitting technology can significantly improve your riding comfort.
- Ensuring your bike setup is adjustable allows for personalized modifications that can further improve comfort and performance.
A proper frame size supports safe mounting and dismounting, promotes ideal riding posture, and minimizes discomfort on long rides. Always verify the correct size before hitting the road or trail.
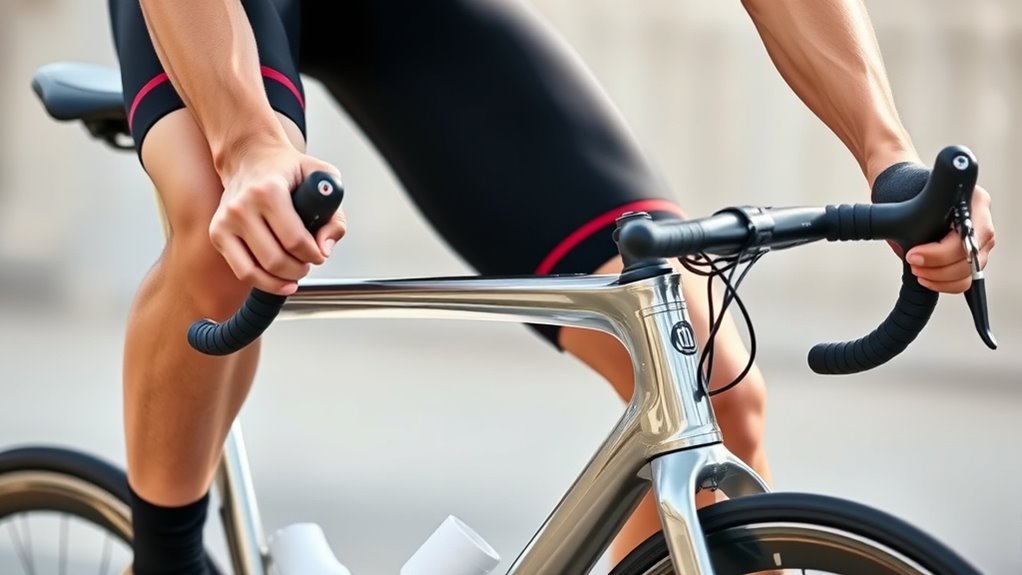
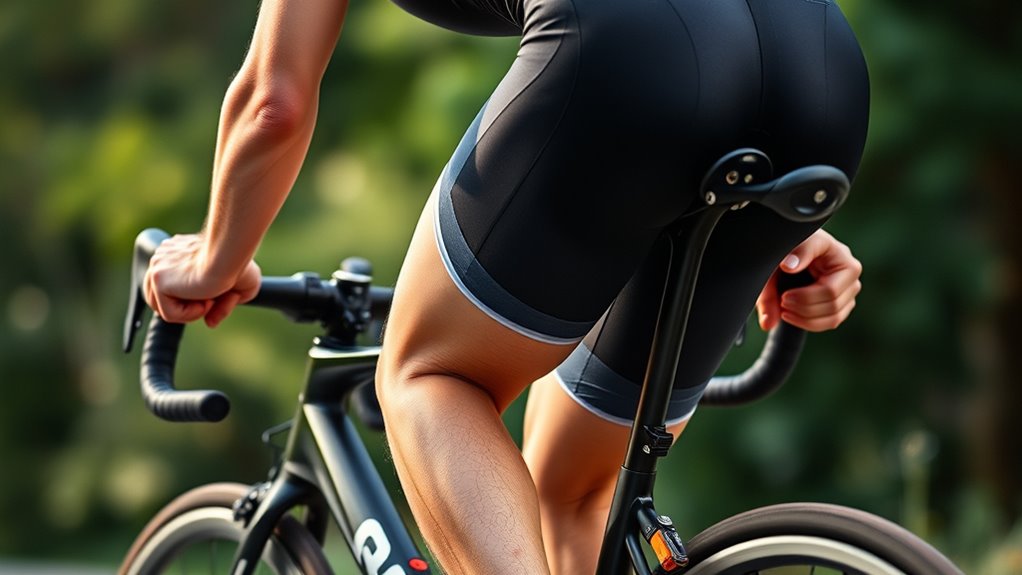
Setting Your Saddle Height and Position

Start by pedaling with your heel on the pedal at the bottom of the stroke—your knee should be almost fully extended with a slight bend. Adjust your saddle height so that when the ball of your foot is on the pedal, your knee remains slightly bent at the bottom. Use the knee-over-pedal-spindle method to fine-tune your saddle’s fore/aft position for ideal efficiency. Incorporating proper bike fit techniques can also help prevent discomfort and improve overall riding performance. Ensuring your ergonomic setup is correct can further enhance comfort and reduce the risk of injury during rides. Additionally, selecting the right tuning and setup for your bike can optimize handling and response, making your ride more enjoyable and efficient. Paying attention to cultural influences and the history of bike design can also inspire ergonomic choices that honor traditional practices while enhancing functionality. Recognizing the importance of self-watering plant pots can serve as a reminder to maintain consistent hydration, which is crucial for optimal physical performance during cycling.
Pedal at Bottom Stroke
To properly set your saddle height, position yourself on the bike so that when your foot is in a normal riding position, your knee has a slight bend of about 80-90% at the bottom of the pedal stroke. This guarantees a proper fit and efficient power transfer. To fine-tune your saddle height:
- Sit on the saddle and place your heel on the pedal at the lowest point; your leg should be fully extended without locking the knee.
- Pedal with the ball of your foot, maintaining a slight knee bend at the bottom of the pedal cycle.
- Confirm your knee alignment by checking that your kneecap is vertically over the pedal spindle when the crank arm is at 3 o’clock.
- Remember that saddle position can also influence comfort and efficiency, so adjust it along with height for the best fit.
- Regularly reassess your cycling posture to ensure that your saddle height remains optimal as your flexibility and riding style evolve.
Adjust gradually for comfort, keeping your riding position and knee bend within the ideal range.
Knee Bend Angle
Achieving the correct knee bend angle is essential for an efficient and comfortable bike fit. The ideal knee bend at the bottom of your pedal stroke should be around 80-90%, meaning your knee is slightly flexed but not fully extended. To set your saddle height, position your heel on the pedal at its lowest point; your leg should be almost straight. When you pedal with the ball of your foot, a slight bend should appear. Proper saddle height helps optimize power transfer and minimizes knee strain, contributing to better cycling comfort. The saddle fore-aft position is confirmed when, with the crank horizontal, your kneecap aligns vertically over the pedal axle, ensuring correct knee tracking. Regularly checking your saddle height maintains the proper knee bend angle and improves your overall bike fit. Additionally, understanding your knee bend angle can also help prevent injury and improve pedaling efficiency. Being aware of your body alignment can further enhance your riding posture and comfort. Ensuring your bike setup is properly adjusted based on these measurements can also help prevent injury and enhance overall performance.
Fore/Aft Saddle Position
Proper fore/aft saddle positioning is crucial for ideal pedaling efficiency and comfort. Your saddle position affects knee alignment, power transfer, and overall ride quality. To optimize your bike fit, consider these steps:
- Confirm your knee cap is directly over the pedal spindle at the 3 o’clock position.
- Adjust the saddle forward or backward to align the spindle with the first and fifth metatarsals on your foot.
- Maintain a slight bend in your knee—about 80-90 degrees—at the bottom of your pedal stroke for proper fit and comfort.
Fine-tuning the fore/aft adjustment can reduce knee pain, boost pedaling efficiency, and improve riding comfort. Remember, proper saddle position ensures a more efficient and enjoyable ride.
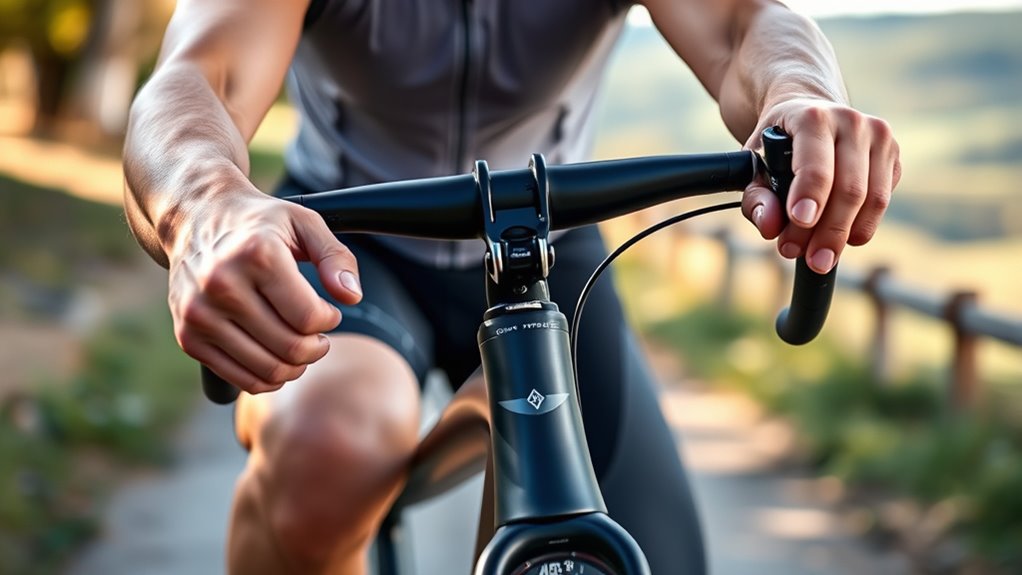
Adjusting Handlebar Reach and Height
Adjusting handlebar reach and height is essential for customizing your bike fit to suit your body and riding style. You can modify handlebar reach by changing the stem length or position, ensuring a slight elbow bend (~10°) for comfort. Adjusting handlebar height using spacers or stem adjustments influences your riding posture, helping reduce back and neck strain. Proper handlebar height allows you to maintain a relaxed arm position with minimal wrist extension. Fine-tuning the handlebar angle through stem adjustments can improve reach and control. These changes help distribute weight evenly, enhance handling, and prevent discomfort like numbness or shoulder tension. A well-set handlebar height and reach are key to a comfortable bike setup, making your rides more enjoyable and efficient.
Aligning Cleats for Optimal Pedaling
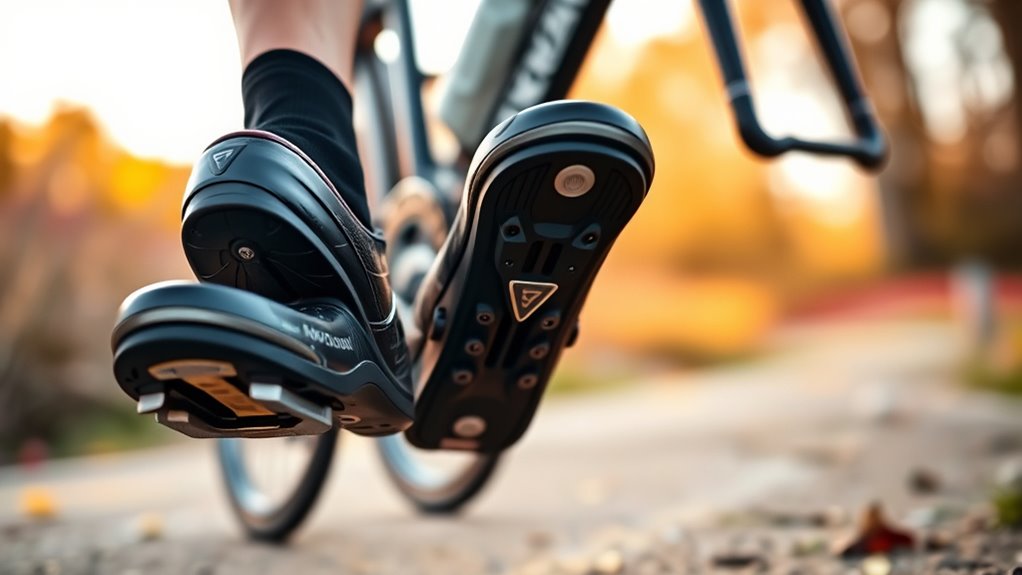
To pedal efficiently and prevent discomfort, you need to make sure your cleats are aligned correctly. Proper cleat alignment ensures your foot position supports ideal pedaling and reduces knee strain. Here’s what to focus on:
Proper cleat alignment ensures efficient pedaling and reduces knee strain.
- Position the cleat so the spindle is beneath your first or fifth metatarsal, aligning with your metatarsal heads.
- Use fore-aft adjustment to set the proper placement, allowing your foot to sit comfortably in your pedal stance.
- Allow for slight float, giving your foot some lateral movement, which minimizes knee strain and improves pedal efficiency.
Secure the cleats tightly once aligned to keep your foot position consistent. Correct cleat alignment promotes smooth, efficient pedaling and helps prevent overuse injuries.
Fine-Tuning Handlebar and Stem Angles
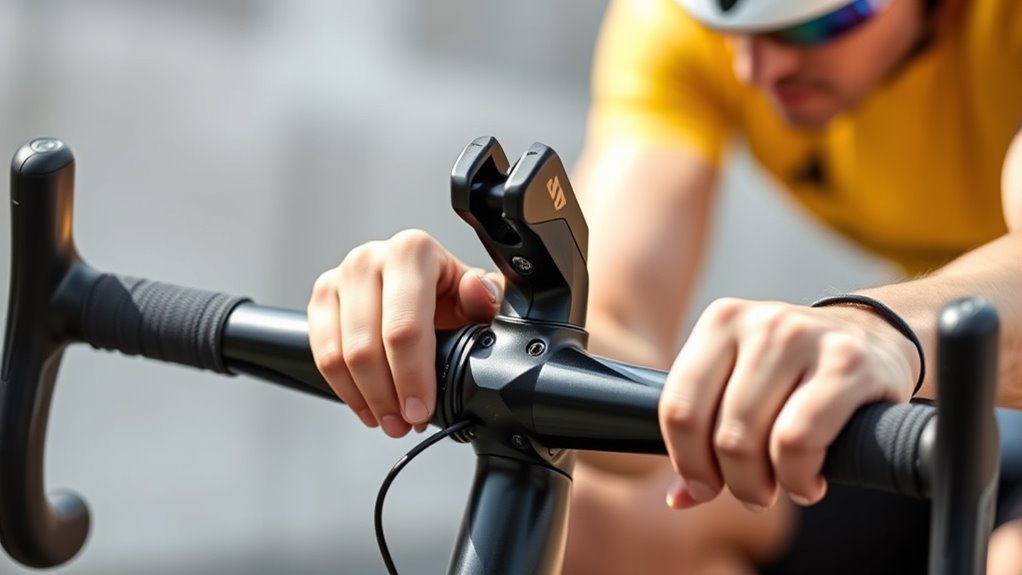
Adjusting your handlebar tilt can make a big difference in comfort, helping reduce wrist strain and support a natural arm position. Using spacers or changing the stem angle allows you to fine-tune your riding posture for better control and less fatigue. Small tweaks to handlebar and stem angles can markedly improve both comfort and handling, especially on longer rides.
Handlebar Tilt Adjustment
Fine-tuning the handlebar tilt can greatly improve your comfort and control on the bike. Proper handlebar tilt affects your bike fit, riding posture, and overall ergonomics. To optimize your setup, consider these key adjustments:
- Level the handlebar tops with the ground or tilt slightly for comfort.
- Tilt handlebars inward or outward to reduce wrist strain and improve reach.
- Use a level or smartphone app to measure the handlebar angle accurately, aiming for a slight upward or downward tilt as needed.
Making these adjustments ensures your handlebar angle supports a neutral wrist position, alleviating numbness and discomfort. Remember, small changes in handlebar tilt can profoundly enhance your ergonomic comfort and control during rides, especially on long distances.
Stem Angle Selection
Selecting the right stem angle is key to customizing your bike’s handlebar height and reach for ideal comfort. Your stem angle, or stem tilt, directly affects your handlebar reach and overall riding position. A positive stem angle (upward tilt) raises the handlebar height, promoting a more upright and relaxed posture, while a negative angle (downward tilt) lowers the handlebar, creating a more aerodynamic position. Fine-tuning your stem angle in 10° increments helps you find the perfect balance between comfort and performance. Most adjustable stems allow a range of about ±17°, giving you flexibility to customize the handlebar height and reach. This adjustment enhances your bike fit, reduces strain, and ensures you maintain an appropriate riding position for your needs.
Achieving Ergonomic Posture
To achieve an ergonomic riding posture, focus on positioning your handlebar and stem angles to support natural arm and wrist alignment. Proper handlebar positioning allows a slight bend (~10°) in your elbows, promoting ergonomic support and reducing fatigue. Consider these key adjustments:
- Fine-tune handlebar tilt so the tops are level or slightly angled for wrist and arm comfort.
- Adjust stem length and angle to ensure a comfortable, natural reach, easing shoulder and neck tension.
- Experiment with handlebar height and tilt to distribute weight evenly across your hands and saddle.
Regularly re-evaluate your setup as your flexibility and riding style evolve. These posture adjustments help maintain an ergonomic posture, enhancing comfort and reducing strain during rides.
Recognizing Signs of an Uncomfortable Fit
When your bike doesn’t fit properly, you’ll often notice signs during or after rides that something’s off. Persistent pain in your back, neck, knees, or wrists indicates the fit isn’t right. Numbness or tingling in your hands, fingers, or feet suggests handlebar position or cleat alignment issues. If you feel excessive fatigue or soreness that doesn’t improve with rest, your saddle height or seat angle might be wrong, affecting your comfort and body position. Visible knee tracking problems, like knees pointing inward or outward while pedaling, also signal improper saddle fore/aft placement or cleat alignment. Discomfort or pain that persists despite adjustments usually means you need to revisit your fit, possibly with professional help, to ensure your saddle height, handlebar position, and seat angle promote a proper fit.
Upgrading Components for Better Comfort

Upgrading your bike components can make a noticeable difference in comfort, especially if you’ve been experiencing discomfort despite proper fit adjustments. A component upgrade allows you to customize your riding position and reduce strain. Here are three ways to improve comfort:
Upgrading bike components enhances comfort and customizes your riding position for a smoother ride.
- Adjust your saddle support or consider a new saddle that better fits your anatomy.
- Upgrade your stem for improved reach and handlebar comfort, tailoring your riding position.
- Switch to wider, ergonomic handlebars or add cushioned grips to lessen shoulder and wrist fatigue.
These upgrades directly impact your bike fit and overall comfort. By paying attention to handlebar width and saddle support, you’ll enjoy a smoother, more comfortable ride. Remember, small component changes can considerably enhance your cycling experience.
Frequently Asked Questions
How Should a Bike Fit for Beginners?
When fitting your bike as a beginner, start by choosing the right frame size based on your height and inseam. Adjust the saddle height so your knee has a slight bend at the bottom of your pedal stroke. Position the saddle forward or back to align your kneecap over the pedal spindle. Set your handlebars for a relaxed arm bend, and consider professional help for precise adjustments to guarantee comfort and control.
What Are the Four Basic Factors That Determine Bike Fit?
Imagine your perfect ride as a symphony, with four key notes. You, as the rider, control them: saddle height adjusts your leg extension, saddle fore-aft aligns your knee with the pedal spindle, handlebar height sets your posture, and handlebar reach determines arm extension. Mastering these four factors guarantees comfort, efficiency, and control, transforming your bike into an extension of yourself on every journey.
What Is the Rule of Thumb for Bike Fitting?
The rule of thumb for bike fitting is to set your saddle height so that you have a slight bend in your knee, about 80-90%, at the bottom of your pedal stroke. When your heel is on the pedal at the lowest point, your leg should be fully extended. Also, align your knee cap over the pedal spindle when the crank is horizontal for ideal comfort and efficiency.
How Do I Work Out My Bike Fit?
To work out your bike fit, start by measuring your inseam with shoes on, then adjust your saddle height using the heel-on-pedal method until your knee has a slight bend at the bottom. Next, align your knee cap with the pedal spindle when the crank is horizontal. Fine-tune your handlebar height and reach for comfort, making sure your feet track straight over the pedals.
Conclusion
Getting your bike fit just right transforms every ride from a chore into an epic adventure. When your bike feels like an extension of your body, you’ll pedal with effortless grace and ride further than you ever imagined possible. Don’t settle for discomfort—think of your perfect fit as the secret weapon to conquer mountains and crush miles. So, take the time to fine-tune your setup, and unleash your true cycling potential today!