I have been passionately involved in cycling for many years, yet dealing with a loud bicycle remains one of the most aggravating challenges. The noise can be disruptive, irritating, and sometimes even mortifying when cycling alongside others.
One of the most common types of bike noise is when pedaling. In this article, I’ll go over the different types of pedal noise, how to identify them, and what steps you can take to fix them.
The first step in fixing a noisy bike is to identify the type of noise you’re hearing. Is it a clicking, creaking, grinding, or rubbing sound? Each type of noise could have a different cause, so it’s important to pinpoint the problem before attempting any repairs.
Once you’ve identified the noise, you can start inspecting the parts of the bike that could be causing it. In this article, we’ll take a closer look at the chain, bottom bracket, pedals, and crankset to determine what could be causing the noise and how to fix it.
Key Takeaways
- Loose chain, worn gear teeth, and dry chain are common causes of bicycle noise when pedaling.
- The chain, bottom bracket, pedals, and crankset are the main parts of the bike that could be causing noise.
- The type of pedal noise can be identified as clicking, creaking, grinding, or rubbing.
- Regular lubrication of the chain, inspecting the bottom bracket, tightening loose pedals, and checking for worn or damaged crankset are important maintenance tasks to prevent bike noise.

Schwinn Sporterra RX Gravel Bike, 700c Mens and Womens Bike, 14-Speed Drop Bar Gravel Bicycle, Mechanical Disc Brakes, Rigid Fork, Aerodynamic Riding Position, Quick Release Seat Post, Adult Bicycle
GRAVEL BICYCLE: Enjoy next level riding with the Sporterra RX by Schwinn. With 700c wheels, this mens and...
As an affiliate, we earn on qualifying purchases.
Identify the Type of Noise
You’re probably wondering, ‘What’s causing that annoying, squeaky noise when you pedal your bike?’ Well, let’s figure it out together and get you back to enjoying a peaceful ride.
First, we need to identify the type of noise. Is it a clicking sound, a grinding noise, or a high-pitched squeak? These different noises can indicate various issues, such as a loose pedal, worn bearings, or a dry chain. By recognizing the type of noise, we can narrow down the potential causes and solve the problem more efficiently.
Common causes of bike noise when pedaling include a loose chain, worn gear teeth, and a dry chain. To prevent these issues, it’s important to maintain your bike regularly. Keep the chain lubricated with oil and check it for tightness. Also, inspect the gear teeth for signs of wear and replace them if necessary.
By taking these preventative measures, you can avoid the frustration of a noisy bike and ensure a smooth ride. Now, let’s move on to the next section and check the chain to see if that’s the culprit.

Mongoose Men's Elroy Adventure Bike 700C Wheel Bicycle, Blue, 54cm frame size
Versatile adventure touring bike features capable adventure bike geometry, a sleek alloy frame and steel fork for the...
As an affiliate, we earn on qualifying purchases.
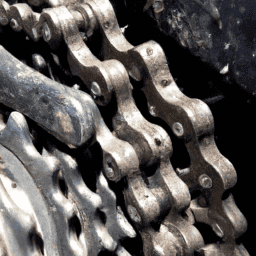
Check the Chain
If you notice a rhythmic clunking coming from your ride, it may be worth investigating the condition of your chain. A worn or dirty chain can cause noise and affect your bike’s performance. The first thing to check is the lubrication of the chain. A dry chain can cause unnecessary friction and noise. You should lubricate your chain regularly to keep it running smoothly. Use a bike-specific lubricant and apply it to each link of the chain. Wipe off any excess lubricant with a clean rag.
Another thing to consider is the wear on the chain. Over time, a chain can stretch and become loose, leading to noise and poor shifting. You can measure the wear on your chain using a chain checker tool. If the wear is significant, you may need to replace the chain. In some cases, a professional bike tune-up may be necessary to properly diagnose and fix the issue. By keeping your chain well-lubricated and replacing it when necessary, you can help prevent noise and ensure a smooth ride. Moving forward, let’s take a look at how to inspect the bottom bracket.

PEXMOR Foldable Bike Cargo Trailer with Universal Bike Hitch, Bicycle Wagon Trailer with 16" Wheels & Reflectors, Large Loading Bike Trailer Storage Cart
【FOLDABLE & EASY TO INSTALL】- Comes with detailed instructions for easy installation and foldable design makes it easy...
As an affiliate, we earn on qualifying purchases.
Inspect the Bottom Bracket
Now that we’ve covered the importance of chain maintenance, let’s delve into inspecting the bottom bracket to ensure a smooth and effortless ride. The bottom bracket is the part of the bike where the pedals and the crankset attach to the frame.
To inspect the bottom bracket, follow these steps:
-
Check for looseness: Grab the crank arms and try to move them side to side. If there’s any play or looseness, it may be time for a bearing replacement.
-
Listen for noise: Pedal the bike while listening for any creaking or clicking noises. This could indicate that the bearings need to be replaced or that there’s a problem with the pedal threads.
-
Grease application: If you’re comfortable with DIY maintenance, you can try removing the bottom bracket and applying a thin layer of grease to the bearings. This can help reduce friction and extend the life of the bottom bracket.
If you’re not comfortable with DIY maintenance, it may be best to take your bike to a professional repair shop for a bottom bracket inspection and any necessary repairs.
Once you’ve inspected the bottom bracket, it’s time to move on to examining the pedals and crankset for any issues that could be causing noise while pedaling.
To examine the pedals and crankset:
- Check for any looseness or play in the pedals
- Listen for any noise while pedaling
By inspecting these components and making any necessary repairs, you can ensure a smooth and quiet ride.

VEVOR Bike Cargo Trailer, 275 lbs Load Capacity, Foldable Compact Storage & Quick Release with Universal Hitch, 20" Wheels, Fits Most Bike Wheels, Carbon Steel Frame, Heavy-Duty Bicycle Wagon Cart
Professional Tire Design: Our bike trailer comes equipped with sporty 20" tires and iron hubs, providing excellent stability...
As an affiliate, we earn on qualifying purchases.
Examine the Pedals and Crankset
Now that I’ve inspected my bottom bracket and ruled out any issues there, it’s time to examine the pedals and crankset.
First, I’ll check for any loose pedals and tighten them if necessary using a pedal wrench.
Then, I’ll inspect the crankset for signs of wear or damage, such as bent teeth or cracks in the arms.
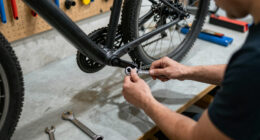
Tighten Loose Pedals
To fix the irritating clunking sound when you pedal your bike, you’ll want to tighten those pesky loose pedals. Proper maintenance of your bike’s pedals is essential to ensure a smooth and noise-free ride.
Loose pedals can cause damage to the crankset and even lead to accidents if left unchecked. To tighten the pedals, you need to use a pedal wrench. First, remove any debris or dirt around the pedal area.
Then, insert the wrench onto the pedal spindle and turn it clockwise to tighten. Make sure not to overtighten, as this can strip the threads or cause damage. If the pedals are beyond repair, consider pedal replacement.
Checking the pedals should always be a part of your regular bike maintenance routine. Now, it’s time to check for a worn or damaged crankset.
Check for Worn or Damaged Crankset
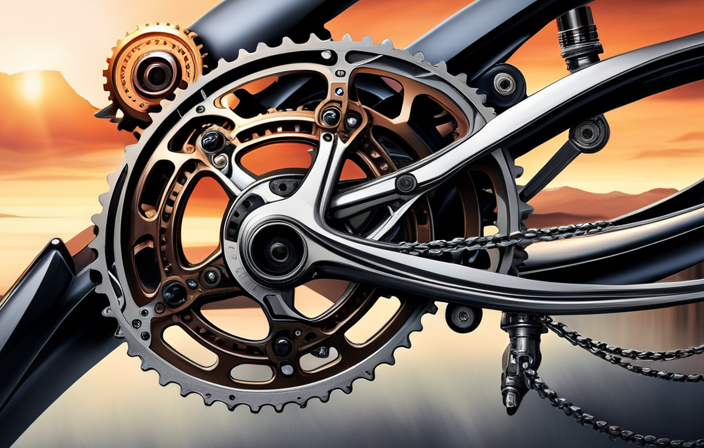
Ensuring your bike’s crankset isn’t worn or damaged is crucial for a safe and enjoyable ride. It’s responsible for transferring power from your legs to the bike’s chain. One common cause of crankset damage is wear and tear from extended use. Over time, the teeth on the chainrings can become worn down, affecting the chain’s ability to grip and transfer power efficiently.
Improper installation or maintenance can also lead to damage, such as overtightening or cross-threading the crank arms. If you suspect that your crankset is worn or damaged, it’s important to replace it as soon as possible to prevent further issues and potential safety hazards.
To replace the crankset, you’ll need to remove the pedals, bottom bracket, and crank arms, and then install the new crankset in the reverse order. It’s important to consult your bike’s manual or a professional mechanic for proper installation instructions.
Once the new crankset is installed, be sure to test ride the bike after repairs to ensure that all components are functioning properly and that the noise when pedaling has been eliminated.
Test Ride the Bike After Repairs
Hop on the bike and feel the difference after the repairs have been made to fix the annoying noise when pedaling. It’s crucial to test ride the bike after any repairs have been made to ensure the issue has been resolved.
Start by adjusting the seat height to ensure maximum comfort and proper leg extension during pedaling. This will also help you determine if the noise is coming from the pedals or elsewhere on the bike.
Next, test the brakes to ensure they’re functioning correctly. While riding, listen for any unusual noises or vibrations that may indicate the presence of the previous issue. Pay attention to the pedals to ensure they’re turning smoothly and without the previous noise.
If the noise persists, it may be necessary to make further repairs or adjustments. However, if the repairs were successful, you’ll immediately notice a significant difference in the bike’s performance and smoothness.
Frequently Asked Questions
Can using a different brand or type of lubricant on the chain reduce pedal noise?
Experimentation with different lubricant brands has shown that some are more effective at reducing noise than others. By trying various noise reduction techniques and using different lubricants, I have found that certain brands can significantly decrease pedal noise.
How often should the bottom bracket be inspected and maintained to prevent noise?
As a cyclist, I cannot stress enough the importance of frequent inspection and maintenance of the bottom bracket. Signs of wear, such as creaking or grinding, should prompt immediate attention to prevent costly damage and ensure smooth pedaling.
Is it possible for pedals to cause noise even if they appear to be in good condition?
Proper pedal maintenance and installation are essential to prevent noise. Even if pedals appear to be in good condition, they can still cause noise if not properly installed or maintained. Regular pedal maintenance can prevent noise and ensure smooth cycling.
Can a bike fitting or adjustment help reduce pedal noise?
Do bike fitting or adjustments reduce pedal noise? Proper bike posture and pedaling technique improve efficiency and reduce noise. Adjusting the saddle height and handlebar position can also help.
Are there any other factors, besides the bike itself, that could be causing pedal noise during riding?
Pedal stroke and rider technique can greatly affect the noise produced during cycling. Poor technique, such as "mashing"the pedals or grinding gears, can create excess noise. Proper form and gear selection can reduce noise and improve efficiency.
Conclusion
In conclusion, identifying the type of noise coming from your bike is crucial to determine the root cause of the issue. Once you’ve identified the type of noise, you can proceed with the necessary repairs.
Checking the chain is a simple yet effective way to eliminate noise when pedaling. Ensure that the chain is properly lubricated and tightened to prevent any issues.
Inspecting the bottom bracket and pedals and crankset is also crucial in eliminating bike noise when pedaling. A worn-out bottom bracket or faulty pedals and crankset can cause unwanted noise. Therefore, it’s essential to examine these parts and replace them if necessary.
In a case study, a cyclist experienced a clicking noise whenever they pedaled their bike. After inspecting the chain and bottom bracket, it was discovered that the pedals and crankset were the root cause. A simple replacement of these parts eliminated the noise, and the cyclist was able to enjoy a smooth ride again.
Overall, bike noise when pedaling can be frustrating, but it’s fixable. By identifying the type of noise and inspecting the chain, bottom bracket, pedals, and crankset, you can eliminate the issue and enjoy a quiet ride. Remember to test ride the bike after repairs to ensure that the noise has been eliminated.