As an avid cyclist, I’ve always loved the freedom and exhilaration of riding a bike.
But what if I told you there’s a way to take that experience to a whole new level?
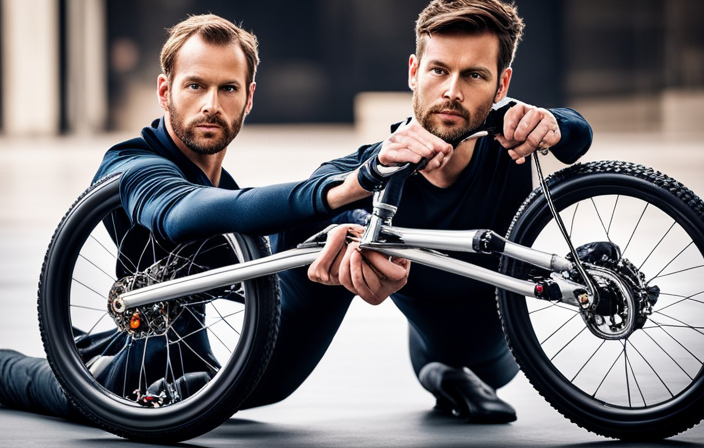
With a DIY electric bike conversion, you can transform your ordinary bicycle into a powerful and efficient electric ride.
In this article, I’ll guide you through the step-by-step process of how to make your own electric bike, from gathering the tools and materials to testing and troubleshooting.
Let’s dive in and unlock the incredible potential of your two-wheeled companion.
Key Takeaways
- DIY electric bikes offer cost savings compared to buying a new electric bike.
- Customization options for the motor, battery, and controller allow for personalized preferences.
- Building a DIY electric bike provides a better understanding of the bike’s inner workings.
- Troubleshooting and performing maintenance on a DIY electric bike is easier due to the builder’s familiarity with the components.
Introduction to DIY Electric Bikes
Making your own electric bike is a great way to save money and reduce your carbon footprint. DIY electric bike advantages are numerous, making it an attractive option for those looking to explore eco-friendly transportation alternatives.
As a beginner’s guide to DIY electric bikes, it is important to understand the benefits of undertaking such a project.
One of the key advantages of a DIY electric bike is the cost savings. By converting your existing bicycle, you avoid the high price tag associated with purchasing a new electric bike. Additionally, you have the flexibility to choose the components that best fit your budget and needs.
Another advantage is the ability to customize your electric bike. You can select the motor, battery, and controller that best suit your desired speed, range, and power requirements. This level of customization allows you to create a bike that is tailored to your specific preferences and riding style.
Furthermore, building your own electric bike provides a better understanding of its inner workings. This knowledge empowers you to troubleshoot and perform maintenance tasks, ensuring the longevity and reliability of your bike.
To begin your DIY electric bike journey, the first step is to gather the required tools and materials.
Gather the Required Tools and Materials
First, you’ll need to gather all the necessary tools and materials. To successfully convert your bike into an electric one, there are a few key items you’ll need. The first is a conversion kit, which typically includes a motor, battery, and controller. Make sure to choose a kit that is compatible with your bike’s frame and size.
You’ll also need a wrench, screwdriver, and pliers to remove and install parts. Additionally, gather zip ties, electrical tape, and wire cutters for securing and managing the wiring. Safety gear such as gloves and eye protection are essential when working with electrical components. Finally, don’t forget a good set of Allen keys for adjusting and tightening various bolts.
Once you have gathered all the required tools and materials, you can move on to the next step: choosing the right bike frame for your electric conversion.
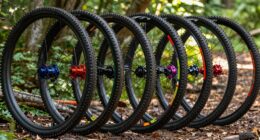
Choose the Right Bike Frame for Your Electric Conversion
Now that you have all the necessary tools and materials, it’s time to select the ideal frame for your electric conversion. When it comes to bike frame selection, it is crucial to consider frame compatibility with the electric components you will be installing. The frame should be able to accommodate the battery, controller, and motor without any issues.
First, you need to determine the type of bike frame you have. Is it a road bike, mountain bike, or hybrid? Each type may have different frame dimensions and features that can affect the installation process.
Next, you should carefully examine the frame to ensure it is structurally sound and in good condition. Look for any cracks, dents, or signs of wear that could compromise the integrity of the frame. It’s important to choose a frame that can handle the additional weight and stress of the electric conversion.
Consider the size and geometry of the frame as well. Make sure it aligns with your body measurements and riding style for optimal comfort and performance. Additionally, check if there are any mounting points or attachments that can be used for securing the electric components.
By carefully considering frame compatibility and selecting the right frame for your electric conversion, you can ensure a successful and safe transformation.
Now, let’s move on to the next section where we will select and install the electric motor.
Select and Install the Electric Motor
To select and install the electric motor, you’ll want to carefully consider motor compatibility with your chosen frame and ensure a secure and proper installation. Here are some tips for selecting and installing the electric motor:
-
Determine the motor type: There are several electric motor types available, including brushed DC motors, brushless DC motors, and hub motors. Consider factors such as power output, efficiency, and weight when choosing the motor type that best suits your needs.
-
Check the motor specifications: Pay close attention to the motor’s voltage and current ratings, as well as its power output. Ensure that these specifications align with the capabilities of your battery and motor controller to avoid any compatibility issues.
-
Mount the motor securely: Properly secure the motor to your bike frame using suitable brackets and fasteners. Make sure the motor is positioned in a way that allows for efficient power transfer and does not interfere with other components.
-
Ensure proper wiring: Follow the manufacturer’s instructions to connect the motor to the motor controller and battery. Use appropriate gauge wires and connectors to ensure reliable and safe operation.
By carefully considering motor compatibility and following these installation tips, you can successfully select and install the electric motor for your DIY electric bike.
Now, let’s move on to the next section and discuss how to install the motor controller and battery.
Install the Motor Controller and Battery
When installing the motor controller and battery, make sure you secure them properly and follow the manufacturer’s instructions for wiring connections.
The motor controller is a crucial component in the electric bike conversion process as it controls the power output to the motor. Begin by locating a suitable location for the motor controller, ensuring it is easily accessible but protected from water and other elements. Use mounting brackets or straps to secure the controller in place, ensuring it is firmly attached to the frame.
Next, it’s time to install the battery. The battery provides the necessary power for the motor to run. Choose a location on the bike that is both secure and easily accessible for charging purposes. Attach the battery securely to the frame using mounting brackets or straps.
Before proceeding any further, it is important to double-check that all connections are secure and properly tightened. Loose connections can result in poor performance or even damage to the electrical system. Take the time to carefully follow the manufacturer’s instructions for wiring connections, ensuring all wires are connected to their respective terminals.
With the motor controller and battery securely in place, we can now move on to the next step: connecting the wiring and testing the electrical system. This will allow us to ensure that all components are functioning properly and that the bike is ready for use.
Connect the Wiring and Test the Electrical System
Make sure you carefully connect the wiring and test the electrical system to ensure all components are functioning properly. This step is crucial for the successful installation of an electric bike. Proper wiring is essential for the safe and efficient operation of the bike’s electrical system.
When connecting the wiring, it is important to follow the manufacturer’s instructions and guidelines. Start by identifying the correct wires and connectors for each component. Take your time to make secure connections, ensuring that all wires are properly insulated and protected from any potential damage or short circuits.
Once the wiring is completed, it is time to test the electrical system. Begin by turning on the power and checking for any signs of malfunction or loose connections. Use a multimeter to measure the voltage across different components to ensure they are receiving the proper power supply.
If you encounter any issues during the testing process, it is important to troubleshoot the wiring connections. Check for loose or disconnected wires, damaged connectors, or any other signs of wiring problems. Address these issues promptly to ensure the safety and functionality of the electrical system.
Now that the wiring is connected and the electrical system is tested, it’s time to move on to the next step: adding a throttle and brake lever system. This system will allow you to control the speed and braking of the electric bike, providing a safer riding experience.
Add a Throttle and Brake Lever System
Now that the wiring’s connected and the electrical system’s been tested, it’s time to add the throttle and brake lever system. This step is crucial for controlling the speed and stopping power of the electric bike.
First, let’s focus on the throttle adjustment. The throttle is responsible for regulating the motor’s power output. To ensure optimal performance, it’s important to calibrate the throttle sensitivity. This can be done by adjusting the throttle cable tension or using a digital throttle controller. By fine-tuning the throttle, you can achieve the desired acceleration and responsiveness.
Next, let’s discuss the brake sensitivity. A well-adjusted brake lever system is essential for safe and efficient braking. Start by installing the brake levers on the handlebars and connect them to the brake calipers. Make sure the cables are properly tensioned to provide quick and reliable stopping power. It’s also crucial to adjust the brake pads’ position and alignment for optimal contact with the braking surface. This will enhance the overall brake sensitivity and improve your control over the electric bike.
With the throttle and brake lever system in place, you’re one step closer to completing your DIY electric bike. The next section will guide you through installing a battery mounting system, which is essential for securely attaching the battery to your bike frame.
Install a Battery Mounting System
To securely attach the battery to your frame, you’ll need to install a battery mounting system. This is an essential step in converting your bike into an electric one. Here are three battery mounting techniques that will ensure your battery is securely fastened:
-
Frame-mounted bracket: This technique involves attaching a bracket directly to your bike’s frame. The bracket is designed to hold the battery securely in place and prevent any movement during rides. It is usually made of durable materials such as aluminum or steel to provide maximum strength and stability.
-
Velcro straps: Another popular technique is using Velcro straps to secure the battery to the frame. This method is simple yet effective, as it allows for easy installation and removal of the battery. The Velcro straps should be tightly fastened around the battery and frame to prevent any slippage or shifting.
-
Custom-made battery holder: For those who prefer a customized solution, a custom-made battery holder can be designed and fabricated. This involves creating a unique holder that perfectly fits your bike’s frame and battery specifications. It ensures a snug fit and optimal security for your battery.
By implementing these battery mounting techniques, you can securely attach your battery to the frame and enjoy a stable and reliable electric bike.
Now, let’s move on to the next section, where we will discuss how to upgrade the bike’s gearing system.
Upgrade the Bike’s Gearing System
You’ll need to consider upgrading your gearing system to optimize the performance of your ride. A bike gearing system consists of multiple gears and a mechanism to switch between them, allowing you to maintain a comfortable cadence while riding in different terrains. Upgrading your bike’s gearing system can improve your overall riding experience by providing smoother gear shifts and better power transfer.
To help you understand the different options available, here is a table showcasing some common gear ratios for a typical 3×9 gearing system:
| Front Gears | Rear Gears (Cassette) | Gear Ratios |
|---|---|---|
| 1 | 12 | 0.083 |
| 2 | 15 | 0.133 |
| 3 | 18 | 0.167 |
| 3 | 32 | 0.375 |
By upgrading your gear system, you can choose gear ratios that suit your riding style and terrain preferences. For example, if you frequently ride on steep hills, you may want to consider installing a larger rear cassette with a wider range of gears. This will provide you with lower gears for easier climbing. On the other hand, if you enjoy riding at high speeds on flat roads, you might want to opt for a smaller cassette with closer gear ratios to maintain a consistent cadence.
Upgrading your bike’s gear system is an important step towards optimizing your ride. Once you have completed this upgrade, you can move on to the next section, which focuses on installing a display and control panel for your electric bike.
Install a Display and Control Panel
Installing a display and control panel on your bike allows for easy access to important information and adjustments while riding. This simple addition can greatly enhance your biking experience and provide you with valuable data at your fingertips. Here are three key benefits of display installation and control panel setup:
-
Real-time Speed Monitoring: With a display mounted on your handlebars, you can easily keep track of your current speed, ensuring you stay within safe limits and maintain efficient riding.
-
Battery Life Indication: A control panel equipped with a battery life indicator allows you to monitor the remaining power in your electric bike’s battery. This information is crucial for planning your rides and avoiding unexpected battery drain.
-
Adjustable Assistance Levels: Many control panels offer the ability to customize your electric assistance levels. This feature enables you to tailor the amount of assistance you receive from the motor, giving you greater control over your riding experience.
Modify the Bike’s Brakes for Electric Use
When modifying your brakes for electric use, it’s important to ensure that they are capable of handling the increased speed and power. Modifying the brakes on your bike is a crucial step in ensuring your safety when converting it into an electric bike.
The increased speed and power of an electric motor can put additional strain on your brakes, so it’s essential to make the necessary modifications.
To modify your brakes for electric use, start by inspecting the brake pads. Ensure that they are in good condition and have enough thickness to provide sufficient stopping power. If they are worn out, replace them with new ones. Additionally, consider upgrading your brake system to a disc brake setup if your bike currently has rim brakes. Disc brakes offer better stopping power and are more reliable at high speeds.
Furthermore, it’s important to adjust your brake cables properly to ensure responsive braking. Make sure there is no slack in the cables and that they are securely attached to the brake levers.
By modifying your brakes for electric use and taking these safety precautions, you can ensure that your bike is equipped to handle the increased speed and power of an electric motor. This will provide you with a safer and more enjoyable riding experience.
In the next section, we will discuss how to add lights and reflectors for safety.
Add Lights and Reflectors for Safety
To enhance your visibility and ensure your safety while riding, it’s important to add lights and reflectors to your bike. Safety should always be a top priority when it comes to cycling, and having proper lighting and reflectors can greatly reduce the risk of accidents, especially when riding at night or in low light conditions.
When it comes to choosing lights and reflectors for your bike, there are several options available. It’s important to select lights that are bright enough to be seen by motorists and other cyclists. Front lights should be white and rear lights should be red to comply with traffic regulations. Reflectors should be strategically placed on the front, rear, pedals, and wheels of your bike to ensure maximum visibility from all angles.
Here is a table summarizing the different types of lights and reflectors you can consider:
| Type of Light/Reflector | Purpose | Mounting Location |
|---|---|---|
| Front Light | Illuminate the road ahead | Handlebar |
| Rear Light | Alert motorists and cyclists behind | Seatpost |
| Pedal Reflectors | Highlight your presence from the side | Pedals |
| Wheel Reflectors | Increase visibility from the side | Spokes |
| Front and Rear Reflectors | Enhance visibility from all angles | Frame |
Test Ride and Make Adjustments
After ensuring that my DIY electric bike is equipped with proper lights and reflectors for safety, it’s time to take it for a test ride and make any necessary adjustments.
Before I get on the bike, I start by adjusting the seat position to ensure optimal comfort and proper leg extension while pedaling. This is crucial for maintaining a balanced and efficient riding posture.
Once seated comfortably, I turn on the motor and begin my test ride. As I ride, I pay close attention to the motor torque, which determines the power and speed of the bike. Fine-tuning the motor torque is important to achieve the desired level of acceleration and speed. I make adjustments to the torque settings, ensuring that it aligns with my preferences and riding conditions.
Throughout the test ride, I carefully monitor the bike’s performance, paying attention to any vibrations, noise, or handling issues. If I notice any irregularities, I make note of them to address later during the maintenance stage.
Transition: Now that I have completed the test ride and made necessary adjustments, it’s important to understand how to maintain and troubleshoot my DIY electric bike to ensure its longevity and optimal performance.
Maintain and Troubleshoot Your DIY Electric Bike
Now that I’ve completed the test ride and made necessary adjustments, it’s important to understand how I can maintain and troubleshoot my DIY electric bike for optimal performance. To ensure that my electric bike continues to run smoothly, I need to follow proper maintenance techniques and be prepared to troubleshoot any potential issues that may arise. Here are some troubleshooting tips and maintenance techniques that will help me keep my DIY electric bike in top shape:
| Troubleshooting Tips | Maintenance Techniques |
|---|---|
| Check the battery connections regularly to ensure they are secure. | Clean the bike regularly, removing any dirt or debris that may have accumulated. |
| Test the brakes periodically to ensure they are functioning properly. | Lubricate the chain and gears to prevent rust and ensure smooth operation. |
| If the motor is not working, check the wiring connections for any loose or damaged wires. | Inspect the tires for wear and tear, and replace them if necessary. |
| If the bike is not providing enough power, check the battery charge level and recharge if needed. | Adjust the seat and handlebars to ensure a comfortable riding position. |
Enjoy the Benefits of Your Electric Bike Conversion
You can fully enjoy the benefits of your converted electric bicycle by taking advantage of its enhanced speed and convenience. To maximize your battery life, there are a few tips you should keep in mind.
First, avoid accelerating too quickly or riding at high speeds for extended periods. This can drain your battery faster. Instead, try to maintain a steady pace and use the pedal-assist feature when possible.
Additionally, be mindful of the terrain you’ll be riding on. Uphill climbs and rough terrains require more power, so plan your routes accordingly.
Speaking of routes, finding the best ones for your electric bike rides can greatly enhance your overall experience. Look for bike-friendly paths and trails that offer smooth surfaces and minimal traffic. Consider using GPS navigation apps that cater specifically to cyclists, as they often provide valuable information on bike lanes and dedicated routes. Exploring scenic areas and parks can also make your rides more enjoyable.
Frequently Asked Questions
Can I convert any type of bike into an electric bike?
Yes, any type of bike can be converted into an electric bike through the electric bike conversion process. This process involves installing an electric motor, battery, controller, and other necessary components onto the bike.
Converting a bike into an electric bike offers numerous benefits, such as increased speed, extended range, easier uphill climbs, and reduced physical effort required.
It allows you to enjoy the convenience and efficiency of an electric bike while still using your existing bike frame.
How long does it typically take to complete a DIY electric bike conversion?
On average, completing a DIY electric bike conversion can take anywhere from a few hours to a few days, depending on your experience level and the complexity of the project.
Common challenges during the conversion process include selecting the right components, properly installing the motor and battery, and ensuring all the electrical connections are secure.
It’s important to carefully follow instructions and take your time to ensure a successful conversion.
What is the average cost of converting a bike into an electric bike?
The average cost of converting a bike into an electric bike can vary depending on factors such as the quality of components and the level of customization desired. However, a recommended budget for a basic conversion kit is around $500 to $1,000.
This includes essential components like a motor, battery, controller, and throttle. Additional costs may include tools, installation fees, and any upgrades or accessories desired.
It’s important to research and compare prices to find the best options for your specific needs and budget.
Are there any legal requirements or restrictions for riding an electric bike?
There are legal requirements and restrictions for riding an electric bike. Electric bike regulations vary depending on the country and region, so it is important to familiarize oneself with the specific laws in the area where the bike will be ridden.
Safety guidelines should also be followed, such as wearing a helmet, using lights and reflectors, and obeying traffic laws. Adhering to these regulations and guidelines ensures a safe and legal riding experience on an electric bike.
How do I maintain and service the electrical components of my DIY electric bike?
Maintaining the battery is crucial for the smooth operation of your DIY electric bike. Think of it as tending to a delicate plant, nurturing it regularly.
Keep the battery clean and dry, avoiding extreme temperatures. Regularly check for any signs of damage or corrosion.
Troubleshooting electrical issues requires patience and precision. Start by inspecting all connections and wires, ensuring they are secure and free from any wear or tear.
Use a multimeter to test voltage levels and diagnose any potential problems.
Conclusion
So there you have it, folks! After hours of hard work and dedication, my DIY electric bike is finally complete.
It’s truly amazing how a regular bike can be transformed into a powerful and efficient electric vehicle. With just a few tools and materials, I was able to choose the perfect bike frame, install the electric motor and controller, and add the necessary safety features.
Now, I can enjoy the benefits of my electric bike conversion and ride in style and comfort. It’s truly a coincidence that such a simple project can bring so much joy and convenience into my life.